Want to shoot better? Don’t we all!
Well, you’ve come to the right place. We’ve all been shooting awhile here at Pew Pew Tactical so we have a pretty good grasp on what to do (and not to do).
Today, we’re going to help you improve your shots!
Learn how to shoot more accurately with your pistol/handgun through:
- Review of fundamentals
- Easy to do exercises at home
- Proper range practice tips
- Helpful gear
All with tons of pictures and videos. Some of which will include what NOT to do.
We also cover everything in our video Beginner Handgun Course…perfect if you’re completely new or have no formal training and want more hand-holding.
Table of Contents
Loading...
Introduction
If you’re here, you probably realize that…shooting pistols is actually pretty hard!
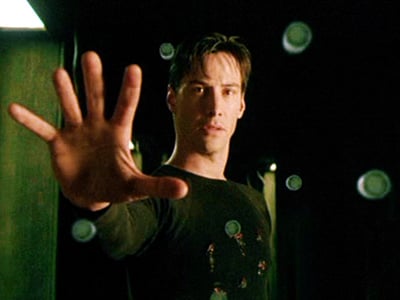
At the beginning of my shooting experience, I had a lot of sympathy with the Stormtroopers missing everything too. At least they had the excuse of a stressful situation!

Now I’m not some professional competitive shooter or instructor, but take that as a positive…I still remember how it felt when I couldn’t hit anything and the differences each tip/exercise made in my development.
It’s going to take you a while, but let’s get started in making you a more accurate pistol shot beginning with fundamentals.
Shooting Stance
Some of you might scoff at the idea that how you stand has anything to do with how you shoot.
But think of it as the foundation of everything.
If you have a wobbly base, chances are it doesn’t take much to mess up whatever is on top. And loud explosions and recoil have a way of messing stuff up.
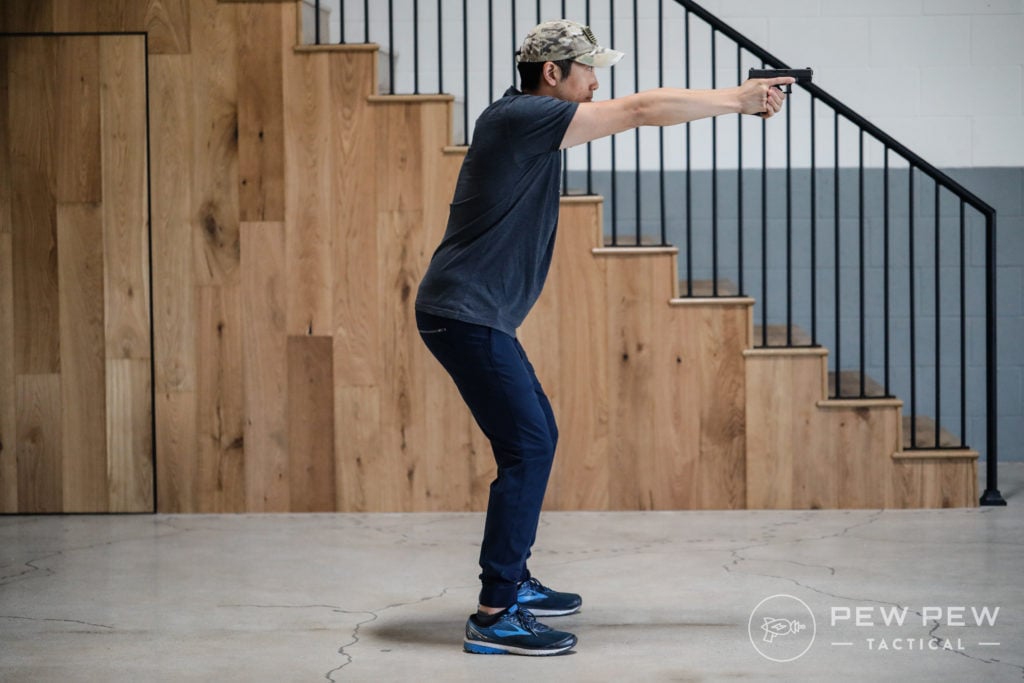
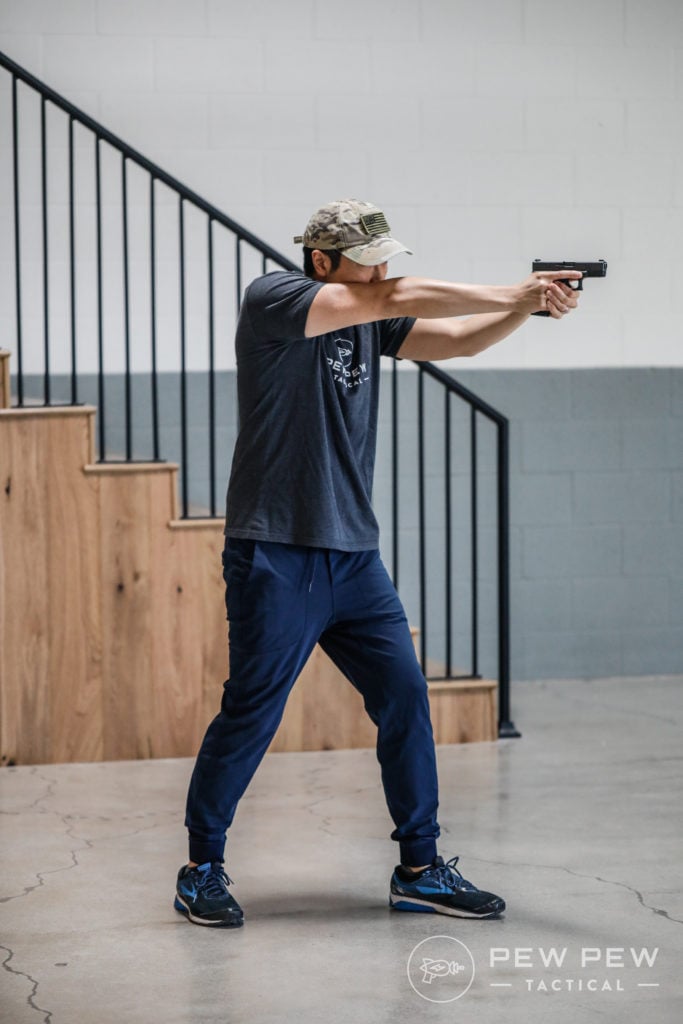
The main thing is to have a stable/comfortable stance that tilts you a little forward to manage recoil. Don’t worry if you’ve done that newbie lean (back), we’ve all been there.
Now’s the time to correct it, though!
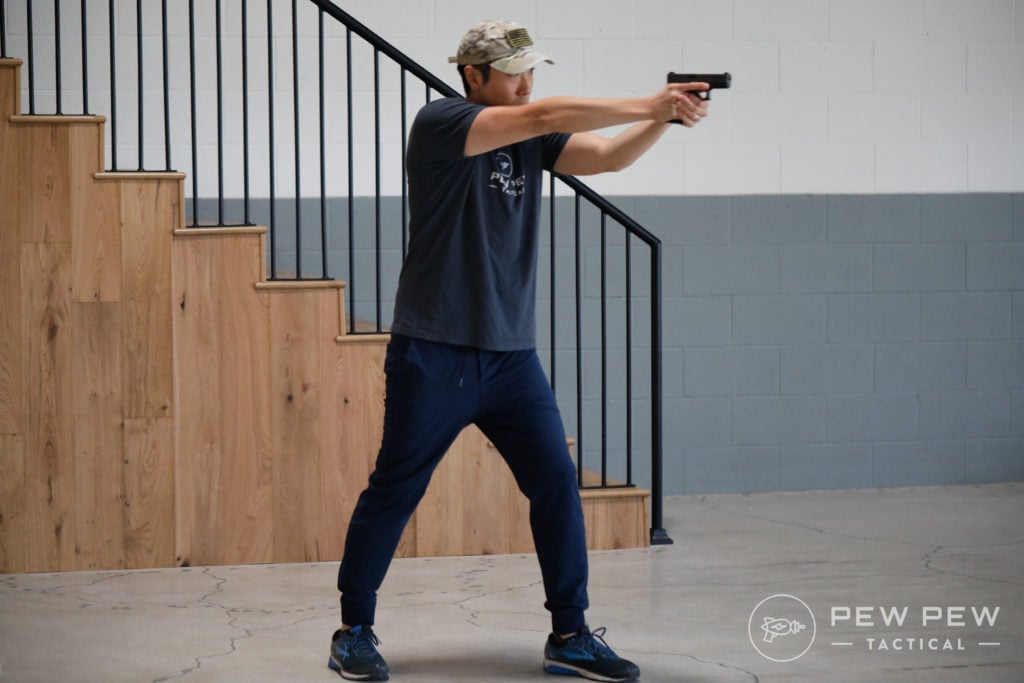
If you want to get more technical, there are the three main types of stances: Isosceles, Weaver, and Modified Weaver (Chapman).
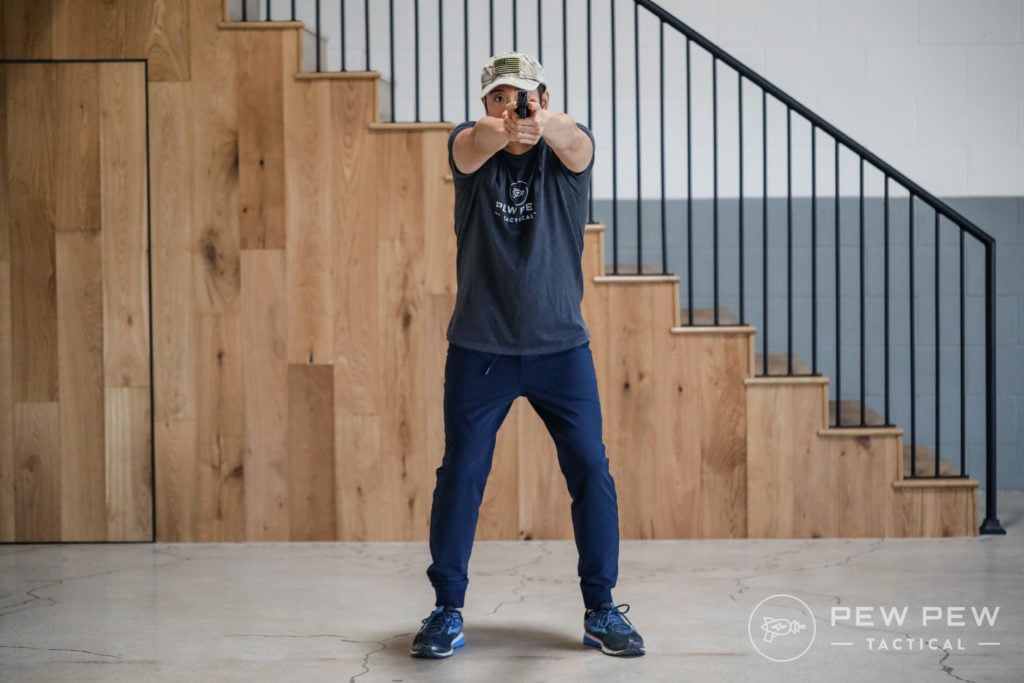
These are just variations on foot placement and which arm is flexed a little more. But take a look the picture below and see just how stable I look. Also, notice the slight lean forward.
Can you guess why it’s call Isosceles?? Thanks high school trigonometry class!
My favorite (Chapman) is geared towards right handed but left-eye dominant shooters.
Ultimately, choose what feels most comfortable for you…but I go through all three stances more in-depth in our Stances article.
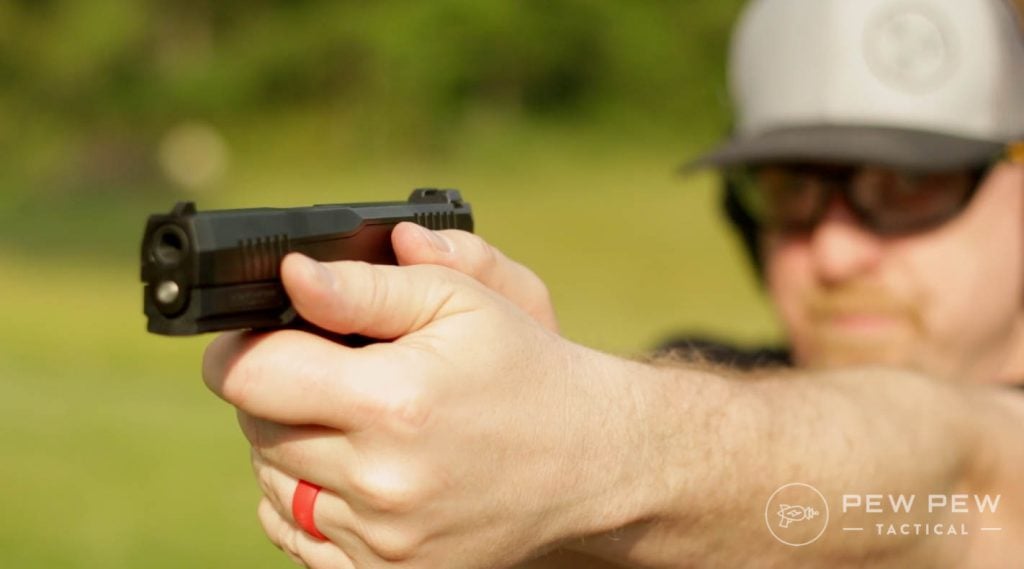
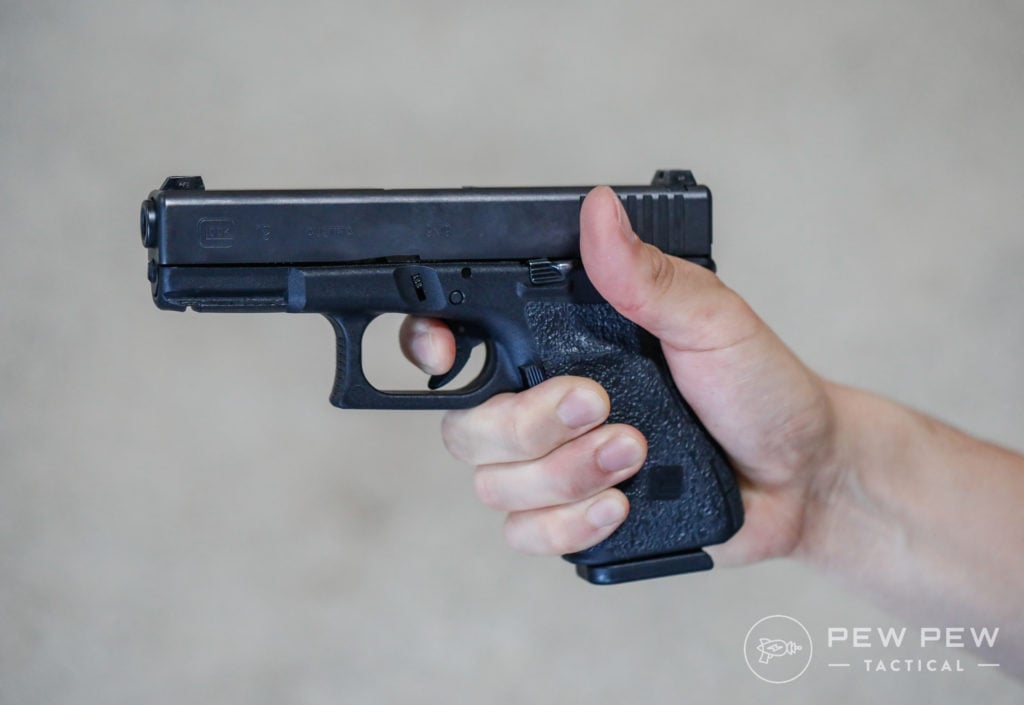
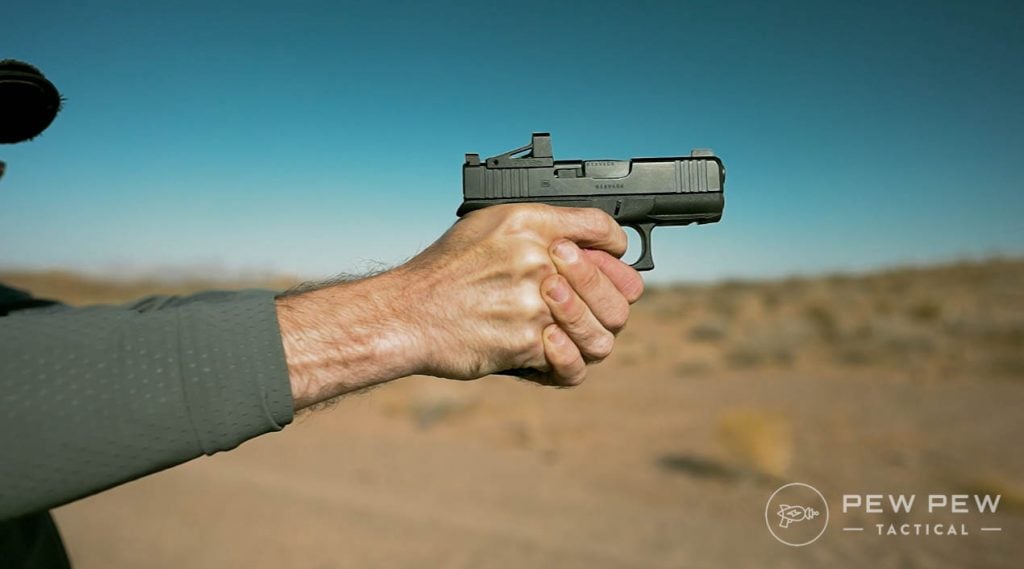
Handgun Grip
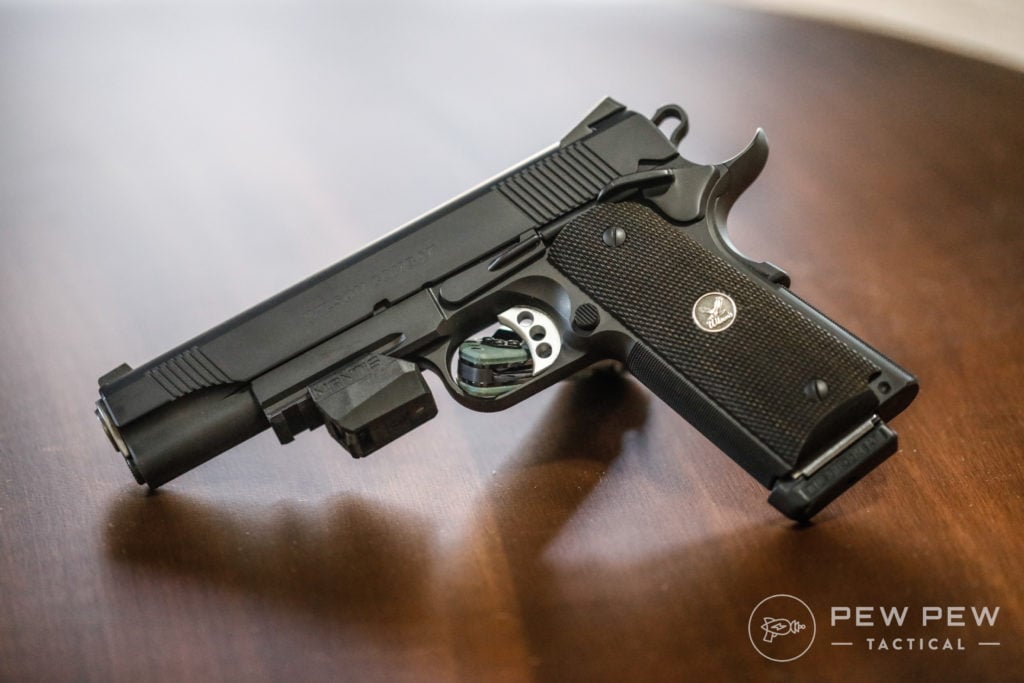
The first piece of advice I received about handgun grip was from the salesman at my local gun shop. He asked me to grip his hand with the same strength I planned on griping my future 1911.
I gave him a nice firm handshake while he proceeded to crush my hand.
A dick move, but a great lesson.
I’m now an advocate of gripping as hard as you can — but not so much that you have tremors. I’ve found that a crushing grip on the gun reduces the movement of your non-trigger-fingers, which is a good thing.
And how you hold the gun also has a huge effect on your accuracy.

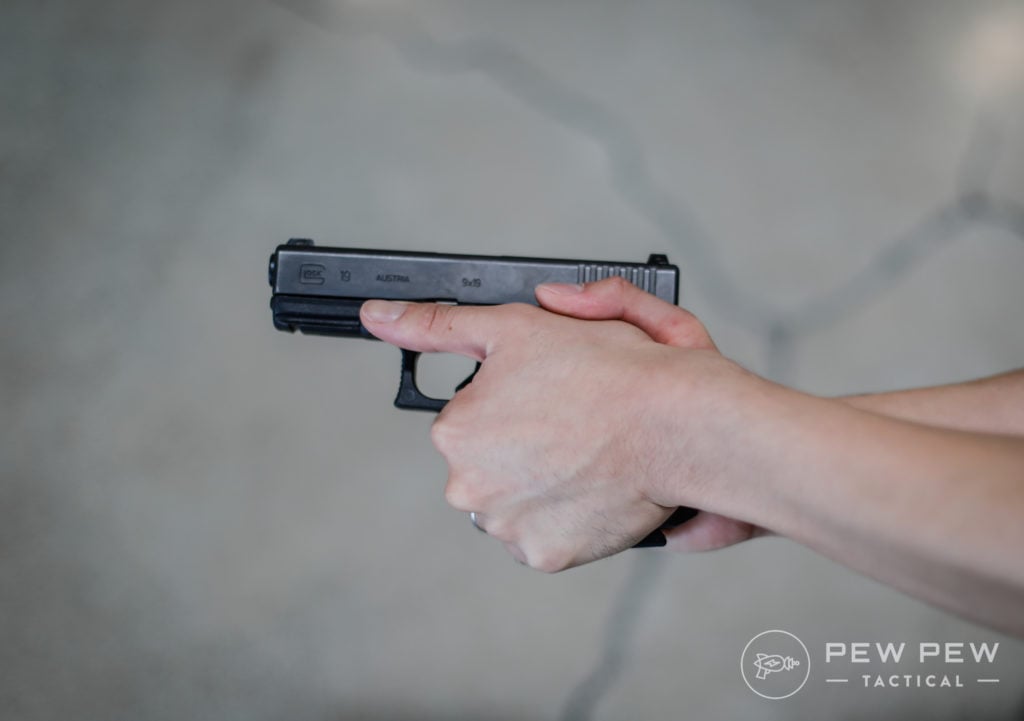
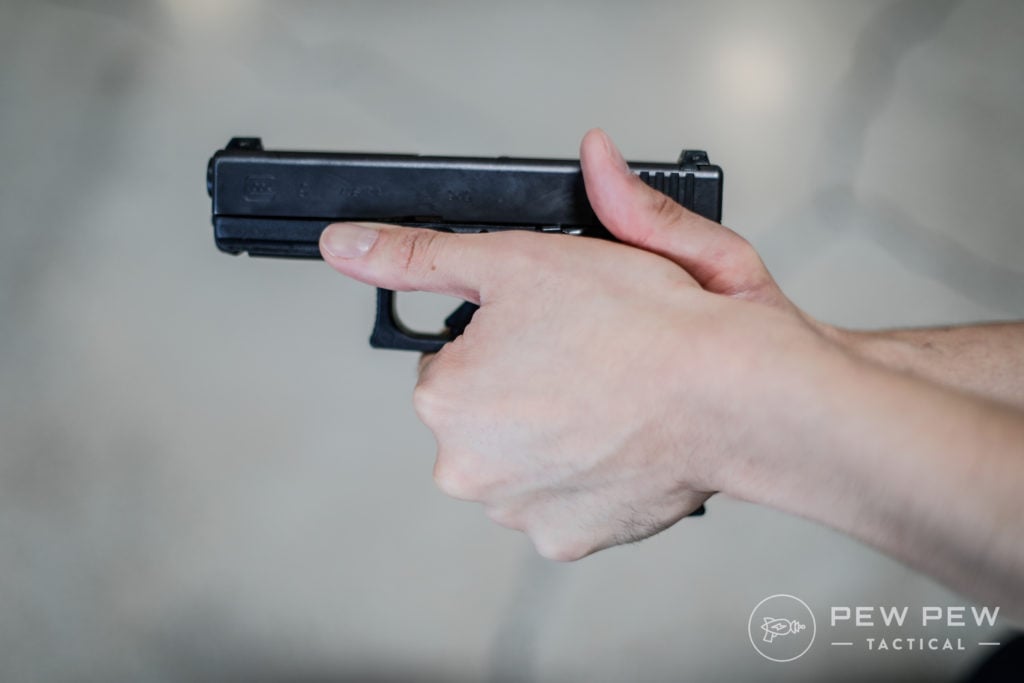
You want the web between your trigger finger and thumb to rest as high as possible on the grip. This helps contain the recoil of the slide moving back and forth.
A low grip would cause the gun to do a lot more flipping. So, you’ll want to almost jam your hand/web into the backstrap to get a high grip.
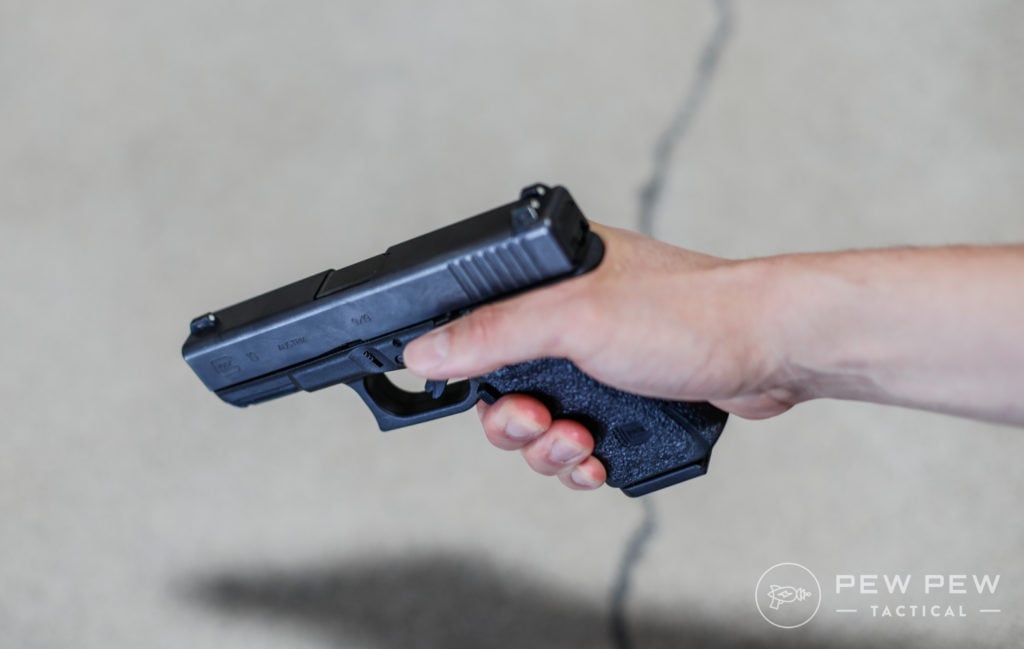
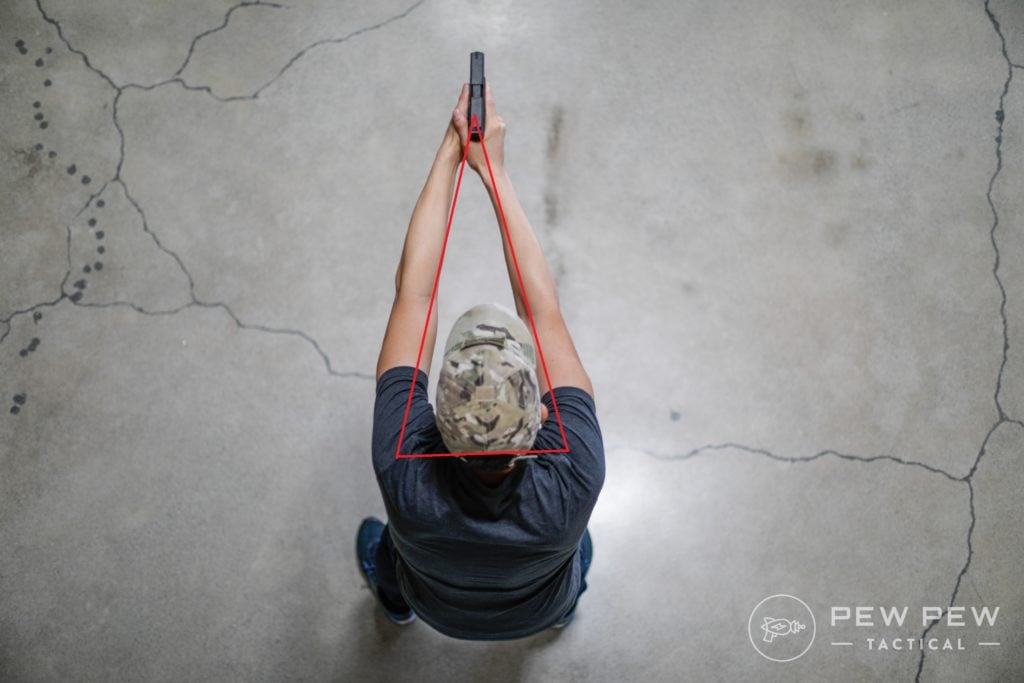
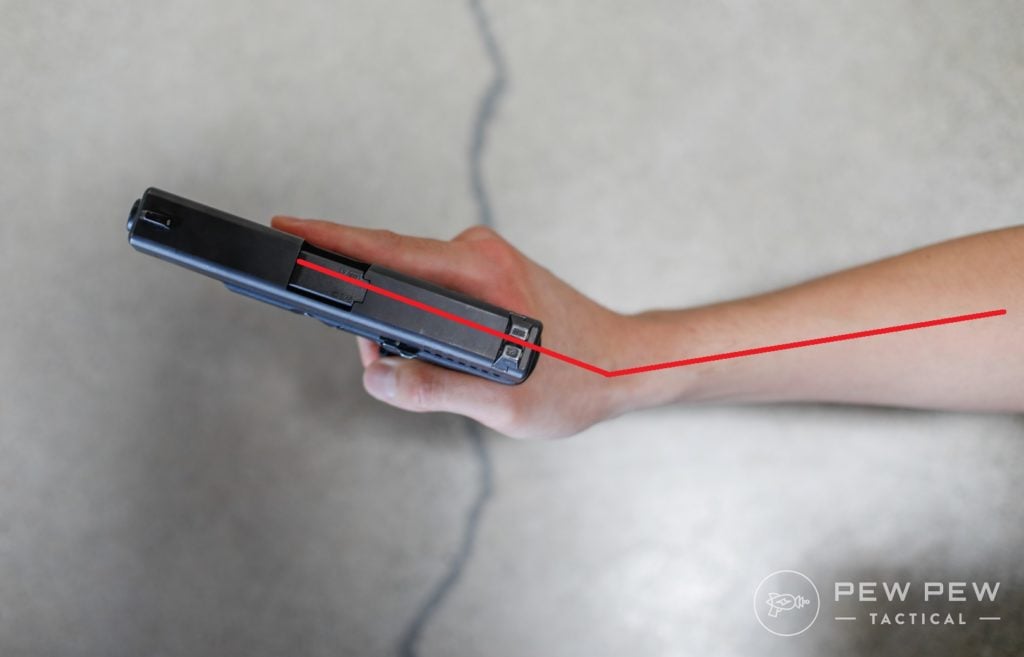
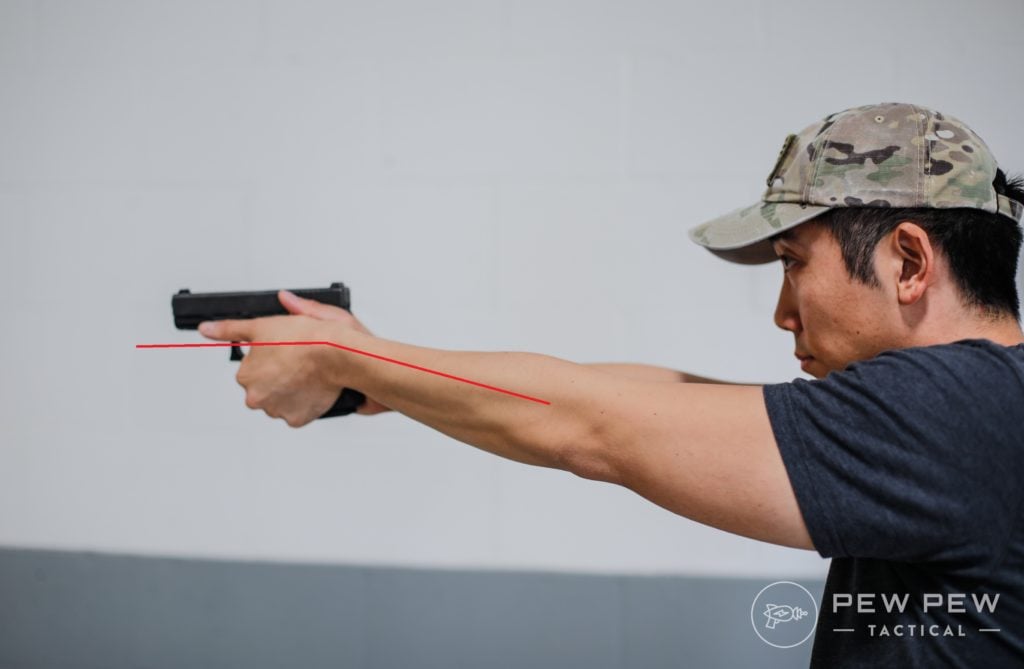
And because there’s this piece of metal moving back and forth, you want your forearm in line with the gun to absorb more recoil.
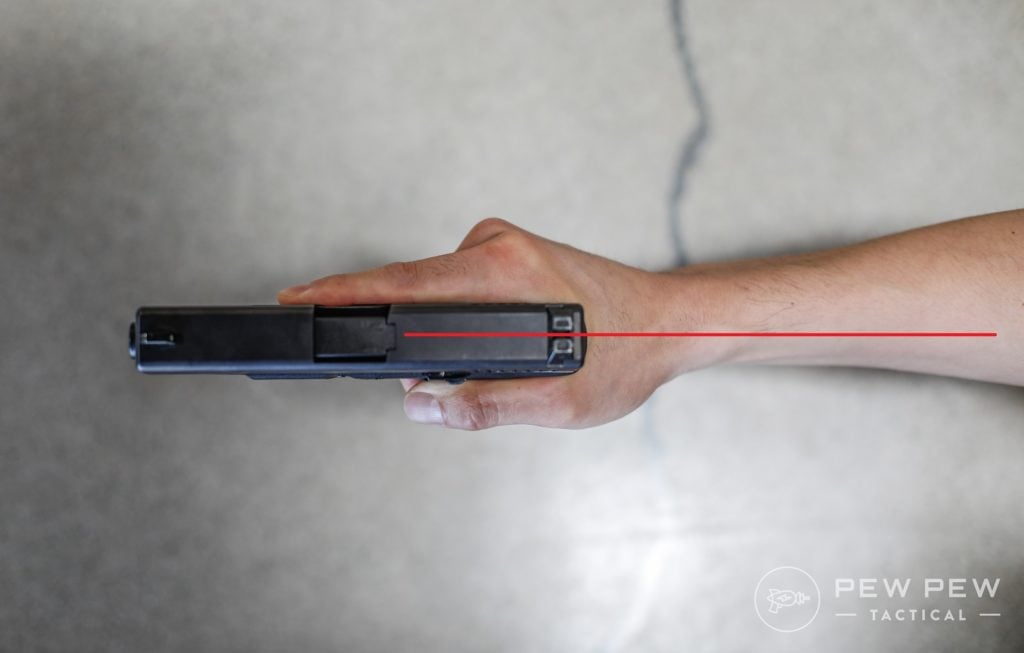
You’ll be tempted to first hold it at a slight angle since it feels more natural…but resist!
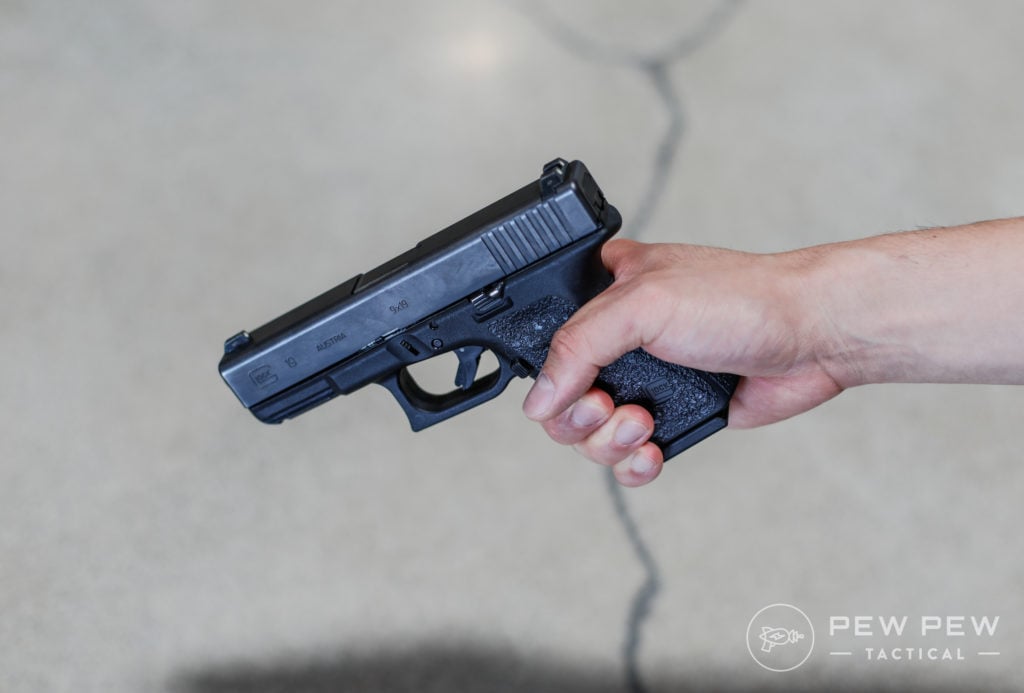
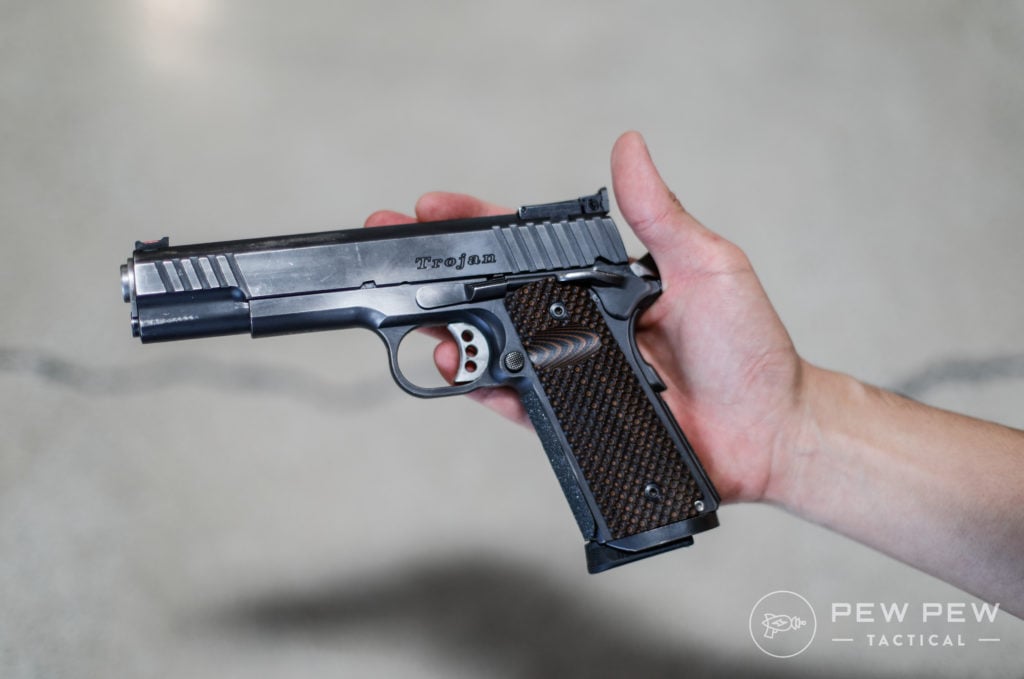
Now that you’ve got your shooting hand grip correct, let’s take a look at the empty space for your non-dominant hand.
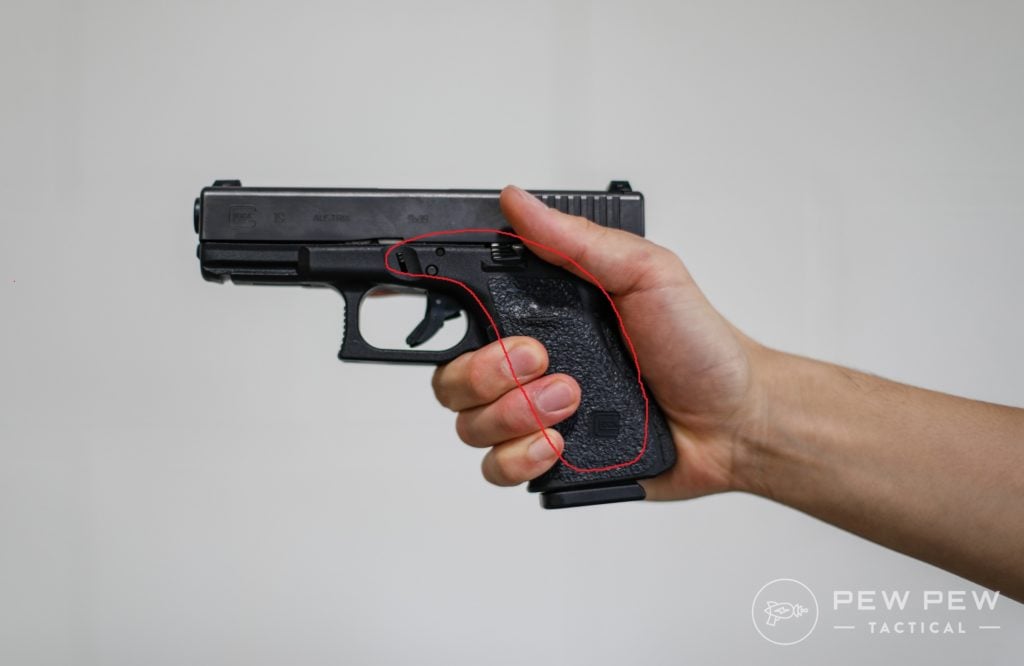
You want to fill it completely up with the other hand so you maximize grip. I like to double-check by making sure there’s a 45-degree angle between my left hand and the handgun slide.

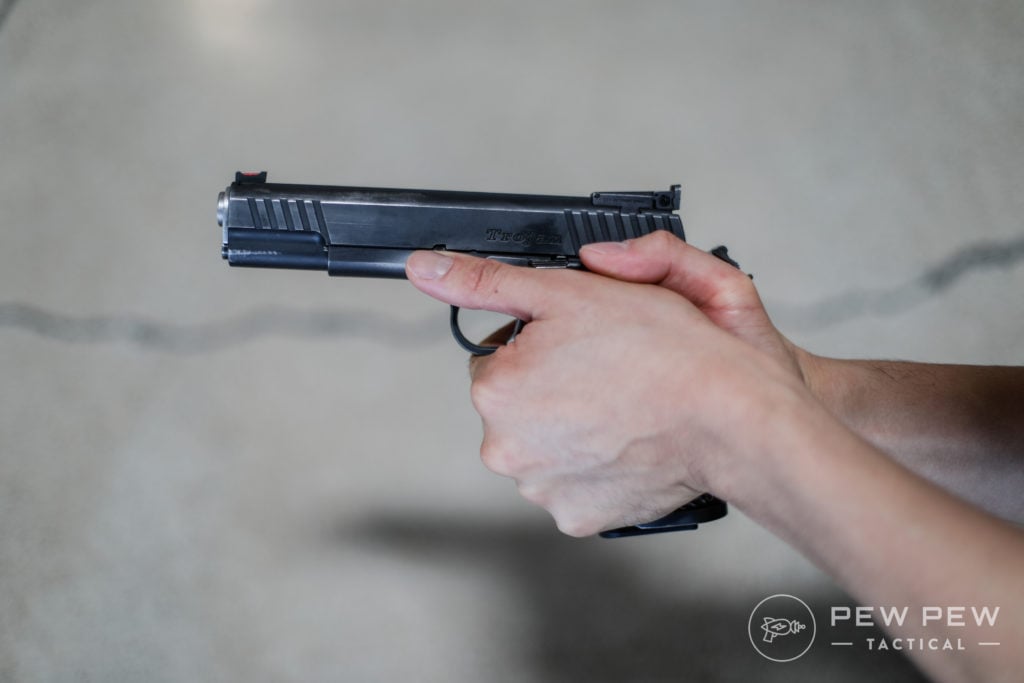
Thumb placement of your dominant hand is personal preference.
You’ll see both up in the air or pointed towards the target.
Experiment to see what you like or just go with what feels more natural. The non-dominant thumb will run along the frame.
If you’re running a 1911 or something else with a manual safety…
I like to rest my right thumb on it, since it was already there when I disengaged the safety.
And although it might feel a little weird at first, I like to set my wrist at an angle when I punch out both my arms.
This keeps everything steady and helps prevent limp wristing — floppy wrists that don’t allow proper ejection and loading of the next round.
Want to learn more about grip? We cover revolvers and semi-auto grips in more detail in How to Grip a Pistol.
Sight Picture
You’ve probably heard it before…focus on the front sight!
Well, it really does help. In the beginning, I squinted hard and struggled to focus with just one eye open on the target.
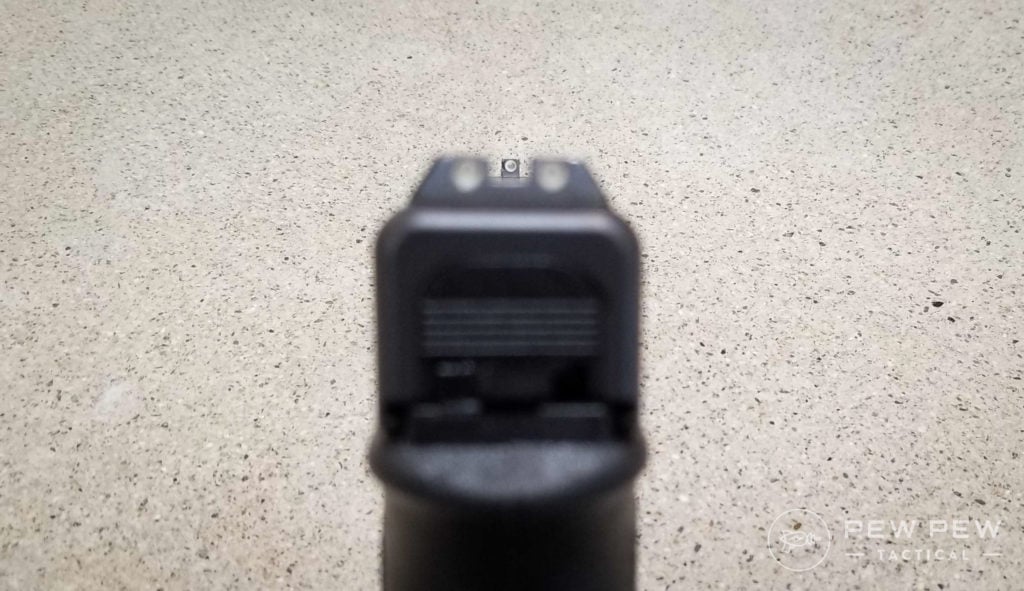
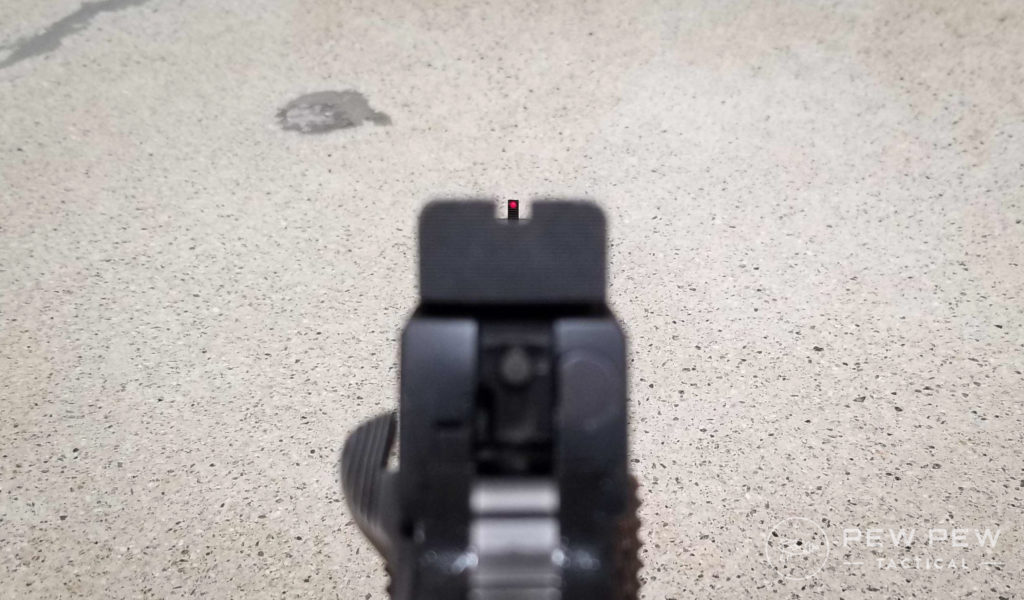
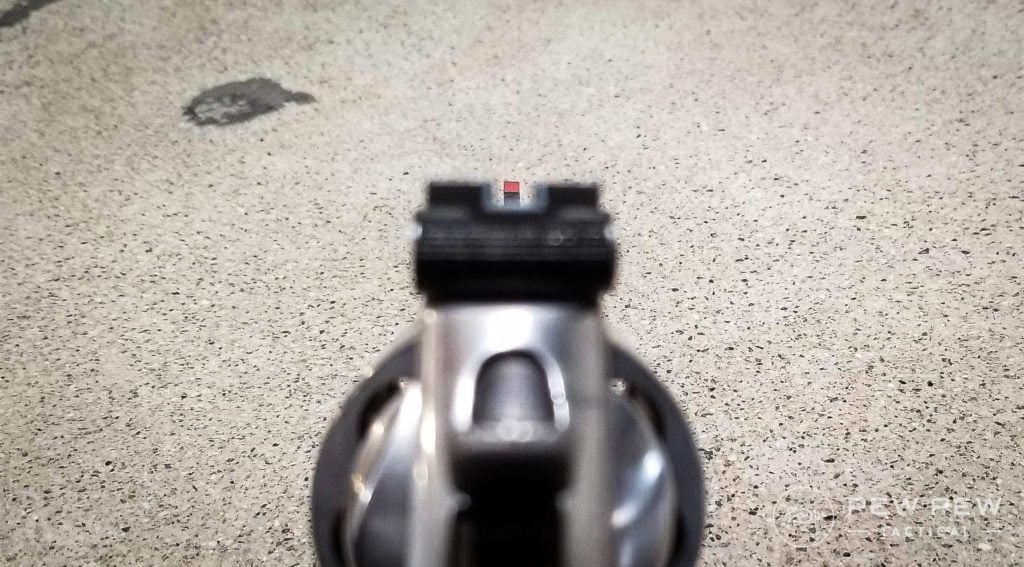
Remember that you want to match the top of the front sight with the top of the rear sight.
The top and middle of the front post is where your rounds should end up…not the actual front dot.
Same for fiber optic sights…
And more standard iron sights.
I’ve found it immensely helpful to keep both eyes open.
It will be very difficult at first depending on how long you’ve been shooting with one eye open. But once you master it, it makes everything so much faster with less eye fatigue.
And now you get more situational awareness.
First thing is to figure out which eye is dominant.
If you’re like me, you’ll be seeing some double-vision because both eyes are open.
I’ve found adjusting your sights closer to your dominant eye (left to right, not closing the distance to your face) makes it a lot easier to figure out which image to use.
This might be just a little shift if you’re using Isosceles, or it might already be perfect with Weaver.
Since I’m left-eye dominant but right-hand dominant, I like the Chapman stance as it puts the sights more in line with my left eye.
Trigger Pull
Might be the most important part of everything, and what dry-firing practice is all about below.
The best advice is to squeeze super slowly that you’re almost surprised when the shot breaks.
You’re not yanking on it since that will result in jerking the trigger and sending the shot off. The slower you pull the better your shot will be.
How about where to place your trigger finger?
It’s a personal preference and something to do with your finger length too. But I would suggest somewhere between the top quarter of your fingertip to before the first joint crease.
Keep in mind that the ideal pull would be completely straight back with nothing else moving except the first two joints of your trigger finger. Take a look at your gun and fingers to see what looks/feels the best.
I find that I shoot better when I’m closer to the first joint. This length gives me good leverage and isolates the third section of my trigger finger (closest to hand) so only the first two joints are moving.
Less is more here!
Breathing
One thing I always forget to do when I’m shooting.
Holding in your breath messes you up after a while and so I just try to breath naturally.
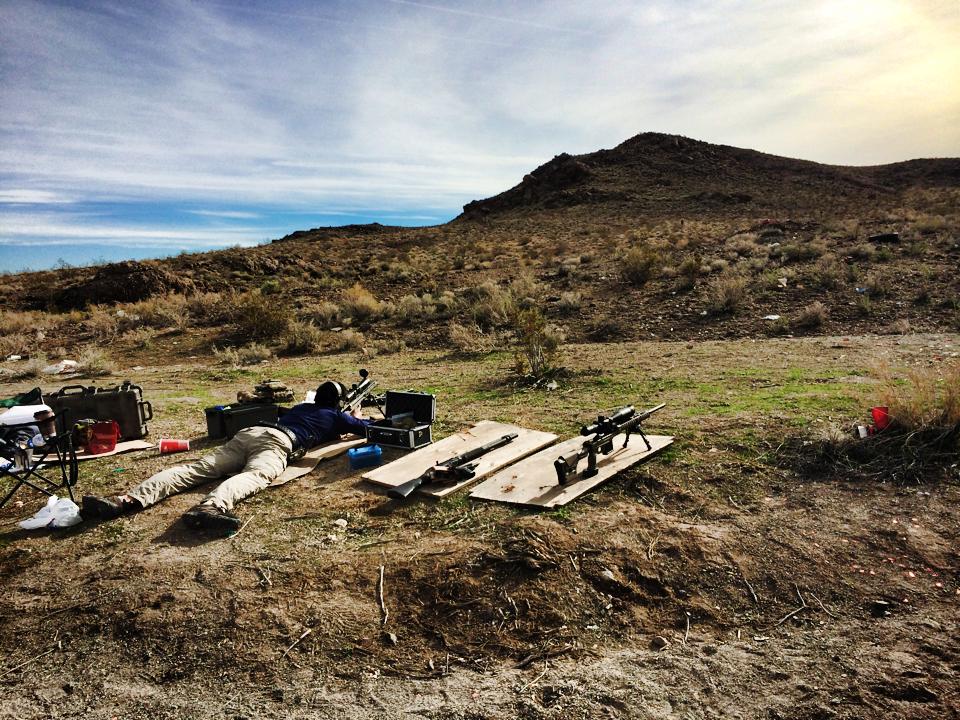
You’re pistol shooting, not sniping 1,000-yards, so you don’t have to plan your breaths (and heartbeats).
Trigger Reset
An easy mistake is to immediately lift your finger off the trigger after each shot and look at the target.
But trust me, the hole will always be there so take your time.
Whenever you lift your finger off quickly, you’re likely shooting too fast and jerking the trigger, or introducing excess movement to the gun.
You’re also making it harder for yourself the next shot since you’ll have to pull the first part of the trigger again (also known as the slack).
Proper trigger reset is:
- Holding the trigger all the way at the end until after the shot breaks.
- Releasing it only until the point it resets (you’ll feel or hear the click).
- If you’re firing again, start at the reset point — not all the way at the beginning of the trigger pull.
Dry-Firing Practice
What is Dry Firing?
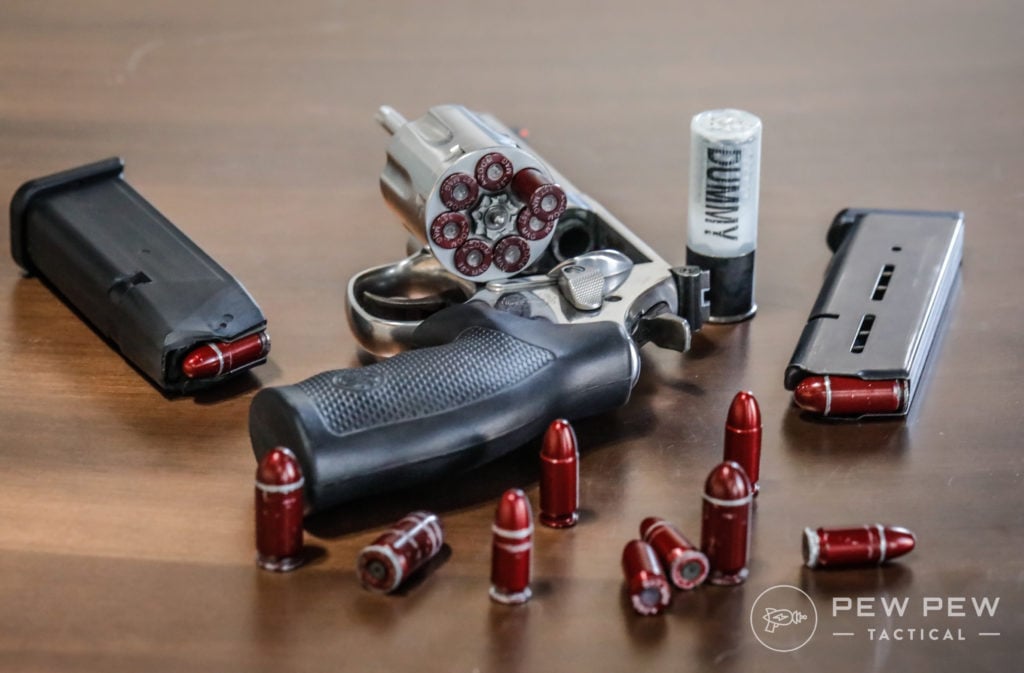
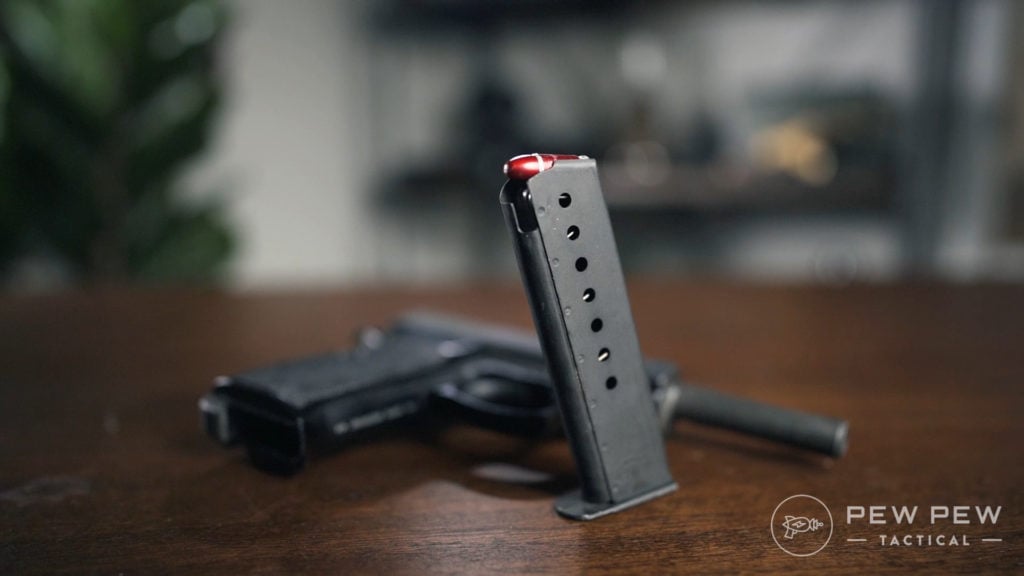
Dry firing is pulling the trigger on a cocked gun and allowing the hammer/striker to drop on an empty chamber or dummy round.
It’s probably the most effective way of improving pistol accuracy. And you can do it at home!
Is Dry Firing Safe for My Gun?
If your handgun/pistol shoots centerfire rounds (9mm, .40 S&W, .45 ACP, etc) instead of rimfire rounds (such as .22 LR), then you can dry fire all you want since the firing pin is not actually hitting anything.
Rimfire firing pins hit the mouth of the chamber when there’s no cartridge, so you should practice with snap caps that take the hit.
Still…my advice is to consult your owner’s manual to double-check.

Prices accurate at time of writing
Prices accurate at time of writing
-
25% off all OAKLEY products - OAKLEY25
Copied! Visit Merchant
There are a lot of snap caps and dummy rounds on the market, so be sure to take a look at the Best Dummy Rounds & Snap Caps For Dry-Fire Practice!
Why Dry Firing?
The main point of dry fire practice is to develop muscle memory so you consistently produce an awesome trigger pull and don’t flinch when it’s time for real shooting.
And if you’ve developed some bad habits along the way, it does a great job of rewiring you back over time.
At least for me, I find that after a week or two of dry firing a few minutes a day, I become “one” with my trigger and grip.
My grip just feels right, and I can sense all the little nuances in the trigger pull. And when I focus on the front sight and pull the trigger, the front sight stays super steady.
It takes a lot of practice (and perfect practice) to reach that point. And it’s a diminishing skill that needs to be kept up to date too. Even after just a few days of not practicing, I can feel some differences the next time I dry fire or shoot.
Best Way to Dry Fire
First, always make sure your gun is unloaded and follow the 4 Rules of Safety.
- Guns are always loaded (treat them as such and don’t have live ammo in the room).
- Never let the muzzle cover anything you don’t want to destroy (point it in a safe direction).
- Keep your fingers off the trigger until you’re ready to shoot.
- Be aware of your target and what is beyond.
I always check if my gun is empty every time I pick it up — even if it’s between strings of dry firing. It just gets you into a good habit.
I also like to set up targets or at least small things that are safe to “shoot,” as a light switch or doorknob.
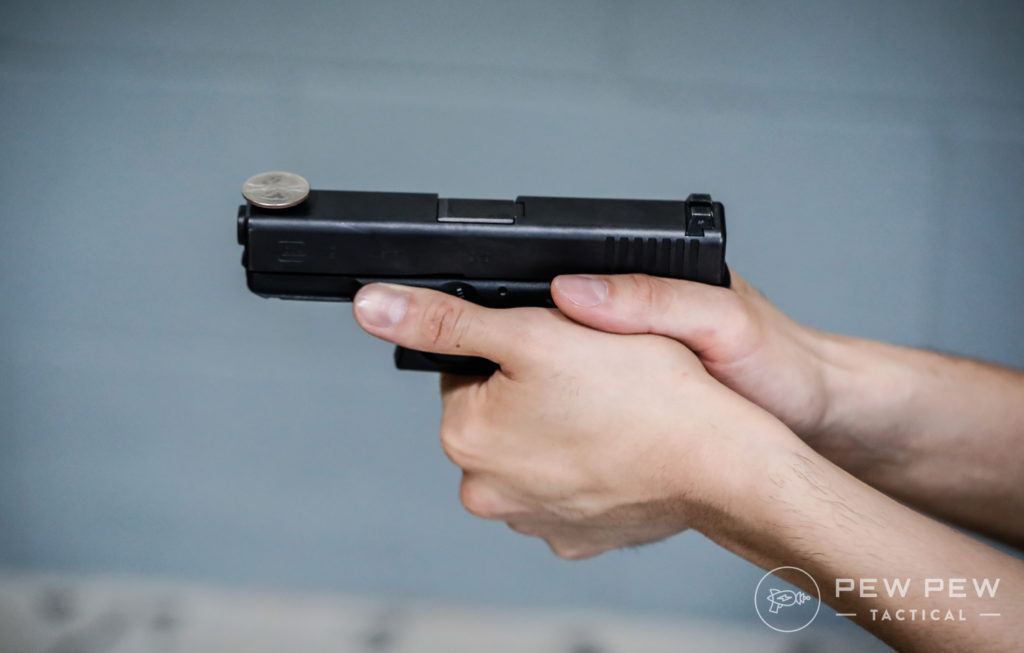
I focus on the front sight (both eyes!) and remember to squeeze so slowly that I’m surprised when the gun clicks.
I sometimes actually say “squeeze” out loud to make sure I do it. Once you can do it slowly, you can speed it up a little, as long as the front sight still doesn’t move.
One great way, in the beginning, to make sure the sight doesn’t move is to physically place a small coin on top of the front sight during your exercise. If it doesn’t fall off, you’re probably doing a great job.
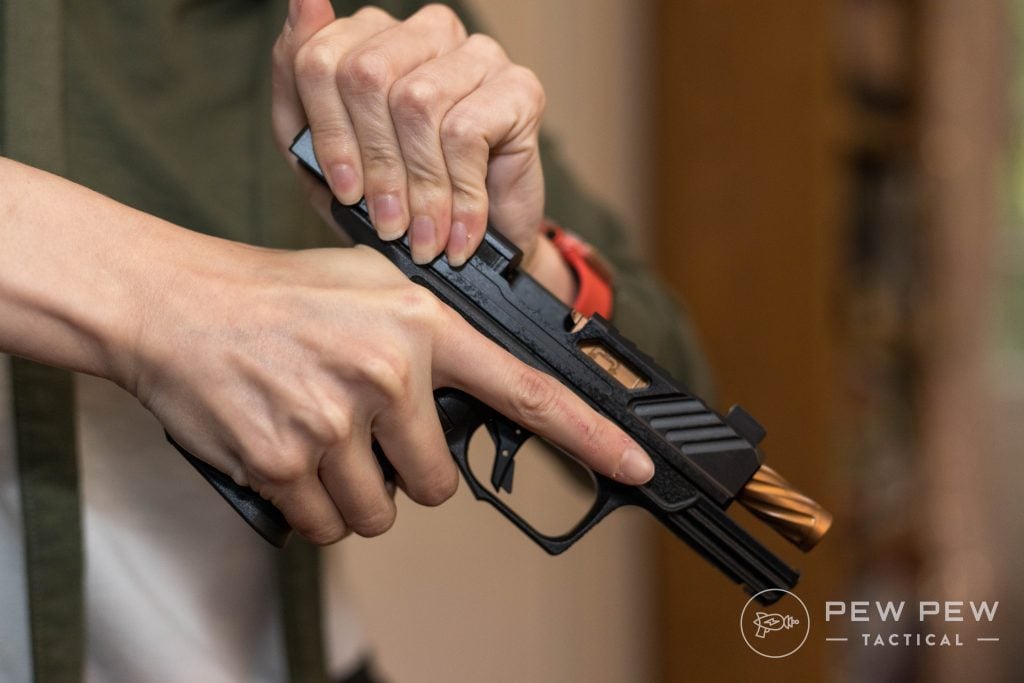
Finally, remember to practice both full trigger pulls (with the slack) and trigger reset pulls. To do a trigger reset pull, leave your trigger finger depressed at the end of the first shot, and rack your slide with your non-dominant hand.
For some guns you don’t have to rack it all the way back, sometimes just a half-inch or so is enough. Get back into your two-handed grip, let the trigger reset (listen for the click), and shoot.
For the longest time, I only practiced full trigger pulls and got great at those. But, when I had follow-up shots, I started jerking the trigger. You’ll likely be firing both ways so be prepared for anything!
Check out more in our Safe & Effective Dry-Fire Training article.
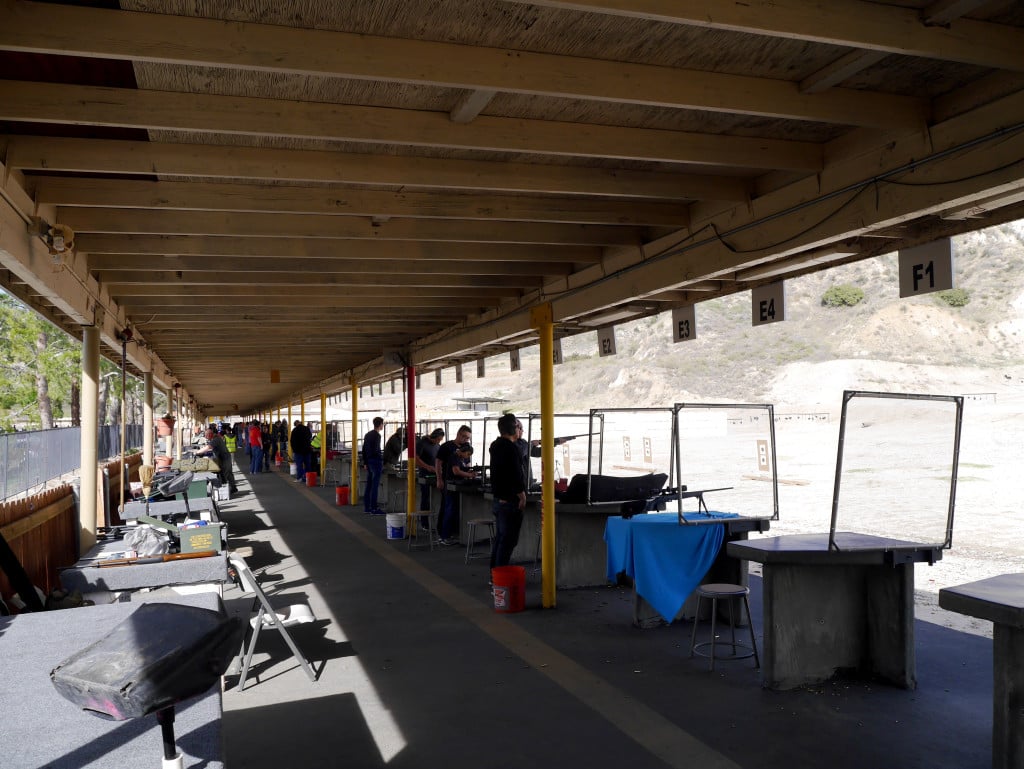
Range Practice
Too much range practice, in the beginning, is sometimes detrimental. That’s because you haven’t built up good muscle memory. Instead, you build up a flinch reaction.
Don’t worry if that’s you…with some quality dry firing at home you can overcome it.
I like to always have some dry firing sessions at home in between range days. And when I get to the range, I always dry fire a couple of shots before loading up real ammo.
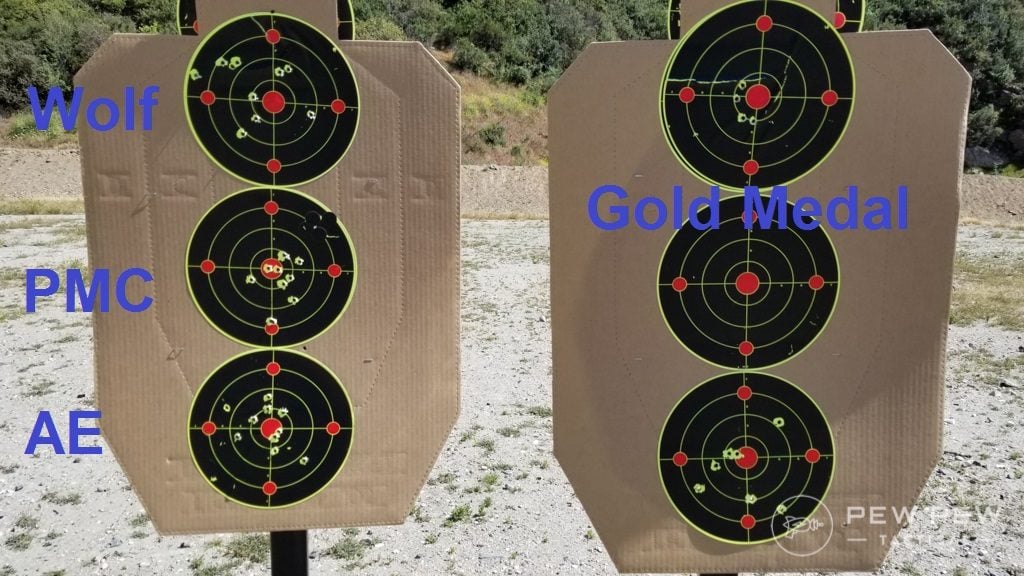
I start off at short distances since there might be a lot of effects that come into play at 25-yards (wind, ammo, etc) but it’s all me at 3- to 5-yards.
To learn more about zones and what shooting at different distances does in a defensive situation, check out the Brownells Daily Defense video below.
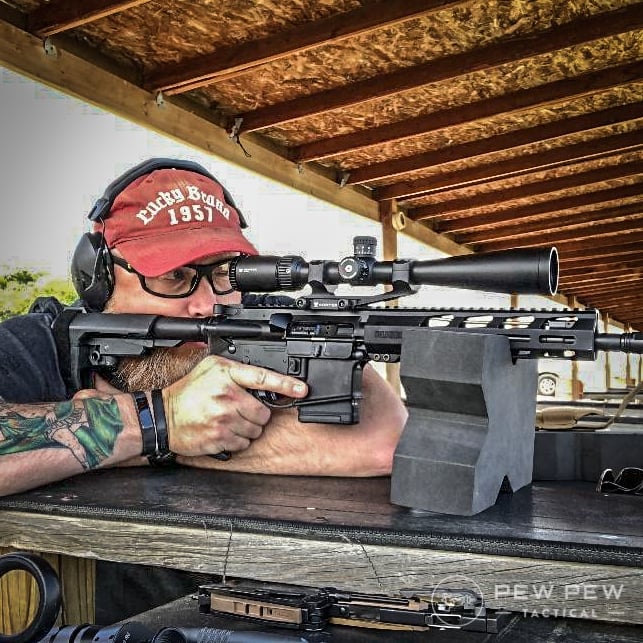
Sometimes if it’s a new gun or if I’m doing really poorly, I’ll start shooting with a supported position first to get some confidence and set a baseline accuracy.
You can do this by sitting down and placing your elbows on the bench, or leaning into the counter.
I also found this graphic to be immensely helpful in diagnosing my shooting errors.
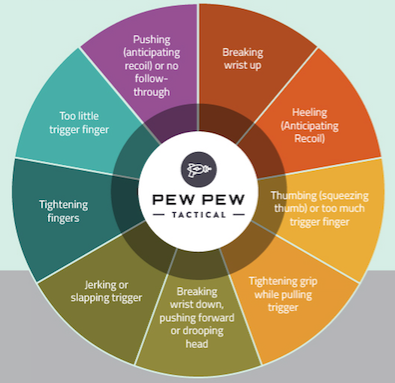
Have a target, shoot a couple shots at it, and see where they land in relation to the chart.
If you’re a lefty, you will have to mirror image the findings. And if there’s no overt grouping (your shots are all over the place), it’s likely your grip is not consistent.
I usually start off pretty strong and as I get more comfortable I forget some of my lessons, such as remembering to squeeze. That’s when I start telling myself “squeeze” every shot again.
Lastly, there’s a great drill to run once in a while if you have a buddy. Have them help you load a magazine with both live ammo and snap caps, so you don’t know what’s next in your stack.
The point is to see if you have a natural flinch during shooting which will show up when you reach the snap caps. It’s a great visual moment to see how you actually deal with the recoil.
It’s one thing to be dry firing and shoot perfectly, but another once real recoil is entered into the equation. My own natural flinch was a pretty pronounced pull-down and to the left.

Check out our article on some of the best range training drills.
Shooting Gear
Here are some shooting gear and accessories that I’ve found to help me become a better pistol shot.
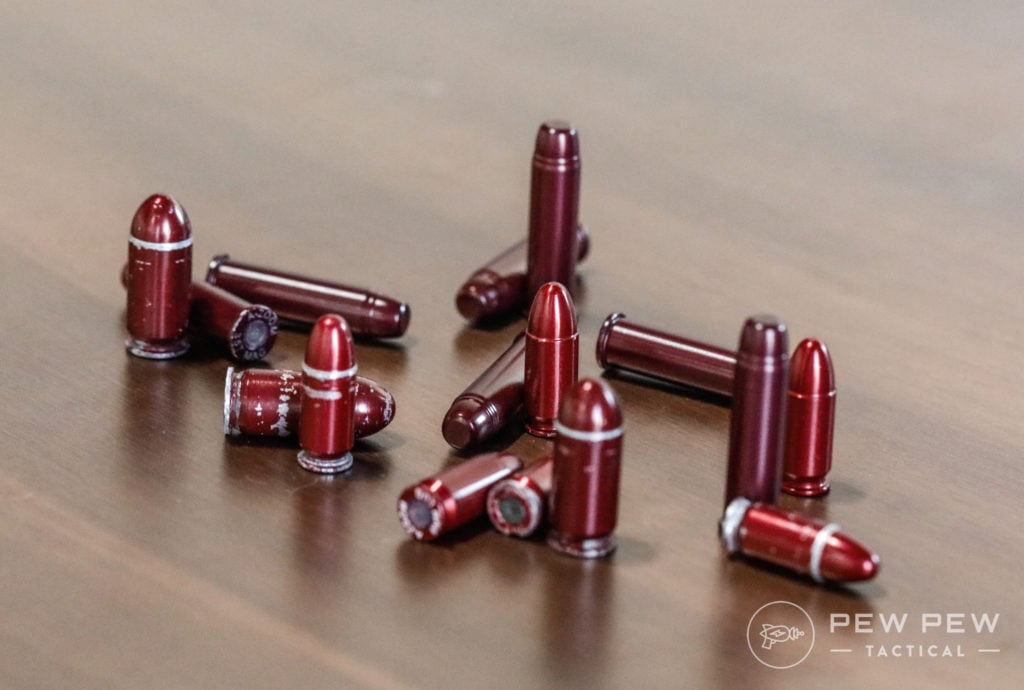
Snap Caps: Essential if you’re shooting rimfire such as .22LR, but also great for other calibers if you want to work on reloads in the future, or do the drill I just mentioned above.
Prices accurate at time of writing
Prices accurate at time of writing
-
25% off all OAKLEY products - OAKLEY25
Copied! Visit Merchant
Laserlyte: Awesome tool to visually see where your shots hit. It’s a device that fits into your handgun as a dummy round but shoots a laser when the firing pin hits it. Pair it with randomized targets that detect the lasers to work on target transitions and future competitive shooting moves.
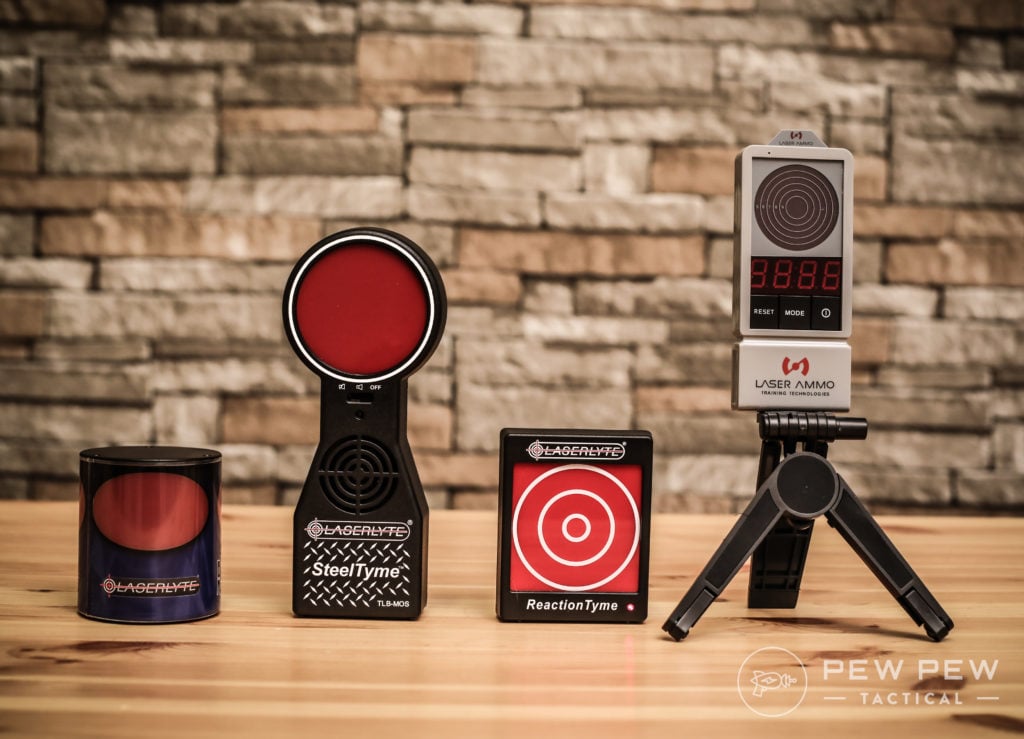
It’s also a great tool for getting non-shooters interested in going with you to the range! Kind of expensive but think of all the ammo you’ll save.
Find our complete roundup of the best Laser Cartridges and Targets.

Prices accurate at time of writing
Prices accurate at time of writing
-
25% off all OAKLEY products - OAKLEY25
Copied! Visit Merchant
Shoot N’ C: Sticker targets you can put on paper targets at the range which show a splash of color whenever you hit it.
Makes it much easier to figure out where you’re shooting when the target is farther out.

Prices accurate at time of writing
Prices accurate at time of writing
-
25% off all OAKLEY products - OAKLEY25
Copied! Visit Merchant
Hand Strengtheners: I thought it was dumb to get these, but the harder grip you can get on your gun, the more you can manage recoil. Consider me a believer. Just get ready for literally every single person that sees them to try it out.

-
25% off all OAKLEY products - OAKLEY25
Copied! Visit Merchant
Talon Grips: Essentially sandpaper/rubber stickers that are cut for your specific gun. Drastically increases the amount of grip on your gun.
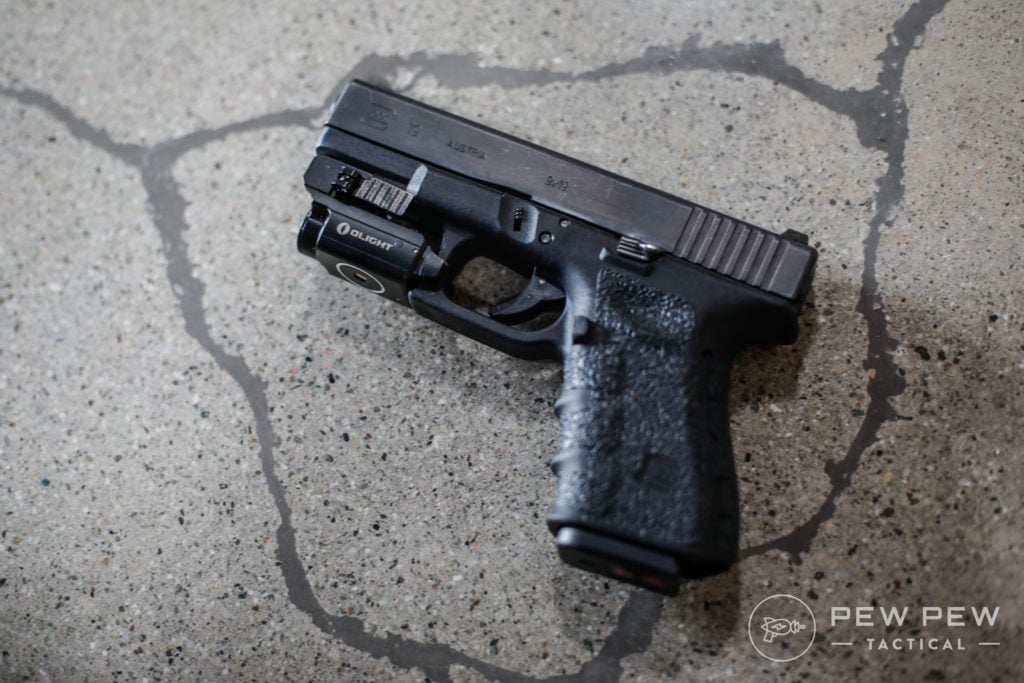
Or you can be really obsessed about grip like me and just stipple your polymer gun.

-
25% off all OAKLEY products - OAKLEY25
Copied! Visit Merchant
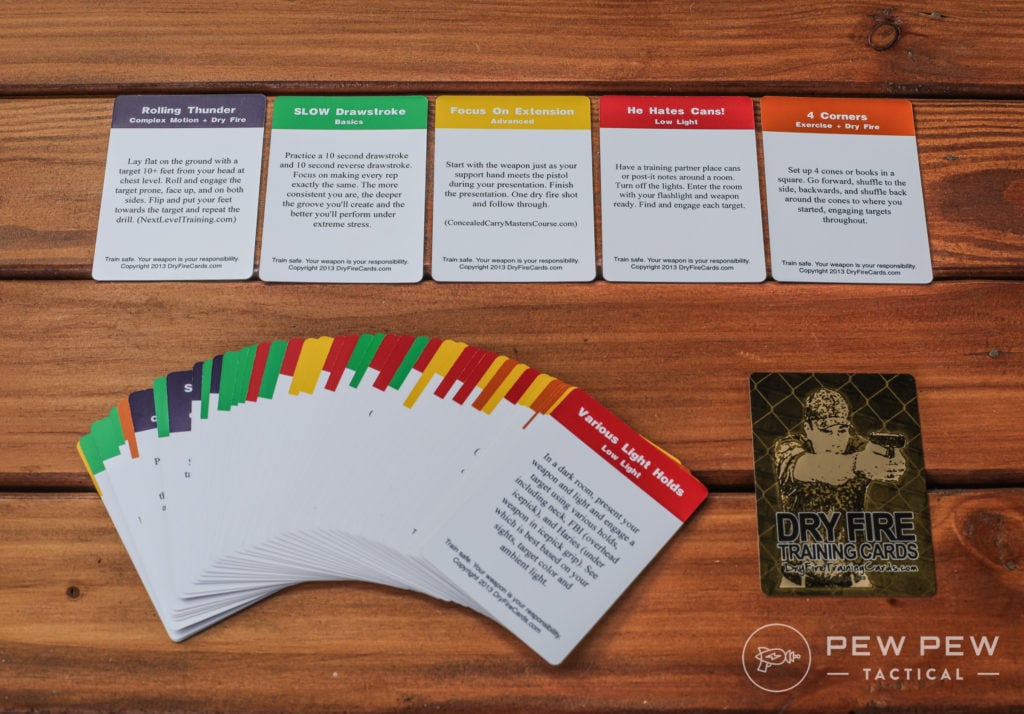
Dry Fire Training Cards: Simple idea but great for both beginners and advanced shooters. It gets boring sometimes to raise your gun and shoot at a target. Maybe it’s a little better with laser targets or a timer, but now you have a couple of dozen variations to choose from.

-
25% off all OAKLEY products - OAKLEY25
Copied! Visit Merchant
I’ve started training with my set so I’ll report back to see if I make it higher in the competition standings.
MantisX: Now we’re going hi-tech! This training module attaches to your front rail and gives feedback to your phone through Bluetooth.
I’ve had my hands on one for a few months and it’s definitely much better than simply looking at if your front sight moved when dry-firing. Instead of simply feeling like you messed up…it tells you where it moved, how much it moved, and how to correct it.

Prices accurate at time of writing
Prices accurate at time of writing
-
25% off all OAKLEY products - OAKLEY25
Copied! Visit Merchant
Full review HERE.
I’d say if you’re really serious about upping your shooting game…try it out. It works with both dry and live fire. Plus, it’s fun to compete with your friends.
Conclusion
And that’s it…now you’ll be able to work on your fundamentals, dry-firing, and range shooting to become a more accurate pistol shooter. Remember, you won’t become a pro in a few days.
The guy next to you at the range nailing all the steel targets probably has dozens of hours of dry firing and thousands of rounds under his belt.
And in case we didn’t say it enough…don’t do this!
What things helped you learn to shoot better? Let us know in the comments below! If you’re looking for some handgun training…check out our Gun Noob to Gun Slinger program. All the important stuff to get you competent in 2 hours!

113 Leave a Reply
Reflectors are awesome laser targets! When you hit one you know it. Also a laser travels in a straight line....bullets do not. So don't rely on it for more than trigger training.
Thank you for your training information and videos. I’m 73 with childhood memories of my father teaching us gun safety. I had a 20 gauge to start at 10, moved up to 16 and began shooting my mothers 22 rifle soon after, but never had handgun/pistol training. I’m excited to purchase my first pistol in the future and go back over this material as I dry fire (never heard this before) and start to get into target practice. Thanks so much
Is there a rail light that would help me see my hits at the range?
It's been over 55 years since I fired a real weapon. Started with the M 14 16 60 then 50 cal. Training with the 45 was relatively short. Couldn't remember much but after reading your article it really helped. My grandsons have been shooting pump and breakdown rifles for a very long time. My training with rifles were extensive so teaching them safety and techniques were easy. Bought a Co 2 pistol for them to target practice and drew a blank about how to teach them anything. Your article was spot on. Downloaded some targets offered and can't wait to watch them shoot. The Chapman shooting stance worked great for me. Thanks
Hi. I read an article a while back by Kyle Lamb that mentioned putting pressure between your thumb and middle finger to free up your trigger finger. This definitely works to keep you from pulling your shots. After I did this I reset my sights to center on my pistols as I had been pulling my shots and didn't realize it.
All I can say is WOW, great info. Thank you for putting this out there. I know there are lots of sites that offer stuff like this and everyone has their own opinions of how to do things, but for me you can never have too much info or training tips. All it takes is one new tip or trick and the read was worth the time. Thanks again
Great important information. Love that instructions are clear to understand. Much appreciated.
Good info. My instuctor is very advanced and doesn't realize some of the details people new to guns need.
Thanks so much!
Lots of good nuggets in this mine of munitions!
I have recently gotten back into shooting. Something I never did, even when qualifying in the USMC, was to release the trigger only to its reset. I always, and always have, fully reset the trigger.
Next range session will include practice on releasing the trigger only to the reset point.
Thanks for this!
Doesn't makes much sense. Looking at slow-mo videos of the pros, they are just releasing the finger naturally. Controlling precise release puts too much tension and focus on what is unnecessary, excessive. Here is an example: facebook_._com/watch/?v=1065852504084065
Amazing! I consider myself an experienced shooter with 50+ years of exposure. Having competed in many national and international events, acquired bronze medal 1980 muzzle loading worldchampionship and numerous first places in Europe.
Still learned to refresh and improve old worn-out habits here!! Also appreciate very much the clear, concise and organised approach as to "how to be a better shot" as presented here by PewPew
Thank you. I'm new at handguns and am reading alot and now shooting alot. Your advice it great.
ive been going to the range for awhile now ive shot 9mm,.44 magnum,Desert Eagle .50 cal Action Express and recently ive been shooting the Heckler and Koch USP .45 today i was shooting i think my problem is shooting too fast all my shots go off to the right i can not hit the center bullseye to save my life.i come close to the bullseye and have some nice groupings i do need to have more practice .could you tell me what i need to do to remedy this problem.
Never too old to learn!
Trying not to get complacent and sloppy!
ty
buy canik at rowe ammo nation . com
Excellent article for me!! Thank you.
Beginning "retraining" in June with a professional trainer on a local range, since I haven't practiced in years, and this helped rekindle a lot of pointers that vanished over time. Had no idea there was such a thing as Snap Caps, etc., to help. Your advice and info was valuable. Thanks.
Placing a coin on top of the rear sight accomplishes the same goal as putting the coin on the front sight with the added bonus of helping with sight alignment.
Thank you very much for your time. To share your knowledge, thank you. I haven't fired a pistol in twenty years. I just bought a Beretta px4 9mm. Compact. I haven't shot it yet ; l am on a fixed income. Year from now, l want a 45. Thank you .
You made a good point when you shared that it is great to develop muscle memory in order to consistently produce excellent trigger pulls. My uncle just mentioned the other day that he is planning to get himself a concealed carry as he wants to protect himself, as well as his family. I will suggest to him getting the permit from a reliable service before he can purchase one.
Eric
Thank you for your article and referencing the Mantis X. I will review and possibly pick one up. It seems to be an excellent tool.
They are a great tool and allow you to practice many fundamentals inexpensively.
Very good information! I’m a recent “range goer” and found I have developed a few of the above mentioned bad habits that I need to break. The dry firing (I was told you shouldn’t shoot without ammo) is going to be a lifesaver! Thank you!
I just saw a suggestion for you to move to Rumble. I hope you do.
Excellent especially for newer pistol shooters. Love the graphics....very helpful
Great stuff Eric. Looking forward to more
Thank you Eric this was very helpful.
Thank you!
Thanks Eric! Great stuff.
Hi Eric
Thanks for your awesome articles.
I was wondering if you would consider posting your videos on Rumble.com as well as youtube, not everyone is staying on youtube.
Many people are switching to Rumble and we'd love to follow you on Rumble.
Thanks.
Hi Eric, excellent info. I can’t thank you enough. Keep up the good work.
Sigs sight differently:
https://www.realgunreviews.com/sig-sauer-sight-heights-sight-numbers/
Great article and good guide for beginners!
One comment on this line:
"The top and middle of the front post is where your rounds should end up…not the actual front dot."
While that's true for sights configured for center hold, many pistols (combat/duty Sigs come to mind) have sights factory set for a different sight picture. For example, my fn fnx45 came from the factory with fixed sights set for combat hold (front dot = point of impact) @ 20 yards.
Anyways, my point is that one should check their manual/research what the factory sights are set for so they are not surprised if they end up shooting a bit low using a center hold.
Otherwise, great guide. Thank you!
Eric, thank you, for this very helpful article. My body had naturally defaulted to the Chapman stance to compensate for my being left-eye dominant yet right-handed. You've confirmed the correct stance to suit my needs so I can be more confident when I practice that I'm doing things properly. Bonus, now I know what to call the stance! God bless you, Sir.
Here's what I did to cure a flinch when shooting full power Glock etc. Buy a .22LR revolver for practice. Dry fire practicing with the long, heavy trigger pull makes semi-auto trigger easy by comparison. Be sure to use snap caps to avoid damage to the gun. Snap caps are expensive, so use 4-6-8x7/8" drywall anchors, which are the same size as .22. At the range, replace half the snap caps with live ammo so you can tell if you're flinching on empty cylinders. Buy bigger snap caps, eg 9mm, to use this same technique in glocks etc.
My .22 revolver is an S&W 63-5, which is steel, but an alloy one might be even better since the lighter weight would be even harder to control.
Great advise! I have a .22LR Ruger Revolver and will try the drywall anchors!
When you did your dry fire review was the G-Sight system considered? If so, what was your analysis?
Nice basic article. I add some things:
1. Don't get too frustrated with your inability to shoot as they do in videos that show rapid fire double tap shooting, remember the pistols they are shooting are NOT stock! They have, at the least, had trigger and spring jobs done on them, which greatly improves their ability to do accurate double taps. Having more tweaking done makes it even easier.
2. Even after a trigger/spring job on my pistol, I continued to struggle with rapid fire accuracy using the isosceles stance. When I signed up with Front Sight, they sent a video to review prior to attendance. They recommend the weaver stance which that change alone immediately improved my accuracy. The grip uses isometric tension; the support hand/arm applies rearward pressure to the firing hand's forward push which helps with recoil control and back on target faster.
3. Another helpful program is the 21 Day Alpha Shooter course - a lot of great tips in there.
4. I would also one other thing I have not seen anywhere but developed on my own: while Dry Firing with your pistol empty or on a snap cap, take a few minutes before practice to just cock the pistol and press the trigger with your eyes CLOSED! Do this several times, it will really help to get you in tune with your trigger.
Good stuff, but one correction - Springfield, at least on certain models, do not recommend dry firing without a snap cap as there is a small roll pin that can break from repeated dry firing. Tikka also recommends a snap cap. Be sure to check your owners manual before repeated dry firing.
I was stupendously fortunate to have a retired Delta Operator teach me how to shoot a pistol. Place the front sight on the target and squeeze the trigger. It is that simple and that difficult.
Sorry sir....you don't wait to hear the trigger reset.
That makes you let the gun dictate when you shoot. Also leads to lesser accuracy
Better to just avoid that.
Better to practice when you are live shooting and take your trigger finger off it let it reset and back to the wall while the gun is cycling.