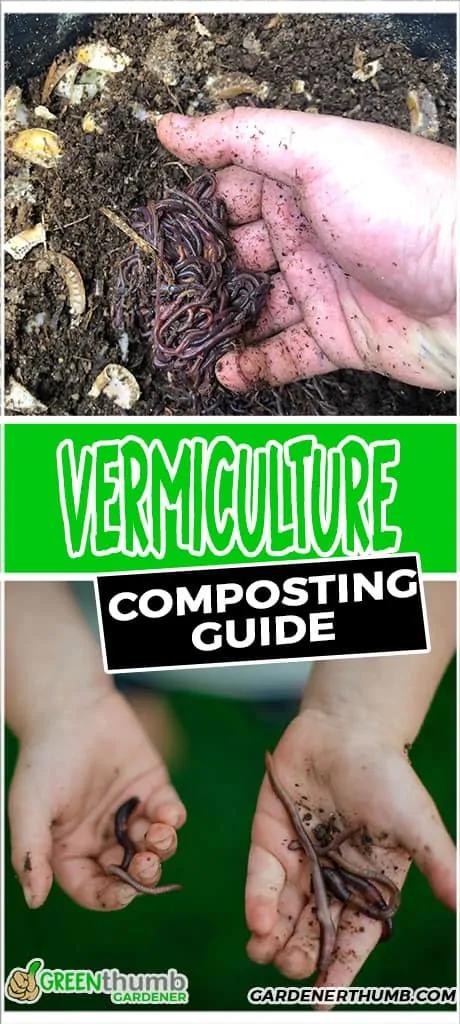
Vermiculture | Composting with Worms Guide
Last updated:10/30/21
Do love to garden on your apartment balcony, but want a way to compost? Are you challenged for space in your garden area?
You will want to read on as we will explore the army of crawlers that can help compost and transform your food and vegetable scraps into black gold for your garden.
Vermiculture is the answer to many gardeners who seek a way to get beneficial microbes and worm castings into your garden soil.
It is so easy to employ earthworms to help produce vermicast for your garden beds or containers. You will learn all about the vermicompost benefits as well as the methods about how to build a worm bin.
Enter your email below and we will send you a guide to help you SAVE money in your garden.
Vermiculture is a method of cultivation of earthworms that are typically used to create vermicompost or as fishing bait. Vermicompost is the by-product from the various types of earthworms that consume and breakdown organic materials such as decomposing plants, vegetable and/or food waste.
The organic matter is turned into vermicompost that is rich with nutrients and health microbes that are beneficial for soil. The vermiculture methods are extremely easy to adopt for the individual home gardener as well as on large scale worm farming operations.
This method of composting is passive to help create a nutrient-rich organic fertilizer and soil conditioner.
You simply must suspend your beliefs about utilizing worms to decompose your food waste. We will explore the ways to leverage vermiculture to make it a desirable method to add for your garden projects.
You can easily build a worm bin or purchase a worm farm kit to get the worms working for you in no time. You will come to realize how beneficial the worm castings will help you when your tomatoes are the talk of the neighborhood.
Everyone will then know about your tricks to composting with worms.
Take a look of a small scale vermiculture operation below:
Benefits of Vermicomposting
You will unlock some awesome benefits when you have access to your own worm farm or bin. These little worm crawlers sure know how to pack a punch in a with little room to produce.
Let’s check out the plethora of benefits of when you start your own vermiculture operation to make worm castings.
Worm Composting is less work – You have enough to do with your own gardening efforts. Why add on another more active gardening task to your growing task list? Composting with worms is really not much work.
- You simply add your vegetable and/or food waste to the bin and cover with shredded newspaper. That’s it, there is nothing else left to do to produce the black gold.
- They do all the work in exchange for some leftover scraps of food. What’s the catch?
Worm Poop is Black Gold – You want to know the secrets to getting big tomatoes. It is not necessarily what you do after you plant them. The real secret is what you do before you plant your tomatoes.
- Healthy soil is the key to any successful harvest. Worm castings are chock full of microbial activity.
- Soil that has castings added to it will benefit from the microorganisms and enzymes.
Worm Castings improve water retention in your soil – Vermicompost improves the water holding capacity. The castings are an organic matter that contains spongy matter that promotes aeration and drainage.
- This is great if you are you also garden with containers.
Vermicompost enhances germination & plant growth – seedlings that are grown in soil that has some worm castings always takes offs and flourishes.
- The root growth of these plants fares much better than without. This is a cool gardening project to experiment if you want to see the results yourself.
- Plant 2 of the same tomatoes and try worm compost versus regular compost. Let us know the results in the comments below.
Composting with worms requires less space – You can simply make a worm compost tube in your garden out of a cylinder PVC pipe.
- You only need a box that is about 3 square foot box that is 1 foot deep to accommodate most average homes waste. This equates to about 1 square foot area for each pound of waste.
Vermicomposting reduces greenhouse gas emissions – You are keeping food waste out of our landfills. While you may think this a small thing, it really adds up if every gardener practiced the art of vermiculture.Worm Compost produces compost tea – If the worm compost is the black gold then the liquid drippings form it is the magic elixir of the plant gods.
- Well, that is a stretch, but this liquid is really beneficial as liquid fertilizer
Worm Casting Vs Compost
The most obvious difference between worm compost and normal composting is, of course, those slimy cute little worms. Really, though are worm castings much better than your good old compost pile.
Unfortunately, there is not a clearly defined study of this. Generally, it will also vary because there are so many different materials that can be feed to worms or added to a compost pile.
This might be subject to a Green Thumb Gardener experiment where we compare equal portions of food scraps that are left to decompose on their own and munched up by a select group of wrigglers.
It is worth noting that composting with worms will be a much faster process if they are left in the same environment. Those little guys are some of the most loyal workers and devour the food waste and scraps with utmost diligence & steadfast.
They definitely win employee of the month when it is planting season. (don’t worry -the bees win it during flowering periods).
Composting in general also requires some active work such as turning the pile and keeping it moist unless you just have a pile you don’t care to monitor. Worm Composting is pretty much set it and forget it.
All things equal, worm castings probably have some edge because you are not only building healthy soil, but you are also feeding life.
How Do I Start Vermicomposting?
By now you might be psyched to hear about how easy it is to compost with worms. You now know the vast benefits of providing your vegetable garden with an abundance of nutrients that are found in worm castings.
However, what is the best way to start vermiculture? You stumbled upon the best resource for getting started. The best way is to just get started with a simple bin.
Take a peek at the video above if you want to see a live look in of our worm bin.
You can also check out an excellent book called “How to Start a Worm Bin” by Henry Owens that is also a good reference about worm composting. It really has an excellent FAQ and troubleshooting guide that helps once you get started.
Sometimes you need to be able to reference a good book while you are at the bin to see what to do in case you are unsure.
Note: Most problems are usually due to not enough bedding and/or brown materials or it is just too wet.
Here are a few questions you need to ask before getting started with vermicomposting. We’ll try to help you answer some of these further below.
- Where do you want to place your worm bin? Inside or outside?
- What size worm farm do you need for your home?
- Should I build a worm bin or purchase one for vermiculture?
- What food will you feed the worms?
- How will I know when the worm castings are ready to use?
Where Do I Find The Worms?
It might be time to introduce you to your new team. They are the star of the compost show. Let’s get to know the earthworms to help you build your garden soil.
First, you need to know that there are certain earthworms that are readily used in a closed composting system. Your garden variety earthworms are not the types of worms that you want to employ for this.
You want to look for composting worms that are detritivorous (eaters of trash), such as the red wiggler or Eisenia fetida.
Red wiggler worms are native to Europe but have been used in most vermicomposting practices. These worms are also used as fishing bait and found in tackle shops.
These little guys will eat all the food in your compost bin without much fuss. They don’t like the bright light, so make sure to keep them out of the sunlight if at all possible. You might be able to ask a friend of yours that has a bin to give you a bunch of them to get started.
Probably the easiest way is to order them online. Make sure that you have your bin ordered or built before you order them so you can place them in there when they arrive.
They arrive in the mail usually in coconut coir or peat moss.
Uncle Jim’s Worm Farm is where we purchased our worms years ago.
- Check out their store here.
- You can get about 500 worms for about $20
To Build Or Not To Build A Worm Bin
It is time to get yourself mini farm to house your worms. You really can’t throw these guys directly in your garden. While it won’t hurt your garden, it is better to keep them in a tight-knit community to help you concentrate your efforts of building good compost.
The most important thing is to prevent the worms from getting wet when you have rain if you keep them outside. You also want to ensure that rodents and other critters don’t have access to it. It also has to be somewhat contained if you plan on keeping it indoors so you don’t smell any of it.
Our experience relies on only keeping it outdoors. We do take in our smaller bins in the winter and place in our garage. We have also left the bins out during the winter, but our area does not have long periods of freezing weather.
The worms do huddle together and can sustain some freezing, but we definitely recommend covering the small bins since there are not enough worms in there to sustain long periods of freezing.
You only have one of 3 choices when it comes to housing these roommates:
- Purchase a worm farm bin – We recommend the penthouse of worm bins, Nature’s Footprint Worm Factory DS3BT 3-Tray Worm Composter.
- This thing is pretty sweet and is one of the best worm composters, but check out the reviews on Amazon for what others have to say about this worm farm.
- It has 3 trays but can be expanded to 7.
- It measures about 16 x 16 x 13 inches and has a reservoir to collect worm compost tea.
- This is perfect for indoors tucked away in your basement or closet since it is said to be odor free.
- Build your own Worm Bin – This is the most economical option to construct your own bin. You literally could head down to Walmart now and buy a few materials and be up and running in an hour.
- You could also build an elaborate wooden bin that is permanent near your garden beds.
- Use your imagination to see what you want for your needs.
- Check out the easy guide below for the steps on how to build a simple and easy Rubbermaid worm bin.
- Build a worm compost tube in your garden – This option is really not a true worm bin but thought it is still a helpful idea. This method is useful to use for the deep burrowing earthworms that you normally may find in your garden. It helps to attract them to newly established beds.
- Essentially, you will bury a cylinder PVC tube in your garden and add a cap on it.
- You will place some vegetable food scraps in this tube so that the earthworms can find this and make some compost for you.
- It is a cool project, but probably not that effective or practical. You really don’t want to place your red wigglers in this as this is more useful for attracting earthworms.
- Your time may be better spent on building your soil.
- Here are some helpful videos if you want to see what this is about. Click here
Further Reading
DIY Worm Bin Build
Materials & tools needed:
- 3 of the 10-gallon Rubbermaid bins – The link here is close to what we used for one of our bins. You could find these in any store.
- Ideally, 10 gallons is the best size, but you could make them smaller or large depending on your needs.
- The larger ones will mean you can store more, but will also weigh more. You may need to move them around
- You can use 2 bins where the bottom bin is for collecting the compost tea.
- 1/2 ” Drill bit
- 1/4 drill bit
- Electric Drill
- Shredded newspaper
- 4-5 sheets of Newspaper
Steps to build the worm bin:
- You will drill several holes along the bottom of 2 of the Rubbermaid bin with the 1/2″ drill bit. This is so the compost tea can filter out and the worms can climb up when you add the 3rd bin. You will drill holes about an inch apart just on the bottom part of the bin. It will look like swiss cheese.
- You will then drill 1/4″ holes all along the upper edge of the Rubbermaid bin below the cover. This is so the worms have some air when the cover is closed. You don’t want them suffocating.
- The bottom bin will not need any holes as it will be used to collect the worm compost tea.
- Next place one of the bins with the holes on top of the bin without the holes.
- Add the 4-5 sheets of news on the bottom of the worm bin to cover the existing holes.
- Add shredded newspaper to cover about 1/4-1/2 of the bin. This is what you will use to cover the food waste materials that you feed the worms.
- Add bags of worms along with the materials that the worms came into the bin. It is best to start in one corner of the bin. Be mindful that the worms will eventually multiple, so the colony will reproduce as they settle in.
- Add scraps of food waste to the same corner and cover with the shredded newspaper. It is best to slowly add food for the next week or two to allow the worms to adapt to their new environment.
Here is a video that shows you exactly how to build a worm compost bin:
How & What to Feed Your Worms
Your worms have moved into their new condo to start producing compost like a boss. Think of worms like your finicky teenage that will eat most things that you put in front of them.
There are some DOs and DON’Ts on the types of foods that you give them. Let’s take a look at some of them for your worm bins.
Things to Feed your Worms:
- Coffee Grounds
- fruit scraps (try to minimize citrus fruits)
- Vegetable scraps (minimize onions)- banana scraps, apple peels, grapes etc.
- Egg Shells- great to help reproduction of earthworms
- Nuts and Seeds
- Untreated Grass Clippings
- Tea bags
- Pasta
- Bread
- Paper
Things NOT to Feed your Worms:
- Citrus- some rinds are ok, just don’t overdo it
- Salty Foods
- Oils
- Meat
- Dairy
- Spicy Foods
- Pickled Foods
- Seeds -we try to scrap out vegetable seeds to minimize sprouting
- Bones
Tips for DIY Rubbermaid Worm Bin
You want to rotate where you place the food in your Rubbermaid DIY worm bins if you use that container. You place the food in one corner and then add more food in another corner the next time. You would do this over and over.
You would place a new bin on top of the full bin and start placing food in that new bin once your bin is close to being full. The worms will eventually migrate to the top bins after they have consumed most of the food in the lower bin. This will help when you want to harvest your compost.
The bottom bin will collect the worm compost liquid that you can use as compost tea. It is recommended to dilute the compost tea since it can be higher in acid pH. Maybe start with 1 part of compost tea to 3 parts of water.
You can experiment with this to see what works best for you. We don’t recommend using this directly on plants at full strength though since your compost tea may be a different strength depending on what you use in your compost feedings.
How Do I Know When Our Vermicompost Is Ready?
Your worms are settled in their worm farm and have been feeding regularly. When do you get to actually use the worm castings?
Sure, this is the crux of what we have been building. Your container that you use will usually have some recommendations because they have different designs.
We will focus on the DIY Rubbermaid type of bin, but many of these tips below will still be applicable to other bins.
Ultimately, the actual compost will definitely not look like food. The actual compost will look like dirt and have an earthy smell.
You may also notice that most of the worms have migrated away from this particular pile. The vermicompost will look very dark and pretty much like soil.
It should not be too damp, but maybe a little spongy with liquid. You can begin to harvest some of it when it reaches this point. a good practice that we utilize is to harvest parts of the bin a scoop at a time. you can also harvest all of it at once.
A good way to harvest all of it at once is to dump the bin onto a big tarp and pick out any of the worms. You want to put those worms back into your bin.
It is ok if a few of the worms find their way into your compost and into your garden. We sometimes let this dry out a little bit in the sun and bag it up.
Ideally, it is better served when you add it your garden right away as most of the microbial life is at its peak.
Check out Uncle Jim’s Worm Farm FAQ for some other tips & for some common vermicompost problems you may have.
How To Use Vermicompost In Garden?
Worm castings are a great addition to any plant or garden bed. You will want to use black gold everywhere once you start building up a good supply of vermicompost.
Here are a few ways that you can start to incorporate them into your garden.
- Seed starting– Worm castings are great to use in seed starting tray. Mix 1 part of compost to 3 parts of peat moss or coconut coir and boom your seedlings will be off to a great start.
- Planting holes– This is by far what we always do. Just put a scoop of it directly into your planting holes if you transplant your seedlings into the garden
- Top Dressing – Sprinkle the worm castings all around your plants during their growing cycles. It will help with all the plant nutrients right when it is needed.
- Throw it into your existing compost – Compost feeding more compost..huh bro? This is a great way to help start a new compost pile. It is teaming with helpful microbes and they are looking to spread their love everywhere. Why not spread the love?
- Houseplants – sprinkle some of the worm casting goodness for your indoor plants. They also need the worm poop
Vermiculture and composting with worms could not be much easier. Please take action of just getting started. Don’t sit on the sideline of your garden thinking that this is such a difficult project to undertake.
Just get in there and get your hands dirty and let the worms do the work for you.
Lets us know in the comments below what your worm bin setup is like.