Bird Photography
If you like nature and you are looking for a bit of a photographic challenge, you might want to consider photographing birds. Maybe you are already into bird photography, but you are quite getting the types of shots you are hoping for. Here, I will take some time to share some tips and tricks that will help you get the shots you have been waiting for. Be prepared though, as I mentioned earlier, it will be challenging. It takes practice to get the shots you see the “pros” taking.
Do Some Research
The first step is to do research on the bird(s) you want to photograph. Research can take many forms. You can search for information on the Internet and in books, but you can also research birds by watching them. I might even dare to say, this type of research will go farther in making the great photos you want to see than doing a Google search. This is not to downplay the importance of researching the species of birds in your area or where you can find them, so you can go and watch them. But, observing their habits and behaviors in their natural habit might be some of the best research you can do.
It might take several trips to the same location to determine what time of day a certain species visits that spot. You might find there isn’t a specific time of day it visits, while that might not be ideal for shooting them, it is good information for you to have. You might also find another species you want to photograph more, which might lead you back to research step number one, Google. In addition to visiting locations at different times of day, try to visit different times of the year. Not only could the subject of your shots change, for example nesting eagles in the winter, but the visibility you have could also change. This year, I visited a nest of eagles several times over several months. I was able to see the eaglettes grow from tiny babies into almost fully grown juvenile eagles. What I did not account for during my visits, was how drastically the visibility of the nest changed from the winter to the summer months. As the leaves grew back on the tree branches, I was scarcely able to get a clear photo of the eagles in their nest. Lesson learned….I still enjoyed watching these eagles grow, but my photos were not so great.
Observe Before you Shoot
Once you’ve nailed down a location or a couple you would like to continue to visit, be ready to go and observe. Before even lifting the camera to take a shot, look around. What is the lighting like? Is it consistent or are there well-lit areas and shadowy areas? What type(s) of birds are there? Are they moving from spot-to-spot? Are they intimidated by your presence? Are they interacting with each other, or with other birds there? Spend some time looking for behavior and action because those are the ingredients that typically make some of the best bird photos.
“Bird on a Stick”
There’s a term photographers have coined called “bird on a stick”. Bird on stick refers to a photo where a bird is stationary on an object, usually a stick. If you like “bird on a stick” photography, that’s okay. What I will say, though, is that “bird on a stick” photos don’t typically stand out as much as action shots of birds doing something. Again, photos of birds strategically placed in their natural habitat can be absolutely stunning. In fact, I’d venture to say it’s important to practice photographing stationary birds before attempting to capture birds in action, but the action shots are usually the ones that grab the viewer’s attention. The preparation that goes into capturing action shots (and just being in the right place at the right time—-more on that later), helps them to be the ones that usually stand out to people because they show something that isn’t seen every day. In fact, it might have taken the photographer ten trips back to the same location at five different times of day to nail that shot.
My Lucky Break
Talk about being in the right place at the right time— I visited a spot for the first time ever. It was a beach location where seagulls, oystercatchers and various other birds spend their time hunting for food. About five minutes into the trip, while on the way to a group of seagulls, out of the corner of my eye, I see something huge flop down into the water about twenty feet away. I look over to see this huge mass of a dark blob on top of the water. Before I could think of what to do next, this dark blob started to ascend into the air. It was an osprey that had just caught its lunch.

Fortunately for me, it turned around and flew back toward me just in time for me to snatch a few shots of it with a fish in its talons. I have visited this location twice more since, to find some gulls and that’s about it. Although this may seem to contradict what I said earlier about visiting several times before getting “the shot”, there are times when just being in the right place at the right time is the way to get the shot. I’d venture to say, the odds increase as you visit and spend more time in a location, though.
Adjust Your Camera Settings
If you aren’t set up to take a photo in the location you’re currently at, the right place or right time won’t matter at all. Prior to walking the beach, I made sure my camera settings were already set for the photos I was anticipating. I considered at least two very important things: the exposure and moving objects. What does this matter? If I am prepared to shoot a moving bird, I most likely use focus tracking. Of course, the exposure is important but also balancing the right shutter speed for a moving bird, while getting a proper exposure is just as important. These are things I considered before stepping foot on the beach and this is the reason I was able to quickly capture a shot of a flying osprey when I wasn’t ready for it.
What should you look for when preparing a spot to photograph? Are there distracting colors or objects in the background? Is my subject far enough away from the background for it to be blurry? Do I want the background in or out of focus? How much of the scene/environment do I want in the shot? Where do I want to place the subject in the frame? Once you figure this out, take a test shot to see if all of what you’re hoping for appears in the scene. It’s okay if the bird isn’t in the frame yet, make sure everything else is set so you are ready when it is.
Going back to something I mentioned earlier, “bird on a stick” or a term that I think I coined, “swan on a pond” (we’ll see if it catches on)—Before taking to the streets to photograph birds in action, I practiced with stationary birds in my backyard. I think it is important to learn your camera before venturing out to take action photos. I set up natural-looking bird feeders to get natural looking photos. If you take a medium-sized limb from a tree and cut a piece, you can bore a long trench down the center. Then, melt some suet for a short amount of time in the microwave. Fill the trench in the limb with the suet and hang it in a location where you can control the background and every other aspect previously mentioned. Wait for the birds to come and be ready to fire away. I spent hours in the doorway with the slider door slightly ajar, with my camera poking out, so I could capture woodpeckers feeding. It was well-worth the effort. This was taken from right inside the house, with a Sigma 150-600mm lens.
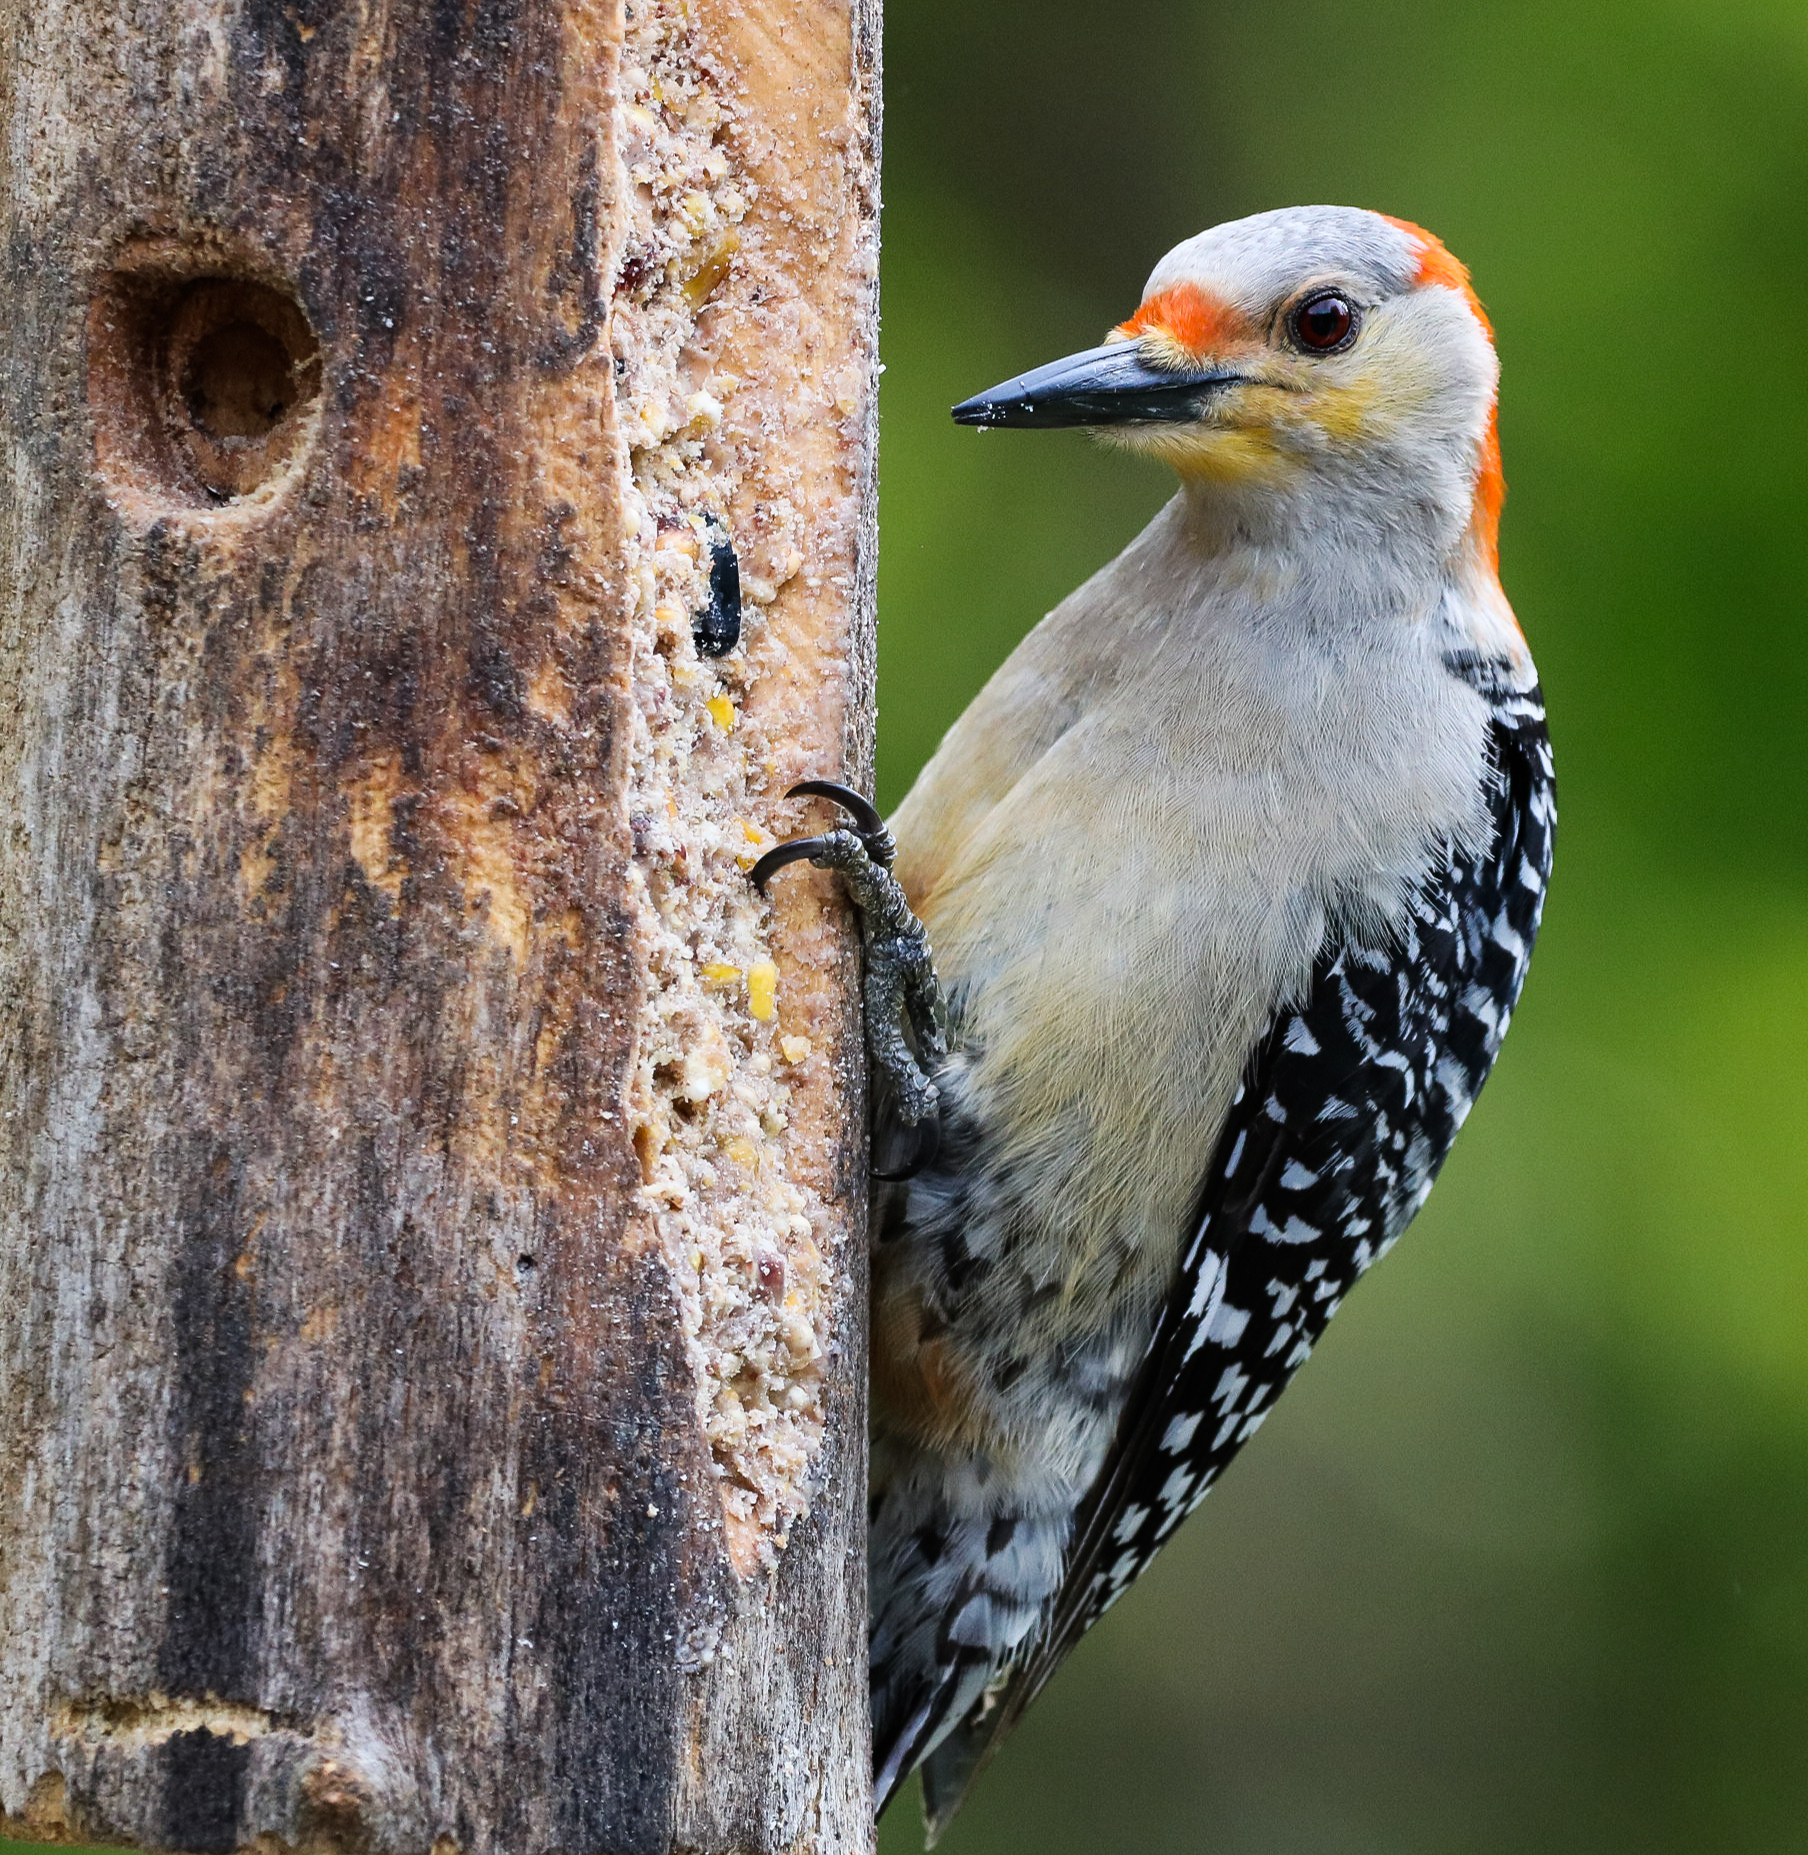
I was able to spend time waiting for the right moment without the pressure of having just driven far to possibly come home with nothing.
On that note, be prepared to come home with “nothing”. There are days you might venture out and come home to a memory card filled with photos to delete. But, remember, even though you came home with no photos to share, you did not come home “empty handed”. In fact, the time you invested in learning about the birds you desire to photograph and how to set your camera to take these photos is worth it. Eventually, this type of investment will lead to the kind of photos you are hoping to take.
To Sum it Up
If I could sum it up, practice using your camera and research the subject you want photos of as often and as much as possible. Be prepared before taking the shot by knowing your subject and by having your camera settings set before the action begins. Most importantly, don’t get frustrated when you don’t immediately land the types of shots you see others getting. Who knows how long they spent waiting for that shot or how many years of practice it took them to get where they are.
How SlickPic Can Help
To track the progress of your bird photography journey, consider a SlickPic account. I have used SlickPic to store bird photos. It is amazing to be able to see the progress I have made and to keep track of the places I have visited with organized folders. Slickpic can help you to organize your photos so you know where you were when you took certain photos and it can also help you share your amazing work. Check it out!