As a new streamer, we recommend getting familiar with each platform. If you already have an established community on Facebook or YouTube, start there. You may find it helpful to Multistream at first to see which platform gets traction.
In this blog, we are going to focus on Twitch. The platform allows for a ton of customization and has tools to help you create and establish a unique brand.
Setting up a Twitch stream can seem like a daunting experience. In this blog, we are going to discuss several key factors you should consider before going live on Twitch.
Before we begin, it’s important to remember there is no secret to success. If you’d like to become a full-time streamer, hard work, dedication, long hours, and a deep commitment to creating engaging content is required. For many people, becoming a full-time streamer isn’t necessarily the end goal, and that’s okay. either way, these tips will help you create a great Twitch channel.
Create a Consistent Brand
You may find that creating a unique look or aesthetic for your channel is a good way for people to remember you. The best ways to create a unique brand include:
- Social media
- Overlays
- Twitch Panels
- Alerts
Social Media
Your brand starts with social media. There are many social media platforms to choose from, but we recommend starting with Twitter because that is most popular in the creator and gaming space. Start communicating with the world about your stream. Promote your social channels when you stream. Plug your handles when you are live. Include links in your about section. Social media acts as a way to amplify your reach when you stream and gives your community a place to interact with you.
Overlays
Stream overlays make it easy to grab people's attention while showing off your personality and unique style.

There are over 250 free overlay themes available in Streamlabs. You can also get access to hundreds of stream overlays, assets, and templates designed by top artists in the industry like Nerd or Die, Visuals by Impulse, OWN3D, and more when you subscribe to Streamlabs Ultra.
Visit our theme library to browse all of the overlay assets available to you.
Twitch Panels
Panels help keep your brand cohesive and consistent throughout your channel. Panels provide viewers with links to important websites that you want them to see. This can be everything from your Twitter, Instagram, Creator Site, tip page, and anything in between.

TimTheTatman’s recent rebrand is a great example of Twitch panels with a consistent theme. While not necessary, a professional-looking stream can encourage new viewers to stick around and drop a follow.
If you have skills in photoshop you can create Twitch panels yourselves. Or, you can use Streamlabs’ new Twitch Panel Editor.
Our Twitch panels are professionally designed and come with over 50 different templates.
Each template comes with a panel for your donations, YouTube, Instagram, Twitter, merch store, and Creator Site.
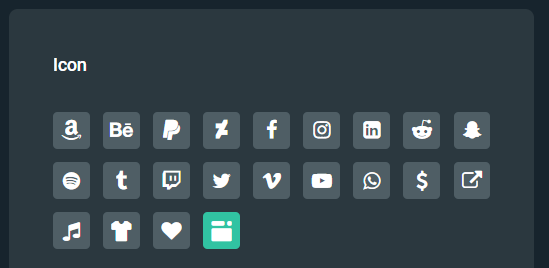
Don’t see a panel for a website you want to promote? There are 20 different additional icons you can choose from to match the website or social media you want the panel to link to. Completely customize the font style, text, size, and position.
Adding Alerts
Having alerts is a crucial element of any live broadcast on Twitch. Think of them as an extension of your brand. They can be completely customized to match your personality or aesthetic. Having unique alerts will help you stand out from the crowd, keep viewers coming back, and encourage others to interact with your live stream.
On-screen alerts are often your viewer’s first impression. We recommend spending time to make them unique and memorable.
How to Customize Your Twitch Alerts
To add alerts to your Twitch you must first add an Alert Box widget. Widgets are features you can add to your live stream to help you interact and engage with your community. Learn more about the top widgets we recommend adding to your live stream by watching our video here.

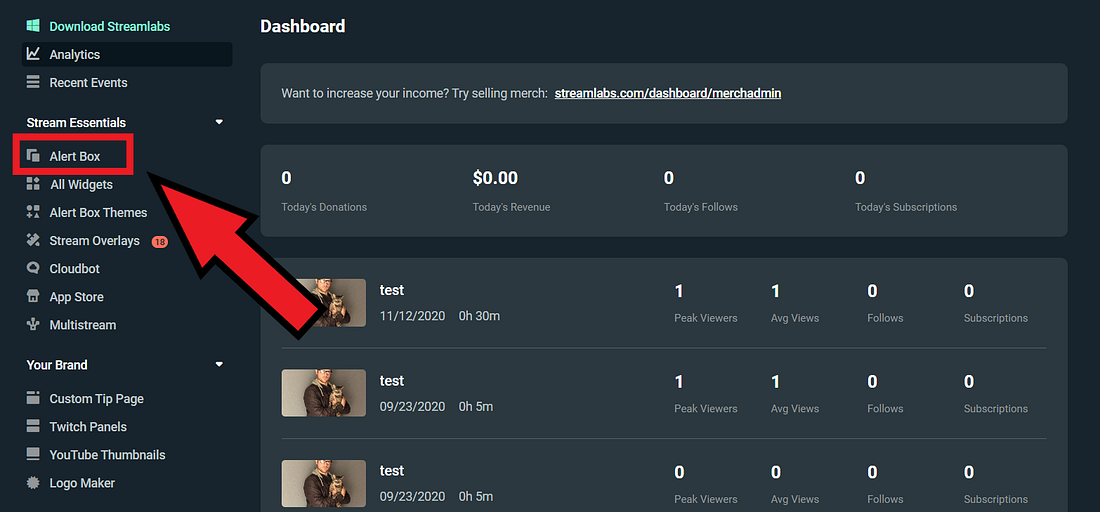
To add an Alert Box, press the plus sign in the Sources section of Streamlabs Desktop and select “Alert Box.”
Now viewers will see alerts on the screen when you get a new Subscriber, Bit, Cheer, or tip. Use this opportunity to acknowledge your viewers for contributing to the stream. Recognition makes your viewers feel good and also encourages others to support you. *Please note, the Alert Box widget will use Streamlabs’ default alert animation until you customize it on your own.
Get Pre-Made Alerts
Streamlabs offers pre-made alerts created by top designers in the industry like Nerd or Die, Visuals by Impulse, and OWN3D. Visit our themes library and click on “Widget Themes” to view our collection. You can also access this library by logging into Streamlabs.com and clicking on “Themes.”
Create Custom Alerts
If you don’t want to use a pre-made alert, you can manually customize your own by navigating to the Streamlabs dashboard and clicking on “Alert Box” on the left-hand side.
This page is your command center when it comes to editing your alerts. From here, you can choose to edit your “General Settings”, which will affect every single alert type and/or further customize specific alert types.
Depending on the platform you choose, your alert types will differ. For example, in the picture below I’m logged into Twitch, and therefore have options to customize my alerts for Follows, Subscriptions, Hosts, Bits, etc.
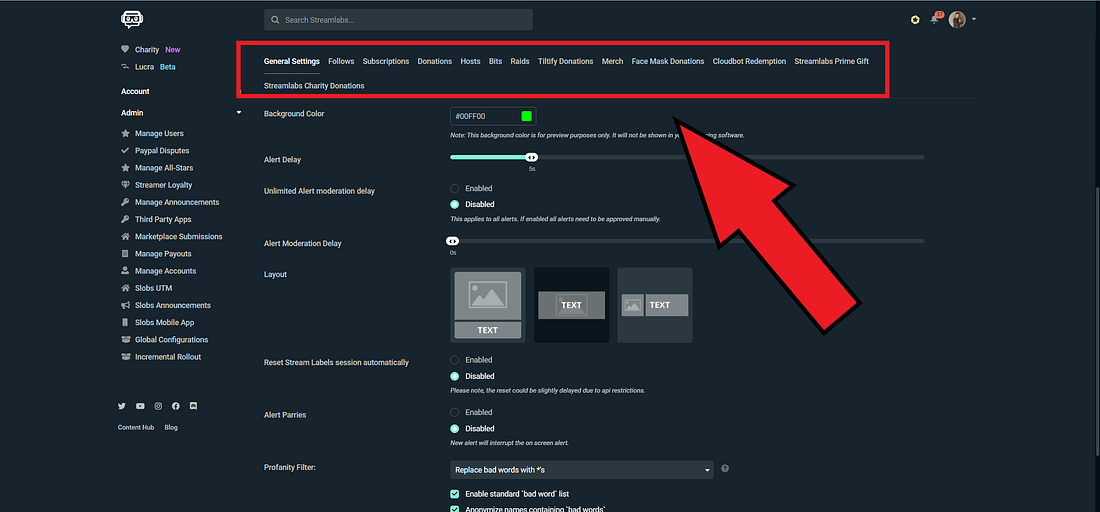
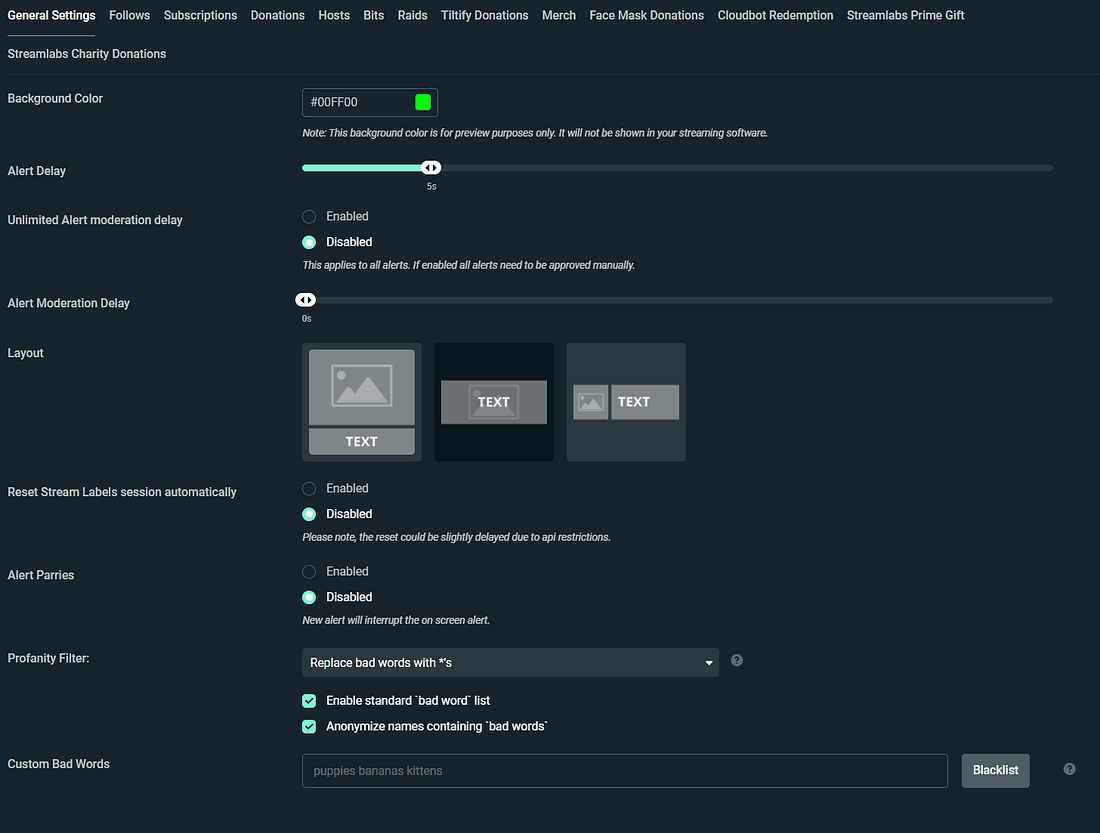
General Settings
General Settings apply to every alert type. You can edit the alert delay, mod approvals, profanity filters, add custom bad words, etc.
How to Customize Specific Alert Types
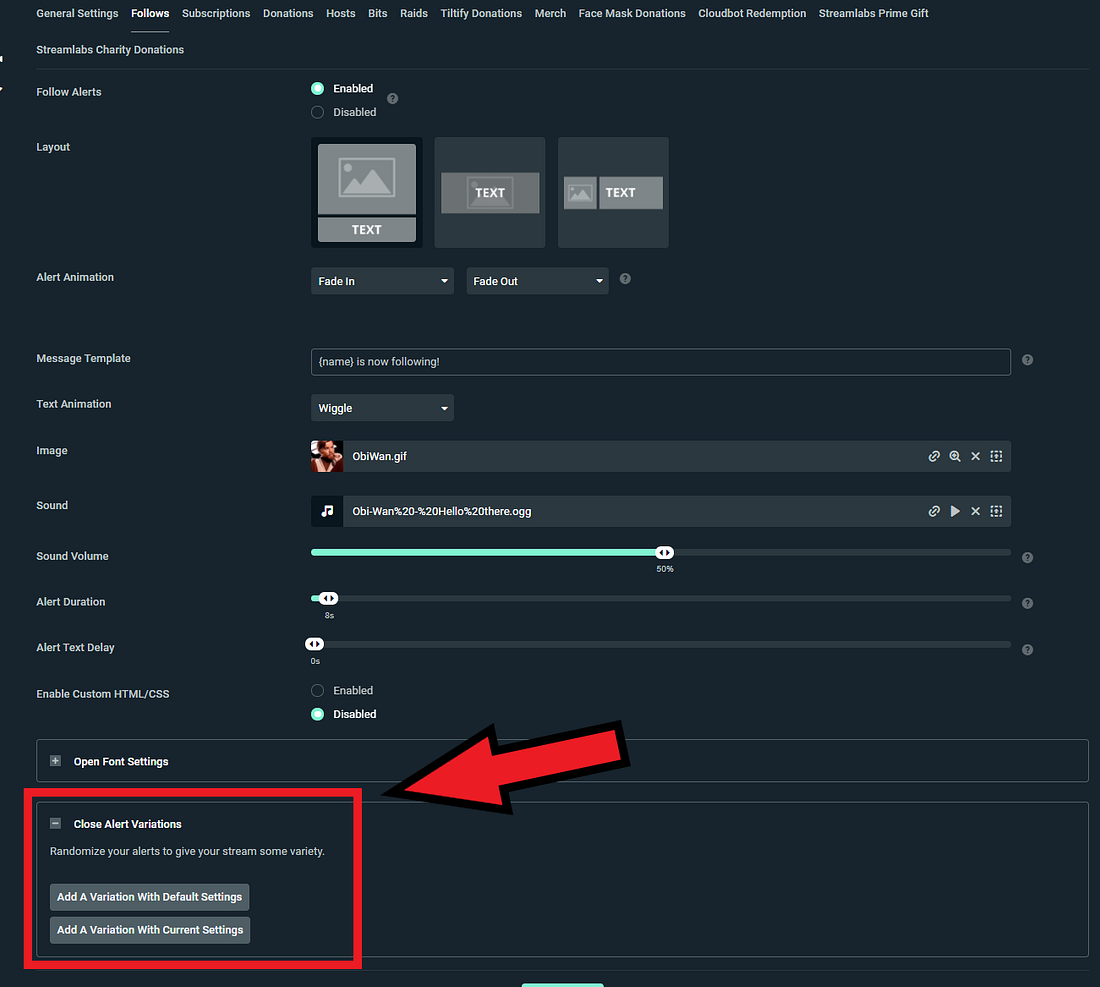
To customize an alert click on the specific event type you wish to edit. In the example pictured below, we are editing alerts for new Twitch followers.

On this page, you can customize the layout of the alert, the image or gif that’s played, sound, font, animation, duration, etc. Now when I receive a new Twitch follower my viewers will see a sweet gif of Obi-Wan Kenobi.

How to Add Alert Variations
Alert Variations allow you to play exclusive alerts if a viewer meets certain conditions. For example, you can play a different alert for a $10 tip vs. a $5 or $1.
Let’s say you would like a special alert to play when someone sends $10 or more.
- Click on “Open Alert Variation” and add a variation with default alert settings or your custom alert settings
2. Name your new variation. In this case, we’ll call it “Donations greater than $10.”
3. Set the correct condition so that tips over $10 trigger a different alert. Remember, each alert type will have specific conditions. We recommend getting familiar with each alert type and the conditions available for each one.
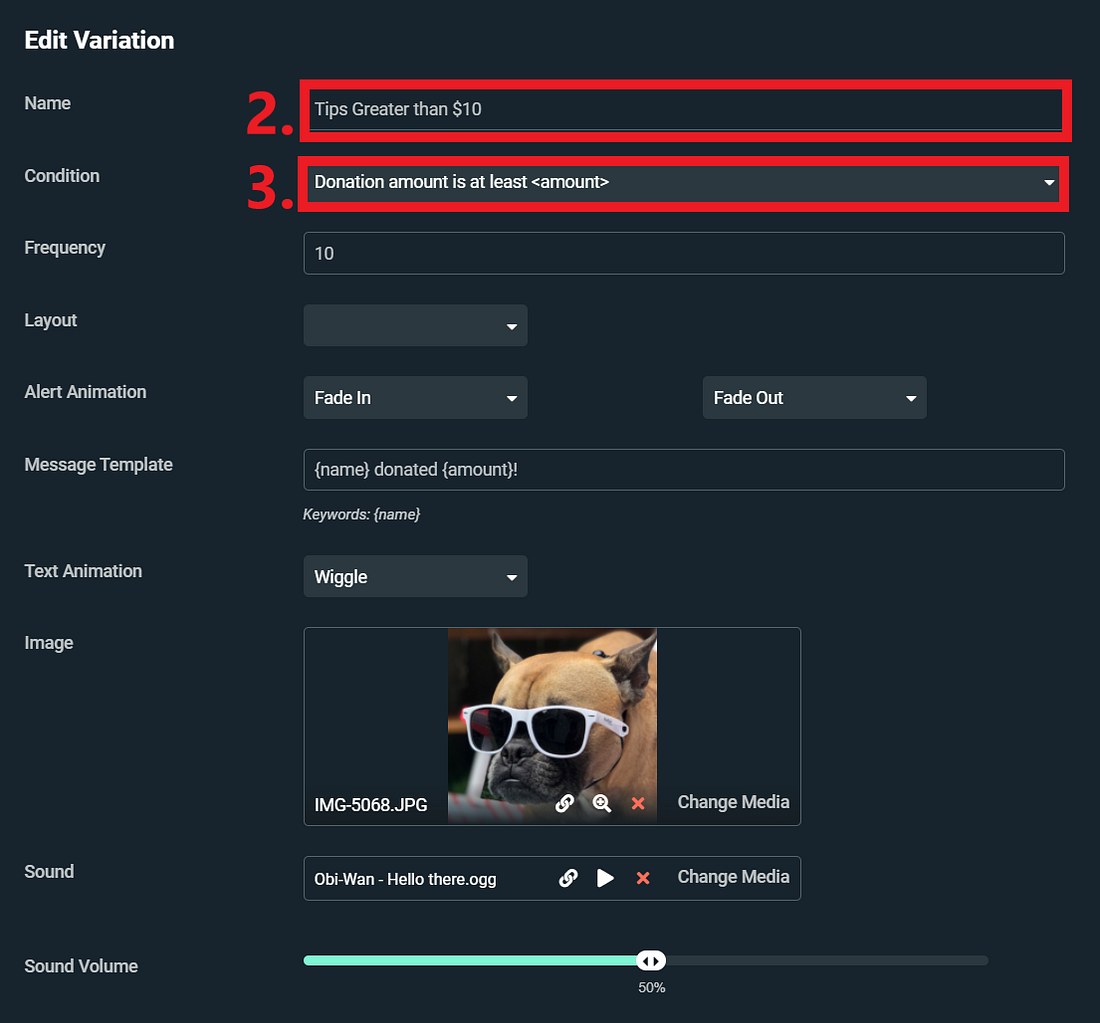
Now when someone tips $10 or more, my viewers will see a sweet picture of my dog.

Quality and Resolution
Having settings that are too high for your computer’s hardware can cause performance issues for your live stream. The output of your video resolution can have a significant impact on the quality of your live stream and the performance of Streamlabs Desktop. For example, streaming at 1080p vs 720p will double the number of pixels, meaning your computer will be using more resources.
To adjust your resolution, select “Video” from the side panel in the setting window.

You can leave the base (canvas) resolution as your computers native resolution. We recommended lowering the Output (Scaled) Resolution since streaming in 1080p can have a significant impact on your CPU. We recommend lowering the Output (Scaled) Resolution to 1280x720 for a good balance between performance and quality.
Choose your Encoder
When it comes to encoders, there are two types: software (x264) and hardware (NVENC). The software encoder (x264) will use your CPU to encode video, while hardware encoders like NVENC utilize a dedicated encoder in the GPU, allowing you to play and stream without compromising game performance. If you are using an NVIDIA graphics card we recommend you stream with NVENC.
Change the CPU Usage Preset
To change the CPU usage preset, navigate to “Output” in the settings window.
x264 offers a range of usage preset. This refers to how fast the CPU encodes video. The faster it encodes, the less CPU it uses. By default, this is set to “Very Fast”, which provides the best balance between performance and quality.
NVENC presets range from low-latency, optimal performance, and max quality. We recommend starting with the “Quality” preset and experimenting from there to find what works best for you.
Enable Dynamic Bitrate
In a recent update to Streamlabs Desktop, we included a feature called Dynamic Bitrate. This feature allows our software to automatically adjusts your bitrate based on network conditions to prevent dropping frames.
If you’re computer and internet speed can’t handle the bitrate you’ve set, you may experience dropped frames to improve the stability of your stream and minimize latency.

To enable Dynamic Bitrate, make sure you download the latest version of Streamlabs Desktop. Navigate to “Advanced” in the settings window. Scroll down and toggle the box next to the option that says “Dynamically change bitrate when dropping frames while streaming”.
Edit Bitrate Manually
You can also manually edit your bitrate. Below is Twitch’s own recommend specs for NVIDIA NVENC depending on the resolution and fps you’d like to achieve.
1080p 60fps
- Resolution: 1920x1080
- Bitrate: 6000 kbps
- Rate Control: CBR
- Framerate: 60 or 50 fps
- Keyframe Interval: 2 seconds
- Preset: Quality
- B-frames: 2
1080p 30fps
- Resolution: 1920x1080
- Bitrate: 4500 kbps
- Rate Control: CBR
- Framerate: 25 or 30 fps
- Keyframe Interval: 2 seconds
- Preset: Quality
- B-frames: 2
720p 60fps
- Resolution: 1280x720
- Bitrate: 4500 kbps
- Rate Control: CBR
- Framerate: 60 or 50 fps
- Keyframe Interval: 2 seconds
- Preset: Quality
- B-frames: 2
720p 30fps
- Resolution: 1280x720
- Bitrate: 3000 kbps
- Rate Control: CBR
- Framerate: 25 or 30 fps
- Keyframe Interval: 2 seconds
- Preset: Quality
- B-frames: 2
Please remember, everybody’s set up is going to be different so make sure to play around with the settings yourself to find out what works best for you.
If you have any questions or comments, please let us know. Remember to follow us on Twitter, Facebook, Instagram, and YouTube. Download Streamlabs Desktop.
0 Comments