Between overlay themes, creating alerts, choosing your Twitch panels, everything you do to customize your Twitch stream is a reflection of you and your brand. It’s essential to take the time to make them look nice. Investing in this area of your channel tells your community that you care and helps you stand out from the crowd. Of course, your community will keep watching at the end of the day because of your personality and content, but creating an aesthetically pleasing stream can help! This blog will tell you everything you need to know to customize and design your Twitch channel. Please, note: this article assumes you’ve already downloaded Streamlabs Desktop. You can learn more about getting started with Sreamlabs Desktop by visiting our blog!
So, where should you begin? Let’s start with some of the basics
How to Create a Twitch Channel
If you are reading this as a complete newbie to the streaming world, the first step you’ll want to do is actually create your Twitch channel. If you’ve already done this, you can skip ahead to the next step.
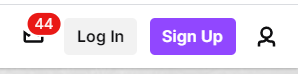
To create your channel, visit Twitch.tv and click the “Sign Up” button on the top right-hand side of the screen.
Now enter in your username, email, password and click “Sign up.”
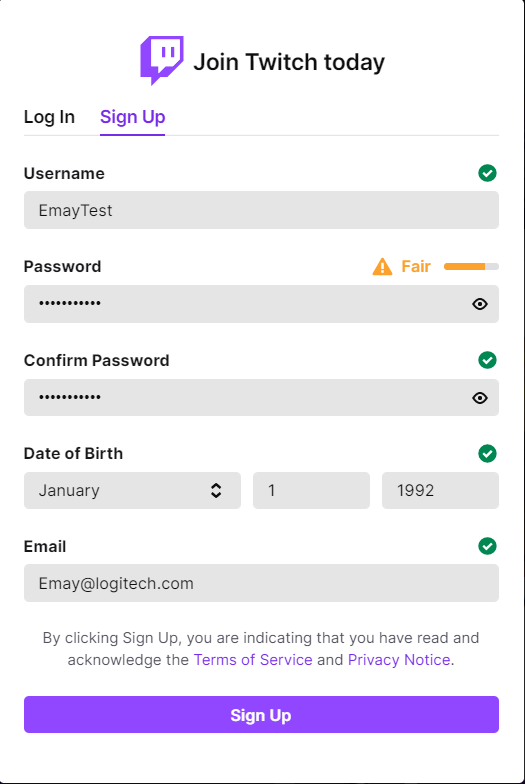
Twitch will send you an email with a verification code that you will need to enter.
After that, welcome to Twitch! You can now select from a few categories that interest you, and Twitch will come with recommended channels they think you’ll enjoy.
So, now that you are working with a blank canvas that is your Twitch channel, you may be wondering what you should do next? A lot goes into customizing your Twitch channel, and it can seem a bit overwhelming. Well, have no fear; in this next section, we’ll go through, step-by-step and show you exactly how to customize your Twitch channel.
How to Change your Profile Picture on Twitch
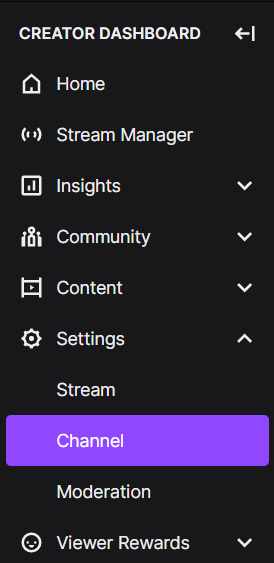
The first thing we recommend doing is updating your profile picture. To do that, head to your Creator Dashboard. This dashboard helps manage your stream, edit safety preferences, and even has resources and best practices to help you on your streaming journey. We highly recommend pursuing through this dashboard to get familiar with the resources available. If you’re ever unsure where to change a setting, chances are the Creator Dashboard is where you want to go.
Now, updating your profile picture is easy.
- In the Creator Dashboard, click “Settings” to see the drop-down menu.
- After that, click on “Channel.”
- Now, click on “Brand” and then click on “Add Profile Picture.”
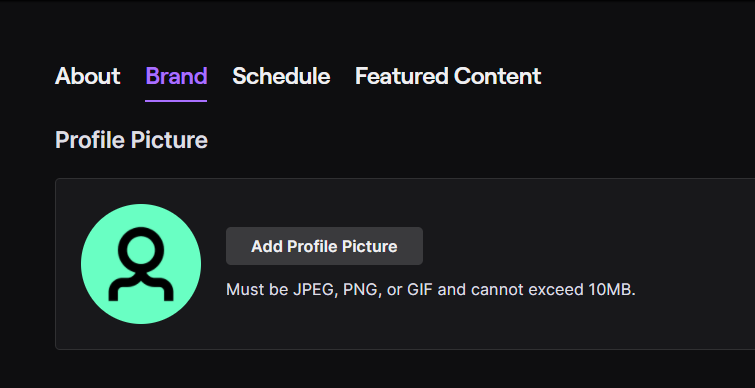
Congratulations, now your soon-to-be new followers can see your beautiful face. If you don’t want to add a picture of your face, you can also add anything you want here. You may even have a logo you want to use. If you don’t have a logo but want to create one for you, Streamlabs offers a Logo Maker as part of Streamlabs Ultra, our premium toolkit for professional streamers. If you’re interested, feel free to check out our home page to see if it’s right for you.
How to Edit Your Bio on Twitch
Now that you’ve updated your profile picture, it’s time to tell your viewers a little bit about yourself. To update your bio on Twitch:
- Open the Creator Dashboard.
- Click on “Channel” from the left-hand side.
- Click on “About.”
You will now see a section where you can update your username, display name, and bio.
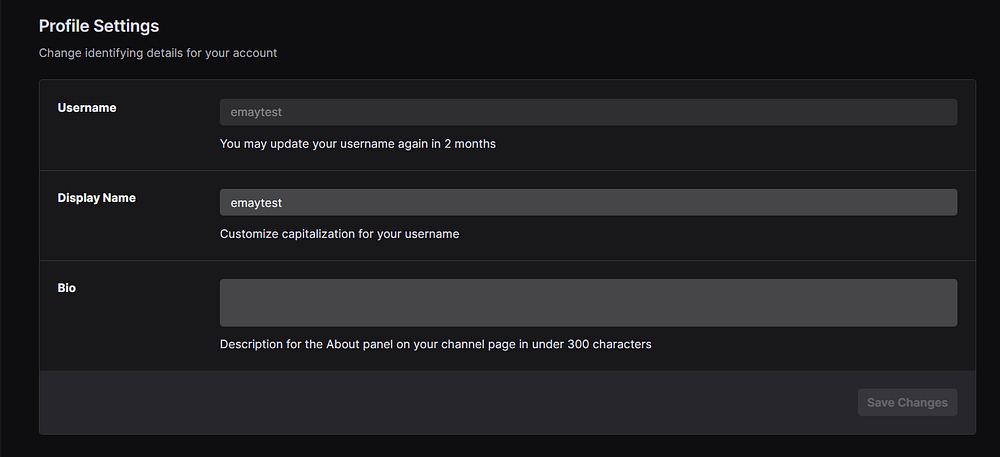
Many people use this area to talk about what to expect when people watch their stream, but you can use it for anything. Tell your viewers a little bit about yourself, your hobbies, what you enjoy doing, your favorite games. There is no limit to what you can tell your viewers (as long as it fits in 300 characters or less).
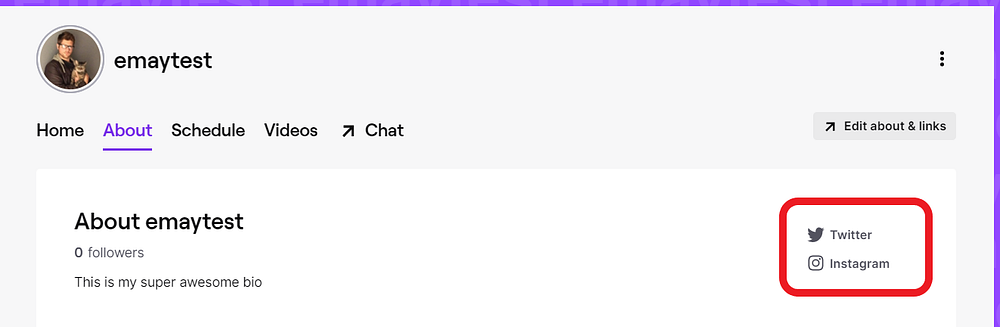
How to Add Social Links to Twitch
Twitch recently updated the bio section to include a place for your social media links. We recommend creating a Twitter at the bare minimum. Twitter is extremely popular in the streaming world, and driving your viewers from your social media to your channel (and vice-versa) helps build your community.
To add social links to your Twitch channel:
- Open the Creator Dashboard.
- Click on “Channel” from the left-hand side.
- Click on “About.”
Scroll down, and you’ll see an option to add your social links.
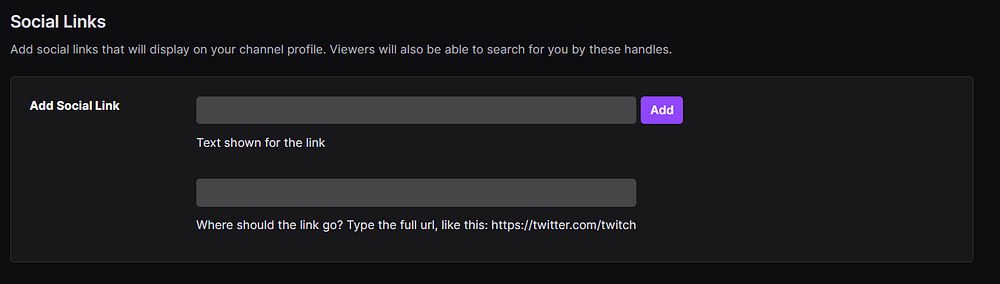
Enter the text and URL, and now your social media links will appear on your channel page.
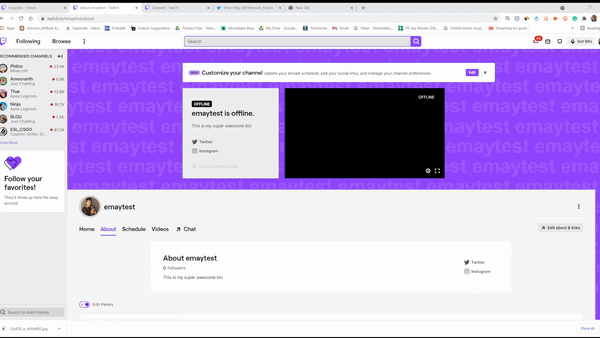
How to Add Panels to Your Twitch Channel
While Twitch panels are technically not necessary for streaming, the value they provide is well worth spending the time to make them look good. Twitch panels are a fantastic way to promote tip pages, social media, and other important links.
To add panels to your Twitch stream:
- Click on your avatar from the Twitch homepage and click on “Channel” from the drop-down menu.
- From your channel page, click the “About” button under your name and followers.
- Click the “Edit Panels” toggle to allow you to customize your “About me” section.
- Click the “Add Image” button.
- Upload an image from your computer.
- Add a description of the panel and add a URL you want the image to link to
Finally, press “submit” to add the panel, and you are done!
How to Add Stream Overlays to Your Twitch Stream
Now that you have your profile picture, bio, and panels ready to go, it’s time to give your live stream a unique look. Stream overlays give your stream a “theme,” if you will. Streamlabs offers over 250 free overlay themes. Just head to our overlay themes library and search “free.”
After browsing our list of themes, click install, and we’ll open Streamlabs Desktop and automatically populate your scenes and sources with an overlay theme.
When you choose a theme — everything is populated for you. A theme will come with a stream starting soon, a live scene, a be right back scene, and a stream ending scene. You’ll want to use your live scene when you are ready for your audience to see and hear you.
How to Customize Alerts for Your Twitch Stream
We’ve covered this topic extensively in our blog post about creating custom alerts for YouTube, Facebook, and Twitch. While most overlay themes come with custom alerts you can use right away, you can create custom alerts if you want to create something personal to you. We’ll briefly cover the instructions you should follow to customize your alerts, but be sure to check out the blog post above for more in-depth instructions:
- On the Streamlabs dashboard, click on “Alert Box” on the left-hand side.
- General Settings apply to every alert type. You can edit the alert delay, mod approvals, profanity filters, add custom bad words, etc.
- You can customize the layout of the alert, the image or gif that’s played, sound, font, animation, duration, etc.
In Conclusion
There are so many different to personalize the look of your Twitch stream. From overlay to alerts, we highly recommend taking the time to create something unique to your channel. Hopefully, this blog helps you in creating your Twitch channel.
If you have any questions or comments, please let us know. Remember to follow us on Twitter, Facebook, Instagram, and YouTube.
About Streamlabs
Founded on the belief that we want to help creators make a living do what they love, Streamlabs provides a robust suite of features to help creators better engage with their fans, grow audiences, and improve monetization. Building on this mission, Streamlabs is expanding its product with 1) Melon, our browser-based streaming studio, 2) Willow, an all-in-one bio link tool, 3) Oslo, a video review and collaboration tool, and 4) Lucra, a live streaming platform for ticketed events.
0 Comments