

10 Tips for Taking Photos From Airplanes

Belize’s famous Blue Hole. Photo by Paul Zizka.
January 4, 2017
By Paul Zizka
I have no doubt that a lot of us will fly this year, and most of the time it’ll be on a plane, going from A to B, rather than on a pricey heli-tour. While a bird’s-eye view provides interesting photographic opportunities, if you have ever tried to take photos from a plane you’ll know that an in-flight photo session can be quite challenging.
Here are some tips to help you make the most of your next time up high:
10 Tips for Taking Photos from Airplanes
1. Open Up. Set your camera to aperture priority and shoot wide open. This will reduce your depth of field and the chance that your device picks up unwanted window impurities. Shooting wide open will also increase your shutter speed, allowing for sharper images. For the same reasons, consider shooting with a wide-angle lens.
2. Reserve the Right Seat. Look up the aircraft diagram when booking and make sure you get a seat that offers an unobstructed view of the land below. Also, make sure you’re on the best side of the plane (think of aurora borealis on those overnight flights!). Finally, also remember that heat from the exhaust causes blur.
3. Choose Your Subjects in Advance. Use that handy map inside the aircraft to anticipate when the good subjects might appear.
4. Ask for Directions. Inquire about the flight path. Many of the best aerial shots are taken right after takeoff or immediately before landing. It may be worth asking from which direction the plane will depart the airport or approach the landing strip.
5. Use Manual Focus. The autofocus mechanism can get confused when shooting through a window. Make use of your manual focus.
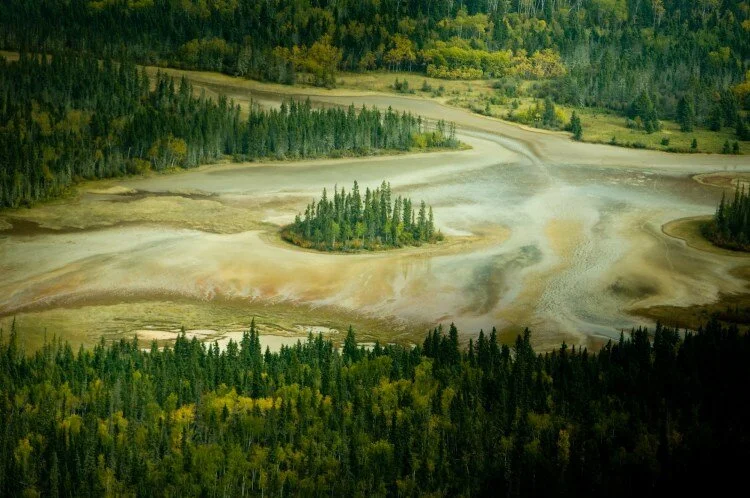
Wood Buffalo National Park. Photo by Paul Zizka.
6. Shoot Early. The buildup of ice crystals on the window as the flight progresses is a common problem. Make the most of the first hour of your flight!
7. Leave Out the Polarizer. The windows are probably already polarized. Unless you are looking for a psychedelic cross-polarized look, do not use your polarizer.
8. Clean Up! This may seem a bit strange, but consider bringing small amounts of cleaning supplies to make sure your window is as see-through as possible. You may get the odd funny look, but every little bit helps!
9. Be Discreet. Avoid pointing the camera towards the cabin and be aware that the sound of your shutter clicking might not put you in the good books with your seatmate. This is your chance to practice some sleuth-style photography.
10. Processing is key. Tools and sliders such as blacks, clarity, de-hazing and sharpening will go a long way towards improving images shot through thick windows. Hopefully, they’ll help you get the odd keeper!