Do You Want to Record Video Windows 10
What does screen record mean? It actually refers to the action of taking a picture or capturing a video on the screen of your device. Screen recording helps you keep important information or create a tutorial easily. Undeniably, the demands for video capture Windows 10 is increasing, so I’m going to focus on how to record video on Windows 10 in the following sections. Hope the methods, steps, and tool suggestions can get you through the woods.
Users’ Demands for Video Capture Windows 10
Let’s be honest, people’s demands for screen video capture Windows 10 are huge; they are asking for help on screen capture video Windows in different forums and communities.
Case 1: Screen Recording Software.
Anyone know of a good (preferably free) screen recording software for Windows? I’m looking to create some training videos to help prep staff for IT changes along with written documentation.– posted by Aaron7003 in Spiceworks Community
Case 2: Windows 10 Screen Recorder.
Hi can anyone recommend a screen recorder that will run on Windows 10 and if possible to record the full screen and the mouse movements if possible. Possible free as I only need to use it a couple of times.– posted by sam02 in Windows TenForums
Case 3: Does Windows 10 come with video capture software? If not, what is a good one?
I am trying to upload a Hi8 video to my PC; the instructions say I have to have video capture software. This is the first time I am trying this and need some hints. The format is .MOV so I have to convert to be able to use Movie & TV. Thanks!– said by The Rev deniray mueller in Microsoft Community
It’s true that many people really need to record screen Windows 10 sometimes.
How to Record Video on PC Windows 10: Methods & Steps
There are mainly 4 ways to record video on Windows 10; please allow me to introduce them to you.
Read this page if you want to record your screen on Chrome OS:
Method 1: Record Windows 10 with the Snap-in Screen Recorder
Do you know there’s an Xbox Game Bar feature in Windows 10? Though this feature was designed originally to help people record games they play on PC directly, you can still use it to record video of an app on Windows 10 easily.
Your Windows 10 PC must support one of the following encoders before it can help you capture video clips.
- AMD VCE
- Intel Quick Sync H.264 (Intel 2nd-generation CPU or newer)
- Nvidia NVENC (most Nvidia GeForce 600 or newer; most Quadro K series or newer)
How to record a video on Windows 10?
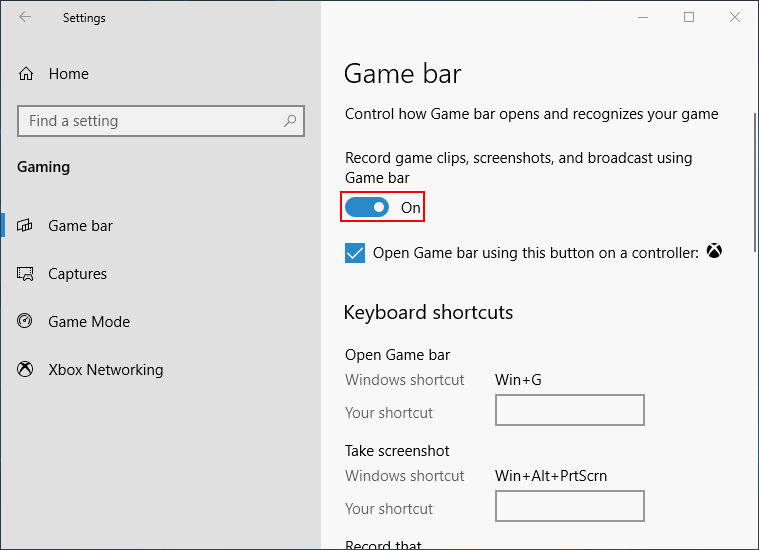
Step 1: Enable Screen Recording
- Open Settings by pressing Win+I or in other ways.
- Select Gaming from the Windows Settings menu.
- Make sure the Game bar is selected in the left-side pane.
- Toggle the switch under Record game clips, screenshots, and broadcast using Game bar to On.
Related settings:
- You can also add a checkmark to enable the feature – Open Game bar using this button on a controller.
- You are allowed to change the keyboard shortcuts used for opening the Game bar, taking a screenshot, etc.
- To change the screenshots/videos save location, enable background recording, or modify audio settings & video quality settings, you should select Captures in the left pane.
How To Disable Xbox Game Bar On Windows 10: 3 Ways.
Step 2: Start Windows 10 Video Capture
- Press Win+G to open the Game bar (please press the key combination you define to open it if you have changed the default shortcut manually).
- Several widgets will pop up to provide different options for capturing your screen. Please look for the Capture module.
- Now, you can open what you want to record (it can help you start screen recording of most apps and windows).
- Please click on the Start recording button (the third one) in Capture or press Win+Alt+R directly to start recording a video.
- You can perform whatever screen actions you want to capture during the screen recording process.
- Please click on the Stop recording button on the floating bar or press Win+Alt+R.
- A notification will show up to inform you that the video was recorded (the video will be saved as an MP4 file).
FREE!!! How To Convert An MP4 Video To MP3 (Win & Mac)?

Please note:
- You can also open the Windows 10 Game bar by clicking on the search box/icon on taskbar -> type game bar -> press Enter or select Xbox Game Bar from the search result.
- If you don’t see the Capture module, you can click on the Capture button from the main toolbar or press Win+Alt+R to start recording.
- You’ll need to check Enable gaming features for this app to record gameplay when you start recording from a specific application/window for the first time.
- You can click on the notification in the last step to let it bring you to the specified save location or go to find the recorded video manually by accessing the Captures folder inside the Videos library.
Windows 10 Taskbar Not Working – How To Fix? (Ultimate Solution)
Step 3: Edit the Recorded Video (Optional)
You can edit some aspects of the screen recording video with the Photos app.
- Use the methods mentioned above to find the recorded MP4 video you want.
- Right click on the video and navigate to Open with.
- Choose Photos from the pop-up list.
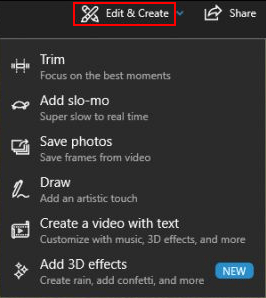
- Select Edit & Create from the right side of the menu bar at the top.
- Choose one editing option at a time and follow the instructions to finish editing your video. The available options are: Trim, Add slo-mo, Save photos, Draw, Create a video with text, Add 3D effects, etc.
How to recover lost video files on Windows?
Method 2: Record Video with Computer Webcam
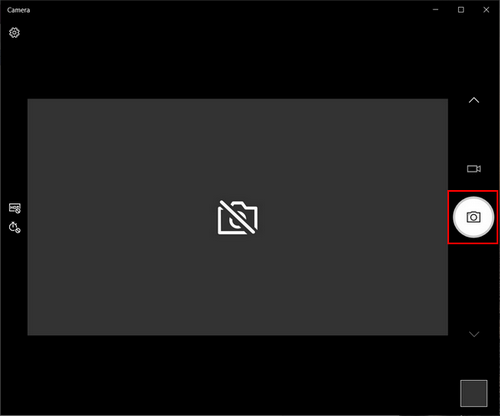
If your Windows 10 laptop or computer is equipped with a webcam, you can record a video on it by using the Camera app (which is a free app).
How to capture video on PC having webcam:
- Press Win+S to open Windows search.
- Type camera into the search box.
- Select Camera from the search result or press Enter.
- Click on the Take Video button inside the app to switch from photos to video mode.
- Click on the button again to start recording.
- Perform any actions you want to record.
- Click on the button (which turns red) again to stop the recording.
- You can follow the on-screen instructions to edit or share the video with others.
The video recorded by the Camera app will be saved to the Camera Roll folder which is inside the Pictures folder under your user account.
You should understand that the video quality is decided by your Webcam resolution: the higher resolution your webcam provides, the clearer the video will be.
Method 3: Record Screen with Microsoft PowerPoint
Many don’t know there’s a Screen Recording feature in Microsoft PowerPoint, which can be very useful when you want to capture the computer screen.
How to record a video with PowerPoint:
- Open Microsoft PowerPoint by double clicking on a PPT file (you can also open the app by right clicking on desktop -> navigate to New -> select Microsoft PowerPoint -> double clicking on the new PPT file).
- Shift to the Insert tab at the top.
- Go to the Media pane on the right side.
- Click Screen Recording inside it.
- Click Select Area in the pop-up toolbar.
- Define which part of the screen you want to record by dragging the crosshairs (you can also press Win+Shift + F to record the entire screen).
- Click on the Record button to start recording (you can also press Win+Shift + R simultaneously).
- Capture the actions you want to record.
- Click on the Stop button to end the capture (you can also click on the Pause button to halt the recording when necessary).
- Right click on the video in PowerPoint and select Save Media as from the context menu.
- Follow the on-screen instructions to save the video to a safe location.
The video enhancement tools included in PowerPoint can help you edit the video shape, add a border, or add visual effects (such as shadows and glow).

Extended reading:
- How To Recover Unsaved Or Deleted PowerPoint Files?
- Top 5 Methods For Repairing PPT Files (Cannot Saved/Opened)?
Method 4: Use the Third-party Screen Recorders for Windows 10
If you search on the internet, you’ll find there are lots of screen recorders for Windows 10. But which software is best for screen recording? That all depends on your actual needs. In this part, I’d like to introduce some popular free screen recording software that you can use.
#1. MiniTool Video Converter
The MiniTool Video Converter is a free video converter designed by MiniTool Solution.
- It can help users convert videos & audios quickly.
- It allows you to download videos, audios, playlist, and subtitles from YouTube directly.
- It is able to record the full screen or selected area of your PC screen within a few clicks.
MiniTool Video ConverterClick to Download100%Clean & Safe
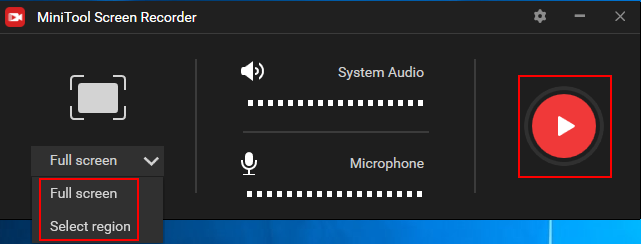
How to capture Windows 10 screen with MiniTool Video Converter:
- Download, install, and run the software on your computer.
- Select Screen Record from the menu bar located at the top.
- Tap Click to record screen.
- Choose Full screen or Select region.
- Adjust the System Audio or Microphone if you want.
- Click on the Record button and wait.
- Press F6 to stop recording.
- Right click on the video you get and choose Preview or Open folder.
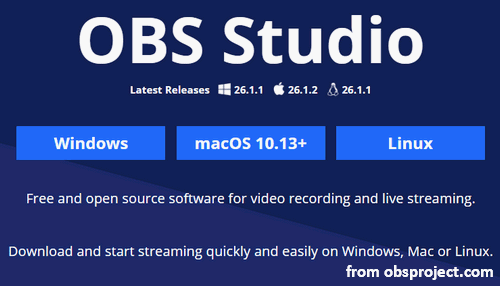
#2. OBS Studio
The OBS (Open Broadcaster Software) Studio is a free and open-source screen recorder (it can be used for both video recording and live streaming). Many people especially hardcore gamers like to use it to record videos on Windows 10 since it has no watermark or time limit. In addition to the Windows version, it also provides a Mac version and Linux version.
Main advantages:
- No watermark, no time limit, and ad free.
- The audio mixer included is intuitive.
- There are various filters for scenes, sources, and audio devices.
- It’s able to record the entire screen, window, selected part, webcam, microphone, and computer sound.
Main disadvantages:
- There’s no video editor included in the software.
- There’s no pause function for suspending the recording.
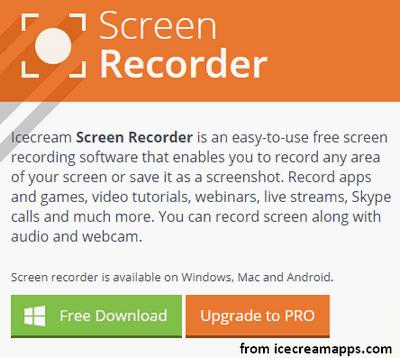
#3. Icecream Screen Recorder
Designed by Icecream Apps, the Icecream Screen Recorder is a free screen recorder for Windows 10; it also has a paid version. What’s amazing is that the free version contains all the basic video editing features. But you need to notice that the free version records only with the output video format (WEBM) & video codec (VP8) and the recording time is limited to 5 minutes.
Main advantages:
- No watermark.
- You’re allowed to add a logo to the screen capture.
- You can schedule the recording at a certain time.
- It’s able to record the full screen, selected area, webcam, microphone, and computer sound.
Main disadvantages:
- You can’t record webcam alone.
- The video editing features in the free version are limited.
- You can’t try the advanced features before buying a paid version.
#4. Free Cam
Free Cam a free screen recorder that is very simple to use: there are attractive and intuitive interfaces that allow you to create screencasts in easy steps. Besides, there’s an audio/video editor built in the free recorder.
Main advantages:
- No watermark, no time limit, and ad free.
- It allows you to record voice-overs and computer sounds.
- The video can be uploaded directly to YouTube.
- You can edit the video as you like after recording.
Main disadvantages:
- The video can only be saved in WMV format.
- There’s no support for webcam recording.
AVI To WMV: Keep Good Quality With Small File Size!
Other free screen record software you may try:
- Ezvid
- ShareX
- TinyTake
- CamStudio
- Flashback Express
- Free Screen Video Recorder (DVDVideoSoft)
Some paid screen record software:
- Camtasia
- FlashBack
- iSpring Suite
- Filmora Scrn
- Movavi Screen Recorder
- Icecream Screen Recorder Pro
- My Screen Recorder Pro
If you don’t want to download additional software to your computer, you may resort to the free online video recorder for Windows 10.
![Why Is My Screen Recording Not Working? How to Fix it [Solved]](https://images.minitool.com/videoconvert.minitool.com/images/uploads/2022/08/why-is-my-screen-recording-not-working-thumbnail.jpg)
Final Words
There are indeed times when you want to record your computer screen on Windows 10 (for different reasons). But many users just don’t know how to record video on Windows 10. Do they have to get third-party software for recording the screen? Of course not.
This post demonstrates 4 different ways to help users record videos on Windows 10.
- Method 1 and method 2 don’t need additional applications (the Game bar and camera app are built in Windows 10 by default).
- Method 3 works perfectly when users have installed Microsoft Office suite on their PC.
- Method 4 introduces some free screen recorders that can be used on Windows 10.
- Besides, it provides a bonus tip: users can rely on some online screen recorders to perform video capture Windows 10.
Hope this post can help you all record what you want on the Windows 10 computer.