Embracing Linux on Mini PCs: A Starter’s Guide to the Linux PC World
In the ever-evolving world of technology, the synergy between Linux and mini PCs has emerged as a game-changer. Linux, known for its robustness and flexibility, has found a perfect match in the compact yet powerful mini PC. “Linux on a Mini PC Guide” delves into the essentials of harnessing the power of Linux on mini PCs, offering insights for both seasoned Linux users and newcomers alike.
The mini PC, with its space-saving form factor, has revolutionized the concept of desktop computing. From Intel’s NUC to AMD-powered compact machines, these devices are redefining what small but mighty means in the computing world. Whether you’re looking to upgrade your home office, set up a portable workstation, or dive into the world of Linux-based computing, this guide provides the knowledge you need.
Join us as we navigate through the installation process, customization tips, and best practices to ensure you get the most out of Linux on your mini PC.
This comprehensive guide is tailored for anyone looking to master using Linux on a mini PC. We cover everything from selecting the ideal Linux distribution for various mini PC models, including Intel NUC and Raspberry Pi, to a detailed, step-by-step installation process. You’ll find practical tips on optimizing your Linux setup for peak performance, addressing common issues like USB-C connectivity and fanless mini PC challenges. For those not ready for a full installation, we explore virtualization as an alternative, allowing you to run Linux alongside your existing operating system. This article also includes a FAQs section to quickly answer top questions related to using Linux on a mini PC. Whether you’re a beginner or an experienced user, this guide aims to enhance your Linux experience on a mini PC, combining detailed instructions with helpful visuals.
What are the Benefits of Linux as an Operating System for Mini PCs?
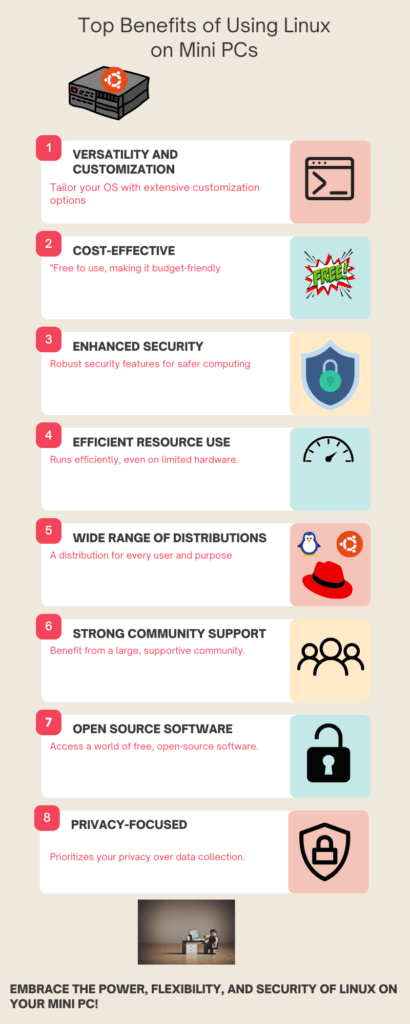
Linux, as an operating system, brings a plethora of advantages to mini PCs. Its open-source nature not only ensures constant updates and community-driven improvements but also offers unparalleled customization to meet the specific needs of every Linux user. From lightweight distros perfect for less powerful mini PCs to feature-rich versions for high-spec machines, Linux’s versatility is unmatched.
For those new to Linux, understanding the range of Linux distros available is crucial. Distros like Ubuntu Linux are renowned for their user-friendliness, making them a great starting point for beginners. On the other hand, distros like Arch Linux appeal to those who prefer a custom build, offering a more hands-on approach to setting up your Linux system.
Versatility and Customization
Linux stands out for its unparalleled versatility and customization options. Unlike more rigid operating systems, Linux allows users to tailor their OS to their specific needs and preferences. Whether it’s changing the desktop environment, tweaking system performance, or installing specialized software, Linux empowers users to create a truly personalized computing experience. This flexibility is particularly beneficial for mini PC users who often have unique requirements for their compact systems.
Cost-Effective
One of the most appealing aspects of Linux is its cost-effectiveness. Being a free-to-use operating system, it offers a budget-friendly alternative to other paid operating systems. This makes Linux an ideal choice for mini PC users who are looking to build or upgrade their systems without incurring additional software costs. The financial savings extend beyond the initial installation, as most Linux-based software, from office suites to media players, is also available for free.
Enhanced Security
Linux is renowned for its robust security features, making it a safer computing choice. Its strong security model, frequent updates, and lower susceptibility to viruses and malware provide a secure environment for both personal and professional use. For mini PC users, this means a more secure platform for handling sensitive tasks and data, without the constant worry of security breaches that are more common in other operating systems.
Efficient Resource Use
Linux is known for its efficiency in resource usage, making it ideal for mini PCs, which often have limited hardware capabilities. It can run smoothly on systems with less RAM and slower processors, breathing new life into older or less powerful mini PCs. This
Wide Range of Distributions
The Linux world offers a wide range of distributions (distros), each designed for different user needs and purposes. From beginner-friendly distros like Ubuntu and Mint to more advanced ones like Fedora and Arch Linux, there’s a Linux distro for every level of user expertise. Mini PC users can choose a distro that best fits their specific use case, whether it’s for general computing, programming, multimedia production, or gaming.
Strong Community Support
Linux benefits from a large, active, and supportive community. This community is a valuable resource for new and experienced users alike, offering assistance, advice, and troubleshooting tips. For mini PC users, especially those new to Linux, this community support can be instrumental in navigating the initial learning curve and resolving any issues that arise.
Open Source Software
Linux provides access to a vast world of free, open-source software. This open-source nature not only means cost savings but also transparency and the freedom to modify and distribute software. For mini PC enthusiasts, this opens up a plethora of software options, from basic utilities to professional-grade applications, all available without licensing fees or restrictions.
Privacy Focused
In an era where privacy concerns are paramount, Linux stands out for its focus on user privacy over data collection. Unlike some other operating systems that collect user data for various purposes, Linux distributions typically prioritize user privacy, offering a more secure and private computing environment. This aspect is particularly appealing to mini PC users who are conscious of their digital footprint and data security.
These benefits collectively make Linux an attractive choice for mini PC users, offering a combination of customization, security, efficiency, and community support that is hard to find in other operating systems.
Mini PCs and Linux: A Perfect Match for Performance and Customization
Linux offers unparalleled flexibility, allowing you to tailor the operating system to fit your specific needs. Whether you’re a developer looking to create a customized environment or a casual user wanting a streamlined interface, Linux has you covered.
| Feature | Linux | Windows | macOS |
|---|---|---|---|
| Source Code Access | Open Source | Closed Source | Closed Source |
| Customization Level | High | Moderate | Low |
| User Interface Options | Multiple (GNOME, KDE, etc.) | Limited | Limited |
| Software Repository | Extensive | Moderate | Limited |
| Command Line Flexibility | High | Moderate | High |
| System Requirements | Low to Moderate | Moderate to High | Moderate to High |
| Cost | Free | Paid | Paid |
| Security Customization | High | Moderate | Low |
| Hardware Compatibility | High | High | Limited (Apple Hardware) |
| Community Support | Extensive | Moderate | Limited |
As illustrated in the table above, Linux outperforms both Windows and macOS in terms of flexibility and customization. Not only is Linux open-source, allowing for extensive modification, but it also offers a wide range of user interface options and an expansive software repository. Its low system requirements make it highly adaptable to various hardware configurations. Moreover, the extensive community support and high level of security customization further solidify Linux as the most flexible and customizable operating system for your needs.
Selecting the Ideal Linux Distribution for Your Mini PC
Choosing the right Linux distribution (distro) for your mini PC is a critical step in ensuring optimal performance and user experience. Factors such as the mini PC’s CPU (be it Intel Core or AMD Ryzen), RAM capacity (from 4GB to 8GB or more), and specific use cases play a significant role in this decision.
For instance, a mini PC equipped with an Intel Core i7 processor and a substantial amount of RAM (say, 16 GB) can effortlessly run more demanding Linux distros. In contrast, a mini PC with an Intel Atom processor and 4 GB of RAM might be better suited to lighter distros like Linux Mint or XFCE, ensuring smooth performance without overtaxing the system.
Ubuntu: The Jack of All Trades
Ubuntu is one of the most user-friendly Linux distributions, making it an excellent choice for beginners. It provides a vast array of software packages, backed by strong community support.
Fedora: For the Tech-Savvy
Fedora is ideal for those who want to stay on the cutting edge of technology. It often features the latest updates and developers commonly use it for testing environments.
RedHat and CentOS: The Enterprise Duo
RedHat offers a commercially supported Linux distribution, while CentOS serves as its open-source counterpart. Their stability makes them popular in enterprise settings, ideal for business-oriented setups.
| Linux Distro | User-Friendliness | Software Availability | Community Support | Stability | Use-Case Suitability |
|---|---|---|---|---|---|
| Ubuntu | High | Extensive | Strong | Moderate | General Purpose |
| Fedora | Moderate | Moderate | Moderate | Moderate | Development |
| RedHat | Moderate | Extensive | Commercial | High | Enterprise |
| CentOS | Moderate | Extensive | Strong | High | Enterprise |
As the table indicates, each Linux distribution has its strengths and weaknesses. Ubuntu is highly user-friendly and versatile, making it suitable for general purposes. Fedora is more geared towards tech-savvy users and developers. RedHat and CentOS offer enterprise-level stability, with CentOS providing an open-source alternative to RedHat’s commercial support.
Linux Distributions for Intel NUC and Other Popular Mini PCs
When delving into the world of mini PCs with Linux, one of the first decisions is choosing the right distribution. This choice can significantly impact your user experience, system performance, and overall satisfaction. In this section, we explore optimal Linux distributions for popular mini PCs like Intel NUC, Raspberry Pi 4, fanless mini PCs, and Gigabyte Brix.
Intel NUC: A Favorite for Linux Enthusiasts
Intel NUC (Next Unit of Computing) is renowned for its robust performance, making it a preferred choice for Linux enthusiasts. For Intel NUC, Ubuntu stands out with its user-friendly interface and comprehensive support, making it an excellent choice for both beginners and veterans. Alternatively, Fedora, with its cutting-edge features, provides a dynamic environment, especially appealing to developers and power users. These distributions bring out the best in Intel NUC, ensuring a smooth and efficient Linux experience.
| Feature/Aspect | Ubuntu | Fedora |
|---|---|---|
| User Interface | GNOME (default), customizable with other environments | GNOME (default), streamlined and modern interface |
| Performance | Stable and reliable, optimized for a broad range of hardware | Cutting-edge, with latest kernel updates and features |
| Software Management | APT package manager with extensive software repositories | DNF package manager, known for speed and efficiency |
| Security | Regular security updates, with LTS versions offering long-term support | Strong focus on security, featuring SELinux for enhanced protection |
| Compatibility with Intel NUC | Excellent compatibility, supports a wide range of Intel hardware and drivers | Great support for Intel hardware, often includes latest driver support |
| Community Support | Large and active community, extensive documentation and forums | Strong community, especially among developers and tech enthusiasts |
| Ease of Use | Known for being user-friendly, suitable for beginners and advanced users | Offers a balanced experience, ideal for those with some Linux knowledge |
| Default Software Selection | Comprehensive set of default applications for everyday use | Lean default software set, focusing on essentials |
| Customization | Highly customizable, with options to tweak UI and system settings | Flexible, with a focus on modern design and usability |
Raspberry Pi 4: Compact Yet Mighty
The Raspberry Pi 4 breaks barriers with its compact size, offering surprising versatility. It pairs seamlessly with Raspbian, a distribution specifically tailored for the Raspberry Pi, ensuring optimal performance. If you’re looking for a more traditional desktop experience, consider Manjaro ARM. This distribution brings the flexibility of Arch Linux to the Raspberry Pi, ideal for users who love to tinker and customize.
| Feature/Aspect | Raspbian | Manjaro ARM |
|---|---|---|
| User Interface | PIXEL (default), a lightweight and easy-to-use interface | XFCE (default), KDE, and GNOME options, offering flexibility |
| Performance | Optimized for Raspberry Pi hardware, stable and reliable | Offers a balance of performance and modern features, optimized for ARM architecture |
| Software Management | APT package manager with software repositories tailored for Raspberry Pi | Pacman package manager, known for its speed and user-friendly nature |
| Security | Regular updates, with a focus on stability and security | Rolling release model ensures latest security updates and features |
| Compatibility with Raspberry Pi 4 | Specifically designed for Raspberry Pi, ensuring maximum compatibility and performance | Broad hardware support for Raspberry Pi, including the Pi 4, with ARM-specific optimizations |
| Community Support | Extensive support from Raspberry Pi community, with a wealth of tutorials and resources | Growing community, particularly among enthusiasts of Arch Linux and ARM devices |
| Ease of Use | Ideal for beginners, educators, and those new to Linux | Suited for users who prefer Arch Linux’s approach, with some Linux experience |
| Default Software Selection | Comes with essential tools for learning and programming, including educational software | Leaner software set, allowing users to customize their installation |
| Customization | User-friendly customization options, suitable for educational and beginner use | High level of customization, adhering to Arch Linux’s philosophy of user control |
Fanless Mini PCs: Silent and Efficient
Fanless mini PCs, prized for their silent operation, require distributions that are resource-efficient. Linux Mint offers a full-fledged desktop experience while being gentle on system resources, perfect for these silent workhorses. Lubuntu is another excellent choice, providing a lightweight yet functional environment, ensuring that your fanless mini PC remains efficient and responsive.
Gigabyte Brix: Versatility in a Small Package
Gigabyte Brix, known for its compact size and versatility, accommodates a wide range of Linux distributions. Elementary OS, with its clean and intuitive interface, is ideal for those who appreciate simplicity and elegance. For users prioritizing stability and a vast software repository, Debian is a solid choice, offering a robust and reliable computing experience on Gigabyte Brix.
Selecting the right Linux distribution is a balance of matching the software to your hardware capabilities and personal preferences. With these recommendations, you can tailor your Linux experience on your mini PC, ensuring an enjoyable and productive journey into the world of Linux computing
Step-by-Step Guide to Installing Linux on Mini PCs
Installing Linux on a mini PC can be a straightforward process, whether you’re a seasoned Linux user or new to the platform. The first step is to choose a Linux distro that aligns with your mini PC’s specs and your personal needs. Once selected, you can typically install the Linux OS via a USB drive – a process known as ‘boot from the USB.’
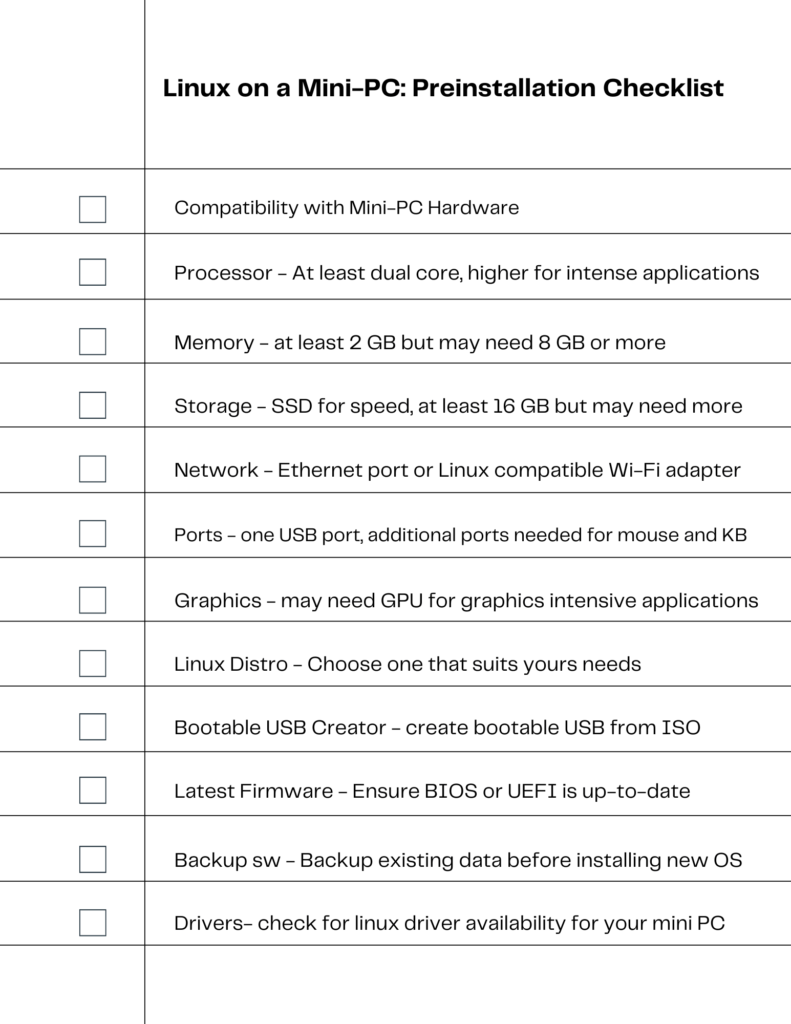
Pre-Installation Checklist
Before diving into the Linux installation on your mini PC, it’s crucial to ensure that both hardware and software requirements are adequately met. This will facilitate a smoother installation process and a more reliable system post-installation.
Hardware Requirements
- Compatibility: Verify that your mini PC’s hardware is compatible with Linux. Most mini PCs support Linux, but checking the manufacturer’s website or Linux communities for compatibility lists is advisable
- Processor: A minimum of a dual-core CPU is recommended for basic tasks, but a quad-core processor or higher is preferable for more intensive applications.
- Memory: Aim for at least 4 GB of RAM for a comfortable experience, though 2GB may suffice for lightweight distributions. For multitasking and more demanding workloads, 8 GB or more is ideal.
- Storage: Solid-state drives (ssd) are recommended for their speed and reliability. A minimum of 16GB is needed for the installation, but 64GB or more is recommended for additional applications and user data.
- Network: An Ethernet port or a Wi-Fi adapter is essential for internet connectivity. Ensure that the Wi-Fi adapter is Linux-compatible as some may require proprietary drivers.
- Ports: At least one USB port is necessary for the installation media, and additional ports may be required for peripherals such as a keyboard and mouse.
- Graphics: Integrated graphics are sufficient for most Linux distributions. However, if you plan to use graphics-intensive applications or games, consider a mini PC with a dedicated GPU.
Software Requirements
- Linux Distribution: Choose a Linux distribution that suits your needs. Popular choices for mini PCs include Ubuntu, Fedora, and Linux Mint for their user-friendliness and extensive support.
- Bootable USB Creator: Software like Rufus or UNetbootin can create a bootable USB drive from the Linux distribution’s ISO file.
- Latest Firmware: Ensure the mini PC’s BIOS or UEFI firmware is up to date to avoid compatibility issues during installation.
- Backup Software: Before installation, it’s wise to back up any existing data. Use cloud services or external storage devices to safeguard your files.
- Driver Support: Check for the availability of Linux drivers for your mini PC’s hardware, especially for Wi-Fi adapters, graphics cards, and any proprietary components.
By thoroughly preparing both hardware and software aspects, you’re setting the stage for a successful Linux installation on your mini PC.
Installation Steps

As illustrated in the infographic above, the installation process is a multi-step journey that begins with preparation and ends with post-installation setup. Each stage has its own set of requirements and actions, making it crucial to follow the guide carefully for a successful installation.
Selecting the Right Linux Distribution
Before diving into the installation process, the first crucial step is choosing a Linux distribution that suits your system’s hardware and your usage needs. Popular choices include user-friendly Ubuntu, versatile Fedora, and lightweight Linux Mint. Each distribution offers different features and interfaces, so consider your requirements and preferences.
Creating a Bootable Installation Media
The installation journey begins with creating a bootable USB drive. After downloading the ISO file of your chosen Linux distribution, use a tool like Rufus or UNetbootin to create this drive. For mini PCs with USB-C ports, ensure you have a USB-C drive or an appropriate adapter. This step is crucial as it prepares the physical media from which your mini PC will boot Linux.
Preparing Your Mini PC
With your bootable USB drive ready, connect it to your mini PC. If using a USB-C port, ensure proper connectivity with an adapter if needed. Then, power on your mini PC and enter the BIOS/UEFI setup by pressing the designated key. Adjust the boot order to prioritize booting from the USB drive.
Beginning the Installation Process
Restart your computer to boot from the USB drive. You’ll be presented with the Linux installation menu. Follow the on-screen instructions, which will guide you through language, region, and keyboard layout selection. For hard drive partitioning, you can opt for automatic partitioning for simplicity or customize it as per your needs.
Finalizing and Setting Up
After the installation is complete and your system restarts, remove the bootable USB drive. Your mini PC will now boot into your newly installed Linux OS. You’ll be prompted to complete a few more setup steps like creating a user account and setting a password.
Post-Installation Configuration
The final phase involves updating your new Linux system and exploring additional settings and applications. This is a good time to install necessary drivers, explore the software center for useful applications, and personalize your desktop environment to fit your style.
Visual: An interactive guide or clickable walkthrough for post-installation customization and software updates.
By carefully following these steps, you’ll find that installing Linux on your device is a manageable and satisfying project. This process not only enhances your computing capabilities but also opens up a world of open-source possibilities.
Installing Linux on Raspberry Pi and USB-C Equipped Mini PCs
Installing Linux on a device like the Raspberry Pi or a USB-C-equipped model involves a few specific steps and considerations. This section guides you through this process, ensuring a smooth and successful installation.
Raspberry Pi: A Unique Linux Experience
The Raspberry Pi offers a unique platform for Linux enthusiasts. Start by choosing a suitable Linux distribution, like Raspbian or Ubuntu Mate, tailored for the Raspberry Pi’s hardware. You’ll need a microSD card to act as the boot device. Use software like BalenaEtcher to flash the chosen Linux image onto the microSD card. After flashing, insert the card into your Raspberry Pi, connect it to a monitor, keyboard, and mouse, and power it up. The setup wizard will guide you through the initial configuration, including network settings and user account creation.
USB-C Equipped Mini PCs: Modern Connectivity
For mini computers with USB-C connectivity, the installation process introduces a few modern conveniences. First, ensure your chosen Linux distribution supports USB-C booting – most modern versions do. You can use a USB-C flash drive to create a bootable installation media. Tools like Rufus or Fedora Media Writer are excellent for this task. Once your bootable drive is ready, connect it to your mini PC’s USB-C port. Access the BIOS or UEFI menu on your mini PC to change the boot order, prioritizing the USB-C drive. Follow the on-screen instructions to install Linux, partitioning your drive and configuring system settings as needed.
Post-Installation Tips
After installing Linux on your Raspberry Pi or USB-C equipped mini PC, there are a few post-installation steps to consider:
- Update your system to the latest software packages.
- Configure any additional hardware, like Wi-Fi adapters or Bluetooth, if they’re not automatically recognized.
- Explore additional software options to enhance your experience, such as media servers for Raspberry Pi or productivity tools for more general-purpose systems.
By following these guidelines, you can successfully install Linux on your Raspberry Pi or USB-C equipped device, paving the way for a versatile and rewarding computing experience.
Optimizing Linux Performance on Mini PCs
Enhancing the performance of Linux on a mini PC can significantly improve your computing experience. Whether you’re using a high-powered Intel NUC, a compact Raspberry Pi, or a fanless device, there are various strategies you can employ to boost efficiency and responsiveness. This section outlines key techniques to optimize Linux for different types of computers.
Streamlining the Operating System
- Lightweight Desktop Environments: Choosing a lighter desktop environment like XFCE or LXDE can reduce the strain on your system’s resources, especially beneficial for lower-powered mini PCs.
- Unnecessary Services and Startup Applications: Disable services and applications that aren’t essential for your daily use. This frees up resources and speeds up boot times.
- System Updates and Upgrades: Regularly updating your Linux system ensures you have the latest performance enhancements and security patches.
Hardware-Specific Optimizations
- RAM and Swap Usage: Monitor and manage RAM and swap usage. Consider adding more RAM if your mini PC allows upgrades, or configure a larger swap space to improve performance under load.
- Solid-State Drives (SSDs): Using an SSD instead of a traditional hard drive can significantly improve boot times and application responsiveness.
- External Cooling Solutions: For fanless mini PCs, external cooling solutions can prevent thermal throttling and maintain optimal performance.
Software and Application Management
- Lightweight Software Alternatives: Opt for software that requires less processing power and memory. For instance, use AbiWord or Gnumeric instead of full-fledged office suites if your tasks are basic.
- Background Processes: Limit or schedule background processes like backups or updates during times of low usage to avoid performance hits during peak hours.
Maximizing Efficiency: Tuning Your Linux Mini for Peak Performance
To get the most out of your Linux mini PC, fine-tuning for peak performance is key, especially for specific models like Intel NUCs or Raspberry Pi.
Performance Tools and Utilities
- System Monitoring Tools: Use tools like htop or Glances to monitor system resource usage in real-time. This can help you identify and address performance bottlenecks.
- TLP for Battery-Powered Mini PCs: On battery-powered mini PCs, TLP can optimize power consumption, indirectly improving performance by managing power-hungry processes efficiently.
Custom Kernel and Driver Optimizations
- Custom Linux Kernels: For advanced users, custom kernels tailored for specific hardware can offer performance improvements. However, this requires careful consideration and testing.
- Proprietary Drivers: In some cases, using proprietary drivers for graphics or wireless cards can enhance performance compared to open-source alternatives.
By applying these optimization strategies, your Linux mini PC can achieve a balance of performance, usability, and efficiency, tailored to your specific hardware and usage needs. This proactive approach ensures a smooth and productive Linux experience.
Overheating in Fanless Mini PCs Fanless
mini PCs are prized for their silent operation, but they can face overheating issues, especially when running resource-intensive tasks on Linux. To mitigate this, ensure your Linux distribution is lightweight and consider using a performance monitor tool to keep an eye on system temperatures. Regularly clean the vents and consider using external cooling solutions, like a passive heat sink or a laptop cooling pad.
Display and Graphics Issues
Display issues, such as screen tearing or resolution problems, are common in mini PCs, particularly when connected to high-resolution monitors. To resolve this, check if your graphics drivers are up to date. For Intel-based mini PCs, installing the latest Intel graphics drivers can significantly improve performance. Additionally, tweaking display settings through your Linux distribution’s settings panel can help align the display output with your monitor’s capabilities.
Power Management and Battery Life
For mini PCs with battery power, optimizing power management in Linux is crucial. Tools like TLP or Powertop help manage power usage effectively. Adjusting screen brightness, disabling unused peripherals, and configuring sleep settings can also extend battery life.
By addressing these common issues, users can enhance their Linux experience on mini PCs. Remember, part of the appeal of Linux is its community-driven support, so don’t hesitate to seek help from online forums and user groups when encountering unique challenges.
Virtualization: Running Linux on a Mini PC Without Full Installation
Virtualization involves creating a virtual machine (VM) – a software-based emulation of a physical computer. This VM can run a different operating system, like Linux, independently of your mini PC’s primary OS. Tools like VMware Workstation, VirtualBox, and Parallels Desktop are popular for setting up VMs. They allow you to allocate resources like CPU, memory, and storage to your Linux VM according to your mini PC’s capabilities.
Understanding Virtualization
Virtualization involves creating a virtual machine (VM) – a software-based emulation of a physical computer. This VM can run a different operating system, like Linux, independently of your mini PC’s primary OS. Tools like VMware Workstation, VirtualBox, and Parallels Desktop are popular for setting up VMs. They allow you to allocate resources like CPU, memory, and storage to your Linux VM according to your mini PC’s capabilities.
Setting Up a Linux Virtual Machine
- Choosing a Virtualization Software: Select a virtualization tool compatible with your mini PC’s operating system. For instance, VirtualBox is a great free option that works on Windows, macOS, and Linux.
- Installing the Virtualization Software: Download and install your chosen software following the provider’s instructions.
- Creating a New Virtual Machine: Open the software and create a new VM, selecting Linux as the guest OS type. You will need to specify the amount of RAM and disk space to allocate to the VM.
- Installing Linux on the VM: Mount the Linux distribution ISO file in the VM and follow the on-screen instructions to install Linux.
Benefits of Virtualization
- Risk-Free Environment: Running Linux in a VM allows you to experiment without affecting your primary OS.
- Ease of Use: Switch between Linux and your main OS quickly and easily.
- Resource Management: Allocate resources based on your usage needs, optimizing both the VM and the host system’s performance.
Effortlessly Run Linux on Your Mini PC with Virtualization
Running Linux through virtualization is particularly effective on Intel Mini PCs, known for their robust performance and support for virtualization technologies.
- Optimizing Virtualization on Intel Mini PCs: Intel Mini PCs often come with powerful processors and sufficient RAM, making them ideal for virtualization. Enable Intel VT-x or AMD-V from your mini PC’s BIOS settings to optimize performance.
- Networking and Peripheral Support: Most virtualization software allows seamless integration of network settings and peripherals, ensuring that devices connected to your mini PC work flawlessly in the Linux VM.
- Snapshot and Backup Features: Utilize the snapshot feature in your virtualization software to save the state of your VM. This is useful for backup purposes or when testing new software and settings.
By leveraging virtualization, you can enjoy the flexibility and power of Linux on your mini PC without committing to a full installation. This method is particularly appealing for those who need to maintain their primary OS for other tasks or who wish to test Linux in a controlled environment.
The Linux User Community and Support Networks
The Linux community is one of the most active and supportive tech communities. New Linux users can find a wealth of resources, from forums to dedicated Linux support networks, offering help on everything from installation to advanced configuration.
Concluding Thoughts: Maximizing Your Linux Experience on Mini PCs
Concluding our journey through the realm of Linux on mini PCs, we’ve navigated a diverse terrain, ranging from the cost-effective Raspberry Pi 4 Model B to the robust Intel NUC 11 Enthusiast Kit. Indeed, the adaptability of Linux, when paired with the compact efficiency of mini PCs, forges a powerful combination that meets a broad spectrum of computing requirements.
Moreover, we’ve examined the practical aspects of employing Linux on these compact dynamos, addressing the potential for customization, assessing performance benchmarks, and even resolving typical issues. Furthermore, the comparison table offered a concise overview of viable choices, catering to budget-conscious individuals and those seeking top-tier performance alike.
The domain of Linux on mini PCs is vast and continuously developing. Consequently, your personal experiences, valuable insights, and encountered obstacles contribute significantly to this collective exploration. I encourage you to share your narratives in the comments—what has been your preferred mini PC for Linux? Have you stumbled upon any modifications or advice that could benefit the community? Let’s foster a collaborative environment where our collective enthusiasm for Linux and mini PCs can flourish. Additionally, if you’ve found this guide to be beneficial, please consider passing it along to other Linux aficionados or through your social networks. Your endorsement aids in guiding others to the potent capabilities and versatility of Linux on mini PCs.
As we arrive at the conclusion of this guide, my hope is that it will act as an indispensable tool for both novices and veteran Linux users. I extend my gratitude for your engagement, and I wish you a fulfilling experience in computing!

I am a retired software engineer with experience in a multitude of areas including managing AWS and VMWare development environments. I bought a relative a mini-PC a year ago and have become passionate about the technology and its potential to change how we deploy software.