Manhunt Walkthrough
This walkthrough will tell you everything you need to know in order to survive Rockstar's most intense, visceral game yet. It includes a full walkthrough for every mission, general tips, and cheats.
Design by Katie Bush
You'd think that, after the lawsuits and the media reaction caused by titles like Grand Theft Auto III and Vice City, a publisher might back off a bit, and perhaps even tone down the content of their games. You might think that, but you'd be wrong, because Rockstar's latest M-rated masterpiece, Manhunt, instantly vaults itself into the top spot in the Violent Video Games Hall of Fame. Blood will be spilled, bad people will be decapitated, and heads will explode before the awesome might of your shotgun. This game is not for the weak of heart.
Thankfully, though, there's a gripping and well-designed game underneath the crimson veneer. Mixing healthy doses of elements from Metal Gear Solid, first-person shooters, and b-grade horror movies, Manhunt is rarely boring, and, thanks to the scoring system that awards you bonus material based on how you play through the game, you can feel free to be as loud and violent as you wish, or concentrate on stealth kills and silent executions; both play styles are valid methods to get through the game.
Of course, you won't be able to get through alone: Manhunt can be quite a difficult game. Luckily for you, though, this guide is here to help. Along with hints, tips, weapon advice, and cheat codes, we're serving up a full walk-through for the game's lengthy set of missions, as well as revealing how to survive in the difficult bonus missions. So grab your machete and get ready to slink into the shadows; the manhunt has just begun, and you're the target.
Table of Contents
Tips and HintsWeapons and Items
Walk-through
Doorway Into Hell
Road to Ruin
White Trash
Fuelled By Hate
Grounds for Assault
Strapped For Cash
View of Innocence
Drunk Driving
Graveyard Shift
Mouth of Madness
Doing Time
Kill The Rabbit
Divided They Fall
Press Coverage
Wrong Side of The Tracks
Trained To Kill
Border Patrol
Key Personnel
Deliverance
Cheats
Tips and Hints
Style Points
As you play through the game, you'll notice that you're ranked on a scale of one to five stars after every mission. One of these stars is an automatic boost that you receive for playing on Hardcore mode, meaning that you're limited to four stars if you're playing through the game on the Fetish difficulty. Another star is a time bonus; this will appear if you finish a mission underneath a certain time limit. The last three stars are your style points; you can gain anywhere from zero to the full three by killing large numbers of Hunters, with a large number of full-gore executions (the ones with the red targeting arrows) thrown into the mix. The kill count, execution numbers, and time limits can all be found alongside an individual mission's entry in the walk-through. These star ratings have two effects: First, if you finish a mission with three stars, you unlock an art entry that can be accessed through the "Bonus Material" selection in the main menu. Getting three stars in five consecutive missions will also unlock a bonus scene, which can be selected from the end of the Scene Listing.Getting five stars in a mission (which is obviously only possible in Hardcore mode) grants you parts of a password, which can be combined to make codes. These codes can be entered into the main menu to access special gameplay features that will give you a bit more replay value for the game, but you can only enter them after you've unlocked them, so even though we give them to you below, you'll still have to slog through the game if you want to use them.
Difficulty Levels
Manhunt has two difficulties: Fetish and Hardcore. Both are accessible before you start your first game, and you can toggle them on and off for individual missions. Hardcore is functionally similar to Fetish mode: there'll always be the same number of enemies in the same locations. The difference is that you take a noticeably increased amount of damage, and, most importantly, the radar that fills you in on enemy positions is eliminated. You'll still be able to pick up on the Hunters' general location by listening for audio clues, but you won't know for certain where a target is until you make visual contact. For this reason, it's generally going to better to play through the game on Fetish mode first, concentrating on learning the levels and/or getting the three stars to unlock the bonus missions, before heading up to Hardcore mode to get the full five star rankings.
Getting Executions
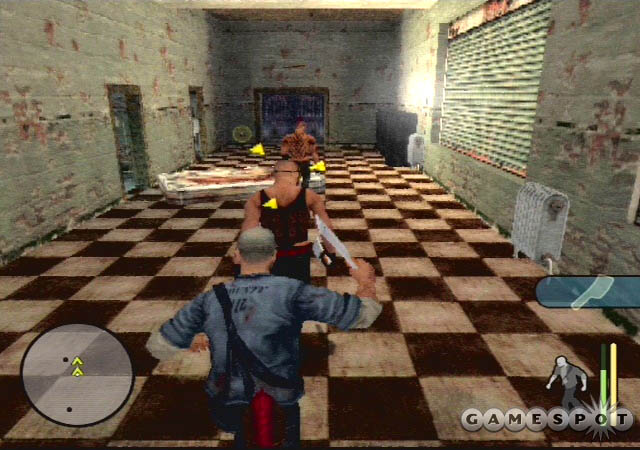
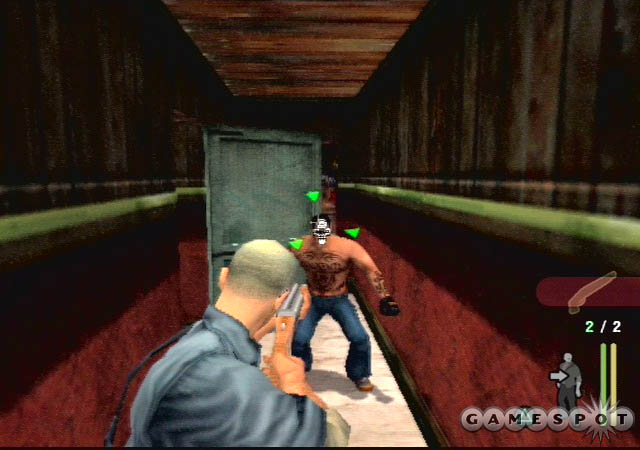
The execution is the design feature that's central to Manhunt's gameplay experience, and the game, indeed, will force you into executing as many of your enemies as you can, both to survive and to gain the style point bonuses necessary to unlock bonus materials. You can, of course, run through the game going toe-to-toe with every Hunter you come across, but you won't live long. Alternatively, you can use firearms and blow away everyone who stands in your path, but you won't unlock any bonus features. (This is a great way to play through the game for the first time, though). Getting executions and, more importantly, getting full-blown, red arrow, Gruesome executions, revolves around three key skills: the catch, the bait, and the lure. You are truly a fisher of men in Manhunt, although not in the sense that that phrase is normally applied…. The Catch
The easiest way to execute a Hunter is to get him as he goes about his normal business. Most of the enemies in the game will patrol an area along a set path, deviating from it only if they spot you, hear a suspicious sound, or otherwise become alerted. If you can maneuver yourself into a position from which you can pick up their trail, you can usually sneak up behind them and overtake them, since your walking speed is quicker than that of the Hunters. After you get within range of an execution, it's a simple matter of holding down the button until the targeting arrows turn red to get the full style points.
Catching enemies isn't without complications, however. First off, you'll need to make sure that you don't wander into any other enemy's line of sight while you're skulking along behind your potential victim. If even a single opponent spots you tracking your prey, you'll have to deal with both him and the person you've been stalking, since the spotter will call out and warn your victim. Second, catching people as they walk their routes is often time-consuming, both because you'll often have avoid other enemies, as noted, and because they walk slowly enough to make them generally take a minute or more to complete a full circuit along their appointed path. (This depends on the target, of course; many take less.) Waiting this long will usually prevent you from coming in under the time limit for a mission, and is also, well, kind of boring. Still, if you have an opportunity to get an easy execution on a route-running enemy, a catch can be a wonderful thing.
Getting Executions - cont.
The Bait
Baiting enemies to your position will be the primary method for getting executions in Manhunt. It's generally easier to bring enemies to you, then execute them as they walk away, than it is to track them down and kill them without alerting them. Since the game doesn't penalize you for alerting enemies (except by increasing the risk that you'll get beaten or shot to death; there is that), you can feel free to bait in enemies all you like.
Before you bait in an enemy, you need to have a shadow in which to hide. These are found all throughout the levels, so you shouldn't have any problems in tracking one down; just walk into a likely spot and check your profile icon. If it darkens, you'll know that enemies can't spot you, even if they're standing two feet away from you. Enemies will not walk into shadow zones to check on sounds, so you're usually going to be 100% safe while you stay in the dark, with certain exceptions, of course.
Once you have your shadow picked out, all that's left to do is to bring a nearby Hunter into the trap. Visual clues are perhaps the best method of letting someone know that you're in a certain spot; if you edge out of the shadow and into a Hunter's field of vision for a moment, they'll spot you, but won't necessarily know what they've seen (if you're not right up next to them, that is). Instead of alerting everyone in the vicinity, which they will do if they get a positive i.d. on you, they'll saunter over by their lonesome to check things out. After investigating the area and finding nothing, they'll turn around and walk back to their post, presenting their back to you for an easy execution. Oftentimes, though, the safest hiding spots will not be near a Hunter's line of sight, and you'll have to resort to audio clues to draw in your victims. There are a few ways to make sound, the easiest of which is to just hit the wall with a hand-held weapon, or your first. The loudest sounds will be made by contacting a hard object against a hard surface; slamming a decapitated head against a tile wall isn't going to be quite as audible as will tapping a machete against the same surface. If you lean up against a wall with your triangle button, the x button will tap any weapon you have against the wall, letting you make rapid-fire sounds by hitting the button over and over.
In general, though, much as with Captain Ramius, one ping will suffice, and one ping only. If you make a single sound that a Hunter hears, he will be mildly alarmed, will walk slowly over to investigate, and will return to low alert status fairly quickly, giving you an easier kill. If you make another sound while his icon is still red on your radar, he'll run towards you, and will remain in alert mode for a bit longer. If you make a truly obscene string of noises, you'll generally wind up watching a Hunter (or Hunters) thoroughly investigate the area, turning around and around, preventing you from getting at their back long enough to get a full red execution going.
Of course, you can never be certain that making a sound won't bring in a whole bunch of Hunters, but as long as you remain in the shadows, you can usually still get an execution as the Hunters break up to return to their patrol routes. If they all proceed to walk back to their locations in a group, it's best to find another way to get your silent kills, or just consider it fate and whip out a gun and get your kills the easy way.
Speaking of guns, you may be tempted to use gunfire as a lure, but you shouldn't. A gunshot isn't something that a Hunter will suddenly forget having heard; if you fire a bullet while enemies are within earshot (and that's a pretty long range), all of them will hit high alert right away and come running towards the area. It's best not to fire a weapon unless you intend to kill someone with it.
On a final note, be aware that shadows won't protect you from being discovered if you make a sound when an enemy is in your immediate proximity. In general, if an icon on your radar is more than halfway in from the outer radius, then any sound you make will give your position away, allowing them to target you, shadows or not.
The Lure
As you travel throughout the scenes of Manhunt, you'll occasionally stumble across items that aren't intended for use as weapons. These appear as yellow items in the game world and will have a yellow background when you select them in your inventory. These lures can be thrown to make sounds in a location distant from where you're standing; when a Hunter hears the lure clattering on the ground, he'll head to that spot instead of coming to investigate you.
Lures are, first and foremost, great for distracting Hunters who are a bit too close for comfort; if you're about to be spotted and have no nearby shadows to hide in, throwing a lure in the opposite direction can help save your skin. They can also be used to help facilitate executions, especially when used in conjunction with other audio clues to bait in your targets. The basic ploy here is to draw a Hunter in towards your shadowy lair, then throw a lure out beyond him so that he turns his back to investigate. If done properly, you should be able to get an execution as the baddie walks away, but if you've already made too much noise, your target will run to the lure, instead of walking.
In addition to distracting Hunters, lures also seem to give them an explanation for noises that they've already heard. If you're getting tired of waiting for an alerted Hunter to return to his normal route, try throwing a lure at his feet; he'll check it out, of course, but this does seem to reduce the timer that dictates how long they'll run around before deciding that there's nothing to worry about. Note that the opposite is true of using heads as lures; whereas running across a soda can or bottle is a fairly explainable occurrence, having part of your best friend's corpse tossed at your feet isn't going to make you feel all that complacent. Heads don't seem to be quite as bad at alerting Hunters as full bodies are, but they don't help matters at all. If you get the opportunity, try to pick up heads as you make them and toss them into shadows or into corners where Hunters aren't likely to spot them.
Using Firearms Properly
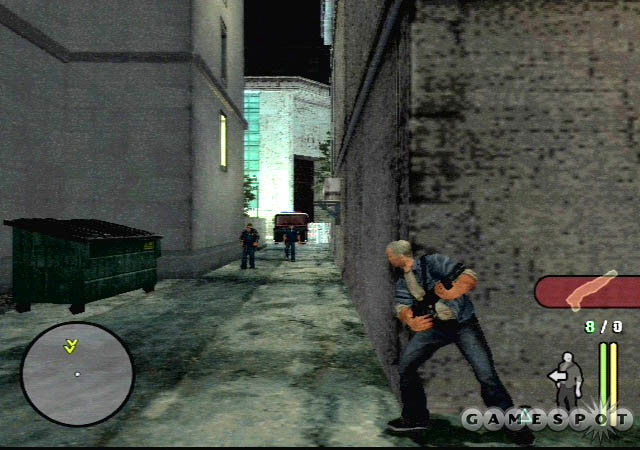
Although you'll be a fair ways into the game before you get "real" guns (quasi-weapons like the nailgun and the tranquilizer rifle are found fairly early on), that's no reason not to use your heavy firepower correctly when you do come across it. Whether it's a lowly handgun or the mighty Assault Rifle, most of your firearms will be controlled in the same way, with common tactics being applicable to all. Duck and Cover
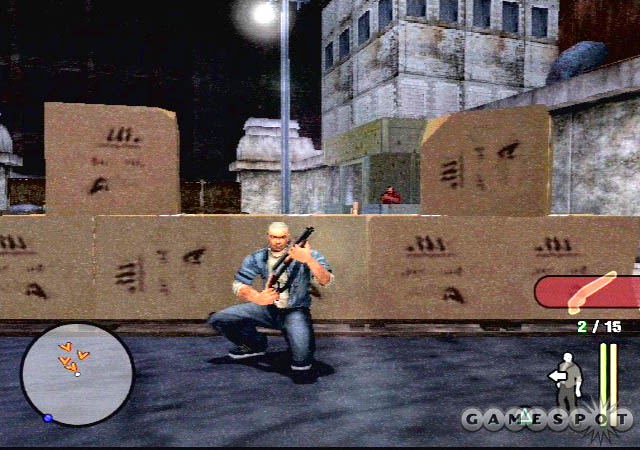
Most of your kills with firearms are not going to occur in the open; your health is too precious a commodity to risk in free-standing firefights. You're going to want to be under cover before you use your weapons; this is where the ability to lean up against walls and obstacles will save your life many times over.
In order to lean or duck against a wall, all you need to do is press the triangle button when you're close. Your profile will become emblazoned with an arrow when you're in range; after you press the button, Cash will turn his back to the wall, allowing you to slide him back and forth using your left analog stick. This restricts your ability to move a great deal, so if you're being approached on multiple sides, you don't want to hug a wall; it's better to retain the ability to run away at a moment's notice.
When you have all of your enemies on one side of you, however, you'll be able to use the wall-lean to rack up easy kills. When you approach the edge of a wall, you can use the L1 button to pop out from behind your cover; Cash will automatically whip out his equipped weapon and target any Hunters within range. Letting go of the L1 button will bring Cash back to his safe spot; you can go through this animation fairly quickly, which is helpful when you have a half-dozen Cerberus units returning fire. The usual routine is to lean out, take a shot at whatever the computer selects for your auto-aim, then duck back to allow your weapon to reload. For burst weapons, like the SMG or the Assault Rifle, you should still restrict yourself to a few rounds; the longer you stay out from behind your cover, the bigger the chance that your enemies will hit you.
If you have a really good spot selected, where the corner that you're standing next to has a long line of sight on the approach to your position (corners near long corridors are excellent for this purpose), you can lure any nearby Hunters to you by tapping on the wall. With a firearm in hand, you can tap automatically by pressing the X button while Cash has his back to the wall. This will, as always, bring Hunters to investigate; when they get close enough for you to get a headshot, whip out from behind cover and pop off a round. Depending on the level architecture, any further Hunters will usually come from the same direction that the first one did, so stick where you are and use your corner to peg the rest when they come to look for their fallen comrade.
The Fun and Gun
In some instances, whether for time purposes or because you're unable to lure in Hunters, you'll need to abandon your cover and advance throughout a level. Moving without cover is obviously a deadly situation; if a Hunter spots you, he'll overcome his fright and begin firing within a second or two, and that's generally all that's required for him to put you six feet under. You can protect yourself, however, by ensuring that you get the first round off.
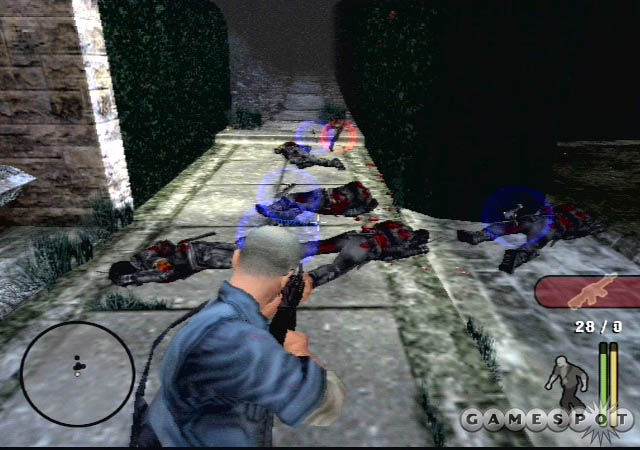
There isn't much of a secret to this; what you need to do is abandon Manhunt's basic movement scheme and instead convert to the first-person shooter controls. If you hold down L1 while you're holding a firearm of any type (excepting a Sniper or Tranq Rifle), Cash will hold his weapon out in front of him, allowing you to move with the left analog stick and aim with the right analog stick. If you've ever played a first-person shooter game, you'll know the basics of this method of control; for instance, when moving around corners, aim towards the adjacent hallway and use your right analog stick to strafe out, rather than moving out, then turning. Strafing lets you cover your corners and helps you avoid getting shot from enemies you haven't spotted yet, especially in the Hardcore difficulty, where you won't have a radar to pick up noises on.
In addition to the basic controls, though, Manhunt also gives you a few ways to gain an edge on Hunters. Foremost among these is the ability to kick in doors to get a jump on anyone inside a room. This technique is simple to pull off: get close to the door, facing it, and when Cash pulls his weapon up to his chest, hit the X button to kick in the door. You'll automatically target anyone inside the room, so pressing the X button again will start the slaughter. It's important to be careful not to let the door swing back; if it does, any shots coming from inside the room may hit it and slam it in your face, which will protect you, but will also give the Hunters on the other side the opportunity to close in.
Weapons and Items
You'll have a fairly impressive array of weaponry in Manhunt, from the rather benign plastic bag to the full-gore chainsaw. You'll need to pick and choose your weapons based on your surroundings; if you are trying to sneak through a maze of Hunters without alerting them to your presence, it'd be best to use silent kill weapons to get executions. On the other hand, if you need to blaze through a checkpoint of six Cerberus units, you'll not want to be packing anything less than a shotgun or assault rifle. Luckily, you can hold as many as three weapons, with an extra slot set aside for lure items.
Yellow Items
Items that show up as yellow in your inventory are used as lures; when you want to make a sound, hold the X button down for a second to launch the item into the air. The longer you hold down the button, the farther the item is thrown. You can also, in a desperate situation, use a lure as a weapon, by targeting a Hunter with the L1 button before throwing it at them. If you're reduced to this, however, you may as well reload the game, because you're probably not going to survive much longer anyway. Brick
Bricks are probably the best of the lure items; you can use them repeatedly, and they make a lot of noise when they hit a hard surface.
Bottle
Bottles smash upon impact, rendering them single-use items. You can sometimes stun a Hunter by hitting him with one of these.
Head
In a calculated attempt to woo the coveted soccer-mom demographic, Manhunt gives you the ability to chop off a victim's head and use it to distract his comrades. You can grab a head with a red execution from a wire, a white execution from the chainsaw, or any execution from the cleaver or machete. Heads will generally place a soldier on alert, though, so you should try to use another kind of lure item if at all possible.
Soda Can
As with the brick, cans can be used multiple times to distract your foes. You can make a soda can by shooting any vending machine that you come across.
Green Items
Anything that's in your inventory as a green weapon is a single-use execution weapon; if you sneak up behind a Hunter and use it to take him out, he'll die quietly, and the item will be removed from your inventory. These are obviously handy for killing opponents whom are packed into small spaces, but whom don't possess a line-of-sight to each other. Glass Shard
You'll come across a whole mess of glass shards in the game, and, what's more, you can make your own by hitting or shooting most glass objects in the game world, such as windows, picture frames, free-standing panes of glass, and so on. These replace your fists during fistfights, and allow you to do extra damage to your opponents.
Plastic Bag
There are only a couple of plastic bags in the game, but they're still useful for stifling your foes as soon as they turn their back on you.
Wire
Wires are unique only in that, if you make a red execution, you'll obtain a head from your opponent to use as a lure.
Wooden Stake
You'll only see one of these the entire game; it acts in precisely the same manner as the glass shard.
Blue Items
Any blue items that are hand-to-hand weapons can be used to repeatedly execute Hunters; any such executions with a weapon of this sort will be noisy, and may alert nearby gang members, but the weapon won't disappear from your inventory after you use. These weapons are also useful as a replacement for your fists during toe-to-toe combat; you'll deal more damage when you have a crowbar in your hands, for instance.There are also blue-level firearms that you can pick up to replace an execution weapon. These firearms are generally handguns, useful against one or two enemies at a time, but without the power or the rate of fire that will allow you to hold your own against multiple foes.
Blackjack
Nightstick
Knife
Hand Axe
Sickle
These weapons are all basic execution weapons. You can use them over and over to get kills, but they don't have any special properties.
Crowbar
The crowbar, in addition to serving up some gruesome kills, can be used to pry the locks off of gates, or to pry open the backs of SWAT or police trucks.
Machete
Cleaver
The machete and the cleaver, although apparently different weapons, have the same three executions. Any of these executions will net you a fresh head to use as a lure; these weapons can also be used to cut through rope that binds some of the doors you come across.
Nailgun
The nailgun is the first "firearm" you'll come across in Manhunt, and it's also the weakest. You'll be required to connect with at least three nails to the head in order to kill a Hunter; body shots will cost you a half-dozen rounds or so. On the plus side, enemies that use the nailgun on you won't be a drastic threat.
Revolver
The revolver is the first real gun you'll come across. Although it only has a six-round capacity, and its rate of fire is among the poorest of any firearm in the game, a headshot from it will kill a Hunter just as surely as the most brutal execution.
Light Handgun
Many of Carcer City's police forces use light handguns. It has a larger ammo capacity than the revolver, and has a better rate of fire, but is weaker when aimed at the body of an enemy.
Heavy Handgun
The heavy handgun is the most powerful of Manhunt's pistols. While headshots are, as usual, instantly fatal, you can safely use this weapon to blow away opponents from long range, with the assurance that they'll keel over after just a few rounds.
Submachine Gun
If you really want some heavy firepower in your blue weapon slot, you owe it to yourself to track down a submachine gun. Although it chews through its 30-round clip in a matter of seconds, any enemy you get in your sights will usually be stunned by the rapid fire, and will die after taking four or five rounds to the body, letting you kill off your foes without worrying about return fire. The main drawback here is that ammo is scarce; if you do use an SMG, make sure you pair it up with a powerful weapon in your red slot, lest you run out of bullets and are reduced to throwing bricks at your foes.
Red Items
When push comes to murder, you'll want nothing less than a heavy weapon at your disposal, and that's the need that red items are intended to fill. Baseball Bat
Metal Bat
The metal bat is functionally identical to the baseball bat, to the point that they each have the same execution animations. The sole difference is that the Metal Bat deals a bit more damage in hand-to-hand fighting.
Chainsaw
You'll only see the chainsaw in one scene during the main portion of the game, but it'll definitely leave a lasting impression. It is, of course, only useful at very close range, but if you manage to make contact with an enemy while the blade is spinning, they're usually as good as dead. The chainsaw makes a fair amount of noise when its engine is turned on, which will lead Hunters to you, but you can turn it off with the square button. Executions can be performed with this weapon without having the engine on.
Tranquilizer Rifle
When you hit someone with a tranquilizer round, they'll either hit the ground and sleep for around thirty seconds (if you get a headshot), or will become dazed and stand motionless for five or six seconds (if you hit them in the body). Either situation allows you to follow up with an easy kill: if your target is on the ground, stand over them with a hand weapon and use your attack buttons to beat them to death; if they're stunned, quickly switch over to an execution weapon and get behind them for the kill. Hunters stay stunned long enough for you to get a red execution, but you will have to move quickly in order to do so. If you're waiting for the red targeting arrows to come up, and you notice that the Hunter is struggling out of his stupor, go ahead and get whatever kind of execution you can muster; a Hunter's first reaction upon waking up is usually to look behind him.
Sniper Rifle
The sniper rifle is another rare find, as it only shows up in two or three scenes during the game. Its utility is somewhat questionable, as you'll often come across it while armed troops are advancing on your position, and it's simply too unwieldy to use except on extremely distant foes. Unlike other weapons, the L1 button gives you a scope view here, with the left analog stick allowing you to move the scope and the right analog stick being used to zoom in and out. In close quarters, the sniper rifle becomes a liability, so it's usually best to use it to snipe out any foes when you find it, then switch back to whatever weapon you were carrying before and proceed on your way.
Sawn-Off shotgun
The SOS has an incredible punch, but it only holds two rounds, and is woefully inaccurate at anything other than short range. This weapon is best when used against opponents who don't have ranged weapons themselves; make a noise, let them come to you, and blow their heads off when they come within range.
Shotgun
This upgraded version of the shotgun has an eight-round capacity and much better range than the sawn-off variety, although it sacrifices that weapon's rapid-fire capability. Still, the shotgun is a more than reliable weapon, and will be a handy firearm to keep in your red weapon slot. SWAT team members will sometimes carry a shotgun equipped with a flashlight; ammo can be carried over if you switch from one of these weapons to the other.
Assault Rifle
If you want a firearm that possesses rapid-fire capability without sacrificing accuracy or power, the assault rifle is your weapon of choice. Packed with a 30-round clip and pinpoint accuracy at decent range, the AR can be used in full-auto mode to mow down Cerberus units as they advance on your position, or can be manually aimed for single shots to the head on unsuspecting foes.
Walk-through
There are twenty missions in Manhunt's story mode. As mentioned in the Style Points section above, you'll be ranked after each one according to how quickly you finished, how many red executions you obtained, and how many total kills you got. Total kill scores are a combination of normal kills, such as from gunfire or low-level executions, and red executions. If you're looking for a maximum style point score, it never hurts to go overboard on gory executions, but make sure you don't spend too much time setting up Hunters for the kill; this can easily push you over the time limit.Born Again
Time Limit: 10 MinutesRed Executions: 7
Total Kills: 7
Part 1
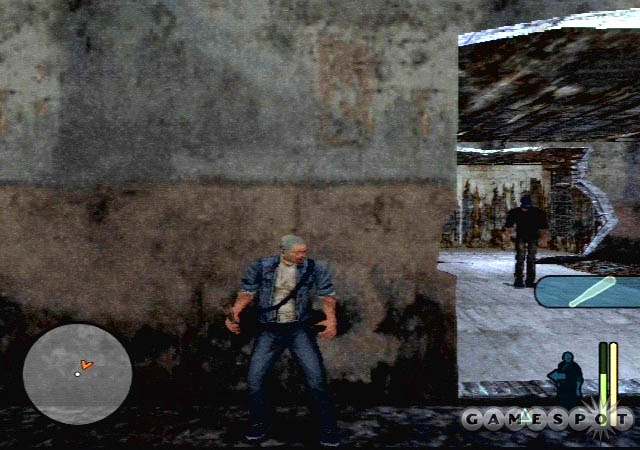
You begin your journey through hell in one of Carcer City's many and sundry alleyways. There's not much in the way of environmental interaction here in Manhunt, so don't stop to look around; everything you see is mostly window dressing. Grab the plastic bag up ahead of you and move on until you reach your first victim. The pop-up menus will tell you what to do, but to recap: Use the L1 button to lock on to your target, get close enough for the green arrows to turn grey, then hold down either of the execution buttons (square or X). You can get a decent execution right away, or hold down the button until the arrows turn red for bonus violence. And, just like that, our use of the phrase "bonus violence" will probably cement the fact that you're playing a Rockstar game. 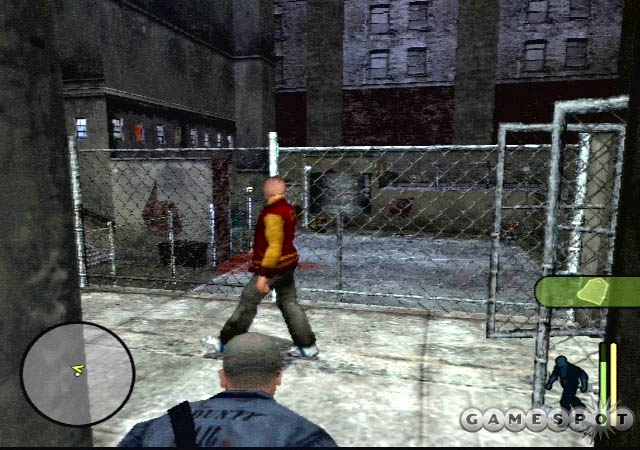
You'll get another plastic bag at the bottom of the stairs here, so grab it and run up into the shadows near the locked grate. Another poor schmo comes around the corner, blissfully unaware that this is the last day of his pitiful life. You'll need to time this execution; he'll walk past you and give you an opening, but he won't stay turned away from you forever. Put him down and proceed into the basketball court. The fistfight here isn't too terribly painful; lock on with L1, keep your hands up (by letting go of the buttons), and wait for your opponent to throw a few punches before returning fire with your jabs (X button). The square button deals a more powerful blow, but will leave you open for an attack while you wind up. (Don't worry too much about learning how to fight; if you play the game properly, you'll be able to get through most of the remaining levels of the game without ever having to resort to hand-to-hand combat.) Drop your foe and finish him off with kicks when he's on the ground. Grab the painkillers and save.
Part 2
The next foe waits for you on the stairs nearby. He's on a patrol route that takes him from the top of the flight to a point near the bottom, but he shouldn't see you if you wait around the corner or in the shadowy doorway at the stair's end. Wait in either of those two places for him to come to the bottom, then sneak up behind him and execute him with your newly-obtained glass shard. If you're forced into a fight, take him down, then grab the painkillers hidden behind the dumpsters at the top of the stairs.
At the end of this alleyway is a parking area with two Hoods inside, and, conveniently, two weapons; a glass shard and a plastic bag. One Hood is on patrol through the shadows to the right of the entrance gate; the other will walk amongst the cars to your left. Your first target should be the one on the right.
The trucks here cast a long enough shadow to let you hide away, so do so until your man walks around the dumpster, then sneak up behind him and use the glass shard to take him out. If he's in an exposed spot, you'll need to pick up his body and hide it away behind the dumpster. Then, grab the plastic bag (near the entrance gate), and use the cars on the far side of the parking lot for cover while you make your way over to the other Hood. This one has a couple of right angles in his route, so if you're holding the execute button down, you might want to let it go if he begins turning, or just run away, if you wish to get a full-blown execution after he calms down.
Part 3
Another save point awaits, but only after the two Hoods are dead. If you did have to go hand-to-hand, there are two bottles of painkillers in the parking lot. Heal, save, then proceed up to the rear of the mall. There are two more Hoods in the immediate vicinity: one that remains on guard duty near the fire barrels, which you saw during the video the Director showed you, and one who patrols through the building adjacent to him. His patrol leads him through the building towards the stairs you used to come up to this level, so you may need to either wait for him to pass all the way through, or skirt the building through the alleyway to the right and come in behind him. Either way, executing him shouldn't alert the Hood on guard. If you wish to bait him over with sound, hide in one of the many shadowy areas here before doing so, and be aware that you may draw in the other Hunter as well.
There's another glass shard in the building furthest away from the stairs; grab it and lure the Hood away from the door by tapping on a wall. After he gives up and heads back to his post, sneak up behind him and execute him, then head through the Chute doors to exit the first level.
Doorway Into Hell
Time Limit: 10 MinutesRed Executions: 8
Total Kills: 8
Part 1
The limit for getting a Time Bonus on this level is 10 minutes, same as the last one, but this level is a bit more intricate. Still, you have a bit of slack built-in to that time limit, so don't worry too much if you have to run to the shadows and wait for an alerted Hunter to reset to his path.
You begin the level with an easy execution. Sprint up through the two alleyways, but when you hear the Hunter heading outside, start walking. You can get behind him for a red execution without a problem; grab his blackjack and move on. Inside the nearby building, there are two Hunters on the top floor; grab the glass shard, then hide in the room just ahead of it and rap on the walls. The first Hunter will come down the stairs and stand extremely close to you; he may walk outside or just turn around for a moment. Wait for him to begin walking away from your position before beating him to death with the blackjack. The noise shouldn't attract his friend, so head upstairs.
The other Hunter is a couple of rooms away from the top of the stairs, but can also be easily baited while you stand in the shadows in the small hallway just before where he's situated. After you get his attention, wait for him to walk away before you try to approach him; he's got fairly good lateral vision and will spot you if you come out from cover too early. Execute or kill him and move on. After you drop down into the alleyway, you'll spot a padlocked gate; your goal now is to find something to bust the padlock with.
Part 2
There's a house with a large courtyard near the gate; sneak into the shadows along the right side, being sure not to get the attention of the Hunter in the doorway. There are two more Hunters behind the house itself, one in either alleyway. The one in the alleyway where you wind up will be walking a route through the shadowy section of the road; you can sneak up on him or tap on the walls while hiding in the shadows to get his attention. The Hunter on the far side of the house walks an even simpler back-and-forth route up and down his alleyway, making him an easy target for a red execution. The last Hunter to kill here is the one in the doorway; you can easily sneak up on him from the building's back door and put him down. Don't forget to grab his baseball bat.
You'll find a door in the alleyways behind the house, at the end of the road with the eloquent graffiti. Head up into the second floor of the building here and kill the madman with the crowbar. You won't have an opportunity to sneak up on him, since he'll always spot you coming, but you should be able to pound him with your baseball bat. Kill him and exchange your blackjack for the crowbar. Grab the painkillers in the nearby room, then drop back into the alley.
Two new Hunters have been placed into the level; one walking along the rear of the large building and one pacing near the padlocked gates. The one walking behind the building should be an easy execution, if you catch him heading away from you. The other can also be snuck up on, but, depending on time factors, you may wish to just duke it out with him. Either way, use the triangle button to bust the padlock with your crowbar, then sprint down to the end of the interior alleyway and grab the painkillers. Find the passageway into the building and run downstairs.
You'll eventually find yourself inside a bit of a trap room, where you'll have no choice but to duke it out with one of the Hoods. This fellow introduces you to the new style of hand-to-hand combat that most of the opponents will use for the rest of the game; namely, they'll grapple, meaning that they'll grab you and prevent you from attacking or defending yourself while they take a few free shots at you. Tap X as quickly as possible to break out of their grasp. If you want to try and grab your opponent, get close to him before holding down the square and the X buttons simultaneously.
After you kill the Hunter, head through the door he entered from to end the level.
Road to Ruin
Time Limit: 10 MinutesRed Executions: 8
Total Kills: 9
Part 1
Road to Ruin is the final level with a ten-minute time limit, which you can be thankful for, but you'll have to earn your time bonus star here. You should be able to make it to the first save point without having to get into a fight with any of the Hoods; it's relatively easy to get executions on all of them.
The next Hunter is another of the unsurpriseable variety. As you reach the next exterior area and head down the alleyway next to the truck, a Hunter will hop out in front of you and charge. You'll need to turn around and beat your feet back into the shadows near the tree you just passed by. If you can't lock onto him because of the tree, strafe to the left or right until you're facing the Hood's back, then liquidate him.
The last Hunter before the save point is another unsurpriseable. You'll come across a long hallway lit by a single, unsheltered bulb; before you reach the end of the hall, the Hood will pop out and run after you. Avoid him by turning around and hiding in the shadows adjacent to the door; the Hunter will usually run right past you before stopping, giving you an easy shot at an execution. (If you're really on the ball, you can trigger these scripted events by walking backwards, which saves you from having to turn around when the Hunter jumps out at you.)
Part 2
The next area is presumably the road alluded to in this scene's name; it's a well-lit avenue with three Hunters walking about. Save your game, obviously, then find the shadows in the alleyway ahead of you. Make some noise to attract the Hunters; hopefully only one will come around the corner, but you should be prepared for two. After you have a shot at one of their backs, execute him. If this gets the attention of another predator, do your best to run back past the save point, through the poorly-lit hallway, and into the shadows where you hid before you killed the previous Hunter in this location; if all goes well, you should be able to execute him with the same ease as you did his forebear.
After returning to the road, you'll need to lure out and kill the remaining Hunter; he's probably off to the right of the alleyway, perhaps inside the building here. After he's been finished off, you can stock up on health in this area; there are no fewer than five painkillers scattered around. The highest concentration is in the building to the right of the alleyway; there's a solo painkiller on the top floor, and two hidden away in the basement, behind a padlocked gate.
When you've taken care of the vermin, return back to the road and find the padlocked gate underneath the large building across the way. Break through and save your game, then eliminate the Hunter in the next room, being careful not to attract his attention. He walks a route that leads him into the far room, so he shouldn't be too difficult to follow and execute. What is difficult is killing off the next three Hunters: two of them populate the alleyway behind the building that you're in, with another one further down the way, guarding another padlocked gate that's the endpoint of this mission. Luckily, you've just saved your game, so if something goes horribly awry, you can reload and try again. The Hunter tandem will, of necessity, be the first targets on your hitlist. You're going to have to lure them into the basement by making noise; if you're lucky, they'll come down one at a time and you can execute them individually. Otherwise, you may have to fight off one of them, but there are painkillers nearby should this be necessary. The game apparently has another Hunter appear back on the road, so you'll want to avoid making large amounts of noise, lest you bring him running as well; three Hunters at once is well more than you can chew at this point.
The final Hunter, as mentioned, waits by the gate that ends the level. The entire alley here is drenched in shadows, so make a bit of noise, wait for him to pass you by, then impale him with whatever you have handy. In point of fact, you should probably switch to your crowbar before you kill him, as it'll save you from having to do it when you want to break through the gate later on. We're only talking about a time savings of a second or two, but without a level timer, you can never be too sure about when such amounts of time are going to be important.
At any rate, kill the last Hunter, break the lock on the gate, and treat yourself to an odd little cutscene.
White Trash
Time Limit: 15 MinutesRed Executions: 11
Total Kills: 17
Part 1
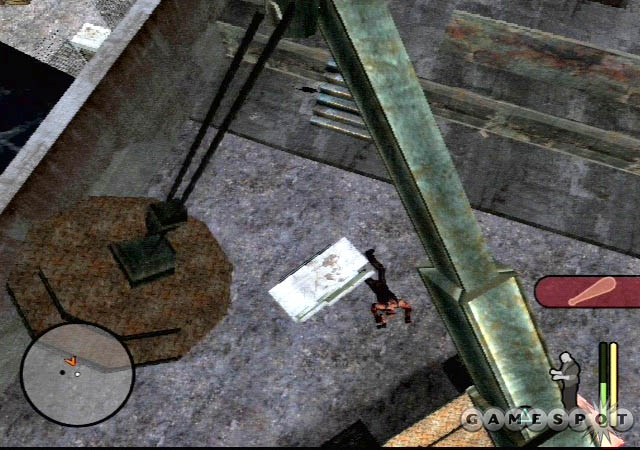
You'll start off here mano-a-mano against a member of the Skins. He's walking a route across the yard where you'll first encounter him; since you're unarmed, you'll have to take him down with an execution. Fortunately for you, there's a wire located in the little enclosure near where he's walking, so wait for him to turn his back on you, grab the wire, then sneak up behind him while he's walking and asphyxiate him. The Wire is capable of doing more than that, of course; if you get a Gruesome Execution with it, you'll slice off your target's head, which will then be useable as a lure. Very pleasant. Grab the baseball bat and get on your way.
Starkweather will show you a little vignette; apparently another gang member is standing guard over the gate through which you need to pass to reach the first save point here. There are a couple more Bigots to kill before him, though; one walking a route near the crane ahead of you, and another amidst the boxes and shadows beside the house in which the guard Skin is, well, guarding. Kill them, then find the back door into the house, sneak up on the guard, and waste him. You'll probably rile another nearby Hunter, but it shouldn't be difficult to race back out to the shadow-filled crates and lose him. Once he turns his back, get another execution.
You'll note that the gate here is held by rope instead of chains; thus, you'll need some kind of cutting instrument to get through. You'll find it in the Used Motor Oil hangar near the house; a Bigot is waiting in the shadows here to jump you, so walk in, get him on your tail, then run back to a shadowy area until you can get him confused. One execution later, and you have your knife. Use it to get through the gate and be on your way.
Part 2
When you drop down from the little ledge here and approach the trailer, you'll get a delightful little cutscene involving more bodily functions. The prospect of obtaining your first gun should get your blood racing a bit, but there's no reason to pass up a perfect opportunity for an easy execution. You'll need to break the window of the trailer before you can get the Skin's attention, so do so, then run around the corner and into the shadows behind the trailer. Knocking on the wall will bring him outside and put him in position for the kill.
After you grab the nailgun in the trailer, two more Skins will spawn and head towards the door. If you're trying to get in under the time limit, the best way to dispatch these gentlemen is to hide in the shadows at one end of the trailer's interior, make a sound to attract them inside, then use the nailgun to off them both. Don't forget to tap your right analog stick down to aim for their head; these fellows aren't able to stand more than three headshots from the nailgun. If you're looking for executions, you may have to either try to lure them into the trailer, or just run out and head for the shadows of the crates further on. Dividing these fellows is tough, but can be done, especially if you rely on letting one of them see you instead of making sounds to attract them. Sounds generally draw in every Hunter in the area, whereas visual contact generally only brings the Hunter that saw you, unless he calls in reinforcements. Whichever case it is, drop the Hunters and move on. You'll pick up a box of nails for your Nailgun; equip it and hit the square button to reload. The gate to finish the level is locked electronically, so you'll need to track down the switch before you can move on.
Part 3
There are two more Skins in the shadows beyond the gate, and another one within earshot. You'll have trouble executing them if they're all on your case, so try to stand near the gate until one of them sees you, then run away a bit, back towards the trailer, until you can hide away and get your kill. Take down the other one with the same method, then repeat the process for the third, banging away on the walls here to get his attention, if need be.
There's yet another Skin nearby, this time hiding in front of the building where the electric switch is located. He's not as easily lured from his post as the other hunters are, but if you can sneak up into the shadows to the left of his position, you can use a series of taps to draw him near you, then walk up behind him as he heads back to his post. It's best not to get into a fight with him, if possible, due to the fact that he has a nailgun. Although it may seem like a bat would be a fair match for a nailgun in a fight, you'll usually wind up getting stunned by the rapid succession of projectiles, and if you can't move, you usually die.
After flipping the switch here (with the triangle button) a terrible trio of Skins spawns near the now-opened gate. Two of them are your average baseball bat thugs; you have plenty of space and shadows to work with in between the gate and the switch, so lure them around and get your executions. The third is another nailgunner, and unlike the switch guard, this one will be lured away from his post (guarding the gate) rather easily, but will sprint back after he loses sight of you. If you want to make an execution on him, you'll need to lure him with sound, move towards the gate area so that he passes you, then quickly sneak out and get him from behind. Even at your quickest, however, you may not be able to get more than a yellow execution. If you're pressed for time, just take your nailgun and pop him from a ways away, then head for the gate to end the level.
Fuelled By Hate
Time Limit: 20 MinutesRed Executions: 10
Total Kills: 24
Part 1
The 20-minute time limit here is somewhat laughable; you can easily spend an hour and a half on this level, baiting and luring Hunters into the shadows. It isn't difficult to obtain three stars using the slow-and-steady method, but it will take a bit of time. If you really intend to come in under the time limit, you'll need to play through the level a few times before you can learn each Hunter's precise route.
Your first three targets are congregating within and around the shipping containers near the entrance to the level. The interiors of these containers make for perfect hiding spots, so bait the Hunters by tapping on the walls and go Riki-Oh on them when they make their way back to their routes. You'll need to eliminate all of them before Starkweather opens the gate.
Take a right outside the gate and head through the broken chain-link fence to reach the next area. A little encounter will ensue with a porn-watching Skin; use your weapon to smash the switch here, then hide in the shadows behind the nearby boxes until he comes to investigate. Off him and move on.
Part 2
Your objective now is to find the gas, which shows up on your radar as a blue dot, bring it back to the crane, fuel it up, and then use it to move the refrigerator that blocks your passage. Save your game at the save point, then eradicate the three Skins guarding the path to the fuel. You have plenty of area to work with here, so don't be afraid to run if you're forced into a confrontation.
After you grab the fuel and begin walking out of the hangar, you'll spot four more Skins coming into the junkyard arena. If you're gunning to finish the mission in under 20 minutes, you'll need to drag the fuel canister along with you as you hunt these guys down, or avoid them; leaving it here and coming back for it later will cost you too much time. Alternatively, you may want to bring the fuel out as far as you can bring it towards the crane, then lure all of the Bigots back into the hangar before returning for it and moving along. You don't need a 100% kill ratio to reach five stars, after all (but it definitely helps).
Unfortunately, the new Hunters will be clumped together, making them difficult to eliminate one by one, but it's still possible. The best spot for losing a pursuit is in the shadows near the passage to the small corridor off to the side of the hangar. If someone spots you further down, run along the corridor, turn the corner, and hide in the shadows; they'll usually pass right by you. Three of them will patrol in the junkyard across the hangar, but the fourth will be right up next to the crane itself.
After all four of the bastards are dog meat, grab the painkillers and hop into the crane. You can use the X key to pick up the refrigerator now, but as soon as you start up the vehicle, two nailgunners will come running towards your position. You'll take less damage than normal while you remain in the cab, allowing you to drop the refrigerator on them if you wish, but be warned that after they die, two more nailgunners appear. Better to refrigerate one of the nailgunners, then hop out and run back towards the yard before you get perforated. Execute the second nailgunner and head back through the refrigerator passageway.
There are two more painkillers here, but hopefully you won't need either of them just yet. If you've managed to retain half a life bar or more, proceed up the right side of the building here and avoid the painkillers that have been set in your path. Note that if you've managed to get Gruesome Executions on more than ten of the Hunters so far (you've seen thirteen), then your three stars are all but assured, so don't be afraid to use your nailgun on your enemies from now on. Speaking of which, you can pick up a ten-pack of ammo near the burning barrel in the little yard beyond the refrigerator passage.
When you're ready to move on, head towards the stairs in the building here; two Skins will pop up and start chasing after you. You can either run, hide, and execute, or shoot them both dead as they charge. Whichever you choose, save your game at the last save point and get ready for an incredibly non-fun sequence of enemies.
Part 3
After you go up the stairs past the save point, take a right and grab the nailgun ammo. Note that the truck near the second flight of stairs you need to climb conceals painkillers; if possible, save them for the moment. None of the Skins on the other side of the fence will come down the stairs here, although they'll spot you and give chase, so don't be too worried if you see a mass of enemies barreling up their walkway towards you. There is one Hunter at the top of the flight, though, who is difficult to execute precisely because you can't bait him away from his route. You'll need to wait and watch him travel his normal route until he begins walking away from you, then quickly sneak up behind him and put him down.
There are no fewer than four Skins walking around at the bottom of this piece of machinery, two of which have nailguns. You should be able to distinguish which two have Baseball Bats and which two have nailguns if you walk slowly down the conveyor belt; if possible, use your own nailgun to drop one of your ranged competitors before proceeding into the killing zone. If you don't mind settling for nailgun kills, you can then retreat back onto the "roof" of the machine that you're on, killing off the Skins as they chase you up the conveyor; otherwise, you'll have to sneak past them on the way down by hugging the right side of the conveyor until you're in the yard. You won't have much time to size up executions, since everyone's moving into each other's line of sight, so you may have to settle for simple white executions. Whatever the case, there are plenty of shadows in which to hide, especially among the boxes.
After the Hunter atop the machine and those below are dead, the gate nearby opens. Grab the painkillers next to the crane, if necessary, then hop in and move the refrigerator here. As before, two waves of nailgunners will appear, but unlike with the first crane, the second wave appears whether or not you remain in the crane itself. Since it's been a while since your last save, you'll probably want to play it safe and just move the fridge before hopping out of the vehicle and finding a nice place to hide.
The gunners here will often appear in the nearby tower; you'll have to sneak up on it and use your own nailgun to take them down without getting hurt. Beware, though, of the hidden Hunter that spawns with the second wave of nailgunners; one of them spawns in the tower, but the other spawns back near the construction machine and will thus be approaching from your rear. Watch your radar for any unexpected surprises before you head towards the mission's end.
The final gate here is guarded by, what else, another Hunter with a nailgun. This one can't be baited very far, but if you pound on the wall next to the switch that you smashed previously, you can coax him a couple dozen feet from his post, which will be enough to sneak up on him and execute him after he starts walking back. From there, it's a clear shot to the exit.
Grounds for Assault
Time Limit: 20 MinutesRed Executions: 10
Total Kills: 15
Part 1
Although this level isn't quite as large as Fuelled by Hate, it can be comparable timewise due to the way the enemies are clumped together. In order to cut down your time, you'll need to pick up and hide the bodies of your kills so that they don't attract unwanted attention.
You'll start off unarmed, as you usually will after a forced relocation, so be careful not to rile the Wardog that's walking away from you when the level begins. If you're on a time budget, though, go ahead and get him on your tail before grabbing a piece of wire from the hallway to the right of the zoo entrance. Hide and kill him, then do the same for his nearby friend with the machete you receive. Said machete is a magical lure-making weapon, as you'll discover when you execute someone with it; every time you pull off a silent kill, you'll chop off your target's head, which can then be used to distract his fellow hunters. Show this to your parents!
If you need painkillers, there's a bottle of them in the room to the right of the soda machine; otherwise, take your machete and cut the rope on the door that leads into the zoo proper. There's a hidden enemy outside the door leading away from the bathroom, so hide in one of the stalls, lure him in, and take him out. Make a note of the door with the padlock on it; we'll be getting a crowbar later, and this is the first door we'll want to use it on.
There are two more patrol/victims that you'll meet upon exiting the bathroom area; hide in the shadows to the left of the exit and lure one of them over with noise. Be careful, though, as their patrol paths do overlap a bit; you may have to settle for a less-than-gruesome execution if one of them spots you while you're stalking his friend. Kill them both and save your game.
Part 2
Five more Wardogs await you on the main zoo grounds. Luckily, the grounds are quite wide, so you won't have to worry about overlapping patrol paths. Most of the paths here are well-lit, however, so if you kill someone, you'll either need to move away from the body or move the body itself into the shadows before attracting the attention of another guard; the latter is preferable. Take the guards out one by one until you have a clear shot at the grizzly cages at the back of the zoo, where the crowbar resides. If you get spotted, sprint around until you can get into the shadows, then use a softly-thrown head to get the bastard facing away from you. Hunters usually move to examine a lure, which will expose their back to you, then continue to move in a straight line across from it, giving you a few seconds to track them and get the red execution. Wash, rinse, repeat.
There's one final Wardog guarding the crowbar, whom you can lure out with noise from a goodly distance away. Do so, execute him, grab the crowbar, then head all the way back to the padlocked door you passed by earlier for your first real firearm: a sawn-off shotgun. There are only three rounds for it, but it's a guaranteed kill when used at short range. After you grab it, find the other padlocked door near the grizzly cages, bust through, and save your game.
Part 3
The Wardog shown on the video doesn't possess a sniper rifle, although it looks a bit like one. Don't worry about avoiding his range of fire; he won't see you unless you make a lot of noise on his level. For now, though, attract the two Wardogs on the lower level into the building near the save point and use the shadows to execute them. One more awaits on the upper level. The marksman won't move from his perch no matter what, so feel free to make as much noise as you wish to attract the other Hunter before killing him. When the armed Wardog turns yellow on your radar, sneak up behind him and execute him. Grab the tranquilizer gun, drop down, and break into the restaurant with your crowbar.
Two more Wardogs await when you exit the restaurant. You won't be able to surprise them, so retreat, find a spot to hide, and execute them before heading to the exit to end the level.
Strapped For Cash
Time Limit: 20 MinutesRed Executions: 14
Total Kills: 14
Part 1
Ah, the game's first big gameplay complication! Unlike previous levels, being seen here will have a deleterious effect on your progress; if you're spotted by a Wardog that's guarding a member of your family, that family member will be executed without hesitation. Your only chance to save your relatives is to sneak up on their guards and execute them without giving them an opportunity to enact their nefarious scheme. In truth, though, you only need to rescue one of your family members; there are four all told, giving you a margin of error that even a government contractor would find comfortable.
The first Wardog can be easily eliminated, either by using your tranq rifle to get a headshot through the fence, and then walking over and beating his face in while he lies defenseless, or by luring him back to one of the shadowy spots near the level's beginning and getting a good, old-fashioned, crowbar-through-the-brain execution. The second Wardog, however, is one of the hostage guardians, so you can't let him spot you lest you want to see your unidentified family member take a bullet to the head.
It's fairly difficult to get a red execution on this guy, since you can't really risk baiting him away from the little route that he walks outside the room where your kin is held. The best thing to do is to either time his route and grab a normal or second-tier execution, or just hit him in the head with a tranq dart and finish him off when he's on the ground. Either way, pick up the glass shard inside the room and free your relative with it.
There's an absolute mess of Wardogs in the grassy area around the corner. If you're looking for executions, you'll need to try and distract them one by one back to the area where your relation was held and kill them as they make their way back to their posts once they get bored. The first can easily be dispatched this way, while the remaining three (one of which possesses a tranq rifle) will likely come all in a group, forcing you to wait until they cool off before executing one of them, then retreating before the other two can kill you. The tranq, especially, will have a nasty effect on your abilities; besides the health hit it'll give you, you'll also be temporarily treated to a bit of psychedelic feedback that will make controlling Cash a bit difficult. (Relatively speaking, of course; it's already hard enough as it is.) If you want to soften these fellows up before executing them, or just want to get past them quickly, grab the revolver that the guard dropped and use it to get some headshots as they close in on you.
After you eliminate these Hunters, with whatever methods you choose, you'll come across another hostage, whom you cannot see at first, and who is guarded by two Wardogs. You'll need to tread lightly to take them down without having either of them see you. The best method to get executions here is to sneak along the left side of the trail, very slowly, until you reach the shadows near the painkillers. Make a sound to attract them, but only tap once. They should both approach slowly, and will hopefully come around 10 seconds apart. If you get lucky, you'll be able to execute the second while the first walks away, then repeat the process for another gory kill. If you've managed to get everyone with a red execution so far, you should have eight in total, putting you over the halfway mark for the full style point bonus. If you're not interested in getting style points, or in saving your relative, you can always use the revolver that you picked up earlier to nab a couple of headshots.
Part 2
When you've rescued the woman, you can sprint along the path until you finally reach the building where the first save spot is located. Time the route of the Wardog inside; you can either get a red execution by skirting around to the right and following him back towards the hostage when he turns away from you, or you can just shoot in-between the boards near the save point to get an easy headshot.
There are three more Wardogs in the immediate vicinity of the exit from this building (you need to break the glass with a weapon before you can get out). Hide behind the nearby boxes to get into a position to lure them away from their routes before getting your executions, then head towards the blue building around the corner to find your last hostage/relative. The Wardog guarding her has a large room covering his back and a route that doesn't open him up to executions; the easiest way to deal with him is to lure him outside with sound, then get him with a tranq headshot. If you want to get an execution on him, leave him for now, and go cut your relative free; he'll walk up shortly afterward and resume walking his route, so you'll be able to lure him out and execute him without having to risk him killing your sister if he spots you.
Part 3
In any case, after the final hostage is rescued (or killed), the door to the next save point will open and two more Wardogs will spawn in, one with a machete back near the Monkey cages, and another with a tranq rifle near the shark's mouth. The rifleman cannot be lured from his position, so you may need to use your own rifle to drop him before the kill, or you can just close the distance and waste him with any other weapon of your preference.
After saving, you'll be inside the first building of the mall, and the last building of this level. The two gentlemen strolling through the upper level are easy kills; just sneak up on them and execute them. Keep in mind, though, that you won't be able to get over the ramp that you dropped in from, so if they spot you before you can drop them, you'll need to run like hell towards the other end of the building and hope that they flag far enough behind you to let you hide away in the shadows. After they're both dead, hit the switch that opens the door. Two more goons will run out from the now-unlocked exit door; you can draw them out and then hide in the shadows in the switch room if you want to try getting executions on them.
View of Innocence
Time Limit: 10 MinutesRed Executions: 8
Total Kills: 8
Part 1
This level has a 10-minute limit for the time bonus, so you can't afford to lollygag. It is quite possible to come in under this limit, but you'll need to step lively from one encounter to the next.
Unlike the previous missions, you won't be focusing on getting executions here. In point of fact, only one execution is possible, since you'll only have a single shard of glass to use throughout the whole level. The bulk of your kills will come from a revolver. Said revolver is found in the laundromat to the right of your entrance point. Note the painkillers here; it's easy to forget about them, but if you're hurting real bad and aren't worrying about the time limit, you can always run back here in a pinch.
The first two goons are around the corner from where you begin. You'll need to get behind one of the planters, preferably one close to their position, before you can take them out with any guarantee of success; even if you manually aim at their heads from a distance away, the revolver isn't a sniper rifle, and you'll likely miss unless you're close enough to get an aiming reticule anyway.
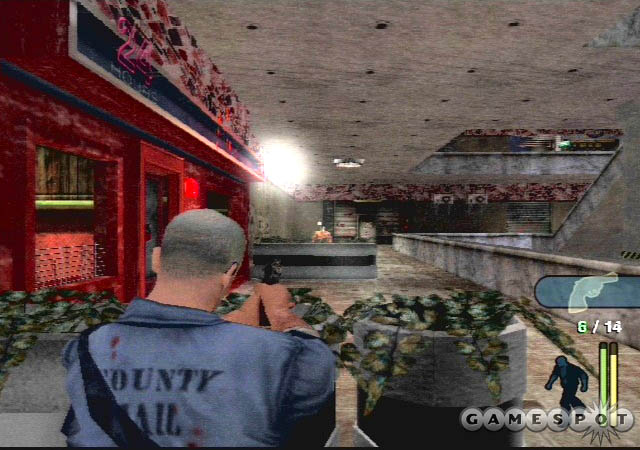
At any rate, you can duck behind the planters with the triangle key. Get used to doing this, as you'll be doing it for the rest of the level. You can pop out from behind cover with the L1 key, fire a shot, then release the L1 button to duck back. It's just like playing Time Crisis, except for the fact that the revolver has a pitiful rate of fire. If you're not close enough to get a headshot, settle for the body shots; each Hunter will require four body shots before he drops. Don't try to get all of these in one rain of fire; instead, pop out, take a single shot, then drop back behind cover to cycle in another round. Repeat until each target is dead, but beware: after you move in on their position, one or two more Hunters will pop out of the door and start blasting away. Repeat the duck-and-fire routine. There is another set of painkillers behind the doors through which these guys came, but hopefully you're not banged up just yet, because another Hunter will come at you from the right. He's not amazingly attentive, so cap him with a headshot. (Use L1 to aim, then click on the right analog stick to enter free-aim mode.) Two more goons will pop out of the petstore down here. One of them quickly retreats back inside; this is whom you want to get your execution on, so take down his partner, wait for the other Hunter to get calm, then sneak in behind him and use your Glass Shard to slice him.
Before you head up the escalator, yet another pistol-packin' Innocent will pop out from the center of the room; you should be close enough for a quick headshot. Two more await you at the top of the stairs; again, if you walk to the top of the stairs and wait for them to come to you, you should be able get both of them with a single bullet apiece.
Part 2
Save your game before the next difficult firefight. You'll notice all the vending machines that have been thrown about around the corner from the save point. Hide behind the first one that's lying on its side and duck-and-fire on the three Innocents that will try to pin you down. You'll probably take a bullet or two, but there are painkillers waiting for you nearby, so don't sweat the pain.
Passing the bar will bring along another solo Hunter, so headshot him and move around to the stairs that lead up to the top floor of the mall. Another gangster waits for you at the top of these stairs; play it safe by ducking behind the planter or the balcony edge and popping out to get him with body shots. Two more Hunters will pop out of the record store as you approach it, so duck behind the black dumpsters and blow them away.
Before you head into the record shop to get the video tape, you may want to duck around the corner to the right and enter the pharmacy. The back room here (you'll have to shoot off the lock) contains a shotgun with six rounds, which will certainly help you later on, but getting it will add at least thirty seconds to your completion time. After you've picked it up, or haven't, grab the video tape in the record store and save your game.
Part 3
A whole mess of Hunters spawn into the mall after you grab the video and exit the store, two of which will appear on either side of the record store's entrance. You may want to try throwing your lure out to attract them, but if they haven't spawned yet, it won't be of much use. After eliminating them, you'll have one more waiting for you at the bottom of the stairs (you have to start backtracking now), one inside the bar (you can strafe while aiming by holding down the L1 button and moving the right analog stick left and right), and one more who will likely be attracted by the fire from the bar and come running towards you from the first level.
The guardian of the video camera is standing behind the counter of the "Toy Corner" store on the second floor. If you did pick up the shotgun, you can get a clean kill by running across to the far side of the door, then strafing in and blowing him away; otherwise, you may need to dash in and out a few times if you can't get a headshot with the pistol. Save your game, then grab the video camera.
Part 4
Two more fools will try to make the toy store into a shooting gallery by firing through the windows, so hide in the corner and tag them with headshots after strafing. Another Hunter has somehow managed to teleport atop the scaffolding in the middle of the mall, so rub him out as you make your way around to the bar, the door of which is now open. Another Innocent will bust out of the back room when you approach, so slaughter him and sprint down into the basement to turn the power back on.
You can run to the top of the stairs, but from there, tread softly until the last Hunter of the level jumps out from behind the blue door. You'll want to hold down your L1 key until this happens; you should lock on to his head right away, giving you a one shot kill with a minimum of hassle. Use the television with the triangle key to end the level.
Drunk Driving
Time Limit: 20 MinutesRed Executions: 12
Total Kills: 19
Part 1
Starkweather, your very own personal trickster god, introduces another twist to the game here, in the form of a drunk old tramp, whom you have to guard and escort across hostile territory. Gone are the carefree days of blasting away at Hunters from around obstacles, at least for now; the cholos who run this territory wield little except for bladed instruments. Luckily, there's quite a few save spots, which will ease your journey a bit.
The first baddie here can be easily lured away from his post and executed with your knife. Grab the tramp from the door, but hide him in the shadows around the corner (using the triangle key) rather than allowing him to follow along. If you're trying to get this level done under the time limit, you'll probably need to keep him on a short leash, but otherwise, it's best to just park him in a shadowy spot, track down any Hunters between you and the next gate, and kill them before returning for him. There's only one more Hunter to worry about before the first gate, though, so hide behind the dumpster, lure him over, gut him with your sickle, and head through the gate which Starkweather unlocks.
Part 2
After you save, you'll need to hide your tramp away in the nearby shadows before taking on the three cholos huddled around the fire. There's a few different spots to hide here, noticeably behind the fenced-in area across the street, and in the upstairs portion of the building to the right of the save point. It's perhaps best to get these guys on your tail and then find a spot to hide; each cholo will lose sight of you at a different time in most cases, and each will take their own little search vector to explore. It's difficult to sneak up behind any of them on the main road, since his buddies will undoubtedly spot you, so try to pick your targets based not on their accessibility but on the sightlines of their friends. When you've dropped all three, grab the tramp and head to the next gate.
Part 3
Three more cholos await you here, but these fellows are a bit easier to kill individually. Try to stand in the shadows near the mouth of the alley, using sound cues to lure one target at a time, then throw a lure back towards the rear of the alley so that the other two Hunters won't see you as you make your kill. When you drop a foe, hide his body back inside the room where the save point was, then repeat the process with your other two unsuspecting victims. Last, but not least, there's an Innocent who'll jump out in front of you as you proceed into the service duct behind the burnt-out bus. Dispatch him, grab your tramp, and hit the next save.
Part 4
The open street here will be your hunting ground for the next trio of Innocents. A good spot to hide is in the shadowy corner directly across from the gate you came through; tap on the wall here to lure the cholos, then take down the last one who turns to head back to his position. Don't forget to hide the bodies as you go along. The third Hunter here may not respond to your noises from out on the street; if not, sneak into a shadow near the demolished building he's hunched in, lure him out with noise, and take him down when he comes out to investigate. Grab your hobo and book it to the next gate after you're done.
Part 5
You'll be accosted by another cholo as you make your way through the sepulchers; if you're quick enough, you can wheel around and make it to the shadows just around the corner before he gets on your tail, which results in an easy kill. Otherwise, you may have to backtrack all the way to the building where you left the hobo.
There are actually two Hunters with shotguns here, one up the steps next to the gate, and one around the corner to the right. The one on the right is a bit easier to execute, if you dash from tree shadow to tree shadow as he makes his little route. When he finally turns his back on you, get gruesome and grab his firearm. The Smiley near the gate (who has some great taunts) cannot be lured out of position very far. If you're desperate for an execution, get on the stairs, hit the wall with your weapon, and quickly move behind him when he turns around. You won't have nearly enough time for a red execution, though; you'll have to settle for a white one. If you don't care about executing him, sneak up behind him anyway; you'll be assured an instant kill from a shotgun headshot. Bring up the tramp to the gate, and note the lack of a save point here.
There are no fewer than four armed Hunters in front of your destination; three with revolvers, one with a shotgun. If you're spotted, you can expect to be chased by all four of them, which isn't necessarily a bad thing. If you can lure them back down the steps before the gate and lose them in the shadows, you'll have a relatively easy time nabbing the last one to head back. You can repeat the process, but try not to get shot up too much. If you've managed to get red executions on every Hunter save for the shotgun fellow by the gate, you should've hit your quota for the level already, so have a little fun with your shotgun here. Given the vagaries of addition, though, it's always a good idea to have one or two extra executions under your belt if you want those three stars at the end of the level.
At any rate, the four Hunters here are your last tasks in this scene. Dispatch them and bring your tramp friend to the gate.
Graveyard Shift
Time Limit: 15 MinutesRed Executions: 1
Total Kills: 30
Part 1
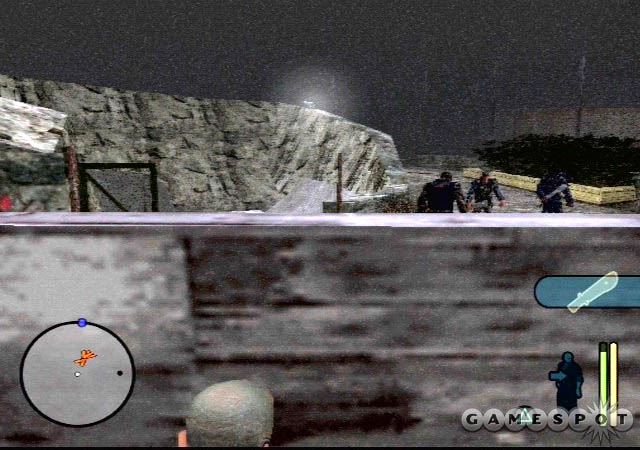
As with View of Innocence, this is a run-and-gun mission, with a single red execution being all that's required for maximum style points. Also like View of Innocence, you can get your extra star on Hardcore mode if you're having trouble getting three stars on the Fetish difficulty; the lack of a radar isn't incredibly important, given the density of opponents.
From the start, head up the stairs and get a headshot on the Hunter nearby, then retreat into the shadows and reload. When the two other Hunters come to investigate, blow their brains out, then head down to the red gate along the right-hand side of the building.
This guard hut sequence is nearly impossible to get through without taking severe damage, due to the way that you'll need to get up close to your targets to enter the shotgun's effective range. It also doesn't help that the game manages to pick targets based on their threat to you, rather than their proximity; you can expect to get taken down once or twice because you targeted the shotgunner in the rear rather than the pistol-packing hunter right next to you.
As soon as the cutscene that shows the Hunters running towards the guard hut ends, sprint over to the cardboard boxes at the head of the little cul-de-sac. Use your shotgun to put down the pistol-wielding foes who take up positions inside the guard hut and behind your cardboard boxes. You may need to try and dash out to grab one of their pistols before you can get the shotgunner behind the car; he's too far away to hit reliably with your shotgun. If you have to stick with the shotgun, though, dash in towards whatever the Smileys are hiding behind and get close before taking your shots. Keep in mind that you have three sets of painkillers to use here: one all the way on the other side of the factory (cut back to the entrance, then head the other way to find this one); one near the corner that leads to the guard hut; and one behind the guard hut itself. You can take a few rounds without having to worry about preserving your health.
Part 2
After you've run that little gauntlet, flip the switch in the guard hut. Getting the Gruesome Execution here is tricky, but for once luck would have it that it comes directly after a save spot. When you hit the stairs leading up to the factory's loading bay, you'll hear the tension music start, so flip to your shotgun, manually aim at the top of the stairs, then blast the Hunter that comes running out. This will attract two more cholos, so retreat into the shadows and lure them over with noise before decapitating one of them with your boomstick. If you're lucky, the other one will be far enough away to let you grab the first's bat without a problem; if this isn't the case, run around for a bit and return when you're out of harm's way. When you have the bat, find a hiding spot, lure the second Hunter over, and get your red execution when he walks back to his post. All of this obviously isn't a quick method of getting a kill, but it is a fairly easy one, and in a safe spot to boot; if you're trying to get this mission in under ten minutes, you may have to bring your bat into the building and sneak up on one of the Hunters there. Otherwise, switch back to the shotgun and head back to the factory. If you've been banged up, there's yet another set of painkillers behind the stairs to the loading dock.
Before you head in, though, you can get a couple of cheap kills at the entrance. Begin by using your revolver to shoot at the wooden crate below the blue propane cylinder (not at the cylinder itself). This noise should bring a couple of chumps in from the next room; they won't quite reach the source of the sound, however, as they stop immediately inside the loading bay. Now shoot the propane tank to blow them both to kingdom come.
The next room in the factory possesses a broken lift. You're going to need to head into the tunnels underneath the floor to fix it; said tunnels are predictably overrun with Hunters. Note that, while most of the floor panels are filled in with bulletproof glass, the one in the middle of the room is open, giving you a bit of an opportunity to fire downwards at the Hunters as they walk their routes. Try to clear out of a couple of them before heading down. You may also want to walk down the steps, fire a shot off, then retreat back up to the main level and get your headshots as the guards walk towards the entrance. If you do have to do your killing in the tunnels themselves, keep your finger on the L1 button and aim down hallways before you turn the corner. You can also rap on walls to draw the hunters in, then send them to the morgue as they come around the bend. There is one Smiley near the switch itself, packing a shotgun, so watch your corners as you hit the rear of the tunnel.
Part 3
After the lift is activated, get your shotgun out and blow away the Hunter who'll appear on the balcony that you pass. Save your game and walk the walkways; another Hunter may appear back on that very same balcony as you walk, so take out your revolver and get a manually-aimed headshot, then hide before the other Hunters track you down.
There are three more gang members on the upper level of the walkways; two at the bottom of a flight of stairs and one off to the left of where you come around the corner. There's no really good way to take these guys without getting shot; the best method is to just rush the Smiley on the left, get a headshot with your shotgun when you're in range, then keep running around the walkway and jump over the hole that leads below. If you hide behind the boxes here, you can dart out and blast the other two Hunters with your revolver. There's another Smiley that will take potshots at you with his shotgun from across the room; he's likely out of range, so ignore him and drop into the hole.
If you didn't kill the cholo on the balcony earlier, he'll be here now to mess up your life, along with two Smileys in the opposite corridor. Crossfires are no fun, but the Smileys won't be able to get a good shot at you with their shotguns, so concentrate on the cholo before hugging the wall next to the door and popping out to blast the Smileys. The door at the end of this corridor will be locked, so ride the lift up, kill the last Smiley, and save.
Part 4
If you've been having fun so far, then this next little sequence will be right up your alley. Grab the painkillers in the air ducts if you need them, but bust out through the left-hand vents. (You can break the vents by shooting at them, or using your fists.) Drop down, then head into the next room and waste the two Hunters there. Two more Hunters are out in the hallway, one of whom is hiding behind an overturned vending machine; use your revolver when he pops out to shoot you. The control room is through the door to the left; shotgun the Smiley and flip the switch to unlock the doors on the lower floor. This triggers the arrival of two more Hunters, who'll come charging up the stairs. The bodies outside may distract them, so shoot off a round or two inside the control room to get their attention, and get your headshots when they come through the door.
The last Hunters of the level are down below. You can actually use your triangle button to hug the railing of the stairs here; do so until you're around halfway down, then use your revolver to tag the two Hunters near the door. The final Smiley can be taken down with a shotgun blast from close range as you round the stairs.
For some odd reason, the doors nearby lead you right back to where you began the level, effectively meaning that the entire purpose of this scene was to kill everyone within the factory. One wonders how Starkweather deals with these levels of self-inflicted turnover.
Mouth of Madness
Time Limit: 20 MinutesRed Executions: 10
Total Kills: 23
Part 1
You are, yet again, stripped of your weaponry as you begin this level, so your first task is to find something to kill with. A wire immediately behind your starting point will do nicely; grab it, then flip the switch next to the EST room to give the prisoner a little jolt. This'll bring a Fug, as the Smileys in the asylum generally refer to themselves, back to where you are; get your first red-arrow execution, and pick up his head to use as a lure.
When you're past the mesh door, hide in one of the shadowy rooms nearby and tap on the wall to bring another Lunatic or two to your position. Hopefully only one will be drawn; if not, try to split them up with the lure before getting your executions. It's difficult to find hiding spots if you rile them, though, so stay out of sight.
The courtyard beyond houses as many as four Hunters, but you should've managed to lure and execute at least one of them. If they see you, they'll lock the door leading to the Greenhouse; it'll open again after they lose sight of you, so don't worry overmuch about this little complication. If you're looking to get more executions, you can tap on the wall before the courtyard to drag each Hunter back to the padded cells, one by one. Even if you get two at a time, you can wait until they both turn yellow on your radar and pick off the tailer.
The final Hunter in the courtyard is perched on a walkway above the door, and can't be lured down to the courtyard's surface. He's got a revolver, so you should probably just ignore him for now, and sneak around the courtyard's right side until you reach the door. If he spots you, just hide in the little corner near the door; you won't be in shadows, but it won't matter, since he'll run to the steps and stop, well out of sight. After he loses sight of you for a few seconds, the door will unlock (you'll spot the light turn green), and you can run through it to the save point without a care. If you wish to try to get another execution, you can try to get his attention, then run into the shadows at the bottom of the stairs, but these shadows are very easy to accidentally step out of. If you do try for an execution, best to save your game first.
Part 2
The Greenhouse area is guarded by six more crazies, all of whom pack revolvers. You'll need to divide and conquer if you want to get your red executions here; if you're just trying to survive, execute one, grab his Revolver, then blow away the rest. 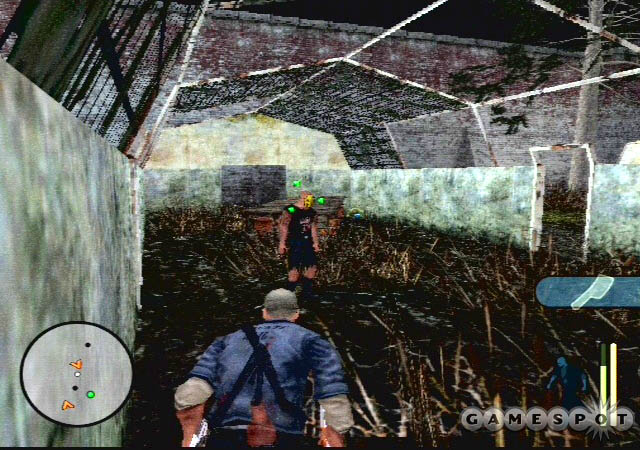
Two of the Lunatics run routes that take them near the right end of the Greenhouses (from the perspective of the previous courtyard); These should be your first targets. If you can't follow them on their routes, hide in the shadows along the far wall and lure them out with sound; you should be far enough away to avoid rousing the attention of the other Lunatics at the far end of the Greenhouses. From there, the Greenhouse farthest from the door that led you here is a good spot to lure Hunters; hide in the shadows within, tap a wall, and use your lures to get them in position for a kill. The final Hunter guarding the door is nearly impossible to lure out; best just to get behind a pillar and blow him away.
The entrance to the watchtower that you saw in the opening sequence has been bricked up. You'll need to use the fuel in the second greenhouse to destroy the doorway, but first, head around the corner from the Greenhouses and eliminate the Hunter positioned behind the cardboard boxes. Again, he's tough to lure, so just use your revolver, then head back and grab the fuel, as well as one of the wires if you don't already have one. Drop the fuel by the bricks, manually aim at it with your revolver, and voila, you'll have one spanking-new door.
All the commotion will bring a Lunatic out, so wire him for another execution; if he starts heading back towards the Greenhouse, you'll know he's going to be walking a bit, so get your red arrows when that lucky event occurs. From there, sprint up to the top of the tower, shut down the power to the gate on the first floor, then sprint back down to save.
Part 3
To use precise scientific terminology, there's a whole stew of Hunters in the hospital that lies beyond the next gate, two of which have routes that lead directly to the door. Two more will come running if alerted by the first two, and there are more on the floor above who will come if they hear an alarm from within the first floor, and so on. Obviously, executions will be difficult here, but if you can get one, you can get a lot; it's all a matter of timing, with a healthy dose of luck thrown in. You may have to tap on the walls to get these fellows to appear on your radar, but don't worry: they don't seem to come through the doors leading outside very often, and when they do, they'll usually walk straight through the guard tower, giving you plenty of time to get behind them and get an execution. If you spot the two nearest Hunters walking away from each other, you can sneak in and get your first kill, then run like hell before you get mown down by a shotgun. From there, you can pick off the rest of the crazies with the same method. If you want to make things easier, use your revolver to kill the first Hunter or two, then execute the rest. It's going to be difficult to get a 100% execution rate in here due to the density of the Lunatics, but it isn't beyond question. Use your shadow spots to lure them in; the incinerator-like apparatus on the first floor, directly to the right of the door, is a great spot, since there are plenty of Hunters within earshot.
When you're ready to move on, take either of the stairs leading to the second floor; both lead to the same room. Depending on how successful you've been in luring enemies, you may have three or four Hunters to deal with here, but your new light handgun should have plenty of ammo by now. You can hide in the surgery bays that line the room, and even make a complete circuit to the far door, if you wish to maneuver around a nutjob on patrol.
Proceed through another surgery ward to reach a door with an exit sign above it. This leads onto the roof, whereupon two cleaver-wielding loonies and the guard dwell. If you're still looking to pad your execution score, you can get a headshot on one of the melee Hunters here, use his cleaver to kill his friend, and then sneak up on the guard by rotating around the right side of the guard tower to get another Gruesome kill. Otherwise, let your 9mm make a persuasive argument for the relative merits of the death penalty. When you're done killing, grab the guard's body and drag it over to the warden's office to end the level.
Doing Time
Time Limit: 15 MinutesRed Executions: 5
Total Kills: 18
Part 1
This little prison level starts out with a return to the basics of the game. The cellblocks here have plenty of hiding spots; the long corridors that run behind the cells will be prime killing grounds. Starkweather has another one of his patented twists, though; you'll need to perform the kind of kills that he requests, rather than just go through an endless succession of red executions.
Well, ok, they'll mostly be red anyway, but still: it's the thought that counts. Grab the hammer near where you begin, and suddenly, hallelujah – it's raining mental patients. Three of them appear at first, so get your red and yellow executions, and don't forget to pick up one of the bricks that scatter the area to use as a lure. The best place to get your kills will, again, be in one of the long grey corridors. Get a Hunter's attention, then chuck the lure as far as you can down the hallway when they come to investigate. You'll have plenty of time to get up into the red zone if necessary.
After you get the first two executions, another Hunter, this one with a bat, will drop down into the cellblock. Track him down and grab his weapon, then use it to get two more red and yellow executions. After all this is finished, the next area will be unlocked; if you're looking to ensure that you've hit your gore quotient for the level, go ahead and whack any remaining Hunters, otherwise, get to the save point.
Part 2
Be quick on your toes when you exit from the menu after saving; a Hunter with a revolver will be coming down the stairs. He'll take up a position in the save room while his friend starts patrolling the cell block; sneak up behind him and take him out, then switch your hammer for his weapon. Use your baseball bat to execute the other Hunter that came down, but watch out: there are more Hunters on the top floor who may try to take potshots at you.
When you're ready to go upstairs, proceed slowly and quietly. You might want to throw a lure up the stairs to bring down the closest guards, then get your headshots in when they turn their backs. After the first group of Hunters are dead, the upper floor becomes a game of reverse whack-a-mole, where you're the mole, and you're trying to avoid getting hit by ducking back undercover as soon as you get a shot off. Hide behind the beds and mattresses, then pop out to kill the next Hunter, dash to the next bed, and repeat. You'll probably want to advance up the right side of the upper level, then switch over to the left before taking on the two Hunters in the corner.
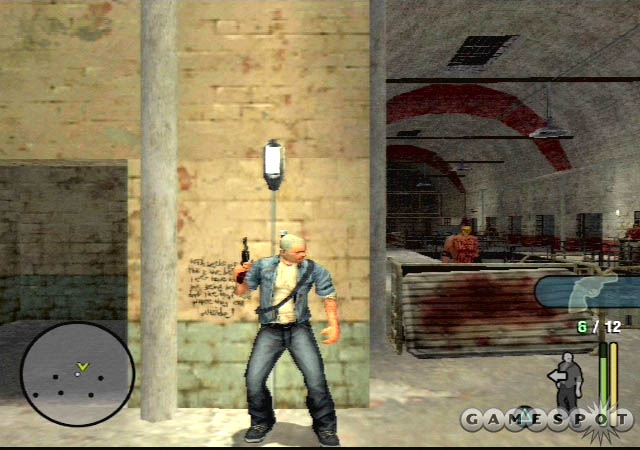
Getting around the corner itself can be a pain, since the Fug immediately closest to it wields a pump-action shotgun, and at close range, it'll likely kill you in one hit. If you sidle up to the wall just before him and L1 your way around, you should be able to get a headshot in before he can react, especially if he's at yellow alert. Move around to his position and cap the other Hunter here in the head. Move quickly, though; the ammo from the two Hunters in the corner will disappear if you take too long. There's a bottle of painkillers in the cell next to the pump-action Hunter, so don't be afraid to stick your head out.
After you grab the ammo, hide behind the overturned desk where the last revolver loonie was stationed, and pop out to kill the last two Hunters up here. These guys are mobile, so you'll have to hit them as they move, but you should be well within range for lock-on. After you take them out, head down to the showers to end the level.
Kill The Rabbit
Time Limit: 20 MinutesRed Executions: 1
Total Kills: 45
Part 1
This is another shooting gallery level; it's a bit more fun than the previous excursions into gunplay games, not least of which is because you finally have some decent firepower at your disposal. If you held over your shotgun from the last level, you'll begin with it; if not, you'll be able to pick one up right away. Switch out your red weapon for it, pick up the shells, then back into one of the corners or into a cell and get your headshots on the first four Hunters that are coming for you. The next three targets are back in the showers; none of these guys have firearms, so they should all be easy kills. When you're in the clear, search the showers for more shells, then pull the switch in the locker room to open up the path to the next area.
When you head through the doorway here, you can expect your first shot to bring on another torrent of enemies, including a couple with revolvers and at least one with a shotgun. You're best off retreating back to the cells and hiding yourself in one of them, then picking off the Hunters as they come looking for you. You'll almost definitely take some damage here, but you do have two sets of painkillers in the cells to use in case of emergency. When the tide has stemmed, you'll have an opportunity to get your first and only required execution. Grab a blue weapon from one of the fallen loonies, then head back to the corridor you just unlocked, taking the first door on your right. At the back of this little morgue is a hallway that leads around to flank the guard Hunter. You'll have to sneak out when he's right next to the door, however, so be prepared to run like the dickens if he spots you. If you wait until he's on the far side of the hallway, though, you should be able to walk out of the doorway and get your kill without a problem.
The next challenge is another shotgunner who guards over the watch room. This guy, unlike most stationary guards in the game, can be lured away from his post with relative ease, so if you still have your execution weapon, you can use a brick or bottle to get him into position for a gore kill. You'll probably need to lure him anyway, as he has good line of sight over the entire approach and will get a shot off if you just try and sneak up on him. Head upstairs and hit the save point; you can also grab some more shotgun ammo here. Avoid hitting the boxes if you're near 56 shells in reserve, though; you can't carry more than that, so anything left in a box you pick up will be wasted.
Part 2
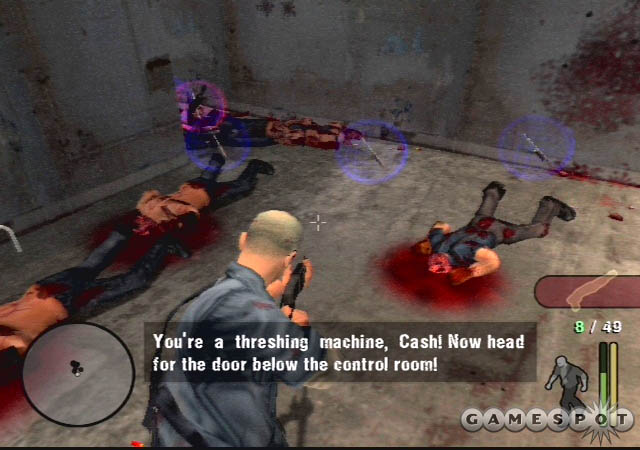
After the save, a few more waves of mental patients will be released from the cells in the cellblock you just passed. Most of them will be knife-wielders; a couple carry shotguns. Stick close to the left wall before the stairs, and let them come up and around before you get your headshots. Whatever you do, though, don't try to go downstairs before you're done with the killing; the knife users will charge in and start slicing you, and you won't be able to use your shotgun at such close range. When everyone's dead, head back downstairs and get the next save spot. (If the painkillers in the control room weren't enough to top you off, you can retreat into the cellblock and grab some from one of the now-unlocked cells.)
Part 3
Two more Fugs will be near the stairs leading to the next level, and another pair await above. Get used to the idea that Hunters will be around every corner, even if you tap on the walls every few feet; many of these appearances are scripted, meaning that the Hunters physically aren't in the level until you hit a certain spot that tells the game to spawn them in, meaning that they can't be lured out of position, meaning that you'll just have to suck it up and walk around until they pop out and come looking for you. You'll just have to think on your feet and keep yourself in L1 aiming mode as much as possible. Luckily, you should still have two or three bottles of painkillers waiting for you in the last cellblock, should you need to backtrack. There are two more bottles through the first door on your right as you reach this last area, and yet another pair through the double doors at the end of the first hallway (alongside a pretty cheap scare). You may have a few dozen bullets in your brain at this point, but as long as you keep yourself doped up, you should be good to go.
The workshop awaits you when the reach the end of the corridor. At first glance, all appears placid: the White Rabbit stands alone in the middle of a big, empty room; tables are scattered here and there; all is quiet. There's just no way this is a trap, right? Right? Hey, guess what! It's a trap! (If you need more ammo before this next segment, you can flip the red switch in the rear of the Workshop to open the door to the Armory nearby. Unless you've been going really crazy, though, you should be at or near your max capacity.) Starkweather, after seeing you kill perhaps 250 men all by yourself, apparently thinks that four shotgunners will be enough to finish you off for good. Show him his error of judgment by popping caps at his horsemen. You should be able to get these guys without a problem by running behind one of the pillars or tables in the middle of the room before darting out and firing. A table is perhaps the best choice, as it's difficult to accurately hit the hiding zone on a pillar without exposing yourself to fire. At any rate, kill kill kill, then grab one of the bodies and dump it onto the Security Zone in the back corner of the room to unlock the door leading out.
Part 4
The White Rabbit leads you out to a prison yard, where massive numbers of cardboard boxes have been stacked for what we're sure is a very good reason. The three black figures lurking about down here aren't more loonies, mind; they're Starkweather's special forces, members of the Cerberus gang. These are the fellows who've been beating the crap out of you in between every level, so get your payback by grabbing some cover and using your shotgun to put them all six feet under.

The White Rabbit and another Cerberus await you at the top of the watch tower here, so oblige them by reaching the top floor and killing them both. You'll spot six more soldiers entering the courtyard through the gate near the trucks; by sheer coincidence, that's the number of bullets in the Sniper Rifle that the Cerberus just dropped! You'll also find plenty more ammo scattered around the top of the watchtower, but, regrettably, the grunts below aren't going to sit around letting you pick them off; they'll charge the tower one by one, with more reinforcements coming in to replace those who are lost. It's best to take up a position above the stairs and cap the first few idiots with your shotgun, then run down in-between soldiers, kill any that remain in the courtyard, and hit the exit to end the level.
Divided They Fall
Time Limit: 25 MinutesRed Executions: 8
Total Kills: 30
Part 1
Buckle down, Cash; this is going to be one of the longest and most difficult levels of those you've seen so far. The 25-minute time limit is five minutes more than any previous level, but you'll still need to get your kills rapidly if you want to complete the mission under it.
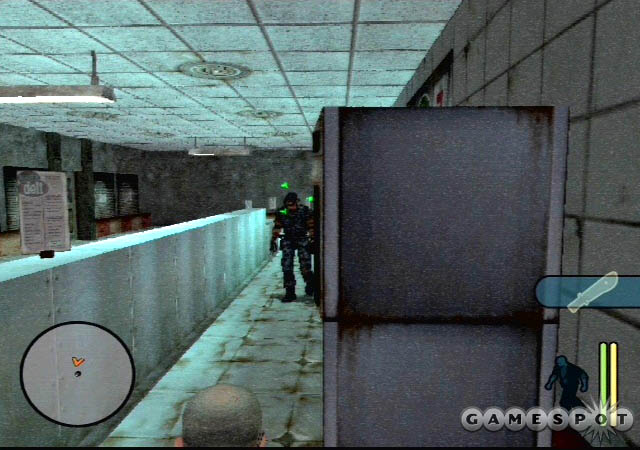
From your starting position, grab the wire and backtrack down the stairs behind you. Cross the little alleyway here, heading up the stairs, then run through the building, taking a left to enter the deli. There's a shadow spot to the left of the entrance that's perfect for luring Hunters; the three that you start out against will be spread fairly thin, so it shouldn't be difficult to lure them in with sound or visual clues and execute them. Make sure you hide the bodies in the shadow before you bring in the next victim, and don't forget to throw the heads in an out-of-the-way spot if you can afford the noise.
Three more Wardogs will pop up after you take down the first three, but each of these will have shotguns. The same routine will work, however, except that you'll be more likely to attract multiple Hunters when you make your lure-noise. Make another stack of bodies before infiltrating the apartment complex. Whatever you do, don't wander too far away from the yellow side of the courtyard; if you stand atop the blue wall, you're going to get picked off by a sniper within a few seconds. Just hug the wall until you reach the recessed wall of the courtyard.
Now, as you near the door, you'll note that the two Hunters inside go on red alert; just hang back and don't head around the corner until you see them ease up. The one nearest you will actually turn around; hug the wall and use the L1 button to make this the shortest day of the end of his life. Afterwards, you can either wait for the other Wardog to cool out before moving, or just run across the hallway right away. The other Wardog can actually be executed, if you approach through the furniture room and flank him from the left. It looks like he'll spot you as you come out of the doorway, but as long as he's in the yellow when you make your move, you should be able to get another red kill before hitting the save spot up the stairs.
Part 2
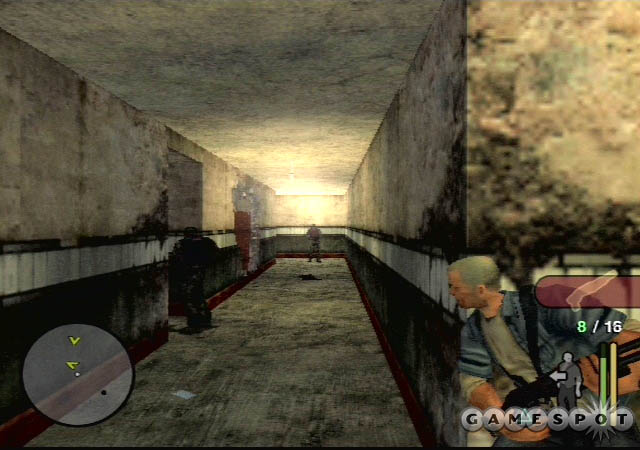
Two more Wardogs spawn upstairs, so hide in the shadows at the bottom of the flight that the save point's on and lure them down. Even when these guys are on red alert, they'll often walk a route that leads them back upstairs, leaving you plenty of time to stalk them and get a couple more executions. The quota for the level is eight; if you've killed everyone it's possible to kill thus far, you should have nine, plus one gunshot death. Thus, it's finally time to put that shotgun to good use.
Another Hunter stands guard at the top of the stairs that lead to the third floor. He's well within range of your weapon, so sidle up to the wall and lean out to bring him down; he may try to hide behind the corner upstairs, so use your left analog stick to peek around and spot him when he's not under cover. The next three Hunters all seem to have gotten the short end of the weapon-selection stick, as they all wield machetes. Do what you do best; you can even get some more executions on these guys if you wish.
On the fourth and fifth floors, you'll have to deal with more route-running shotgun Hunters, four of them in total. By now, the utility of the recessed doorways should be quite clear, but just to be sure: hide there, use your own shotgun when you have a solo enemy passing by, then run to another one and check your profile to make sure it's not flashing. Repeat.
When you reach the top floor, you'll hit a little snag in your search-and-destroy plan: Ramirez has gotten behind you, and is escaping through the lower floors of the building. You'll only have a short period of time before Ramirez will be able to call for help, so you'll have to sprint down to the bottom floor, killing off two Hunters per level, and then exit the building before taking on Ramirez and two more Wardogs outside. The Wardogs are easily dealt with, but Mr. Beret can take a ton of punishment. Luckily, he's not the world's best shot, so get behind the burnt-out car, lean out, and unload a couple dozen shells into his rear. If you're having trouble killing him this way, you can backtrack up to the top floor of the building and use the sniper rifle to take him out. After that, there's one more Hunter to kill before you reach the gate (at the far end of the yard, past the deli), and the end of the level.
Press Coverage
Time Limit: 25 MinutesRed Executions: 4
Total Kills: 28
Part 1
Ah, great, another escort mission. You know the drill by know; use your triangle button to stash the reporter away back in the shadows, then do all the killing on your lonesome. There is, as always, another twist here: if you get too far away from the reporter, she'll "freak out" and come looking for you. You'll get a warning when this is about to occur, and you'll have twenty seconds to return to her position, so it's nothing major to worry about, but keep it in the back of your mind as you proceed. Unfortunately, Cash seems to have managed to lose all of the weapons he had in the last mission; presumably they're mixed in with the stacks of Cosmo on the back seat of the reporter's car.
To begin with, then, park the journalist into one of the shadows near where you start, then grab the crowbar and start up the machine in the ditch. This will attract one of the nearby cops, letting you get an easy kill; you can pick up his baton if you want to see novel new ways of bludgeoning people. The second cop should keep his back to you while you skulk up behind him, but watch out for any sudden turn-arounds. This cop will drop either a baton or, if you're lucky, a revolver. Get the gun if that's your fortune; in either case, move on.
Five more coppers are patrolling the street outside the reporter's apartment building. If you don't have a revolver yet, you'll need to lure one of the cops away from the rest with a visual clue, hide inside some shadows near the construction site, then lure him the rest of the way in with the soda can. Grab your gun and start picking off the rest of his friends; the best way to do this is to lure them around the corner from the apartment building, then hide behind the dumpster next to the wall, peeking out only when they're in range of a headshot. Just make sure you position the reporter close by; the cops can and will blow her away if they spot her.
Part 2
The journalist (whom apparently Rockstar couldn't be bothered to name) has the keys to her building, so let her unlock it. If you want a bit of a weaponry upgrade, you can track down one of the crowbars and use it to pry open the police van across the street; a heavy handgun awaits.
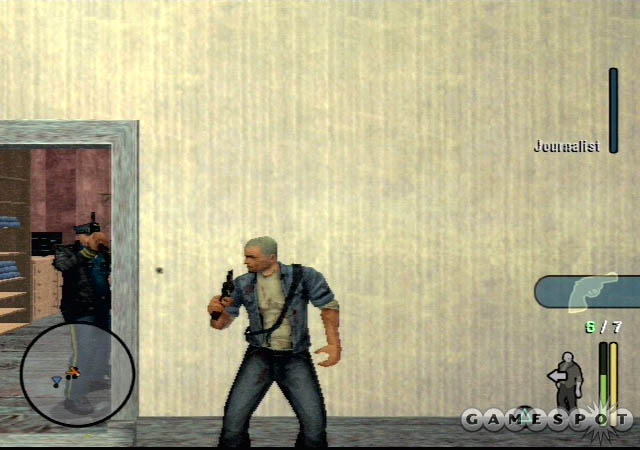
By now, you should be getting used to the notion that cramped corridors = plenty of enemies, and, by our unofficial calculations, a "crapload" of police officers await you on the second floor of the building. There are a half-dozen or so, packing revolvers and shotguns, and they won't be lured by sound, for the most part, excepting the two that patrol the hallways. When you reach the reporter's apartment, you may need to try darting in far enough for them to see you, then retreating to the hallway and hiding behind the wall of the corridor. Whatever you do, cover your corners as you head past the two doors; one of the shotgunners is positioned just inside the left-hand side door inside the apartment.
After you guide the journalist back to her living quarters, Cash will, in a rather pleasant surprise, kick her to the curb, so to speak, and tell her to book it back to her car and get out of town. Congratulations are in order: you've lost your ball and chain and can go about the rest of the level as you see fit.
Part 3
The rough sequence of events for the rest of the level is as follows: first, kill the two cops that are walking down the alleyway. Take note of the sniper taking up a position on the casino balcony, then sneak up the right side of the lane, using the trucks for cover.
There are yet more cops inside the casino, presumably to prevent just this sort of felonious incursion; God forbid you should steal a few chips in the middle of your death campaign. The doors here will prevent you from getting easy shots on your targets, but most of them will congregate in the hallway at the back of the first floor, giving you a good, concentrated group of enemies to go after with your shotgun. The sniper himself can be snuck up on easily and taken down with a red execution.
There's no rest for the wicked, however, as another horde of cops will come storming into the building as soon as you off the sniper. One of them will take up a position outside and unload an infinite stream of shotgun rounds at the balcony, so you won't be able to hide there; far better to retreat into the casino and make your stand as the bad boys come up the stairs.
When you've cleaned house, and taken out the trigger-happy cop outside, you'll need to get to the subway around the corner. There are two ways to proceed here. First, you can be sneaky, and duck into the treed courtyard to the left of the police trucks. From there, you'll hop from the mattress down into the alley, walk up to the roof, take out the sniper, and use his rifle to off the shotgun cops outside the subway entrance. You can expect to take a bit of return fire with this method, though. The second (and easier) method is to just grab the sniper rifle from the sniper in the casino, walk past the trucks, use the rifle on the three cops outside the subway, then get a headshot on the second sniper, before heading down into the sewers to finish off the mission.
Wrong Side of The Tracks
Time Limit: 7 MinutesRed Executions: 0
Total Kills: 26
Part 1
The first thing to do here is to stop. Don't head down the subway steps any further than you've already gone; the two cops here will spot you before they head to their routes, and you're better off just waiting for them to get complacent before killing them off. When you're ready to get your kills, you can either stand up against the subway stair wall and peek out, or make your way into the corridor nearby and make sounds to draw their attention. Either way, only two of them will come running, even though there are three on your radar; the stationary fellow is positioned inside the tunnel, and will drop you nearly instantly with his submachine gun if he spots you. Better to eliminate the first two dopes, then sneak through the doorway near where he is. When you have an angle into the corridor, bounce a lure off the wall so that it lands on the side of the cop away from you; when he turns around to investigate, paint the walls red and get his SMG. Shoot the lock off of the door and head out.
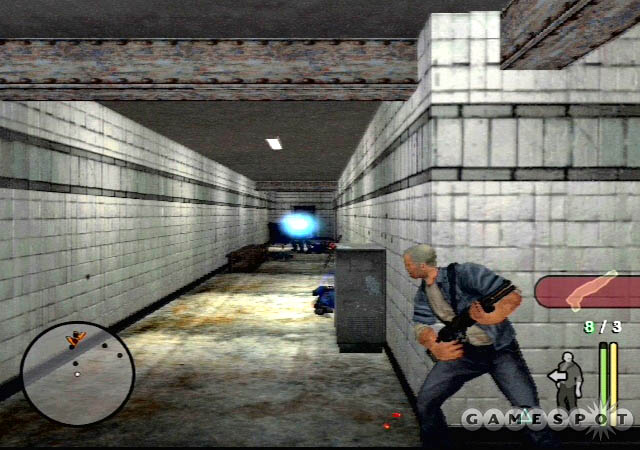
Part 2
The save point that you saw in the cutscene is available if you take the leftmost of the three tunnels here; you can either sprint to it if you're trying to get under the time limit, or just walk if you're attempting to avoid noise. The point is directly outside the power control facility that you need to reach in order to restore electricity to the subway train, so save your game and head inside. There are a few entrances; the closest one will occasionally see a SWAT member pop out of it, so watch your radar as you approach it. The second door, beyond the save spot, is locked, so you'll need to shoot the lock off if you want to get through, which obviously alerts the guards. The advantage is that this entrance places you directly next to the control room, where the electricity switch is, but whether you flip the switch now or later is immaterial; you're still going to wind up having to kill the SWAT members, so it's generally best to get it out of the way.
After you restore power, three more shotgun-wielding SWAT members spawn down by the subway car, and will usually begin booking it towards the power control room. If you want to wait for them, you can hide down one of the nearby hallways and bait them with noise when they arrive, or you can start running down the subway tunnel and do the same thing with one of the shadowy cross-passages. Or, if you have some kind of weird pacifistic urge, you can jump over to the farthest tunnel and avoid them entirely. Whichever method you choose, you're going to need to return to the train and hop on to reach the next area.
Part 3
The save point here precedes an encounter with two cops immediately outside the door; both should have their back turned to you for easy kills, but the noise will attract another three or four cops from the upper level, who'll come barreling down the nearby stairs. Luckily, the wall next to the stairs makes for a natural cover spot, so duck behind it and end them as they descend. Another cop is in the coffee kiosk at the head of the stairs. This one has a shotgun, though, and is difficult to get an aim on due to his concealed position. If you switch your SMG out for one of the handguns, though, or already have one in your possession, you can slowly sneak up the stairs, clicking on the right analog stick for manual aim when you spot the top of his head. What follows should be obvious.
Another scripted event is triggered when you pass through the exit stalls to the left of the kiosk; two more cops come running, and will home in on your position. If you want to gain a bit of an edge, you should just tap the exit bars so that they open; you should hear the tension music swell up, and you can duck back into the kiosk and pop the cops as they come running through their own exit stalls. One more shotgun cop awaits you as pass through the exit for real; duck behind one of the pillars before getting your kill.
The next cop isn't as easy as the rest of these fellows were. He's hiding behind a hotdog stand at the top of the next stairs, doesn't respond to bait or lures, and has a shotgun with which he covers the entire flight leading to him. If you don't have much health left, you may have to head back to your last save, because the only way to really deal with this guy is to rush him, get within shotgun range, and unload a round or two at his head. If you're really feeling lucky, you can try to use one of the light handguns and get another headshot, but you'll have to be pretty far back down the stairs if you don't want to get filled with lead yourself. Luckily, though, you can afford to go for broke, as he's the last guardian of the level's exit.
Trained To Kill
Time Limit: 20 MinutesRed Executions: 4
Total Kills: 27
Part 1
You'll grab some wire right after you start the level, and immediately come upon a cop facing away from you. Hold off until you see his partner walking away from the truck before taking him out, then stash his body down the steps so that it doesn't alert anyone. As for the other cop here, you can either shoot him (which will bring another cop running), take him down with an execution weapon you still have on you (doubtful, considering the last mission), or grab the other wire in the far corner of this little parking lot and use that to get an execution. It's a relatively easy matter to learn his route around the truck, grab the wire, then lure him over with a single tap before accomplishing the silent kill. Take note of the items in the back of the trucks here; there's a lure and painkillers, either of which you can return for when you come across a crowbar later on.
After you've taken down these two (or perhaps three) cops, you'll need to deal with the guard waiting for you in the tunnel nearby. Kill him; if you haven't made much sound yet, the other cop will come looking for you, so off him as well. Pick up one of their revolvers and use it to take down the officer waiting downstairs; you can lean up against the interior corner of the stairwell here to get your shots in.
There's a SWAT member patrolling the area to your right; he'll be an execution later on, but for now, take the first tunnel to your left and get the baseball bat. Hide in the shadows here and tap a few times to make the cop nearby come running; he'll be on alert, but he'll only have one way to walk when he starts looking for you, so get another full-gore kill when he turns his back. Head downstairs to get the SMG ammo if you're still carrying that weapon.
The SWAT member can be taken out without a problem, if you can get on his tail. He walks from left to right when passing through the archway, and from right to left when walking back outside, so hang a right from the doorway and track him down before executing him. He has an SMG, on top of some painkillers, so if you're looking for a nice weapon for your blue slot, you can pair this up with the ammo clip found in the downstairs portion of the terminal. There's also a crowbar in one of the alleyways here; if you're in desperate need of even more health, you can retreat back to the police vans and pry them open to get patched up. At any rate, trade your baseball bat back in for the shotgun, if you haven't used up all of its bullets; it'll help immensely during this next little firefight.
When you reach the locked gate back near where the SWAT guy was patrolling, shoot off the lock; at least three cops will be alerted. If you hide behind the blue shipping container, you should have an excellent shot at them with the SMG from long range; if they start to slip through the gate, flip over to your shotgun (learn the number of button presses this requires before you start shooting) and get your close-up kill.
Part 2
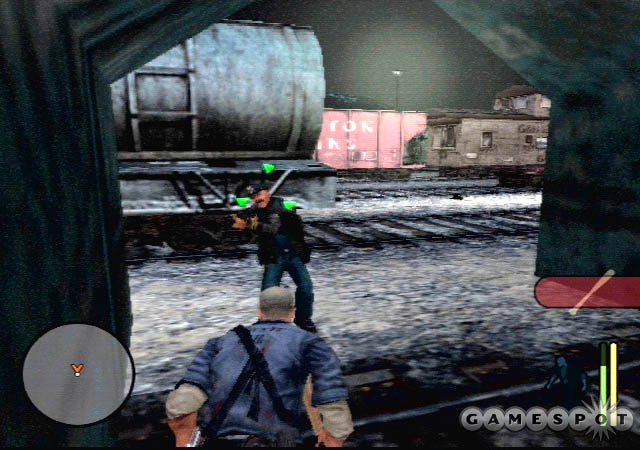
Now, if you've obtained the four possible executions thus far, you should be over the limit needed for the full style point bonus, which is a good thing, because the gravel in the trainyard makes it impossible to sneak up on people. There are plenty of trains which you can use for cover, so feel free to lure people towards you and blow them away.
In this first section of the trainyard, there are two cars that you can actually enter; one immediately to the right of the gate, where a few of the cops here will be hanging out, and another one across the yard. Each has painkillers, which will probably be important, and the one near the gate has a little murder hole you can use to take down the cops near the entrance to the next section of the yard. You can kill both of these guys fairly easily by shooting the blue top of the propane tank that they're squatting next to. Brilliant tacticians, they. Of course, any such noise near the gate, even a gunshot, will open the floodgates, sending in a whole bunch of policemen with revolvers and shotguns. The angle at which the gate is open makes it difficult to defend that particular position, so you may want to retreat a bit, get behind a normal train, and lean out to get your kills. After the stack of dead is a half-dozen high or so, you should be able to proceed without worry.
Part 3
The next save point is visible from this gate, but you won't be able to reach it without first popping off a few more cops. The ladder leading up to it is on the right side of the train; after you save, you can jump to the next car by running at the edge. No special button presses are needed; just hit the run button and you'll jump automatically. Drop down through the opening in the third car here, grab the sniper rifle, and head into the other nearby train to pick up some SMG ammo if you still have one. Afterwards, head back up the ladder and jump over to the next section of the trainyard.
The SWAT team makes their re-appearance here, so whip out your sniper rifle and take down the one patrolling the first little area you land in. Two or three more SWAT members are along one of the corridors to your left, so repeat the headshot process on them, then grab their SMGs, hide behind the small metal block near the bodies, make some noise, and cut down the rest of the SWAT team when they come to investigate. After you pick up the crowbar and pry your way through the red gate here, a short, odd cutscene ensues, ending the level.
Border Patrol
Time Limit: 20 MinutesRed Executions: 10
Total Kills: 20
Part 1
So, to recap, Starkweather wanted you dead, so he sent the Cerberus after you at the end of the asylum level. Then, he decided to send the Carcer City police to do the job. Then, when the SWAT team had finally surrounded you, he had the Cerberus kill all of them and capture you alive. And now that the Cerberus soldiers have taken you to his compound, they're going to kill you. This all makes perfect sense.
As soon as you open the door here, via the switch on the wall, a Cerberus will come running in, so make sure you've picked up the wire in the room before you do so. Execute the bastard and take his gun; normally he'll turn his back to you for a few seconds, but if he spots you, just quit out and start the level over. After you go outside, head around to the back of the garage and grab the crowbar; you're going to be able to get a few executions on the next group of Cerberus if you play your cards right. In point of fact, if you're looking to get three stars on this level, it's best to just hold on to the crowbar until you reach the end. If you're going for the fun-and-gun, though, pick up the heavy pistols and feel free to blast away.
There are three more Hunters beyond the next gate, and all will come running if any of them spot you. Try tapping on the far end of the garage to draw one of them in, get an execution, then make some noise on the other end, near the switch, to lure in the other two. If you do draw in all three, try hiding inside the garage. The close quarters will force them to split off into tangents, meaning that when they go yellow, one will usually lag behind the others on their way back to their posts, allowing you to get your execution. If you have to run, hide in the shadows behind the garage, but watch out for the trash here; if you start sneaking behind a Cerberus, a single misstep could alert your target and end your quest for vengeance right quick. If you're having trouble getting executions, you can, of course, grab one of the heavy pistols and use it to get headshots. It's best to keep the crowbar for now, but if you're not worried about time, you can pick up one of the heavy handguns from the Hunters and compile all of the ammo into one weapon, then drop it, just in case you need it later on. This will prevent it from disappearing.
Another Cerberus is guarding the gate at the top of the nearby hill; you can either grab the glass shard in the left watchpost, then skirt around to the right side of the yard, or just bring up the crowbar. Either way, you'll get an easy execution and a shotgun. Shoot or pry the lock off the gate and move on.
Two more Cerberus (Cerberuses? Cerberi?) are on patrol in this little statuary. Another glass shard is available behind the statue on the hill, but you'll probably have a tough time getting to it. If you insist on trying, though, you can dash from tree shadow to tree shadow along the left side of the courtyard, then run to the shadows of the statue when the nearest soldier has turned his back. Even if you grab the silent kill weapon, you should still kill off one of the soldiers with a headshot before getting your execution on his comrade, just to avoid any possibility of a sudden sighting. If, on the other hand, you still have the crowbar, you can get a couple of easy kills by tapping on the trees and waiting until the Cerberus is very, very close before going into your execution animation.
Part 2
It's finally time to put your weapons to the test. There are five soldiers in the little hedge area beyond the save point, but you'll need to make them spawn in before you can kill them, so walk along, taking the first left, until you start seeing yellow dots on the edge of your radar, then retreat back to the edge of the hedge that came just before the save point. This is where you'll make your stand; if you haven't used up any bullets on the shotgun yet, you should have nine rounds for it. If you have any less than that, you'll probably want to retreat and pick up the heavy handgun you dropped earlier. 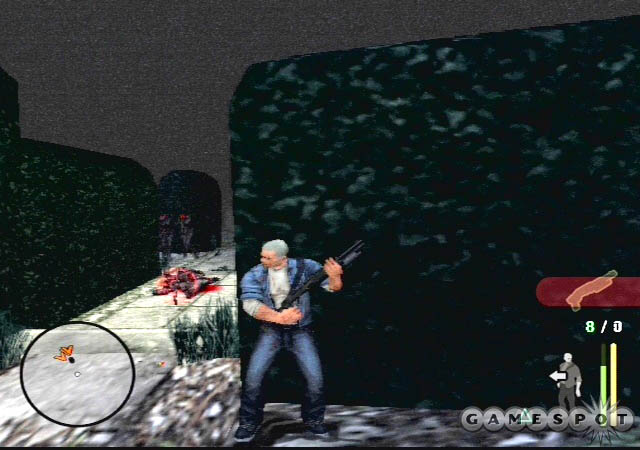
The passage to the north of your position now is the one that's covered by the sniper, so you won't be able to pass through. You can eliminate a few of the guards up there, though, by passing close enough to get within visual range of them, then luring them back into the same little deathtrap that their comrades fell for. You can even use the shotgun that you dropped to off them, to preserve the ammo for your assault rifle. There should be three in all; any you kill now won't be around to trouble you later.
In order to reach the mansion here, you're going to have to pass through a hedge maze off to the left of the last save point. The first entrance is clear, but the second entrance will let you get another full red execution if you approach it correctly. The guard here is positioned in such a way that you can't just walk up behind him; he's facing the right wall of this little passage, so you'll need to approach him by walking along the left wall before coming down the stairs and getting the kill. He doesn't move about without provocation, though, so as long as you can approach him quietly, you can nab an easy kill. If you don't have any execution weapons, you can backtrack a bit and grab a glass shard near the choke point where you slaughtered all of the soldiers earlier.
Part 3
The hedge maze past this guard is a charnel house. You can't get executions due to the noise you make as you pass through, so you'll just have to pick a spot and gun down all of the Hunters as they approach you. So, make a little noise, and don't be shy about using your assault rifle; it will kill any soldier in less than a second, even with body shots. Six Cerberus will come gunning for you after you make your first sounds. After they're all dead, you should switch over to the shotgun if you're almost out of ammo for your rifle; don't forget to grab the weapon from the guard that you executed near the gate.
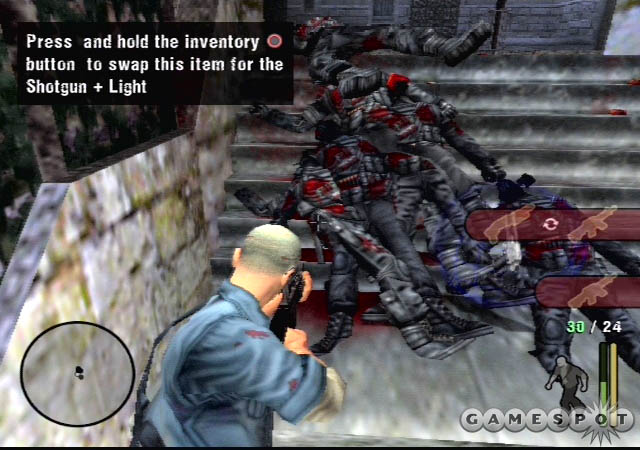
Now, the exit from the hedge maze to the mansion exterior is either going to be quiet or very, very noisy. If you manage to avoid alerting any of the mansion guards, then you can infiltrate the mansion without a sound, but will be restricted in the noise that you can make for the rest of the level. If you have a decent amount of health, it's generally better to get the guards alerted, then make your stand at the bottom of the stairs. With a single gunshot at the top, you can rile up at least a dozen soldiers who'll come running; if you use your shotgun, you should be able to get single-shot kills after they hit the middle platform of the steps. Better still, if a soldier hits the stairs while running, he'll jump to the middle platform and pause for a moment to regain his footing, giving you the perfect opportunity for a kill. After all of these guys are dead, you should find almost two full clips of assault rifle ammo.
The sniper is still visible off to the right of the stairs, so avoid walking too far down that way; instead, head into the little corridor near the steps, hide in the shadows, and make a tap to attract the Cerberus who's on patrol before executing him. There are a few more Cerberus in the area; see who you can attract by tapping on the wall in the stairwell nearby. You can get more executions as they head upstairs or back down the hallway after they leave, since either route is essentially a straight line, but make sure they don't spot you in their peripheral vision as they round the corner to the stairs. When you run out of targets, or are just ready to move on, head up the stairs and take out the sniper, then repeat the process with the second sniper further down the building. You can pick up the sniper rifles that they drop and use them to pop any remaining Soldiers below, but keep your assault rifle close at hand in case any of them should reach the stairwell and come up to prowl around. Now that you've cleared out the front area of the mansion, you can freely walk down the outside sidewalk until you reach the back alley leading to the side entrance to the mansion.
Key Personnel
Time Limit: 20 MinutesRed Executions: 7
Total Kills: 29
Part 1
The opening cutscene here will outline your basic goals for this level: first, you need to find and kill the Cerberus commander who has the key to the elevator; second, you need to head to the basement and turn the elevator engine back on. Note that the door you pop out of at the beginning of the level can be opened; down the stairs here is a lure, a couple of painkillers, and a sickle. Grab this latter weapon if you don't still have the crowbar. Also note that the Cerberus commander begins the level on the first floor; if you kill too many soldiers here, he'll move up to a more secure location on the second floor. If you want to head for him first, start moving to the right of the start point and try to avoid enemy contact before heading into the bar, which the billiards room is connected to; for the purposes of this walk-through, we're going to assume that you're looking to kill everything that breathes.
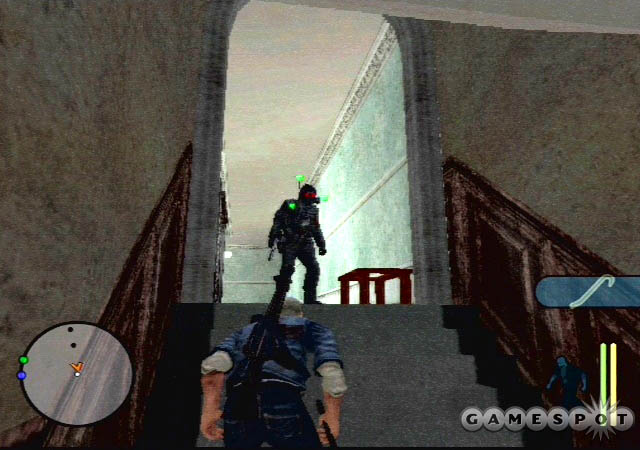
First off, though, you'll need to start clearing out the Cerberus that populate the lower level here. There's a perfect spot to do this around the corner to the left of your starting position; in a rather weird architectural decision, the mansion was built with a corridor with a flight of stairs at its end, leading nowhere. You can hide in the shadows down here and tap on the wall to bring the Cerberus running; they won't investigate in the shadows, so you'll get easy executions as they turn around and walk back down the hallway. To start out, two soldiers roam the hallways, but a third will likely come running if you shoot the security camera near where you began the level. Another Cerberus is inside the library, which you can access through the double doors near the hiding spot. He won't budge from his spot until you actually get close to him, so run into the room, move until your radar center is underneath his icon, and then you should be able to lure him back to the killzone, just like his friends. After the first few soldiers are dead, you can lure the rest back with gunshots and taps on the wall; if you need a silent kill weapon, you can hit the painting next to the doors here to create a glass shard. Past the library is a small nexus of hallways, one of which has another security cam. Shooting this one will alert a few more guards, whom you can draw back to the earlier killzone if you wish. Also note that the entrance to the library steps behind you has another pair of shadow zones; these make for good execution spots, especially if the Cerberus fracture into small groups to investigate sounds. Execute or shoot everyone you attract here, then move into the carpeted living room off to the left and bang on the wall next to the corridor that leads to the dining room to bring more guards. Your execution count should be going through the roof; you only need seven for your full style point bonus, so don't hesitate to whip out your assault rifle and start gunning down any soldiers that approach you. When you clear out the dining room, find the staircases to the balcony above and grab the ammo box for the assault rifle.

Now that you've slaughtered most of the Cerberus units that are on normal patrol, it's time to take out the commander's bodyguards. There's another security camera in a hallway near the dining room, so shoot it, then sidle up against the corner here and make some noise to create another flood of Cerberus. Eight or nine will start coming through the doorways, so kill them all, grab some painkillers from the dining room or bar, then save your game in the foyer, checking the area for visible soldiers first.
Part 2
The Cerberus commander is almost directly above your save point, but you'll have to kill yet more soldiers to open your path. These guys are somewhat shy about responding to taps on the wall, so you should probably just whip out your pistol and get them to come downstairs in response to your gunfire. The same corner that you turned into an abattoir early can be used to take down these guys; whatever you do, don't head upstairs until you've eliminated as many of these guys as you can possibly lure away. There aren't any objects to hide behind between the stairs and the security office, where the commander is holed up, and you won't survive more than a second or so if someone gets a lock on to you with an assault rifle.
El capitan won't leave the office until you've shot down every single one of his bodyguards; he then exits the room and comes to investigate. The amount of damage he can take would surely seem to propel him into the lower ranks of the demigods; if you don't get close enough to get a headshot, he'll soak up around 20 rounds from your assault rifle. He'll be stunlocked while this is going on, of course, and won't be able to fire back, so fire away! Grab the key from his corpse, and raid the security office's ammo supply for good measure, then head into the surveillance office and deactivate the security cameras by flipping the switch on the side of the monitor bank.
Return to the ground floor and find the exit to the well-lit corridor, across from where you originally entered the foyer. You'll need to enter the stairwell here to get the guards' attention, most likely; when you do, retreat back to the foyer and sidle up against the wall to get your kills. (The wall in the hallway has one of those odd, curved endings that exposes you when you're right up against the edge.) One more guard awaits you in the elevator power room downstairs, at the rear of the little block through the door. You can't lure him out, so kick the door in and blow him away. Grab some painkillers from the room off to your left, save the game, and hit the elevator power switch.
Part 3
As always, the save point next to a trigger, in this case the switch, indicates the sudden presence of critical threats; in this instance, five more Cerberus units appear. It's possible to lure as many as four of them down into the basement, and you should do so by firing off a few rounds. It's important not to hide on either side of the door here; you don't have enough distance to prevent the soldiers from getting instantaneous luck kills with their assault rifles. It's far better to retreat to one of the two nearby corners and use that as your redoubt. After you lure down the four, head back upstairs and kill the remaining soldier on patrol near the elevator. Grab any remaining ammo from the security office and take the elevator upstairs. It's finally payback time.
Deliverance
Time Limit: 15 MinutesRed Executions: 0
Total Kills: 6
Part 1
In true Texas fashion, you'll need to deal with a slightly – well, more than slightly – deranged chainsaw killer before you can take down Starkweather himself. Piggsy's weapon will kill you in three hits on Fetish mode, so you'll have to both tread softly to avoid alerting him, and run like the dickens to get the hell away from him when he's on your tail. To make matters worse, Cash has, yet again, somehow managed to lose all of the weapons that he was carrying, so you'll begin this level naked, in terms of armament. You'll need to track down the three silent kill weapons in this little apartment block to even hurt Piggsy.
Before you even begin actually trying to beat the level, though, it'll probably help to start and restart the level a few times to get a feel for the layout; Piggsy's living quarters are a mess of broken walls and same-looking rooms, and it's very easy to get lost or lose your bearings, and if you make a wrong turn while the swine is on your tail, you're going to be ground chuck before you know it. What's more, Piggsy's entrance is scripted, so that he'll pop out in front of you and start chasing you when you make your way down one of the hallways after the mission starts. There is, however, a way to avoid this, and avoid it you should.
The hallway in which you begin the mission branches out after you take the first left, leading to a room on the left, a hallway on the right, and an extension of the hallway stretching out in front of you. If you head down any of these for long enough, Piggsy will, as mentioned, pop out and start chasing you. The inability to quickly turn around will usually give him a free shot at you. If, however, you run down the hallway in front of you, and into the doorway just before the next corridor, then stop running, Piggsy's health meter will appear, but he shouldn't have spotted or heard you, meaning that he'll start running his patrol route without giving chase. Whether he's heard you or not, though, you'll want to proceed through the graffiti'ed hall nearby, taking a right into the room with the stairs. From there, head back out into the hallway and grab the weapon in the recess to your left.
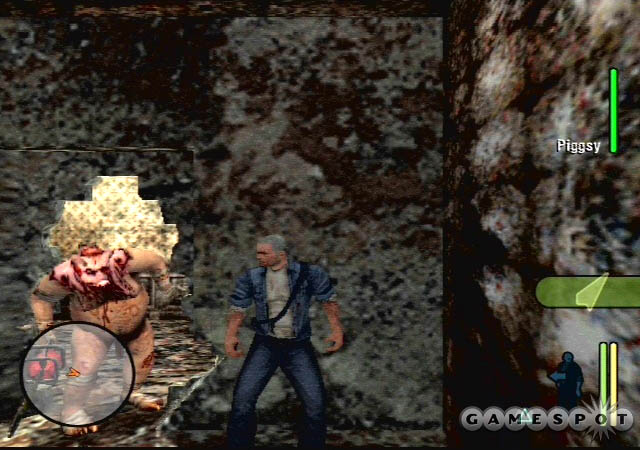
Now that you have one weapon, you can take a bit of health off of Piggsy. He's immune to actual executions, so you can't kill him outright, but on the plus side, you won't have to hold down the execution button when he has his back turned. Before you start luring him in, though, you'll want to move down the hallway across from the stairs, take a right, and enter the second padded cell here; you should spot another weapon within. Sidle up to the wall immediately next to the entrance and tap on the concrete to get Piggsy's attention; you'll be in the dark, so he won't spot you when he comes calling, but you'll have an easy opportunity to stab him in the back when he turns. Grab the Wooden Shard and repeat the process to bring him down to one-half of his life bar.
After Piggsy's gone and given you a bit of breathing room, exit the cell and head to your left, going up the bloody steps into a bedroom. There are painkillers in the bathroom here, if you need them, as well as another weapon. The corner of this room is shadowed sufficiently enough to let you lure the pig-man back in and get the final back-stab before he runs off and up the stairs.
You'll find him (it?) hunkered down in a blackened room at the top of the steps. If you get close enough, he'll run off and up the stairwell that you encountered in the last mission, and hide in the corner next to the door leading to Starkweather's sanctum sanctorum. Grab one of the bricks nearby, then follow him up, but stand on the other side of the grate in the middle of the floor when you reach him. You can probably see where this is headed…. Sure enough, you're going to need to use the brick to grab Piggsy's attention (use the L1 button to lock on to him before throwing), then lure him over the grate, which will begin to break before he runs back downstairs. Chase him, but be prepared to run back up the steps as soon as you hear his chainsaw, because he'll regain his courage and decide that yes, he really does want to kill you after all. After you reach the top of the stairs and lure him onto the grate one more time, a cutscene occurs, in which Cash gives Piggsy a lollipop and cake before sternly warning him about the dangers of using power tools without adult supervision and sending him home to his mother. No, really; that's what happens. Honest!
Part 2
Now that you have Piggsy's chainsaw, use it on Starkweather's door to trigger the next event: five Cerberus come running after you, all of whom have assault rifles. After you regain control of Cash, turn off the chainsaw's motor with the square button, then run through the black chimney room and down the ramp on the other side before ducking into the little hidey-hole on the left. Three of the soldiers will run past you; you'll need to lure one back to you for an execution (your chainsaw doesn't have to be on to get an execution, mind you), then grab his rifle and use it to take down his comrades. The last two Cerberus will likely remain up near Starkweather's door; you can lure one of them by hiding behind the pillar in Piggsy's blackened room, tapping, then blowing him away when he comes to investigate. Kill the final one by stepping slowly up the stairs, then blowing his head off with a manually-aimed shot as soon as you see it pop up from the view through the grate.
Starkweather himself lies through the locked door at the top of the stairs. You'll need to retrieve the chainsaw and cut through the door to gain access to Mr. Nasty, so do so. The Director is something of an anticlimax as an end boss; he packs a revolver, but will run away from you if you get within chopping distance, so sneak around the outside perimeter of the room, with the chainsaw's motor turned off, until you get close enough to get your shot in. Lock onto him with the L1 button, and then just hold down the X button while you run after him. He's only capable of taking a half-second's worth of chainsawing, so as soon as you're within range, the fight is essentially over. Sic semper tyrannis.
Bonus levels
Bonus levels are unlocked by getting three or more stars on a number of missions. Hard as Nails is unlocked after you get three stars on missions one through five, Brawl Game is unlocked after you get three stars on missions six through ten, and so on. Each mission can be found at the end of the scene selection menu.
Hard as Nails
Hard as Nails pits you, with a nailgun, against a steadily increasing number of enemies. You start off with two unarmed Hoods on your tail; after you take them down, three more will pop into the level, then four, then five, and so on. There are three boxes of ammo that will respawn with each wave of enemies, giving you a total of thirty possible nails for each round. Since you will eventually face waves of ten or more Hoods, and each Hunter can take three nails to the head before they die, the math dictates that you won't last forever, no matter how adept you are at avoiding damage. Maximizing your kill count will still require you to grab each box of ammo during each wave of enemies, however. 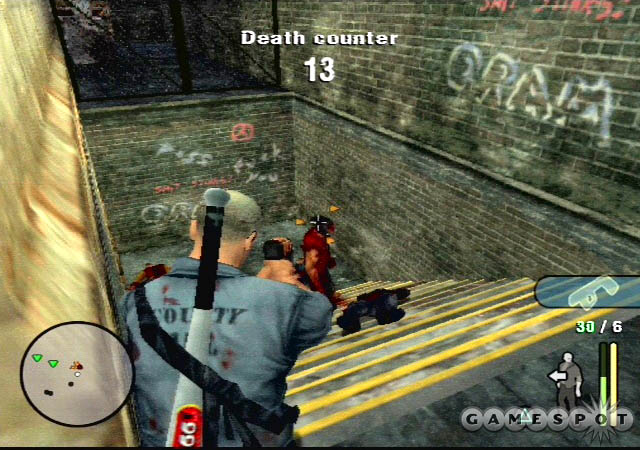
There aren't many viable defensive positions here, but the best spot in which to rack up kills is in the alleyway, at the head of the stairs. If you back up against the wall at the top of the stairs and lean around, you should be able to get clean headshots at the Hoods as they attempt to rush you. The enemy AI here is slightly modified from the normal levels; the Hunters will back off and attempt to circle you if you brandish your weapon at them, and charge when you're forced to reload. You can use this to your advantage if you lean against the wall; your reloading animation doesn't take very long, so you can start reloading, which will start the Hunters on their path up the stairs, then lean out when you have a fresh clip and take down the Hood nearest to you.
Brawl Game
You'll probably recognize the environs of Brawl Game: it's set in the basketball court from the first level of the game where, fittingly, you learned how to lock on to opponents and throw punches. Now, however, the court is locked off, preventing you from escaping the half-dozen gang members within. On the bright side, the gang members aren't all coming after you; they're divided into pairs, and each pair will form its own team, which will try to kill the members of the other squads. What this means is that five of the six gang members will generally be fighting each other, leaving a single Hunter to concentrate on you. New bad guys will respawn as old ones die.The basic strategy for staying alive here is to turn the court into your own personal lap track, using the fire barrels in each corner as your markers. Just sprint from corner to corner, avoiding the big brawl that will usually gravitate to one end of the court, and try to keep ahead of the Hunter who'll pursue you. You will, of course, run out of stamina eventually, after which the gang member on your tail will start to catch up. You can use the aforementioned barrels as makeshift barriers; if he's right on your ass, rub up against the barrel as you turn the corner and he will probably hit it, losing momentum and giving you another few seconds of relative safety. That's really all there is to it; whatever you do, avoid getting into fistfights, as these guys will grapple you at every opportunity and suck your health away quite rapidly. Some health loss is unavoidable, as the Hunters will hit you in the back when you run out of stamina, but you will get a bottle of painkillers after every tenth gang member buys the farm.
Monkey See, Monkey Die!
Part 1
MSMD is the longest of the bonus missions, as it plays out like a regular scene, in that you travel from a fixed starting point to a fixed ending point, with survival your only goal. You're not going up against any regular gang, however; in this instance, you'll be fighting off the terrible forces of the Monkey Horde. They don't have prehensile tails, but they do pack double-barrel shotguns. Come to think of it, so do you; this will restrict your effective range quite a bit until you can upgrade your weaponry. To start the level off, three Monkeys spawn in and come running down the ramp in the middle of the mall. Duck behind the planter that you find yourself near, then time your shots so that they fall between those of the Monkeys. This becomes easier after you take down your first target; no matter what, though, keep in mind that they'll duck to reload after their second shot, so you'll have to fire after their first if you don't want to waste your ammo.
After the three Monkeys are dead, grab the ammo from the two near you and proceed slowly up the ramp. Two more Monkeys will appear on your radar, so lean up against the wall and strafe up the ramp until Cash is forced to kneel to remain under cover. The far Monkey will probably spot you, but shouldn't be able to shoot, so pop out and take down his friend, then run up the ramp and hide behind the planter. Take down the second Monkey, then move around the corner to the nearest planter.
Yet another pair of Monkeys will arrive shortly thereafter, but these Monkeys are roamers, and they'll probably come looking for you if you tap on the planter or otherwise give away your position. The two-shot capacity of your shotgun makes waiting for them a precarious game; best to lean out and take your potshots and hope you take at least one of them down. If they do close in on you, wait until they're within headshot range before attempting to lean out, and don't forget that your shotgun can discharge both rounds nearly instantly. If you do accidentally hit a Monkey in the guts, it's best to have two shots to unload, just to insure that he actually goes down.
Anyway, after the last two shotgun Monkeys are dead, walk up a bit to spawn in the next wave, then retreat back to the planter you were just hiding behind. Make some noise to lure in the apes, then walk out into the open so that they see you; these guys have machetes and thus aren't very likely to be much of a threat, so long as you wait until you see your aiming reticule go to their heads before you fire.
The last two Monkeys inside the mall have a tough defensive position behind a barrier nearby. You can try to take these guys head on, but reaching the planter across the way from them is a tall order. It's better to skirt the wall to the right, run up and over the little hop until you reach the ramp area, then repeat the process of sliding along the ramp's wall until Cash kneels. From there, you can get an easy kill on the closest Monkey, and have a decent chance of injuring the far Monkey. After they're both dead, you can leave the mall area; if you need painkillers, retreat to the other side of the mall and shoot the lock off of the metal door.
Part 2
There isn't a save point here, but it seems like a logical place to split up this little level description, since the shark's mouth will take you back outside to the main zoo area. You'll need to walk down the road a bit, preferably backwards, to trigger the next scripted event, which will spawn in a whole gang of apes, two of which will chase you with machetes. Run back to the doorway before turning around and headshotting them.
You'll have three more shotgun foes lying in wait for you near the planters around the corner. You can deal with the first one by sprinting across into the shadowy corridor, then getting up against the wall and leaning out for the kill. From there, you'll need to run to his planter to get the second one. The third Monkey will be nearly impossible to get a clean leaning shot on; it's best to strafe from the soda machine to get a shot off, then charge towards his planter when he ducks down to reload. You shouldn't be hurting for ammo yet, so lean up against the wall near the ramp and move as far as you can to the right before leaning out and killing the somewhat distant simian near the Monkey cages.
After jumping the ramp and heading left, you'll eventually run into another machete Monkey who acts as a precursor to a whole stew of simian soldiers that guard the pump-action shotgun near the blue building. The first one is a relatively easy kill, but the remaining three will probably require a bit of tomfoolishness in terms of picking your cover spots. You'll almost surely need to round the corner before offing the ape behind the dumpster, for instance, and the following two will likely require you to sprint to the triangular stone structure before popping out and finishing them. If you have a lot of ammo, you can try to take them down from further away, but you will miss quite often. The metal door here prevents you from accessing the pump-action shotgun, so blow the lock off, but do it from far away: another machete-wielding foe will pop out and come running for you after you've cleared the way. Grab a headshot, then run in, pick up the shotgun, and come back out. The two apes you saw on the camera both have pump-actions of their own, but your increased range with the new weapon should help you survive the encounter easily.
Part 3
There are two Monkeys inside the Monkey cages; at least, there are two that show up on your radar. It's best to deal with the one on the scaffolding before you go inside, so take a right before the door and follow the cage around until you reach the sign with the arrow painted on it; if you hide behind this and aim, you should be able to get a lock on the ape, so keep squeezing off rounds until he falls. Another Monkey is nearby, but he's very difficult to aim at from here, so return back to the side entrance and head through that way. Ease yourself in, if possible, until you get a reticule over the second Monkey, then take him down. Two more Monkeys with machetes will appear nearby, so kill them as well.
As you exit the cages, another wave of Monkeys appear, running with knives. You'll want to back up a ways and give yourself plenty of space over which to kill them, but kill them you must. Two more shotguns wait outside the small brown building which your family member was held in during the Strapped For Cash mission. As you head through the window, watch the boards to your right: somewhat predictably, a Monkey will appear and take potshots at you through the space between them. It's best to retreat back through the wall, then aim your shotgun at the window through the gate off to the side here and pop off a shot to get the Monkey's attention. This will point him towards that window, allowing you to re-enter the building and strafe around the table to get an easy headshot without having to worry about him firing first.
Now that you're so tantalizingly close to the end of the level, the designers are going to give you three more opportunities to screw things up. Walking towards the bathroom will trigger another Monkey appearance; this time, it's a shotgun Monkey who'll start firing as soon as he gets his bearings. Prevent that unfortunate occurrence by firing first. Two more surprise simians will hinder your passageway to the exit door, but hey, you didn't come through all this just to die, did you?
Time 2 Die
This last bonus game takes place in an entirely original setting, so you may have to familiarize yourself with it by playing through a few times. After you know where to run, however, the ten-minute time limit for taking out the Hunters becomes absolutely laughable; it's actually not impossible to cut down all of your foes in less than half that time.The key to remember here is that the Hoods on this level will, by default, run away when they spot you. They won't fight unless they have backup, rendering individual Hoods easy prey. The easiest way to proceed against the Hoods on the lower levels is to find a shadowy spot, tap the wall, and get one or two of them with executions, just to thin the numbers. It's important to remember that the game isn't considering whether the executions are red or not, so just get the quickest kills possible. The rest of the targets can be taken out with flying beatdowns; if you hold down your R1 button to run, then lock on to a target with the L1 button, you can smash them in the head as they attempt to flee with the X button. This results in an automatic knockdown, allowing you to kick them to death while they writhe in agony on the ground, with little chance of damage to yourself.
The entrances to the rooftops, where four more Hoods await, are guarded, except for one. If you can find the fire escape that leads up to the rooftops, avoid them and enter the building adjacent to the ladder via the doors on the ground floor. One of the doors here leads up to a second level, where you can lure down one of the rooftop Hunters and get an execution. Make sure you grab his crowbar. After you reach the rooftops, you can jump from building to building by running towards the edges; you'll complete the jump automatically. The two Hunters off ahead of the exit from the building will usually team up; if both of them get on your butt, you might want to try approaching them from street level and luring them down. None of these guys has the patience to do a hard search after hearing a noise, so it's relatively easy to lure them down and get an execution after they turn yellow.
At any rate, after the rooftops and streets are clear of vermin, you can take your crowbar and return to where you began the level to pry the chains off of the warehouse door. From the entrance, head up and over the wooden ramp to the left, grab the chainsaw, and hide in the shadows across the way while you switch over to it and prime it up. The three Hunters here will be in such close quarters that it's difficult to make them run, but they can only survive a second or so before falling before the mighty might of your mighty blade, and if there was ever a sentence that deserved an exclamation point, this is it! If all three of them start to tagteam you, though, you'll need to run for cover, while picking up one of the painkillers to recover your health.
After every Hunter is dead, you'll be called to enter a red gate near the fire escape that led to the rooftops. Do so and the mission is over.
Cheats
There are several cheat codes that can be entered in at Manhunt's main menu to gain a few special powers. The majority of these are unlocked after you play the game's Hardcore difficulty mode and get five stars on each level, but the God Mode code can be entered after you beat the game on Fetish mode.
God Mode
After you've beaten the game on Fetish difficulty, hold down all of the controller's shoulder buttons to hear a message being played backwards. If you bother to record this message and play it in reverse, you'll hear a bit of a poem, followed by a string of button presses. The buttons won't do anything as they're found, but if you enter them in in reverse at the main menu, you'll activate God Mode. (You'll know the code has gone through because it'll say "God Mode" at the bottom of the screen.) Down, Down, Circle, Up, Square, Triangle, Square, R2, Up, Up, L1, TriangleHardcore Codes
These codes are only usable after you've beaten missions with five stars on Hardcore difficulty. Enter them at the main menu, then go into the level select to play through a mission with them. Runner (Infinite Sprint)
R2, R2, L1, R2, Left, Right, Left, Right
Silence
R1, L1, R2, L1, Right, Left, Left, Left
Regenerate
R2, Right, Circle, R2, L2, Down, Circle, Left
Helium Hunters (High-pitched voices on your enemies)
R1, R1, Triangle, Circle, Square, L2, L1, Down
Fully Equipped
R1, R2, L1, L2, Down, Up, Left, Up
Super Punch
L1, Triangle, Triangle, Triangle, Circle, Circle, Circle, R1
Rabbit Skin
Left, R1, R1, Triangle, R1, R1, Square, L1
Monkey Skin
Square, Square, R2, Down, Triangle, Square, Circle, Down
Invisibility
Square, Square, Square, Down, Square, Down, Circle, Up
Piggsy Skin
Up, Down, Left, Left, R1, R2, L1, L1
Got a news tip or want to contact us directly? Email news@gamespot.com
Join the conversation