How To Safely Deep-Fry a Turkey | Cook's CountryAmerica's Test Kitchen LogoCook's Country LogoCook's Illustrated Logo
America's Test Kitchen LogoCook's Country LogoCook's Illustrated Logo
Guide

How To Deep-Fry a Turkey (Safely!)

Frying is the key to a succulent, juicy turkey. But to avoid danger, you should do your homework first.
By and

Published Oct. 27, 2022.

How To Deep-Fry a Turkey (Safely!)

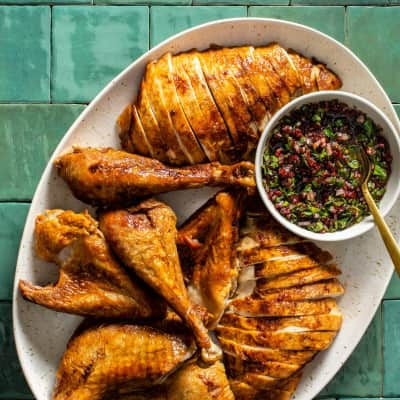
A deep-fried turkey is the crispiest-skinned, juiciest bird you’ll ever eat. But cooking one at home can be daunting.

Deep-fried Thanksgiving turkeys have gotten plenty of bad press, particularly from those earnest home cooks who didn’t do quite enough research before deep frying a whole bird. From disastrous oil splatters to tipping fryers and sky-high oil flames, there’s plenty that can go wrong. 

But that’s why we’re here: to teach you everything you need to know to make your own deep-fried turkey—and keep both your eyebrows intact. Read on for safety tips, the gear you’ll need, the best ways to season the turkey, and lots more.

Jump to a Section

Deep-Fried Turkey

It took dozens of birds to bring you a failproof method that takes the fear out of frying.
Get the Recipe

The Gear You Need to Deep-Fry a Turkey

Here are a few necessary tools you’re going to rely on throughout the deep-frying process. It's important not to skimp here: You want good-quality supplies to ensure that everything goes to plan.

Bayou Classic Stainless Steel 32-Quart Turkey Fryer and Gas One High Pressure Burner

Turkey Fryer

Our favorite fryer is the Bayou Classic Stainless Steel 32-Quart Turkey Fryer and Gas One High Pressure Burner. It delivered a great fried turkey in record time. It also comes with an all-important meat injector that allows you to spread your compound butter throughout the meat of the turkey. (And yes, there are many uses for a turkey fryer besides turkey.)

ChefAlarm® Cooking Alarm Thermometer and Timer

Probe Thermometer

You’ll be using a probe thermometer to temp the thickest part of the bird’s breast to check for doneness. Our preferred model is the ChefAlarm® Cooking Alarm Thermometer and Timer, which will allow you to safely monitor the bird's temperature without needing to pull it out multiple times.

Kidde FA110 Multi Purpose Fire Extinguisher

Fire Extinguisher

It may sound dramatic, but it’s important to have a good fire extinguisher on hand just in case. Make sure you brush up on your chosen model’s instructions before the big day. Our preferred model is the Kidde FA110 Multi Purpose Fire Extinguisher.

Steven Raichlen Best of Barbecue Extra Long Suede Grill Gloves

Grill Gloves

Without even mentioning the danger of spitting and spilling while reaching over a vat of boiling oil, the temperatures that you’ll be dealing with while cooking your turkey are sky-high. According to our Reviews team, the very best gloves are the Steven Raichlen Best of Barbecue Extra Long Suede Grill Gloves.

Safety Tips for Deep-Frying a Turkey

Safety should always be your first priority when deep-frying a turkey. Thanks to the ATK Reviews team’s work on turkey fryers, we’ve developed a few best practices to make sure you’re as safe as possible on the day of the turkey fry. Here are some of the most important. (Read the full list of turkey-frying safety tips that one editor compiled with her local fire department.)

  • Watch the weather

Obviously you’re going to be frying outside, but if you think the weather is threatening rain or snow—even just a little bit—it’s time to get a raincheck. This is why it’s important to have a backup plan for your meal; if you’re frying your turkey for Thanksgiving, maybe ensure that you have a backup protein or centerpiece if the weather is miserable. 

  • Look up

Speaking of your cooking environment, make sure that you’re not going to be deep-frying under a tree or any long branches or an area where floating leaves or debris could plop into the fryer. You should be in a completely clear and flat area, at least 10 feet away from buildings, and away from any pets or children.

  • Check for leaks

Be sure that all connections between the tank and fryer are secure and leak-free. We recommend turning on the fuel supply and applying a half-and-half solution of liquid dish soap and water to the various junctions connecting the propane tank to the burner. If bubbles appear, there’s a leak. Wait about 5 minutes after turning off the gas for the propane to disappear, go back in and make sure all of your connections are secure, and try again.

Sign up for The Thanksgiving Success Series

Be Thanksgiving-ready with the help of the Test Kitchen experts.

  • Don’t overfill the fryer with oil

You’re going to want to know how much oil you need before the frying day. Here's how to find the volume you need:

  1. Put the turkey—frozen is fine—and the turkey rack into the stockpot.
  2. Fill the pot with water until it’s about half an inch over the turkey, keeping track of how much you’ve used as you go.


Make sure that all of the water from inside the tank is dried before the oil is added and the gas is turned on, as the mixture of oil and water could result in spitting and spilling oil.

  • Be aware of the flame

The burner should always be centered under the fryer so that any oil that does manage to dribble out of the pot doesn’t come into contact with the fire as it runs down the side and cause a flame-up.

  • Go slow

As you lower the turkey into the fryer, the oil will bubble vigorously. So go slow as you insert it, and don’t get scared and drop the meat straight in when the oil begins to bubble! The bubbling is completely normal. Also be sure to take the turkey out slowly while temping and at the end of cooking to avoid splashes.

someone lowering a turkey into a fryera turkey being fried

Go slow when lowering the turkey into the fryer—and don't be intimidated by the bubbling oil!

How to Prepare a Turkey for Frying

Juicy meat, crispy skin, loads of flavor. These are the three key elements to a great deep-fried turkey. To achieve all this, you’re going to need to prepare your bird (and yourself). Follow these four steps to prepare your turkey for frying.

1. Start with a fully defrosted turkey: Ensure that your turkey is completely thawed. This is incredibly important, as you want the turkey to be dry when lowered into the oil. Remember, oil and water don’t mix, so submerging a bird with pockets of water (even frozen water!) can be risky. 

someone holding a raw turkey on a cutting board

2. Trim excess fat and skin: You’ll want to make sure that the frying oil can easily flow through the turkey and cook it evenly when submerged. To do this, trim the neck cavity of any excess fat and skin, creating a clear channel through the middle of the bird. 

Trim the skin around the neck cavity.

3. Inject the turkey with flavor: For a burst of buttery, intensely garlicky flavor, play doctor: Inject garlic herb butter into the turkey with a syringe, targeting areas all across the bird’s body for an even distribution of flavorful butter.

Inject garlic herb butter.

4. Season and truss: Flavor, flavor, flavor! To make that crispy fried skin even more delicious, rub the entire exterior of the turkey with a seasoning mix. You’ll also want to bind the legs and wings of the turkey to create a more compact mass that will cook more evenly.

Rub the exterior of the turkey with a seasoning mix.

How to Season a Deep-Fried Turkey

Our Deep-Fried Turkey recipe seasons the turkey in two ways:

1. Injecting the turkey meat with a compound butter

To ensure that the flavor penetrates deep into the bird, we inject an herb-butter into the meat with a syringe, all over the turkey’s body.

2. Rubbing the outside of the turkey with a seasoning mix

To make sure the bird’s skin stays ultracrispy and also very flavorful, a seasoning mix of salt, brown sugar, and pepper is rubbed over the turkey’s entire body before it is refrigerated for 12 to 24 hours, letting the seasoning settle into the skin and bring the turkey’s flavor to life.

Entertaining Made Easy

Cook's Illustrated All-Time Best Holiday Entertaining

In this definitive collection, we've gathered the absolute best dishes (many with make-ahead instructions) for making your next celebration memorable, stress-free, and, above all, delicious.

What Temperature to Use to Deep-Fry a Turkey

In our Deep-Fried Turkey recipe, we call for a relatively low frying temperature of 325 degrees Fahrenheit. Heat the oil over high heat and turn the heat off while adding the turkey. Once the turkey is in the oil, maintain the temperature of the oil between 300 and 315 degrees. 

How Long to Fry a Turkey Per Pound

An average turkey weighs about 15 pounds. In our Deep-Fried Turkey recipe, we recommend frying the turkey for 35 to 50 minutes, meaning that we’re giving about 3 minutes per pound for the bird to cook. If your bird is lighter or heavier, adjust your cooking time accordingly.

Importantly, however, we do not recommend just going by time when you’re cooking meat. Always be sure to use a thermometer to temp the turkey and ensure that it is fully cooked. The turkey is ready when the breast registers 150 degrees. (It will reach around 160 degrees after it rests, thanks to carryover cooking.)

What Temperature a Deep-Fried Turkey Should Be When Done Cooking

The breast meat of a turkey should be 150 degrees when it’s finished cooking, while the thigh will register at around 175 degrees at the correct level of doneness.

Think Beyond Thanksgiving

5 Things You Can Cook In Your Turkey Fryer Besides Turkey

A turkey fryer is a serious investment. What else can you cook in it? A lot.
Read Article

How Long to Rest a Deep-Fried Turkey

After removing your turkey from the deep fryer, set it to rest on a kitchen counter with the probe thermometer still secured to the deepest part of the breast. Let the turkey’s temperature rise to about 160 degrees and then you can remove the thermometer. Let the bird rest for about another 20 minutes after that until it becomes cool enough to handle with bare hands. (No, your turkey won't get cold if you let it rest this long. We ran tests to determine how long turkey stays warm after cooking.)

Then you’re ready to carve and serve.

How to Carve and Serve a Deep-Fried Turkey

Carving a turkey may happen only once or twice a year, but because the cut-up bird is usually on full display you want it to look good. Carving isn’t difficult, but there is a definite way to approach it that will yield nicely portioned slices. The process of carving a fried turkey is no different than carving any other whole turkey.

Sign up for the Cook's Country Dinner Tonight newsletter

10 ingredients. 45 minutes. Quick, easy, and fresh weeknight recipes.

Start with the leg quarters

1. Start with the leg quarters: Remove the kitchen twine used to hold the legs together. Start by slicing the turkey through the skin between the leg and the breast to expose the hip joint. 

Remove the leg quarters

2. Remove the leg quarters: Pull the leg quarters away from the carcass. Separate the joint by gently pressing the leg out to the side and pushing up on the joint. Carefully cut through the joint.

Separate the drumsticks from the thighs

3. Separate the drumsticks from the thighs: Cut through the joint that connects the drumstick to the thigh. Repeat on the second side. Slice the meat off of the drumsticks and thighs, leaving a bit of skin attached to each slice.

Remove the wings

4. Remove the wings: Pull the wings away from the carcass and carefully cut through the joint between the wing and the breast to remove the wings. Cut the wings in half for easier eating.

Remove the breast meat

5. Remove the breast meat: Cut down along 1 side following the curvature of the breastbone, pulling the breast meat away from the bone as you cut. Continue to cut and pry until the breast has been removed.

Slice the breast meat

6. Slice the breast meat: Cut the breast meat crosswise into thin slices for serving.

What To Do with the Leftover Frying Oil

Let the oil cool completely and then use a large liquid measuring cup to ladle it out of the pot and into a funnel placed in the original container you've saved. 

If you want to reuse the oil (and we’ve run tests to prove that you can reuse the oil several times), run it through a fine-mesh strainer lined with cheesecloth. If you don’t want to reuse it, here’s the easiest way to discard the oil.

This is a members' feature.