No matter how great your defenses against airborne noise are, impact noise will still rock your world. As I have explained in many of my past articles, there really aren’t many ways to adequately protect yourself from these vibrations that shake the very structures of our homes. Well, resilient channels are actually one of the most effective solutions to this problem. So today, I’ll answer some of the most common questions about these products and review a few of the best resilient channels on the market.
In the past, I’ve talked about how you can use resilient channels when you’re soundproofing your walls from the inside out. However, you can also use resilient channels on top of your regular drywall to attach another drywall sheet. And, you don’t even have to use them for only your walls. In fact, they can be used to create dropped ceilings as well.
Essentially, resilient channels help you make a room within your room that’s separate from the building structure. So if you want to know where you can get the best resilient channels and how you can install them, I’ll explain all of that in this article. But before I get to that, we should stop and consider what resilient channels even are.
What Are Resilient Channels?
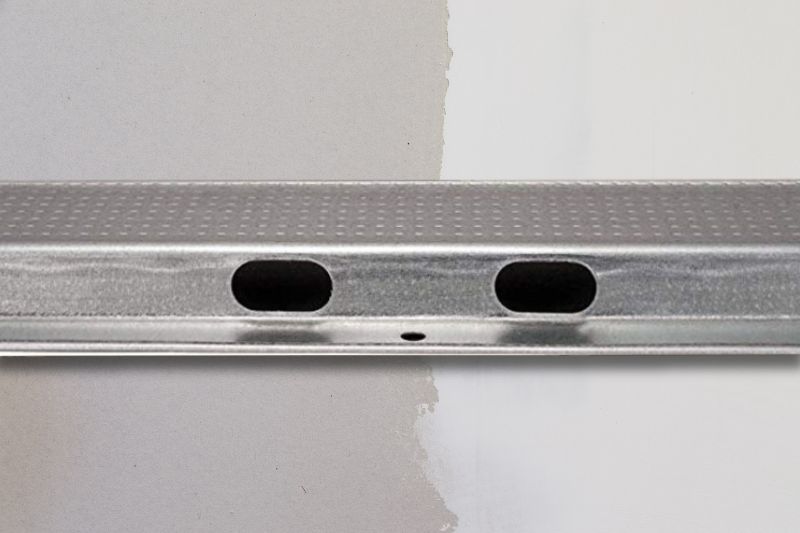
Resilient channels are thin and flexible strips of metal. As I have mentioned, they’re supposed to separate sheets of drywall from the structure of the building.
Screwing drywall directly onto the wall and ceiling studs would cause more transfer of vibrations to get into the room. So rather than doing that, you can attach the resilient channels into the wall or ceiling studs and top them with drywall. Doing this should, in theory, cause a significant decrease in the impact noise that’s getting into the room.
After all, when we’re talking about soundproofing, decoupling is one of the main tools you have under your belt. However, it may be one of the toughest ones to really wrap your head around. I’ve already talked about some of the soundproofing elements we can use in previous articles. You see, there are actually four principles of soundproofing:
- Absorption is achieved with dense and soft materials. It’s the reason why I’m adamant about filling up rooms with soft furniture, and it’s also why acoustic foam works. But as you know, absorbent materials usually only reduce the sound slightly.
- Mass further reduces the sound and, in combination with density, even blocks it. That’s why Mass-Loaded Vinyl is so helpful.
- Damping materials are also very dense, so they serve to reduce vibrations. That is what the Green Glue drywall sandwich technique is all about.
- Decoupling allows you to make gaps in the path sound waves take. We know that wooden building structures and the air are often the main transportation devices of the noise that surrounds us. Therefore, reducing the surfaces the vibration can travel through is very important. Resilient channels allow us to create that pocket of air between the studs and the drywall.
- Decouples drywall layer from the supporting...
- Installation information provided
- Product is used to hang drywall instead of...
- For best sound isolation, Auralex recommends...
Do They Work?
Well, if resilient channels weren’t effective, I wouldn’t be recommending them. However, I believe that it’s important to know the capabilities of the soundproofing materials I suggest here.
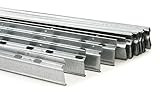
So, resilient channels come in two shapes. When most people talk about resilient channels, they mean the single leg ones. But, there are also double leg channels as well as hat channels.
Actually, although double leg channels are similar in shape to hat channels, there’s one main difference between the two. Namely, single and double leg channels have pre-drilled holes for you to screw them into the studs, while hat channels rely on sound clips to hold them.
In fact, many people consider the hat channel and sound clip technique to be superior to using resilient channels. But I’ll tell you all about that in a minute. You’ll even be able to see what all of these products look like when I review them later in this article. For now, let’s stick to resilient channels.
So now we know that resilient channels are screwed directly into the wooden studs, while hat channels are just slipped into sound clips. Between the two types of resilient channels, though, you could have a single row of screws or two parallel rows.
Therefore, the single leg channel would be more unstable, taking the brunt of the impact vibrations. But if you don’t want to have that type of unstable connection between the interior drywall and the solid wood structure of the room, you might want to look into double leg resilient channels. Or, you might even consider the other resilient decoupling method: sound clips and hat channels.
Resilient Channels vs. Hat Channels and Sound Clips
While resilient channels are meant to be attached directly onto the studs, sound clips provide an added checkpoint the vibrations need to pass before reaching the hat channel. As I have mentioned, many people believe the sound clips and hat channels method to be a more effective decoupling solution than resilient channels. Is there any truth to that? In a word: yes. However, even having resilient channels will result in a significant noise reduction.
Adding Green Glue between two sheets of drywall on top of that would increase the method’s soundproofing efficacy even more. Using clips and hat channels would add even more points to your setup. Finally, building staggered studs is a great way to reduce the noise. Or, if you don’t want to make your walls from scratch, you can just add another layer of studs to attach the resilient channels to.
Whatever route you decide to go, the fact is that resilient channels would decrease the level of noise audibly. You’d actually be able to hear the difference between a room with no decoupling and one with either resilient channels or sound clips and hat channels.
However, despite the claims that sound clips are much more effective than resilient channels, I can’t say that you’d be able to hear a noticeable difference between the two methods. So ultimately, this is one place where you get to pick the technique you’ll want to implement.

Sizes of Resilient Channels
When you’re shopping for resilient channels, you might want to pay attention to their sizes. That’s actually where you’ll see a significant difference between the single leg and double leg channels and hat channels.
Single and double leg resilient channels are only about half an inch deep. So that’s about the distance you’ll have between the studs and the drywall.
On the other hand, hat channels are usually about an inch deep. That extra space may result in even less noise getting through to your room. However, even if you only use the shallow resilient channels, you can always add more soundproofing measures over your walls when you’re done.
Most of this type of product I’ve seen is about 8 feet long. That should be long enough to cover a wall or a ceiling. However, if you need to, you can also snip off a channel at the stud and splice another channel on top of it to get more length.
Where to Buy
Now, where can you find all of these products, if you wanted to install them in your home?
Well, I suppose your first stop might be the local hardware or home improvement stores. However, in my experience, you’d have a much larger scope of products available online.
I understand that many people still have their doubts about online shopping platforms. However, as long as you’re shopping on safe sites, like Amazon, that have reliable delivery times and customer service representatives, you’ll be just fine.
Besides, I prefer to do most of my shopping online because it gives me a clear view of what I’m getting. All of the dimensions of the products are in the description, and let me tell you — user reviews pull no punches.
Some of the Best Resilient Channels
Believe it or not, many of the resilient channels on the market are pretty much the same thing. They’re all made of 25 gauge steel and have about the same look. And, as I have said, there are single and double leg channels, there’s not much other variety here.
Additionally, resilient channels are often made by the same companies that make other acoustic materials. So if you’ve been following my articles, you may recognize some of these names. For example, Auralex Acoustics — the manufacturer of one of the insulations I’ve recently written about — also makes excellent resilient channels.
This Auralex 25 gauge metal resilient channel comes in packs of 24. Each channel is 8 feet long, but you can trim the excess with metal scissors and splice in another channel, as I have mentioned. But this isn’t the only single leg channel out there.
")
In fact, Trademark Soundproofing — a company you might know as the manufacturer of MLV — also came out with their own channel. Their single leg channels are also 8 feet long, but they come in a pack of 32. They’re more affordable than the previous product, but there are also fewer reviews on them, so make of that what you will.
Personally, I’d stick to these resilient channels, if only because I know the companies who make them. However, there are other resilient channel manufacturers that sell their products over their own sites. Still, I’m more inclined to trust retailers like Amazon.
As it turns out, even though hat channels and double leg channels are essentially the same things, the former is much easier to get your hands on. I haven’t been able to find any double leg resilient channels. But now that I’ve mentioned hat channels, I also wanted to show you what those look like as well.
Options for Sound Clips and Hat Channels
If you looked at sound clips and hat channels on studs, you might not be able to tell the difference between them and resilient channels. So I’ll also link to a few of these products so you can see how they work.
There are two clips that come highly recommended. The Noiseproofing Whisper Clips are actually made by Green Glue. They come in packs of 10 clips, and they can hold standard 25 gauge channels.

The other sound clips I’ve found are the Resilmount ones that also come in packs of 10. You can see a clear difference in design between these two. Rather than keeping the metal clip flush with the studs, the manufacturer added a rubber bit that’s going to further soften any vibrations that reach the drywall.
So you’d screw these clips into the wooden studs, then snap resilient hat channels into them. This one from Trademark Soundproofing is 8.6 feet long, and it comes in packs of 20.
How to Install Resilient Channels: Step-by-Step
Installing resilient channels can significantly reduce the vibrations that pass through a wall or a ceiling. In fact, it’s one of the most effective techniques for soundproofing your ceiling if your upstairs neighbors enjoy choreographing their dance act right in their apartment.
However, if you don’t install the resilient channels correctly — or worse, install the drywall incorrectly — the whole project would become useless. So here’s how it’s done.
Step 1: Get to the Studs
If you want to cut corners, you could screw the resilient channels onto your existing drywall. But to do it properly, you’d have to take the drywall off and start at the studs.
Step 2: Prepare the space
Once you can see the studs, you can take the time to check out the insulation and possibly change it. Also, make sure that you know where all of the power outlets and other important device boxes are. If you’re working on a ceiling, you’ll want to lower all of your lighting fixtures, so they end up flush with the drywall.
Step 3: Put in the First Channel
Most resilient channels installation instructions say that the first channel can’t be further than 6 inches from the outside wall. However, you should keep it as close as possible (without actually touching the outer structure). So leave about a sixth of an inch of space around the edges of the room.
Have a helper hold the channel up while you screw it into the studs. If you’re working on your walls, the studs will be vertical, so you’ll position the channels horizontally. Therefore, you should also get a ladder, as well as a drill with a magnetic bit to screw the channel on.
The same goes for installing resilient channels onto the ceiling. You’ll want to position the channels to be perpendicular in relation to the direction of the studs. So, have them going across, so that they’re making a grid with the studs.
Step 4: The Spacing
Most manufacturers will include precise specifications regarding the spacing of the resilient channels. That will tell you how far apart each of these should be from one another. Usually, 16 inches is the perfect spacing, although you should check the product you’re using. With that in mind, you can continue to screw the resilient channels into the studs until you’re done with the whole surface.
Step 5: Put the Drywall Into Position
At this point, you should have already decided on whether you’re topping your resilient channels with a Green Glue and drywall sandwich or just thick drywall. Now you can lift the drywall into position and use a pencil to mark everywhere you put resilient channels. If you want to avoid mistakes, you can also mark or remember where the studs are, so you can avoid drilling into them.
If you’re working on walls, the positioning of the drywall should be obvious — vertical. On ceilings, the drywall should be perpendicular to the resilient channels, so it should move in the same direction as the studs.
Step 6: Screw the Drywall On
Once you start screwing the drywall on, you can really make or break this project. Up until now, everything has been fairly straightforward, but here it gets a bit tricky. Whatever you do, you can’t drill into the studs.
Essentially, the decoupling process will fail if there’s still a direct line between the building structure and your drywall. So your screws should only go through the resilient channels.
When your drywall is on, you can seal the gaps, prime it, and paint it. This video shows the installation of resilient channels on a ceiling. Don’t worry; it would look much the same on a wall. And if you want to see how you can screw the drywall onto the channels, you can watch that here:
The Bottom Line
No matter how you look at them, resilient channels are simply one of the few options you have for dealing with impact noise. They can help you build a separate room inside of the room you’re working on. That decoupling actually decreases the amount of sound that enters the room.
Ultimately, though, there are several different routes you can take this project. For one, you can use regular single or double leg channels. However, you might also try the sound clips and hat channels, as many people seem to think that that’s the better soundproofing technique.
As for me, I remain unconvinced. Even if it does turn out that resilient channels are the weaker defense against impact and airborne noise, the difference will be negligible.
As long as you remember to properly insulate the room and decorate it in a way that deals with the internal audio quality, you can choose any of the methods we’ve discussed here today. After you’ve made everything to your liking, check in on the doors, windows, and other more vulnerable places around the room. Then, you’ll be good to go!
RELATED POSTS: