


A-Z of Essential Photography Terms for Beginners in 2024
Starting out as a photographer? This glossary of common photography terms and their definitions will help you to learn the basics to start taking great pics!
This is a list of the most common photography terms and definitions to help you understand everything a photographer needs to know in 2024.
Learning about shutter speed, aperture priority, spot metering, dynamic range, and all the other photography terms can be a little overwhelming, especially for those just starting out… but don’t worry!
We’ve kept it simple for you here by including only the essential 25 photographer terms that are applicable to anyone with a camera.
We want to make learning to take a better photo as enjoyable as possible ;-)
Let’s get stuck in!
36 Must-Know Photography Terms for Beginner Photographers
AI Servo Mode (Continuous/AF-C)
AI Servo is a form of autofocus camera mode whereby your camera continuously updates the focus based on whether your subject moves closer or further from you in the frame. On Nikon cameras it’s known as Continuous/AF-C.
It’s important since it helps keep subjects moving towards or away from you in focus.
By initiating AI Servo mode (check your camera’s manual for the location of all these photography terms), hold down your camera’s shutter button half way to lock focus on your subject, and as they move closer or further from you, your camera will keep them in focus.
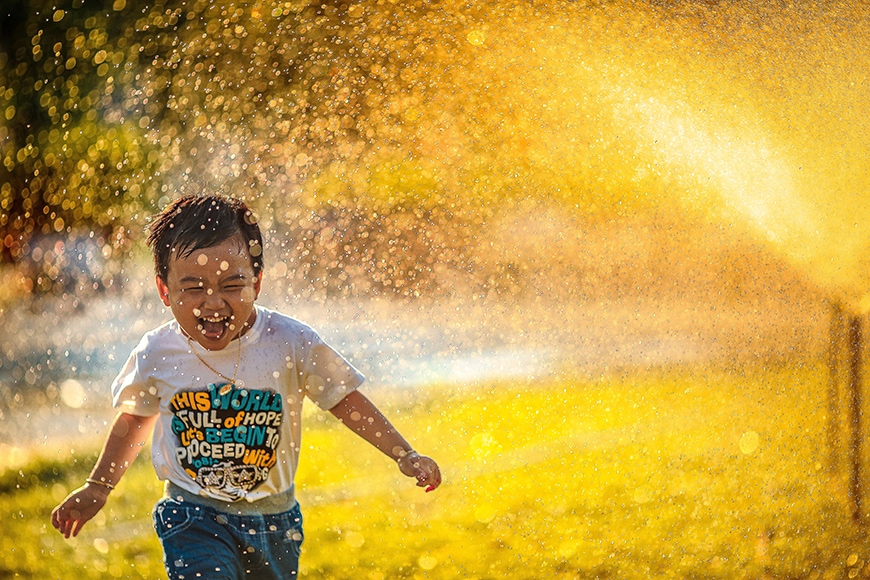
AI Servo mode is great when photographing children, who may be running straight towards you. Just half-press the shutter button with the focal point on the child, then click the button down completely when ready to take your shot – AI Servo mode will ensure that when you do, they’ll be in focus.
In general, the more advanced your camera, the better the AI Servo will be at keeping fast-moving subjects in focus.
You should also read: AI focus vs AI servo: which AF mode is the best?
Ambient light
Ambient light is any light that already exists in a scene that you’re about to photograph, as opposed to any light you as the photographer decide to add.
An example would be the sun, a car’s headlight, or even a desk light in your office – it’s just light that’s ‘already there’.
The photography term ‘exposing for the ambient light’ refers to setting your camera’s aperture, shutter speed and/or ISO in a way that the ambient light looks right to you on the back of your camera’s LCD (either after you take the photo, or via your camera’s Live View function) – you can read more about it in this guide.
A good grasp of the notion of ambient light is also important for flash photography, since here you are layering additional light on top of the existing light to produce a certain effect.
Aperture
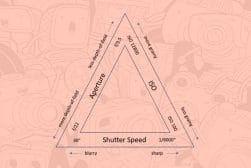
Aperture is one of the three main pillars that lay the foundations of photography (the other two are Shutter Speed and ISO). Aperture is basically the opening that lets light into your camera.
You can control the size of this opening and thus the amount of light that will eventually hit your sensor (or your film, if you shoot analogue).
If you take a look at your camera’s mode dial you’ll find abbreviated A or Av (which stands for Aperture value). This mode is called Aperture Priority.
Selecting it ensures that you’re the one who sets the aperture (or F-stop, as it’s also known) and the camera automatically chooses a suitable shutter speed to create a correctly exposed image.
In general, the more expensive a lens, the larger the maximum aperture available.
How Much Do You REALLY Know About Photography?! 🤔
Test your photography knowledge with this quick quiz!
See how much you really know about photography...

The second element that aperture controls is the depth of field, or how much of your photo is in focus.
If you are focusing on a subject that’s closer to your camera than its background, the larger the aperture you choose on your camera’s lens, the less the background will be in focus.
What are the two types of depth of field? Shallow and deep – depth of field can be used creatively to either blur, or include the background elements. Photojournalists often shoot at smaller apertures (f/8+) to make as much of their scene in focus as possible, so as to tell the story of the scene.
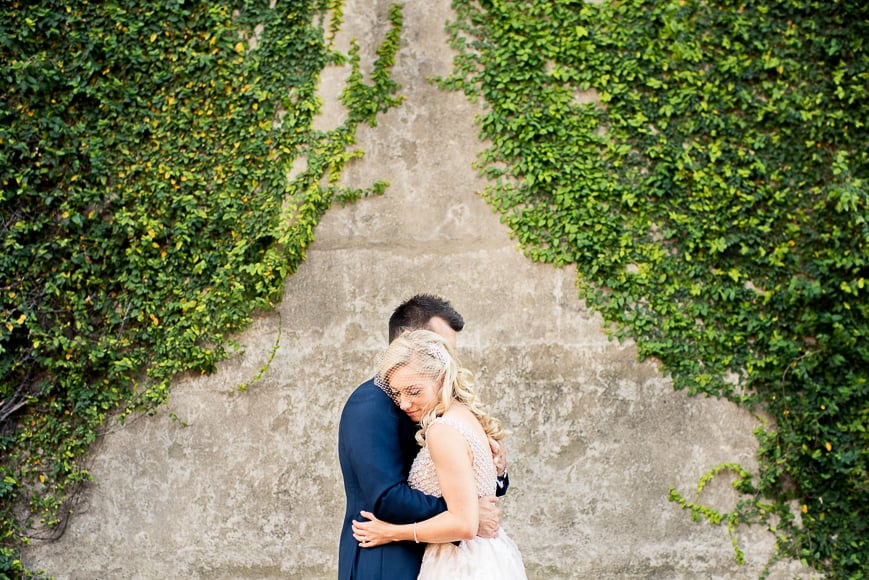
Wedding photographers on the other hand usually favour larger apertures (f/2.8, f/1.8 etc), usually so they can ‘blur out’ unnecessary elements that interfere with the subject of their frame.
Aperture Priority
Is aperture priority mode the best? Well, many photographers shoot in aperture priority a lot of the time, since it’s a very popular and efficient way to use a camera.
The photography term Aperture Priority refers to setting the camera so you decide the lens’s Aperture setting, and the camera decides everything else.
For example, if you were to choose to shoot your lens at f/2.8 in aperture priority on a sunny day, your camera may decide that the shutter speed should be 1/4000 and the ISO should be 100, to ensure lots of light isn’t entering the photo, making it too bright.
(See also: aperture priority with auto ISO)
The camera priority modes (aperture priority and shutter priority) are useful since they allow you to concentrate on one element of the ‘exposure triangle‘ for your creative control, whilst leaving the other elements to the camera.
If you choose to control the aperture in aperture priority, you can control the depth of field of your image (i.e. how much is in focus). Since the camera will be adjusting shutter speed and ISO to maintain a balanced exposure, aperture in this case usually won’t control the amount of light.
Aperture priority is usually abbreviated to ‘A’ or ‘Av’ on your camera’s mode dial. When you’re ready to move away from your camera’s Auto setting, twist the dial to aperture priority, and experiment altering your lens’ aperture to see how it affects your final image.
Aspect Ratio
Aspect ratio deals with width and height, with width always coming before height, e.g.: 16:9. All SLR cameras use the 3:2 aspect ratio, which means that the frame is one and a half times as wide as it is high.
If you’re taking a photo in portrait (ie. vertical orientation), your aspect ratio switches to 2:3.
You may have what’s known as a micro-four-thirds sensor camera, or a compact camera , where the aspect ratio is 4:3. If your photo is square (like on Instagram), the aspect ratio is 1:1.
When printing your photo, you may find that the aspect ratio of most common printing paper won’t ‘match’ that of your images.
The only way around this is to print with a white border, or to crop your image to 1:1.4142 (the square root of two), which is the aspect ratio of common paper sizes (A2, A3, A4, A5 etc).
As for which aspect ratio is best, there isn’t really a clear cut answer – it depends on the look you’re trying to achieve, the limitations of your camera sensor and where you intend to show the image,
Blue Hour
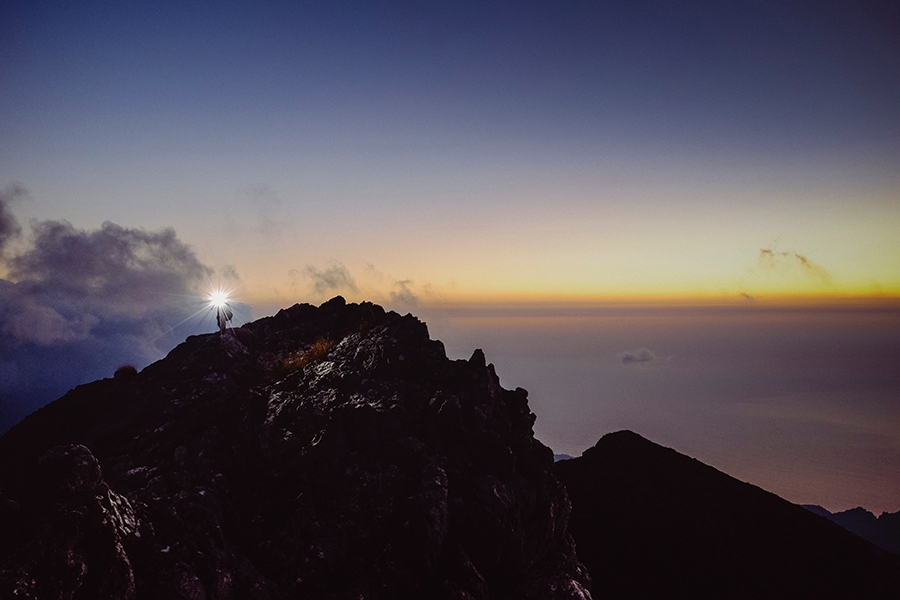
Blue hour is the twilight time in the morning or evening when the sun is quite low beneath the horizon and the light takes on a cooler, more blueish tone.
Like the golden hour (see below for more about golden hour), it can be a great time for shooting as it gives your photos a distinctive mood. In some cases, it can be even more magical than the golden hour itself. It has a touch of mystery to it that is indispensable if that’s the kind of vibe you’re looking for.
It’s great for capturing subjects that have artificial light sources such as bridges or monumental buildings. It could also be more than suitable for portrait photography – you’ll get really soft, gentle light on the face of your model.
During the sunrise, blue hour comes directly before the golden hour while at sunset it comes directly after.
Bokeh
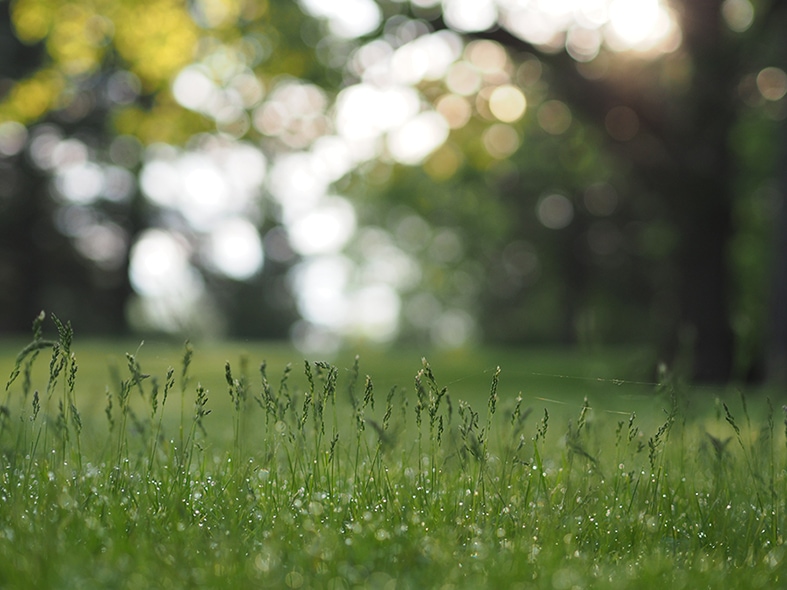
If your aperture values are low, you’ll start seeing areas of your image which are out of focus and these areas will appear as blurred. The term “bokeh” represents the prettiness of this blur, so to speak.
Beautiful bokeh background is highly desirable for those of us who are into the genre of portrait photography. It can also be quite valuable for wildlife and product photography depending on your specific task.
It’s important to know that bokeh is rendered by your lens and not your camera body. Different types of lenses have unique designs which produce distinctive bokeh results.
Generally speaking, a prime lens is capable of creating a better-looking bokeh effect than a zoom lens. You’re also able to blur the background using software such as Lightroom.
Chromatic Aberration
There are two primary forms of chromatic aberration: Longitudinal and Lateral, with affected images showing subjects with blurred edges and ‘fringing’ of various colours.
Most common you’ll see a purple fringe, but it can also appear as red, green, blue, yellow, or magenta. You’ll notice this the most when there’s a lot of contrast in the photo, or when an object is backlit by strong light.
A common type of chromatic aberration appears when you take a photo of a tree. The contrast between the leaves and the bright sky showing through the gaps usually show up with fringing.
It’s personal preference as to whether you decide to fix the CA in an image editing app such as Lightroom, but usually it’s a simple process.
Color Banding
Color banding is a specific type of visual artifact that occurs when the bit depth of a monitor is too low to support enough shades of a color to allow for a smooth transition.
You may have come across it when you shoot a sunset, or any photo with large areas of colour gradient. It looks like a series of lines, rings or bands, which separate the various shades and tones, instead of displaying as a smooth gradient.
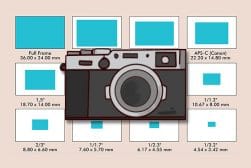
Crop Sensor
A ‘Crop’ sensor refers to any sensor smaller than the traditional 35mm film frame, also known as ‘full frame’. The common types of crop sensor include APS-C and micro 4/3 (MFT) systems.
(See our guide to full frame vs crop to learn more.)
There are several pros of choosing a camera with a crop sensor. ASP-C and MFT camera are usually cheaper, smaller and lighter than their full frame counterparts.
Due to the cropping of the actual size of the image, the equivalent focal length of the lens is increased, providing a virtual telephoto effect that is useful for some sports, wildlife, and macro photography.
However, for landscape, architecture and other forms of photography that rely on wide-angle lenses, the crop sensor is not so suitable.
DOF
DOF, short for Depth of Field, is the distance between the nearest and the farthest object on your photo which are both in focus.
There are three main factors that influence DOF directly: how far are you from the subject, the value of your aperture and the focal distance of the lens you’re currently using.
If you set your camera on low aperture values, you’ll create a shallower depth of field.
Dynamic Range
In photography we call dynamic range the difference which is created between the lightest and the darkest tones in an image or in other words: pure white and pure black.
Our human eye is capable of registering a vast range of tones, much more than even the best digital camera can cope with.
The never-ending struggle of digital photography is to expand this range as much as possible and to make constant improvements in this field.
A wider range than your camera can handle results in dark tones with no detail (underexposed image) or in light tones with no detail (overexposed image).
This is what typically happens if you try to photograph a person sitting in the shadows against a bright summer sky for example. You will either get the person or the sky properly exposed, but not both.
Exposure
The exposure of your photo is essentially how much light has reached the sensor or film. You get your exposure from a combination of three different variables (known as the ‘exposure triangle’): Aperture, Shutter Speed and ISO.
To get the correct exposure, you need the right mixture of those three things.
If you don’t have the “recipe” right, your image will either look too dark (underexposed) or too bright (overexposed). How can you be sure that you make the balance?
Trial by fire is the best strategy here! Experiment with your settings and see how the image you’ve taken changes. In time you’ll learn that in challenging situations you can’t have the perfect balance so you’ll have to sacrifice the ISO to gain a higher Shutter Speed for example.
Choosing wisely which parameter to sacrifice in your particular lighting scenario is also a part of the game.
Focal Length
This term has a bit of a deceptive name – it’s not connected to the actual physical length of your lens. It’s actually the distance between the optical center of the lens itself and the camera’s sensor. It’s measured in millimeters.
It’s important to know that lenses receive their names according to their focal length. Here’s a simple example: if you have a 50mm lens it means that its focal distance is 50 millimeters.
Focal length is also used to categorize the three different types of lenses: wide angle, standard and telephoto.
Focus Stacking
Commonly used in macro, product and landscape photography, focus stacking is a way to achieve sharp focus from the foreground of a photo right up to its background.
Depth of field is based on three elements: the camera aperture, the distance between the foreground and the background, and the focal length of your lens.
By focus stacking, photographers are able to mimic a wide depth of field by photographing a scene multiple times, placing the focus on different points, and ‘stacking’ and ‘blending’ the images afterwards using a photo editor.
This technique also allows you to shoot at the optimum aperture of any lens (i.e. its sharpest setting), without having to compromise by using a narrow aperture to keep everything in focus.
Framing
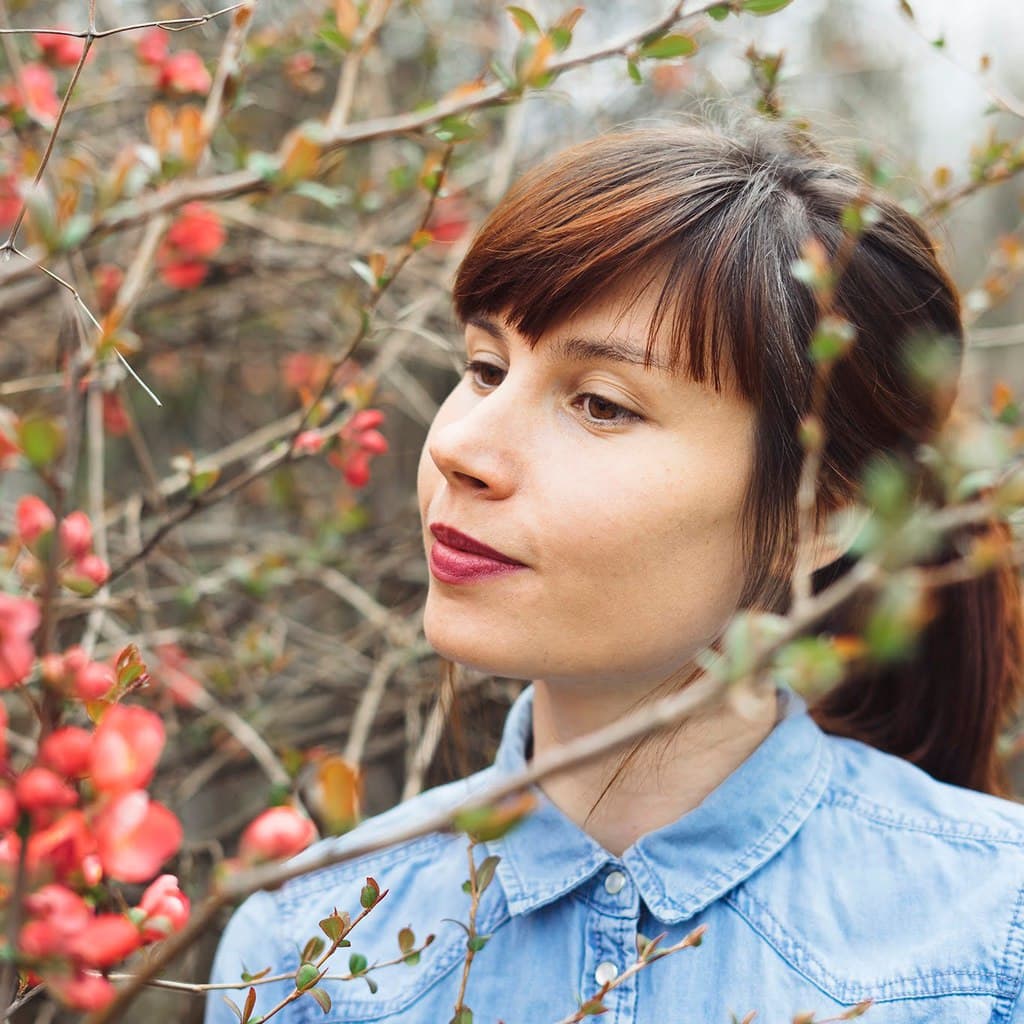
Framing is the subtle art of ensuring the subject of your photo is always the main focus for the viewer. Photographers ‘create’ frames while composing their shots in the camera’s viewfinder (or on the rear LCD screen).
Various elements can be used to frame a subjects, including architecture, nature (see above), people, or even the subject’s own body parts.
You can also use colours, shadows, highlights, and contrast in order to draw the subject away from distracting foreground or background elements.
Full Frame
Full frame is a product specification that you see very often in the descriptions of cameras aimed at professionals. It’s one of the important terms used in digital photography nowadays.
Full frame cameras have a sensor that’s equivalent in size to 35mm film. This is the largest format that you can find on the market without buying a medium format camera.
The full frame type of sensor is usually found in high-end cameras (both in DSLRs and in mirrorless cameras). See also: full frame vs crop.
Golden Hour
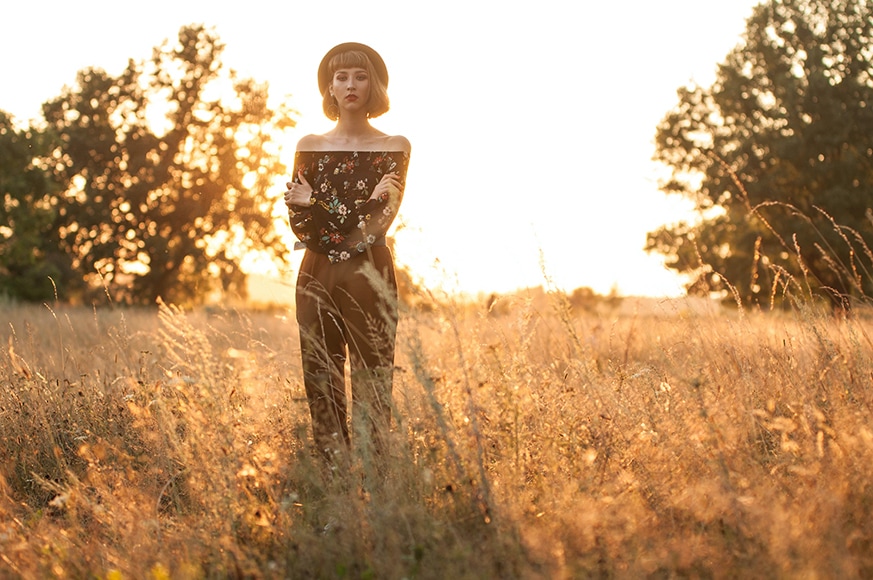
Have you ever noticed how the light warms up taking a great shade of soft orange/red right before the sunset or after the dawn? This kind of natural light is perfect for portraits and it’s an option worth exploring by every photographer.
During this time of the day, the sun is lower and the light is not so harsh – these two make for a wonderful combination. It’s also quite flattering for the human face as no sharp shadows are formed.
The only disadvantage here is that the golden ‘hour’ doesn’t last long – it’s usually around 20-30 minutes at most. So if you’re planning to take your model for a photoshoot at this time, be prepared to act fast and don’t waste too much time hesitating because in a moment this magic light will be gone!
HDR
HDR is directly connected to the photography term just we discussed above. HDR stands for High Dynamic Range and it basically lets you artificially expand on the range between the dark and the bright tones your camera can offer.
It’s done by combining at least three images (it could be done with more too) with different exposures. The goal here is to properly expose the dark and the bright areas separately.
By digitally combining this information you’ll be able to register details in your image that would be otherwise only visible to our human eye. Check out our Aurora HDR review for a great app that will help;.
High Key Lighting
This is a style of lighting which aims to reduce the lighting ratio in a scene, which results in a brightly lit subject with more fill light, less contrast and less shadows.
Due to its light and airy feel, high key lighting helps give an uplifting, optimistic and youthful look to an image. For this reason, it is a staple for portrait and product photography featuring cosmetics.
You can also use this lighting technique to ‘erase’ a background, by positioning a key light on the subject, and using a brighter light in the background (or the sun).
High key lighting is the opposite of low key lighting, which enhances shadows in a scene for drama and mystery.
Histogram
This is a really essential term in the photography world. Histograms are basically visual representations of data and they show all the tones recorded on your image – from pure black (0% brightness) to pure white (100% brightness).
Dark tones are found on the left side of the graphic and lighter tones are displayed on the right side. In the middle you’ll find a range of midtones which are neither too dark nor too bright.
By learning how to read your histogram, you’ll learn to determine if your photo has the right exposure. If you see the graph touching the “ceiling” of the histogram on the left side, it means that you’ve lost detail in the dark tones.
If you see the graph touching the ceiling on the opposite side (on the right), it means you’ve lost some detail in the bright parts of your image.
ISO
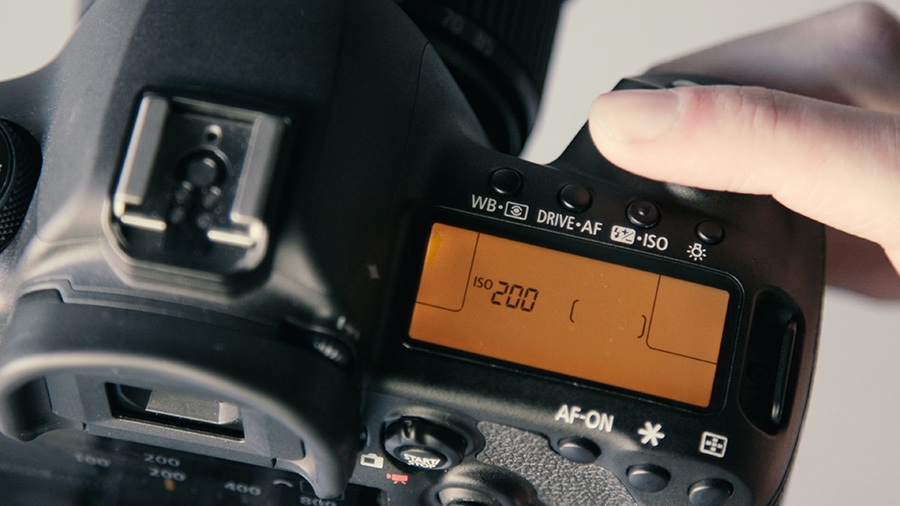
ISO is one of the main components that makes the magic of photography work. If you’ve ever wondered what the acronym ISO means, it stands for International Organization for Standardization.
ISO represents how sensitive your sensor is to the light that has reached it.
It’s interesting to note that ISO was a term to describe film sensitivity, but it later became a part of the digital world of photography.
The less light you have available to take your shot, the higher number of ISO you’ll need. But you can’t just go for the high numbers without considering the consequences, like many other things in life. 🙂
Translated into the language of photography this means that the higher your ISO, the more your image will progressively start gaining noise. This will result in lowering the overall quality of the photograph.
Light Meter
A light meter is something very useful when you need to determine your exposure with accuracy and precision. It’s a device that’s designed to measure the luminosity of the scene.
Are light meters worth it? In some cases, yes, since they allow the photographer to make the right decision – like which aperture and shutter speed are needed for a particular situation.
The light meter can be built in your camera or it can be an external device that is typically used in a studio environment. The external devices are more sophisticated and offer more options to measure the light.
Metadata
When it’s time to manage your images, getting familiar with the term metadata is really important. The ultimate goal of metadata is to help you sort your photographs by making it easier and faster to search for a particular image when you need to.
What kind of information is included? These are the essentials: camera settings, when the image was taken, what kind of camera was used, and the focal length.
The majority of this information is automatically added to the photo, but there are some pieces which can be added later – for example, you can add keywords.
Metering Modes
Modern digital cameras allow you to select various metering modes for image capture. These include spot, matrix (aka evaluative) and centre-weighted metering, and govern how the camera evaluates the light in a given scene based on a selection using the viewfinder’s focal point.
- Spot metering – provides a meter reading of between 1-5% of the image and is particularly useful for portraits or images in which there is a lot of high or low contrast.
- Matrix metering – takes multiple readings from across the entire frame to arrive at a general reading for the whole image.
- Centre-weighted metering – takes readings from only the central area of the frame rather than the specific focal point.
Noise
Noise is what you get when you push your ISO too far. That typically happens in low light conditions when you use higher ISO values.
Noise leads to the visual distortion of your digital image – the more you have of it, the more visible will the granular structure on your photo become.
Back in the day, before the digital era, noise used to have an alternative version: film grain. Film grain is considered to be more desirable than noise because it adds subtle structure without sacrificing image quality. It makes a perfect match with black & white photographs.
If you’re looking for a great software tool remove noise and fix grainy photos, check out our review of TopazDeNoise.
Prime Lens
These are lenses with fixed focal length – the opposite of zoom lenses, which have variable focal length. These kinds of lenses usually have an impressive maximum aperture: from f/2.8 to f/1.2.
They’re great for portrait photography and for achieving a shallow depth of field in general. Prime lenses are capable of letting more light enter your camera because of the wider aperture values they offer.
As far as their size is concerned, they’re usually faster to work with and smaller than the zoom lenses because their build-up is not so complicated. Prime lenses are known to, in most cases at least, produce sharper images with better image quality in comparison to the zoom lenses.
RAW
RAW is a kind of file format which is preferred by professional photographers and which gathers the image data captured by your sensor without compressing it. No compression means no loss in the overall quality.
RAW images are a life-saver when you have an overexposed photo (you’ve let too much light enter through your lens) or when you have an underexposed one (the image is too dark). The data can be easily brought back in post because it’s stored properly in the RAW file.
In other words, fear not if you’ve completely lost detail in the sky, for example; chances are you’ll be able to recover a significant part of it with your editing software afterwards.
The only disadvantage of RAW files is that they’re pretty big in comparison to JPEG files and they take up a lot of space on your disk. But then again, this is a small price to pay for all the benefits you get in return.
Resolution
Resolution measures how much detail your image can hold. In photography, we very often use this term to describe the sensor capabilities of our digital cameras.
Higher resolution results in more image detail. Resolution is also a key factor when it comes to printing – you’ll need to keep an eye out for it if you want your prints to be crystal clear and with good quality.
See also: how to increase the resolution of an image.
Saturation
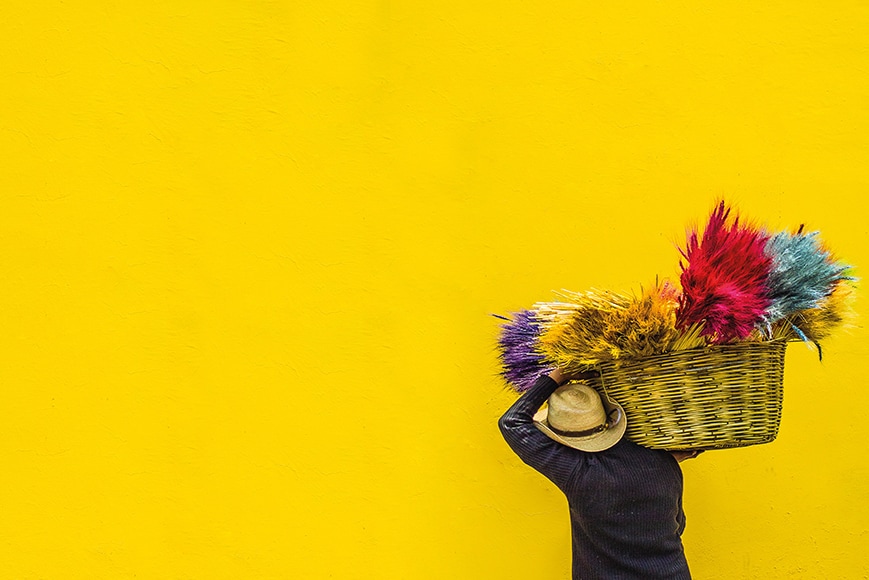
Saturation is one of the main photography terms when working with colour. It measures how intense a particular colour is. The more intense it is, the more vivid it looks and the more it grabs the viewer’s attention.
Increasing the saturation of all the colours on your photo is rarely a good idea unless it’s specifically intended. On the other hand, choosing just one colour (or a combination of two) and boosting their saturation may be the perfect way to introduce a nice colour accent.
Lowering the saturation values creates an image with toned down or muted colours which can dramatically change the overall mood. Complete desaturation gives you a black & white photograph.
S Curve
The s curve in photography is a compositional tool that takes the viewer’s eye on a virtual ‘journey’ through the scene of an image. It can be used to direct the eye to the subject, or simply to allow the eye some time to linger within a portrait, before being guided out of it.
Similar to leading lines, photographers can create drama and intrigue by utilising an s curve, encouraging the viewer to explore the scene, while highlighting various secondary elements along the way.
NB. this is not to be confused with an S curve in editing, which relates to increasing shadows and reducing highlights during post-production.
(Camera) Shutter Count
Not to be confused with the shutter speed, the shutter count of a camera refers to the number of times the shutter has ‘fired’ – i.e., opened and closed. These ‘actuations’ relate to the life expectancy of the camera, since without the shutter, it can’t take a photo.
Knowing the shutter count of a camera is useful in order to gauge how much it has been used, and how much longer it’s likely to be reliable.
In general, the more expensive the camera, the longer the life expectancy. In addition, most shutters do last well beyond their rated life.
Shutter Speed
Shutter Speed is another of the key variables that makes up the ‘exposure triangle’ (see Exposure above).
Shutter Speed, in a nutshell, is the length of time your sensor/film is exposed to light (the same light that you let in through your camera lens by adjusting the Aperture).
High shutter speeds allow you to freeze a moment in time and to capture a fast-moving subject. On the contrary, if your shutter speeds are low (i.e. the shutter is open for longer), you can end up having a blurry effect on your image. This could be considered as a flaw, but it can also be used on purpose to achieve a particular mood.
No matter what type of photography you’re focusing on, mastering the shutter speed is a must both for amateurs and professionals.
In time you’ll find it easier to pick the right shutter speed for the occasion. For example, I already know that if I want to freeze my husky dog while she’s running into the wild, I have to use at least 1/500 to capture her crazy facial expression properly.
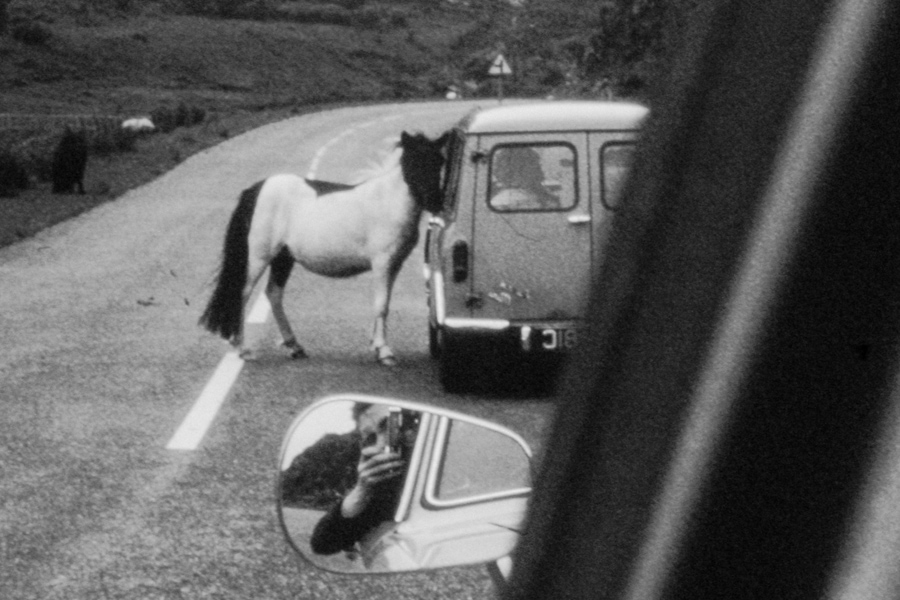
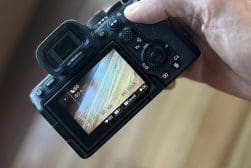
SOOC
SOOC stands for “Straight Out Of Camera.”
It refers to images that are shown exactly as they were captured by the camera, with no post-processing applied whatsoever.
SOOC is often used by photographers to showcase their in-camera skills.
SOOC images are authentic representations of what the camera captured, without alterations.
This can be particularly important in fields like photojournalism, where ethical guidelines often require images to accurately represent the scene without digital manipulations.
Spherical Aberration
This is a common image defect that occurs when incoming light rays pass through the various points of a spherical camera lens, and focus at different points on a camera’s sensor, affecting resolution, clarity and even focus.
Images shot at large apertures can be less sharp, while conversely, ‘stopping down’ (i.e. using a smaller aperture), can result in a sharper image.
Many modern lenses employ an aspherical lens surface to counteract the effect, converging light rays into a single focal point. You can also correct spherical aberration in post, usually with one click.
What is the difference between spherical aberration and chromatic aberration? Spherical aberration is to do with lens curvature, and chromatic aberration has to do with color (chroma).
Vibrance
Talking about saturation is a convenient time to bring up another term: Vibrance. The best way to imagine this is to think about it as a clever saturation setting, although they’re not exactly the same – see the differences between vibrance and saturation.
Vibrance is again intended to spice up your colours in post-production. Only this time, not all the colours on the image fall under the radar of the digital enhancement. Vibrance “chooses” colours that are less intense in comparison to the others and adds saturation only to them.
Using vibrance makes it more difficult to go over the top when editing your images.
Vignetting
Vignetting is when the edges of your photo appear darker and desaturated. This happens mostly around the corners. It’s generally considered to be a flaw, but you can also use it to your advantage as a part of the creative editing process.
If vignetting is added in a subtle way it can effectively lead the attention of the viewer to the center of your picture. But if it’s too much it could start looking a little bit old-fashioned and unless that’s something you purposefully want, it’s better to avoid it.
You can also add a vignette in post-production using photo editing software such as Lightroom – see our guide.
White Balance
White balance has to do a lot with the colour temperature of the light that is spilling over your about-to-be-captured scene. Ensuring that you have set the white balance in advance will make for realistic colours, without any weird colour casts.
To let you in on a little secret: white balance can be easily changed in post, but it’s really not a good idea to get too comfortable with this thought. It’s always better to set things ahead of time. That will make you less dependent on the editing afterwards.
Our cameras have pre-set modes with the most common white balance values, but you also have the option to choose the numbers on your own. White balanced is measured in Kelvins.
Zoom Lens
Speaking about prime lenses, we cannot skip mentioning their main opponents: the zoom lenses. With this type of lens, focal length can be changed to different values.
This main characteristic feature of zoom lenses also happens to be their main advantage and what makes them so popular among many photographers. Being able to change the focal length easily means more flexibility.
Maybe you want to get closer to your subject, but it’s impossible for some reason. In that case, having a zoom lens becomes a necessity and something without which you simply cannot take your shot.
Final Words
The aim of this guide is to include only the photography terms we deemed most common. These are the ones that every photographer should know and understand to take a better photo.
There are lots more photography definitions which describe every minute aspect of camera equipment or the art of taking a photo, but many of them are rather specific in their nature.
By providing you with a selection of the most common photography terms, we hope we’ve given you more confidence to take control of your camera and get out there and shoot.
Were there any common terms that we missed? Let us know in the comments!

Check out these 8 essential tools to help you succeed as a professional photographer.
Includes limited-time discounts.


Hi there! I’m Polina, a freelance photographer, always on the look out for creating simple images with powerful impact.


