
Do-it-yourself patch panels

Fabricating patch panels made simple


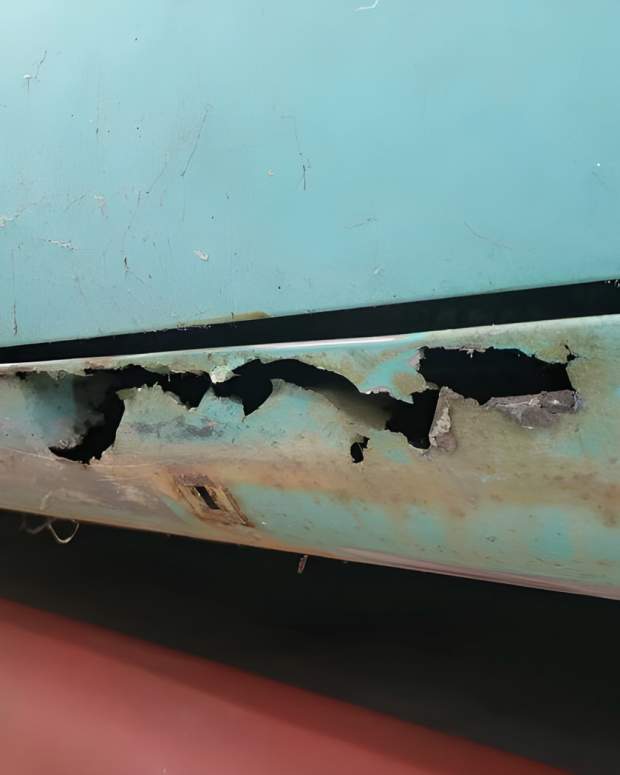
The outer quarter panel Leonard Schrock is fabricating will fit the passenger side. Here, the old, rusty metal has already been removed after the car was sandblasted.
By Angelo Van Bogart
Even on the West Coast and in Texas, it’s getting more difficult to find a 30-year-old or older project car without a case of the tin worm. Chances are, a project car is going to require some metal replacement, and when that metal isn’t available from a reproduction part producer or a parts car, there is but one alternative — make the part yourself.
The subject car here is one of those cars for which limited replacement sheet metal is available. Reproduction companies haven’t quite caught up to the subject project car, a 1973 Plymouth Road Runner, and there is only a limited amount of new metal available. To bring back this tin worm-infested ’Runner back to show condition, master metal man Leonard Schrock is prepared to cut and bend plain flat-stock sheet metal into the curves of the 1973.
In this case, he’ll be replacing the quarter panel around the rear wheel opening on the ’Runner. For this task, Schrock cut two separate panels — one for the inner fender lip and another for the outer quarter panel — from sheet metal stock and welded them together. Using two separate pieces and welding together will make the piece stronger and also make it easier to shape the metal than making the piece out of one piece of metal.

An oversized piece of flat stock is placed against the body so Leonard Schrock can trace the shape of the wheel opening and cut the metal to shape. The trace line is very faint.
To begin, the profile and body lines of the rusted outer quarter panel that will be replaced must be recorded with templates. Three thin pieces of metal were formed to the shape and contours of the quarter panel around the Road Runner’s wheel opening and their locations on the car marked. Since there are multiple contours to the wheel opening (top, front and rear of wheel opening), all of their shapes must be recorded with separate strips of tin and marked for their position on the fender.
The overall shape of the wheel opening must also be marked. Schrock placed the flat sheet metal stock he will use to form the replacement panel against the wheel opening on the car and traced its shape on the new sheet metal. Schrock had already cut out the rust from this area, so he used the inner fender as a guide, because these two panels (inner and outer quarter panel) must meet and be welded together.
Once the shape of the wheel opening is traced on the oversized flat piece of stock, Schrock highlights his cut line with painter tape and uses a power shears to cut the metal.

Schrock highlights the cut line with a piece of 3/4-inch tape to guide his power shears.

The lower line marks the wheel opening and where the metal will be cut with power shears. This line is outlined here with tape.

The power shears Schrock employed to cut the flat sheet metal stock.
Next, Schrock prepared to cut the metal that will form the lip inside the wheel opening. He repeated the previous step, placing a piece of flat stock in the wheel opening to trace the shape of the lip. Tape was placed on the drawn line and he cut the metal to shape. The width of the lip was originally 1-1/4 inch, but the owner will be running wider tires, so Schrock cut the lip to 3/4 inch wide, the minimum width Schrock suggests to maintain strength in this part of the car.
This metal strip forming the lip inside the wheel opening bends around the tire, from in front of the wheel opening to above the tire to the back of the fender. As such, it must be bent, so Schrock begins bending the cut piece of metal at its end to avoid kinks. He works the strip over his knee to the center of the strip to avoid kinking the piece. He frequently compares its shape to the outer quarter panel it will meet until he is satisfied with the shape.

Schrock cuts the sheet metal with the power shears.

The remaining patch panel after the excess metal was removed.
With the two pieces cut to shape, Schrock was ready to begin pounding the contours around the wheel opening into the outer quarter panel. Schrock secured thick bar stock with clamps at the edge of the new panel where he’ll be forming the contours. It will allow him to bend the metal at sharper angles using a duckbill pliers. (For smoother bends, it is not necessary to support the metal with a bar stock guide.) The thick bar stock will act as a guide to where he’ll be bending and shaping the contours, but also braces the surrounding metal so it, too, does not bend until he’s ready to address it.
At this point, he estimates the shape of the contours around the wheel opening, frequently comparing it to the thin metal templates he formed earlier from the body line.

These templates outlined the shape of the original outer rear quarter panel. Schrock will use these to guide his forming of the new outer rear quarter panel. Note each template is marked with its location.

A second, oversized piece of sheet metal stock is placed in the rear fender well to size up the new wheelwell lip. Schrock butts the new metal against the existing inner quarter panel to guide the line he will cut to form the lip inside the rear quarter panel.
To pound the template shape into the outer quarter panel, Schrock uses a body hammer with a convex face to further shape the metal. The convex-faced body hammer also helps keep the sharp bends in the quarter panel, all the while leveling out the panel for a smooth surface.
Once the new outer quarter panel is shaped with the original fender’s contours, Schrock lined up the new lip against the shaped outer quarter panel. Some bending was required, so he bent the new outer quarter panel by hand to match the lip piece he created. Once the pieces were lined up in the ideal location, Schrock drew a line across both pieces to mark the proper place to tack weld them together with a wire-feed welder.

Schrock used a power shears to cut the sheet metal that will form the lip (top metal sheet). Since the lip will be 3/4 inches wide, a piece of tape matching that width was run along the edge of his cut and then the metal was again cut along the opposite edge of the tape strip.

The lip is held into place.
Welding the two pieces together can be tricky at the lower part of the fender, due to the size and contours of the metal. Schrock slowly tack welded from the top to the bottom of the fender, bending and hammering the outer quarter panel to match the lip as he worked down from the top of his new patch panel.
His tack welds were widely spaced and were intended to simply hold the pieces together until they would be completed wire-feed welded together. The weld was then grinded smooth, and the new panel was ready to be mounted on the car.
More images of the process:

The quarter panel around the wheel opening is highly sculpted on a 1971-’74 Road Runner, so Schrock must bend and hammer the new panel to the original shape. A piece of thick flat metal stock is placed along the edge Schrock will begin bending the metal to form the sculpted bends. The thick bar metal stock works well for make sharp bends, but softer bends do not require it.

A second duckbill pliers is used to bend the inner edge of the new quarter panel patch piece.

Schrock measured the width of metal he’ll need to bend, marked that width on the new fender and bent the metal by eye, frequently checking his progress against the template.

Schrock used a convex body hammer to finish off the edge of the outer quarter panel after initially using the duckbill pliers.

Schrock lines up the two metal pieces he fabricated — the outer quarter panel patch and the lip inside the wheelwell — and determines where they should be welded together. Once they’re in the ideal position, he draws a line from one panel to the other, indicating where they should be tack welded in place.

The two panels are tack welded together.

Now that the pieces are tack welded together, their seam can be fully welded and the weld then ground smooth.

The new piece is ready to be installed on the quarter panel.
Source:
Kasper Automotive
Waupaca, Wis.
715-258-9206