How to create a Universal Windows 7 installation DVD or USB Flash - Microsoft Community

How to create a Universal Windows 7 installation DVD or USB Flash Drive

Technical Level : Intermediate

Summary

With one DVD or USB Flash Drive you can install or re-install any version of Windows that you have a valid product key for.

This comes in handy if you have multiple computers and no longer have the recovery media or your recovery partition is damaged.

Note: Windows 7 Starter edition is only available in 32Bit, so if you need a ‘Starter edition’ installation DVD or USB Flash drive, you need to download the Windows 7 Ultimate 32Bit .ISO file.

Notice: As of February 6th, 2015 the links to the various versions of Windows 7 listed in step #1 below are no longer functioning, as an alternative (as long as you have your product key) you can use the link to Microsoft's Software Recovery web page:

https://www.microsoft.com/en-us/software-download/home

Please be aware that this link often fails to provide the correct language download for your product key.

( Only 2 of 3 keys I entered returned the proper "English" language option). If you experience this issue then try the following alternative:

Microsoft Windows and Office ISO Download Tool - HeiDoc.net

As an alternative read this Wiki article on how to create your own ISO file

Create your own ISO file from a Windows 7 installation DVD

After you create your own ISO file you can skip steps #1 and #2 and begin at step #3.


Details

Step by Step guide:

1) Download the Windows 7 Ultimate 32 or 64Bit .ISO file.

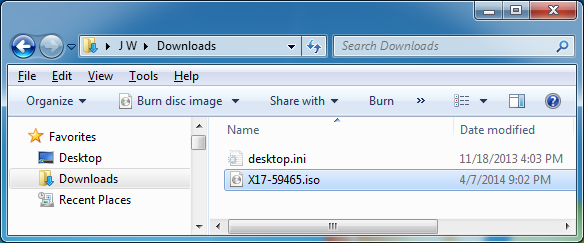
Note: The default download location to your computer is: C:\Users\User account name\Downloads

a) If you want to create a 32Bit universal installation DVD download this file:

Windows 7 Ultimate 32Bit: http://msft.digitalrivercontent.net/win/X17-59463.iso

SHA1 Hash value: 65fce0f445d9bf7e78e43f17e441e08c63722657

b) If you want to create a 64Bit universal installation DVD download this file:

Windows 7 Ultimate 64Bit: http://msft.digitalrivercontent.net/win/X17-59465.iso

SHA1 Hash value: 36ae90defbad9d9539e649b193ae573b77a71c83

2) Verify the .ISO file downloaded is not corrupt by validating the SHA1 hash value is correct.

A utility named ‘HashCalc’ which checks the file and returns a SHA1 value that should match the value listed in step 1a or 1b if the download is not corrupt.

a) Download and install HashCalc: http://www.slavasoft.com/hashcalc/index.htm

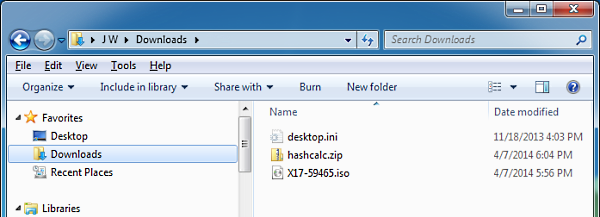
b) Launch HashCalc and navigate to the location of the .iso file you downloaded.

c) Remove all check marks from the list of HashCalc options except for SHA1.

d) Click the ‘Calculate’ button and wait for the SHA1 string of numbers and letters to be displayed.

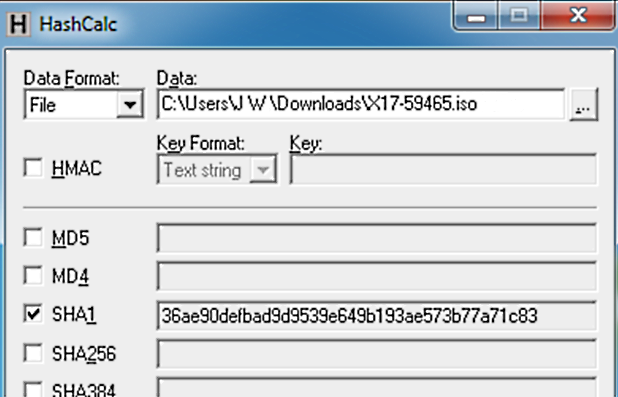
e) Compare the string of numbers and letters displayed in HashCalc with the SHA1 value listed in step #1 above. The entire string must match from beginning to end, if it does not match then the .ISO file you downloaded is corrupt and you must try the download link again.

3) Download, install and run the ‘ei.cfg’ utility.

I choose the default location for the download.

http://code.kliu.org/misc/winisoutils/eicfg_removal_utility.zip

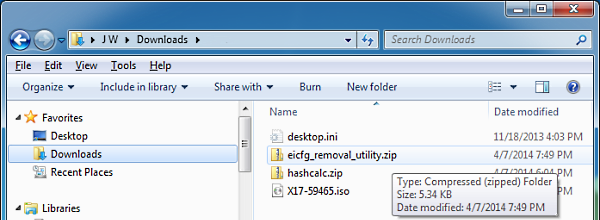
a) Extract the contents of the eicfg_removal_utility.zip file to a destination of your choice.

Start by double clicking on the .zip file and then double click on the eicfg_remover.exe file.

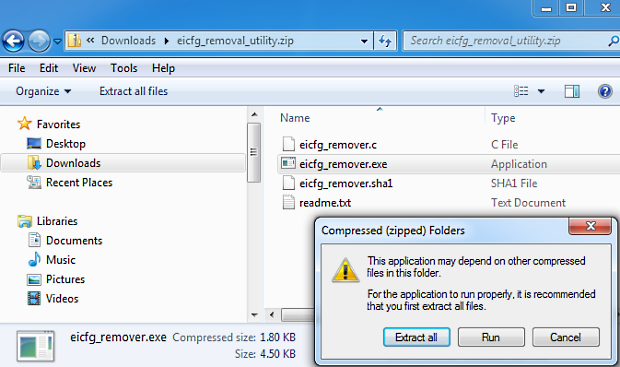
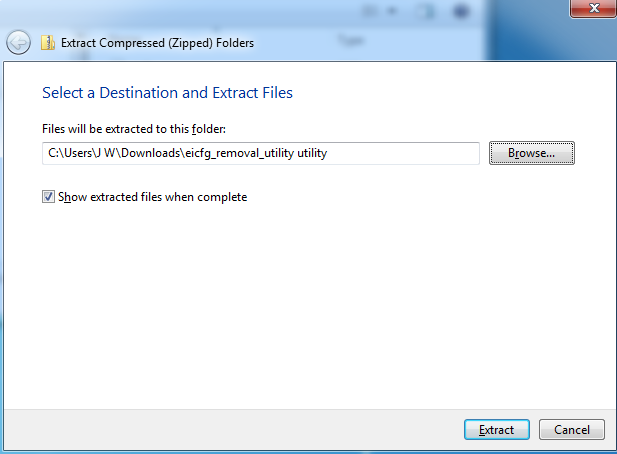
Click the ‘Extract all’ button and browse to a location where you want the zip file extracted to. Then click on the ‘Extract’ button.

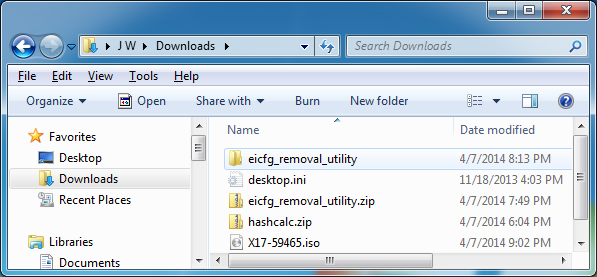
A standard folder with the name: eicfg_removal_utility will be created.

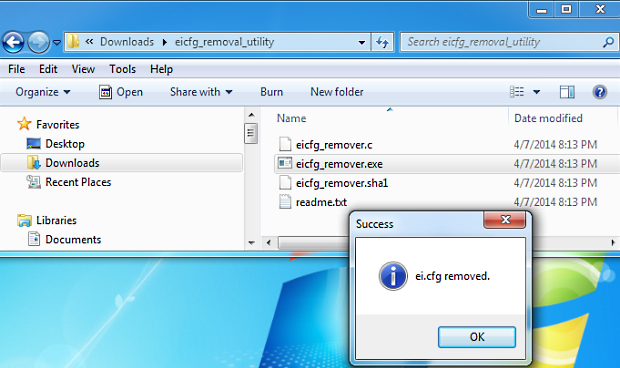
b) Open the ‘eicfg_removal_utility’ folder and click on the ‘eicfg_remover.exe’ file and click the ‘Run’ button.

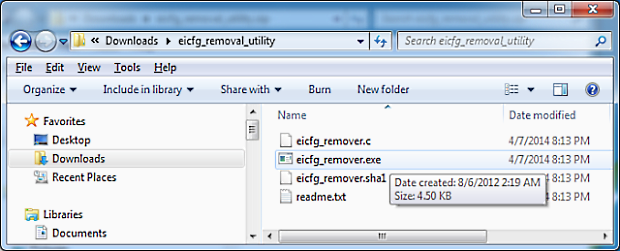
c) Navigate to the folder where the Windows 7 .ISO file is located and click on the .iso file to select it.

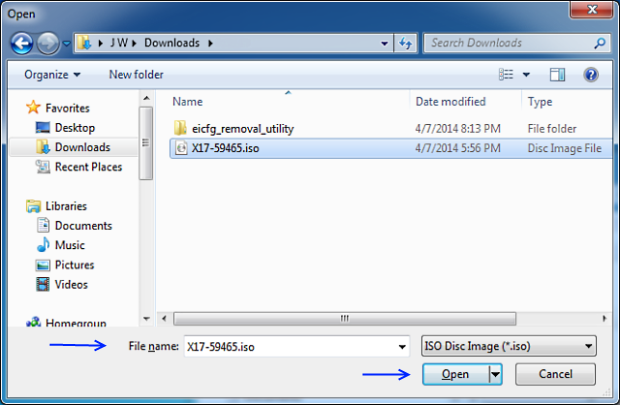
d) Click the ‘Open’ button to disable ei.cfg located inside the .iso file. Finally click the ‘OK’ button to exit the eicfg utility.

What does eicfg do:

From the eicfg ‘Readme.txt’ file:

“This works by toggling the deletion bit in the UDF file table, which instructs the operating system to ignore the file and to treat it as if it does not exist. By not physically removing the file, this eliminates the need to rebuild the ISO, and makes this sort of fast, un-intrusive patching possible.  This also makes it possible to reverse the patch and to restore the image to its original state, if so desired.”

In short you do not need to manually edit the contents of the Windows 7 .ISO file you downloaded.

Now that you have modified the .ISO file using the eicfg utility, the next step is to use the modified .ISO to create a universal Windows 7 installation DVD.

4) Create the universal Windows 7 installation DVD or USB Flash drive:

To create a Windows 7 installation flash drive read the following:

Windows 7 USB/DVD download tool

http://www.microsoftstore.com/store/msusa/html/pbPage.Help_Win7_usbdvd_dwnTool

How to create a bootable Windows 7 USB flash drive

http://arstechnica.com/business/2009/12/the-usb-flash-drive/

To create a Windows 7 installation DVD perform steps a through g:

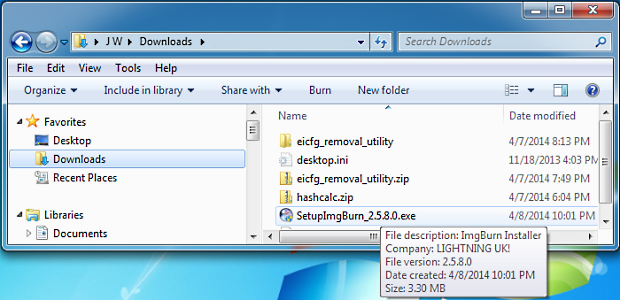
a) Download http://download.cnet.com/ImgBurn/3001-2646_4-10847481.html?hlndr=1  and install ImgBurn (current version 2.5.8.0) to create a bootable Windows 7 installation DVD.

Notes:

a) If you created your own .ISO file using the instructions in the Wiki article titled "Create your own ISO file from a Windows 7 installation DVD" then ImgBurn is already installed and need not be re-installed.

b) Windows 7 does have built in software that allows you to create an installation DVD but it does not offer any control over the burn speed: http://windows.microsoft.com/en-us/windows7/burn-a-cd-or-dvd-from-an-iso-file

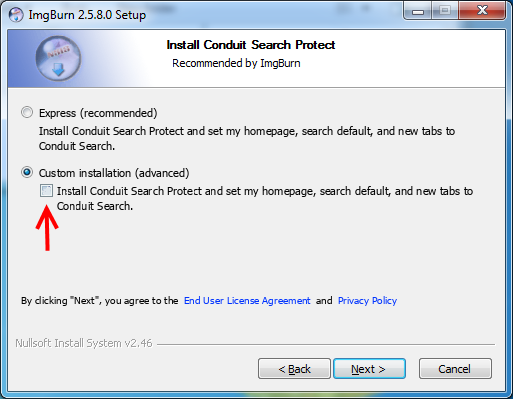
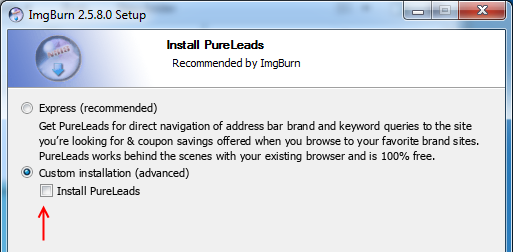
Choose the “Custom Installation (advanced)” option and remove the check mark to eliminate unwanted options.

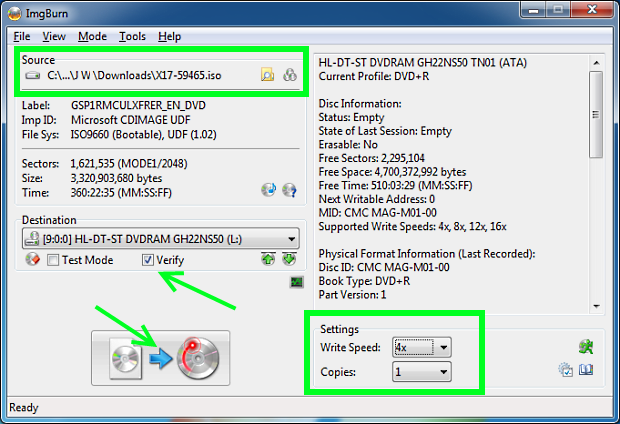
b) Next start ImgBurn,  2 windows will open. The lower window (ImgBurn Log) displays the status of your DVD creation. The top window is where you select what action you want to perform. Choose the “Write Image file to disc” option.

c) Next navigate to the ‘Source’ (.ISO file) location.

d) Set the ‘Write Speed’ to either 2 or 4X (or the lowest speed your DVD supports, which may be 8X) to insure a good burn and then insert high quality DVD+R media into your DVD drive. The ‘Verify’ box should be checked by default. Wait for the status located in the lower left corner to display ‘Ready’.

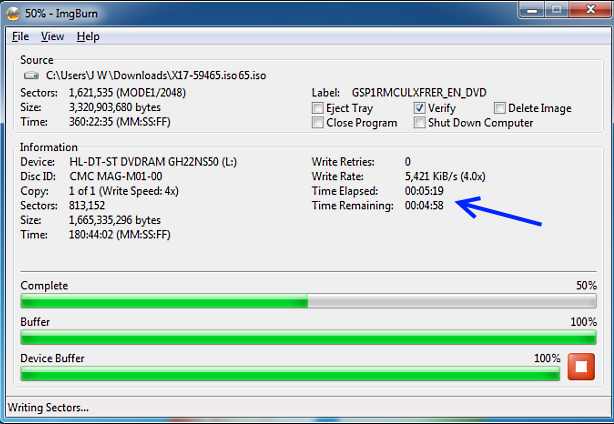
e) Click on the Blue ImgBurn arrow to start the creation of your DVD. At a 4X write speed the creation of the DVD should take about 10 minutes.

f) Check the ImgBurn log in the lower Window for the ‘Finalizing’ disk task to compete, the DVD tray will open and close quickly and the ‘Verification’ process begins. Time to complete verification is about 5 minutes.

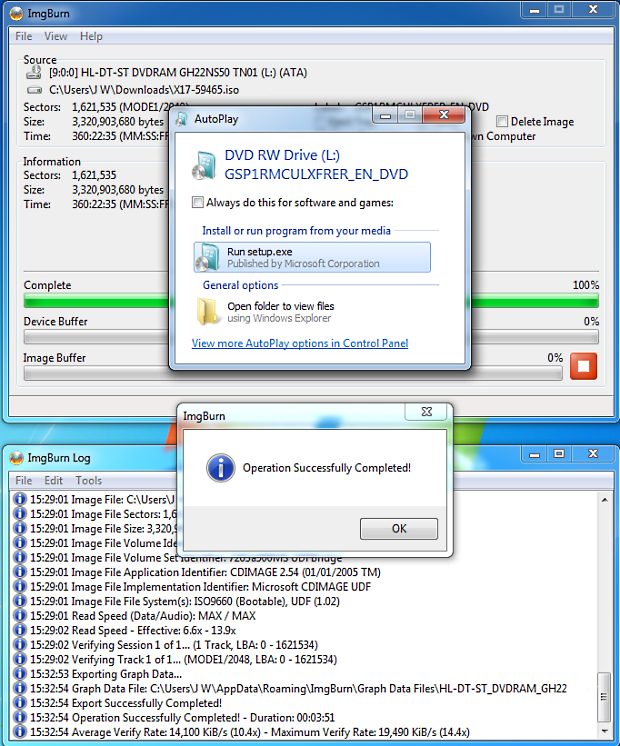
g) Upon successfully completion remove the DVD and insert it into a labeled paper or plastic sleeve. Then close out / exit the ImgBurn utility.

There is a guide published by NeoSmart which also shows the steps you need to perform and some trouble shooting tips: https://neosmart.net/wiki/burning-iso-images-with-imgburn/

5) Install Windows using your newly created installation DVD.

a) Verify that the boot order in your BIOS is set to boot from the DVD first and then 2nd in the list should be your disk drive.

b) Power up your computer and quickly insert Windows 7 installation DVD you created into your DVD drive. Press any key when prompted to do so, and in a few seconds Windows 7 will start loading files.

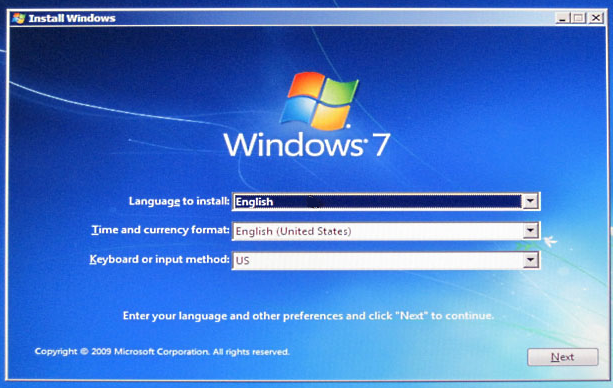
c) Now select the ‘Language to install’, ‘Time and currency format’ and the ‘Keyboard or input method’ options. Then click the ‘Next’ button to continue.

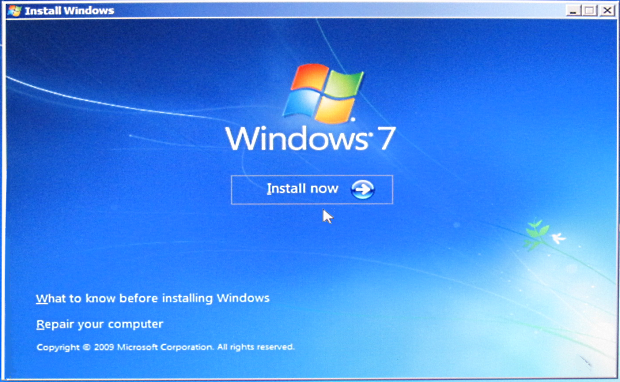
d) Choose / click on the ‘Install Now’ option to install Windows 7.

e) Select the operating system you want to install:
You will see the list of versions you have to choose from.

Move the mouse cursor or use the Up /Down arrow key to select the Windows 7 version that you want to install then click next.
(Note: Windows 7 Starter is only available when installing a 32Bit edition of Windows)

As a reminder, if your product key is for Windows 7 Home Premium then you cannot select a higher (Professional) or lesser (Home Basic) version of Windows as your product key will only activate Home Premium. The version you install must be for the product key you have!

f) Click ‘Next’ to proceed with the installation.

Read and accept the license terms.

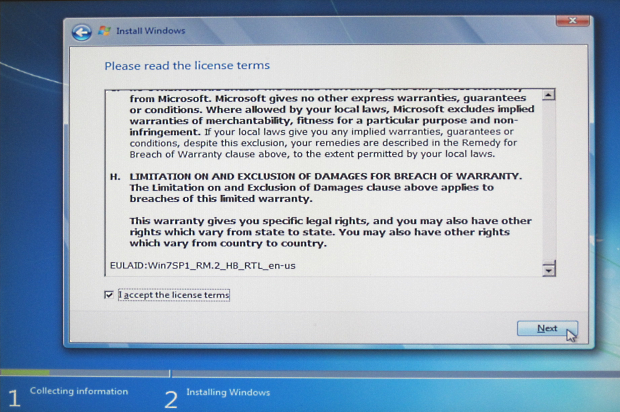
g) Click ‘Next’ to continue with and complete the installation of Windows 7.

Was this article helpful?

Sorry this didn't help.

Great! Thanks for your feedback.

How satisfied are you with this article?

Thanks for your feedback, it helps us improve the site.

How satisfied are you with this article?

Thanks for your feedback.

Unfortunately this did not work for me.  Followed the instructions to the letter TWICE.  SHA1 value matched in both tries.  Received "Success ei.cfg removed" message in both tries.  Created bootable USB using Windows 7 USB/DVD download tool.  After booting from the USB drive it does not give me the option to select which version of Windows I want to install.  Will only install Windows 7 Ultimate Service Pack 1.  Need to install Windows Professional.

19 people found this comment helpful

·

Was this comment helpful?

Sorry this didn't help.

Great! Thanks for your feedback.

How satisfied are you with this comment?

Thanks for your feedback, it helps us improve the site.

How satisfied are you with this comment?

Thanks for your feedback.

Solution found.  After creating the bootable USB using Windows 7 USB/DVD download tool, delete the following file: X:\sources\ei.cfg (where X:\ is your USB flash drive).  Then during install it will let you pick which version of Windows 7 you want to install.

12 people found this comment helpful

·

Was this comment helpful?

Sorry this didn't help.

Great! Thanks for your feedback.

How satisfied are you with this comment?

Thanks for your feedback, it helps us improve the site.

How satisfied are you with this comment?

Thanks for your feedback.

Step 1a; the download link is broken.

The Page or File You Requested Could Not Be Provided

Was this comment helpful?

Sorry this didn't help.

Great! Thanks for your feedback.

How satisfied are you with this comment?

Thanks for your feedback, it helps us improve the site.

How satisfied are you with this comment?

Thanks for your feedback.

There is a notice I included in the Wiki on Feb. 6th about this problem, It reads as follows:

Notice: As of February 6th, 2015 the links to the various versions of Windows 7 listed in step #1 below are no longer functioning, this may or may not be a temporary condition, as an alternative (as long as you have your product key) you can use the link to Microsoft's Software Recovery web page: http://www.microsoft.com/en-us/software-recovery

Note: You may receive a notice to contact the PC manufacture if you have an OEM key that came with your computer, but it can't hurt to try.

After you verify your product key below, you will download a disc image (ISO file) and use it to create a bootable USB or DVD. After the ISO file has been downloaded start at step #2 below.

J W Stuart: http://www.pagestart.com

Never be afraid to ask. This forum has some of the best people in the world available to help.

2 people found this comment helpful

·

Was this comment helpful?

Sorry this didn't help.

Great! Thanks for your feedback.

How satisfied are you with this comment?

Thanks for your feedback, it helps us improve the site.

How satisfied are you with this comment?

Thanks for your feedback.

I just want to say thank you! Removing the file worked for me. I have not tested using the removal utility to set any sort of "deletion bit". I did not have to. But note that, if you are using a USB flash drive, and not burning the ISO file to a DVD disc, you can actually delete the file using the command prompt during the setup. Thanks to the fact that, unlike a DVD disc, a USB flash drive is write enabled.

3 people found this comment helpful

·

Was this comment helpful?

Sorry this didn't help.

Great! Thanks for your feedback.

How satisfied are you with this comment?

Thanks for your feedback, it helps us improve the site.

How satisfied are you with this comment?

Thanks for your feedback.

One benefit of using a USB flash drive to install from, is that it is write-enabled at all times. So once you have written the ISO file to a USB flash drive, and you are at the initial setup screen, press Shift+F10 to drop to the command prompt. Then, you can use diskpart and issue the list volume command to figure out what drive letter your USB flash drive has been assigned. Look for "removable drive". Exit out of diskpart, and switch over to that drive letter. Then cd down to the sources folder and issue del ei.cfg to remove the file. Exit out of command prompt and click the big Install button to proceed with the installation as you normally would. You will be prompted now to select your Windows edition.

Note: This will not work if you are using a DVD disc to install from. In that case you have to remove the file beforehand, using the "deletion bit" trick as described in this article, or extract the ISO file and remove the file, then build a modified ISO file and write that to the DVD disc. You will need dedicated software for extracting and building ISO files.

6 people found this comment helpful

·

Was this comment helpful?

Sorry this didn't help.

Great! Thanks for your feedback.

How satisfied are you with this comment?

Thanks for your feedback, it helps us improve the site.

How satisfied are you with this comment?

Thanks for your feedback.

You said you "created bootable USB using Windows 7 USB/DVD download tool". This is why it did not work for you. If you read the readme.txt file for the utility, or if you just refer to it in the quote above, you can see that it says "works by toggling the deletion bit in the UDF file table". Well... a bootable USB flash drive uses NTFS file system, not UDF. Universal Disk Format is commonly used for DVD discs. Bootable Windows USB flash drives commonly use NTFS, and bootable Linux drives commonly use FAT32. So go ahead and write that ISO file to a DVD-R or a DVD-RW and you will see that it works.

I just tested and verified this. The utility modified 4 bytes in my original ISO file (so it's really a 32 bit change, not 1 bit, or 4 bit at very least). The SHA-1 value of the original file should not match the SHA-1 value of the modified ISO file. If they match, then you're not doing it right. But the SHA-1 value of the modified file should match to that of a second copy, or third copy, or forth copy... of course... it doesn't matter how many times you do it, the result should be the same. But of course, only UDF and DVD discs count. Not USB flash drives and NTFS.

I just thought you should know why you had that odd result. For a USB flash drive, you can always remove that ei.cfg file whenever you enter command prompt during setup, as I said earlier.

4 people found this comment helpful

·

Was this comment helpful?

Sorry this didn't help.

Great! Thanks for your feedback.

How satisfied are you with this comment?

Thanks for your feedback, it helps us improve the site.

How satisfied are you with this comment?

Thanks for your feedback.

window 7 iso file plz downlod

4 people found this comment helpful

·

Was this comment helpful?

Sorry this didn't help.

Great! Thanks for your feedback.

How satisfied are you with this comment?

Thanks for your feedback, it helps us improve the site.

How satisfied are you with this comment?

Thanks for your feedback.

As i know the Free ISO Burner and <removed> are good at creating a Windows installtion disk,i did,and personally speaking,it's much easier to make one using USB.
http://www.freeisoburner.com/

1 person found this comment helpful

·

Was this comment helpful?

Sorry this didn't help.

Great! Thanks for your feedback.

How satisfied are you with this comment?

Thanks for your feedback, it helps us improve the site.

How satisfied are you with this comment?

Thanks for your feedback.

Is this a bad joke? Conduit Search protect is a malware and browser hijacker.

Download clean ISO versions of windows of your choice with this tool

https://www.heidoc.net/joomla/technology-science/microsoft/67-microsoft-windows-and-office-iso-download-tool

Once you have the ISO, use virtually any working PC or laptop to create a bootable installation USB from the ISO.

2 people found this comment helpful

·

Was this comment helpful?

Sorry this didn't help.

Great! Thanks for your feedback.

How satisfied are you with this comment?

Thanks for your feedback, it helps us improve the site.

How satisfied are you with this comment?

Thanks for your feedback.


Forum Article Info


Last updated April 3, 2024 Views 142,479 Applies to: