
The Outlook Calendar is an integral part of our work life; it helps keep track of countless meetings, deadlines, events, zoom calls, and much more. Previously, Outlook’s built-in calendar had limited personalization options, but the new Outlook preview app changes this for the better.
Read on as we discuss how to customize the Outlook calendar to suit your needs.
What Is the Outlook for Windows Preview App?
Microsoft Outlook, now part of the Microsoft 365 Suite, has been the most popular desktop email client for over two decades. Its success, in my opinion, comes down to its overall simplicity and intuitive email/calendar features that have boosted productivity.

Unsurprisingly, Microsoft aims to retain the next wave of users by ensuring their continued adoption of its software. Through the Outlook for Windows preview app, the developers of Microsoft 365 aim to step towards embracing modernity while improving the ingenuity of core Outlook features. The new Outlook preview app is sleek, functional, and makes it really easy to personalize your Outlook experience. It also has unique features such as Gmail account integration into Outlook, and users can even directly integrate Skype and Microsoft Teams.
The Microsoft Outlook preview app is available to Microsoft 365 Insider program participants. Users who have signed up to be an ‘Insider’ are the first to receive the latest updates for their favorite Office apps. Microsoft relies on the feedback collected from the Insider community to improve features, resolve software bugs, and enhance user experience.
Once you’ve set up Microsoft 365 on your Windows PC, you can enable Outlook for Windows preview by sliding the Try the new Outlook toggle button in the top-right corner of your Microsoft Outlook client.
Fortunately, you can access the Outlook for Windows Preview app for free on Windows 10 and 11, even if you do not have a valid Microsoft 365 license. Here's how you can quickly get the Outlook for Windows preview app:
- From the Start menu, launch the Microsoft Store.
- Search for Mail and install the app if you don't already have it.
- Launch the Mail app and set it up with an email account.
- On the top-right corner, enable the Try the new Outlook toggle button.
- The app will then restart to the new Outlook preview app.
How to Set Up Your Calendar Layout on Outlook
The Outlook Calendar is easy to personalize and adjust according to your preferred style. Previously, there were limited options to organize the Calendar, but there’s a lot of room for customization now.
The Calendar layout in Outlook provides various options for customization, allowing you to switch between daily, weekly, monthly, or split views. These different views enable you to closely examine your daily or weekly schedule while simultaneously having a broader overview of the month ahead.
To adjust the layout of the Outlook Calendar:
- First, select the Calendar icon from the left sidebar.
-
Select the View tab from the Ribbon.
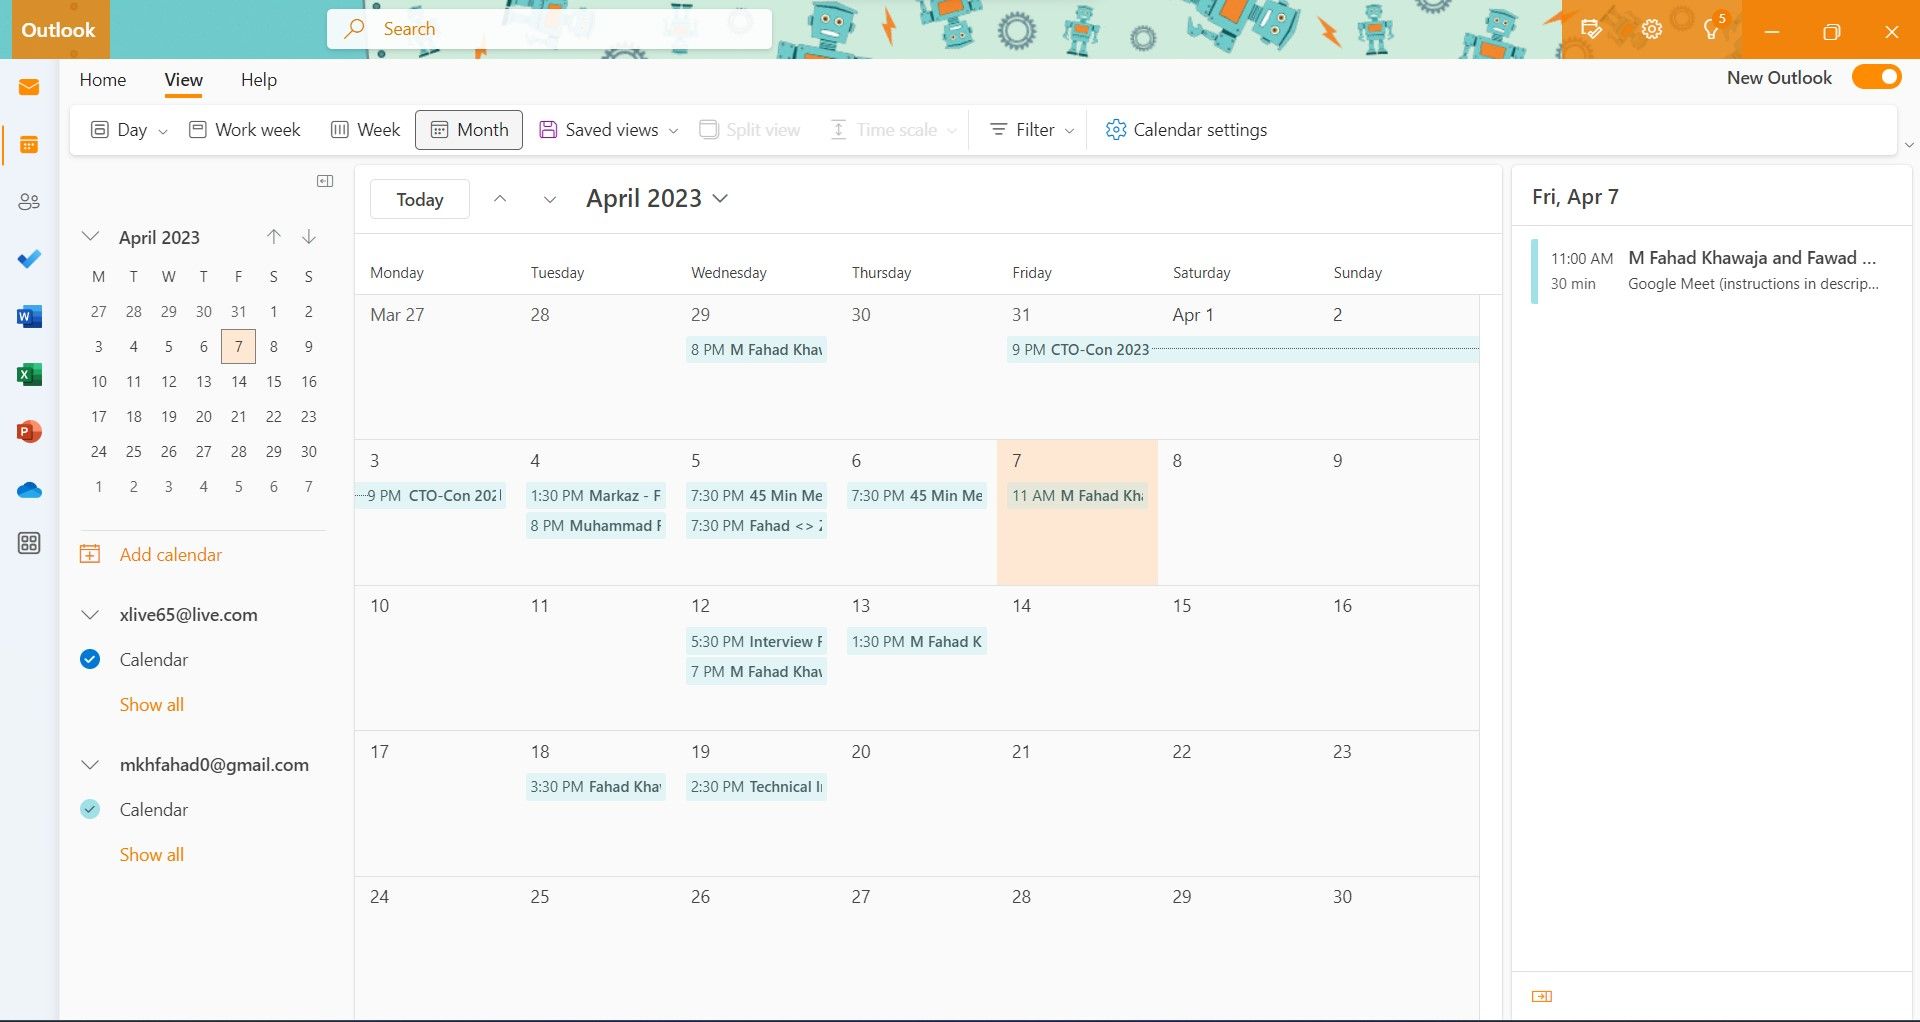
- Choose between Day, Work week, Week, or Month to adjust the view accordingly.
- You can also choose Split view to display calendars associated with different email accounts separately.
- To view upcoming events more detailedly, you can increase the Time scale to make more room for details.
- Once you’ve organized a view to your preference, you can save it as the default view the next time. To do so, select Saved views and then Save the current view.

How to Filter Meetings and Events in Outlook Calendar
You can effortlessly sort through meetings and events to better organize your schedule if your calendar becomes overcrowded. You have the option to filter calendar events according to the following:
- Who is the meeting organizer is
- Whether the event has been canceled or is a draft
- What category the meeting belongs to
- Whether the event is repetitive or set as private

To access the filter options for your Outlook Calendar, select the Calendar icon from the left sidebar and then click on the View tab from the Ribbon. Select the Filter button and choose the required filter criteria from the dropdown menu.
How to Manage Calendar Time Settings in Outlook
You can personalize various date and time settings in the Outlook Preview Calendar for better calendar optimization. This customization allows you to set your work week, define your preferred meeting hours, and choose whether or not to display week numbers.
The meeting hours you see on your Calendar are, by default, set from 8 AM to 5 PM. This doesn’t set your availability status but is the default time scale on your calendar.
To adjust the calendar week and meeting hours settings:
- Head to your Outlook Calendar by selecting the Calendar icon in the sidebar.
- Select the View tab from Ribbon and then click on Calendar settings.
-
From the settings menu, select Calendar and then View.
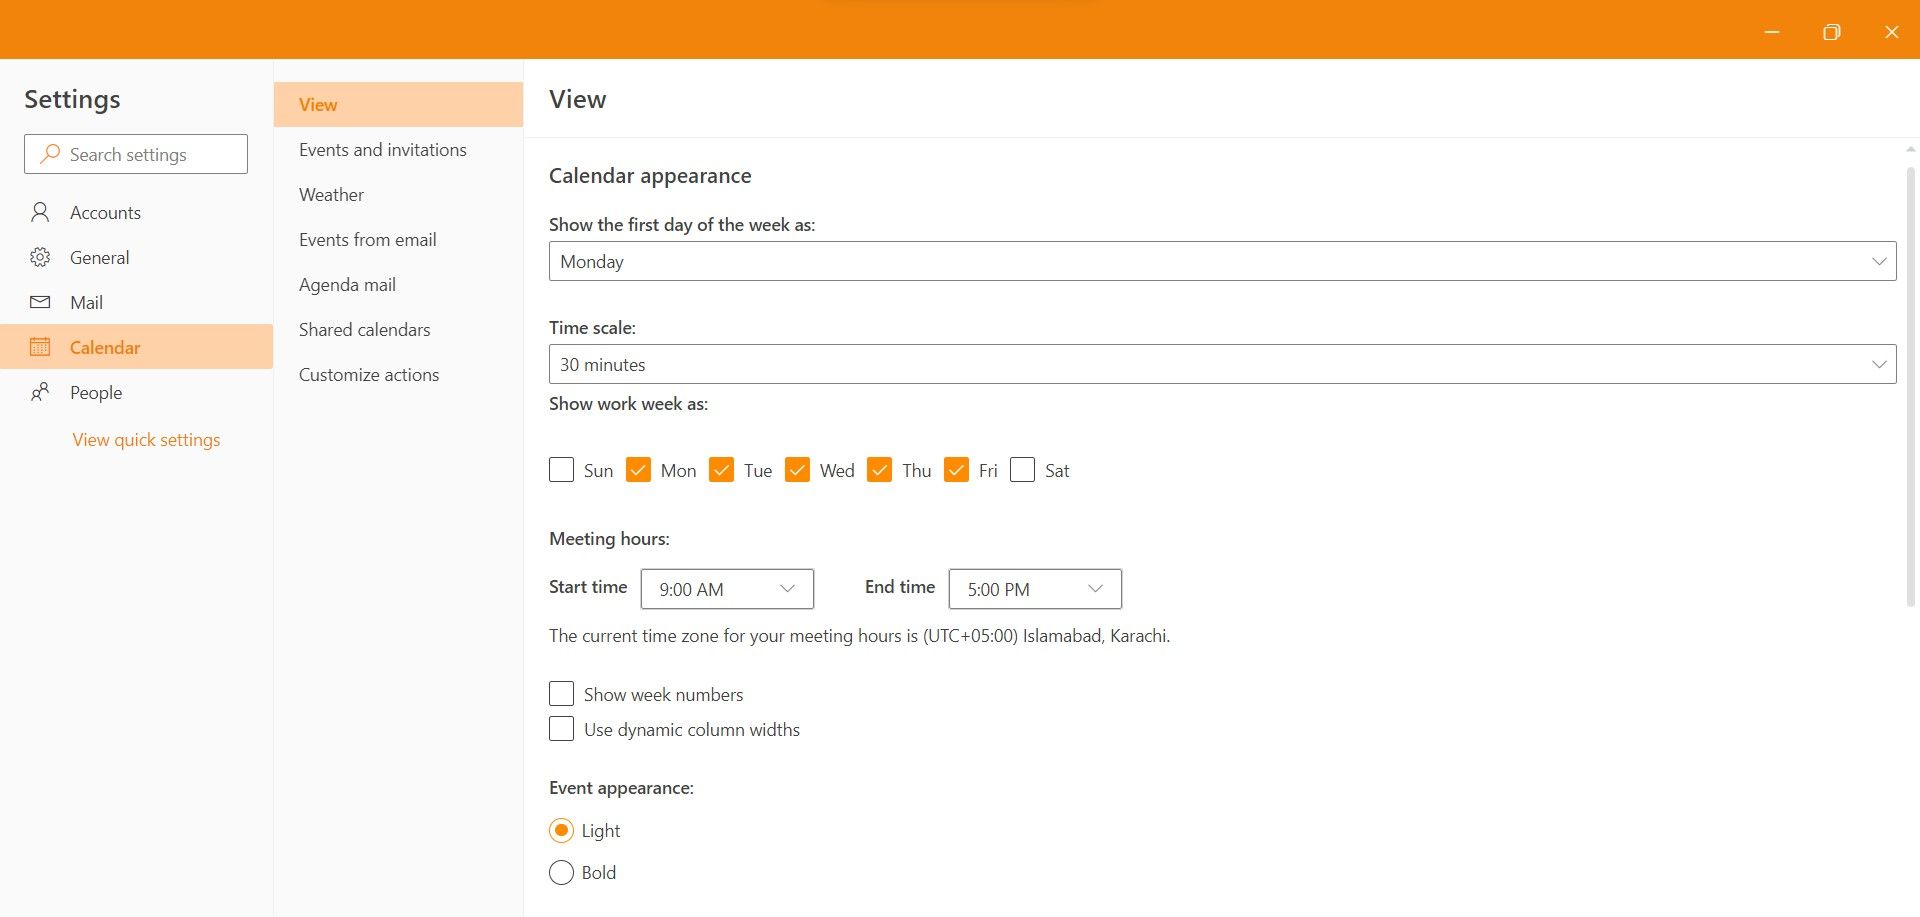
- Under the Calendar appearance section, you can change your work week, adjust meeting hours, and more.
- Finally, select the Save button to confirm your changes.

How to Add Time Zones in Outlook Calendar
If you frequently have to deal with clients and colleagues in a different time zone, you can easily add multiple time zones to your calendar. Doing so helps ensure you stay on track and never miss anything significant due to confusing time zone conversions.
To add an additional time zone to your Outlook calendar:
- Access your Outlook Calendar by clicking on the Calendar icon in the sidebar.
- Go to the View tab on the Ribbon and click on Calendar settings.
-
In the settings menu, choose Calendar and then View.
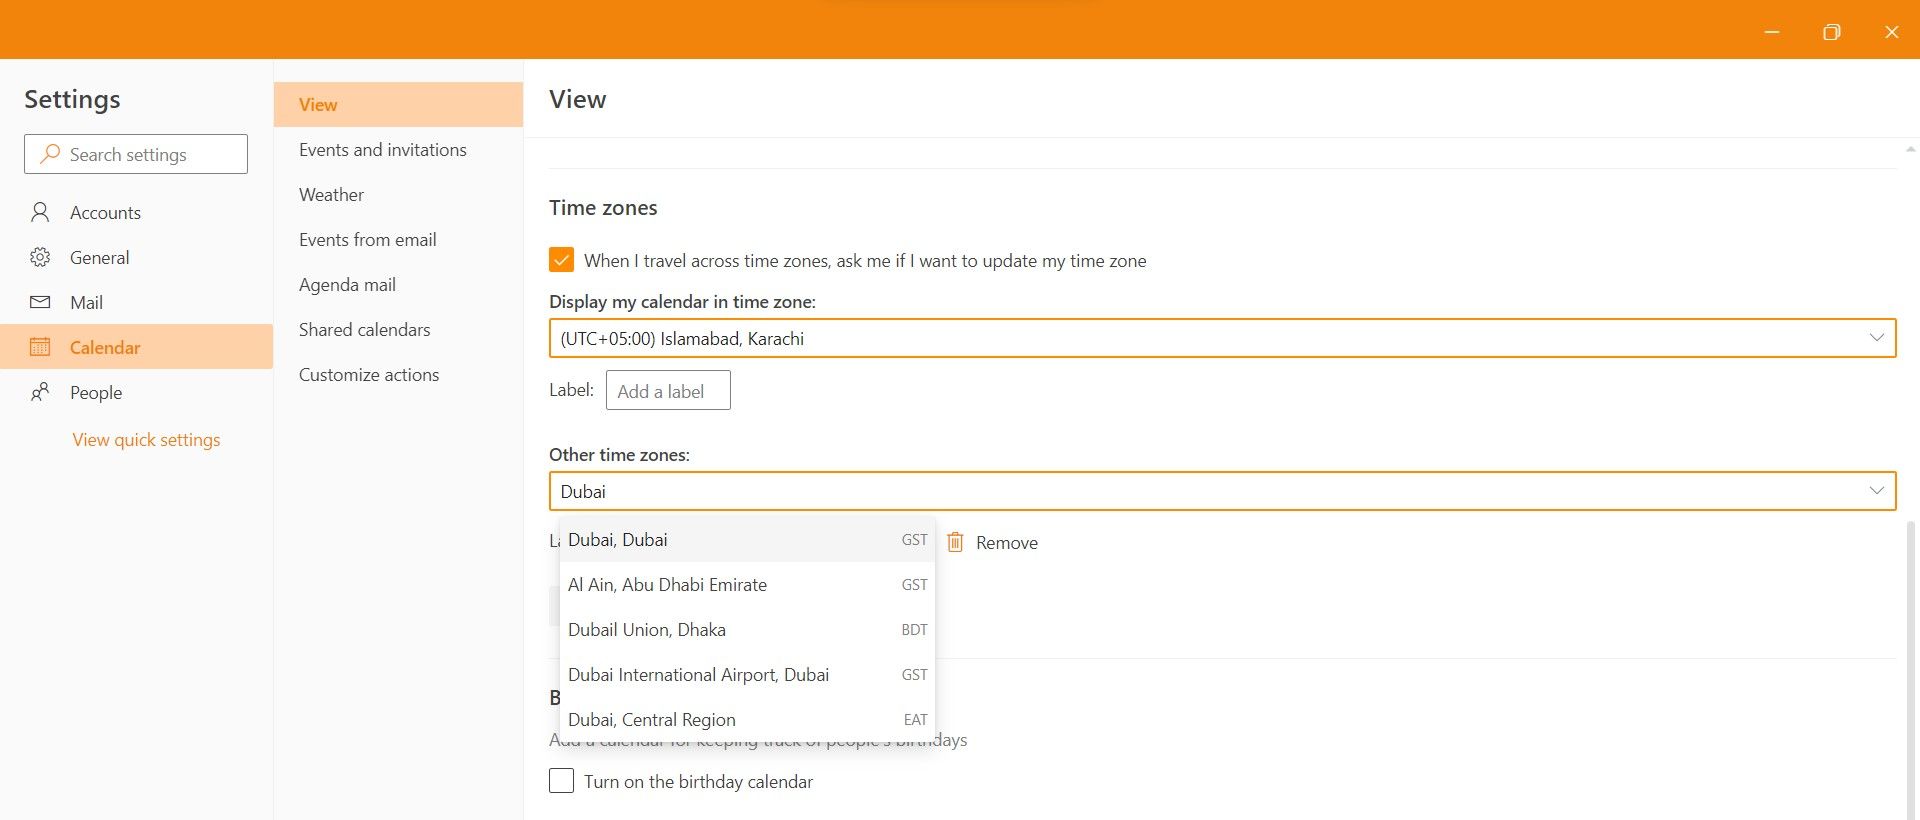
- Scroll to find the Time zones section.
- To update your current time zone, select one through the Display my calendar in time zone dropdown option.
- Add a new time zone by clicking the Add time zone button and searching for the relevant city/time zone.
- You can also add a label to make identifying the newly added time zone easier.
- Finally, select the Save button to confirm your changes.

How to Add Shared Calendars in Outlook
Outlook preview allows sharing your entire Outlook calendar with other people and giving them view or edit access. It can be beneficial for small teams that are working closely.
To share a calendar in Outlook:
- Navigate to Calendar > View > Calendar settings.
- From the settings menu, select Calendar and then Shared calendars.
-
Under the Share, a calendar section, choose a calendar to share.

-
In the Sharing and permissions window, type the email address of the user you want to invite and press Enter.
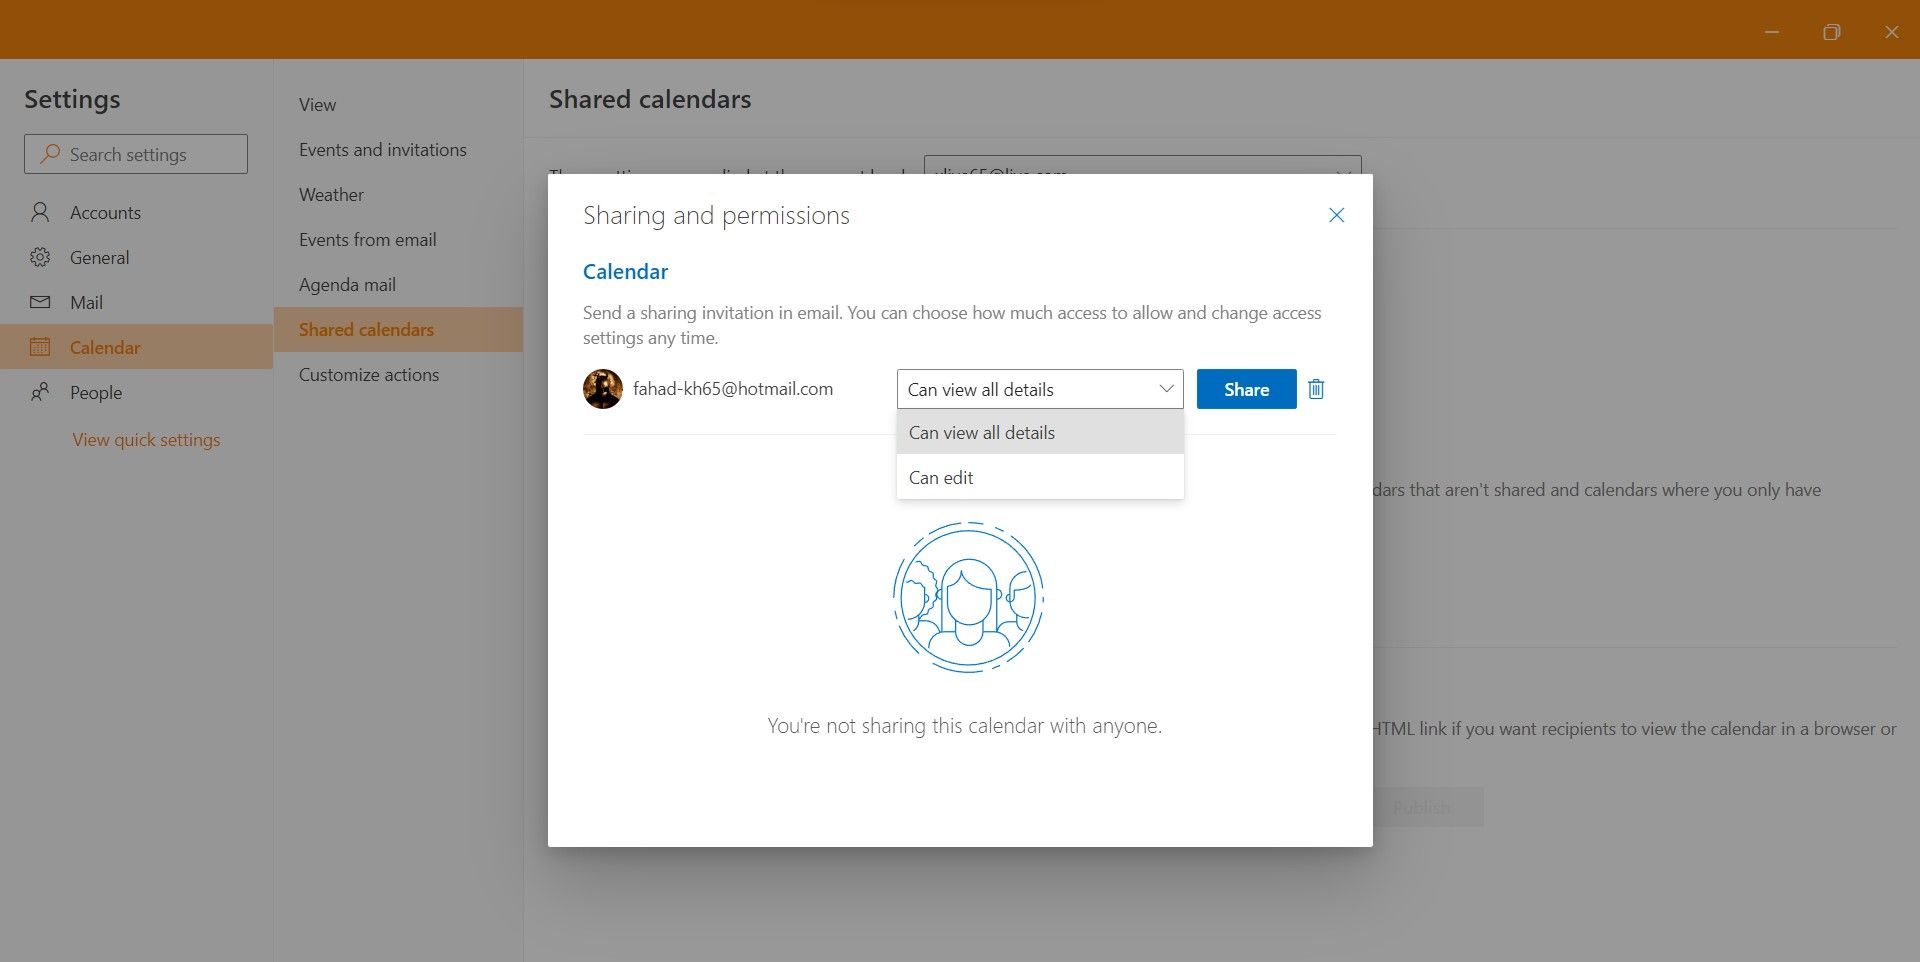
- Select the required level of access and click on Share.


Make Your Calendar Smarter
Thanks to the incredible customization options available in the Outlook preview, you can get more organized and productive. Microsoft has added plenty of exciting features in the new Outlook preview app and has given its users something exciting to look forward to.