Real-Time Data Streaming with Azure Event Hubs: A Guide to Ingesting and Processing Millions of Events Per Second
Azure Event Hubs is a highly scalable data streaming platform that enables the collection, storage, and processing of large volumes of data from different sources. It can handle millions of events per second, making it a perfect choice for data-intensive applications that require real-time processing. In this article, we’ll explore how to use Azure Event Hubs to ingest and process streaming data in real-time, with an example.

What is Azure Event Hub?
Azure Event Hubs is a cloud-based platform designed to handle high-velocity, real-time data streams. It enables users to capture and store data from different sources, including devices, applications, and services, in a scalable and reliable way. The platform supports multiple protocols, including HTTPS, AMQP, and MQTT, making it easy to integrate with a wide range of systems.
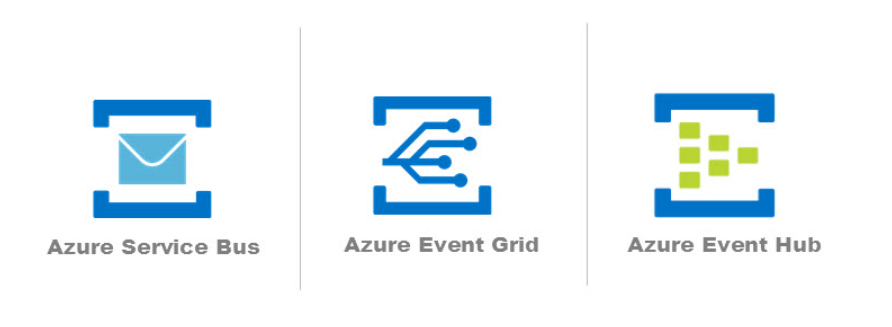
Azure Event Hubs is part of the Azure Messaging Services, which also includes Azure Service Bus, Azure Relay, and Azure Event Grid. Each of these services is designed to address different messaging scenarios, but they can also be used together to build comprehensive messaging solutions.
How to Use Azure Event Hubs
Using Azure Event Hubs involves three main steps: creating an event hub namespace, creating an event hub, and sending and receiving data. Let’s explore each of these steps in detail.
Step 1: Create an Event Hub Namespace
To use Azure Event Hubs, you need to create an event hub namespace, which is a container for one or more event hubs. An event hub namespace provides a unique DNS name for your event hubs and allows you to manage access policies and authorization rules.
To create an event hub namespace, you can follow these steps:
- Sign in to the Azure portal (https://portal.azure.com/)
- Click on “Create a resource” in the left-hand menu
- Search for “Event Hubs” and select “Event Hubs namespaces”
- Click on “Create” and fill in the required details, such as subscription, resource group, and region
- Click on “Review + create” and then “Create” to create the event hub namespace
Step 2: Create an Event Hub
Once you have created an event hub namespace, you can create an event hub within the namespace. An event hub is a partitioned stream of events that can receive and store data from multiple sources.
To create an event hub, you can follow these steps:
- Go to the event hub namespace you created in Step 1
- Click on “Event Hubs” in the left-hand menu
- Click on “Add” and fill in the required details, such as event hub name, partition count, and message retention period
- Click on “Create” to create the event hub
Step 3: Send and Receive Data
Once you have created an event hub, you can start sending data to it and receiving data from it. You can use any of the supported protocols to send and receive data, depending on your requirements.
To send data to an event hub, you can use an SDK or a client library that supports the protocol of your choice. For example, if you’re using .NET, you can use the Azure.Messaging.EventHubs package to send data to an event hub using the AMQP protocol.
To receive data from an event hub, you can use an SDK or a client library that supports the protocol of your choice. For example, if you’re using .NET, you can use the Azure.Messaging.EventHubs package to receive data from an event hub using the AMQP protocol.
Example: Ingesting and Processing Streaming Data in Real-Time
Let’s take a look at an example of how to use Azure Event Hubs to ingest and process streaming data in real-time. In this example, we’ll simulate an IoT device that sends temperature and humidity readings to an event hub.
I. Create an Event Hub Namespace and Event Hub
Follow the steps outlined in Step 1 and Step 2 above to create an event hub namespace and an event hub within the namespace.
II. Configure Access Policies and Authorization Rules
To allow the IoT device to send data to the event hub, you need to configure access policies and authorization rules. Access policies define the level of access that a user or application has to an event hub namespace, while authorization rules define the level of access that a user or application has to an event hub within the namespace.
To configure access policies and authorization rules, you can follow these steps:
- Go to the event hub namespace you created in Step 1
- Click on “Access policies” in the left-hand menu
- Click on “Add” to add a new access policy
- Enter a name for the access policy and select the permissions you want to grant, such as “Send” and “Listen”
- Click on “Create” to create the access policy
- Go to the event hub you created in Step 2
- Click on “Shared access policies” in the left-hand menu
- Click on “Add” to add a new authorization rule
- Enter a name for the authorization rule and select the permissions you want to grant, such as “Send” and “Listen”
- Click on “Create” to create the authorization rule
III. Send Data to the Event Hub
To send data to the event hub, you can use the Event Hub client library for .NET. In this example, we’ll use the Azure.Messaging.EventHubs package to send simulated temperature and humidity readings to the event hub.
Install the Azure.Messaging.EventHubs package using the NuGet package manager, and then use the following code to send data to the event hub:
string connectionString = "your_event_hub_connection_string";
string eventHubName = "your_event_hub_name";

await using (var producerClient = new EventHubProducerClient(connectionString, eventHubName))
{
    using EventDataBatch eventBatch = await producerClient.CreateBatchAsync();

    // Send simulated temperature and humidity readings
    for (int i = 0; i < 10; i++)
    {
        var eventData = new EventData(Encoding.UTF8.GetBytes($"{{\"temperature\":{20 + i},\"humidity\":{50 + i}}}", true));
        eventBatch.TryAdd(eventData);
    }

    await producerClient.SendAsync(eventBatch);
}
This code creates an instance of the EventHubProducerClient class and uses it to create a batch of event data. It then sends simulated temperature and humidity readings to the event hub.
IV. Receive Data from the Event Hub
To receive data from the event hub, you can use the Event Hub client library for .NET. In this example, we’ll use the Azure.Messaging.EventHubs package to receive temperature and humidity readings from the event hub and print them to the console.
Use the following code to receive data from the event hub:
string connectionString = "your_event_hub_connection_string";
string eventHubName = "your_event_hub_name";
string consumerGroup = "your_consumer_group_name";

await using (var consumerClient = new EventHubConsumerClient(consumerGroup, connectionString, eventHubName))
{
    using CancellationTokenSource cancellationTokenSource = new CancellationTokenSource();
    cancellationTokenSource.CancelAfter(TimeSpan.FromSeconds(30));

    await foreach (PartitionEvent partitionEvent in consumerClient.ReadEventsAsync(cancellationTokenSource.Token))
    {
        Console.WriteLine($"Temperature: {Encoding.UTF8.GetString(partitionEvent.Data)}");
    }
}
This code creates an instance of the EventHubConsumerClient class and uses it to read events from the event hub. It then prints the temperature and humidity readings to the console.
V. Process Data in Real-Time
Now that we have data streaming into the event hub and we’re able to read it in real-time, we can process it in real-time as well. One common use case for real-time processing is to apply anomaly detection algorithms to the data to identify anomalies or trends that require further investigation.
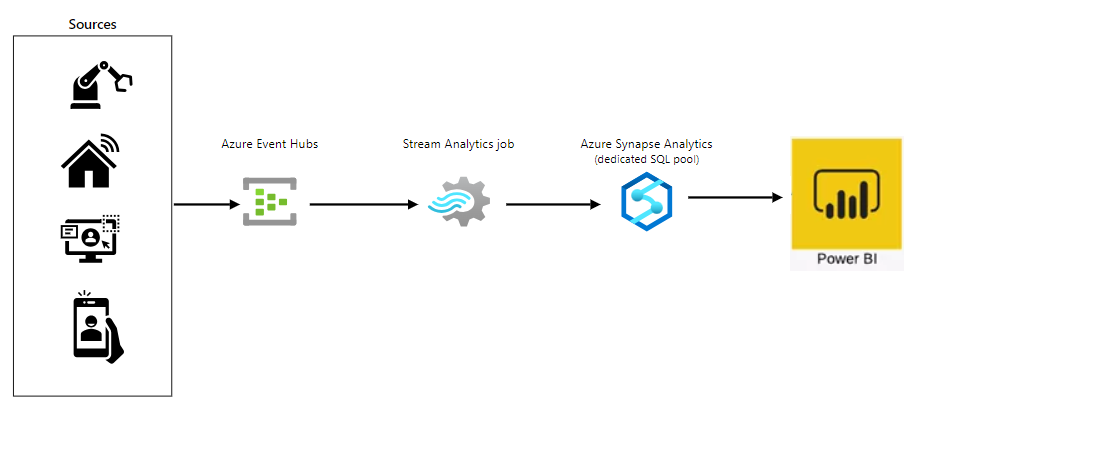
To process data in real-time, you can use Azure Stream Analytics, which is a fully managed service for real-time data ingestion and processing. With Stream Analytics, you can write SQL-like queries to process and analyze data in real-time.
To set up Stream Analytics to process data from the event hub, you can follow these steps:
1. Create an Azure Stream Analytics job by going to the Azure portal and clicking on “Create a resource” > “Analytics” > “Stream Analytics job”
2. Configure the input to the job by selecting “Event Hub” as the source type and specifying the event hub namespace, event hub name, and authorization rule
3. Configure the output to the job by selecting a destination for the processed data, such as Azure Blob Storage or Azure SQL Database
4. Write a Stream Analytics query to process and analyze the data in real-time. For example, you could write a query to detect anomalies in the temperature and humidity readings and output any anomalies to a separate output stream.
Conclusion
In this article, we’ve explored how to use Azure Event Hubs to ingest and process streaming data in real-time. We’ve seen how to send data to an event hub using the Event Hub client library for .NET, how to receive data from an event hub using the same library, and how to process data in real-time using Azure Stream Analytics.
Azure Event Hubs is a powerful tool for handling large volumes of streaming data, and can be used in a variety of scenarios, such as IoT device telemetry, social media feeds, and financial transactions. With the right tools and techniques, you can use Azure Event Hubs to unlock valuable insights and drive business value from your streaming data.