Title
Wired MAC-Based Authentication on Arista switches using AGNI
Article Type
Configuration
Author
Published Date
October 19, 2023
Updated Date
October 19, 2023
Table of Contents
Content
Introduction
This article will guide readers on configuring MAC-Based Authentication [MBA] for wired client devices using Arista Switches and AGNI.
Before we configure MBA, RadSec tunnel must be UP between Switch and AGNI. Please check the article for configuration: Configuring RadSec profile in EOS.
After the configuration is complete, these are the major steps:
- Verify the RadSec connection status between switch and AGNI.
- Configure AGNI as RadSec server on the switch for 802.1x
- Enable 802.1x globally.
- Configure interface to use MAC-Based Authentication.
- Configure a Wired Network in AGNI.
- Register clients in AGNI.
- Verify MBA works
Verify the RadSec connection status between switch and AGNI
For verification, navigate to AGNI’s UI: CONFIGURATION > ACCESS DEVICES > DEVICES.
Below, it can be confirmed that the RadSec tunnel is UP for the switch. Here the Green Circle icon means that RadSec is up and running.

Configure AGNI as RadSec server on the switch for 802.1X
Set the newly created RADIUS group - AGNI for 802.1x authentication and accounting. Note that the AGNI - server group has been previously configured. Sample below:
radius-server host radsec.beta.agni.arista.io tls ssl-profile agni-server
!
aaa group server radius AGNI
server radsec.beta.agni.arista.io tls
!
aaa authentication dot1x default group AGNI
aaa accounting dot1x default start-stop group AGNI
Verify the RADIUS configuration as shown below:
Arista(config)#show dot1x radius
RADIUS Server Status Time
------------------- ------------ -----------
Radsec.beta.agni.ari active n/a
The following steps are used for dynamic-authorization which is optional for now. Dynamic Authorization packets such as CoA use UDP 3799. This port needs to configured in EOS. But, It is also the default port:
Arista(config)#radius-server dynamic-authorization port 3799
Configure the switch to use the same SSL-Profile for dynamic authorization:
Arista(config)#radius-server dynamic-authorization tls ssl-profile agni-server
Enable 802.1X globally
Now that the AAA and RADIUS has been configured on the switch, use the following command to enable 802.1X.
Arista(config)#dot1x system-auth-control
Arista(config)#dot1x protocol lldp bypass
Arista(config)#dot1x dynamic-authorization
Configure interface to use MAC-Based Authentication
After enabling 802.1x globally, use the following configuration to enable MBA authentication. Jump into the interface, for example Et17:
Arista(config)#interface Ethernet17
Set 802.1X interface Port Access Entity type as Authenticator:
Arista(config-if-Et17)#dot1x pae authenticator
Set port control state to automatic:
Arista(config-if-Et17)#dot1x port-control auto
Set the Host mode for authentication on this interface. Below, Multi-Host is being configured instead of Single-Host. However, each host has to authenticate individually. Please check the TOIs on Arista's public website for more information on different setups.
Arista(config-if-Et17)#dot1x host-mode multi-host authenticated
Finally, configure MAC authentication method for this interface.
Arista(config-if-Et17)#dot1x mac based authentication
Verify the 802.1x configuration on the interface as shown below:
Arista(config)#show dot1x interface ethernet 17
Dot1X Information for Ethernet17
--------------------------------------------
Port control: auto
Forced phone authorization: disabled
EAPOL: enabled
Host mode: multi-host authenticated
MAC-based authentication: enabled
MAC-based authentication host mode: Unconfigured
MAC-based authentication always: disabled
Quiet period: 60 seconds
TX period: 5 seconds
Maximum reauth requests: 2
Ignore reauth timeout: No
Auth failure VLAN: Unconfigured
Unauthorized access VLAN egress: No
Unauthorized native VLAN egress: No
EAPOL authentication failure fallback: Unconfigured
Configure a Wired Network in AGNI
Now that the switch is ready and configured, a network needs to be configured in AGNI which will be used by the switch for authentication requests.
Verify that the RadSec status is UP in AGNI.Navigate to AGNI: Configuration > Devices:

Create a Device Groups, this will be useful later when creating network. Navigate to AGNI: Configuration > Device Groups. Click Add Access Device Group as shown below:

Provide a Name and Description for the Network. Select the Switch from the Second Table by clicking the Add button.
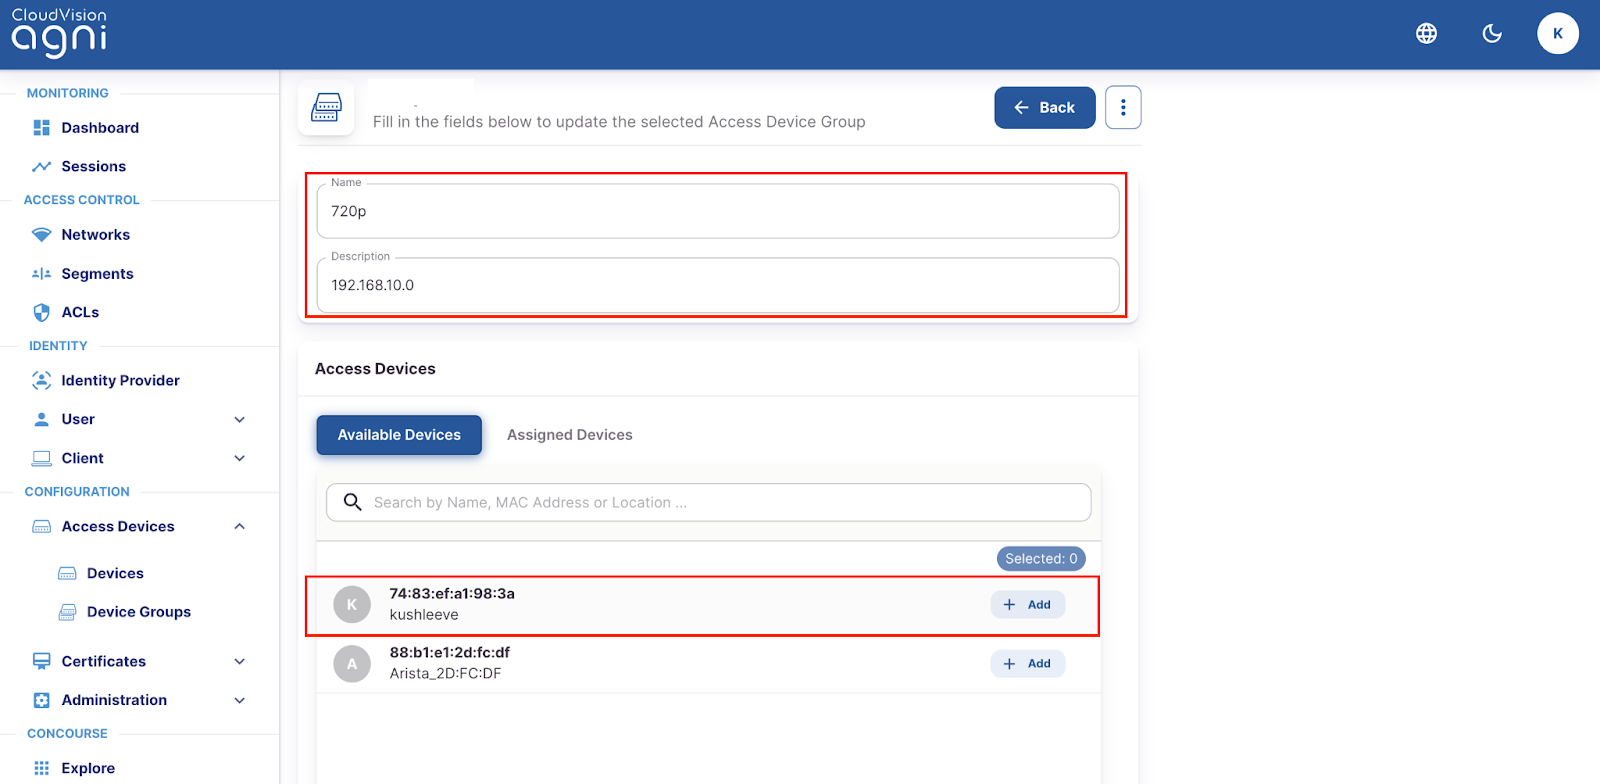
User can double-check, by navigation to the Assigned Devices tab. The devices will be listed.

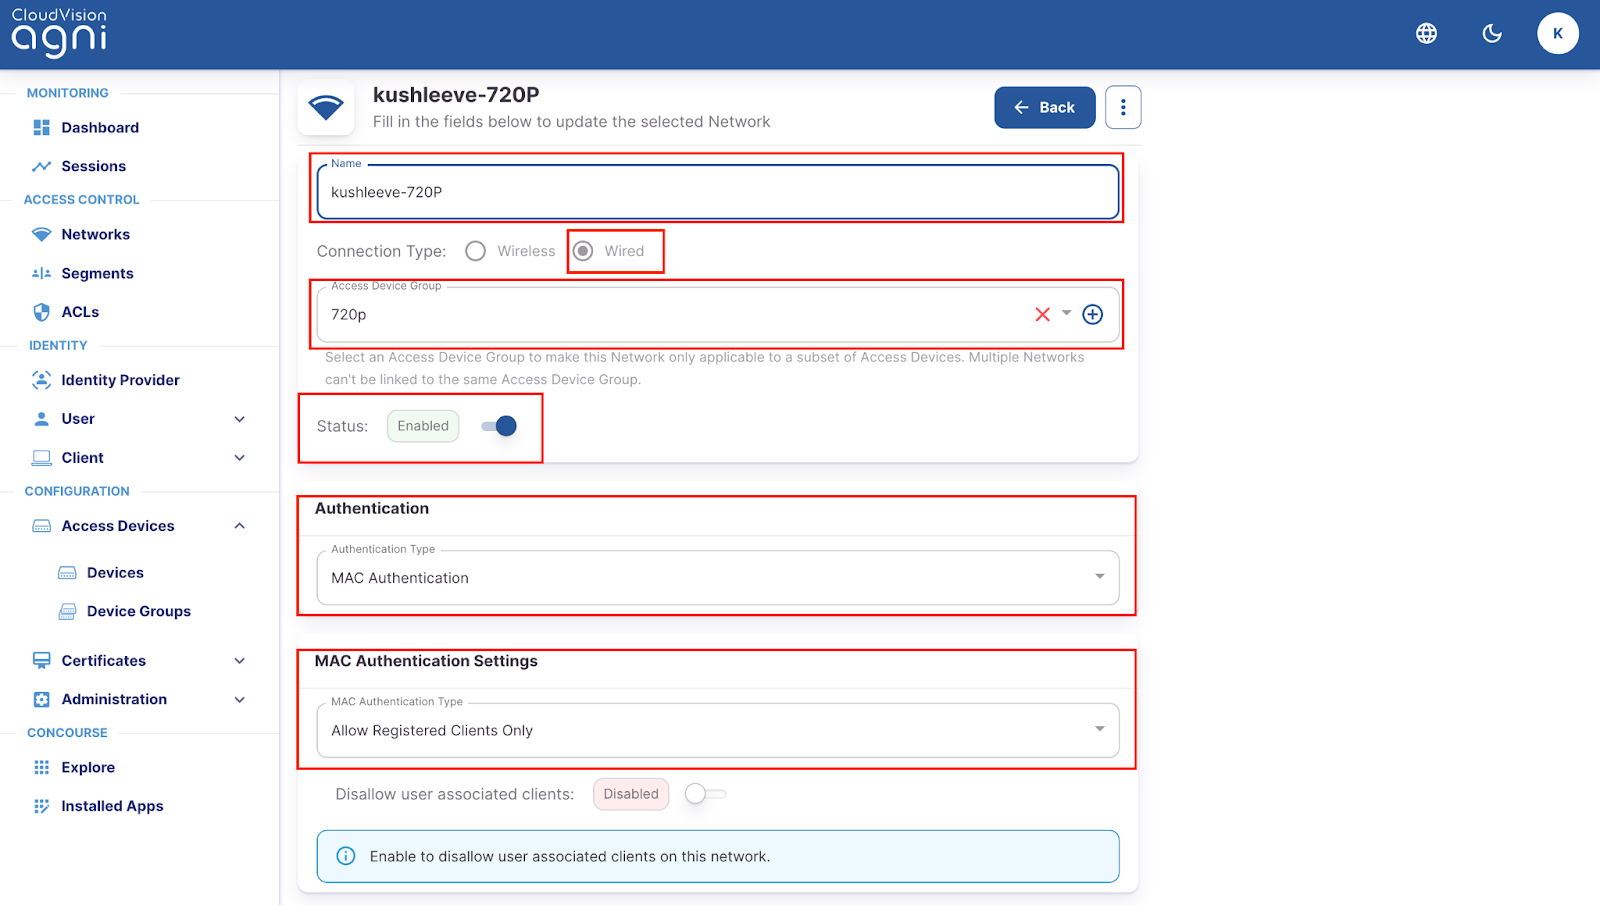
After the device group has been created, navigate to AGNI: Access Control > Networks.

In the screenshot below, Name has been provided. Wired has been selected as connection type. Previously created group 720p has been selected as Access Device Group. The network has been enabled.
The authentication method has been configured to MAC Authentication. Further, it has been configured to allow Registered Clients only. Click Add Network.

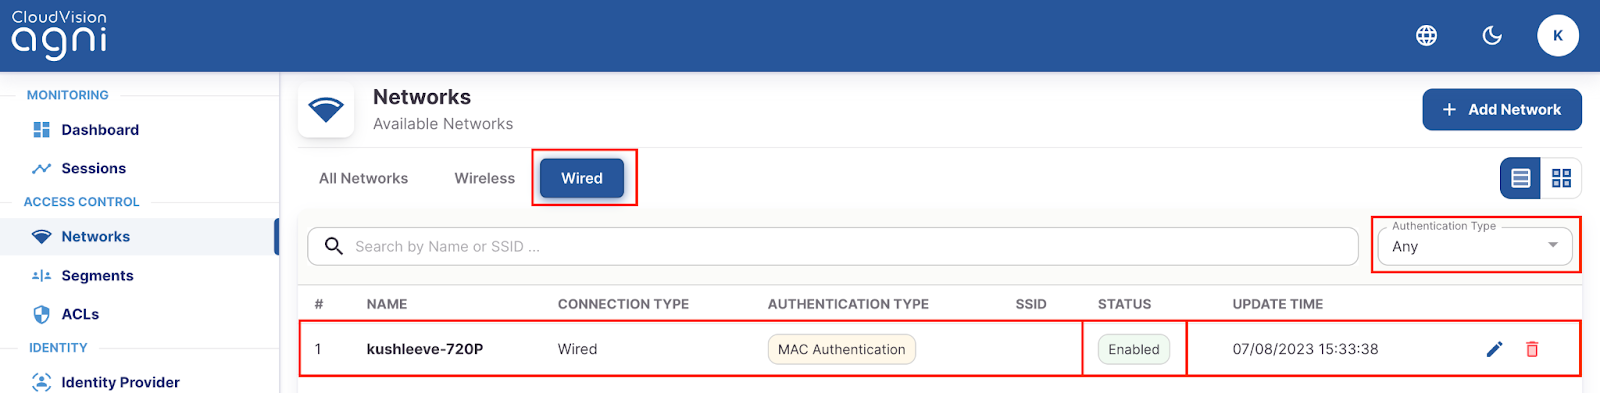
The newly created network will be listed. Please note the Page, Tab and the filter which affects items on the list.
Register clients in AGNI
Assuming that the client device that is being authenticated, will not be able to self-register, admins have option to add the devices manually. Printers, scanners,IP cameras, VOIP phones, etc can be such examples. Please note that this one of many ways that it can be done.
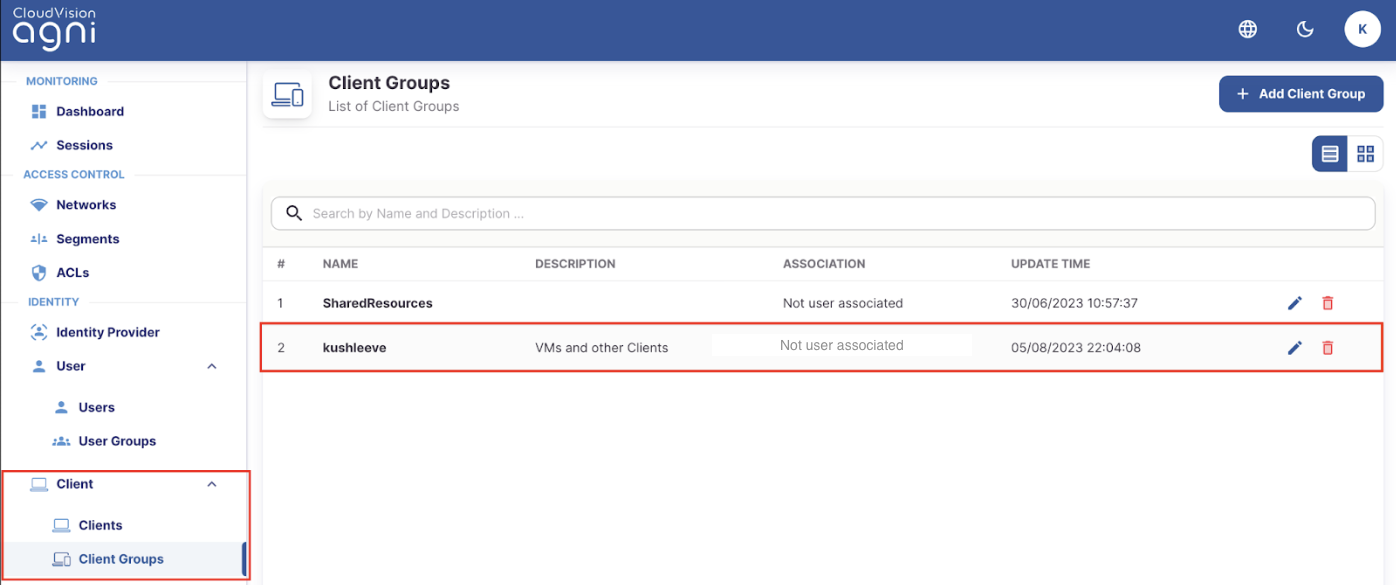
Navigate to the AGNI: Clients > Clients Group and click on Add Client or Import Clients as show below:
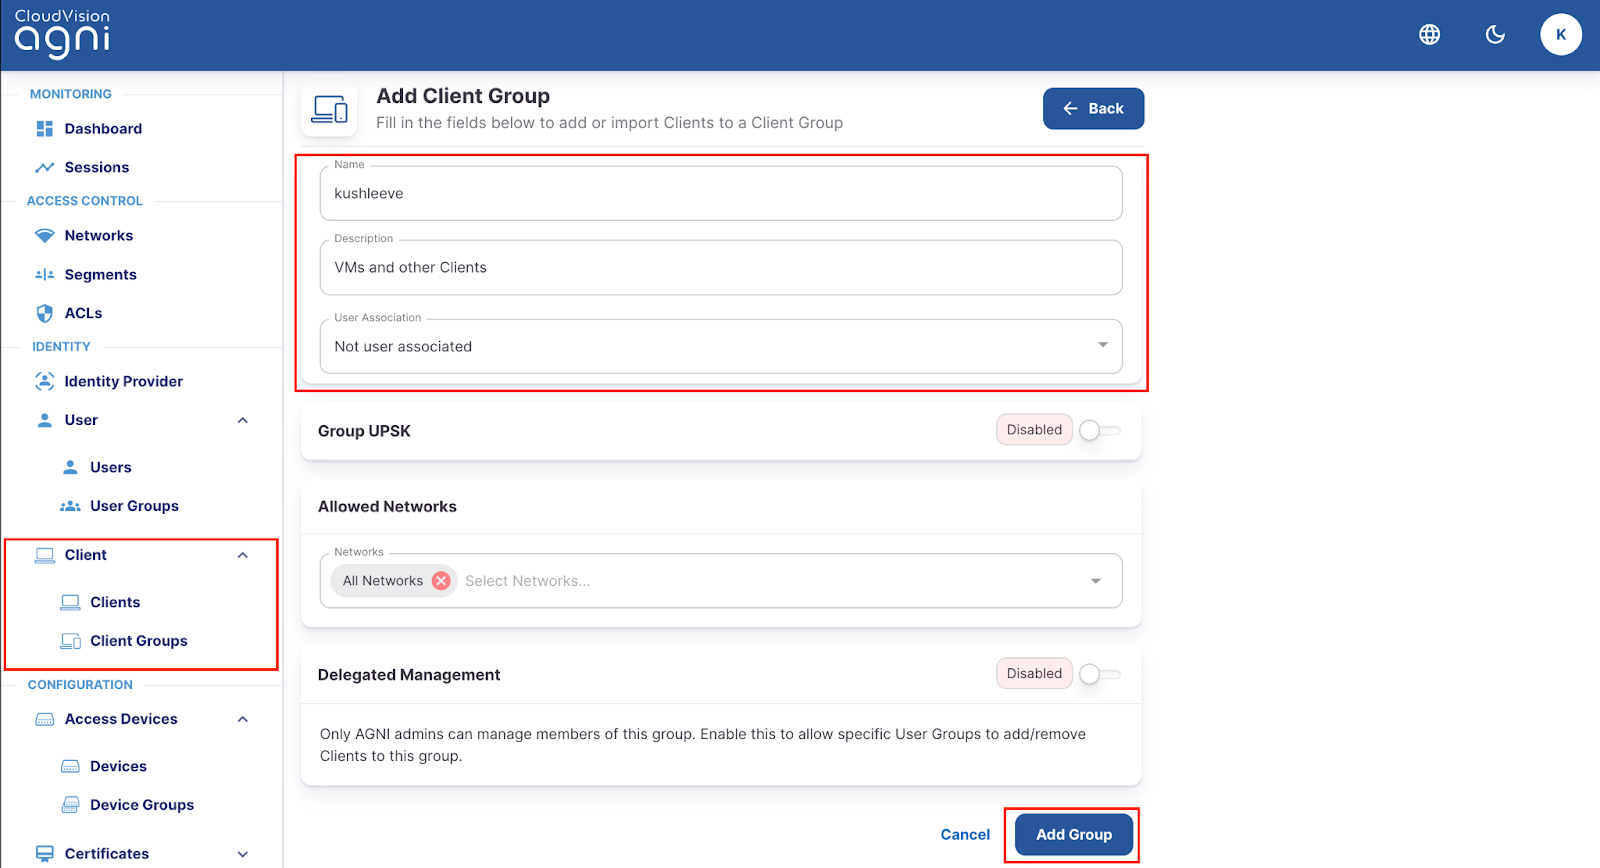
Once the Client Groups has been created, it will be listed as seen below:
Add a client to the newly created group as shown below:

Once clients have been added to the group the are listed as seen below:

Verify MBA works
At last, users can go ahead an plug the client to Et17. Following command can be used to check the authentication status.
Arista(config)#show dot1x hosts
Port Supplicant MAC Auth State Fallback VLAN
--------- -------------- ----- ----------------------- ---------------------- ----
Et17 6416.7f11.df46 MBA SUCCESS NONE
Et17 000c.293a.22e3 MBA SUCCESS NONE
Troubleshooting
AGNI provides admins with all session logs that can be useful for troubleshooting. This can be accessed by navigating to Sessions page in AGNI: Monitoring > Sessions. The list can be filtered based on type of authentication.
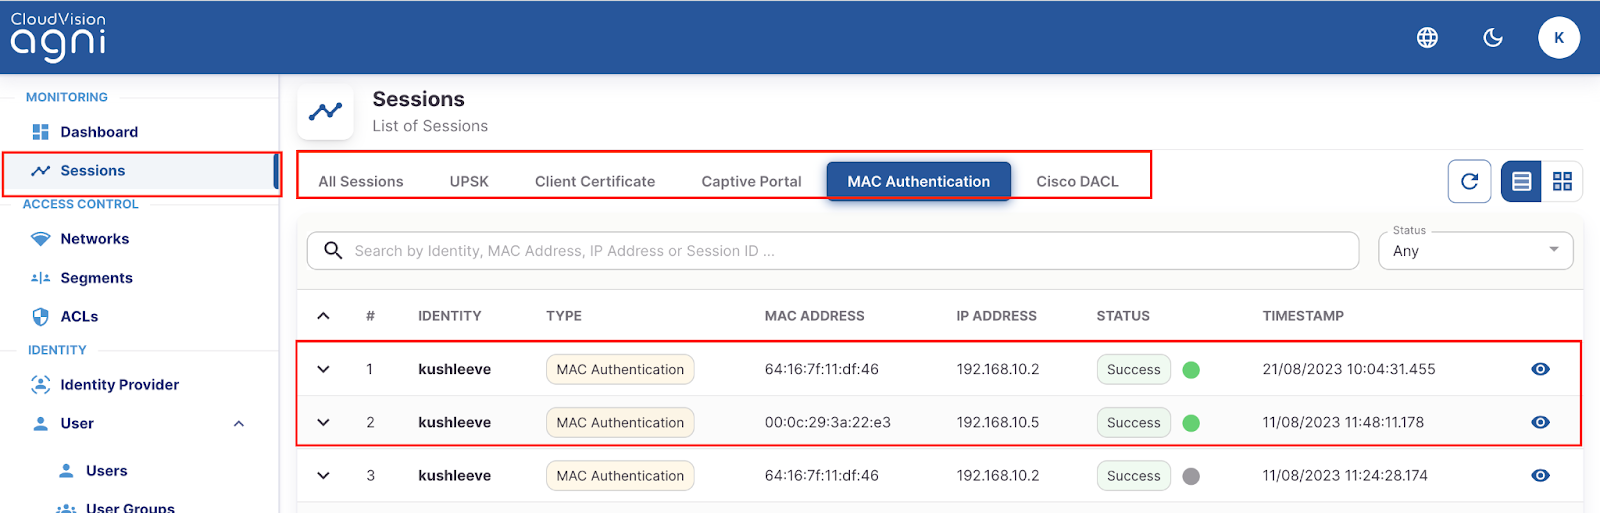
Click on the Eye icon at the far right to see more details about the clients. Once you are in the Session Details page, click on Show Logs button.

The logs seen below can also be downloaded.
