Table of Contents
In this post I'll briefly explain how to create and configure a custom Windows Service in C# using Visual Studio 2019. Before we start, it could be wise to quickly summarize what a Windows Service actually is and how it differs from a standard console program or desktop application.
NOTE: the most recent version of the source code explained in this post is now fully available on GitHub: if you like it, be sure to give it a star!
Introduction
In Windows-based operating systems, the term Windows Service refers to a computer program without a user-interface that completely operates in the background. If you know Unix-based environments, you could think of it as a Windows version of a typical Unix daemon. A Windows service must conform to the interface rules and protocols of the Service Control Manager, the kernel component responsible for managing Windows services.
Once installed, the Windows Service can be configured using the Service Control Manager (services.exe) to start when the operating system is started and run in the background as long as Windows is running; alternatively, they can be started manually or by an event. It's also possible to manually pause, stop and restart the service.
Each service can also be configured to run within a context of a specific user or system account: for example, most Windows services that come shipped with the OS are pre-configured to run within the context of three system accounts: System, Network Service and Local Service. Such behaviours allow them to operate even when the machine is unmanaged and/or a standard user is not logged on.
To get a glimpse of all services running on a Windows machine you can either:
- Open Control Panel, then navigate to the Administrative Tools and click on the Services icon.
- Press Window + R to open the Run window, then type services.msc and press ENTER.
Create the Windows Service Project
Open Visual Studio 2019 and select Create a new project from the initial dashboard. Type Windows Service into the filter textbox near the top to quickly find out the project template we're looking for: select the Windows Service (.NET Framework) project template and click Next.

Give the project a name and create it. After a few seconds, you should be prompted with your newly-created project and a blank page showing the Service1.cs file in Design Mode.
Create an Installer
The next thing we have to do is to create an Installer, which is the component that will register our Service with the Service Control Manager.
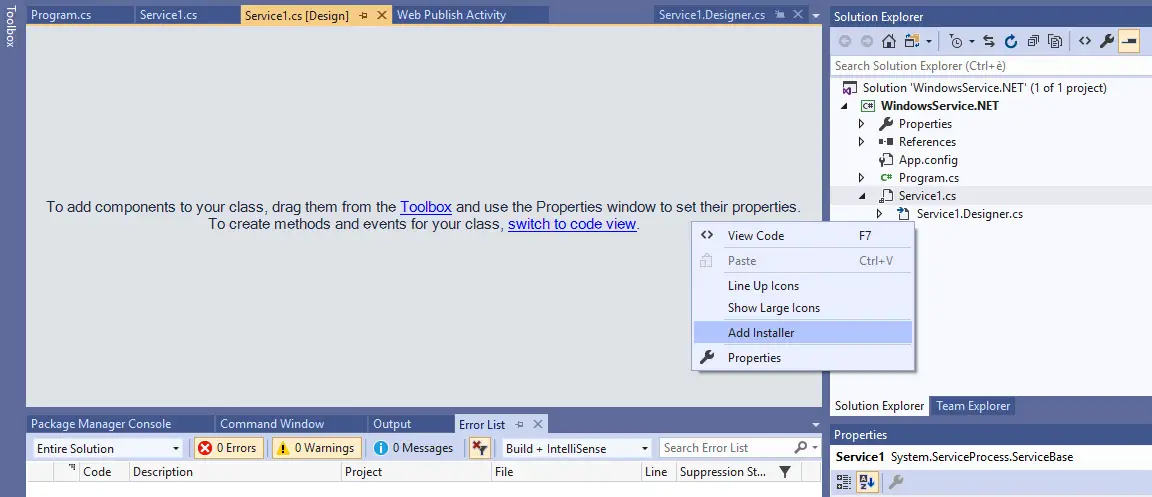
To do that, right-click on the blank area in the Design View of the Service1.cs file and select Add Installer from the contextual menu, as shown in the screenshot below:
Once you do that, a new ProjectInstaller.cs file will be added to the project. Save everything (CTRL + SHIFT + S), then open the ProjectInstaller.Designer.cs file and take a look at the InitializeComponent() method, which defines some important settings of our service: its name and display name, the account context used to run it, and so on.
Configure the Installer
Locate the lines defining the Username and Password (both set to null by default) and add the following line right above them to make our service use the LocalSystem account context:
|
1 2 |
this.serviceProcessInstaller1.Account = System.ServiceProcess.ServiceAccount.LocalSystem; |
Right after that, locate the line of code defining the ServiceName and change it accordingly:
|
1 |
this.serviceInstaller1.ServiceName = "WindowsService.NET"; |
You can also specify a Display Name and a Description by adding the relevant source code lines, in the following way:
|
1 2 3 |
this.serviceInstaller1.DisplayName = "WindowsService.NET"; this.serviceInstaller1.Description = "A sample Windows Service boilerplate written in C# using NET Framework and VS2019"; |
Here's how your InitializeComponent() method should look like after the changes:
|
1 2 3 4 5 6 7 8 9 10 11 12 13 14 15 16 17 18 19 20 21 22 23 24 25 |
private void InitializeComponent() { this.serviceProcessInstaller1 = new System.ServiceProcess.ServiceProcessInstaller(); this.serviceInstaller1 = new System.ServiceProcess.ServiceInstaller(); // // serviceProcessInstaller1 // this.serviceProcessInstaller1.Account = System.ServiceProcess.ServiceAccount.LocalSystem; this.serviceProcessInstaller1.Password = null; this.serviceProcessInstaller1.Username = null; // // serviceInstaller1 // this.serviceInstaller1.ServiceName = "WindowsService.NET"; this.serviceInstaller1.DisplayName = "WindowsService.NET"; this.serviceInstaller1.Description = "A sample Windows Service boilerplate written in C# using NET Framework and VS2019"; // // ProjectInstaller // this.Installers.AddRange(new System.Configuration.Install.Installer[] { this.serviceProcessInstaller1, this.serviceInstaller1}); } |
That's it for the installer: now let's switch to the Windows Service code itself.
Create a sample recurring task
Open the Service1.cs file and switch to Code View. As we can see, there are three main methods here:
- the Service1() method, aka the constructor, which internally calls the InitializeComponents() method that we modified in the previous paragraph.
- The OnStart() method, which is called once when the service is started.
- The OnStop() method, which will be called once when the service is stopped.
For our sample boilerplate we'll just add a basic timelapse logging feature to the default code:
|
1 2 3 4 5 6 7 8 9 10 11 12 13 14 15 16 17 18 19 20 21 22 23 24 25 26 27 28 29 30 31 32 33 34 35 36 37 38 39 40 41 42 43 44 45 46 47 48 49 50 |
public partial class Service1 : ServiceBase { Timer Timer = new Timer(); int Interval = 10000; // 10000 ms = 10 second public Service1() { InitializeComponent(); this.ServiceName = "WindowsService.NET"; } protected override void OnStart(string[] args) { WriteLog("Service has been started"); Timer.Elapsed += new ElapsedEventHandler(OnElapsedTime); Timer.Interval = Interval; Timer.Enabled = true; } private void OnElapsedTime(object source, ElapsedEventArgs e) { WriteLog("{0} ms elapsed."); } protected override void OnStop() { Timer.Stop(); WriteLog("Service has been stopped."); } private void WriteLog(string logMessage, bool addTimeStamp = true) { var path = AppDomain.CurrentDomain.BaseDirectory; if (!Directory.Exists(path)) Directory.CreateDirectory(path); var filePath = String.Format("{0}\\{1}_{2}.txt", path, ServiceName, DateTime.Now.ToString("yyyyMMdd", CultureInfo.CurrentCulture) ); if (addTimeStamp) logMessage = String.Format("[{0}] - {1}", DateTime.Now.ToString("HH:mm:ss", CultureInfo.CurrentCulture), logMessage); File.AppendAllText(filePath, logMessage); } } |
As we can see, we added the following stuff:
- The Timer private variable, which host a standard timer (from System.Timers namespace).
- The Interval private variable, which globally defines the timer interval in milliseconds.
- The OnElapsedTime() private method, which will be called upon each timer interval cycle.
- The WriteLog() private method, which logs a custom log message to a daily log file persisted on disk: such file will be created within the folder that hosts the service executable.
- A minimal implementation in the existing OnStart() and OnStop() methods to put everything together.
While we were there, we also changed the service's default name from Service1 to WindowsService.NET by adding the following line in the constructor, rightbelow the InitializeComponent() call:
|
1 |
this.ServiceName = "WindowsService.NET"; |
Alternatively, the ServiceName property can also be changed from within the Service1.Designer.cs file's InitializeComponent() method.
That's basically it: our service is ready to be installed and tested!
Installing the Service
To install our service, build the project in Release mode: once done, copy the WindowsService.NET.exe file from /bin/Release/ to a more "handy" folder - such as C:\Temp\WindowsInstaller\.
Right after that, open a Command Prompt with administrative rights and type the following:
|
1 |
"C:\Windows\Microsoft.NET\Framework\v4.0.30319\installutil.exe" "C:\Temp\WindowsService.NET\WindowsService.NET.exe" |
You should receive a quick confirmation message saying that everything went good.
Alternative install using SC CREATE
If you don't want to use installutil.exe, you can also install your service using the sc create command with the following syntax:
|
1 |
sc create "WindowsService.NET" binPath="C:\Temp\WindowsService.NET\WindowsService.NET.exe" |
However, if you do that, you'll have to manually specify the service name: also, the service Description won't be shown in the service list UI window (see below).
Testing the Service
Use Control Panel > Administrative Tools > Services to open the service list and scroll down until you'll find our new service:
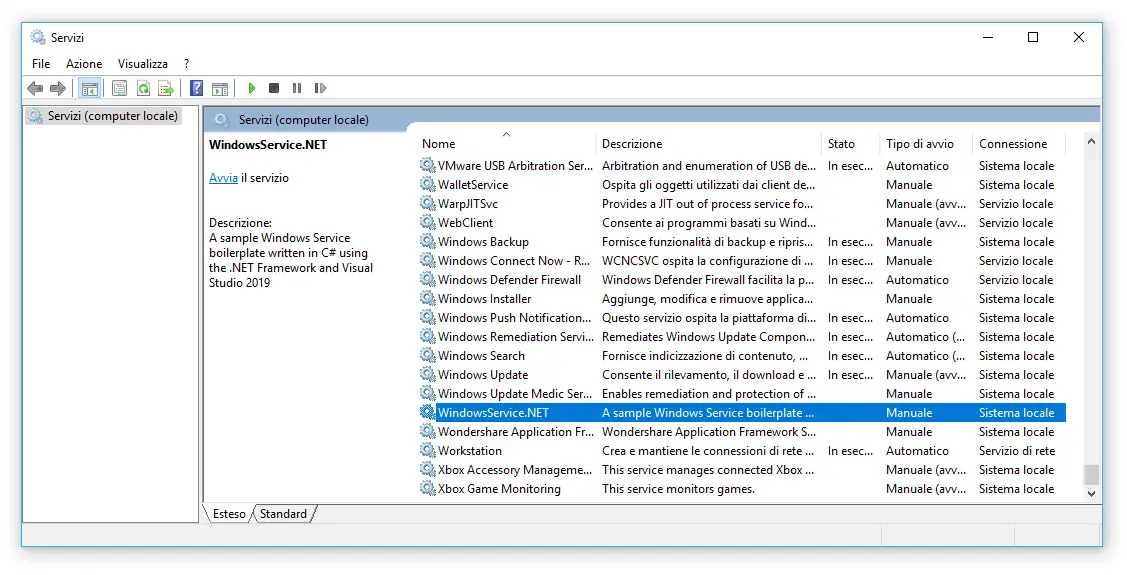
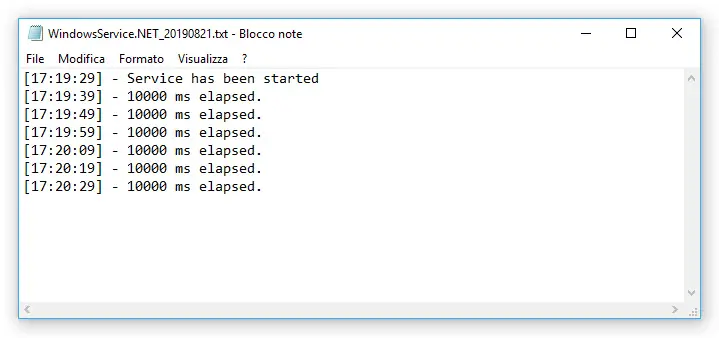
That's our boy! From here we can either manually start it or set it to automatic, so that it will be started whenever the system starts. However, I strongly suggest to not do that for now, since it would permanently drain your system resources if you forget to disable it - it's just a sample service after all! Let's just start it and take a look at the log file, which should be found in the executable folder:
|
1 |
C:\Temp\WindowsService.NET\ |
If everything went good, the log should be similar to this screenshot:
Removing the Service
To remove our service, open a Command Prompt with administrative rights and type the following command:
|
1 |
sc delete "WindowsService.NET"; |
Troubleshooting
It's worth noting that, whenever the service encounters an unhandled exceptions while operating, it will crash without writing anything to the Windows event log. For that very reason, I strongly suggest to wrap your main execution methods within a try/catch block and log any possible exceptions on disk - or somewhere else - so you can better understand what's going on. Such task can be very easy using the WriteLog() function within our sample code: don't forget to do that!
Conclusion
That's it: I hope that this guide will help other ASP.NET C# developers to create awesome Windows Services to fullfill their needs! If you like my project, feel free to give me a virtual hug by starring the GitHub project and/or putting a like on our Facebook/Twitter pages!


Worked like a charm, thank you!
This is an excellent, simple and straightforward example of a C# Web Service. Why would anyone go to all the trouble and overhead of creating an ASP.Net Web Page to provide simple, non-visual, data access services?
It was helpful, thank you