Windows 11 Installation Assistant is a good tool to upgrade your eligible Windows 10 computer to Windows 11. In this post, MiniTool Software will show you how to use this tool to upgrade to Windows 10. Besides, if Windows 11 Installation Assistant keeps closing or doesn’t work on your computer, you can try the method mentioned in this post to fix it.
What Is Windows 11 Installation Assistant?
Microsoft has rolled out Windows 11 on October 5, 2021. Three Windows 11 installation and upgrade tools were released along with Windows 11, including Windows 11 Installation Assistant, Windows 11 Media Creation Tool, and Windows 11 Disk Image (ISO) Download.
Windows 11 Installation Assistant is a Windows 11 installation tool for installing Windows 11 on the Windows 10 computer you are currently using. However, it doesn’t support ARM64 devices.
That is if Windows 11 is not showing up in Windows Update currently, your best choice to install Windows 11 is to use Windows 11 Installation Assistant. Tip: you can use Rufus to install Windows 11 22H2 without a Microsoft account.
How to Use Windows 11 Installation Assistant to Upgrade to Windows 11?
Step 1: Check if Windows 11 Installation Assistant can run on your computer
If you want to run Windows 11 Installation Assistant to upgrade your computer to Windows 11, your device should meet the following requirements:
- You have a Windows 10 license.
- Your device is running Windows 10 version 2004 or higher version.
- Your device meets the minimum hardware and system requirements for Windows 11.
- Your device should have 9 GB of free disk space to download Windows 11.
Windows 11, version 22H2 will be released on the second half of 2022. You can use Registry Editor to check if your PC is compatible with Windows 11 22H2.
Step 2: Download Windows 11 Installation Assistant
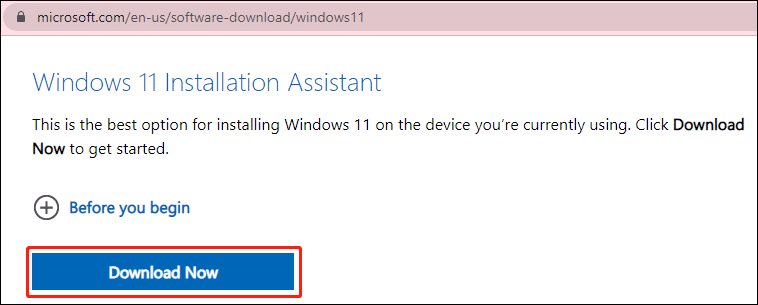
- Go to the Windows 11 software download page.
- Click the Download Now button under the Windows 11 Installation Assistant This tool will be downloaded to the specified download path.
Step 3: Run Windows 11 Installation Assistant to upgrade to Windows 11
1. Open the downloaded Windows 11 Installation Assistant.
2. Click Yes if you see the User Account Control interface.
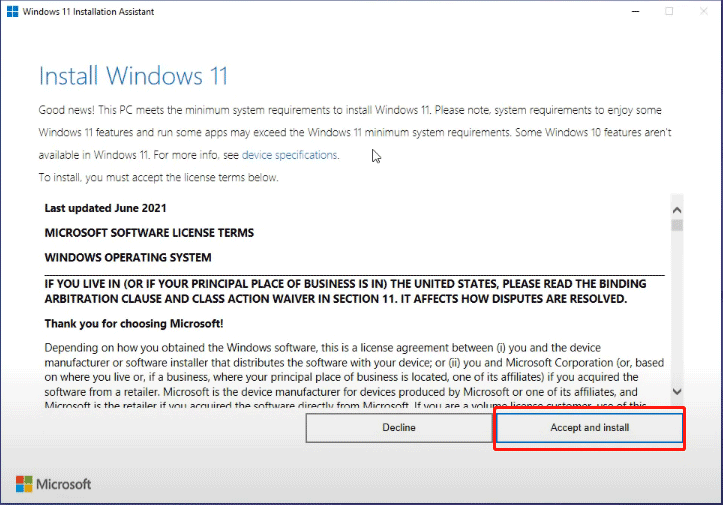
3. When you see the following interface, click Accept and Install to continue.
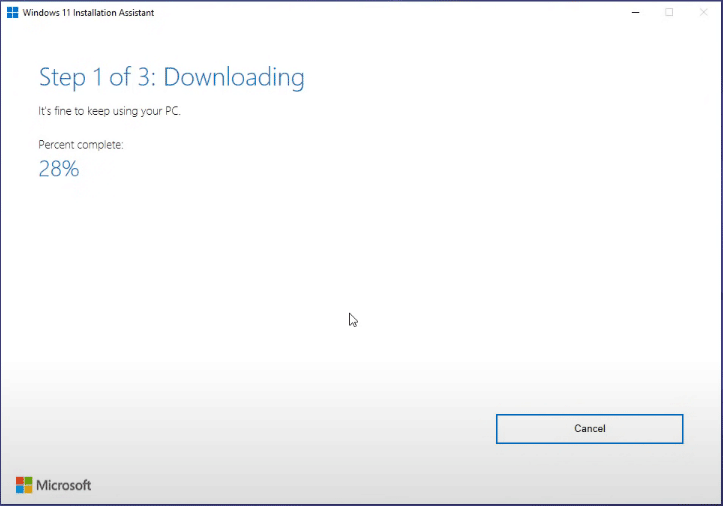
4. The tool begins to download and install Windows 11 on your computer. The whole process will last for a while. During the process, you can keep using your device as normal.
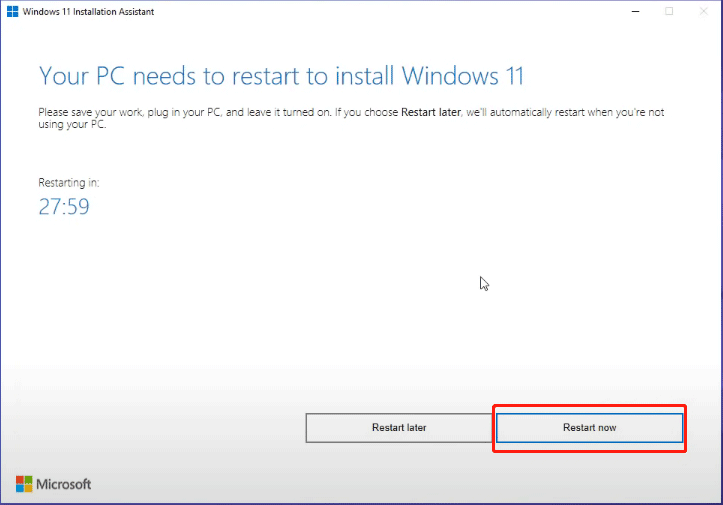
5. When you see the following interface, you should save your work. Then, click Restart now. You still need to plug in your computer and leave it turned on.
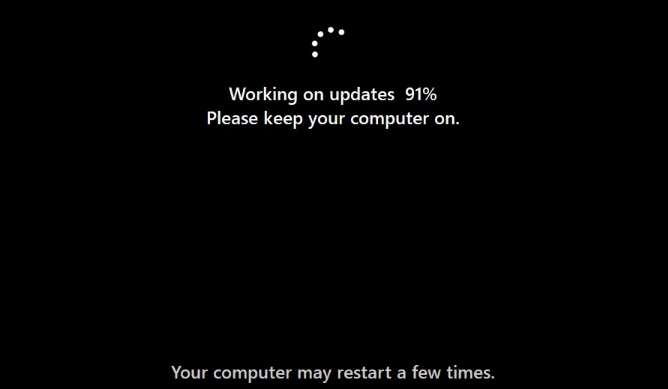
6. Your computer begins to work on updates. It will restart several times. You should wait patiently until the whole process ends.
After these steps, Windows 11 will be installed successfully on your computer.
If you want to install Windows 11 on another computer or an ARM64 device, you should use Windows 11 Media Creation Tool. Here is how to install Windows 11 on Arm with ISO.
Fix Windows 11 Installation Assistant Issues
Windows 11 Installation Assistant is used to upgrade from Windows 10 to Windows 11. If you are currently running a Windows 11 Insider preview build in the Dev Channel, Windows 11 Installation Assistant will not work or opening on your computer.

The specific performance is: after you open Windows 11 Installation Assistant, it will appear on the screen for one second and then quickly disappear/close. No matter how many times you try, the results are the same. Windows 11 Installation Assistant keeps closing or crashing is a normal situation if you are in the Dev Channel of the Windows Insider Program.
It doesn’t affect you because you have already got Windows 11. But if you still want to run it, you can try the following steps to enable the compatibility mode for Windows 7.
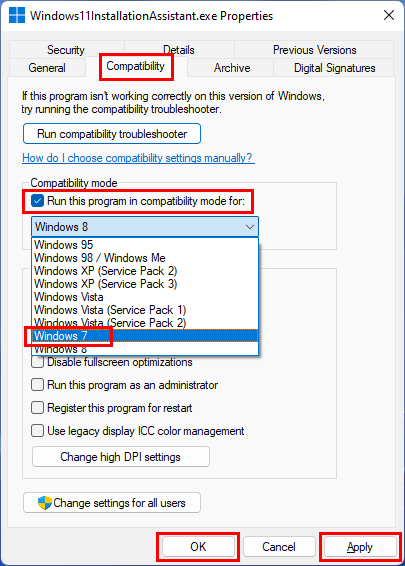
- Right-click the downloaded Windows 11 Installation Assistant and select Properties.
- Switch to the Compatibility section.
- Check Run this program in compatibility mode for and select Windows 7 from the drop-down list under Compatibility mode.
- Click Apply.
- Click OK.
In most cases, Windows 11 Installation Assistant keeps closing will be solved by using the above method. But if the issue persists, you can use another two tools (Windows 11 Media Creation Tool or Windows 11 ISO download) to install Windows 11 on your computer.
![How to Download & Install Windows 11 on Your Computer? [5 Ways]](https://images.minitool.com/minitool.com/images/uploads/2021/08/how-to-download-windows-11-thumbnail.jpg)
Now, you should know how to use Windows 11 Installation Assistant to upgrade your Windows 10 computer to Windows 11. If this tool keeps closing and disappearing, you can just enable the compatibility mode for Windows 7 to make it work normally. If you still have other related issues that need to be fixed, you can let us know in the comments.
About The Author

Position: Columnist
Stella has been working in MiniTool Software as an English Editor for more than 7 years. Her articles mainly cover the fields of data recovery including storage media data recovery and phone data recovery, YouTube videos download, partition management, and video conversions.