Giving Musicians the Tools to Make Better Music
How to Mix Vocals Like Tame Impala (With Free Preset!)

Tame Impala Free Vocal Presets!
Fill it out and we’ll send it over!
Check Your Email!
The Vocal Preset Pack! It's almost yours. It's being sent through cyberspace as we speak! Go check your email for a link to the download!
Tame Impala has got some sick vocals. And today I’m going to show you the plugins you should use to sound just like him, oh yeah, and we’re only using stock plug-ins!
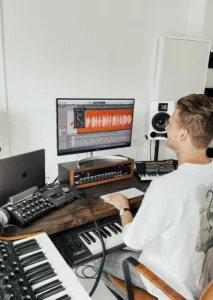
Hey everyone it’s Mattie back with another episode of “Behind the Mic” your go-to series for diving deep into the production techniques and vocal chains used by the world’s most iconic artists, all using nothing but stock plugins!
In today’s episode with have the african animal himself Tame Impala. And let me tell you, this vocal chain is far from tame. Tame Impala vocals are littered with reverb, effects, and a bunch of other processing to transform his vocals into a heavenly dream. We’ll go through each one step-by-step!
If you want to download a free vocal chain for Logic, Ableton, or FL Studio, fill out the form above!
If you missed the last behind the mic, we dissected and made a vocal chain for the Weeknd’s vocal chain right up here. If you’ve got an artist suggestion of who you want to hear next, leave it in the comments below!
If you want to follow along, you can download this vocal chain for free! The chain is also available for FL studio and Ableton users as well!
Let’s get into the good stuff!
Basic Processing
Here we are in this project. I’ve got vocal take of Tame Impala from one his songs called Let it Happen. If you want to hear its sound, go and check out the video!
This vocal in particular has a lot of reverb and spatial audio effects going on. Before getting into some of those cooler effects, let’s process our vocal like normal so it doesn’t sound so – microphony.
For this vocal sound, I recorded my voice onto an SM7B. This is a great vocal mic for getting vintage and classic sounds that I hear a lot in Tame’s Vocals. You can also use a condenser, but getting the recording right from the start will make things a bit easier.
EQ
Let’s start by taming some of the unwanted frequencies with EQ. Keep in mind that your EQ will be highly dependent on your mic selection, voice, and room acoustics.
First off in the chain, I put a normal logic EQ and cut out a lot of the low-mid range frequencies. The SM7B often has a high build up there. I also added a high pass filter to get rid of any unwanted room noise that might plague my track.
If we listen again to Let It Happen vocal, we’ll notice there’s still a lack of high end information in our vocal.
Let’s fix that by keeping true to our vintage, classic sound and adding a tube EQ. This is an emulation of a Pultec tube EQ and will be a great addition to add some sparkling high end to our voice.
To add this, I’ll change the high frequency to around 10k, I’ll make the band broader, and then I’ll boost the high end to taste! Afterwards, I’ll add some natrual distortion by turning this knob up here.
This Pultec simulated EQ is really in line with the Tame Impala classic sound and production techniques. And it sounds great.
Compression
Now, let’s compress our vocal so we can hear every part.
To start, I’ll keep in line with the vintage processing I was using before and throw on a Vintage 1176. My ration is moderate at a 3:1, my attack is a bit slower for vocals at 50ms and my release is quicker around 68ms. I’ll adjust the threshold until I’m getting at least 7 dbs of gain redutction.
Then, I’ll add another compressor to help the first out a bit. I’ll click and drag by holding option click to duplicate the plugin, then I’ll change some of the parameters. For this compressor, I’ll use a different type called an optical compressor, this is simulating an LA-2A type sound.
We’ll go for the vintage variant once again, and we’ll adjust the settings so that the vocal gets compressed more.
This time around I’ll use a lower ratio at 2:1, a faster attack and a slow release. This is to kind of glue the vocal together a bit. I’ll adjust the threshold to taste so that I’ll once again be hitting around 5dbs of gain reduction.
Sweet. Our voice is sounding better and better, but it’s still lacking a bit before we’re ready to add some cooler effects.
Distortion
Now it’s time to add some more grit to our vocals with distortion. In this case, clip distortion.
First I’ll adjust the parameters of the clip distortion so that we’re not getting this filtered effect. You can do that by grabbing these handles here and moving them upwards. This can be easier to adjust if you crank the wet knob all the way to 100%.
Once that’s dialed in, we’ll crank the wet knob down to around 30%. And we’ll affect the amount of distortion we hear by changing the input gain here. Remember that as you increase the input gain, you’ll probably want to turn down the output gain at the end to make up for the difference in volume. Louder sounds might trick your ears into thinking they’re better when they might not be.
The distortion in this case is adding some harmonic energy up at the higher parts of the frequency spectrum. This can help have it cut through the mix, and give it the rock anthem feel. Play around with this to taste.
Spatial Effects
Okay. We’ve got the basic processing down and now our voice is ready to receive some special treatment.
Let’s play the reference vocal again and compare it to what we have so far.
We’re still missing all of the reverb and delay type effects present on the original vocal, and that’s a huge part of the sound.
Let’s add these effects now.
Delay
To start off we’ll put some delay directly on the vocal. Let’s throw a stereo delay on.
Whenever you’re dealing with delay, if it’s synched with the BPM, the delay will blend in with the rest of the track. If you want your delay to stick out, in this case we do, then we can click this eighth note here to de-synchronize it from the beat. This will allow us to change the delay time in ms so that it’s a bit more prominent in the mix.
We want this first delay to be quick to give a bit more atmosphere to the vocals. We’ll also want to make sure we choose different values for the left and right ears to give it a bigger sense of space. In this case I’ll choose 200 ms in the left and 90ms in the right. Once we’ve got that set, we’ll adjust the wet knobs to determine how much of the sound we’ll actually hear.
Around 14% seems good.
That’s a great starting point, but we’re definitely going to need some more reverb and delay to make this thing happen.
Reverb 1
Let’s add three different busses to put these reverbs onto. The first will be a normal reverb. The second will be a flanged reverb, more on that later, and the last will be another delay.
For the first reverb, we’re not trying to reinvent the wheel here, we’re just trying to give some atmosphere to our main vocal. Let’s go into space designer, pick a large presets, bump the wet up to 100%, and add a bit of pre-delay.
Pre-delay will be how long it takes before the reverb actually plays reverb from when your main vocal plays. It helps make the vocal more intelligible, which when we’re using this much reverb is almost essential to have.
Now, we’ll adjust how much of this reverb we want to hear on our track by pushing up the bus send.
Additionally, we can gain more control of our reverb if we add an EQ after it. I’ll do that now and take out the highs and lows of the reverb.
It still needs a bit more reverb, but we’ll take care of that with the next bus.
Special Reverb
Onto bus number 2. For this reverb bus we’ll be following a similar pattern to the last one, but this time we’ll be adding a flanger effect after our EQ.
For this reverb, instead of space designer, let’s use chromaverb. Chromaverb I find a better option, for these really long decay reverb times. We’ll go up to the top, go to halls and choose a large one.
With chroma verb we can effect the reverb EQ by adjusting the parameters on the screen. It also happens to look pretty cool as we do it. We’ll take the wet up, add a touch of predelay, and mix in our bus send.
Similarly to last bus, we’ll then put an EQ after it to shape our sound even more. In this case I don’t want a lot of the low end information, and I want to boost the top!
Since we boosted the top here, our s sounds are becoming a bit too prominent. To combat that I’ll add a de-esser before hand to tame some of those sounds.
And now the moment of audio truth, we’re going to add our flanger and really nail the tame impala reverb sound.
A flanger will move an EQ resonance peak across the stereo spectrum and it gives a really unique sound.
Adding only on the reverb isn’t something I normally do, but it is something I hear in this reference, and it’s a pretty cool effect.
We’ll take the mix knob down a bit, but the default settings are pretty good. Listen to what that sounds like.
Woo hoo hoo, this is sounding pretty damn close. It’s not gonna sound exactly the same for a bunch of reasons, but for just using our stock plugins, we’re getting there.
Processing on Everything Else
And now that we have the processing on one vocal, it’s time to copy pasta these plugins on to the rest of our vocal tracks.
We can do that in logic by going to the mixer window with X, and holding option command c on the track we want to copy, selecting the others and hitting option command v.
Our vocal processing will be pretty much the same for all these save a few things. Namely the volume, the reverb sends, and the panning.
We’ll take all of these doubles and triples and harmonies and pan them around to get them out of the way of our main vocal.
We’ll also add in more of our reverb sends for our vocals we have on the chorus to add some more atmosphere.
And lastly we’ll mix them into taste to make sure they don’t overpower our main lead.
And here’s my favorite tip that we’ll use to tie everything together. You know that reverb bus you just made with the normal reverb and the flanged reverb? Yeah, we can use those to further help us make an awesome sounding track!
In fact, if we use it as our reverb on the other instruments in our song, we’ll be able to blend everything together and create a shared sense of space!
This is what Tame Impala does in his songs and I’d highly recommend doing it!
Just take the track you want to add the reverb to, and route it to that same bus send. Viola! It’s like it’s in the same room.
Conclusion
Take a listen to the final result with everything together by watching the video above!
And there you have it. A tame impala sound for the price of owning your DAW. Tight! Remember, you can download this vocal chain for free using the link below!

Mattie
Hey there, I'm Mattie—the man behind the beats, bytes, and blogs at Music By Mattie. With over 20 years jamming in studios and on stages, I've seen it all—or at least heard it. I created this space to cut through the noise (yeah, that's a pun) and give you straightforward, actionable audio advice.
Come join the ever growing 30,000 audio lovers looking to expand their sound! There's plenty of room!
All Posts
Post Info
Join "5 Beat Friday"
Every week you'll get 5 beats about the production world. Join the over 5,000+ other producers bettering themselves through 5 Beat Friday!