How to 3D Print ABS on an Open Printer
ABS (Acrylonitrile butadiene styrene) is one of the first plastic to be used with industrial 3D printers. Until now, ABS is still popular in a wide variety of fields thanks to its good impact, wear and heat resistance. But it is a bit difficult to print with due to the warping issues. We will explain the reason for warping, and give you some tips to reduce the warping when 3D printing ABS on an open frame printer.
Why is ABS Prone to Warp When 3D Printing?
To figure out the reason for the warping, we referred to the research by Nicolas Tokotuu of Polymaker. According to his explanation, a huge reason for the polymer warp is caused by the accumulation of internal stress created in the 3D printing process.
The origin of the internal stress hangs in doubt as there are many potential possibilities depending on your printer setup and exact filament. But one of the most likely reasons is that when the material is heated and extruded through the nozzle die, it generates a velocity profile that makes the polymer into a stretched stressed state.


This stretched stressed state is not its natural state hence the polymer needs to go back to the natural state by slowly releasing the stress.


However, if the temperature does not allow the polymer to freely move enough to release the stress, the accumulation stress through the layer will tend to lift up the layer from another, which is called deformation. If the layer or the print bed adhesion is strong enough to resist the deformation, the polymer will be able to release the stress without deforming the part. But if the layer is not stuck well to the build plate or the layer below it, the stress can cause the parts to have the layers delaminate from one another, or what we called warping.

Tips for 3D printing ABS on an Open Printer
To ensure the polymer has enough time to release the stress, you have to extend the time the polymer stays above its glass transition temperature. One reason 3D printer enclosure are good at preventing warping is because they can keep the ambient hotter so that your part has a longer time spent above its glass transition temperature, which means it’s releasing its stress slower.

But with an open frame 3D printer, you need some tricks to increase the amount of time the part spent above its glass transition temperature.
The easiest way to do that is to increase the extrusion temperature. It’s simple to understand. If your starting point is a higher temperature, it has to spend a longer time to reach the glass transition points. Commonly, the extrusion temperature of ABS is around 230°C and you can print it hotter up to 250°C or even higher. Running ABS at a higher temperature really makes a huge difference in reducing warping. If you want to print ABS constantly, you better get an all-metal hotend and make sure your printer is up to it.
The second way to increase the amount of time the part spent above its glass transition temperature is to increase ambient temperature using an external heating source.
You also can reduce the warping in the first place. As mentioned above, warping is caused by internal stress. And the internal stress is caused by the velocity profile which will stretch and align the polymer chains when extruding.
You can reduce warping by flattening this velocity profile. Increasing the nozzle size or slow down the extrusion speeds is an effective way to flatten the velocity profile.
In addition, the surface of the build plate can affect the warping. You are suggested to use a PEI sheet when printing ABS. Otherwise, you can paint a layer of ABS slurry on your glass bed..

To make the ABS slurry you will need:
- A chemically resistant bottle (a water bottle will do).
- 12 grams scraps of ABS. It’s to use the same color you want to print, or it’ll discolor your bottom layer.
- 50 milliliters acetone.
Dip the ABS scraps in the acetone for over 12hours, then paint the slurry on the build plate. You need to be very careful during the whole process as acetone is very flammable.
Tests for 3D Printing ABS on an Open Printer
Here are some tests for 3D printing ABS on an open frame 3D printer.
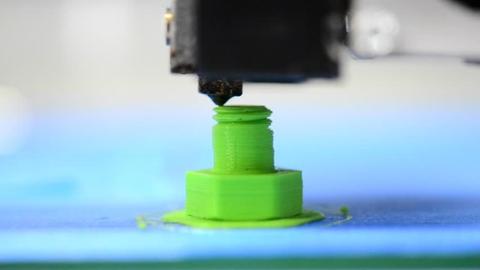
We surprisingly find out that there is no tweaking needed when printing small objects with ABS. if you don’t intend on printing a large part, you can just keep a normal PLA setting.
Here is a comparison between two 3D print ABS models that adopted or not the tips above. The left one was printed with only the ABS slurry to enhance the bed adhesion while the right one used a 0.8 diameter nozzle, a 0.5 layer height, a higher extrusion temperature and added a draft shield to help trap the heat for the print.

The setting really makes a difference. It’s obvious that the right model has thicker layer lines while there are zero layers cracking and delamination on it, which is visibly better than the left one. The settings really make a difference in reducing warping.
To get the best quality of 3D printed ABS, it’s strongly recommended to use an enclosed 3D printer, which can keep a stable ambient temperature. But with an open 3D printer, the setting introduced in the article can improve the quality of the ABS prints. The point to success is to maintain a warm ambient temperature and keep the prints above the glass transition temperature.
Leave a comment