
Tiny10, developed by NTEDV, is a simplified version of Windows 10. Using this OS, you can run Windows 10 on low-end PCs.
It cuts out unnecessary apps and services but keeps core tools like Disk Management, PowerShell, and CMD.
This makes it ideal for computers with limited RAM and storage, requiring only 5GB of space on a 32-bit system.
But just because it has removed some components doesn’t mean you are left hanging. You can install any of the removed apps, drivers, or services without any issues.
You can give it a try and download Tiny10 ISO for your computer. It is easy to install and does not take up much space.
We have listed the latest Tiny10 download links that are straight from the developer.
Once you have downloaded Tiny10 OS, then you can follow our tutorial to install it in a couple of minutes.
Download Tiny10 ISO
Here are the latest links to Download the Tiny10 ISO file straight to your device. They are updated every week so all are verified and working.
| Windows Version | Tiny10 x64 bit NEW |
| Size | 3.6GB |
| Version | 23H2 |
| Download Button | Download Tiny10 ISO |
| Windows Version | Tiny10 x64 bit |
| Size | 3.7GB |
| Version | 23H1 |
| Download Button | Download Tiny10 ISO |
| Windows Version | Tiny10 x86 bit |
| Size | 3.1GB |
| Version | 2303 |
| Download Button | Download Tiny10 ISO |
| Windows Version | Tiny10 x64bit |
| Size | 2.5GB |
| Version | 22H2 Beta 2 |
| Download Button | Download Tiny10 ISO |
| Windows Version | Tiny10 x86 bit |
| Size | 2.0GB |
| Version | 22H2 Beta 2 |
| Download Button | Download Tiny 11 ISO |
Tiny10 OS Recommended Requirements
| RAM | 1 GB (x86) / 2GB (x64) |
| Space | 10 GB (x86) / 20GB (x64) |
| Processor | Dual Core |
Install Tiny10 from ISO
A. Create Tiny10 OS from ISO File
We have the Tiny10 ISO with us, and now it is time to install it. You can just run the setup and expect it to be installed.
You need to create a bootable out of it on a flash drive or a DVD. Then boot it up using the bootable media after restarting to start the installation process.
To do that, we will use Rufus, a freeware tool, to create a Tiny10 bootable flash drive in minutes. Here is how you can do it.
1. Plug your flash drive into the computer with at least 6 GB of free space.
2. Launch Rufus after downloading it. You can use the portable version with the same functionalities.
3. Choose the flash drive from the drive menu. If you have several flash drives connected, ensure you pick the correct one.
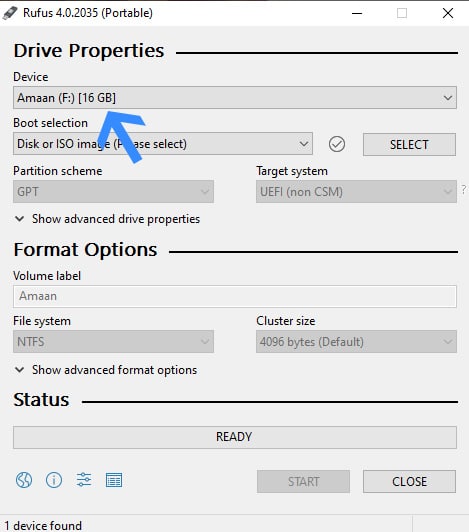
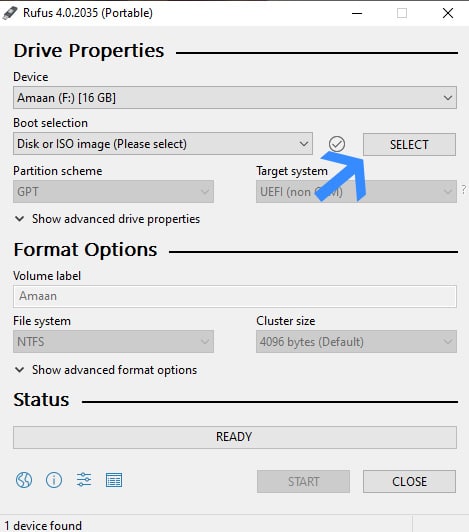
4. Next, click Select and find your Tiny10 ISO to create the bootable drive from the downloaded location. The ISO file’s name will then appear in the boot selection menu.
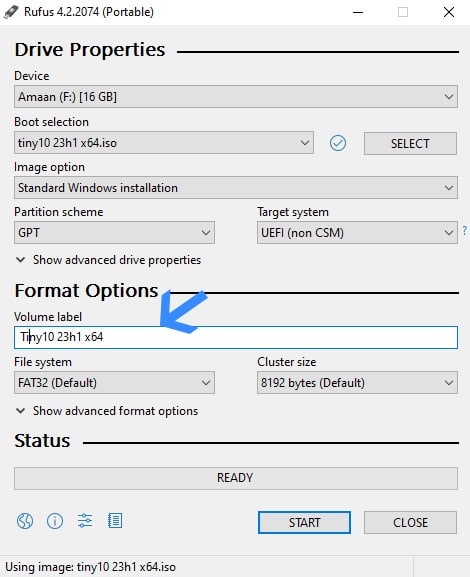
5. Next, head to the volume label and assign a name to your flash drive. You can name it whatever you like. By default, it will take the name from the ISO file.
6. Finally, click Start and Rufus will start creating the Tiny10 bootable on your flash drive or DVD.
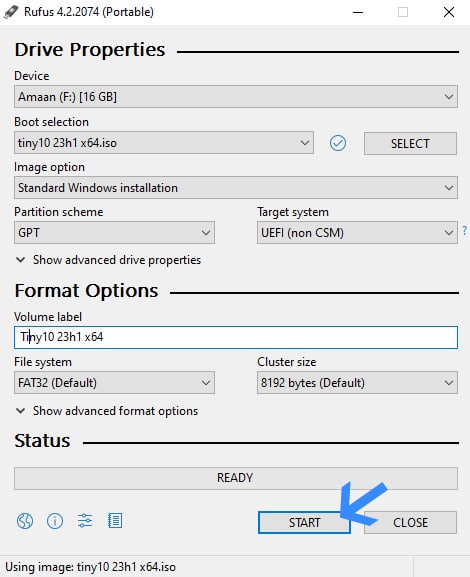
It will take a couple of minutes to complete, and then you will get a success prompt. Then you can restart your computer and install Tiny10.
| Press the Pause – You can install Tiny10 on an existing partition of your choice. But if you want a separate partition then learn to create a partition before moving forward. |
B. Install Tiny10 OS from ISO File
So we have the Tiny10 bootable with us now. Let us begin installing the OS on the computer
You have to choose the Tiny10 bootable drive during your computer’s startup. You will need to press the boot menu key, which can differ across computers.
We have listed the shortcuts for major brands. While they may change over time, most are likely to remain unchanged.
Laptops
| Brand | Boot Menu Key |
| ASUS | F8 |
| Acer | F12 |
| Dell | F12 |
| HP | F9 |
| Lenovo | F8, F10, F12 |
Desktops
| Motherboard Brand | Boot Menu Key |
| ASUS | F8 |
| Gigabyte | F12 |
| MSI | F11 |
| Intel | F10 |
| ASRock | F8, F11 |
| Biostar | F9 |
After pressing the boot menu, then select your bootable Tiny10 flash drive and then follow these steps.
1. Restart your computer and press the Boot menu key > select Tiny10 flash drive.
Then, wait for a couple of seconds to a minute for the files to load.
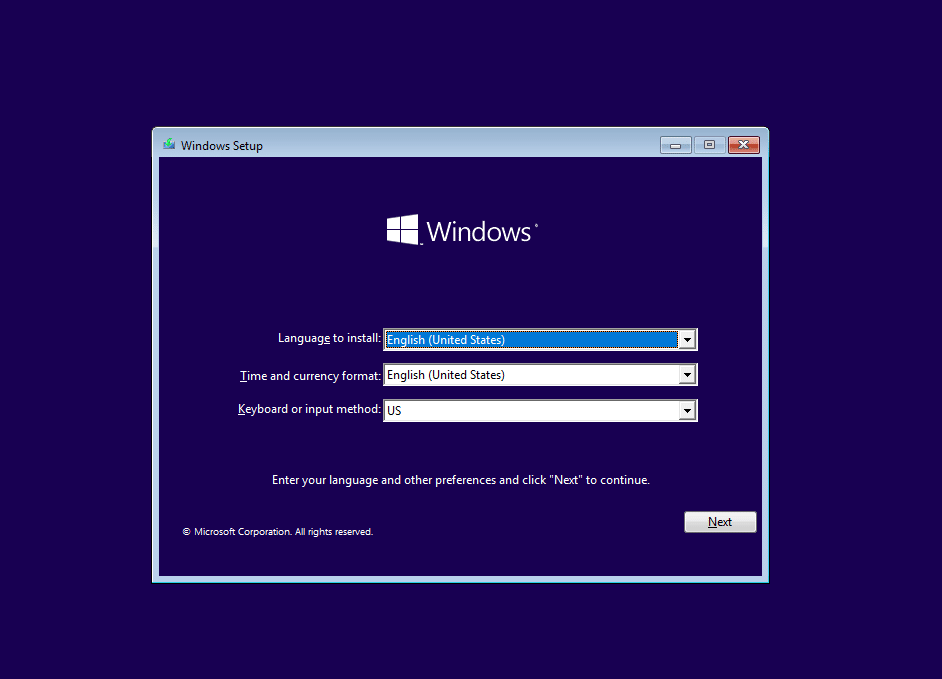
2. Select your preferred language for the OS, time and currency, and keyboard input language.
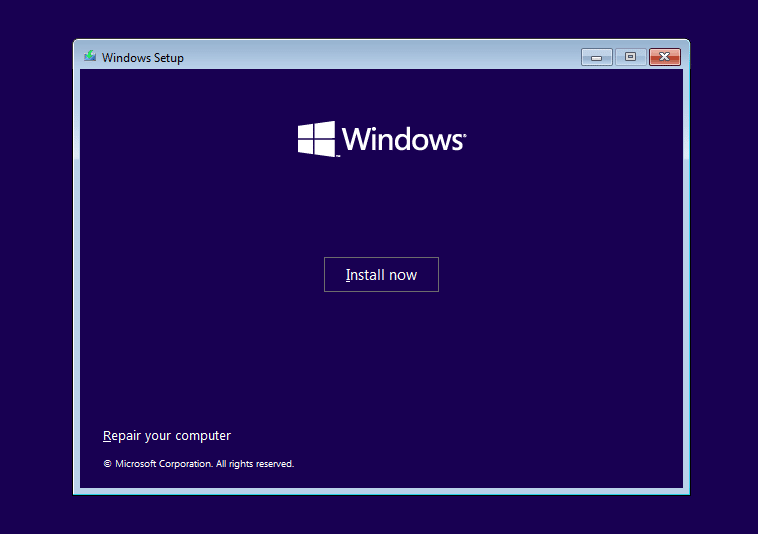
3. Now click on Install Windows and you will be taken to the next section.
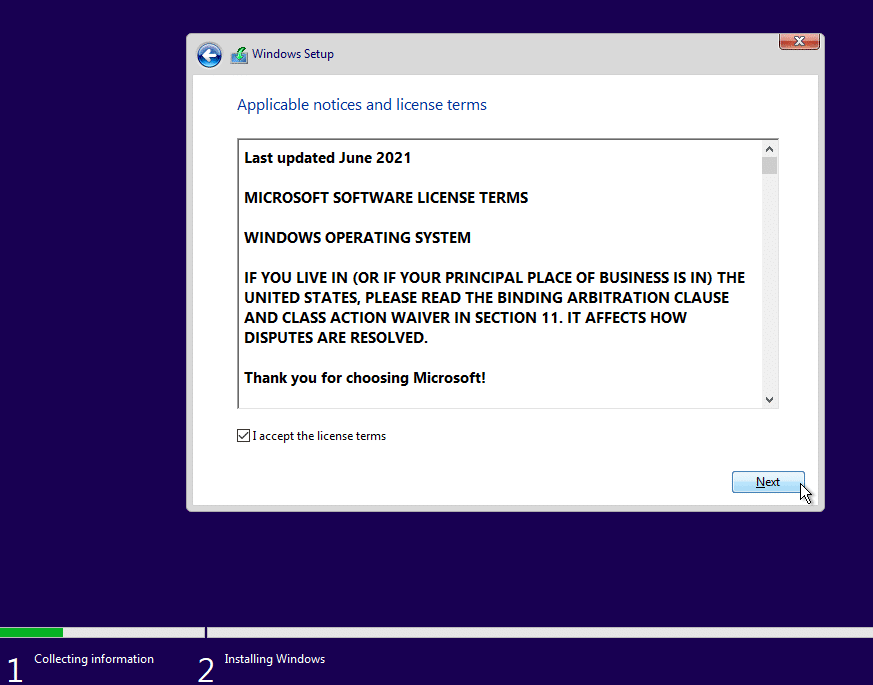
4. Tick I accept the license terms and click OK to move to the next section.
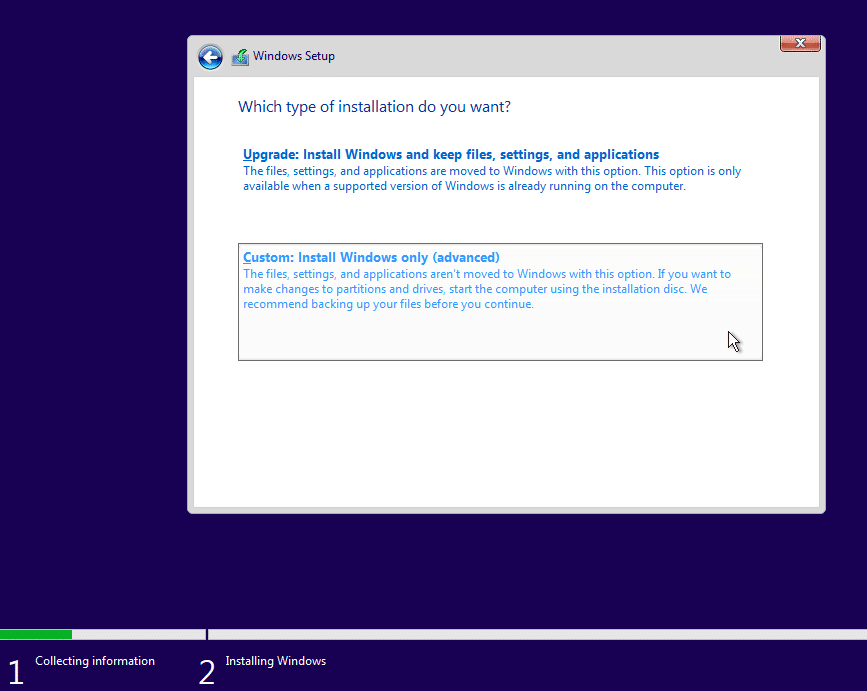
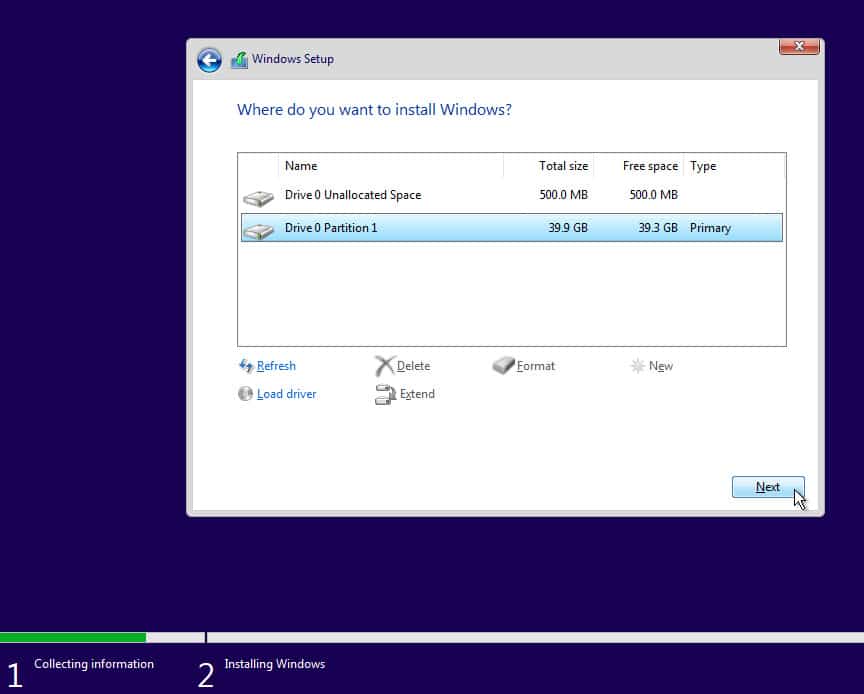
5. Here, you will have to select the installation type. Select the second one – Custom: Install Windows Only(advanced).
6. In this section, select a partition here in which you want to install Tiny10, and then click next.
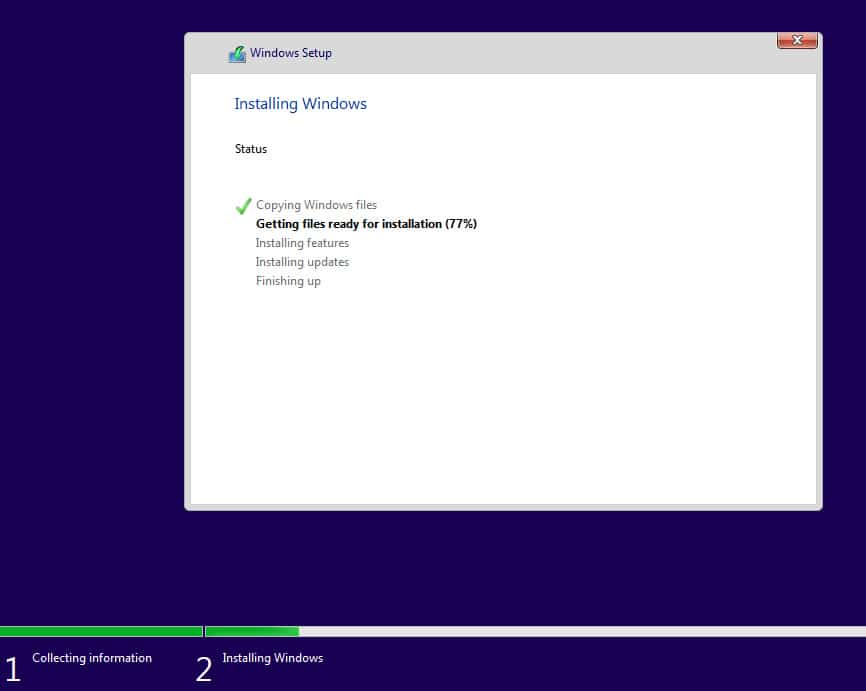
7. Then Tiny10 will start getting installed while you can do other work. It can take between five to twenty minutes, depending upon your storage speed.
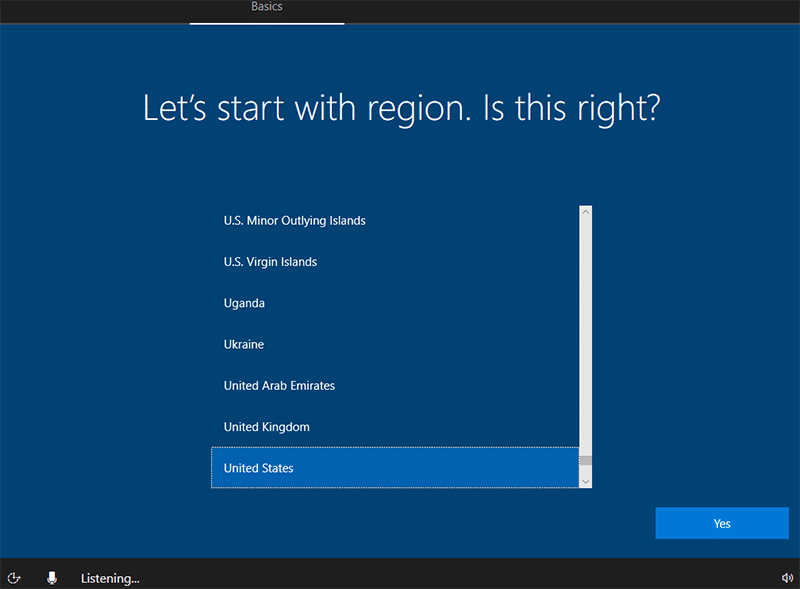
8. After a couple of restarts, you will land on the setup page to select a region. You can either choose the preselected one or change it, and then click Yes to move forward.
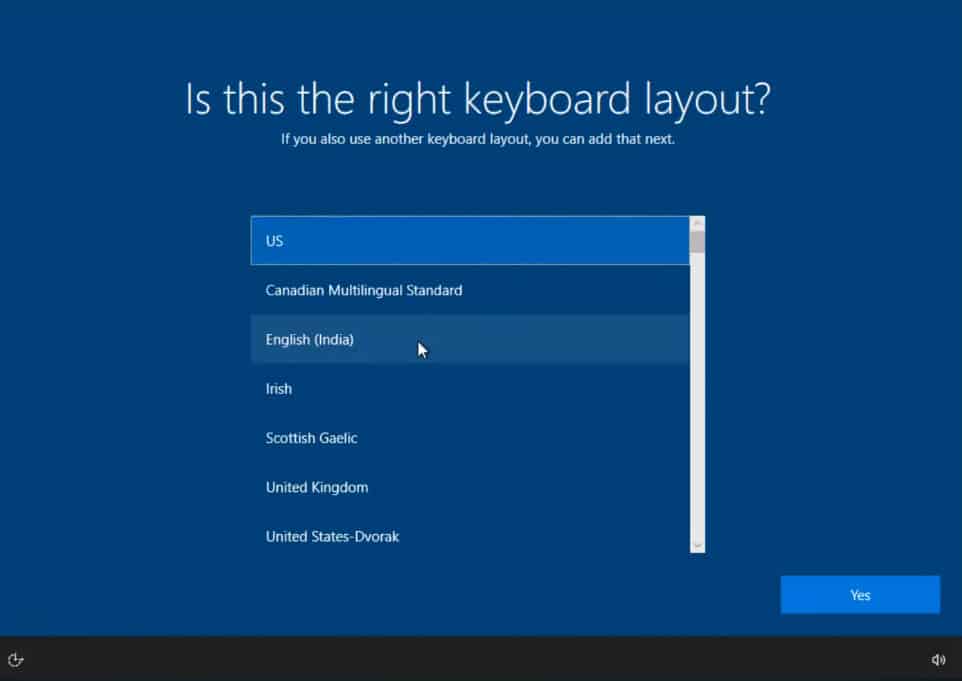
9. Now select a keyboard layout language for your computer. It is also preselected with what Window feels is the right fit for you.
You can change it or leave it unchanged; then click Yes to continue.
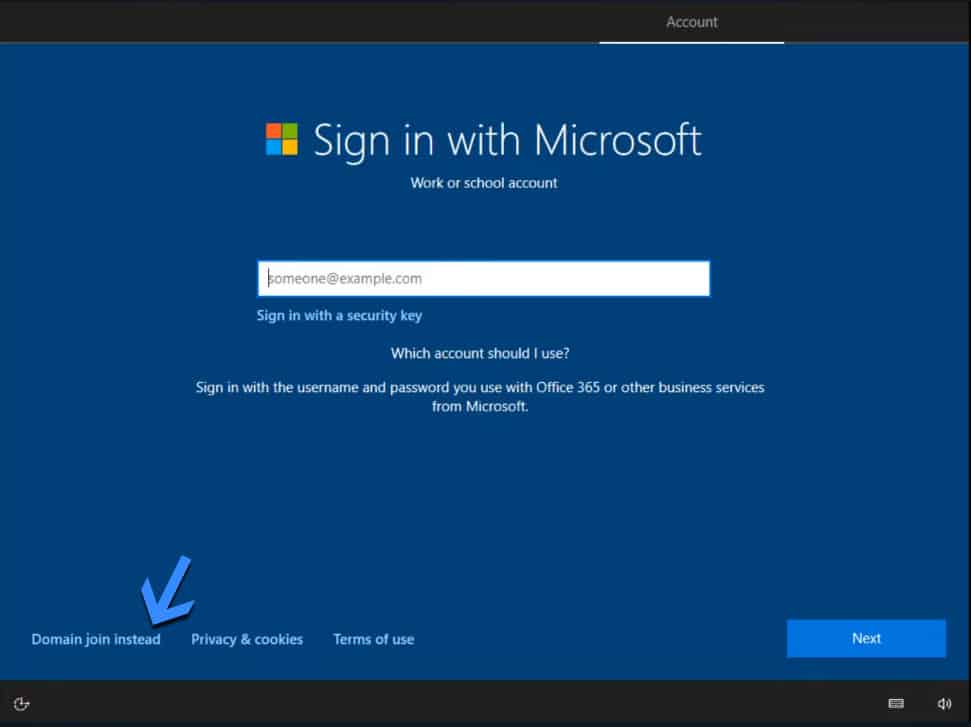
10. On the next screen, you will be asked to log in using a Microsoft Work or school account. Click on Domain join instead to skip this step and move forward.
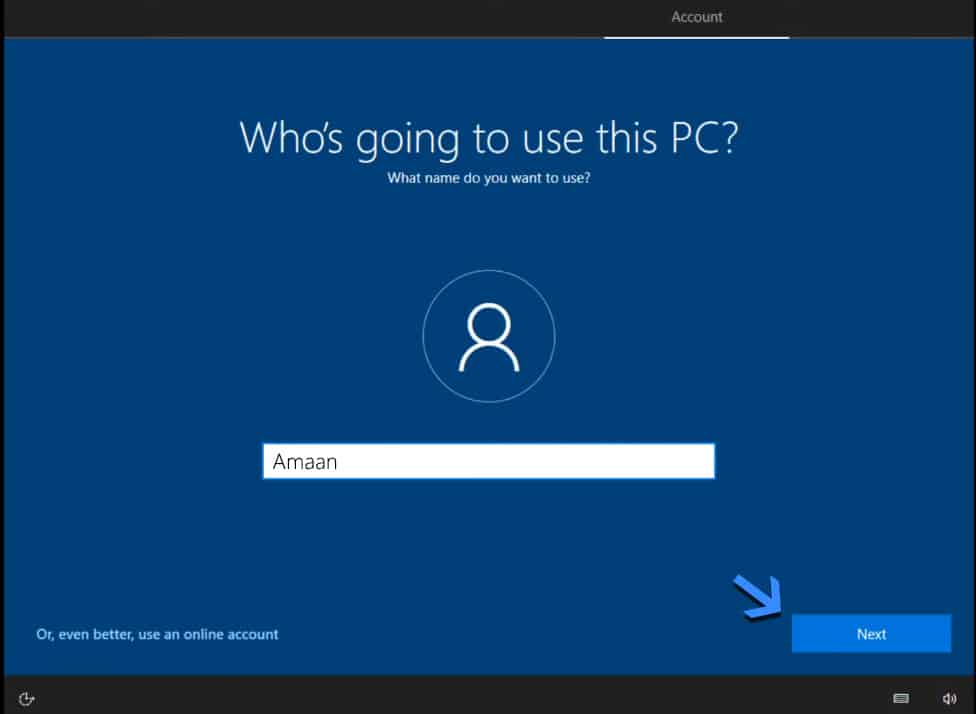
11. Then give your PC a name, depending on who will use the computer.
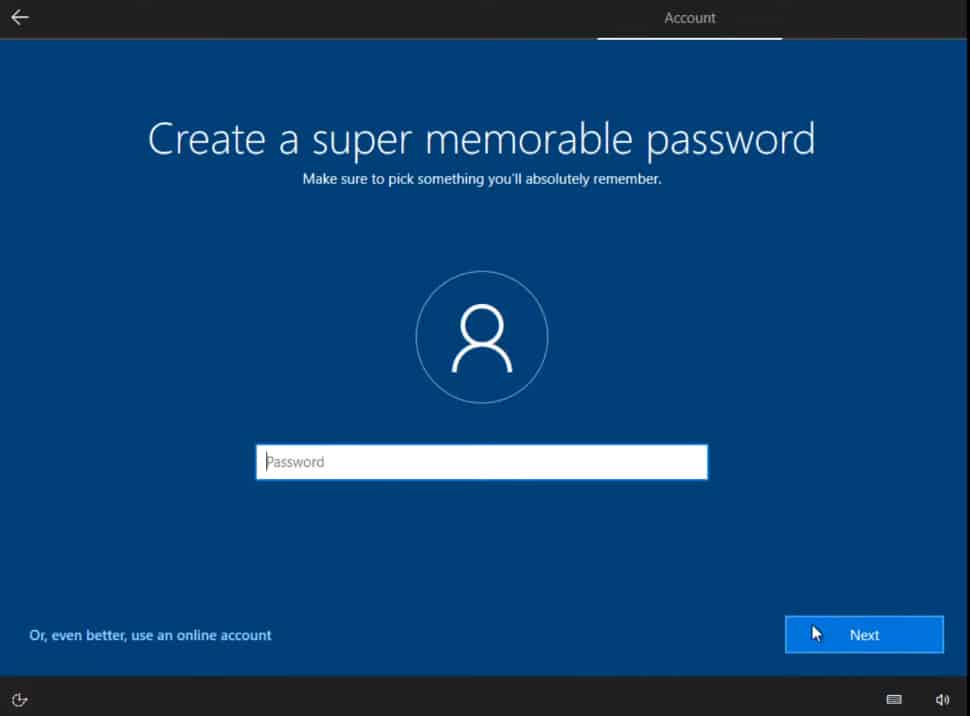
12. After that, add a password for your account and click next. This will make sure that no one else can log into your computer without your consent.
But if you are a single user of the computer and don’t want a password, then leave the box blank and click next.
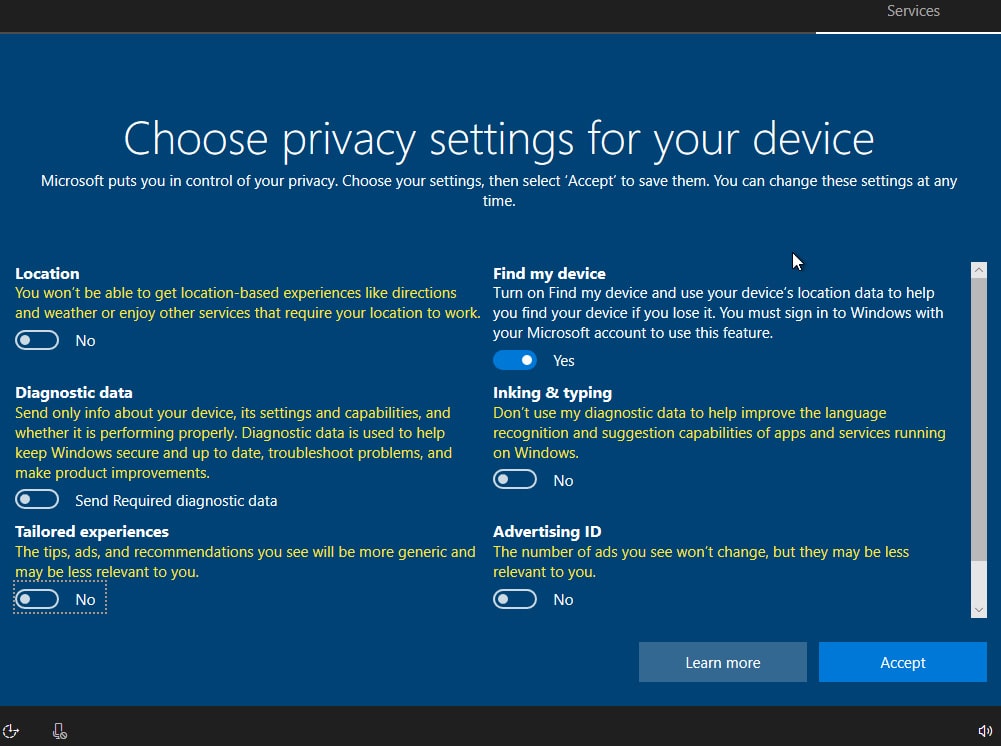
13. After carefully reviewing each privacy option, choose your preferred one. Alternatively, you can follow what we selected and then click Accept.
Then Tiny10 will into the final configuration which will take a couple of minutes at most.
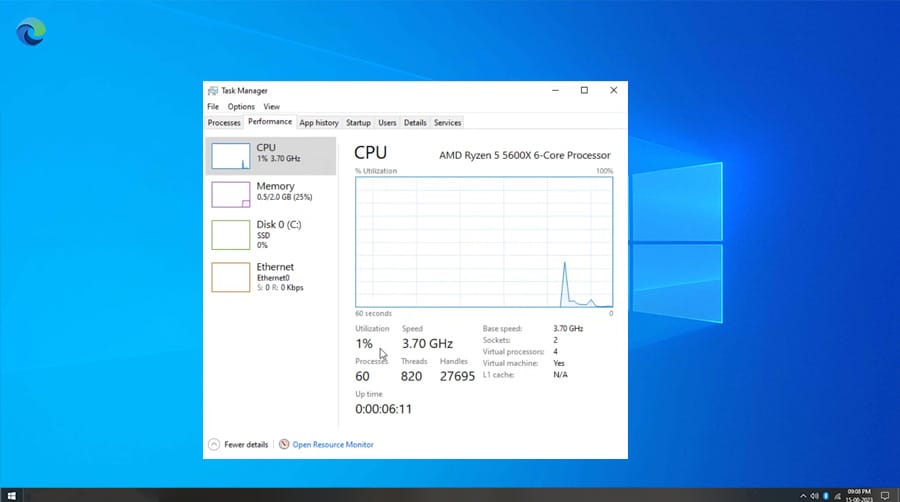
14. You will land on the Tiny10 desktop with minimal applications installed. It feels smooth and works well without consuming a lot of the resources.
15. Then we went to the taskbar to check if Tiny10 lives up to its name. It did not disappoint, as it is even lighter than the Spectre 11 in terms of RAM and processor usage.
C. Getting Started with Tiny10 OS
Tiny10 has the basic applications and has removed everything to keep it lightweight. It does not include a media player, photo viewer, or document reader.
This time around with Tiny10 23H1 they have included Microsoft Edge. This would help in installing other essential third party apps for your workflow.
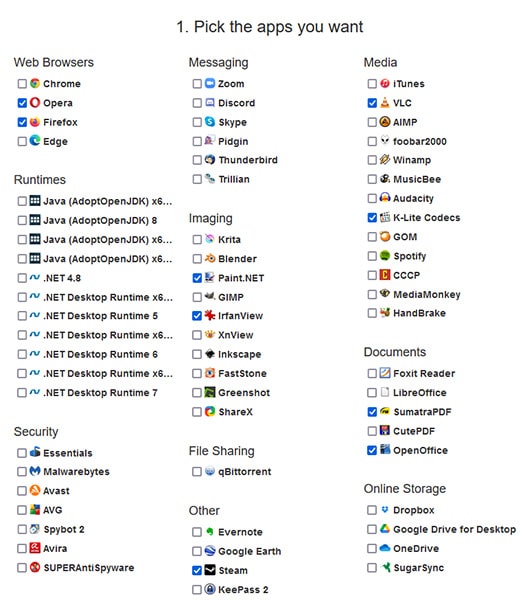
You can install all the important applications in one go using Ninite. Simply select the apps, download the installer and let it do its job using the internet.
Here is how you can do it on your own.
1. Head to Ninite and select the apps you want to install on Tiny10.
2. Then scroll down and click Get your Ninite button to download the installer.
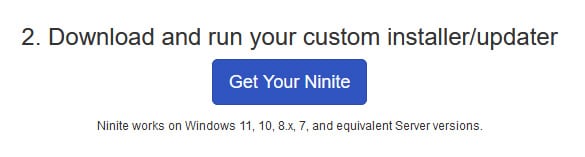
3. Launch the Ninite installer and all your selected apps will be first downloaded, and then installed on your computer.

Frequently Asked Questions
Where to download Tiny10?
We have posted the links to download Tiny10 ISO by NTDEV. Just click on the version you want and it will be downloaded to your computer.
Will I receive Windows 10 updates?
Yes, you can receive updates and control what not to download for Tiny10 to avoid bloatware.
Can We install Tiny10 on 32-bit PCs?
Yes, Tiny10 has a 32-bit version which we have posted above. It is mentioned as x86, which is a technical term for the 32-bit OS architecture.
Power Up Old PC with Tiny10
Tiny10 is a blessing in disguise as with it you can run Windows 10 on low-end PCs without any problem. They can move beyond the older Windows versions.
It is available in both 32-bit and 64-bit so computers with 1 GB RAM can also give it a try. It would be enough for internet browsing and general usage without involving heavy apps.