
Hidden Springs Homestead may earn a commission for purchases made after clicking links on this page. Learn More.
Do you want to learn how to start a garden and grow your own food but are not sure how to start? This post will walk you through 10 easy steps for starting a garden and guide you step by step to creating a sustainable food source.
If you are willing to invest just 15-20 minutes a day nurturing and caring for your garden, you can grow food whether you are a beginner or have minimal experience.
In this post, we will cover the following to guide you step by step when starting a garden at home:
- Plan the best Type of garden to start for you
- How to decide what to grow
- Choose the best location for starting a garden
- How to choose seeds or plants
- Information about needed garden tools
- How to prepare and build rich nutrient soil
- How to care for your garden – watering, fertilizing, weeding, and more
- Harvesting and Preserving
RELATED: Even if you’ve never gardened before, this Vegetable Gardening for Beginners Ultimate Guide is for you! Learn everything you need to know from over 60 resources, all in one place, to be a successful gardener, including improving soil, cover crops, warm and cool season crops, organic amendments, fertilizing, watering, garden pests and diseases and so much more.
How to Start a Garden For Beginners
1. Plan the Best Type Garden for You
The critical step to starting a garden is planning. Of course, the type will depend on the space you have to work with and what you plan to grow.
We will get to what you plan to grow further down. But, for now, let’s discuss the types of gardens to help you decide what type is best for you to start a garden on your homestead.
How to Choose the best garden Layout?
There are 3 basic garden types or ways to grow vegetables, herbs, and even flowers in a home garden. Gardening can be done in containers, raised beds, and in the ground using either traditional rows or intensive gardening.
The amount of space you have will be a significant determining factor in what fruits and vegetables you can grow. You can produce more fresh foods in raised beds and in the ground, but I realize not everyone has the space. So we will look at all 3.
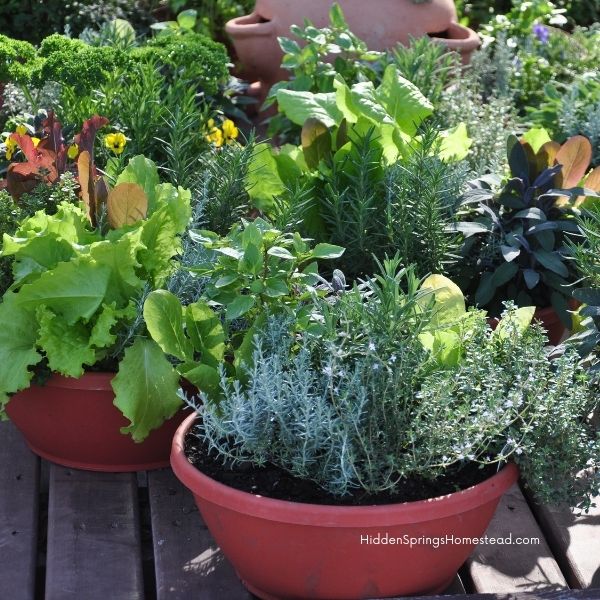
Container Gardening:
Gardening in containers works well in an apartment with a sunny balcony or a driveway.
Container gardening refers to growing vegetables, fruits, herbs, and even small trees in containers. This type of gardening can provide enough food for fresh eating.
But normally not enough for canning and preserving. Of course, eating fresh vegetables is much healthier than those from the grocery, and it helps to cut costs on the family budget.
Containers can be anything that is deep enough for the plant’s roots to grow. For example, 5-gallon buckets work well, food-grade barrels (cut in half), and other large-sized containers. Remember, containers should be deep enough for roots to grow (6-12 inches).
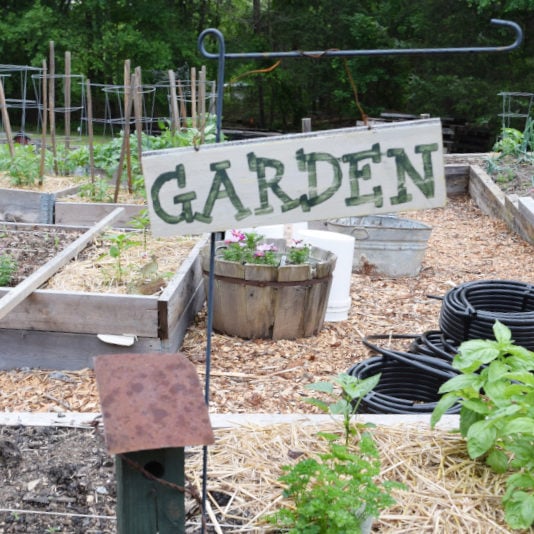
Raised Bed Gardening:
Raised beds are probably the easiest and best way to start a garden as a beginner. And they can be built using various materials. Remember not to use materials treated with chemicals that will leach into the soil, such as treated lumber and railroad ties.
Raised beds cost more to build at the beginning than an in-ground garden, but they are great for families that live in an urban or suburban area that may not have a lot of gardening space.
The expense is the cost of materials upfront unless you have access to free lumber, concrete blocks, logs, or other materials, and the garden soil cost to fill them. And, of course, your time and labor. But gardening is great exercise so look at it that way. In the long run, raised beds are great for a beginner.
The general rule for raised beds is that they should be no wider than four feet and between no longer than four and eight feet. The length is not as important as the width.
The width allows you to reach the center from both sides to plant and harvest vegetables and herbs. The length should have adequate space for walking around, but not so long you are tempted to crawl over compacting the soil. Suitable beginner-raised bed sizes are 4’x4’ and 4’x8’. The depth should be eight to twelve inches.
The great thing about raised beds is they can be built cheaply using recycled lumber, repurposed roofing metals, or whatever you can be creative to find and use.
Benefits of Raised Bed Gardening
- You have complete control of the soil and organic amendments that go into raised beds.
- Raised beds warm up sooner than traditional in-ground beds; therefore, you can begin spring planting earlier.
- It’s easier to control weeds and even have fewer of them.
- Intensive gardening and garden planning are easier since they are raised and in specific sizes.
- You don’t bend over as far, making it light on your body.
- Root crops, such as carrots and beets, have no trouble pushing through uncompacted soil.
- No tillers or expensive machinery is required.
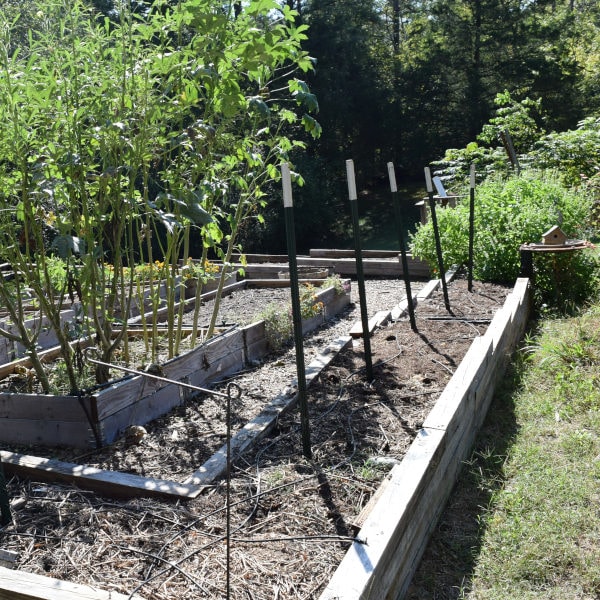
In-Ground Gardening
In-ground gardening does cost less but can require more space. However, when we think of the traditional long rows, in-ground gardening is an advantage if you have access to a tiller or tractor.
But using in-ground beds doesn’t have to be huge like we often think of with commercial farming. On the contrary, they can take less space and even produce more harvest than container gardening or raised beds.
You can plan to grow shorter rows with plants closer together to shade and prevent weeds using smaller-sized in-ground garden beds. This kind of gardening is called intensive gardening.
The key is to start small and expand as your experience grows.
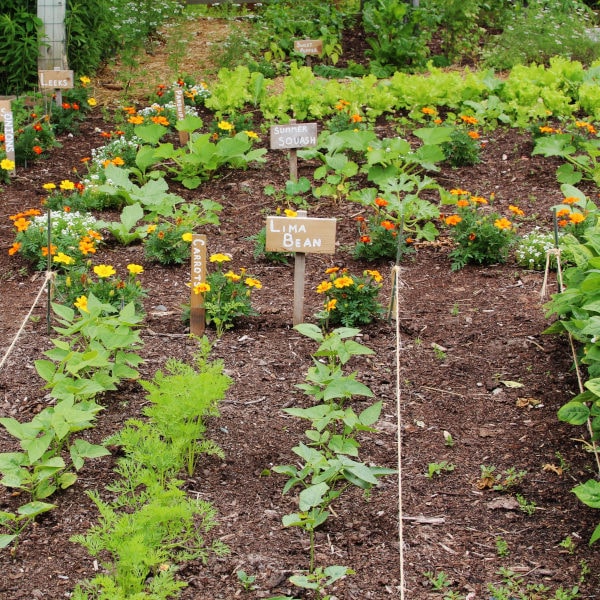
2. Decide What You Want To Grow & What Will Grow in Your Area
These 5 helpful tips help you decide what vegetables and herbs to grow. But be aware it’s easy to get carried away. And before you know it, you’ve listed more than you have space.
Whether you begin with seeds or transplants (we will get to these later), each plant needs its own space to grow strong and healthy. But there is a gardening technique known as companion planting, which helps to grow more in a smaller space.
The plants complement each other. So keep this in the back of your mind. (more on companion planting further down)
5-Tips To Help When Deciding What To Grow
Tip 1: Grow what you and your family will eat. Seed catalogs often provide many different, sometimes odd, varieties of vegetables, herbs, and fruit. But it’s a waste of space to grow what your family will not eat. If you are beginning to learn how to garden, stick with easy, tried, and true varieties.
Tip 2: Look in your pantry and note what you buy at the grocery. What costs you more to buy? Or is there something your family loves to eat but it’s hard to find in the grocery store? These are what you could begin to grow if they are common varieties.
Tip 3: Start small with only 2-3 vegetables and then lace in some companion herbs and flowers. Be realistic about how much your family will eat.
It’s easy to get carried away when looking at seed catalogs. Or course, if you choose, you can always share with neighbors or learn how to do home canning and begin to preserve your own.
Tip 4: Stagger planting. In other words, if you are growing lettuce, plant seeds 2-3 weeks apart. Then, your harvest times are staggered, and you will enjoy fresh lettuce over an extended period. This works really well when planting a fall garden.
Tip 5: Group plants in the number of days they need to grow. Vegetables fall into five main varieties: cool-season, warm-season, annuals, biennials, and perennial crops. Seed packets provide this information most of the time.
RELATED: Take the guesswork out! Use these easy formula worksheets in The Canning Garden Workbook (printable) to figure out how much to plant to feed your family for a full year!
How to Find Out What Will Grow Best In Your Area
Once you’ve decided what your family eats, you’ll need to figure out if these grow well in your area. You’ll need to know 2 things:
1. Your Hardiness Zone
Hardiness zones are provided by the USDA, which breaks the U.S. into 13 growing zones. The zone’s purpose is to help you know what plants will grow well in your area based on the lowest and highest temperatures in your area.
All garden plants need a certain temperature range to grow and thrive. Therefore selecting plants that fit your zone is key to starting a successful garden.
To quickly and easily find your garden zone click here and enter your zip code in the box.
The name of your town and zone will appear in addition to some other helpful information.
2. Your Frost Dates:
You’ll need to know your area’s first and last frost dates. Click here and enter your zip code. Your hometown name, frost dates, and the number of days you have in your growing season will appear. Write these down for safekeeping.
Often, frost dates are close estimation but can vary by 10-12 days on average. So to be prepared, plan to have row covers available just in case a late frost arrives. Row covers will protect young plants that cannot tolerate frost.
Most seed packets will provide the information you need to know when to plant in your area. They will often say something like, “plant two weeks after the last frost date.”
I remember the “blizzard of ’93” It happened on March 12th. Tennessee got 48 inches of snow, and all the flowering fruit trees, spring gardens, and even animals died. My family was without electricity for 22 days.
When to Plant:
- Cool-season annual crops are planted in early spring and early fall.
- Warm-season annual crops are planted after the last frost, and the soil has warmed to recommend temperatures on the seed packet.
- Biennial crops grow the first year planted and then will flower and fruit a second year and then die. (Examples: kale, parsley, artichokes, and turnips)
- Perennial crops will live many years after being planted. You should plant perennial crops in an area where they can be left undisturbed. (Examples: asparagus and rhubarb)
Here in Tennessee, our last frost is April 6th, and our first frost is October 23rd, and our spring season often gets warm quickly. Therefore, cool-season crops struggle to grow to full harvest before temperatures get too hot and cause the plants to bolt. Cabbage is an excellent example of this.
3. Decide To Begin With Seeds or Transplants
Each method has its advantages and disadvantages. And these are not always the same everywhere. It falls back to your area’s hardiness zone and frost dates. So it will depend on the area you live in.
Starting A Garden With Seeds
Starting with heirloom seeds does cost much less than transplants, but seeds may not be an option depending on the number of days in your growing season.
If you plan to grow plants that need 100 days from seed to harvest, and your growing season is less, then a better option would be to start those plants with transplants instead of seeds. Unless you want to start seeds indoors, this is an option.
In Tennessee, we have a long growing season of 184 days.
Some seeds can be direct sown into garden soil. Visit your local garden stores or look online in seed catalogs for information about individual seeds. Click here to find a list of my favorite seed catalog companies.
Another thing to keep in mind is soil temperatures. If temperatures do not warm quickly enough or the season’s temperatures change before garden plants can grow to full maturity, transplants may be the better option.
Seeds can be purchased over the winter when you are in the planning stages of everything.
Here in Tennessee, our spring season is usually short. So often, I will start seeds indoors weeks before the time to transplant them outside.
Our temperatures often get warm too soon, and plants cannot grow to full maturity before they bolt. So transplants are often a better choice here.
Beginning with Transplants To Start a Garden
If your season is a shorter growing season and you want to grow vegetables that need a longer season, transplants are a good choice.
You may either start seeds indoors or buy transplants from local farms and nurseries. There are some advantages to starting with transplants.
- Seeds can be started weeks earlier in a controlled environment, such as a greenhouse, or build your own grow light system.
- Crops can be harvested much sooner with transplants.
- Transplants are less work than starting seeds, but with that comes the extra cost.
I use a combination of both seeds and transplants every season.
This list will help you decide what to grow: (Click each highlighted vegetable step-by-step for how to grow from seed to harvest).
Cool-Season: (Planted Early Spring and Early Fall)
Warm Season: (Planted After Last Frost Date)
- Green Beans
- Okra
- Tomatoes
- Peppers
- Squash
- Onions
TIP: Mix flowers and herbs with vegetables to attract pollinators and help control garden pests. Pollinators will also help to increase the harvest.
4. Choose The Best Site To Start a New Garden
There are three critical things to consider when choosing a garden location. And if you are starting a garden from scratch, you should be able to select the best place in your backyard or anywhere on your property.
There are also some other things to keep in mind. So we will get to those as well.
3 Critical Needs A New Garden Needs
- Sunlight
- Easily Accessible for Working
- Easy Access to Water
Sunlight:
Most vegetables and herbs require full sun to grow. Meaning they are not shaded and receive a minimum of 6 hours of sun a day. Preferably 8-10 hours a day is even better.
Anything less than 6-8 hours, warm-season crops such as beans, cucumbers, and tomatoes will not produce well.
Easily Accessible
The garden area should be easily accessible, which means that you have space to build paths or walkways for accessing all sides of your garden beds. You’ll often visit, so easy accessibility is essential.
Easy Access to Water
Water is critical to a successful garden. Especially if you live in a climate that doesn’t receive a lot of rainfall. Hauling water is not easy, though, and it is time-consuming.
Plants need, on average, 1 inch of water per week. Therefore, watering is essential to a productive garden if you experience drought or get very little rainfall each year. Click here to learn step-by-step how and when to water a garden.
Ideas for easy access to water are:
- Using soaker hoses attached to a water spigot
- Running water hoses from a faucet and attach to sprinklers
- Install rain barrels from nearby roofs and run drain lines to the garden beds
- Install drip irrigation systems (This is the brand I use)
- Drag a water hose to the garden each time and use a water wand (I use this one) NOTE: Dragging a hose will get old, and gardening will become no longer fun and enjoyable, but it’s an easy way to begin gardening
Hauling water will compete with gardening enjoyment, and you’ll quickly find that easy accessibility is essential.
Other helpful tips for choosing a location:
- Start and build on the most level ground
- Avoid trees and shrubs that will shade and compete for nutrients
- Try to avoid windy areas that will blow plants
- Soil should drain well and not stay wet
5. Choose The Best Garden Tools
Fortunately, gardening does not require many tools, but you will need some. These are what I recommend:
- Stirrup Hoe (I use this one)
- 3 Prong-Hand Cultivator (for containers and raised bed gardening)
- 4 Tine Cultivator (I use this one, it is my favorite tool, hands-down)
- Long Handle Shovel (I use this one, and it’s 100% made in the USA!)
- Trowel
- Bow Rake
Click here to see a list of 21 Essential Garden Tools that are helpful for gardening.
6. Amend and Prepare Garden Soil
Container Gardening:
Purchasing potting soil is typically affordable when doing container gardening. Large bags of potting soil costs $12-$15 at nurseries and other garden centers. So it’s cheap to fill several containers.
Fill each container to three inches below the top rim. This will allow for watering and keeping the water inside the container.
Raised Beds:
As mentioned earlier, when building raised beds, you have complete control of what goes into them. But it’s typically not affordable to fill beds using bags from garden centers.
Since you will need a lot of garden soil and compost mix, I don’t recommend getting it from the local landscape company. However, finding a local farm with old manure would be perfect if you could find one.
But if not, the next best option is to contact a local landscape company in your area and purchase “garden soil.” In our area, a yard of garden soil sells for $35. And one yard will come very close to filling a 4’x4’x12” raised bed.
So if you have two beds, you should plan on about $70.00 on the soil.
NOTE: When I built and filled my raised beds, I asked the landscape company to mix a combination of garden soil and organic mushroom compost before loading it into my truck. Organic compost sells for $48 a yard in my area. There was no extra charge for mixing the two.
The cost of garden soil is a disadvantage of building raised beds. Unless you can find a local farm and get aged manure free, you will have the expense of filling them.
In-Ground Gardening:
When doing in-ground gardening, you should use organic soil amendments to increase soil quality. Click here to see details on How to Improve Soil Quality.
Other homemade organic amendments are:
- Making Your Own Compost
- Using Egg Shells to Increase Calcium
- Making Homemade Compost Tea
8. Planting Seeds and Transplants
Always follow the instructions on the seed packet for the best results.
General Rules for Direct Sowing Seeds:
- Plant seeds two times the width or diameter of the seed. In other words, a bean seed is roughly ½ inch in size; therefore, plant it 1 inch deep. Tiny beet seeds that are roughly 1/16 inch in size should be planted 1/8th inch deep. Again, seed packets normally provide this information.
- Measure soil temperatures to ensure soil is warm enough for seeds to germinate.
- Permanently mark the area with a garden marker, so you will remember where you planted.

General Rules for Planting Transplants:
- Most transplants are planted to the depth they are growing in the container. Dig a hole to the depth and size of the container, then place the transplant inside the hole and water it well.
- The one exception to this rule is tomatoes. You can plant them twice the depth of the container or to the bottom of the first set of leaves. Planting tomatoes deeply will strengthen the plant to grow stronger and healthier.
9. Looking After and Caring For A New Garden
Watering:
Rain is best for gardens. But when starting a garden from scratch, until your new seeds or transplants are established, daily watering is critical.
Both seeds and transplants should be watered and nurtured every day until they are well established. On days it rains, watering will not be needed. Keep soil moist but not wet and muddy.
Once your new garden is established, daily watering will no longer be necessary. But watch for drought or water stress symptoms, such as leaves drooping early morning and late evening.
Droopy leaves are typical in the middle of the day with hot sun temperatures, but leaves should be perky in the early morning and late evening temperatures.
Fertilizing:
Fertilizers should be added according to the soil test results.
Once plants are established, healthy garden soil should be adequate for nourishing plants except those with a long growing season, such as tomatoes, okra, and corn.
Avoid the urge to add additional fertilizers unless they are needed. If plants are over-fertilized, you will have lush green leaves but a small harvest.
Weeding:
Why do we need weed control in a garden?
Controlling weeds is essential. Not only do they make a garden unattractive, but they also compete for available water, soil nutrients, and light.
If you stay on top of the weeding and catch them when they are small, it will take much less time each week for weeding. I recommend visiting your garden daily to keep a close eye on weeds and garden pests.
You can control weeds with organic materials like mulches, wood chips, straw, and leaves. These are all organic amendments, so it’s a win-win.
A couple of non-organic weed controllers are plastic and landscape weed barriers.
Mulching:
When starting a home garden, mulching has several benefits:
- It holds moisture in the soil, reducing watering needs
- Aides in preventing weeds, especially annual weeds
- Adds organic amendments and improves soil structure
- Garden beds look cleaner and well kept
- It prevents drainage, keeping water in the ground for plants to absorb
- It helps to control soil temperatures which aids in growing healthier, more vigorous roots
How to Mulch a New Garden Properly
You should apply mulch as soon as seeds or transplants are in the soil. Think donut when mulching. Don’t pile mulch up against the transplants or cover seeds so deep they cannot sprout and push through.
Keep mulch 2-3 inches away from the “seeded area” as well as each transplant. (You can place mulch between transplants if the space allows).
As plants grow taller and more robust, rake mulch closer, 1 inch away, from the stems. Cover walkways 2-4 inches deep, but seeds and new transplants should be no more than a 1-inch deep maximum.
Garden Pest Control
Stressed plants often attract garden pests/bugs and diseases. In addition, deficient plants cannot get the nutrients they need to grow strong, healthy roots.
So building soil, adding organic amendments, fertilizing, watering and mulching are critical steps in starting a garden. You can handle most pest problems organically.
Use this list to find organic ways to control garden pests naturally in your garden:
- 15 Ways to Control Tomato Hornworms
- How to Naturally Get Rid of Yellow Jackets
- How to get rid of Squash Vine Borers
- Naturally Kill Tomato Fruitworms
- How to Get Rid of Ants in the Garden
10. Enjoy Your Harvest or The Fruits of Your Labor
Crops mature at various levels, and harvesting them at the peak of freshness is when you can enjoy the best flavors.
I’d recommend you grab a calendar, mark the day you plant each seed variety, and transplant.
Then count the number of days shown on the seed packet on the calendar. This will be the best time when your vegetables are at their peak of freshness and should be harvested.
NOTE: Harvest within a couple of days of the date marked on your calendar.
For example, if you planted lettuce on February 23rd, and the seed packet says the number of days to harvest is 30 days, mark your calendar out for March 23rd.
Additional tips to follow:
The number of days is an estimated day, just like frost dates. So use these tips, and as your gardening experience grows, you’ll become more comfortable with harvesting time.
Tips for Harvesting Crops for Beginners:
- The best time of day to harvest is early morning. Plants regain moisture lost from the hot sun, making them sweeter and crisper.
- Spinach, lettuces, mustard, etc., are known as cut-and-come-again vegetables. Many cool-season crops are in this category, meaning when harvested, they will re-grow. Cut-and-come-again vegetables are a great way to extend your growing season when planted in the fall.
- Harvesting warm-season crops like beans, tomatoes, onions, and even okra every 2-3 days for peak freshness. And helps to extend their growing season.
So, do you see, learning how and when to start a garden is not nearly as complicated as many think? Just break each of the ten steps down and focus on one at a time.
Will you start a garden this year?
More Helpful Garden Posts
- Get a Head Start on Spring Gardening (with FREE Printable Checklist)
- 5 Seed Ordering Tips to Save Time and Money
- When to Plant Vegetables in the Spring
- Garden Mapping: Planning Your Best Vegetable Garden

Connect with Hidden Springs Homestead!
Be sure to follow me on social media so you never miss a post!

Dianne Hadorn is the owner of Hidden Springs Homestead nestled in the hills of East Tennessee. She is a Master Gardener and enjoys helping others learn how to grow and preserve their own food and sharing tips for living a more self-sufficient lifestyle.
Great tips, I love the narrow raised beds, ours have always been about four feet wide.
What is the depth of the raised garden? 3-4ft w × 10 ft l
Teresa, I’m sorry I left that out. The beds are 12 iches deep. Vegetables are really not “deep” root growers. They are in the annual family. If you can get your beds 8-10″ deep would be great. I used 2 – 2×6’s stacked on the beds my peas are in this year. Hope this helps. Please feel free to ask if you have more questions. I’m here to help.
Teresa, I’m sorry I left that out. The beds are 12 iches deep. Vegetables are really not “deep” root growers. They are in the annual family. If you can get your beds 8-10″ deep would be great. I used 2 – 2×6’s stacked on the beds my peas are in this year. Hope this helps. Please feel free to ask if you have more questions. I’m here to help. The beds in the first image made out of “untreated 4×4’s vary in depth. I live on a hill and I built those beds to run level which put them at different depths. The low side is 36 inches and up to the top of the hill is only 12 inches. If this doesn’t make sense, please let me know.