

by Diego Sanchez
March 28, 2018
Diego prevents carpal tunnel syndrome in designers worldwide by making incredible time-saving Photoshop actions and mock-ups.


How to Design a Book Cover for Print (and Free Template Downloads)
How to make your own book cover
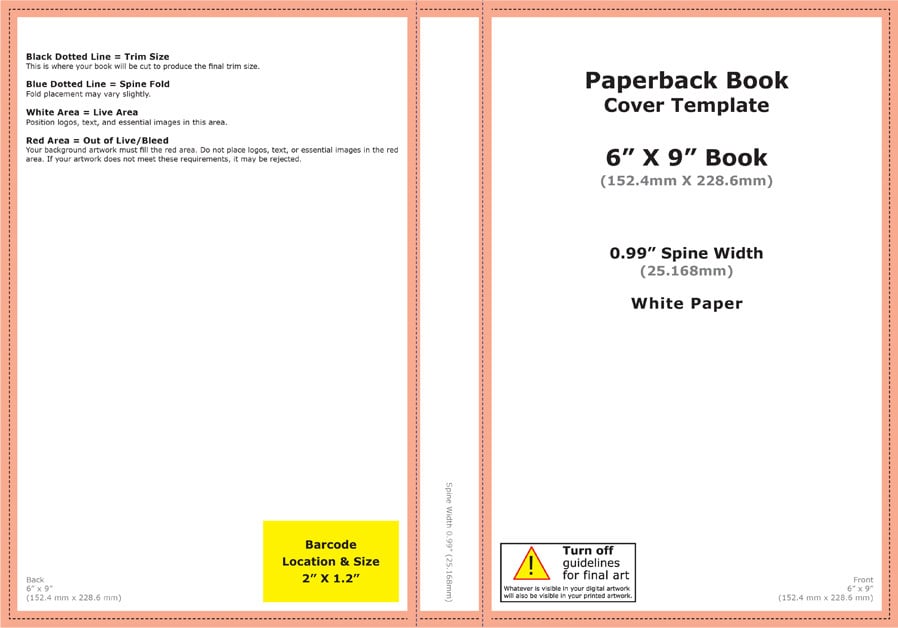
Designing a book cover might seem complicated, but the technical aspects are actually much easier than you'd think. Once you learn how to use and place guides, you'll be making book covers in no time. Of course books come in all different sizes, but with guides, you can design a cover at any size, for any book, with minimal variations. The guides are used for bleed, trim, fold (if any) and margins (safe areas) of our book cover.
Before you begin making a book cover, it's a good idea to ask your printer of choice how much bleed you'll need on the sides, the margins you will need (if any), as well as how thick the book will be, so we know how thick we need to make the book spine. The spine size varies depending on the number of pages and the paper weight, but we will need this information before we begin so we can be sure that the cover will fit perfectly on our book.
In this case, the information we have for our book is:
- Bleed: 5mm
- Trim Size: 350mm x 230mm
- Spine: 30mm
- Front and Back covers: 160mm (width) x 230mm (height)
- Margins: 5mm
Preparing the Template
Step 1
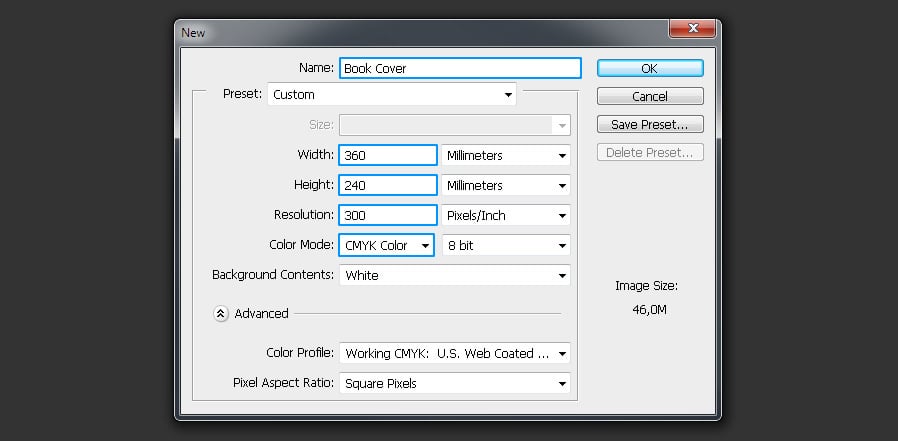
Open Photoshop and go to File > New. Name the file as ‘Book Cover’, set the Width to 360mm, the Height to 240mm, the resolution to 300dpi and be sure to have the Color Mode set to CMYK Color and click OK.
Step 2
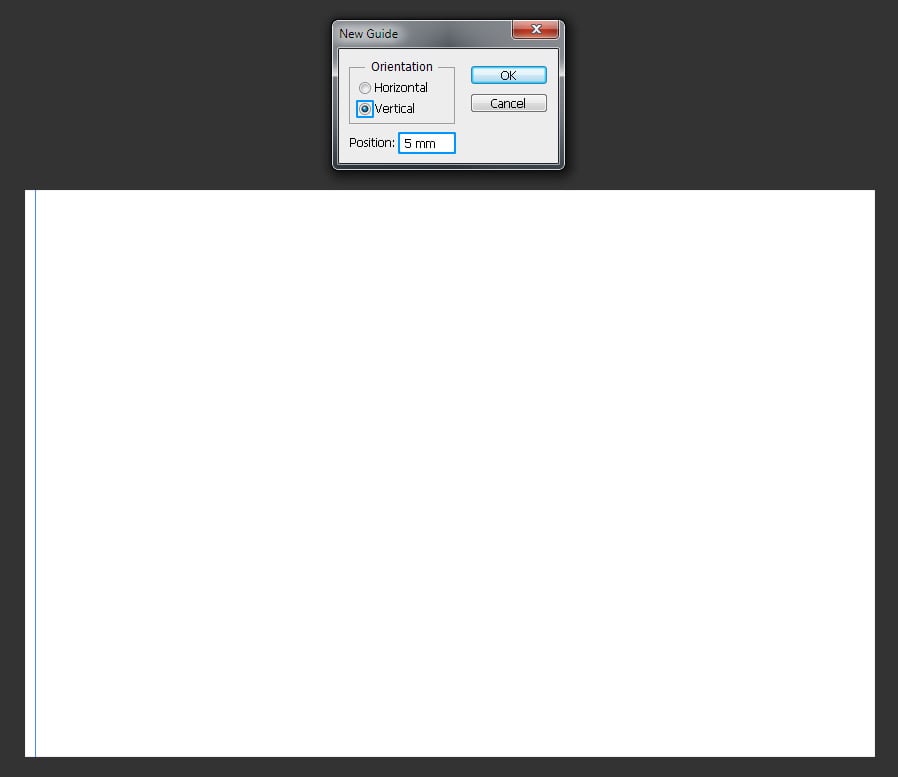
To start placing guides to mark the Trim Size, go to View > New Guide. Set the Orientation to Vertical, the Position to 5mm and click OK.
Step 3
Again, go to View > New Guide. Set the Orientation to Vertical, the Position to 355mm and click OK.

Step 4
One more time, go to View > New Guide. This time, set the Orientation to Horizontal, the Position to 5mm and click OK.

Step 5
Finally, go to View > New Guide. Set the Orientation to Horizontal, the Position to 235mm and click OK.

Step 6
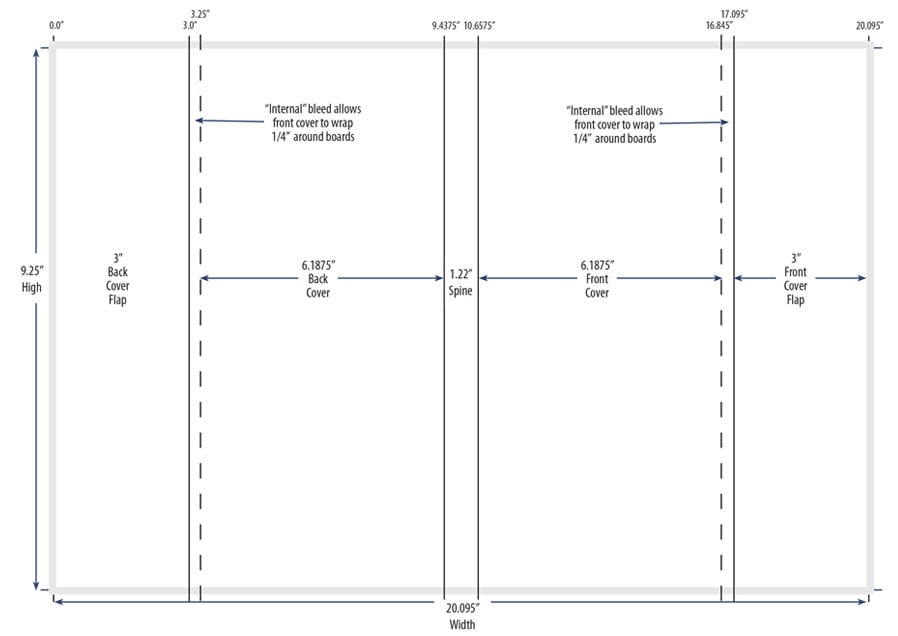
Now that we have the Trim Size guides ready, following the same procedure keep adding the Vertical and Horizontal guides for the Margins and the Spine. Place Vertical guides at: 10, 160, 165, 170, 190, 195, 200 and 350mm, and Horizontal guides at: 10mm and 230mm.

Step 7
Now that we have the Bleed (red), the Trim Size (yellow lines), the Spine (green), the Front and Back (blue) and the margins/safe areas (light gray lines) ready, it is time to start designing our cover.

Designing the Cover
As every book has a unique cover, the one we will make here is a basic one with the only purpose to show you how to properly place all elements following the guides we just did. For this tutorial, I will use an image and the font Lemon/Milk. You can download both resources for free here:
Step 1
With the ‘Book Cover’ already opened in Photoshop, go to Edit > Fill. From the dropdown menu select ‘Color’ and in the Color Picker set the color to #0d121a and click OK.

Step 2
Select the Rectangle Tool (U) and be sure to have the tool mode set to Shape in the top bar. Draw a rectangle (no matter the color) of 195mm x 240mm (or 2303px x 2835px) and place it at the top right of the artboard.

Step 3
Go to File > Place. Locate the foliage image in your computer and click on ‘Place’.

Step 4
In the top bar, set the ‘X’ position to 3156px and hit the Enter key on your keyboard to commit the changes.

Step 5
With the image layer selected, go to Layer > Create Clipping Mask.

Step 6
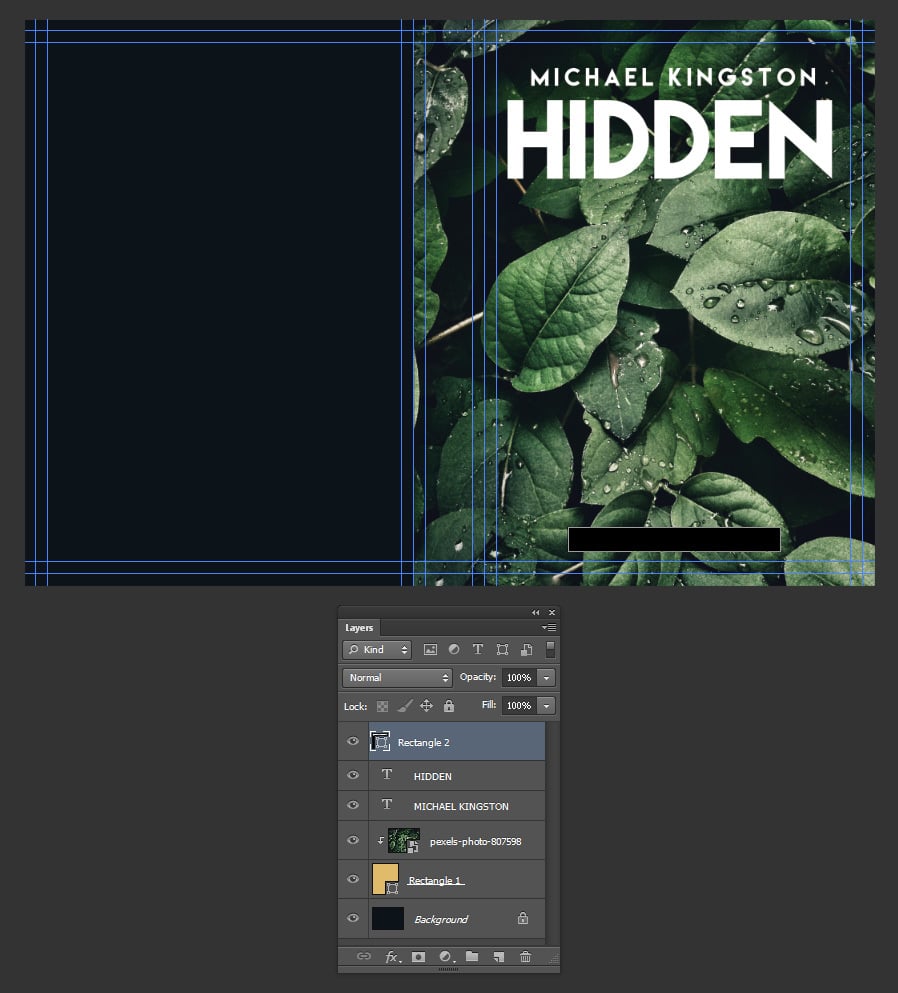
Select the Text Tool (T) and type the author name with a font size of about 110px and place it near the top center of the book cover.

Step 7
Again, grab the Text Tool (T) and type the book name with a font size of 500px and place it centered right below the author’s name.

Step 8
Now select the Rectangle Tool (be sure to have the tool mode set to Shape in the top bar) and draw a rectangle of 90mm x 10mm (or 1063px x 118px) and place it centered near the bottom of the book cover.
Step 9
Again, pick the Text Tool (T) and type ‘Based on a true story’ with a font size of 58px and place it centered in front of the rectangle we did.

Step 10
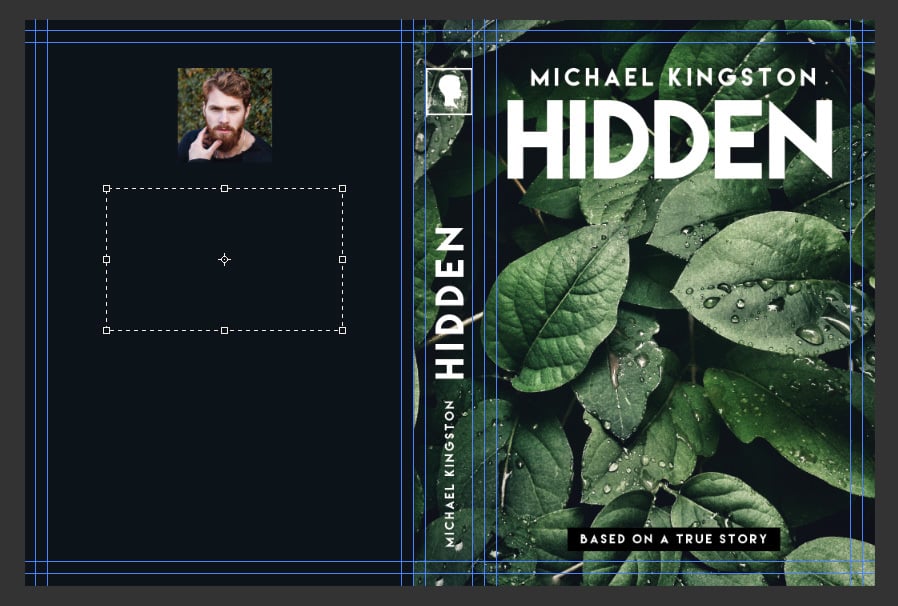
Also, place the author’s name and the book title in the Spine checking that the text do not touch the margin guides we did. In this case, I’ve used a font size of 178px for the book title and a font size of 58px for the author’s name.

Step 11
Draw or paste the Publisher Company logo in the Spine, also taking care that the logo do not exceed the margin guides we did for the spine.

Step 12
Go to File > Place. Locate the Author Photo image in your computer and click on ‘Place’. Place the Author Photo centered near the top of the back in a size of about 40mm x 40mm.

Step 13
Select the Text Tool (U) and draw a rectangle of 100mm x 60mm centered in the back cover and below the author photo.
Step 14
In the top bar, choose Helvetica (or any other font you like) with a size of 46px and write a brief description of the book story.

Step 15
Finally, we just need to place the ISBN code. Go to File > Place. Locate the ISBN code image in your computer and click on ‘Place’. Place the ISBN centered near the bottom of the back.

Final Edits
To make the cover a bit more interesting and attractive to possible readers, you can add a few effects to the text using some masking and shadows to make the words looks like if they were hidden in the foliage.

Free Templates
Now that you learned how to properly make a Book Cover template placing all the necessary guides, you can start creating your own templates for your specific needs or you can download free ones for the most common book sizes and start creating your covers right now.
The Book Patch

Create Space
Completely Novel

The Book Designer

Comments