

Image: monticello/Shutterstock
Many images are paired with text that identifies the image in some way. It might be literal or an interpretation. It’s easy and it’s common. What’s not so easy is resizing the image and the text at the same time in Microsoft PowerPoint. That means you’ll have to resize the elements independently and even then, you’ll be guessing. There’s no built-in way to compare the two as you increase or decrease their sizes. But you can increase the size of both at the same time. In this article, I’ll show you two ways to work with multiple elements, but neither will resize text. Then, I’ll show you a method that will resize the text as you resize the image.
SEE: 83 Excel tips every user should master (TechRepublic)
I’m using Microsoft 365 on a Windows 10 64-bit system, but you can work in earlier versions. This article isn’t supported by the online version. You can download the demonstration .pptx and .ppt files or work with your own slides.
What happens
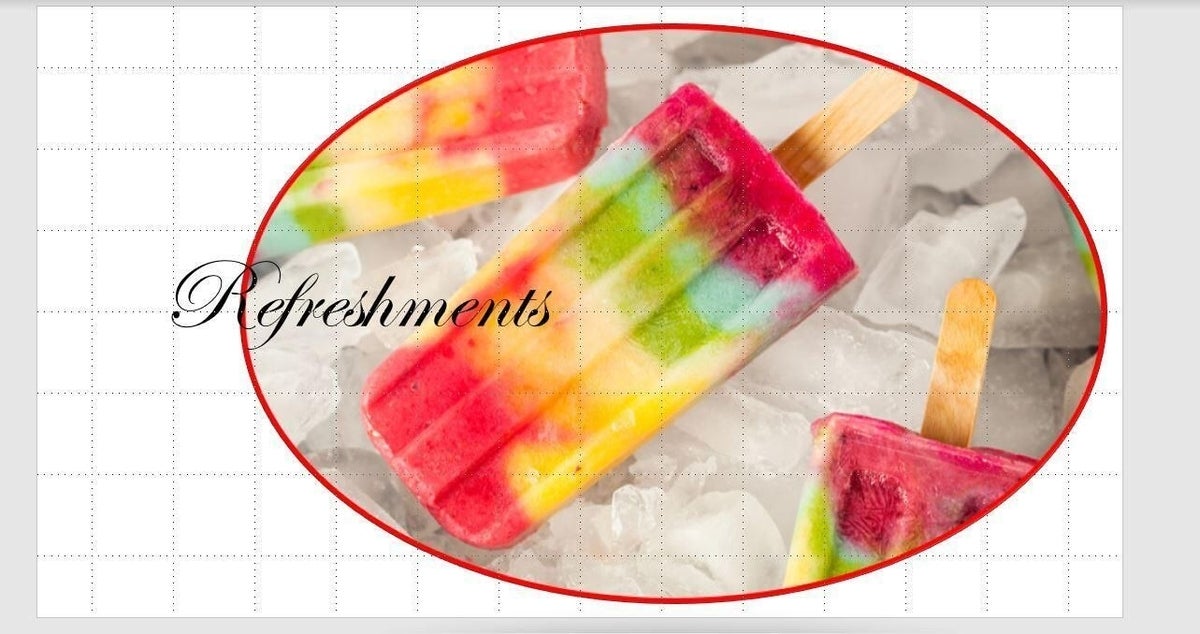
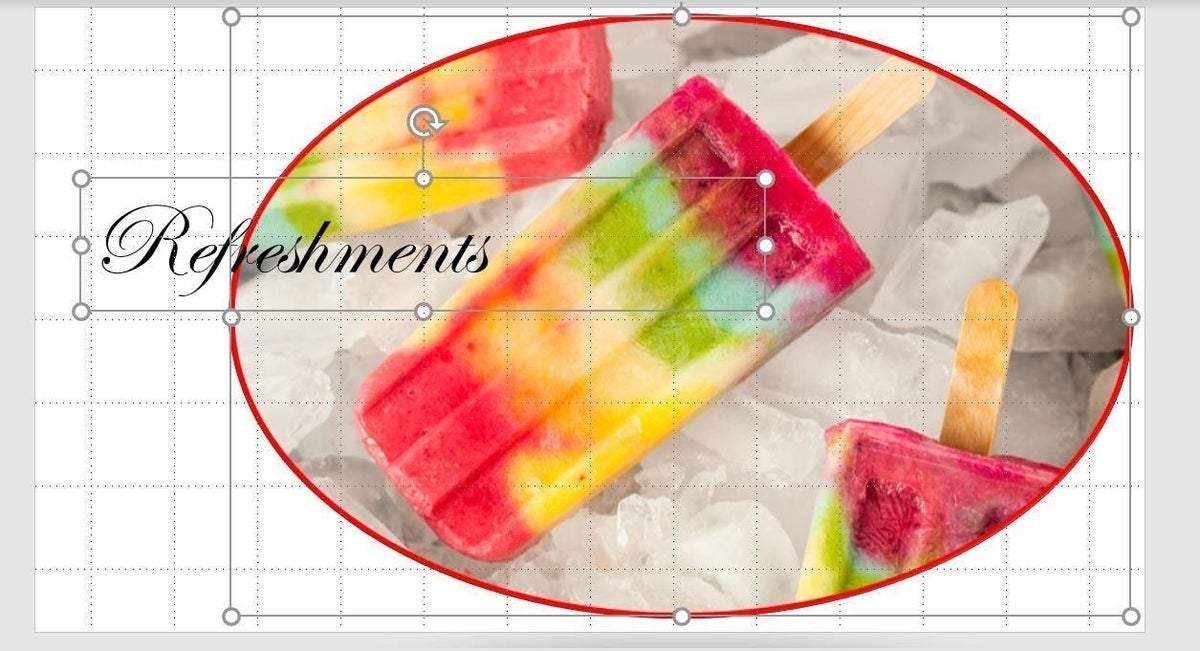
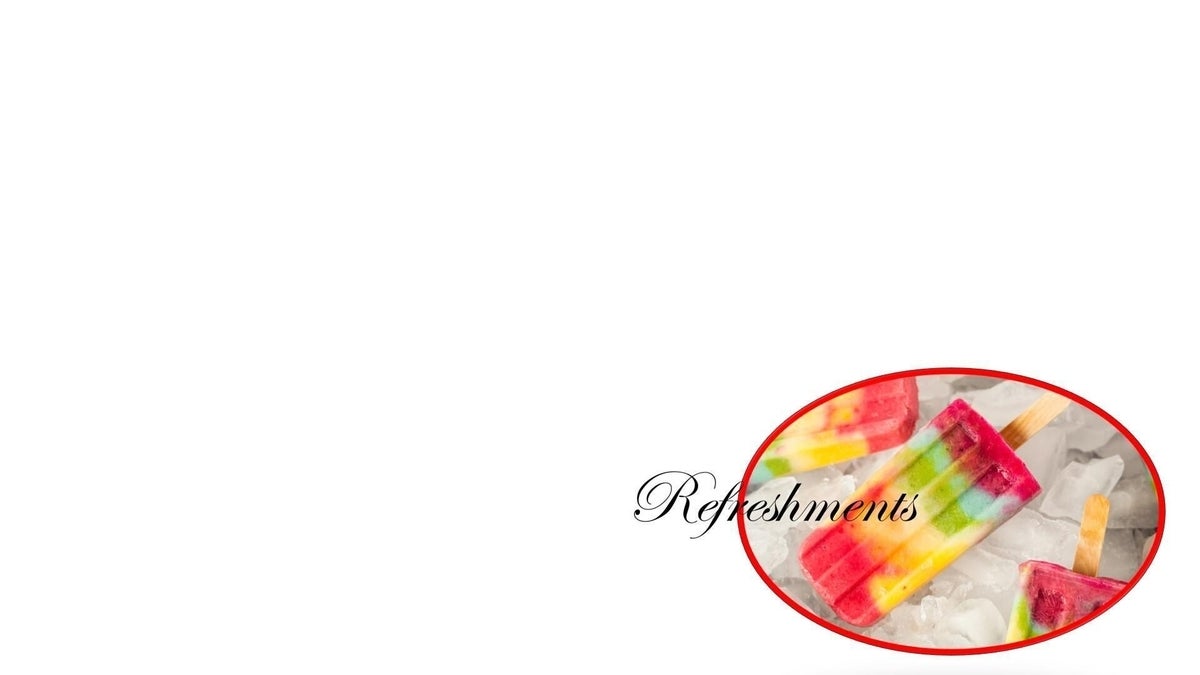
It’s common to label an image with related text. For example, Figure A shows a simple image of a frozen treat with the word Refreshments. The image is a stock photo, and the text uses Edwardian Script ITC, 88. Let’s suppose you want to enlarge both to fill most of the slide. To do so, drag any corner handle and increase the size as large as possible. As you can see in Figure B, the text is still 88.
Figure A
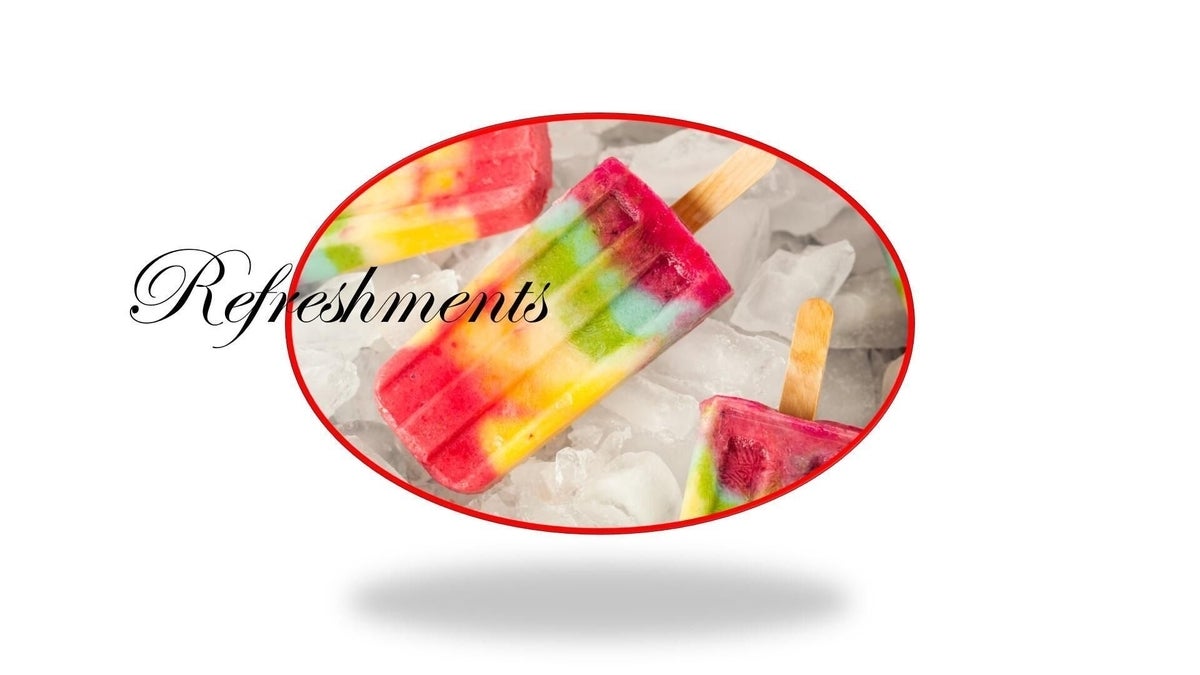
Figure B
Now, this might be exactly the look you want, but let’s suppose you want the text to remain proportionate with the image and the original size (Figure A). But first, let’s look at two methods that you might try.
1. Selecting the image and text together in PowerPoint
Perhaps the easiest way to work with text and an image at the same time is to select them both. Doing so requires only a couple of clicks, but it doesn’t work as you might expect when one of those clicked elements is text. Let’s try this temporary method and see what happens:
- Hold down the Shift key and click both the text box and the image. Doing so will show selection handles around both elements, as shown in Figure C.
- At this point, hold down the Shift key as you can drag any handle to resize both. Figure D shows the result of dragging image handles to the right and down. Holding down the Shift key maintains ratio, but it doesn’t increase the font size of the text.
Figure C
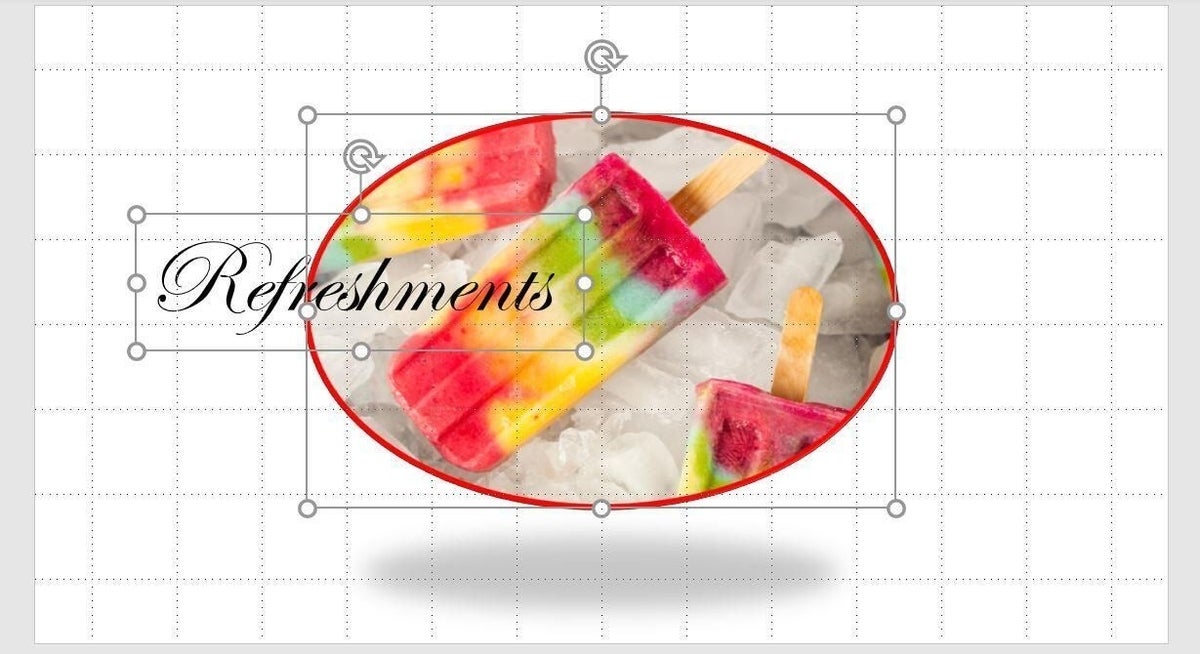
Figure D
You can maintain the shape by holding down the Shift key, but you can’t increase the font size. Now, let’s look at the second method, grouping.
2. Grouping the image and text together in PowerPoint
Perhaps the best way to ensure that text and image stay together is to group them. First, using the instructions in the last section, select the two elements. Then, choose one of the following ways to group the two elements:
- Press Ctrl + G.
- On the Home tab, click the Arrange dropdown in the Drawing group and choose Group.
- On the contextual Format Shape ribbon, click the Group Objects dropdown in the Arrange group, and choose Group.
- On the contextual Format Picture ribbon, click the Group Objects dropdown in the Arrange group, and choose Group.
Once the objects are grouped, PowerPoint will change the selection handles. As you can see in Figure E, there’s only one element now and it’s comprised of the text and image elements. At this point, dragging any of the handles will increase the group, as shown in Figure F.
Figure E
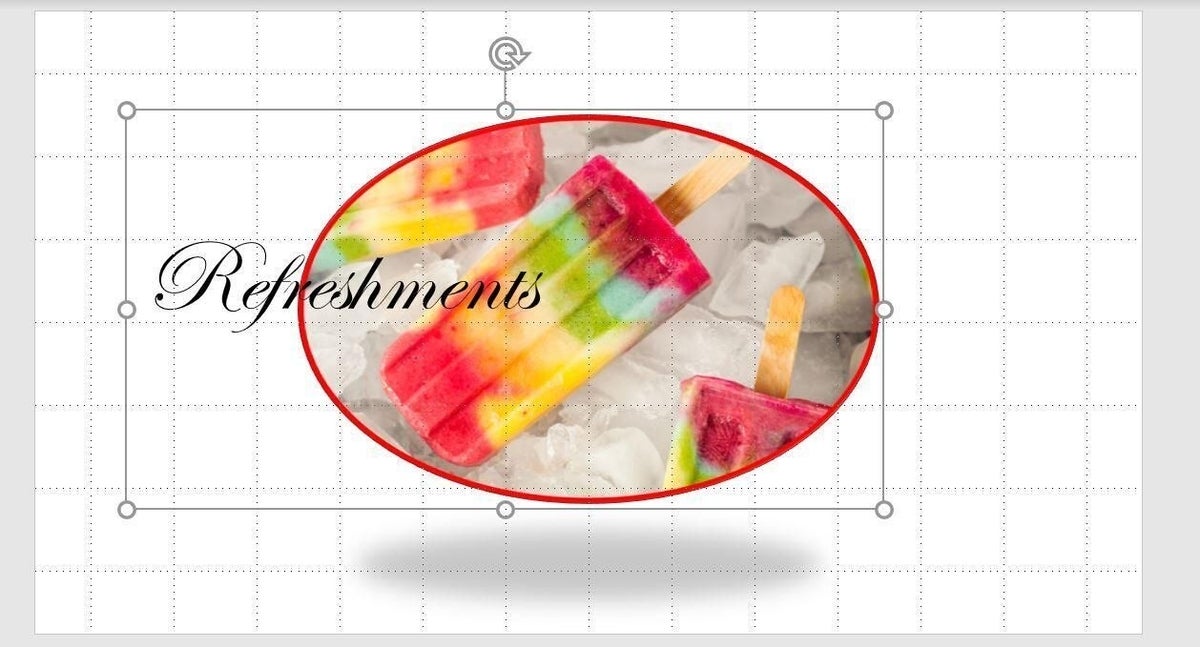
Figure F
Oops … drat. Even as a group, the text size doesn’t change. Holding down the Shift key maintains the image’s shape, but the font size is still 88. Can this even be done?
SEE: Windows 10: Lists of vocal commands for speech recognition and dictation (free PDF) (TechRepublic)
Converting the text control to an image and grouping
I’ve shown you two methods for working with text and images at the same time, but neither changed the font size of the text. You’ll probably use both methods a lot. But what can you do when you want both elements to change size together?
There is a way to achieve this: covert the text control to an image and then group both images. Let’s do that now with our demonstration slide:
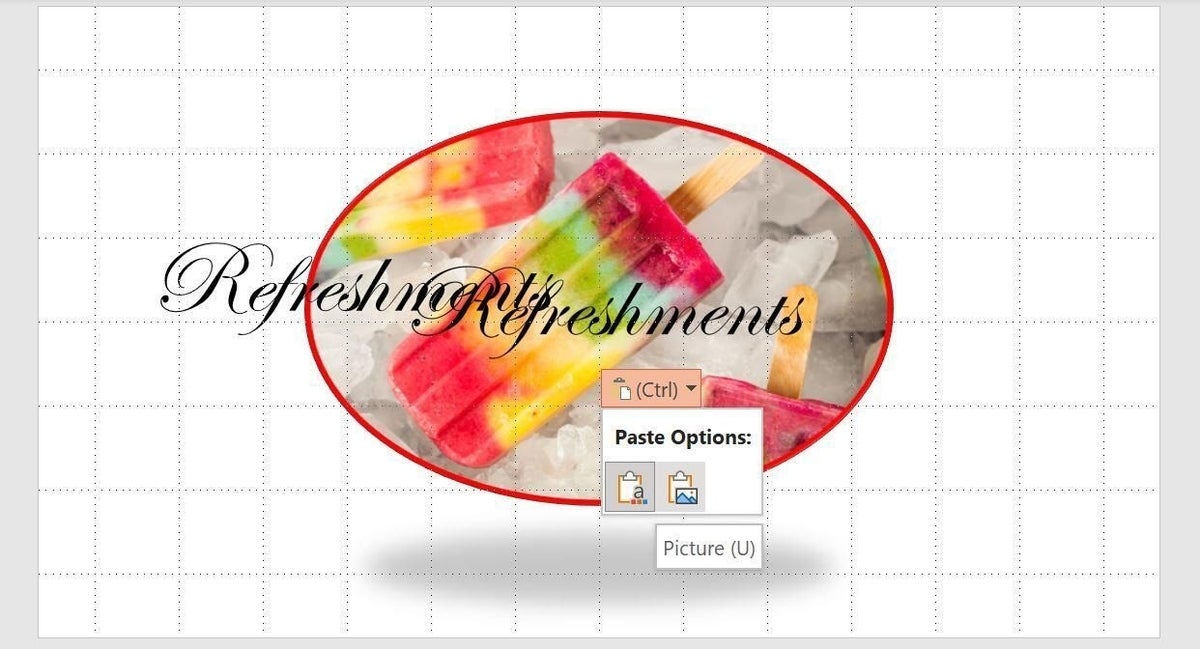
- Select the text box, press Ctrl + C to copy only it to the Clipboard. Then, press Ctrl + V to paste it into the slide.
- When you do, PowerPoint will display a smart tag (Figure G). Click it and choose Picture.
- Delete the original text box and reposition the pasted image if necessary.
- Now, select both images and press Ctrl + G to group them.
- Hold down the Shift key and use the handles to increase or decrease the group.
Figure G
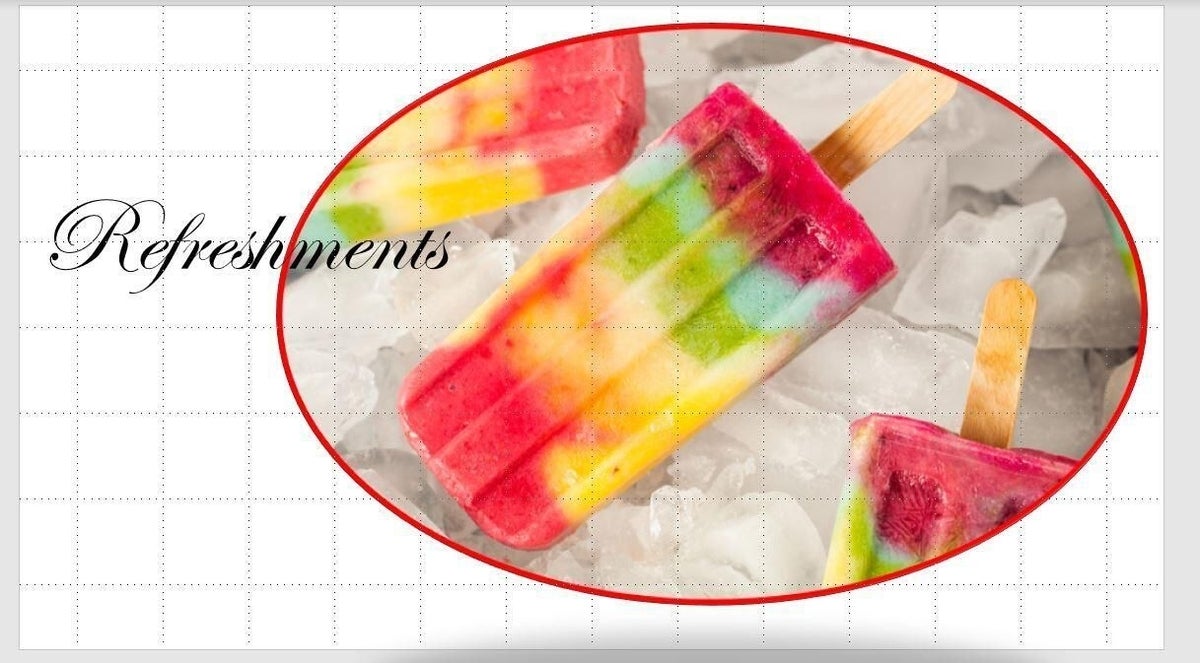
Now the text and image increase, or decrease, in size simultaneously, as you can see in Figures H and I.
Figure H

Figure I
Not only have you learned how to increase the font size of text along with an image, but you’ve learned how to group elements and create multiple element selections when you need a temporary fix.