Creating a website of your own can’t be a very difficult task when you have something as convenient as WordPress. In this guide, we’re going to show you how to create a WordPress website with just a few easy steps.
No worries even if you’re a complete beginner! This WordPress website guide is exactly for someone like you! We’ll walk you through each step, thoroughly.
Before we get started with the steps to build a WordPress website, let’s first talk about what makes WordPress the best option. There are a ton of options for creating a website, after all. So why WordPress then?
A) Why Choose WordPress to Make a Website?
Of all the website platforms out there, WordPress has some distinct advantages that have made it the dominant one. The most important is that WordPress is completely free and open-source. Meaning you can freely use and modify it to your heart’s content.

As a result, WordPress provides you with a level of control over your site that most platforms don’t. From the looks and design to the features, everything is in your hands. It doesn’t matter whether you want a small blog or a massive online store, WordPress is versatile enough to handle it all.
To learn more, you can see our complete guide on what is WordPress.
WordPress.org vs WordPress.com – Which One to Choose?
Before we get into the thick of it, it’s important to note that there are two different versions of WordPress. Despite sharing the name, they work pretty differently.
The first is WordPress.org, which is free software that you can use to create and manage a website. In other words, it is a Content Management System (CMS) that gives you total control over your website. As a result, you can learn how to start a blog, eStore, business site, and much more.
The other version is WordPress.com which is pretty different. This version of WordPress is an online platform that will host your website for you. As a result, it’s much simpler to use, However, it’s also quite limited and you don’t get a lot of control of your site.

For more details, please check our side-by-side comparison WordPress.com vs WordPress.org.
When we talk about how to create a WordPress website, we’re going to be using WordPress.org. If you’re wondering how hard is WordPress to use, then don’t worry! With a bit of effort, it can help you create a website that looks and works just the way you want it to.
With that, let’s move on and talk about how to create a WordPress website.
B) Building a Website in WordPress (Step by Step)
Step 1: Getting a Domain Name
Before you learn how to create a WordPress website for beginners, you’ll need a domain name for your website.
In case you didn’t know, a domain name is basically the address of your website on the internet. It helps internet users find your site on the web.
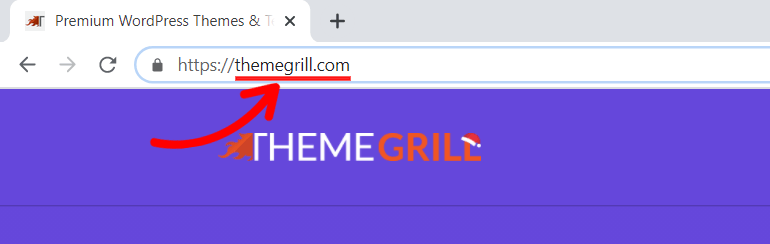
When you go to google.com on your browser, you’re using Google’s domain name to locate the website. Similarly, themegrill.com is our website’s domain name.
For more info, check our article on domain name vs web hosting. Hosting is yet another essential service required to start a website. We’ll explain more about it in the sections below.
Now, let’s go ahead and learn how to get a fitting domain name for your website.
Choosing a Good Domain Name
Before you go ahead and purchase a domain name, there are certain things you need to consider first. Since the domain name is the identity of your website, you’re going to have to be careful before picking one.
Here are a few things to keep in mind when selecting a domain name;
- Keep it simple and short: Nobody wants to type a long and confusing domain name on their browser. Therefore, it’s important to make sure that it’s easy to remember and write.
- Make it suitable for your website: Of course, the domain name also needs to indicate what your website is about. It should be related to your content in some way.
- Keep it unique: It goes without saying that your domain name needs to be unique so that visitors don’t get your site confused with others.
- Choose an appropriate extension: Domain name extensions are of different types, such as .com for commercial, .org for organizations, .biz for business, and more. Make sure that you pick the extension that goes with the purpose of your site.
Once you’ve considered these, you should have no issues picking the perfect domain name for your site. Plus, you can get help from domain name generators.
How to Buy a Domain Name?
Now let us move on to the actual process of buying a domain name. There are tons of domain name registrars that allow you to do this.
In this WordPress guide, we’re going to be using Namecheap to show you how it’s done.
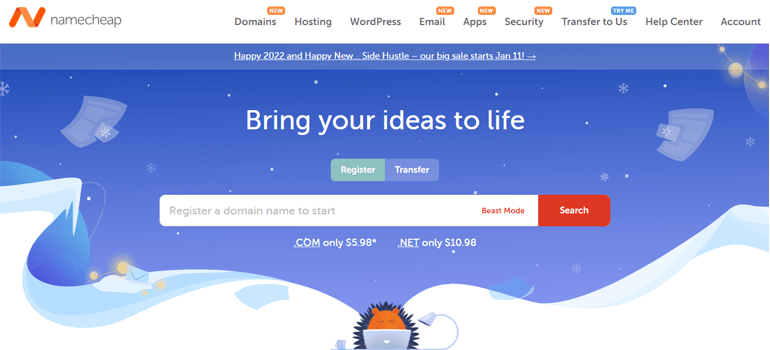
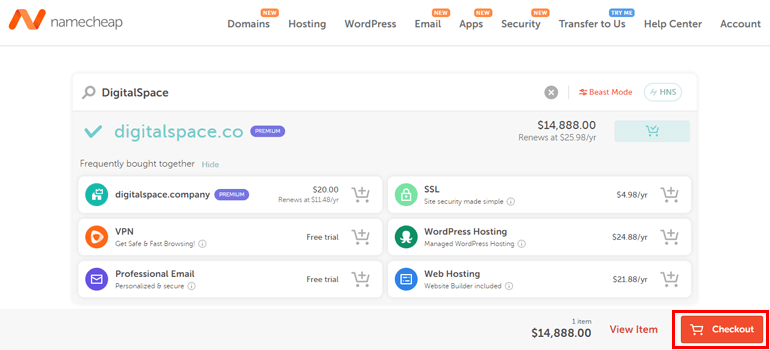
First of all, you will need to check if the name you picked is available or not. Fortunately, domain registrars have handy tools to help with that. Namecheap’s domain name search tool, for example, is simple and easy to use.

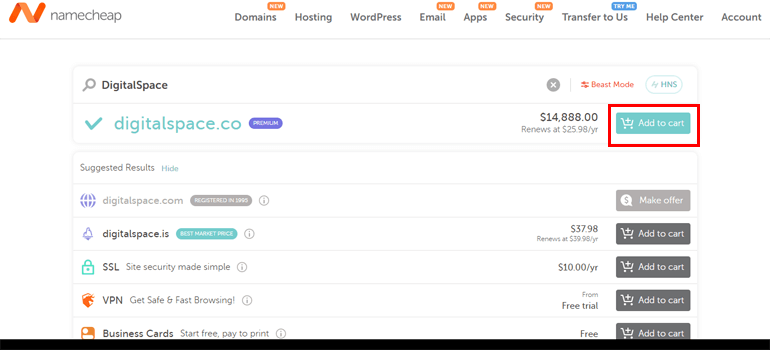
Go to Namecheap.com and enter your selected name in the bar and use the search function. After that, it’ll show the available options along with the pricing. As you can see, it’s super convenient.
Once you find a domain name that’s good as well as available, you can just click on the ‘Add to cart’ button.
Once you’re done, you can just click on the ‘Checkout’ button on the bottom left.
Now, you can choose the specifics of how your domain works. First of all, you can select how long you’re planning to register it for, and whether you’d like to auto-renew it when it expires.
Underneath that, you can also pick additional features for the privacy and uptime protection of your website.
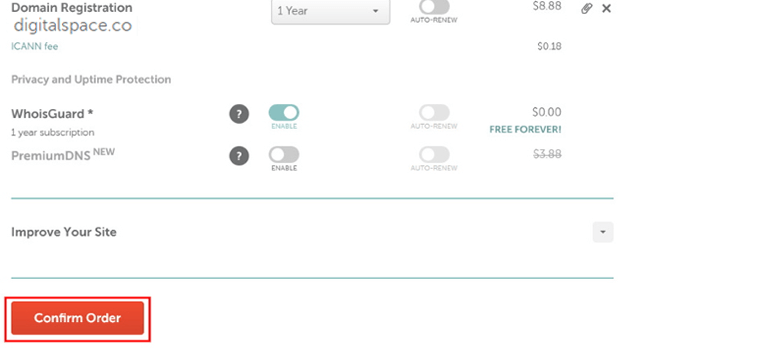
Once you are happy with it, click on the ‘Confirm Order’ button. You can then create a NameCheap account to actually finish it.
Aside from NameCheap, here are some of the best domain registrars out there.
If you want to check out more domain registrars, read our WordPress guide here: 10 Best Domain Registrars for Cheap Domain Registration (Full Comparison)
Step 2: Getting a Web Hosting
Now that you have your domain name setup, we can move on to the second step, web hosting. While a domain name is like the address of your website, the hosting is where your site is actually located.
Basically, web hosting is storage that contains all the files of your website. Once they’ve been stored there, visitors will be able to access your site. Therefore, choosing good web hosting is a very crucial step in creating your WordPress website.
Types of Web Hosting Services
You’ll find that there are different types of hosting services out there. Once you understand what these are, you’ll be able to pick the type of hosting that perfectly suits your needs.
i) Shared Hosting
Cheapest hosting plan. With shared hosting, multiple websites share the same IP address and resources of the server including the memory, hard disk space, and bandwidth.
- Pros: Budget-friendly plan.
- Cons: Limited space, compromised speed, and security.
ii) VPS (Virtual Private Server)
With the VPS plan, you will be provided a certain portion of server resources. You will share the server with other VPS users but there’ll be limited users, not as many as in the shared plan.
- Pros: Secure, Option to get more server resources anytime as your business grows.
- Cons: Expensive for small businesses and beginners.
iii) Dedicated Hosting
A very expensive plan where all the server resources are dedicated to a single user. It’s perfect for large enterprises that expect a ton of website traffic.
- Pros: Full storage, bandwidth, and full control over the server resources, more secure.
- Cons: Not a cost-effective plan for small companies.
iv) Managed Hosting
Managed WordPress hosting is a service where the hosting company will basically handle everything hosting-related for you. You won’t have to worry about stuff like setting up, management, problem-solving, etc with this.
- Pros: Extremely convenient and user-friendly.
- Cons: Quite expensive for small and growing businesses.
How to Choose the Best Hosting for WordPress?
It’s important to remember that each option has its own pros and cons. As a result, you’re going to need to carefully consider the needs of your website, such as server space, bandwidth, security features, etc.
For example, large enterprises will have to deal with a ton of visitors and require a powerful hosting plan as a result. However, a small blog won’t have issues with the limited bandwidth of Shared Hosting. Similarly, a website that deals with a ton of multimedia content will require more server space, compared to a text-only website.
So, the logic is to choose the hosting plan that best meets your needs. By considering the needs of your website, you will be able to find the perfect hosting plan for you.
For more details, please check our article on how to choose WordPress hosting for a website.
If you want to try our recommended hosting companies, then here they are:
- Bluehost – Starting from $2.95/mo. for Shared WordPress Hosting
- SiteGround – $ 3.99/mo. for ‘StartUp’ shared & managed WordPress hosting
- WP Engine – $27/mo. for a managed WordPress hosting plan
To learn more about these hosting services and other alternatives, check our handpicked list of the best WordPress hosting companies.
How to Buy Web Hosting for Your WordPress Site?
It’s much easier than you think to purchase web hosting since the companies have made a lot of effort to make sure that the whole process is simple. The best way to build a WordPress website is through a hosting service provider that has been officially recommended by WordPress.
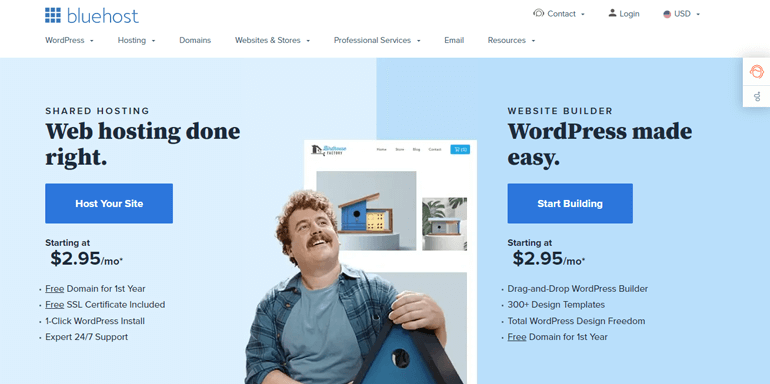
In this WordPress guide, we’re going to be using Bluehost. Not only is it a high-quality hosting service, but it also has a 1-Click WordPress Install feature that’ll make things much easier later on. Just click on the ‘Host Your Site’ button on the homepage.

Now, it’s just a matter of picking the perfect pricing plan for your website. Take your time to carefully consider the features and prices for each plan. Just click on the ‘Select’ button once you find the right one.

Now, under the ‘Use a domain you own’ field, enter the one that you’ve purchased earlier and then click on Next. Alternatively, you can create a new one from Bluehost right here.
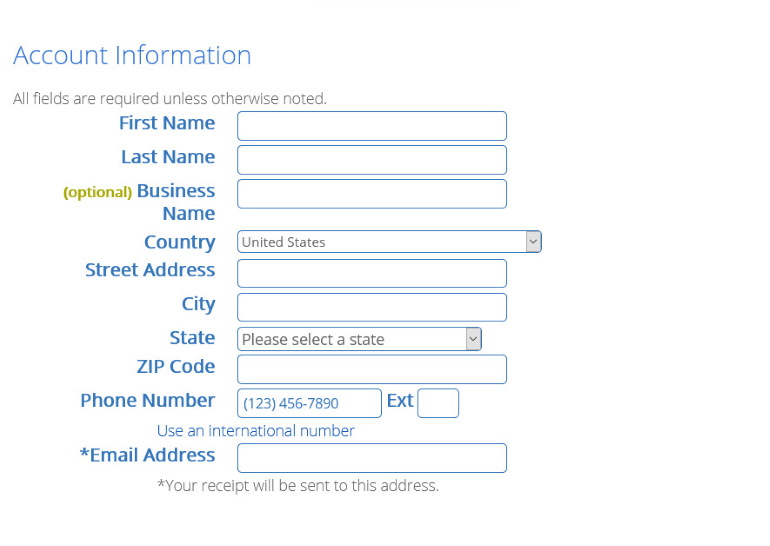
On the next page, you’ll need to fill in all the relevant personal details for your account. After that, scroll down and fill in your payment details. Finally, you can go to the bottom and agree to the terms and conditions before clicking on ‘Submit’.
After that is done, you’ll then be allowed to create a Bluehost account which enables you to move on to the next step. Other hosting companies like SiteGround are also similarly convenient.
And here is the full comparison of the best WordPress Hosting companies and more about web hosting types.
Step 3: Install WordPress on Your Hosting Account
With your domain name and hosting ready, now you can finally get started with installing WordPress software. It’s the major step in creating a WordPress website.
If you’re wondering if it’s a hard step, then don’t worry. Choosing a hosting service like Bluehost or Siteground will make this whole thing super easy.
With the best WordPress hosting services, you’ll get the ‘WordPress Auto-Install’ option when purchasing the web host plan. If not, you can always get a ‘One-click WordPress Install’ option.
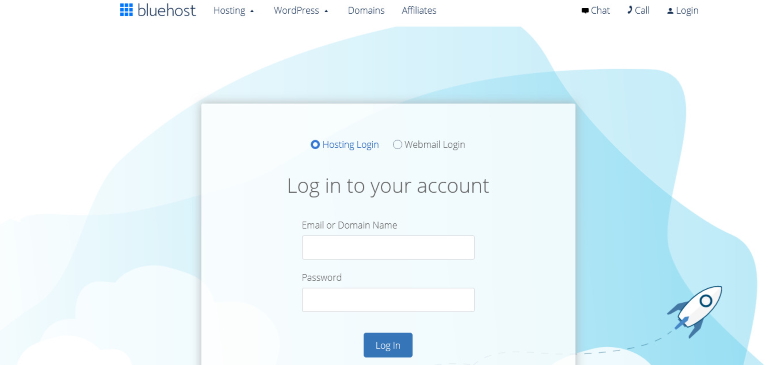
Here, we’ll show you the process with Bluehost. First of all, go to Bluehost.com and click on the ‘Login‘ button at the top menu. After that, enter your email and password that you received earlier and log into your hosting account.
When you’re logged in, you’ll see the Bluehost dashboard something like this. Now to create a WordPress site, click on the ‘My Sites‘ option from the sidebar.
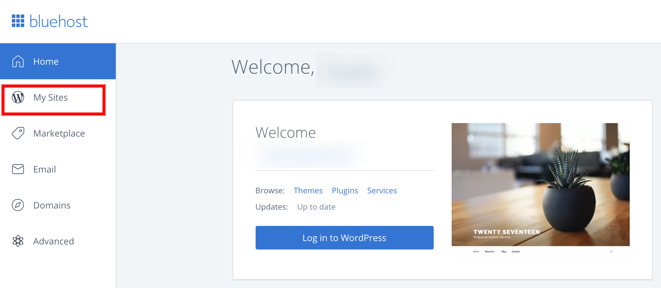
Now click on the ‘Create Site’ button on the top-right corner. All you need to do now is enter your Site Name and Tagline before clicking on ‘Next’.

After that, you’ll have to choose your Domain. Just use the drop-down under the ‘Domain’ field and select the one you purchased earlier and click on Next.

And that’s all there is to it. Bluehost will now automatically install WordPress for you. Just wait until it’s done and then save your login credentials.
Step 4: Log Into WordPress Dashboard
Now that we’ve talked about how to set up a WordPress hosting account and install WordPress, all that’s left is to understand how things work. Fortunately, WordPress is quite user-friendly, so it won’t take a lot of effort to become familiar with the interface.
Next, you must log in to your WordPress website dashboard to carry out further tasks. Luckily with Bluehost and some other best WordPress hosts, you can get a direct link to log in to your site.

Clicking on the ‘Log into WordPress‘ button will directly take you to your WordPress dashboard.
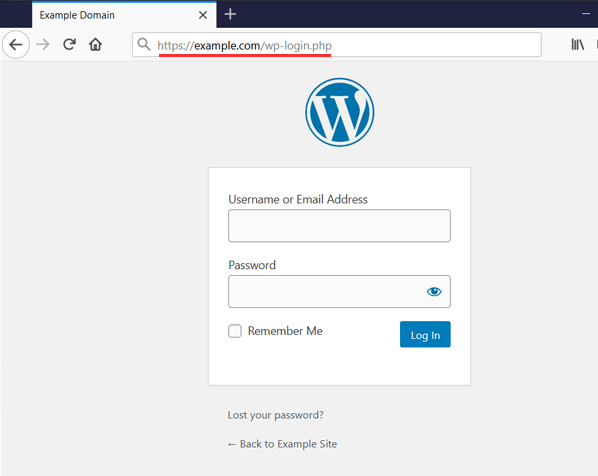
But you may not want to log into your hosting account every time you want to log into WordPress. So, there’s another way; via the WordPress login URL.
The WordPress login URL is your domain name with /wp-login.php. Your login URL looks something like this: https://example.com/wp-login.php. Replace ‘example.com’ with your domain name and enter it on your browser. Then, you’ll see the WordPress login page.
After that, enter the WordPress login credentials that you received earlier. For safety, you can bookmark our detailed guide on WordPress login.
Next, you’ll be able to access your WordPress Dashboard, which is where you can manage your website. The dashboard looks like the screenshot below.

Everything from writing articles, to managing users, to even customizing your website is done here. You can see all the options neatly laid out in the sidebar on the left.
Let’s go through these options one by one:
- Posts: You can add, edit, and manage all kinds of posts for your website from here.
- Pages: This is where you can create, edit, and manage the static pages, such as ‘About Us’, and ‘Contact Us’ for your website. Check our guide on the difference between posts and pages.
- Media: You will be able to manage the various media items such as images, audio, video, etc from this option.
- Comments: If you want to moderate the comments left by your visitors, you can do so from here.
- Appearance: From here, you can customize the looks of your site, including the design, menus, widgets, and more.
- Plugins: If you wanted to add more features to your site, you can go here and manage your plugins.
- Users: This option allows you to manage the different user accounts registered to your website.
- Tools: From here, you can check out some of the useful tools that come with WordPress, such as Site Importer/Exporter, Site Health, etc.
- Settings: You will be able to configure how your site works from here. Since WordPress is a flexible platform, there are a lot of settings to work with.
Now that you installed WordPress on your hosting account and also accessed the dashboard, you’ve technically created your WordPress website. But it’s not complete yet.
Designing your site, adding content, making it SEO-friendly, and secure, etc. are the steps you’re yet to finish. We’ll show you all the steps in the sections below.
Step 5: Choose a WordPress Theme & Customize It
Now that you know how the dashboard works, it’s time to start designing your WordPress site. The good news is that you can customize everything in WordPress to make it look just the way you want. To do so, you’ll make use of a WordPress theme or template.
In simple terms, a WordPress theme provides a pre-designed look for your website and its posts and pages. It’s the main design layout or the integral part of your site’s outlook.
For example, ColorMag is a WordPress theme for magazine sites. Here’s what your site will look like if you use this theme.

As the theme is the core of your site’s appearance, you must carefully choose a theme. Choosing the perfect theme is a crucial step in creating a WordPress website. We’ll talk about how to select a theme next.
How to Choose a Perfect Theme for Your WordPress Site?
Here are a few points you should consider while choosing a WordPress theme.
- Decide your site’s niche: First of all, decide which type of site you want to make. Is it a blog, eCommerce site, business site, or an online magazine? For example, if you want to make an online store, then you need an eCommerce theme like eStore.
- List the features you need: Now you know your site’s niche, you can make a checklist of features that you want on your site. For example, a corporate agency site may need ways to display products, services, reviews, testimonials, etc. So, a highly customizable theme like Zakra may be perfect.
- Check theme’s last update date: WordPress is one of the most frequently updated software. It gets better and more secure with every update. So, you need a theme that incorporates all the latest WordPress standards. Choose a theme that is recently updated or often is updated.
- Support facilities by theme provider: When using a theme, you may sometimes need technical help and support from the theme company. Do research about the theme provider’s support options well and make sure to choose a theme from a company with good support facilities.
You can pick a theme for your site considering these points. Now, let’s go ahead and see where to find the best WordPress themes.
Where to Find the Best WordPress Themes?
The easiest place to get free themes for your site is from the official WordPress themes repository. There are over 9000 themes to choose from and all of them are free to boot. As a result, you can set up a WordPress site to look beautiful for absolutely free.

WordPress.org is the best place to get free themes, not only because the themes are free. It’s also because of the themes available there are quality themes that passed a rigorous review process before being available for download.
And, there’s the transparency of all themes’ stats. You can see the number of active installs, downloads per day, user ratings, support forum activities, etc. With all of these, you can easily find out how good a theme is.
Yet, there’s a catch in selecting the best theme from such a big collection. But no worries! We have handpicked the best free WordPress themes for you.
A simple website for beginners can do with a basic free theme but a powerful and complex site will require a feature-rich and professionally coded one. Such themes are available for purchase mostly. You can buy premium themes from marketplaces like ThemeGrill, ThemeForest, Zakra Theme, etc.
Also, check our ultimate best WordPress themes list (both premium and free themes included).
How to Install a WordPress Theme?
Once you have selected a theme for your website, it’s time to install the theme. It’s the essential step in creating your website in WordPress.
Installing WordPress themes is actually simpler than you’d expect. We’ll show you a tutorial on how to use a WordPress theme for your website in these easy steps.
From your WordPress Dashboard, navigate to Appearance>Themes, where you can see the themes that are currently installed on your site. Now just click on the ‘Add New‘ button at the top.

On this new page, you can just use the Search Bar on the top right and look up themes that are stored in the official repository. Just enter the name in the search bar and then click on the ‘Install’ button. After that, click on the ‘Activate’ button that appears.

If you want to install a theme that you purchased or downloaded from a third-party theme store, then you’ll need to click on the ‘Upload Theme’ button at the top.

Here, you can click on the ‘Choose File’ button and find the file of your theme. Remember, it has to be in a .zip format. Then, you can just click on the ‘Install Now’ button.

Once the theme is installed, you can just Activate it and you’re good to go.
If you need a more detailed guide, then please check our full guide on how to install a WordPress theme.
How to use the WordPress Live Customizer?
Once you have your theme installed and activated, you can customize it to your heart’s content. The exact customization options will differ according to the theme you have on your site, with a high-quality multipurpose theme like Zakra offering the most options.
From your WordPress dashboard, go to Appearance > Customize to open the Live Customizer. Here, you can play around with the settings and see the effects in real-time.

At the right, you’ll be able to see the various customization options. You can check your Active Theme at the top and even select a different one with the ‘Change’ button,
These customization options are going to be different depending on the theme you have installed. However, here’s an explanation of some common customization options in the Live Customizer.
- Site Identity: Here, you can configure details such as the site title, tagline, and icon.
- Colors: Customize the various colors of your website from here.
- Menus: You can create, customize, and remove various menus through these options. Learn more about WordPress menus.
- Widgets: As with menus, you can play around with your WordPress widgets and see how they look in real-time.
- Homepage Settings: It allows you to choose what’s shown on the home page of your site.
- Additional CSS: For even more customization, you can even add CSS codes to your site through this option.
At the bottom, you can find the option to show how your website will look on different screens. It’s important to make sure that it looks good on mobile devices as well. The Hide Controls option can also be used to get a better look at your site without the options sidebar.
Once you’re happy with how it looks, you can click on the Publish button at the top.
Want to learn more about Customizer in WordPress? Check out our detailed guide on what is WordPress customizer and how to use it.
Some of the Best WordPress Themes to get Started
Since there are a ton of amazing themes out there, you might get overwhelmed at first. To help with that, here are some of the best ones that you can find.
- Zakra: A fantastic multipurpose theme with a ton of customization options.
- ColorMag: The most popular magazine WordPress theme out there, with a powerful set of features.
- Spacious: The perfect theme for businesses of all kinds, with a clean and professional look.
- Divi: A highly flexible theme that is feature-rich as well as well-optimized.
- Neve: This super fast theme comes with a ton of amazing features perfect for small businesses and blogs.
For example, if you choose the Zakra theme, your site will look something like the image below. Also, check the demos to see the variety of sites you can build with this theme.

Not satisfied with these? Don’t worry. We have a handy list of the best WordPress themes out there for you.
Step 6: Adding Features with WordPress Plugins
Of course, we can’t talk about how to create a WordPress website without mentioning plugins. In case you didn’t know, WordPress plugins are basically additional pieces of software that you can add to your new WordPress site. By doing so, you’ll be able to add new features to your website.
It goes without saying that plugins are very important if you want to run a WordPress site. Fortunately, it’s actually super easy to manage plugins, and it will require absolutely no coding at all. Of course, advanced users can even go on to learn how to develop WordPress plugins by themselves.
Where to find WordPress plugins?
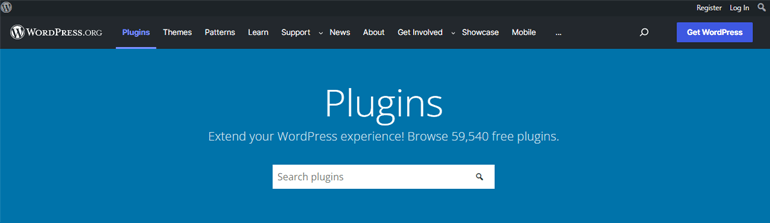
As with themes, you can find a ton of plugins for free on the official WordPress website. In fact, the official WordPress plugin repository contains over 59,000 plugins to choose from.
That’s not all, though. You also have third-party sites like WPEverest and CodeCanyon where you can purchase premium themes with a lot more features as well as dedicated support.
It’s important to note that outdated or badly coded plugins can leave security vulnerabilities on your website. As a result, only go for plugins from sources you can trust and update them regularly.
To help you out, we’ve handpicked the best WordPress plugins for you.
How to install WordPress plugins?
Installing WordPress plugins is not that different from installing themes, actually. It can all be done right from your WordPress Dashboard.
First of all, go to Plugins on your sidebar. It will bring you to the page where you can see your list of installed plugins. Now click on the ‘Add New’ button at the top.

Here, you can directly install plugins from your WordPress repository to your website. All you need to do is enter the name of the plugin in the search bar, then click on the ‘Install Now’ button when you find it. Once the installation is done, click on the ‘Activate’ button that appears.

Of course, you might need to install plugins from outside the repository sometime. In that case, you’ll need to manually upload the plugin. From the Add Plugins page, click on the ‘Upload Plugin’ button at the top.

Now click on Browse and navigate to the .zip file. After that, just click on Install Now and wait for it to finish installing. Finally, click on Activate.

For more details, check our complete tutorial on how to install WordPress plugins (step by step).
Some Amazing WordPress Plugins
Now that you know how to add plugins to your website, let’s get started on the best ones. We’ve listed some outstanding ones for you.
- Everest Forms: With this plugin, you can create all kinds of contact forms for your WordPress website with ease.
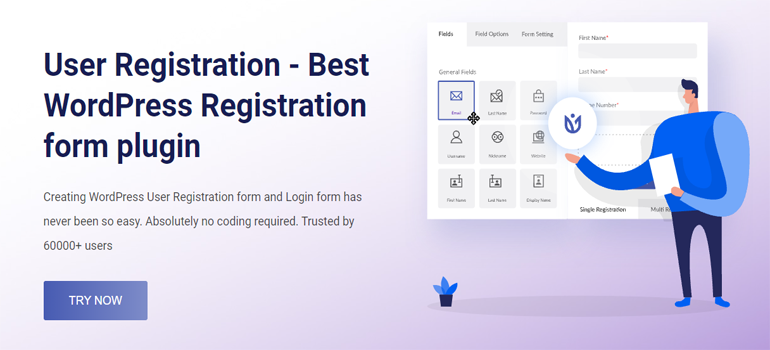
- User Registration: As its name says, this plugin lets you create user registration and login forms, user profile pages, etc. in WordPress.
- WP Rocket: This plugin can help significantly improve your site’s performance through proper caching.
- Elementor Page Builder: Elementor is a drag-and-drop page builder plugin with which you can create beautiful looking web pages with absolutely zero codings.
- WooCommerce: With powerful WooCommerce, you can easily turn your website into an online store in just a few clicks.
For an in-depth list of the best WordPress plugins that you can find, check out our handy WordPress guide: 50+ Best WordPress Plugins.
Step 7: Creating Posts and Pages in WordPress
Now that you know how to create a WordPress website and set it up with free themes and plugins, you can immediately start adding content. That is usually done in two possible ways; posts and pages.
WordPress Posts appear in the Blog section of your site. They can be used for all sorts of content depending on the niche of your website. They are arranged in reverse chronological order so the newest posts will be found at the top. For example, blog articles on our blog.
WordPress Pages, on the other hand, are used for one-off content that doesn’t need to be updated or changed. This includes timeless content such as ‘About Us’, ‘Services’, ‘Contact Us’, which will generally remain the same as time goes by. Most websites will use a combination of Posts and Pages
How to Create WordPress Posts?
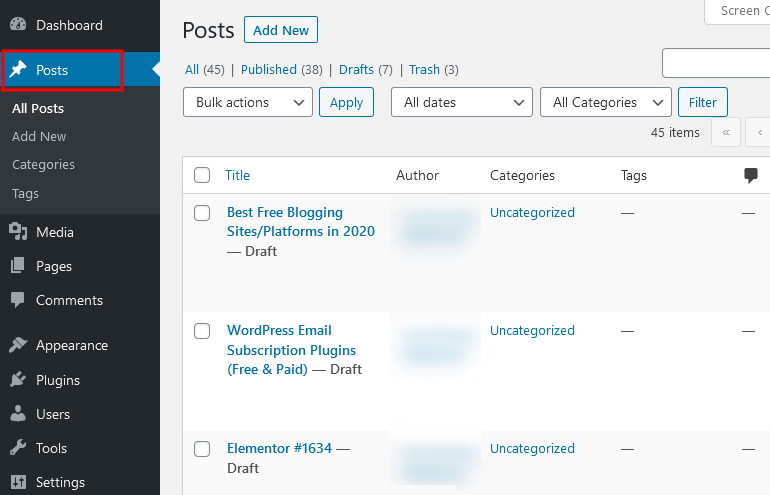
Of course, you’ll need to know how to create posts in order to add content to your website. From your dashboard, first, select the Posts option on the sidebar. This will bring you to the page where all your posts will be listed. You’ll be able to manage your posts from here.
Now to create a new post, just click on the ‘Add New’ button at the top.

This is going to bring you to the WordPress Post Editor. Here, you can add all kinds of content, including text, images, galleries, and more. It’s all fairly intuitive so no need to worry.
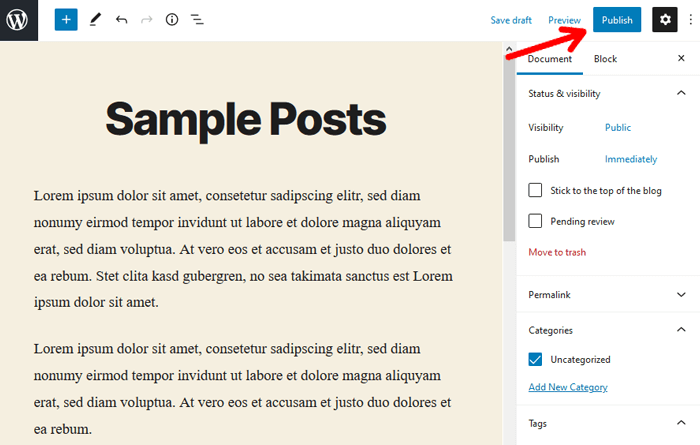
Once you’re done preparing the content, just click on the ‘Publish’ button on the top right.
How to Create Pages in WordPress?
Creating web pages using WordPress is also quite similar. Go to Pages on the sidebar from your WordPress Dashboard, and you’ll reach the screen where you can manage your existing posts. Like before, just click on Add New at the top.

This is going to open up the WordPress Page Editor, which is quite similar to the post editor. Like earlier, you can add content all you want and then press the ‘Publish’ button once you’re done.

Displaying Your Pages in Your Website’s Menu
Now that you’ve created and published content on your website, it’s time to display them on your site. One of the most common places to show the page links is in the WordPress menu. Here, we’ll briefly show pages in the menu.
If you don’t know, the WordPress menu is a list of defined links usually appearing in the header section of your site. It’s mainly used for navigation of your site.
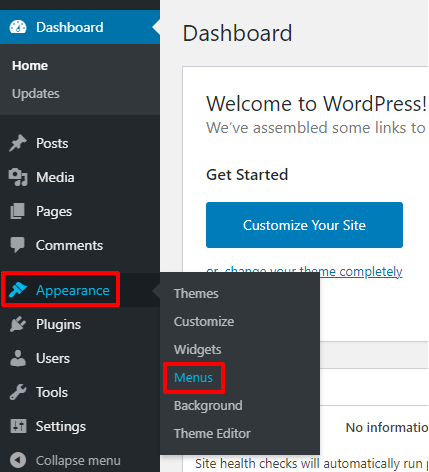
To create a WordPress menu, go to ‘Appearance>Menus‘ from your WordPress dashboard.
Next, you’ll see the menu editor page. Give a name to your menu and click on the ‘Create Menu‘ button.

After that, you should add pages to your menu. On the left panel, you can see ‘Add menu items‘ Click on the ‘Pages‘ tab. After that, tick the pages you want to add to the site’s menu and click on the ‘Add to Menu‘ button.

After that, the added menus will appear on the ‘Menu structure‘ section on the right side. You can drag and order the items as you want.
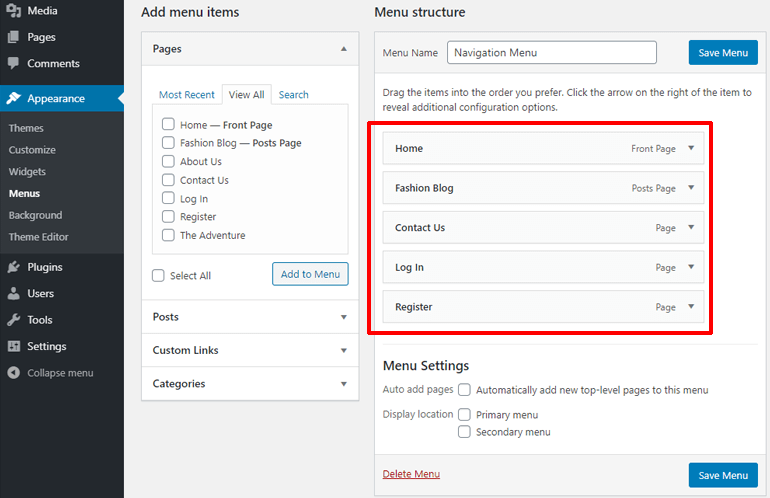
Next, you should select where to display your menu. You can tick a display location from the ‘Menu Settings‘.
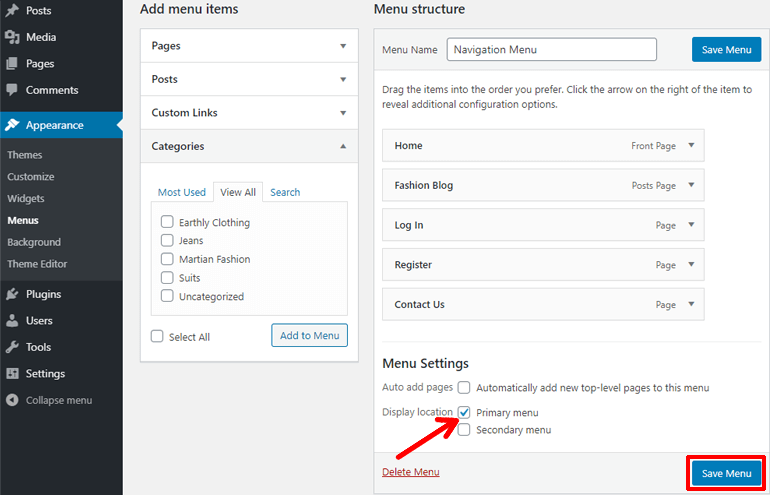
That’s it! You’ve created a WordPress menu and added it to your site. For a detailed guide, please check our article on creating a WordPress menu.
Step 8: Managing WordPress Security
Now that you’ve created your own WordPress website, added content to it, you’re almost done. But there are a few really important things you should work on immediately. For example, security, SEO, etc. let’s begin with security.
It goes without saying that keeping your website secure is extremely important. As a site owner, it’ll be your responsibility to protect your site after all. While WordPress by itself is far from insecure, it’s better to be safe than sorry when it comes to security.
Fortunately, there are some easy steps you can take that’ll make things much better.
1. Keep WordPress Updated
With each new update, WordPress makes improvements in terms of security such as fixing bugs and vulnerabilities. As a result, it’s extremely important for you to keep your WordPress updated to the latest version.

It’s super easy to do as well. Just go to Dashboard>Updates and you can check if your WordPress needs to be updated.
2. Keep your Themes and Plugins Updated
In a similar vein, outdated themes and plugins can also present a huge security vulnerability to your site. As a result, it’s important to keep them updated. As with the last option, you can go to Dashboard>Updates and update your themes and plugins from there.

3. Enable SSL
In basic terms, SSL (Secure Socket Layer) makes the data of your website more secure. In fact, websites without SSL are marked by web browsers as ‘Not Secure’. To add SSL to your website, you can purchase it from your hosting provider.
4. Backup your Websites Regularly
When it comes to website security, it is often better to prepare for the worst-case scenario. As a precaution against your site going down, you should make sure to backup your website data. There are a number of amazing plugins that can help with that.
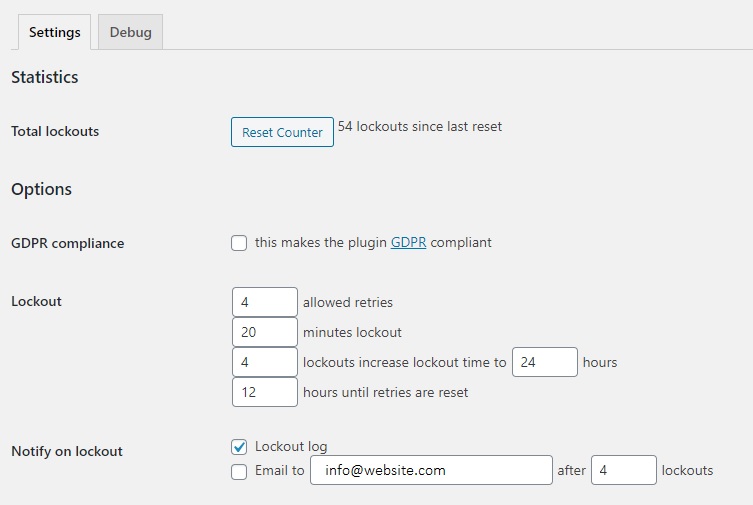
5. Limit Login attempts
One simple method to improve site security is to limit the number of times someone can attempt to log in to your website. Limit Login Attempts Reloaded is a free plugin that can help you do just that.
Aside from these tips, there are some helpful security plugins that come packaged with a ton of amazing features that you might want to check out.
WordPress security is always a task of paramount importance, so never take it easy. Here is a complete guide on keeping your WordPress site secure: 15 Simple WordPress Security Tips to Protect Your WordPress Website.
Best WordPress Plugins for Security
i) BulletProof Security

With over 50,000 active installs, BulletProof Security is one of the best security plugins that protects your WordPress websites. It adds firewall security, database security, and much more to protect your website files and database.
Additionally, it secures your website against RFI, XSS, SQL injection, and code injection hackings through multiple outer and inner layers of website security protection.
Key Features:
- Single-click setup wizard
- Extensive system info
- HTTP error login
- Auth Cookie Expiration (ACE)
- Idle Session Logout
ii) Wordfence

Wordfence is an open-source plugin that performs various tasks like login security, IP blocking, security scanning, and much more. In short, it helps to secure your WordPress websites from malware and infections. The laundry list of features is just too much to go through but the highlight of this plugin is its scanning capabilities.
Key Features:
- Two-factor authentication
- Login security & Security scanning
- Web application firewall
- Advanced manual blocking
- Real-time threat defense feed
iii) iThemes Security

iThemes Security hypes itself as the best security plugin for WordPress and offers 30+ ways to protect your site from malicious attacks. This WordPress plugin is best known for strengthening user credentials by fixing common vulnerabilities and automated attacks.
Key Features:
- Database backups
- Two-factor authentication
- Strong password enforcement
- File change detection
- Brute force protection & Malware scanning
Also, check out and subscribe to the ThemeGrill blog for more WordPress website security tips and tutorials for beginners.
Step 9: Improving your Visibility with Search Engine Optimization (SEO)
In case you didn’t know, Search Engine Optimization means optimizing your website and its content so that it will rank high in the search results on search engines like Google. Basically, it means making your website more search engine friendly.
You might know how to create a WordPress website but managing one professionally is another matter. If you want to ensure that your site has a large audience, then it’s vital that your SEO is good. After all, if people can’t find your website on Google, you’re going to get much fewer visitors.
Fortunately, WordPress also has that covered for you. There are some absolutely amazing plugins that you can install to make the whole thing much easier.
Best SEO Plugins to Optimize Your WordPress Site
WordPress by default comes with a lot of SEO benefits. Like it has a simple and neat content structure for posts and pages. It lets you build SEO-friendly simple and short URLs. And on top of them, you can add more options using SEO WordPress plugins.
Here. we’ll briefly talk about some of the most popular SEO plugins for WordPress.
i) Yoast SEO
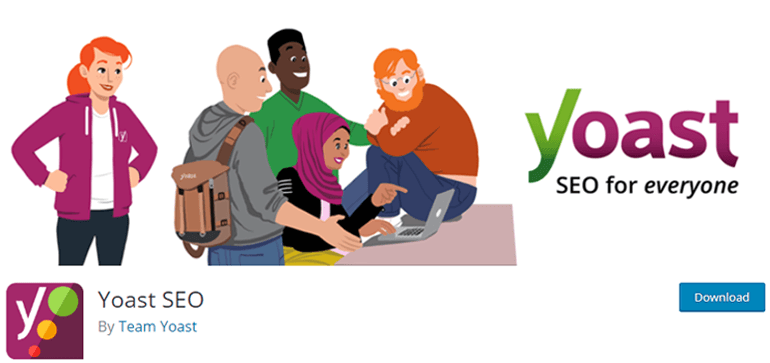
With over five million active installs, Yoast SEO is a leading WordPress SEO plugin in the present market due to its cutting-edge SEO features. The plugin has a powerful option to achieve every sort of technical optimization.
It provides handy options for dealing with page titles, descriptions, and URLs which plays an important role in delivering effective SEO.
Key Features:
- XML sitemaps
- Internal linking suggestions
- Keyword optimization
- Better content
- Page Analysis
ii) Rank Math
Another best WordPress SEO plugin with top features to bring out your site’s SEO capability is Rank Math. The plugin has it all, from clean design, top-notch features like extra keyword information, smart link suggestions, and everything you need to optimize your post.
Your site’s traffic will easily reach greater heights with Rank Math, which acts as an entire SEO team but just within a few simple clicks.
Key Features:
- Role manager
- Setup Wizard
- Multisite ready
- Offers 30 detailed SEO Tests
- Integrated with Google Search Console
iii) The SEO Framework

The SEO Framework is an all-in-one SEO pack best known for its simplicity and ease of use. This amazing plugin comes with a ton of useful features that have been preconfigured so you’re going to have a much easier time managing things.
Additionally, the plugin will help manage all facets of SEO and puts together a beautiful overview page.
Key Features:
- Built-in Sitemap
- Strict privacy policy
- Follows Google’s Webmaster Guidelines
- Overview Pages with color-coded Guidelines
- Automatically pings search engines upon updates
To learn more, you can check out our WordPress guide on helpful SEO techniques for your website.
Step 10: Getting Support for your WordPress Site
Of course, it’s not enough to just know how to create a WordPress website. An important part of running a website is knowing what to do if something messes up. In that case, there are several different options for WordPress users.
WordPress is a free open source software that has now a great worldwide community. As a result, there are thousands upon thousands of amazing WordPress resources, such as tutorials and documentation online. In addition, there are thousands of WordPress experts active on WordPress support forums that can help you with all sorts of issues.
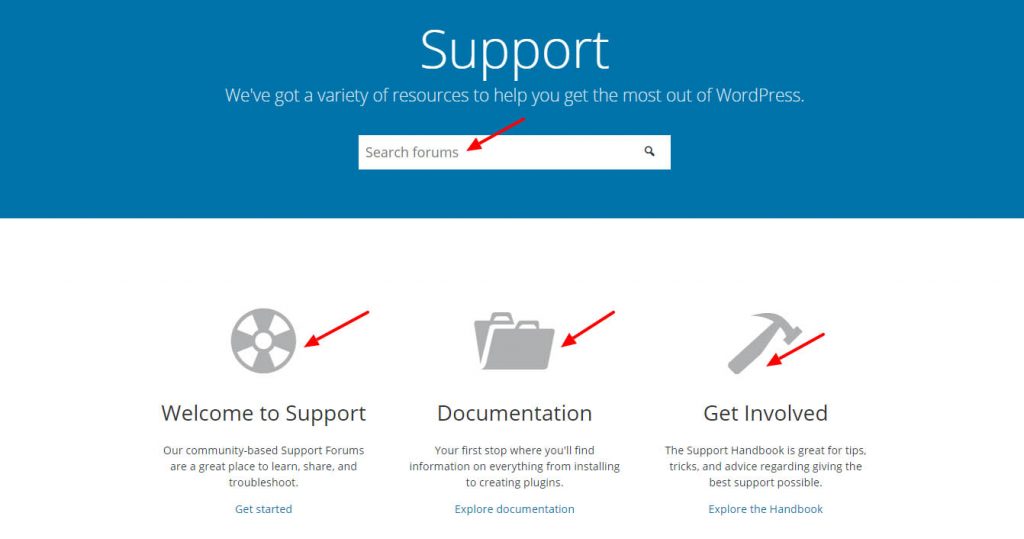
Another option is to get WordPress support from the developers of WordPress products (such as themes and plugins) that you’ve installed. There are product-specific community forums available and on top of which, most of the WordPress companies provide dedicated customer support.
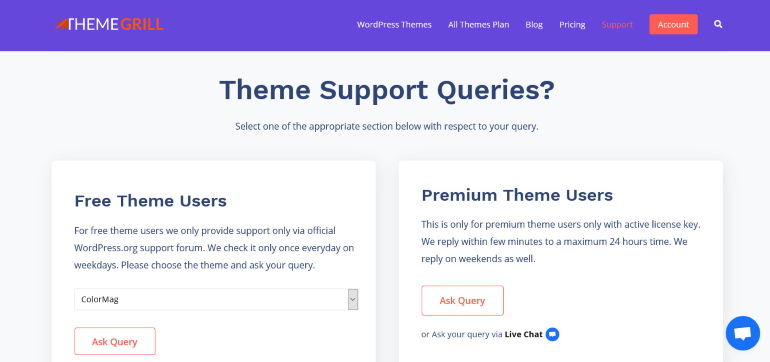
For example; if you are using ThemeGrill products i.e. WordPress themes and plugins by ThemeGrill, you can contact us via our support forum, live chat, or email. In addition, you can also check out the ThemeGrill Knowledgebase and ThemeGrill News.
What to Do After Your Site is Ready? (6 Important Things)
We’ve shared how to create a website in WordPress, step-by-step. So, your site is ready. But that’s not all! There’s still some work you should do to make your website successful.
1) Create a Contact Form
Creating a contact form for your WordPress website is a must. It’s because the contact form helps to maintain effective communication between you and your potential audience. Everest Forms is the best WordPress contact form plugin available in the market. This free drag and drop form builder allows you to build any kind of form quickly and easily.

Everest Forms provides several pre-made templates so that you can make small tweaks to the template and instantly create a contact form. Or else you can also create a contact form from scratch or a blank page.

You can simply drag the required field like Name, Number, Emails, etc from the left-hand side and drop it to the right-hand side to the desired positions. Besides, you can also make other necessary settings like General settings, Email settings, etc. with this plugin.
If you want a more detailed guide then you can read our article on how to create a contact form on WordPress.
2) Start Building an Email List
Emails are one of the most popular and effective tools for digital marketing. Via emails, you can send news about your product updates to your customers, discount offers, etc. Also, you can share your latest blog articles. etc. But for that, you need to create an email list first.
An email list is a list of email addresses of users who agreed to receive emails from you. Hence, creating an email list means collecting emails. One of the best ways to collect emails is via sign-up forms on your website.

In WordPress, you can easily add an email subscription form on your website using the all-in-one form builder plugin “Everest Forms”. You can create a subscription form starting from scratch or tweak the pre-existing form templates provided by the plugin.
Moreover, with a pro version of the plugin, you can get access to the add-on “Email Templates”. It allows you to customize the emails that you send to your users.
One important tip: Always, use a professional email with your custom domain. If you’re a Google user, then there’s also an option to use Gmail with a custom domain.
3) Add Social Share Buttons on Your Blog
Creating a WordPress website isn’t enough. You’ve to popularize your site if you want to grow your brand. And what could be an easier way than to share your content on social media? It’s one of the biggest and largest platforms to share your content and grow digitally.
To grow your site’s popularity, you can add social share buttons to your blog. Basically, these buttons allow your users to share your posts on their social media timelines. Hence, their friends and family can also see your work on their timelines. This gives your site a bigger exposure.
The easiest way to add social share buttons on your blog is through plugins. The most popular plugin on the market has to be Easy Social Sharing. The plugin allows your users to share your post and also displays the total number of shares. Not to mention, you can effortlessly download the plugin from WordPress.org free of cost.

4) Add Google Analytics & Start Measuring
Google Analytics is the best tool when it comes to understanding your audience. It tracks all the data of your visitors and gives you a better understanding of your website. It gives you insight into your most popular pages and posts. Not only that, you can know about the age, gender, location, and interests of your audience.
It’s super easy to add Google Analytics to your website. First of all, you need to sign up for a Google Analytics account. For that, log in to the Google Analytics website.
Next, it takes you to the account creation page where you need to fill in your account name and data sharing settings. After that, you need to fill up the details of your website. Such as your Website Name, Website URL, Industry Category, Reporting Time Zone.

Once you’ve filled the form, you need to connect Google Analytics to WordPress. One way is connecting manually, and another is using the Site Kit WordPress Plugin. After you’ve connected, you can easily see your audience report, acquisition reports, behavior reports, conversion reports, and real-time reports.
If you want a complete guide read our article on how to add Google Analytics to WordPress.
5) Prevent Comment Spam
Comment spams are unwanted or unnecessary messages that are sent over the internet by spammers. These spams may hamper your site in many ways and may also slow down your site’s performance. Hence, preventing such spam is another important task after creating a WordPress website.
One of the easy ways of preventing such spam is from the WordPress dashboard itself. That’s right, the best CMS platform also has built-in functionalities to prevent possible spam. For this, you need to navigate to Settings >> Discussions and enable or disable various discussion settings as per your need.
Besides, there are many WordPress anti-spam plugins for this purpose. One of the best and free of which is the Akismet Anti-spam plugin. Akismet is the most popular open-source plugin by Automattic, the team behind WordPress itself. This plugin checks all of your comments automatically and separates those which look like spam.

6) Improve Your Website Speed
Imagine, you open a website and it takes forever to load. Would you visit that site again? We assume your answer is ‘No’. That’s why the loading speed of your site is very important to attract more audience.
Actually, the right question is, therefore ‘how to create a fast WordPress website?’.
To increase the speed of your site, you need to install a plugin. There are several plugins however, we recommend the WP Rocket plugin. It’s one of the best all-in-one WordPress speed optimization plugins. WP Rocket is a premium plugin, and you can purchase it for a price starting at $49/year.

Best of all, the plugin is user-friendly and you can set it up in a matter of seconds. It provides image optimization, database optimization, and even the ability to host Google Analytics code on your site. With the help of WP Rocket, your site will load as fast as a rocket.
Wrapping Up
So this was our WordPress guide on how to create a WordPress website. To recap the process of building a website in WordPress, we included domain and hosting purchase, setting up WordPress, installing themes, plugins, adding content, security, SEO, support. Plus, what to do after setting up a website using WordPress.
Before we wrap up, let’s revise the steps one more time. You can go back and see above if you missed any steps here.
- Buy a Domain Name and Web Hosting Account
- Install WordPress and Login to Your WordPress Dashboard
- Select a WordPress Theme, Install it, and Customize it
- Add Additional Features on Your Site Using Plugins
- Create Content (Adding Pages and Posts)
- Make Your WordPress Site Security Strong
- Optimize Your Website for SEO
- WordPress support options
This is basically what we’ve included in this WordPress website building tutorial. You can bookmark this article and always check it out when you need help on any step. Need more technical help? You know where to ask for help!
As you can see, the process is simple enough. The great thing about WordPress is that even absolute beginners will be able to have a site of their own in no time.
You can also check our all beginner-friendly guides, WordPress theme reviews, and plugin reviews. For high-quality themes with fully dedicated support, check our most popular themes.
We hope this article made the whole process clear to you. If you have any questions, feel free to let us know in the comment sections below.
If you think this guide can help others too, then please share it with your friends on social media. For fresh updates from our blog, you can follow our blog’s handle on Twitter and ThemeGrill’s page on Facebook.


![Zakra 3.0 | Zakra Pro 2.0 Release [Major Updates!]](https://i.ytimg.com/vi/g3rifl7kWvg/maxresdefault.jpg)