
Why Use Google Street View
Google Street View is a powerful tool that offers users a virtual exploration of the world. With just a few clicks, you can transport yourself to any location and take a virtual walk down the street. But why would you want to use Google Street View? Here are a few compelling reasons:
- Scouting a Neighborhood: Whether you’re moving to a new area or looking to explore a neighborhood before visiting, Google Street View allows you to get a feel for the surroundings. You can check out local landmarks, evaluate the condition of the streets, and even get an idea of the nearby amenities.
- House Hunting: If you’re in the market for a new home, Google Street View can be a valuable tool. By virtually exploring the neighborhood, you can assess the curb appeal of various properties, gauge the safety and cleanliness of the area, and determine if the location meets your criteria.
- Planning Trips: When you’re planning a vacation or a day trip, Google Street View can help you get a preview of your destination. You can virtually visit attractions, check out restaurants and hotels, and familiarize yourself with the surroundings to make your trip more enjoyable.
- Reliving Memories: If you have fond memories of a particular place, Google Street View can transport you back in time. You can revisit the streets you used to walk, the places you used to frequent, and reminisce about past experiences. It’s like a digital time machine!
- Researching Business Locations: Are you considering starting a new business or expanding to a new location? Google Street View allows you to virtually explore potential locations, assess the foot traffic, evaluate the competition, and make more informed decisions.
Overall, Google Street View offers a convenient and immersive way to explore the world from the comfort of your own home. It can save you time, help you make more informed decisions, and satisfy your curiosity. So, the next time you’re curious about a place or need to gather information before making a choice, give Google Street View a try – you won’t be disappointed!
How to Access Google Street View
Accessing Google Street View is incredibly easy. Whether you’re using a computer, smartphone, or tablet, you can follow these simple steps to start exploring:
- Using a Computer: Open your preferred web browser and go to Google Maps. Search for a desired location by typing in the address or the name of a landmark. Once the map appears, drag and drop the “Pegman” icon, located at the bottom right corner, onto a street or road highlighted in blue. The Street View will pop up, allowing you to explore the area.
- Using a Smartphone or Tablet: Launch the Google Maps app on your device. Enter the location you want to explore in the search bar. Once the map appears, tap on the location marker. Swipe up on the info sheet at the bottom of the screen to reveal more details. Then, tap on the Street View thumbnail to enter the immersive view.
It’s important to note that not all locations are available in Street View, especially remote areas and private properties. However, Google’s extensive coverage makes it possible to explore most populated areas around the world.
In addition to accessing Street View through Google Maps, you can also use the “Street View” app available on iOS and Android devices. This dedicated app allows you to easily navigate and explore different locations without accessing Google Maps.
Whether you’re using a computer or a mobile device, the intuitive interface of Google Street View makes it effortless to start your virtual exploration. So, go ahead and embark on your visual journey with Google Street View!
Searching for Your House
Searching for your house on Google Street View is a simple process that can be done in a few easy steps. Here’s how:
- Open Google Maps: Start by opening the Google Maps website or app on your computer, smartphone, or tablet.
- Enter Your Address: In the search bar, enter the address of your house. You can include the street number, street name, city, and zip code to refine the search results. As you type, Google Maps will provide suggestions to choose from, making it easier to find the correct location.
- Locate the Pin Marker: Once you’ve entered your address, Google Maps will display a pin marker on the map indicating the approximate location of your house. The map may zoom in or adjust the view to center around the marker.
- Activate Street View: To activate Street View, next to the pin marker, you will see a small image of a person or a “Pegman” icon. Click or tap on this icon and drag it to a nearby street or road highlighted in blue. This action will open the Street View mode.
- Explore Your House: Once in Street View, you can navigate around to explore your surroundings. Use your mouse to click and drag the view to look around. On a touchscreen device, swipe your finger to move the view. You can also use the arrow keys on your keyboard to navigate.
It’s important to note that the level of detail and availability of Street View imagery may vary depending on your location and the updates made by Google. In some cases, the Street View imagery may not precisely align with your house or show the most current view.
By following these simple steps, you can easily locate and explore your house on Google Street View. It’s an exciting way to virtually visit your home and explore the neighborhood without leaving the comfort of your seat!
Navigating the Map
Once you’ve accessed Google Street View, navigating the map is an essential part of exploring the area. Here are some tips on how to effectively navigate the map:
- Move Around: To move around the map, click and drag the view using your mouse. On touch devices, you can swipe your finger in the direction you want to move. Alternatively, you can use the arrow keys on your keyboard to navigate.
- Change the Perspective: In addition to moving horizontally, you can also change the perspective by tilting the view up or down. To accomplish this, click and hold the cursor on the screen while moving the pointer up or down. On touch devices, use two fingers to swipe up and down to adjust the tilt.
- Zoom In and Out: Get a closer look or zoom out to see a broader area by using the zoom feature. To zoom in, click the “+” icon or scroll up on your mouse wheel. To zoom out, click the “-” icon or scroll down on your mouse wheel. On touch devices, you can pinch your fingers together or apart to zoom in or out.
- Change Your Location: If you want to explore a different area, you can simply drag and drop the “Pegman” icon to a new location on the map. This will reposition the Street View to the selected spot, allowing you to navigate and explore a different area.
- Use the Navigation Arrows: In Street View, you may notice small white arrows or circles on the ground. These are navigation arrows that indicate you can move forward or backward along the street. Clicking on an arrow will move the view in that direction.
- Exit Street View: To exit Street View and return to the map, look for the “X” icon in the upper-right corner of the Street View window. Click or tap on the “X” to close Street View and go back to the map interface.
Mastering these navigation techniques will allow you to explore the map and Street View with ease. So, start navigating the map and uncover the hidden gems of your chosen location on Google Street View!
Zooming In
One of the useful features of Google Street View is the ability to zoom in and out to get a closer or broader view of the area you’re exploring. Zooming in allows you to see details and landmarks more clearly. Here’s how you can zoom in while using Google Street View:
- Using the Controls: You can use the zoom controls provided on the screen to zoom in and out. Look for the “+” and “-” icons usually located in the lower right corner of the Street View window. Click or tap on the “+” icon to zoom in and get a closer view of the area. Click or tap on the “-” icon to zoom out and get a broader view of the surroundings.
- Using Your Mouse or Trackpad: On a computer, you can also use your mouse or trackpad to zoom in and out. To zoom in, place your cursor over the area you want to zoom into, and scroll up on your mouse wheel or trackpad. To zoom out, scroll down on your mouse wheel or trackpad.
- Using Gestures on Mobile Devices: If you’re accessing Google Street View on a smartphone or tablet, you can use gestures to zoom in and out. Simply pinch your fingers together on the screen to zoom in, and spread your fingers apart to zoom out.
- Keyboard Shortcuts: For quick and convenient zooming, you can use keyboard shortcuts. On a computer, press the “+” key to zoom in and the “-” key to zoom out. Additionally, you can hold down the “Ctrl” (Windows) or “Command” (Mac) key and press the plus (+) or minus (-) key to zoom in and out, respectively.
Zooming in allows you to focus on specific details, such as building facades, street signs, or points of interest. It can be especially helpful when you’re trying to identify a specific location or landmark in Street View. By zooming in, you can enhance your viewing experience and gain a closer look at the world around you.
Remember to use the zoom feature sparingly and adjust according to your preferences. Finding the right zoom level for your needs will ensure you have the best possible view of the area you’re exploring in Google Street View.
Rotating and Tilting the View
To further enhance your experience in Google Street View, you can also rotate and tilt the view to explore your surroundings from different angles. Here’s how you can rotate and tilt the view:
- Using the On-screen Controls: When in Street View, you will typically see on-screen controls that allow you to rotate and tilt the view. Look for circular arrows or navigation icons that represent the rotation function. Clicking or tapping on these controls will rotate the view in the desired direction. To tilt the view, look for a tilt control icon, usually represented by a dotted line or a horizon icon. Click or tap on the tilt control to adjust the camera perspective.
- Using Your Mouse or Trackpad: On a computer, you can also rotate and tilt the view by clicking, holding, and dragging on the view with your mouse or trackpad. Move the cursor horizontally to rotate the view left or right and vertically to tilt the view up or down.
- Using Gestures on Mobile Devices: If you’re using a smartphone or tablet, you can rotate and tilt the view by swiping your finger on the screen. Swipe left or right to rotate the view and swipe up or down to tilt the view.
- Keyboard Shortcuts: For quick control over rotation and tilt, you can use keyboard shortcuts. On a computer, you can typically use the arrow keys on your keyboard to rotate the view left or right. To tilt the view, hold down the “Shift” key and use the up and down arrow keys.
Rotating and tilting the view in Google Street View allows you to see your surroundings from different perspectives. You can get a better sense of the area’s geography, explore different angles, and even check out the surroundings above the street level. These features are particularly useful when you want to get a better look at specific landmarks, buildings, or points of interest.
Experiment with rotating and tilting the view in Google Street View to discover hidden details, find unique vantage points, and have a more immersive experience. It’s a great way to explore a location in depth and see it from multiple angles!
Exploring Different Angles
When using Google Street View, you have the flexibility to explore your surroundings from various angles, allowing for a more comprehensive visual experience. Here are some ways to explore different angles while using Google Street View:
- 360-Degree View: In Street View, you can immerse yourself in a 360-degree view of the surroundings by engaging with the on-screen controls. Look for circular arrows or navigation icons that indicate you can move the view in different directions. Clicking or tapping on these controls will allow you to rotate the view and explore different angles.
- Street Level Exploration: As you navigate down a street in Street View, take advantage of the ability to move the view up and down. Look up towards the sky to see the tops of buildings, trees, or even cloud formations. Conversely, look down towards the ground to get a different perspective, allowing you to observe details that may go unnoticed at first glance.
- Switching Streets: To explore different angles, you can move from one street to another in Street View. Simply navigate to an intersection or street junction, and click or tap on the arrow icons that appear on the screen. This will allow you to pivot and explore the new street from a different angle.
- Zooming In and Out: While you explore different angles, remember to utilize the zoom functionality to focus on specific areas. By zooming in, you can observe finer details up close. Conversely, zooming out provides a broader view, allowing you to see the surrounding area from a wider perspective.
- Look Around: Take your time to look around as you navigate the streets. Pay attention to the buildings, landmarks, signs, and other interesting elements. By exploring different angles and observing your surroundings, you can gain a better understanding of the area and discover hidden gems.
Exploring different angles in Google Street View allows you to see the world from unique perspectives and uncover a wealth of visual information. Whether you’re admiring the architecture of a building, discovering unique street art, or simply enjoying the beauty of a scenic location, exploring different angles adds depth and richness to your virtual exploration.
So, get ready to embark on a visual journey and take advantage of the ability to explore your surroundings from different angles while using Google Street View!
Understanding the Street Name and Number
When using Google Street View, it’s important to understand how to interpret the street name and number information displayed on the map. Here’s a guide to help you understand the street name and number in Google Street View:
Street Name:
- The street name is displayed prominently on the map and can be found either directly on the street or above the Street View image.
- It helps you identify the specific street you’re currently viewing or navigating through in Street View.
- Street names consist of the official name designated by the local authorities, such as “Main Street,” “First Avenue,” or “Broadway.”
Street Number:
- The street number, usually accompanied by the street name, helps pinpoint the specific address or location on the street.
- The street number can be seen on buildings or on signs located near properties.
- It helps you locate and identify a particular establishment, house, or property along the street.
- For residential areas, the street number may be followed by the street name, such as “123 Main Street.”
- For commercial areas, the street number may be followed by the name of the establishment, such as “456 Pineview Bakery.”
By understanding the street name and number in Google Street View, you can better navigate and locate specific addresses or establishments. Whether you’re trying to find a friend’s house, a restaurant, or a particular landmark, paying attention to the street name and number will guide you in the right direction.
Keep in mind that the accuracy of street names and numbers in Street View may vary based on the available data. While efforts are made to provide up-to-date and accurate information, it’s always a good idea to cross-reference the details with official sources or local maps for the most reliable and current information.
So, pay attention to the street name and number while exploring Google Street View, and you’ll be able to confidently navigate the virtual streets and find the exact locations you’re looking for!
Tips for Finding Your House
Locating your house on Google Street View can sometimes be challenging, especially if the area is densely populated or if the imagery is not up-to-date. However, with these helpful tips, you can increase your chances of finding your house on Google Street View:
- Start with the Address: Begin your search by entering your exact address in the search bar. Make sure to include the street number, street name, city, and zip code to refine the search results.
- Look for Distinctive Landmarks: If you’re having trouble spotting your house, try identifying any distinctive landmarks or neighboring buildings that can serve as visual cues. Look for unique features such as distinctive architecture, notable businesses, or eye-catching landscaping.
- Identify Street Signs: Street signs can be helpful in determining your location. Look for nearby street signs in Street View that display the names of intersecting streets or crossroads. Once you’ve identified these signs, you can orient yourself and navigate to your house accordingly.
- Use Satellite View: If Street View imagery is limited or unavailable for your area, you can switch to satellite view. Satellite imagery provides an overhead view of your location, allowing you to visually recognize landmarks, driveways, or unique features that can help you locate your house.
- Explore from Different Angles: If one angle doesn’t provide a clear view of your house, try approaching it from different angles or streets. Move along the nearby streets in Street View to get a better perspective and increase your chances of locating your house.
- Check for Time Stamp: Consider the time stamp on the Street View imagery, which indicates when the images were captured. If the images of your area are outdated, keep in mind that the appearance of buildings, landscaping, or other features may have changed since then.
- Reach Out to Neighbors: If all else fails, you can always reach out to your neighbors and ask if they know how to find your house on Google Street View. They may have prior experience or insights that can help you locate your home more easily.
Remember, finding your house on Google Street View may require a bit of patience and exploration. By utilizing these tips, you can improve your search process and increase the likelihood of locating your house within the Street View imagery. So, get ready to embark on your virtual journey and uncover the view of your home!
Saving Your Location
Once you’ve located your house or any other point of interest on Google Street View, you may want to save that location for future reference or to share it with others. Here are a few options for saving your location:
- Bookmark or Favorite: In most web browsers or mapping applications, you can bookmark or favorite a specific location on the map. This allows you to quickly access that location with just a few clicks. Look for the bookmark or favorite icon provided, usually located in the toolbar or menu of the application.
- Share via Link: Many mapping applications provide the option to generate a link to a specific location. This link can be copied and shared with others, allowing them to directly access the same location in Google Street View. Look for the share or link icon in the application, and follow the prompts to generate the link.
- Save to Collections: Some mapping applications offer the ability to save locations to customized collections. You can create different collections based on your preferences, such as “Favorite Places” or “Future Travel Destinations.” Simply select the desired location and add it to the appropriate collection for easy access later on.
- Take Screenshots: If you prefer a more visual way to save your location, you can capture screenshots of the Street View imagery. Press the appropriate key combination on your device to capture a screenshot, or use the screenshot function provided in the mapping application. Once saved, you can organize and label the screenshots for future reference.
- Export GPS Coordinates: For those who require precise GPS coordinates for a location, you can export the latitude and longitude of your desired location from Google Street View or the mapping application. These coordinates can be used for navigation purposes or to input into other mapping tools.
By saving your location, you can easily return to it in the future without the need to search again. It also allows you to share your discoveries with friends, family, or colleagues who may be interested in exploring the same location on Google Street View.
Choose the saving method that suits your preferences best and make the most of your Google Street View experience. Now you can easily keep track of all the intriguing places you come across during your virtual explorations!
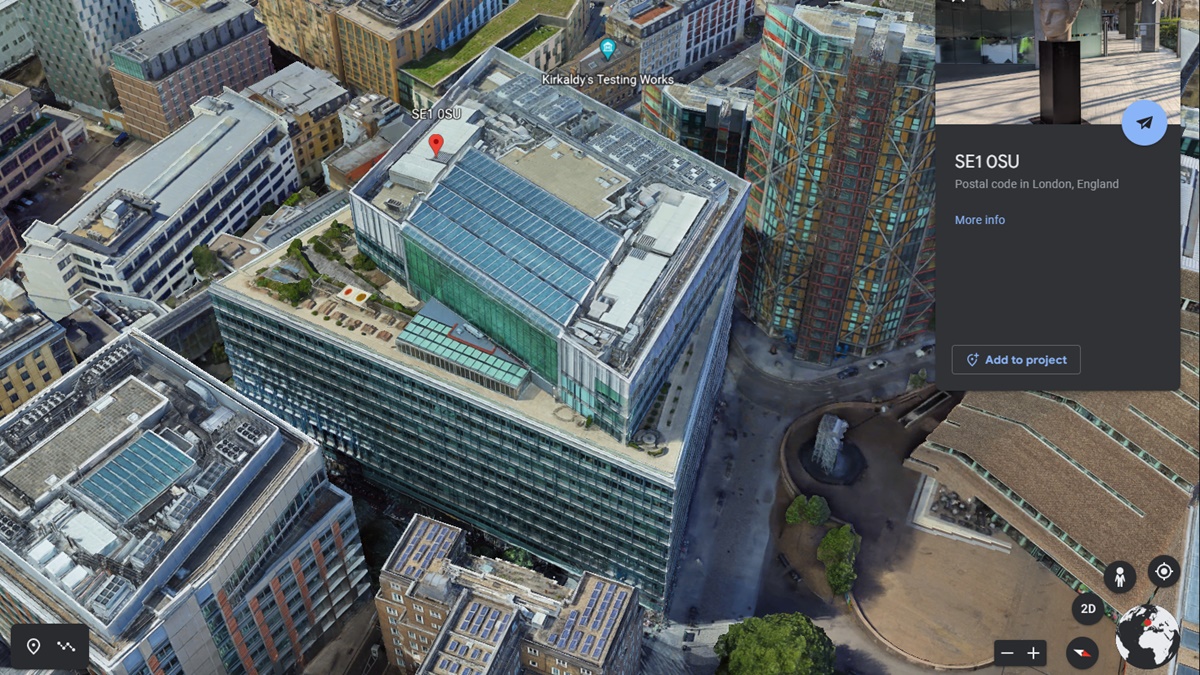
Using Google Earth for a 3D ViewWhile Google Street View provides a rich exploration of cities and streets in 360-degree imagery, for an even more immersive experience with a 3D view, you can complement your virtual exploration by using Google Earth. Here’s how you can access a 3D view with Google Earth:
- Install Google Earth: Start by installing the Google Earth application on your computer or mobile device. You can download it from the Google Earth website or your device’s app store.
- Launch Google Earth: Open the Google Earth application and enter your desired location in the search bar at the top. You can search for a specific address or use general search terms, such as the name of a city or landmark.
- Enable 3D View: Once you’ve located your desired location, navigate to it and zoom in to get a closer view. Look for the 3D button or option, usually located in the bottom right corner, and click or tap on it to enable the 3D view functionality.
- Explore the 3D Environment: With 3D view enabled, you can now navigate and explore the area in a dynamic and realistic 3D representation. You can zoom in and out, rotate the view, and tilt the perspective to get a better understanding of the topography and terrain.
- Take Advantage of Additional Features: Google Earth offers additional features to enhance your 3D view experience. You can toggle on or off additional layers, such as roads, landmarks, or satellite imagery, to further customize what you see. You can also use the search function within Google Earth to discover specific points of interest or explore popular destinations.
- Record and Share Flythroughs: If you want to capture and share your 3D view experience, Google Earth allows you to record flythroughs. Simply navigate to the desired location and access the “Record a Tour” feature. You can then save the recorded flythrough and share it with others.
Using Google Earth for a 3D view adds an extra level of depth and realism to your virtual exploration. It allows you to visualize the environment in three dimensions, providing a more accurate representation of the topography and structures in the area.
Whether you’re virtually exploring cities, landmarks, or natural wonders around the world, Google Earth’s 3D view feature offers a captivating and immersive experience. So, give it a try and take your virtual adventures to new heights with Google Earth’s 3D view!