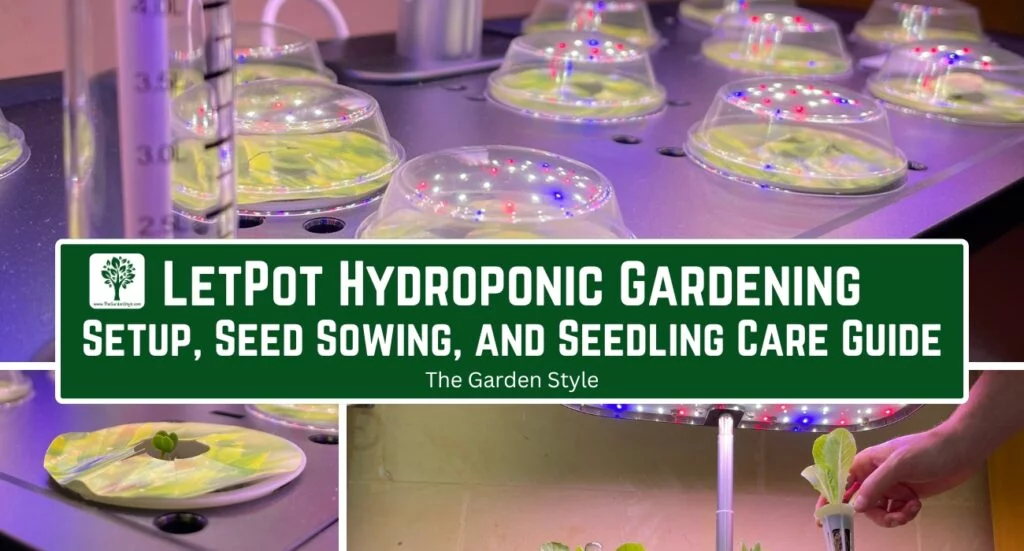
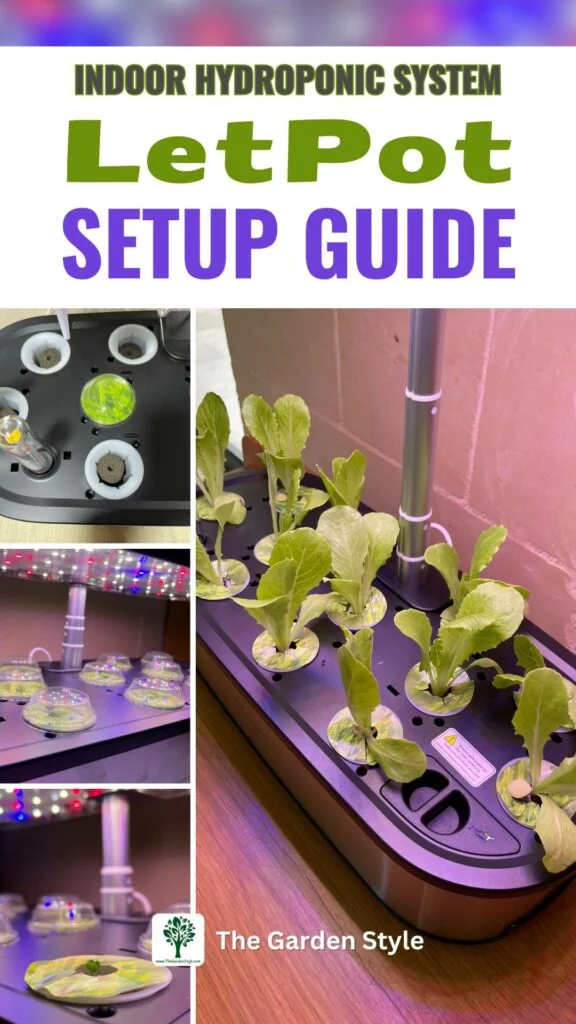
Welcome to our comprehensive guide with all the instructions and tips you will need for setting up your LetPot hydroponic system, connecting with the LetPot App, and caring for your seedlings. In this article, we’ll walk you through each step of the process, ensuring a seamless journey from assembly to bountiful harvests. Discover how to properly set up your LetPot, sow seeds for optimal germination, and provide essential care for your seedlings as they develop into healthy, vibrant hydroponic plants. Let’s dive in and unlock the secrets to successful indoor hydroponic gardening with LetPot!
Here is a sneak peek of our video tutorial for setting up LetPot and start growing vegetables.
Table of Contents
Unboxing and Inspecting Your LetPot
It’s crucial to ensure a safe and seamless setup process before setting up your LetPot. Please read and understand the entire manual before assembling or operating your LetPot system. Safety first!
- Before diving into LetPot, read the manual thoroughly for a smooth setup.
- Check for damage like cracks or missing parts before proceeding.
- Store LetPot away from extreme temps and direct sunlight, indoors only.
- Keep all parts away from children to prevent accidents.
- Avoid heat sources like stoves and drafts from windows for optimal growth.
- Connect the water pump securely and double-check all connections.
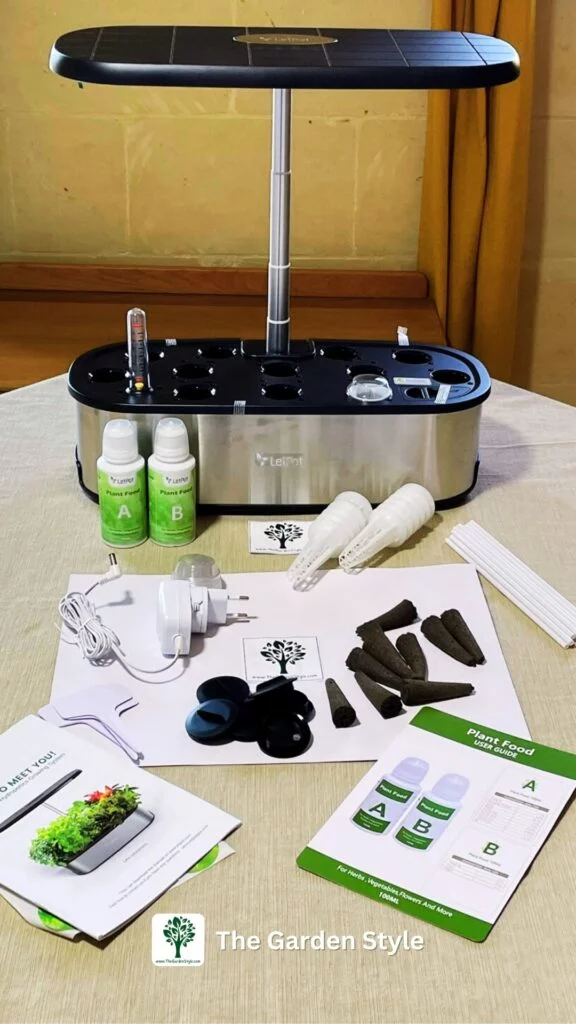
Let’s see the components and supplies provided. You will find the majority inside the water tank.
First, let’s move up the light panel to access your water tank. To adjust the height of the light panel, press the bottom of the telescopic rod and the supporting part of the light panel simultaneously. That allows you to easily raise or lower the light to accommodate your growing plants’ needs.
Then, remove all components from inside the water tank and install the water level float, as shown in the provided picture. Proper installation ensures efficient water level management for your plants.
The supplies provided in the box depend on the LetPot device you choose. This is a LetPot Senior for 12 pods. If you want to grow bigger plants, the LetPot Max is for 21 plants or two larger plants and is even smarter than the Senior model, which nurtures automatically.
This box includes sponges, white baskets to hold the sponges, transparent domes, also called germination covers, light-blocking stickers, and supporting rods in case you prefer to separate your plants and don’t use all the pods. The box also includes shade covers, white plastic tags to label your indoor garden, the plug adapter, and the plant nutrients.
Setting Up Your LetPot
LetPot Placement
Before filling the water tank with nutrients and sowing your seeds, I would suggest thinking ahead about the LetPot placement. It’s not difficult to move when filled with water, but you may prefer first to select a location with a socket power.
- Choose a sturdy, water-tolerant surface on which to place your LetPot system. This will ensure stability and prevent potential water damage to surrounding areas.
- It’s recommended to position the system beyond the reach of children or pets to avoid accidental interference.
- For optimal plant growth, maintain an environment with temperatures ranging from 59°F to 86°F (15°C to 30°C).
Nutrient Preparation Guide for Healthy Plant Growth
In the box, you will find two solid nutrients called A and B (labeled as “plant food”). Getting the nutrient balance right is crucial for the healthy growth of your plants. Here’s a detailed guide on preparing and administering nutrients:
I encourage you to prepare the nutrients according to LetPot’s instructions. It’s essential to avoid excessive nutrients, as they can harm your plants. Experienced growers may opt to use an EC tester to measure the nutrient concentration and adjust the ratio according to specific plant needs.
The first time you set your LetPot, you will need to solubilize the solid nutrients.
- Fill each bottle of nutrients with 100 ml of pure water and shake well to ensure thorough mixing.
- Depending on your LetPot model, you have a water tank with a different volume, 7.5 liters for the LetPot LPH-MAX and 5.5 liters for the LetPot LPH-SE.
- In this case, we have the LetPot LPH-SE. So, once both nutrients A and B have completely dissolved, pour 25ml of nutrient A and 25ml of nutrient B (measured using the cap of the nutrient bottles) into a vessel containing 5 liters of water. Mix the solution thoroughly.
- Ensure the correct ratio of nutrient solution to water to prevent excessive nutrient concentration.
- Alternatively, you can add water gradually according to the manual nutrient ratio instructions.
- Store your bottles diluted and protected from light for up to 5 months and shake them well before re-using them.
Then, pour the prepared nutrient solution into the LetPot hydroponic growing system’s water tank. Be sure not to exceed to avoid overfilling. Use the water tank level to double-check levels. The easy-access water-filling port at the front of the unit simplifies garden maintenance. Just open the lid and pour the water with the plant food.
Sowing Seeds
Next up, sowing seeds. Let’s get those seedlings started!
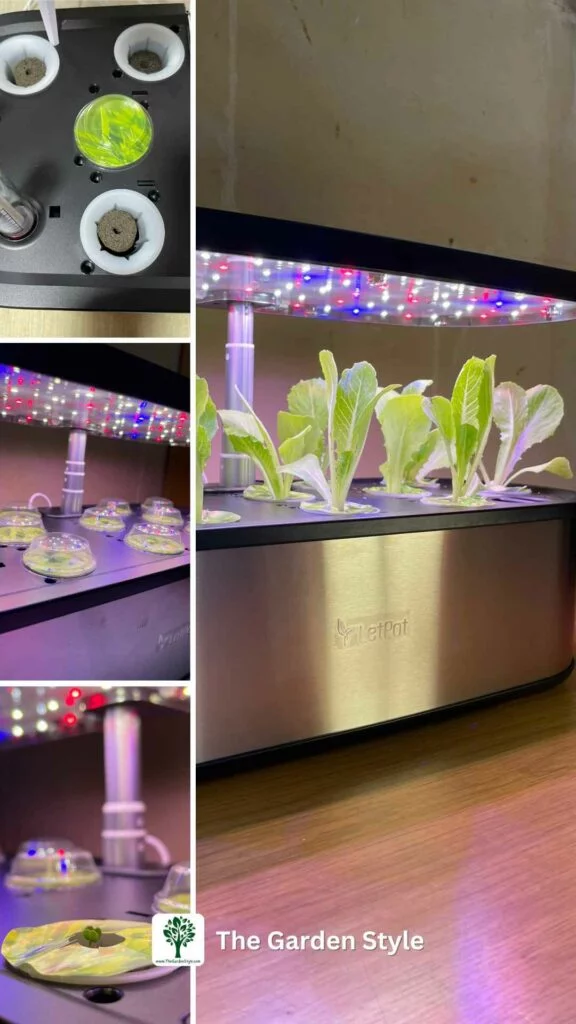
- Place the provided sponges into the white baskets, then insert them into the pods of the growing tray (see Image 1 – Step 1).
- Now, let’s talk about seed selection. Choosing the right seeds is crucial for optimal hydroponic growth.
- We purchase good quality lettuce seeds suitable for hydroponic systems. They germinate in only two days, and in two weeks, it was possible to harvest some leaves without killing the plants, and they continue growing in the LetPot.
- Also, in the time-lapse video, we successfully grow and harvest arugula using seeds suitable for hydroponic systems.
- Plant 2-3 seeds in each sponge for optimal germination. The LetPot system did not provide seeds.
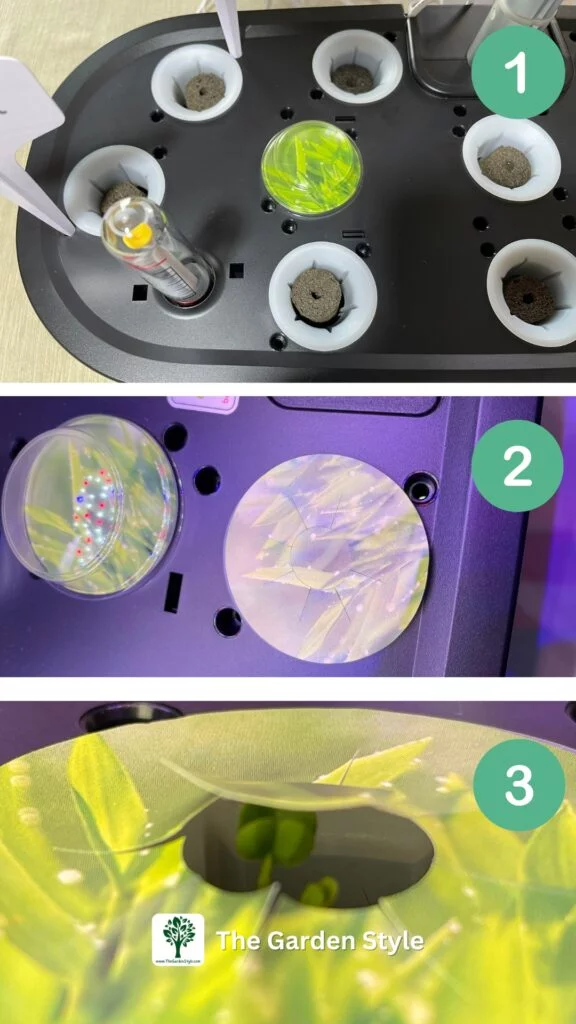
By general rule, cover the white baskets with light-blocking stickers and seedling domes to create a dark, humid environment conducive to germination (see Image 1 – Step 2). However, keep in mind that some seeds need light to germinate, so avoid placing the light-blocking stickers. Place the seedling domes only to increase humidity and temperature to promote germination conditions.
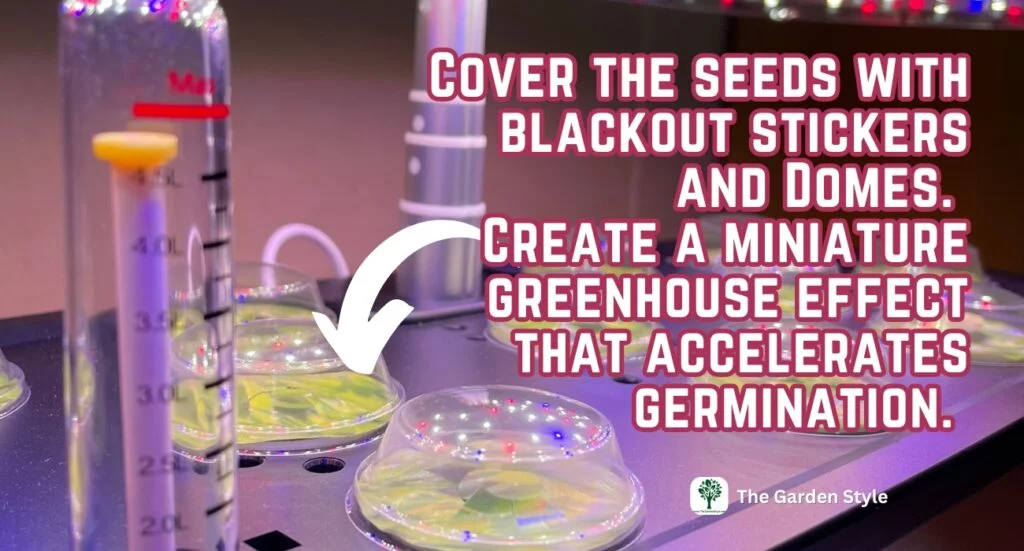
Turn on the lights and adjust the height of the light panel to the lower position (approximately 4-5 inches away from the plants) during germination. By covering the seeds with blackout stickers and using seedling covers, you create a miniature greenhouse effect that accelerates germination. Seedlings will grow through the blackout stickers (see Image 1 – Step 3).
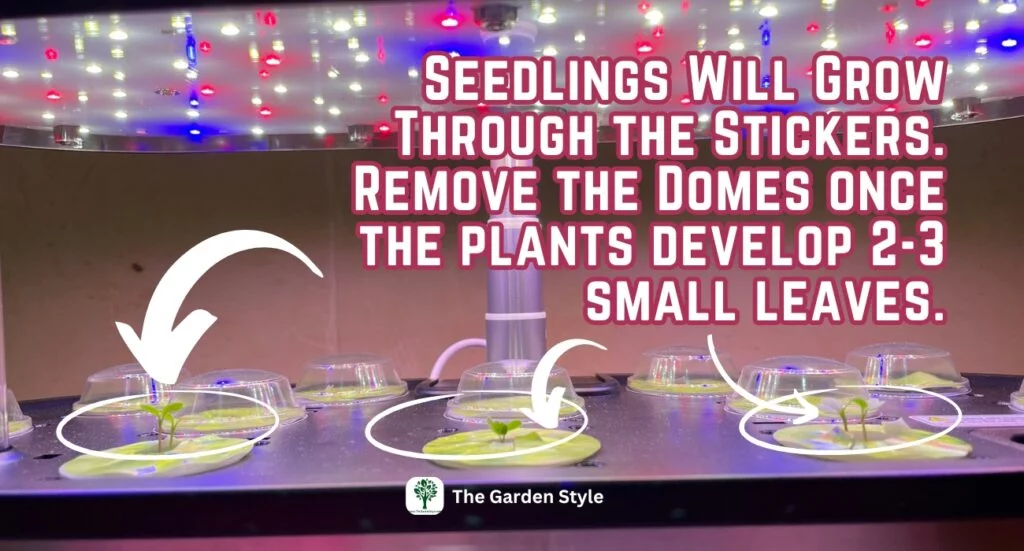
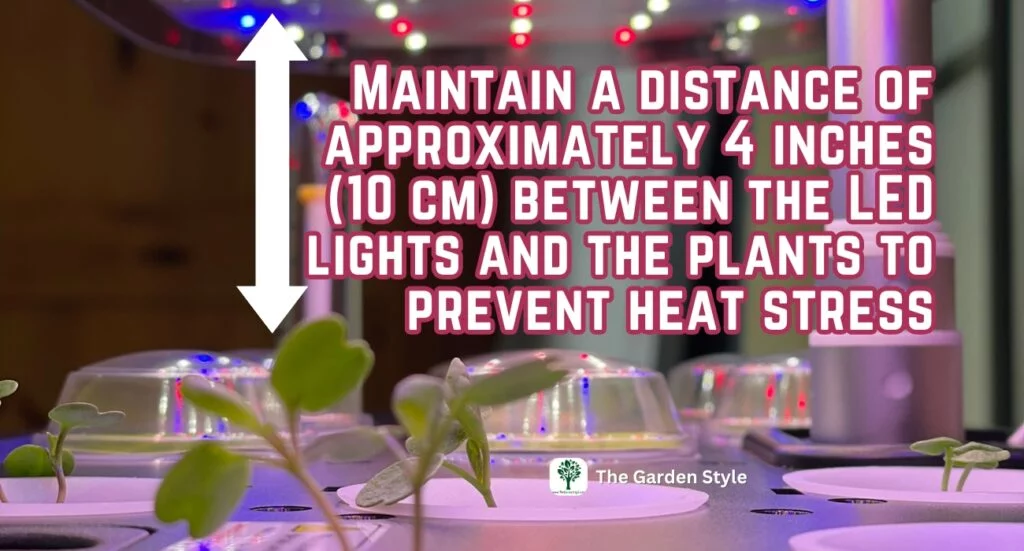
Remove the covers once the plants develop 2-3 small leaves. Maintain a distance of approximately 4 inches (10 cm) between the LED lights and the plants to prevent heat stress.
We have amazing results you can see in our LetPot LPH-SE Review
Pair Your LetPot with Your Smartphone Through the LetPot App
With the LetPot App, you can control your LetPot devices from your smartphone and set the automated features according to your LetPot model. So, for example, you can:
- Customize the name of your LetPot device.
- Control the power of your LetPot system with just a tap.
- Shift between vegetable and herb or flower and fruit modes to optimize your plant growth.
- Toggle the water pump on or off as needed.
- Set your grow light schedule to ensure your plants get the right amount of light.
- Receive notifications when the water level is low, ensuring your plants stay hydrated.
Moreover, the system retains your settings even after a power outage.
To complete your LetPot setup, you now need to pair your LetPot hydroponic device to your smartphone. The following video walks you step-by-step through the instructions to set up the LetPot App.
If you need to read the instructions, I suggest following the link to our post to Connect and Control your LetPot with the LetPot App (Troubleshooting Guide).
Seedling Care
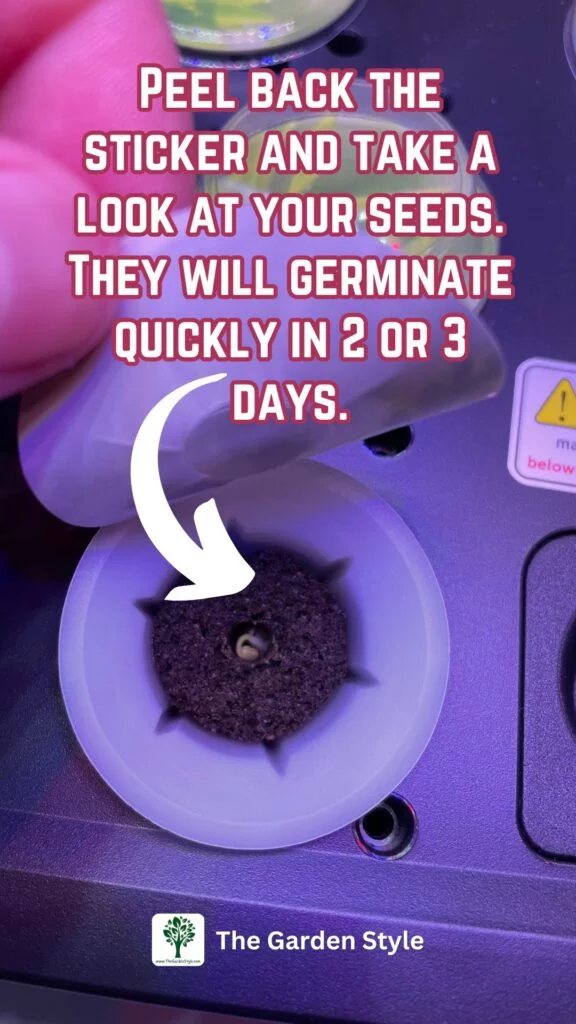
- Peel back the sticker and take a look at your seeds. They will germinate quickly in 2 or 3 days.
- Replenish nutrients depending on your LetPot system and plant needs. When using LetPot LPH-SE, you will need to empty the water tank approximately every two or three weeks and then refill it with a new plant food dilution. The number of weeks definitely depends on what you are growing and how big your plants are.
- Drain the unit to replenish nutrients is very simple. There’s no need to invert the unit. There is a stopper at the back of the unit. Simply remove the stopper to drain the water effortlessly.
- Remember to adjust and maintain a distance of approximately 4 to 5 inches (10 cm approx.) between the LED lights and the tallest leaves to prevent heat stress.

Witness the time-lapse of basil and arugula growing in LetPot LPH-SE and how to harvest them so they keep growing.
Save this pin for later!
Seed Selection Guidelines for Optimal Hydroponic Growth
Let’s delve into the essential process of sowing seeds in your LetPot hydroponic growing system, along with tips on seed selection and preventing mold/algae buildup.
Seed Selection
- Optimal results depend on the quality of the seeds you choose. Purchase seeds from reputable brands suitable for hydroponic cultivation and compatible with your environmental temperature.
- Examine your seeds before planting. Check the expiration date and sow them according to the germination rate.
- Purchase seeds from reliable brands and distributors, ensuring high-quality and viable seeds for successful germination.
Follow the link to our post to learn more about choosing the best seeds for hydroponics and where to buy them.
- 10 VARIETIES GREENS AND SALAD LETTUCE SEED PACKETS – 10 of our most popular salad greens including black seeded simpson, buttercrunch, cimmaron, grand rapids, great lakes, iceberg, red oakleaf, parris island romaine, red salad bowl, and waldmann’s green.
Preventing and Treating Mold/Algae Buildup
- Mold growth is influenced by water quality, air humidity, and seed quality.
- Ensure proper drainage and cleanliness of the water tank, sponges, planting baskets, and covers.
- Discard any sponges or plants affected by mold/algae and clean the accessories thoroughly.
- Cover the sponges and white baskets with seed pod stickers during planting and seedling stages to prevent light exposure, which promotes mold and algae growth.
- Avoid reusing sponges to prevent potential disease transmission and bacterial buildup. Instead, consider cost-effective sponge refill packs for sustainability.
Starting Seeds Hydroponically and Transplanting Plants
One of the most significant advantages of using an indoor hydroponic system, such as LetPot, is that you can start your seeds ahead of time, indoors and in your controlled environment. You can even hard them off when growing using a small oscillating fan and then get them ready to transfer outside to a bigger hydroponic system or grow in the soil.
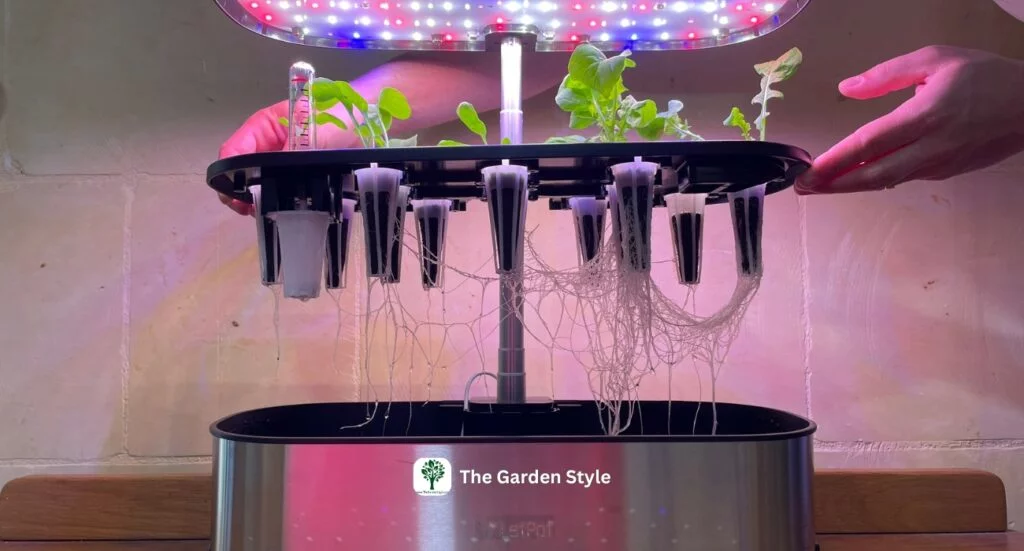
- Monitor the growth of your plants closely, particularly the development of their roots.
- When you observe visible white roots extending from the sponge, it’s an indication that the roots have grown well and the plants are ready for transplanting if you want.
- You can safely transplant the plants from the hydroponic system to other hydroponic systems, pots, or your garden (in-ground).
- The sponges used in the LetPot system are made from biocarbon materials that can degrade in the soil without harming the environment. Order LetPot supplies here.
- Transplanting the plants with the sponge intact can actually enhance their survival rates, providing a seamless transition from hydroponic to soil-based growing environments.
Tips for Pollination
Particularly if you are growing tomatoes, pepper, fairytale eggplants, etc., in the LetPot LPH-Max, you may need to be aware of the following pollinate tips.
- Fruit-bearing plants, such as tomatoes, peppers, strawberries, eggplants, cucumbers, etc., rely on pollination for successful fruit sets and crop yield.
- Pollination involves transferring pollen from the male reproductive parts (stamens) to the female reproductive parts (pistils) of the flowers, leading to fertilization and fruit development.
Hand Pollination Methods
When your plants start blooming, you should pollinate by hand to ensure optimal crop yields. It is best to pollinate during the morning hours when flowers are open. Of course, be gentle and patient while pollinating to avoid damaging delicate flowers or disrupting plant growth.
Depending on the situation of your plants, you can use one or more of the following methods:
- Method 1: Air Circulation: Place a fan near plants for gentle air movement. This aids pollen dispersal among flowers, especially indoors.
- Method 2: Fine Brush or Cotton Swab: Collect pollen using a fine brush or cotton swab. Gently transfer pollen to other flowers for precise pollination.
- Method 3: Hand-Shaking Technique: Place hand inside plant branches. Gently shake to dislodge pollen onto neighboring flowers.
Maintaining Your LetPot
Caring for and maintaining your LetPot hydroponic growing system ensures optimal performance and healthy plant growth. Under normal usage, the water pump typically does not require frequent cleaning, and I did not have any issues after using my LetPot LPH-SE. However, LetPot recommends cleaning the pump and its filter sponge after every six months of use to ensure efficient operation. If you notice dirt or debris inside the water tank, first turn off the power and then use a soft, damp cloth or wet wipes to wipe the interior surfaces.
See the manual for the user cleaning the water pump and tank. Contact LetPot for more insights. Useful sources: LetPot User Manual

- 【Complete Hydroponic Kits for Growing】 The kits package includes 172 pcs of hydroponics growing accessories, with 60 sponges, 60 stickers ( pod label ) , 25 baskets, 25 seedling domes, and 2 bottles of A & B plant food. It has everything you need for hydroponics growing system or germination.
Final Thoughts Regarding Setting Up LetPot Hydroponic Growing Systems
Easily set up your LetPot LPH-SE, sow seeds, and watch your plants thrive without soil or gardening mess. No prior experience is required—just select the right seeds and learn basic harvest and pruning techniques for a continuous supply of herbs and vegetables.
LetPot LPH-SE unlocks hassle-free indoor cultivation, even in dark areas, free from pests and nutrient shortages. It’s my top choice, offering a cost-effective, sturdy, stylish, BPA-free, and sustainable indoor gardening solution.
Just choose the right quality seeds and be prepared for the harvest because this little guy will do everything for you.
