About the post
If you want to work with Atmel Studio (renamed to Microchip Studio in 2020), you first need a suitable programmer to upload your programs from the PC to the microcontroller (MCU). The good news is that there are quite a few of them, the bad news is that the programmers are quite expensive, especially if you want to use features like debugging or HVSP (High Voltage Serial Programming).
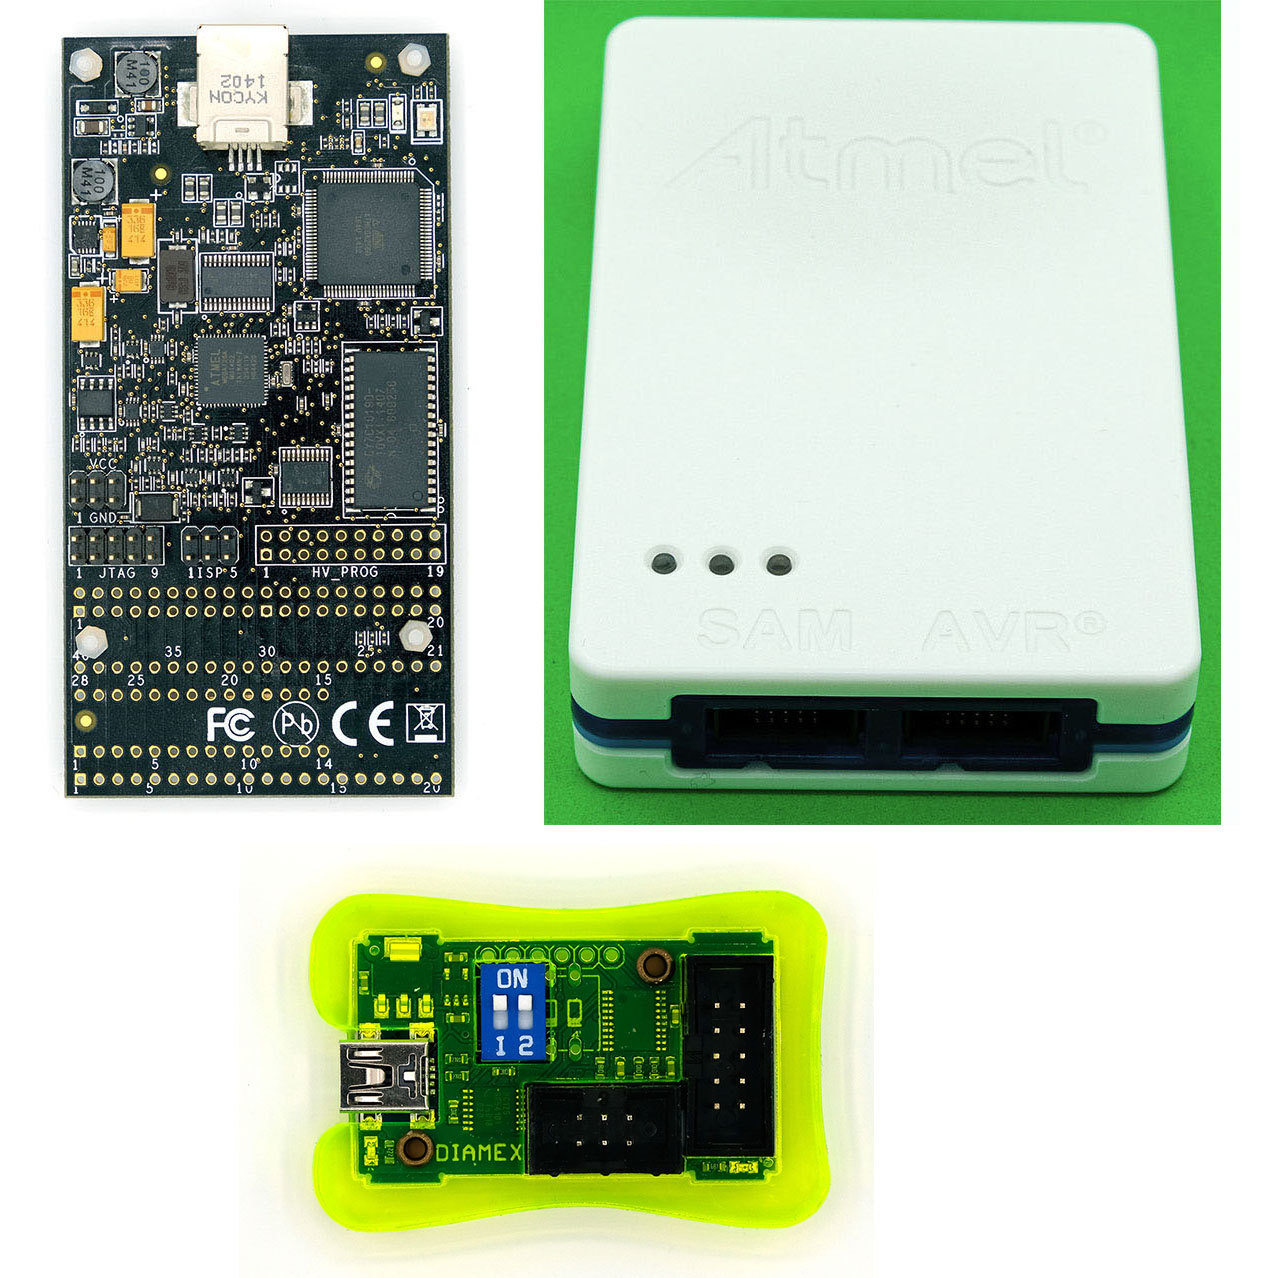
I will only describe programmers that I own and have tried myself. These are the representatives shown in the picture above: AVR Dragon, Atmel-ICE and the USB ISP programmer from Tremex / Diamex.
In separate posts, I’ll give an introduction to Atmel Studio 7 and show how to integrate and debug Arduino sketches including libraries in Atmel Studio.
Which programmer should I buy?
As is so often the case, good questions and answers depend on the budget, personal taste and the individual functionality required. I hope that my post will help you answer this question. First of all, however, a few definitions.
ISP: In-System-Programming. This is the standard method for programming microcontrollers. The name is due to the fact that the programming takes place in the installed state. The ISP connectors are usually identical to the SPI connectors. More about ISP here on Wikipedia.
JTAG: A standard of Joint Test Action Group for programming MCUs. Not every MCU is capable of JTAG.
debugWire: as the term suggests, debugging is possible with this method. You can run programs step by step, set breakpoints and track variables. Debugging is basically possible via both ISP and JTAG, but the programmer has to support this.
HVSP: High Voltage Serial Programming. The term “high voltage” is perhaps a bit misleading, it’s about 12 volts. With this method, MCUs with messed fuses can also be restored. “Messed up fuses” means that you have chosen fuse bit settings that no longer allow programming. You have, so to speak, locked out yourself and this is the saving locksmith.
The AVR Dragon

The AVR Dragon is my personal favorite as it masters ISP, JTAG, debugWire and HVSP, and thus it uses the possibilities of Atmel Studio to the highest degree. For the Dragon you have to pay about 50-80 Euros. And then you might be surprised you don’t even get a case for your money and that the part is also “unfinished” in a way. But the two are interrelated.
The Dragon offers the possibility to program MCUs directly in its on-board prototyping area. This has the advantage that you don’t have to build a circuit on an external board, if you just want to change a few settings, for example.
On-board programming with the Dragon
In order to be able to do the on-board programming, you have to solder a socket for the MCUs and a pin header (2 x 20) for access to the socket next to it. It is best to take a ZIF socket. With the pin header you have the choice between “male” and “female”, most of which probably take “male”. If you want to use HVSP, you also have to solder a 2 x 10 pin header.

So it’s above all the accessibility and flexibility in the selection of extensions that make a case for the Dragon not really useful. As you can see in the pictures, I had screwed on a few polyamide spacers in the raw state, so that the board would not rest directly with its solder joints. Unfortunately, the ZIF socket covers the holes so that the nuts no longer fit. However, I have noticed that the spacers are stuck even without nuts (see next photo).
Like the other programmers, the Dragon is connected to the PC via USB. On my Windows 10 system, the Dragon was easily detected and could be selected directly in Atmel Studio 7. No further driver installation was necessary.
Wiring for on-board programming
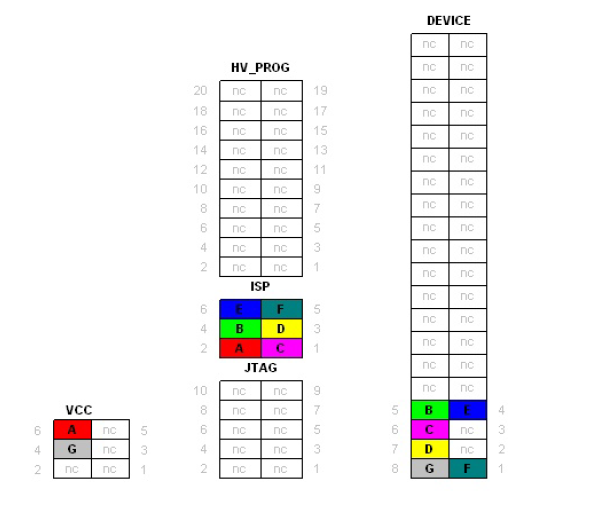
For on-board programming, the MCU is fixed in the ZIF socket. The MCUs is aligned according to the numbering printed at the pin header on the Dragon. Now, depending on the method and MCU type, you have to connect the JTAG, ISP or HVSP pins to the pins of the pin header connected to the ZIF socket. This is shown very clearly in the user guide to the AVR Dragon schematically.
In practice, it looks like this:

External programming with the Dragon
For external programming, e.g. on a breadboard, you can easily make mistakes with the wiring. The ISP port has the following pinout:

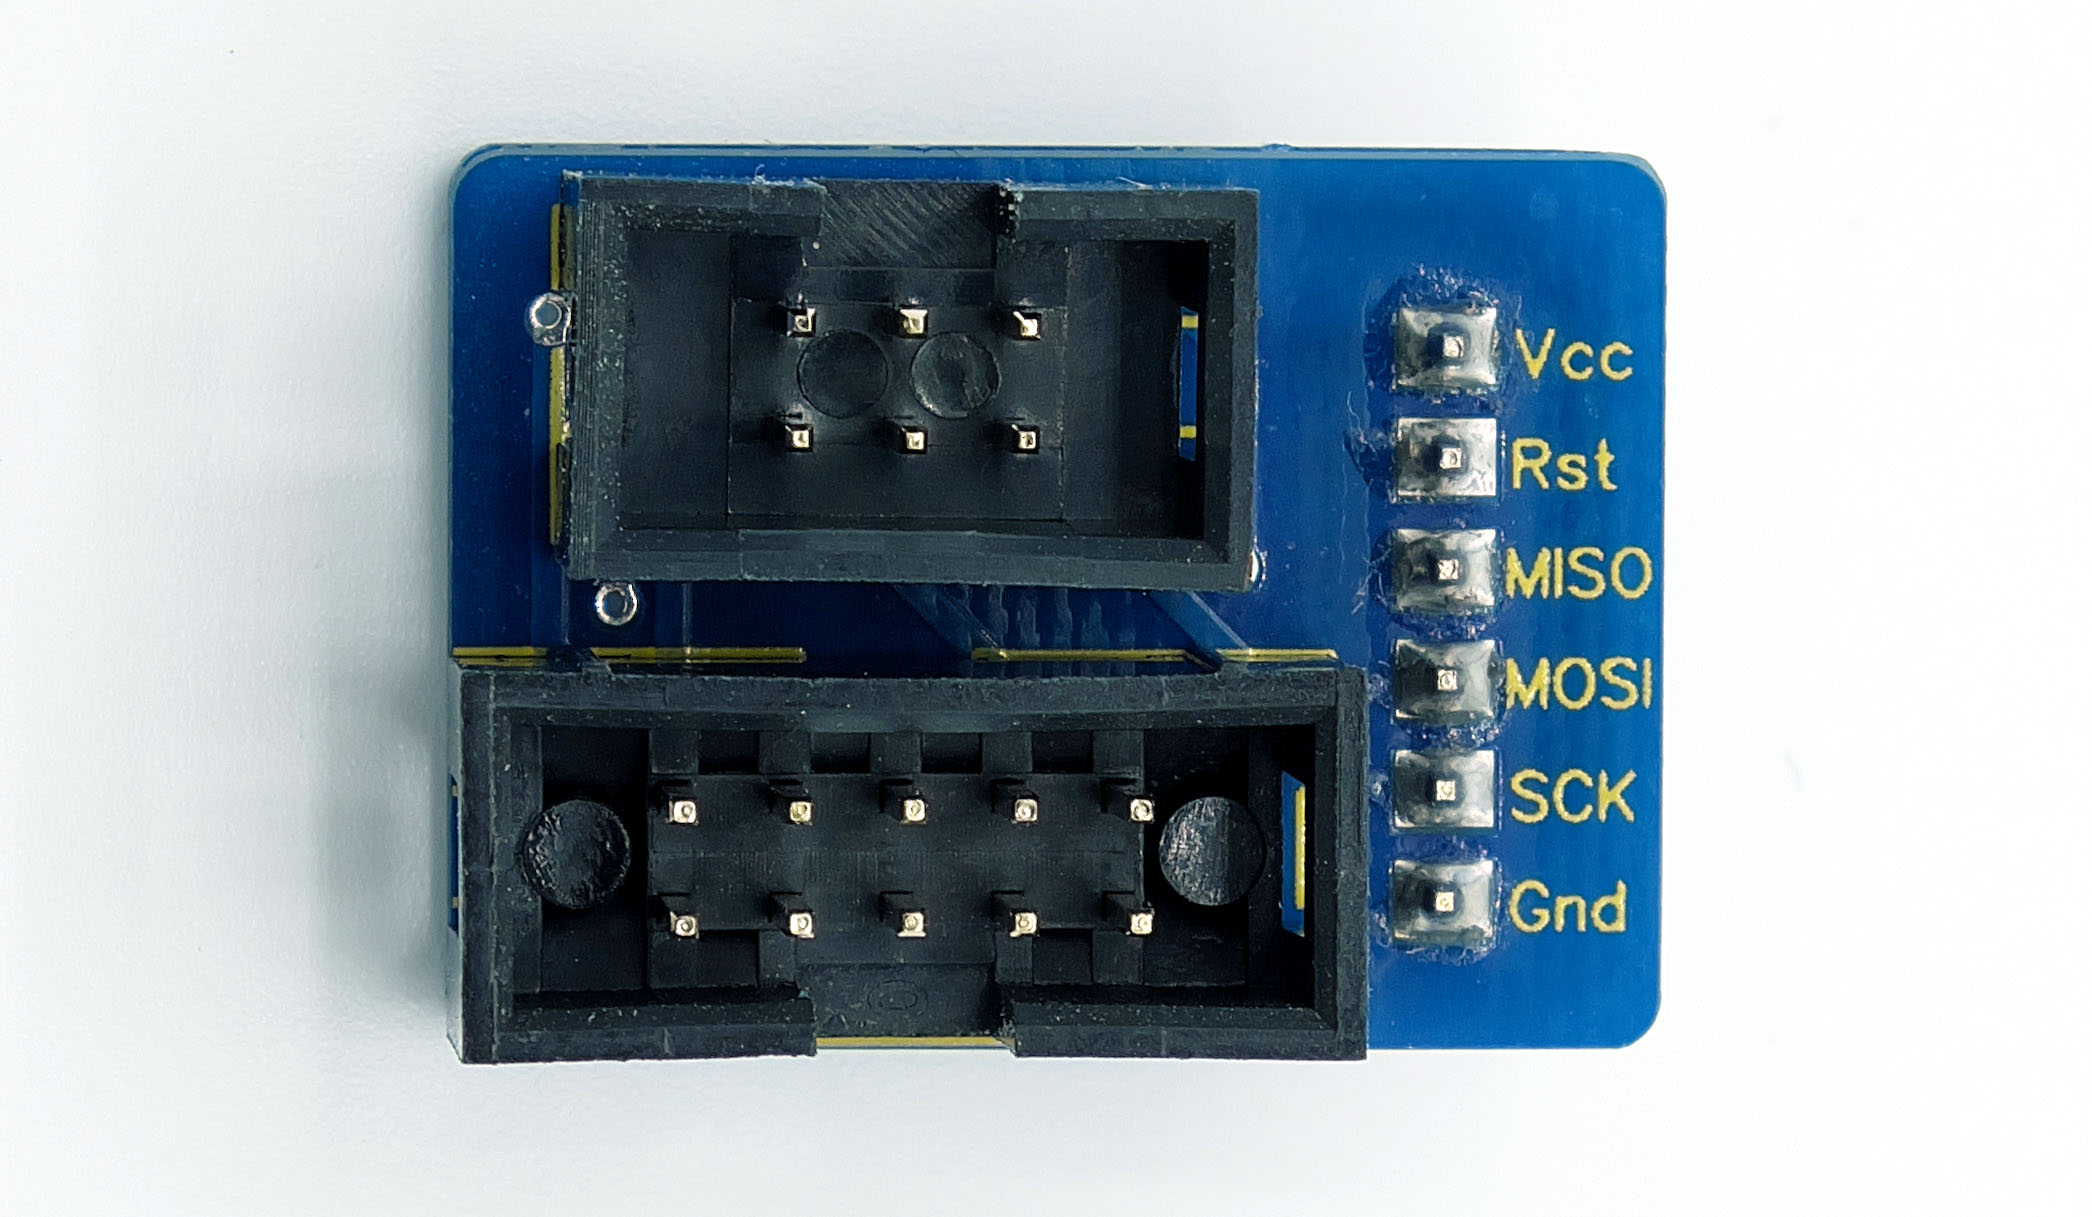
Pin 1 is usually indicated by a dot or a 1. Nevertheless, it is easy to make a mistake. I therefore recommend investing in a breadboard adapter, which is available here or here as a variant with 2×3 pin header.
It should also be noted that the Dragon cannot power the MCU. Nevertheless, VCC and GND must be connected as Atmel Studio checks whether the voltage meets the specification limits of the MCUs.
As a power supply I like to use such a practical power supply module, which is available for a few euros e.g. at Amazon:

Alternatively, I use a 9 volt battery in combination with an LM7805:

The Atmel-ICE

The Atmel-ICE is available in three different kits:
- Atmel-ICE Basic
- Atmel-ICE (Full Kit)
- Atmel ICE – PCBA Kit
The Basic variant
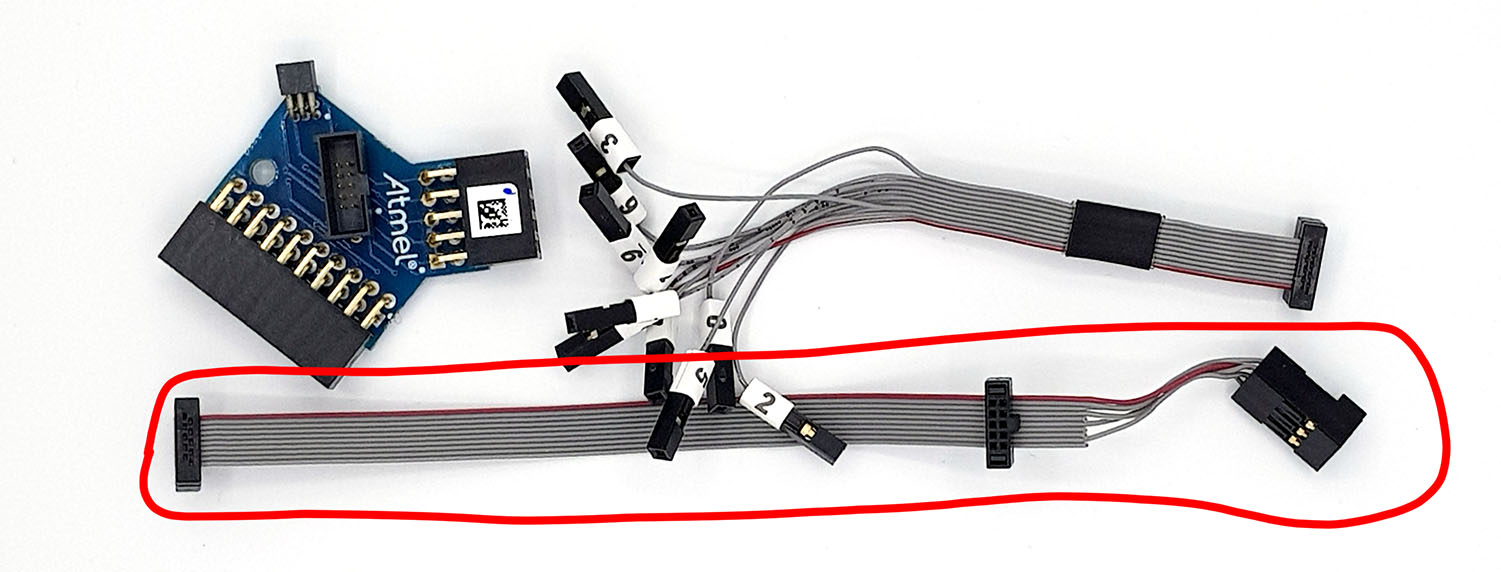
The Basic variant consists of the programmer shown above in the white case, a USB cable and an adapter cable from 10-pin 50-mil to 6-pin 100-mil (marked in red in the picture below). The 10-pin 50-mil side is the somewhat exotic connector for the Atmel-ICE, the 6-pin 100-mil side fits on standard ISP header. Replacement cables cost an unashamedly high amount (€20!). I once tried to get the parts for a replacement cable in self-construction – and failed. So take good care of this cable.
For programming AVR microcontrollers via ISP, the Basic variant is completely sufficient. The price is about 120-130 euros.
The Full Kit variant
The Full Kit contains only two additional adapters, which I do not want to go into here:
If there is nothing mentioned, i.e. only “Atmel-ICE”, then it should be the Full Kit, but check it carefully if you want to buy it. The Full Kit is available for approx. 180 Euro – proud extra charge for a cable and a small adapter board.
The naked board – the PCBA variant
The PCBA version is the naked board without housing and without additional adapter cables. I would only recommend this to “craft freaks”. It is already available for 80 to 90 euros, but without a connection cable it is of no use.
Features of the Atmel-ICE
The Atmel-ICE masters ISP, JTAG and debugWire, but no HVSP. But you get a beautiful, protective housing. Everyone has to know for himself what is important to him/her.
As with the AVR Dragon, the Atmel-ICE requires an external power source for the target MCU.
This programmer is also recognized directly by the PC and Atmel Studio without having to install drivers. Further information can be found in the User Guide.
The USB ISP Programmer

The USB-ISP Programmer can be obtained from Diamex or Tremex. Somehow the companies are linked, but I didn’t quite get through it. No matter, on Amazon you will find the part under the corresponding search terms for about 20 euros. It is therefore by far the cheapest representative among the programmers presented here. Included is a USB cable and a 10-pin cable for the MCU side.
For the low price you have to do without debugging with the USB ISP programmer. HVSP is also not possible. On the other hand, this model has the advantage that it can supply the power for the target. The setting is done via the dip switches:
- 1: ON or OFF / 2: OFF — > Power supply is OFF
- 1: OFF / 2: ON — > 3.3 Volt power supply ON
- 1: ON / 2: ON — > 5 volt power supply ON
You must first integrate the Tremex/Diamex USB ISP programmer into Atmel Studio. To do this, you go in the menu to
Tools – > Add Target… – > Select Tool
Select ST500 and the port, then confirm with “Apply”. That’s it.
For more information, go to the manufacturer’s website. If you follow the link, then you will find a little guide there in the download area.
A breadboard adapter is also a useful purchase for the USB ISP programmer. Another useful tool is the ZIF socket module, which is also offered by Diamex and is available for just under 20 euros. This makes it even easier to program MCUs than on-board with the Dragon, as the wiring of the individual pins is no longer necessary. On the socket module, this is cleverly solved by giving each MCU connection type its own socket for the connection cable.
Other programmers
There are even more programmers that are compatible with Atmel Studio. Further overviews can be found here or here.
Addendum May 2020: another interesting alternative, which I only came across later, is the aTeVaL 2.0 development board. I am reporting on this board here.
I’m particularly interested in the ISP control of the RESET pin when using the ICE programmer.
Features of the Atmel-ICE “The Atmel-ICE masters ISP, JTAG and debugWire” I’m using a mega128A which does not feature debugWire but has both ISP and JTAG interfacing. I bought a Kanda STK300 board with the ICE and have used the JTAG interface successfully but now am unable to transition back to using the ISP mode. The RESET pin needs to be controlled LOW to enable the ISP mode, but I believe the ICE is not able to. Please advise to my email if you have info.
I can only say that I had no particular problems to upload programs to an Atmega328P or an ATtiny85 via ISP using Atmel (Microchip) Studio and the Atmel ICE programmer. What is a bit awkward is the procedure to change from debugWire to ISP, because of the DWEN fuse. I don’t have experience with JTAG – maybe similar issues? But this is pure speculation. Or maybe a pull-up resistor on the reset pin could help? Or you might find something in the user guide (they call it SPI instead of ISP, by the way)?
https://ww1.microchip.com/downloads/en/DeviceDoc/Atmel-ICE_UserGuide.pdf