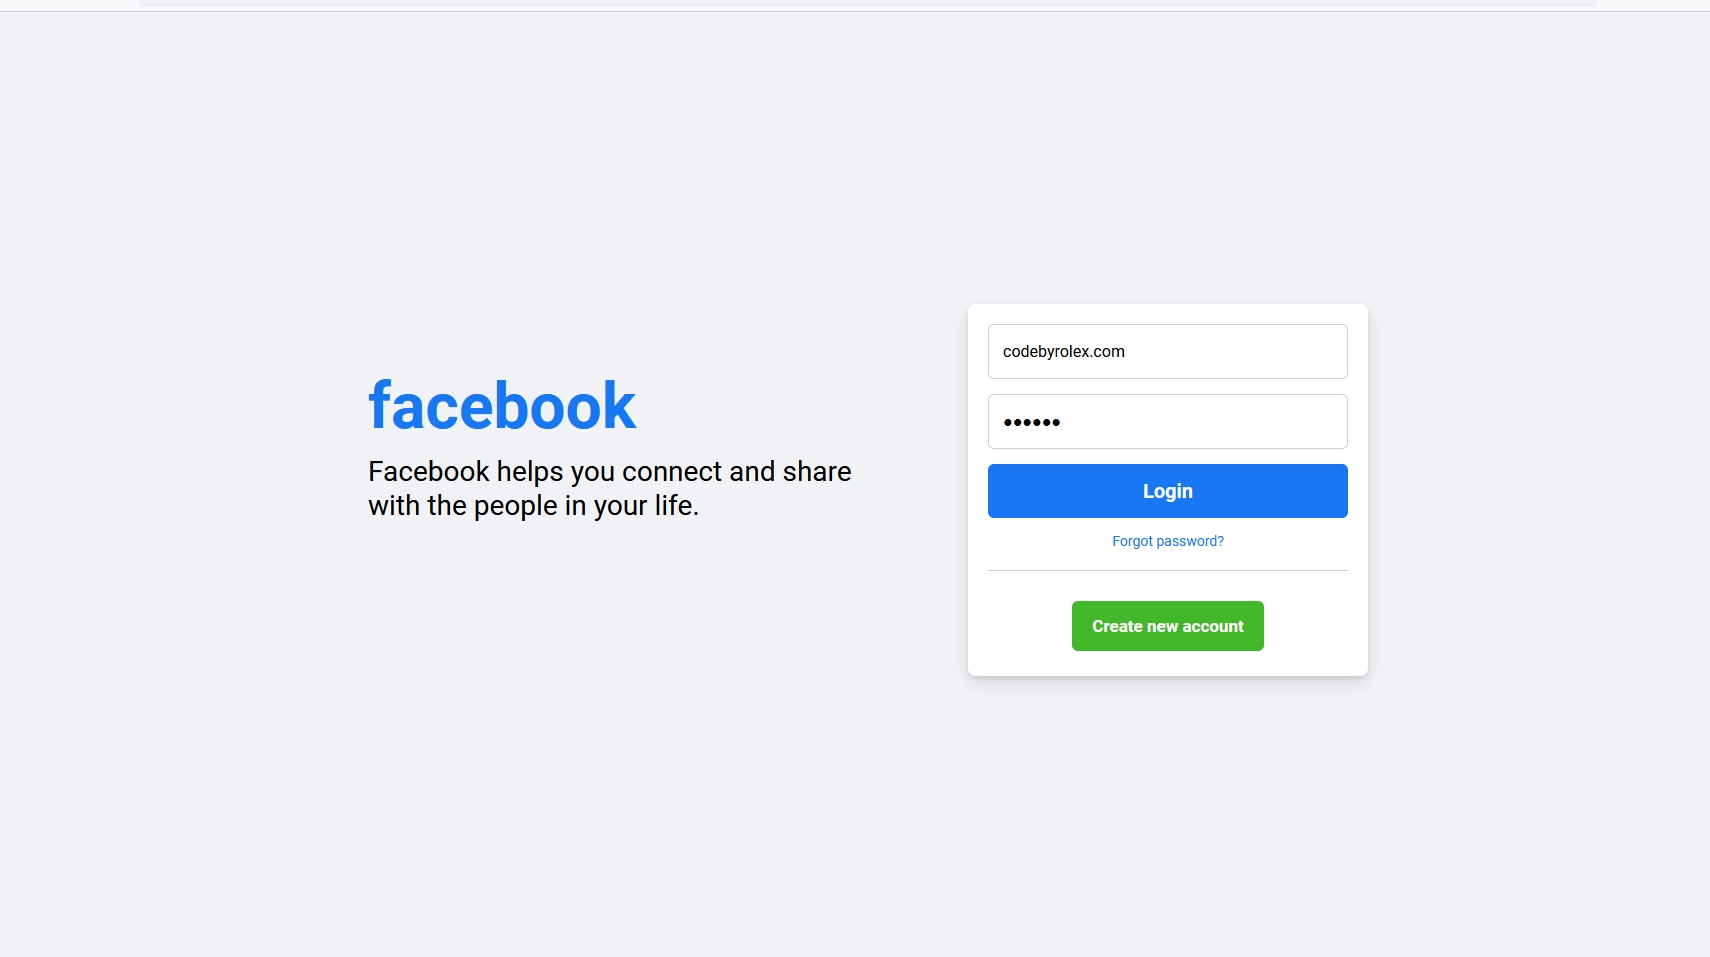
Creating a Facebook-style login page is an exciting project for beginner web developers. In this guide, we’ll use HTML and CSS to build a responsive login page that mimics Facebook’s design.We’ll cover essential HTML elements like headers, forms, inputs, and links. Plus, we’ll apply CSS to style our login form, focusing on colors, backgrounds, and fonts to ensure it’s visually appealing and responsive across devices.This project not only helps you learn but also showcases your web development skills. Let’s start crafting your own Facebook-inspired login page
Steps To Create Facebook Login Page HTML & CSS
To build a Facebook login page using HTML and CSS, follow these steps
1: Create a folder. You can name this folder whatever you want, and inside that folder, create the bellow mentioned files.
2: Create an index.html file. The file name must be index and its extension .html
3: Create a style.css file. The file name must be style and its extension .css
4: And go to html code and paste this <link rel=”stylesheet” href=”style.css”> in head tag. ( <head><link rel=”stylesheet” href=”style.css”></head> )
NOTE: you can give any name for your html code and css. but most of the time we use index.html and style.css. you can try it with yourself.
HERE IS index.html
<!DOCTYPE html>
<html lang="en">
  <!-- codebyrolex    visit our website https://codebyrolex.com/ -->
<head>
  <meta charset="UTF-8">
  <meta name="viewport" content="width=device-width, initial-scale=1.0">
  <title>Facebook Login Page</title>
  <link rel="stylesheet" href="style.css">
</head>
<body>
  <div class="container flex">
    <div class="facebook-page flex">
      <div class="text">
        <h1>facebook</h1>
        <p>Facebook helps you connect and share <br> with the people in your life. </p>
      </div>
      <form action="#">
        <input type="email" placeholder="Email or phone number" required>
        <input type="password" placeholder="Password" required>
        <div class="link">
          <button type="submit" class="login">Login</button>
          <a href="#" class="forgot">Forgot password?</a>
        </div>
        <hr>
        <div class="button">
          <a href="#">Create new account</a>
        </div>
      </form>
    </div>
  </div>
</body>
</html>HERE IS style.css
@import url('https://fonts.googleapis.com/css2?family=Roboto:wght@300;400;500;700&display=swap');
/* codebyrolex    visit our website https://codebyrolex.com/ */
* {
  margin: 0;
  padding: 0;
  box-sizing: border-box;
  font-family: 'Roboto', sans-serif;
}

.flex {
  display: flex;
  align-items: center;
}

.container {
  padding: 0 15px;
  min-height: 100vh;
  justify-content: center;
  background: #f0f2f5;
}

.facebook-page {
  justify-content: space-between;
  max-width: 1000px;
  width: 100%;
}

.facebook-page .text {
  margin-bottom: 90px;
}

.facebook-page h1 {
  color: #1877f2;
  font-size: 4rem;
  margin-bottom: 10px;
}

.facebook-page p {
  font-size: 1.75rem;
  white-space: nowrap;
}

form {
  display: flex;
  flex-direction: column;
  background: #fff;
  border-radius: 8px;
  padding: 20px;
  box-shadow: 0 2px 4px rgba(0, 0, 0, 0.1),
    0 8px 16px rgba(0, 0, 0, 0.1);
  max-width: 400px;
  width: 100%;
}

form input {
  height: 55px;
  width: 100%;
  border: 1px solid #ccc;
  border-radius: 6px;
  margin-bottom: 15px;
  font-size: 1rem;
  padding: 0 14px;
}

form input:focus {
  outline: none;
  border-color: #1877f2;
}

::placeholder {
  color: #777;
  font-size: 1.063rem;
}

.link {
  display: flex;
  flex-direction: column;
  text-align: center;
  gap: 15px;
}

.link .login {
  border: none;
  outline: none;
  cursor: pointer;
  background: #1877f2;
  padding: 15px 0;
  border-radius: 6px;
  color: #fff;
  font-size: 1.25rem;
  font-weight: 600;
  transition: 0.2s ease;
}

.link .login:hover {
  background: #0d65d9;
}

form a {
  text-decoration: none;
}

.link .forgot {
  color: #1877f2;
  font-size: 0.875rem;
}

.link .forgot:hover {
  text-decoration: underline;
}

hr {
  border: none;
  height: 1px;
  background-color: #ccc;
  margin-bottom: 20px;
  margin-top: 20px;
}

.button {
  margin-top: 25px;
  text-align: center;
  margin-bottom: 20px;
}

.button a {
  padding: 15px 20px;
  background: #42b72a;
  border-radius: 6px;
  color: #fff;
  font-size: 1.063rem;
  font-weight: 600;
  transition: 0.2s ease;
}

.button a:hover {
  background: #3ba626;
}

@media (max-width: 900px) {
  .facebook-page {
    flex-direction: column;
    text-align: center;
  }

  .facebook-page .text {
    margin-bottom: 30px;
  }
}

@media (max-width: 460px) {
  .facebook-page h1 {
    font-size: 3.5rem;
  }

  .facebook-page p {
    font-size: 1.3rem;
  }

  form {
    padding: 15px;
  }
}In this tutorial, we have learned how to create a Facebook login page using HTML and CSS. We have covered the essential steps to design and structure the page, ensuring that it closely resembles the actual Facebook login page
FINAL WORDS
Creating a Facebook login page using HTML and CSS can be a valuable learning experience for web developers. It allows you to practice your front-end development skills and gain a deeper understanding of how web pages are structured and styled.
However, it’s crucial to use your knowledge responsibly and ethically. Never use these skills to engage in any form of cybercrime or malicious activities. Respect privacy and abide by the law when working on web development projects.
As you continue to develop your skills, consider expanding your knowledge to include server-side scripting languages like PHP, which can be used to create functional login systems securely. Building real-world projects and following best practices will help you become a proficient web developer and contribute positively to the online world.