
REAPER is a DAW used by many newbies and professionals alike in the music industry. Whether you’re starting music as a career or just as a hobby, this guide will take you through all the basics of REAPER.
By the end of this tutorial, you’ll know how to create and record tracks, add instruments and effects, and navigate your way around the interface.
How to Download and Install REAPER

REAPER is available for Windows, Mac, and Linux machines. It offers a free 60-day evaluation period before you’re encouraged to buy a license for $60 (personal use) or $225 (commercial use).
To download and install REAPER, follow these simple steps:
- Head to the official REAPER download page.
- Select your operating system to download the installer.
- Choose a destination path to install REAPER and hit Next.
The program itself is very lightweight, so it won’t take up too much space on your machine. For Windows users, there’s also a portable install option, so you can take REAPER around with you on an external drive or memory stick.
How to Set Up the Audio Inputs and Outputs

Once you have REAPER installed, it’s time to ensure your audio inputs and outputs are recognized. Follow the steps below to set up your audio devices:
- Navigate to Options > Preferences.
- On the Preferences window, go to Audio > Devices.
- Select the audio devices you’re using from the Input device and Output device drop-downs.
If you’re using an audio interface, ensure ASIO is selected from the Audio System dropdown menu.
Understanding REAPER's Layout

Before you start making music, it’s important to know where REAPER’s key features are located. Thanks to its user-friendly interface, finding your way around REAPER is simple. Let’s look at the basic layout:
- Master Track: This is used for mastering and adding effects to your entire track. You can hide or show the Master Track at any time by hitting Ctrl + Alt + M (Windows) or Opt + Cmd + M (Mac).
- Track List: From the track list, you can add multiple tracks and arm them for recording.
- Playback Tools: Here you can access key playback features such as Play, Pause, and Repeat.
- Edit Cursor: The edit cursor lets you shift to different parts of your song instantly.
- Tempo and Key Signature: Here you can change the project tempo and key signature.
How to Add Tracks and Record

Now that you have a basic understanding of REAPER’s interface, you can begin adding tracks and recording. To add a track, use the keyboard shortcut Ctrl + T (Cmd + T on Mac.) You can change the color of a track by right-clicking and selecting the Track color option. To rename a track, double-click the track title.
Recording on a track requires a few extra steps:
-
Hit the red button to the left of the track name to arm the track for recording.
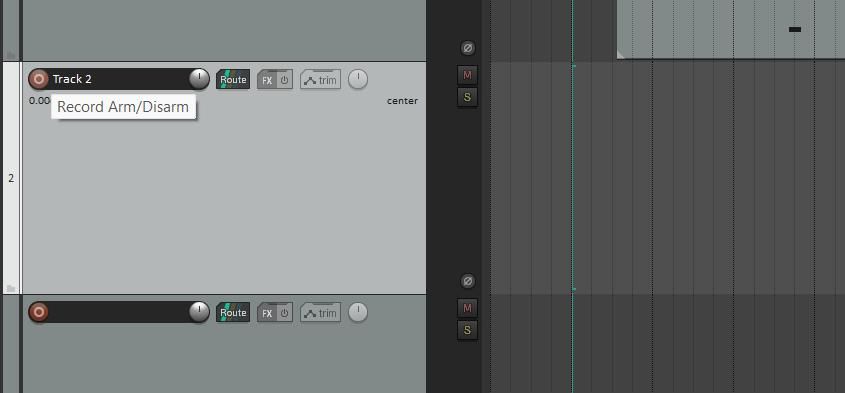
-
Select the dropdown to choose your input device.
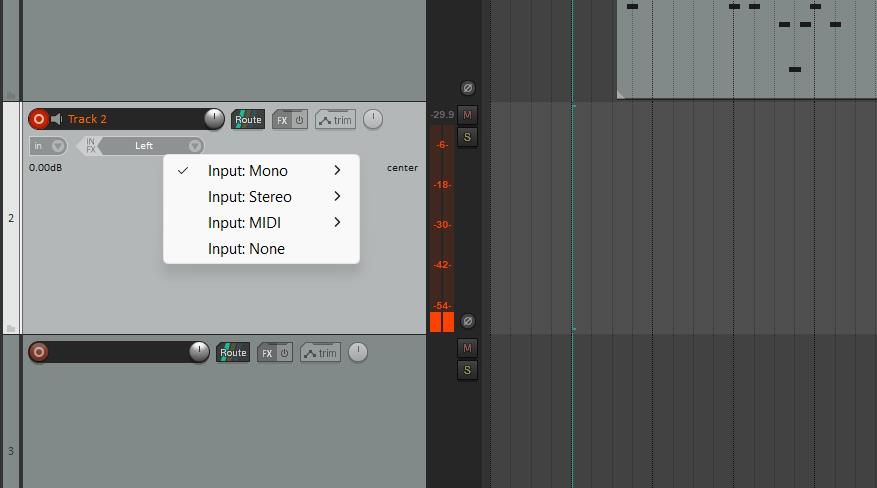
- For microphones, select Stereo. For MIDI devices, select the MIDI option.
- Press Ctrl + R to begin recording on a track.


If you don’t own a MIDI device, REAPER offers a virtual keyboard. This handy feature lets you input notes using your computer keyboard. From the input devices list, select Input: MIDI > Virtual MIDI Keyboard and then select All Channels.
How to Add Track Effects

Adding track effects is crucial for improving your audio. Some of the most common effects include reverb, delay, and chorus. Another effect that’s essential for beginners is learning to use EQ.
To add effects to a track, hit the FX button to open the effects window. This may look overwhelming at first, but you can filter your results using the left sidebar. You can narrow your search by selecting different instruments, effects, or the name of the developer.
For adding instruments, REAPER offers its own basic synth: ReaSynth. You can also find plenty of free VST instruments online. For track effects, ReaVerbate and ReaEQ are two beginner-friendly options for adding basic reverb and EQ. If you're stuck for inspiration, try using ChatGPT to craft sounds.
Navigating Playback and Editing

While producing music, you’ll often need to play back different segments or listen to tracks individually. Thanks to REAPER’s intuitive playback tools, you can have full control over what you’re listening to.
You can change where a track starts playing by dragging the blue edit cursor. Clicking anywhere on a track will automatically move the edit cursor to your mouse. You can also create a time selection to play a segment of your track. Click and drag on the timeline (above the tracks) to make a time selection. To repeat a time selection over and over, hit the R key.
Beside every track is a yellow S button, for Solo. This option is useful for listening to tracks in isolation. Above the Solo button is the Mute (M) option. Muting tracks help you hear what your audio sounds like without those tracks.
How to Add Automation to Tracks

Music at one volume level is unlikely to sound interesting. Track automation is a useful tool that allows you to change the volume of different tracks throughout time. You can also use automation to change parameters such as tempo, dry/wet levels, and panning.
To add automation to a track, press the button labeled trim on the track control panel. This will display a list of envelopes including Volume, Pan, and Width. Hit the checkbox next to an attribute to add it to the track.

Let’s look at the volume envelope. At first, the entire track will be set to one volume, but you can change this by adding envelope points. To add a new point, hold Shift and click anywhere on the track. Now, you can change the track volume by dragging points up and down.
The pan envelope works similarly. By default, panning is set to the center. You can shift audio to the right or left side of your headphones by adding envelope points and shifting them up or down. Envelope points snap to REAPER’s grid, however, you can disable snapping using the shortcut Alt + S.
Produce High-Quality Audio in REAPER
REAPER is a multipurpose DAW that’s useful for recording vocals, creating sounds, or composing music. If you’re looking for software to produce high-quality audio and create detailed sounds, REAPER is a top DAW to consider. Get started in REAPER using this simple guide.