
Quick Links
Key Takeaways
- Installing Windows on a Chromebook gives access to a wider range of applications, but beware of potential hardware limitations.
- Ensure that your Chromebook meets the necessary system requirements before attempting to download Windows.
- After installing Windows, make sure to install the necessary drivers to customize and optimize your setup.
Windows 10 is a versatile and powerful competitor to ChromeOS. While your Chromebook may not come packaged with Windows, you can still install the OS by following a simple process.
How Installing Windows Will Change Your Chromebook
Installing Windows on your Chromebook will free your device from the constraints of ChromeOS and give you access to the fantastically vast selection of Windows applications. Unfortunately, it’s not without drawbacks.
Windows is a demanding operating system, so you might find that your Chromebook's previously sufficient hardware isn't powerful enough to do much on Windows at all. Even after successfully creating what some refer to as a "Chrultrabook", you might end up preferring ChromeOS.
Be warned that you'll need to get rid of Chrome OS unless you have two drives—dual booting ChromeOS & Windows on the same drive isn't possible.
Before downloading Windows 10, you should also verify on chrome://system that your Chromebook has at least 20 GB of hard drive space, 2 GB of RAM, and 1 GHz of processing power, though more is advisable.

Downloading Windows on a Chromebook is risky, and reinstalling ChromeOS is complicated. Weigh up the potential risk to your Chromebook and your warranty and install Windows 10 with caution.
Download Windows and Prepare a Bootable USB
To install Windows on your Chromebook, you'll need to download the official Windows 10 ISO file and prepare a bootable USB drive to run it. You should create this installer using a separate Windows or Linux device.
Although you can create bootable drives with the Chromebook Recovery Tool, this method seems to work best for Linux distributions. It typically doesn't work with Windows ISOs and, worse yet, the Chromebook Recovery Utility puts USB drives in a read-only state that is frustrating to reverse. Instead, you should create a Windows 10 installer using Rufus or a similar program.

Access Developer Mode and Install UEFI Firmware
Once you've prepared a bootable USB, you'll need to disable write protection on your Chromebook. The method you should use to do this depends on your Chromebook model, but you can determine it by checking the MrChromebox.tech wiki. Follow the advice provided in the link next to your specific Chromebook model.

Proceed to install the UEFI Firmware:
- Start by turning on developer mode.
- After logging in to your account, open the Developer Console (Ctrl + Alt + Refresh).
-
Enter chronos as your localhost name, then enter this command:
cd; curl -LO mrchromebox.tech/firmware-util.sh && sudo bash firmware-util.sh -
Once the UEFI Flash window appears, enter 2 to select the Install/Update UEFI (Full ROM) Firmware option.
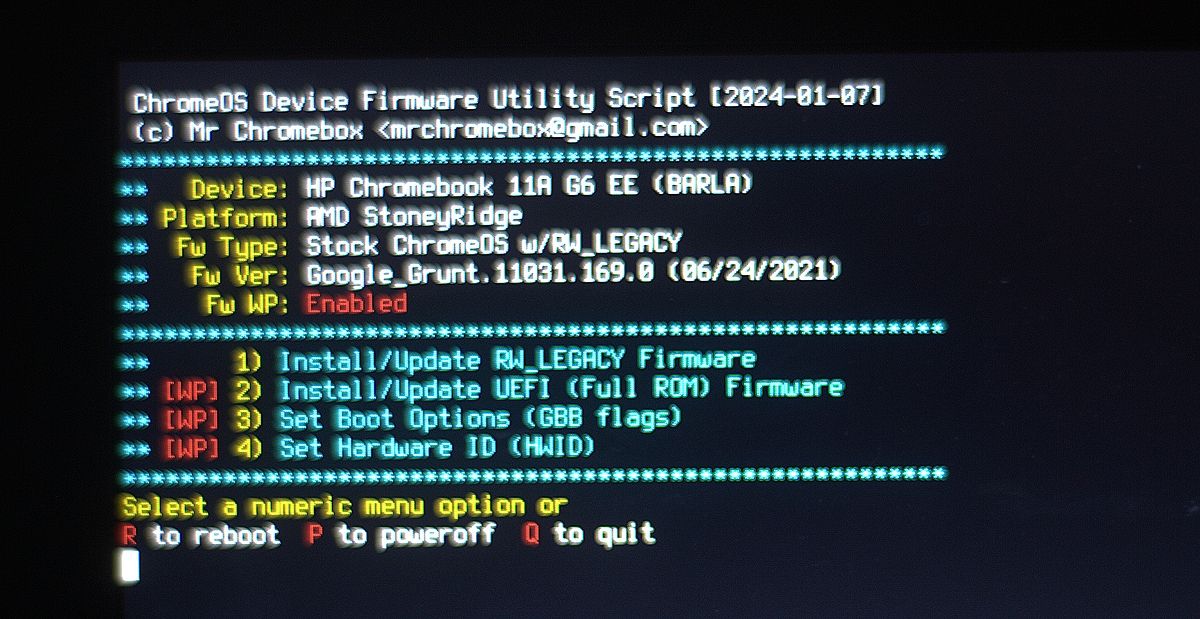
- Enter Y to confirm your selection, then enter U to confirm that you wish to install UEFI-compatible firmware.

Finally, a prompt will appear asking whether you wish to create a backup copy of your stock firmware. This is vital since it lets you return to ChromeOS if you decide a Chultrabook setup isn't for you.
- Ensure that you’ve inserted a spare, separate USB drive.
- Confirm that you wish to flash the firmware .rom to your USB drive by entering the number beside it on the device list.
Once you're finished installing the new UEFI firmware and backing up your old ChromeOS firmware, you're ready to begin installing Windows on your Chromebook. You can also reverse the changes you made to disable write protection—for example, you can reinstall the write protect screw if your Chromebook has one.
Run the Windows Installer on Your Chromebook
Finally, you're ready to install Windows.
- Shut down your Chromebook.
- Plug in your bootable Windows USB installer.
- Press the Power button to boot your Chromebook up again.
- Press the ESC key as soon as your Chromebook boots to access the BIOS.
- Navigate to the Boot Order settings and adjust the boot order so that your USB drive is the first boot device.
- Restart your Chromebook and wait for it to boot to the Windows installation menu. You'll need to connect a USB keyboard or mouse to navigate through the installer.
Proceed through the Windows installer:
- Set your basic preferences and click Install now.
-
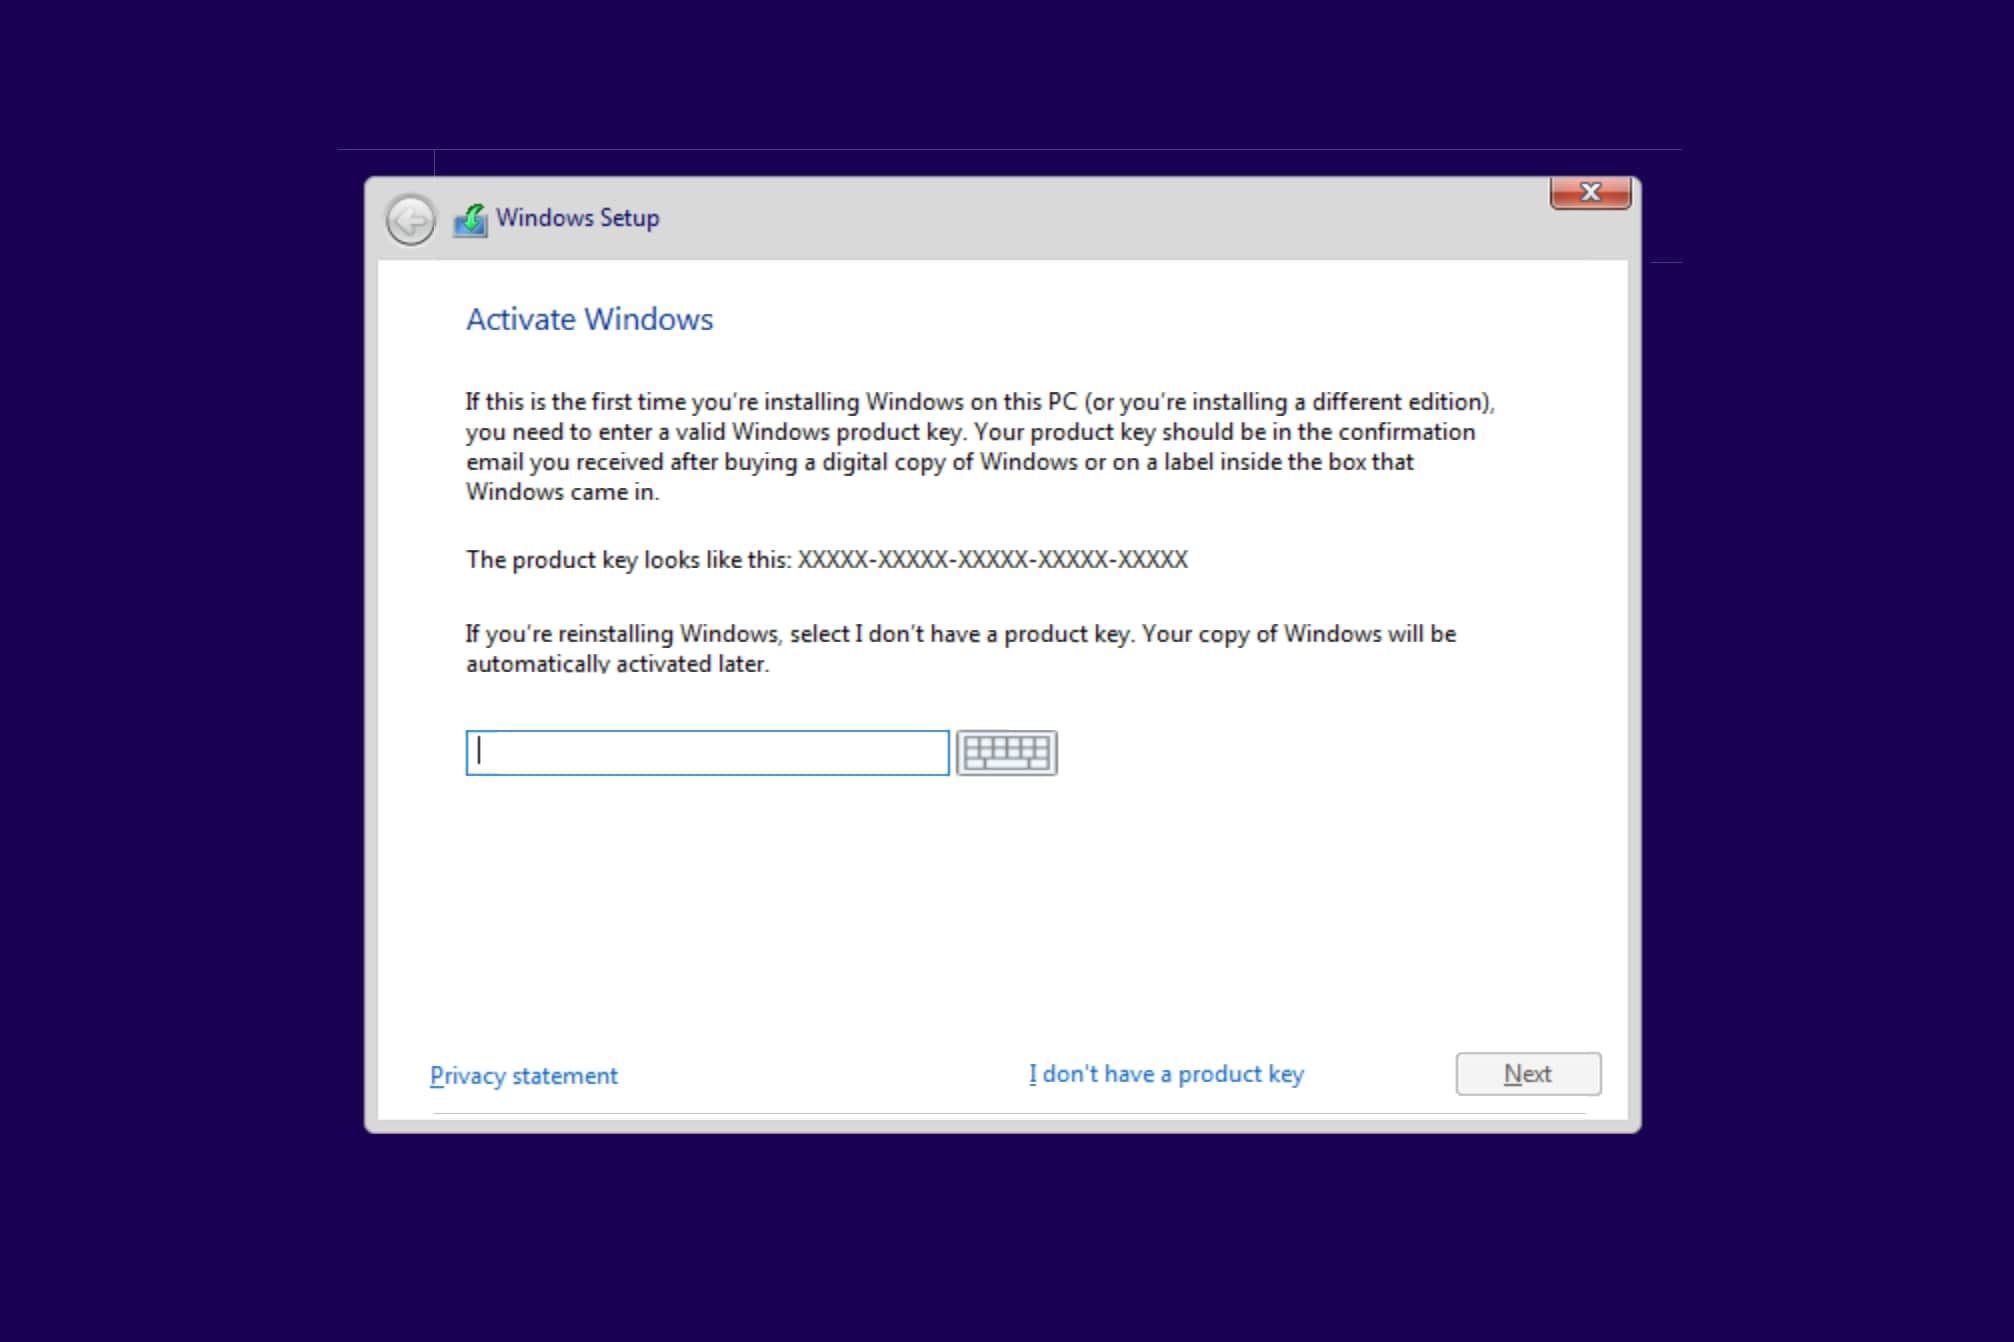
You will be prompted to enter a product key. Select I don't have a product key, then choose your desired version of Windows from the drop-down list.
- Select Custom: Install Windows only (advanced) when prompted to select an installation procedure. You can reorganize your partitions however you like, but it's recommended to install Windows in the largest partition.

When your Chromebook restarts or goes back to the beginning of the installer, remove the USB installer and restart the device. If the installation was successful, your Chromebook should boot to the final Windows setup prompt.
Download Windows Drivers and Customize Your Setup

While you might be past the difficult stage of installing Windows on your Chromebook, you still have a few drivers to install before your new operating system is ready to use. The simplest method of finding the right drivers for your Chromebook involves Coolstar's Chromebook Windows Installation helper.
The drivers that you'll need to download are device-specific, so it's advisable to trust the tutorials that Coolstar gives you. Beyond that, you can take basic steps to customize Windows 10 and install a few extra Windows customization applications if you aren't happy with the basic options offered.