VPN
Guides
By Use
How to Erase & Reset an iPhone Without an Apple ID Password
Your Apple ID is perhaps the most critical piece of data across Apple-made devices. Without it, you can't access some of the core services, such as purchasing apps, syncing data across devices, resetting your device, and plenty more. Well, we're about to help you solve many of those problems – by teaching you how to erase and reset an iPhone without an Apple ID password.
Keep in mind that different methods exist, helping you reset your iPhone and start from scratch. However, they all lead to the same thing – deleting your device's contents. That's why you might want to save any important data you have before proceeding (as resetting your iPhone means losing all that data, after all).
2 Methods to Safely Erase an iPhone Without an Apple ID Password
At the moment, there are two ways to erase and reset an iPhone – if you can’t remember your Apple ID password. We’ll teach you how to use iTunes for this purpose, and we’ll also recommend a third-party app as a backup solution. So, let’s jump right in.
Method #1: Use Recovery Mode + iTunes to Erase an iPhone Without an Apple ID Password
By forcing your iPhone to enter 'Recovery Mode,' you will be prompted to use iTunes to restore it. During this entire procedure, you won't be asked about your Apple ID password, and you'll end up with a freshly reset iPhone – ready to be set up from scratch.
With that said, you first need to put your iPhone into 'Recovery Mode,' as explained just below. Make sure to enter this procedure with your phone turned off.
- iPhone 8 & Newer, iPhone SE (2nd Gen): Press and quickly release the Volume Up button. Then, press and quickly release the Volume Down button. Lastly, press and hold the Side button (on the right) until you see the 'Recovery Mode' screen.
- iPhone 7 & 7 Plus: Press and then hold the Top and Volume Down buttons – and keep them pressed at the same time. Keep holding them until you see the 'Recovery Mode' screen.
- iPhone 6s & Older, iPhone SE (1st Gen): Press and hold the Home and the Top (or Side) buttons simultaneously. Make sure to keep those two buttons pressed until you see the 'Recovery Mode' screen.
Right now, you should see an illustration on your iPhone’s screen, asking you to connect it to your computer. So, prepare a cable to connect your iPhone and your computer, and do the following.
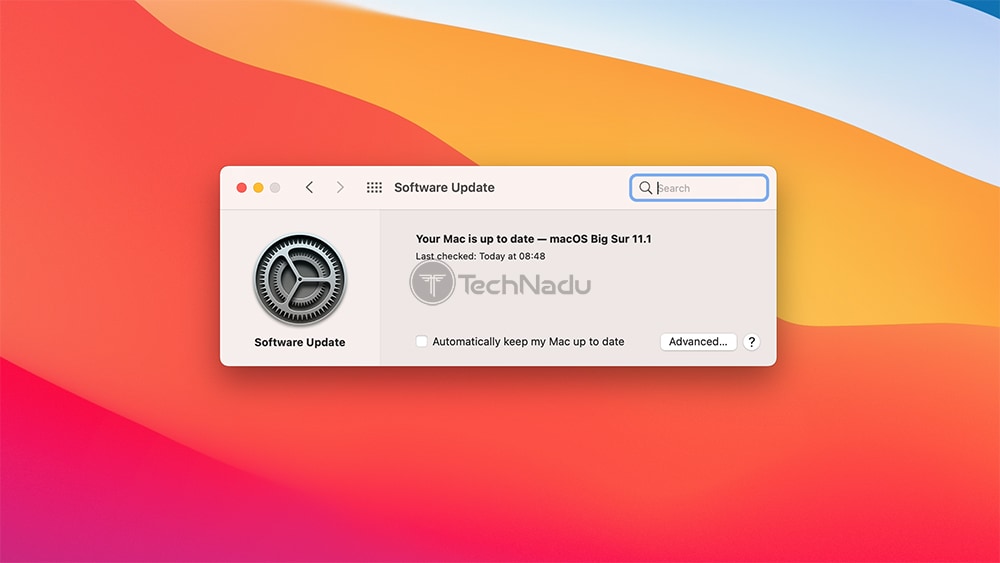
- If you use Windows, you need to have the latest version of iTunes installed. Click on the provided link, and then download and install iTunes. In case you have a Mac, know that iTunes is now built-into macOS. Therefore, we recommend updating your computer (via Apple > System Preferences > Software Update).
- Then, connect your iPhone and your computer, and then launch iTunes (if it doesn’t open automatically). Or, if you’re using a Mac, navigate to Finder. Then, select your phone using the left-placed sidebar.
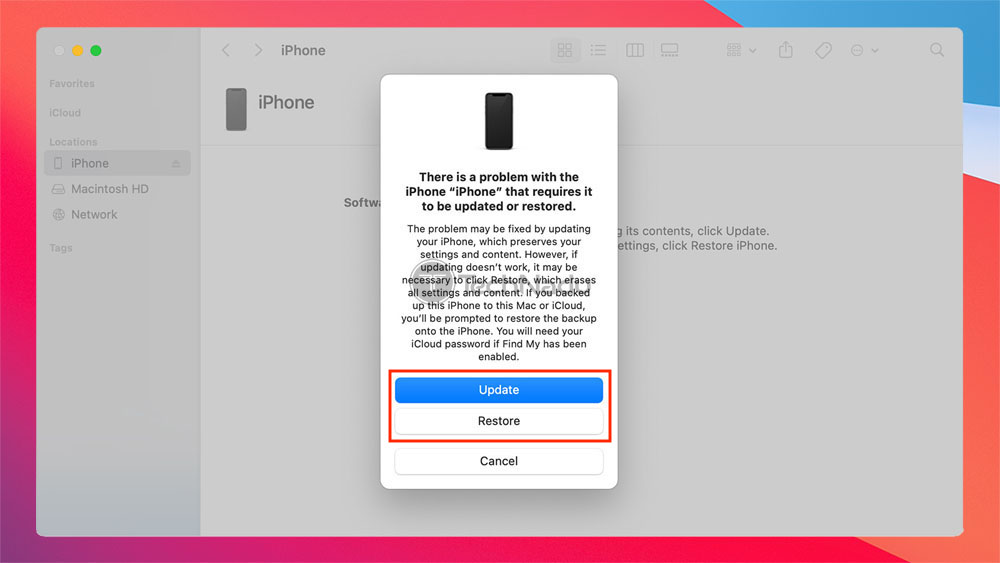
- You should now see a message saying that there’s a problem with your iPhone. You will have two options in front of you – 'Update' and 'Restore.' You need to go with 'Restore,' and then make sure to confirm your decision.
- iTunes will now erase and restore your iPhone (yes, even without an Apple ID password). Be patient and wait, as this process can take some time. Once done, your phone will reboot, and you should see its 'Welcome Screen.' That means you can proceed to set up your iPhone from scratch. That’s it!
Method #2: Use a Third-Party App to Erase an iPhone Without an Apple ID Password
If the previous method sounds complicated, you also have another option. We'll recommend using a third-party app to completely erase your iPhone's content, returning it to factory settings. Then, you'll get to set up your iPhone as brand-new, using a new Apple ID. Here's what you need to do.
- First, download Dr. Fone by Wondershare. This application can be used free of charge, and it’s available for Windows and macOS. So, go ahead and download the application and then install it.
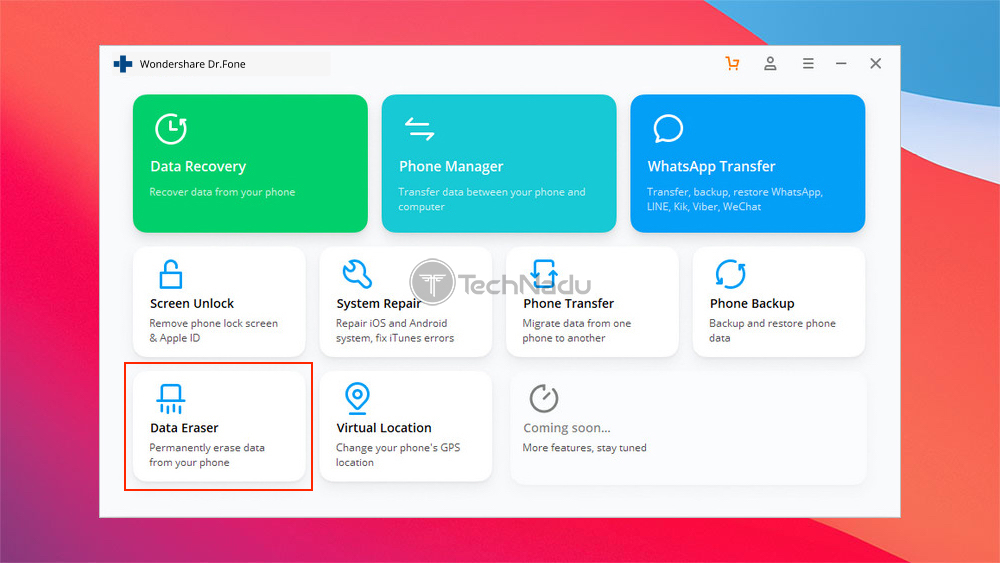
- Launch Dr. Fone, and you'll be greeted by its 'Welcome Screen,' filled with a grid of buttons. You need to click on 'Data Eraser.' Wait for a couple of moments until this component is downloaded and installed. Then, click on 'Data Eraser' once again to launch this handy tool.
- Connect your iPhone to your computer (using a USB data cable). You will see a group of different options right now – so make sure to click on 'Erase All Data.' This is the most secure way to erase an iPhone without an Apple ID password, and it’s fully automated. To begin, click on 'Start.'
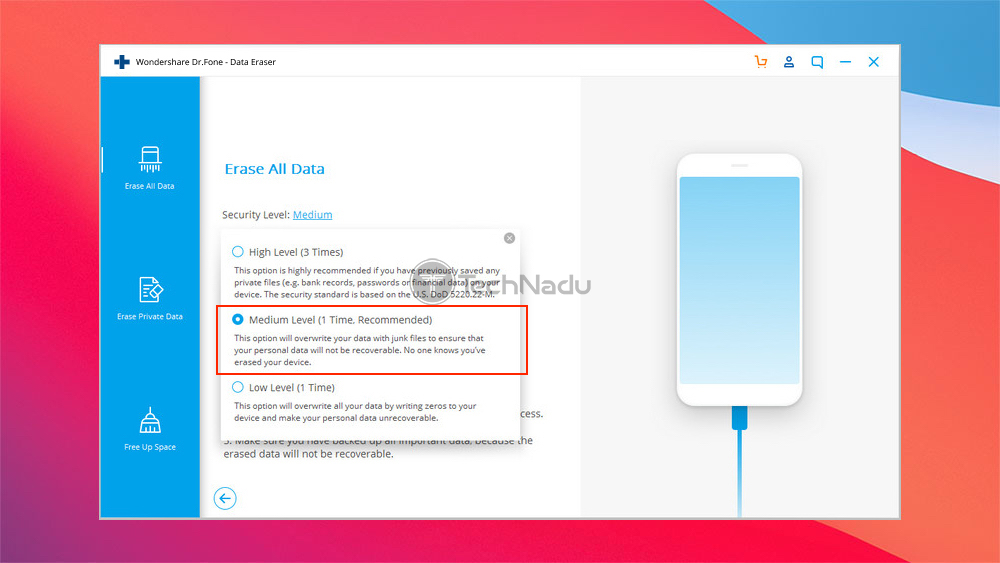
- You will be now asked to pick from three levels – low, medium, and high. To avoid having to wait too much time for this process to be complete, click on 'Medium Level.' Then, proceed to the next step.
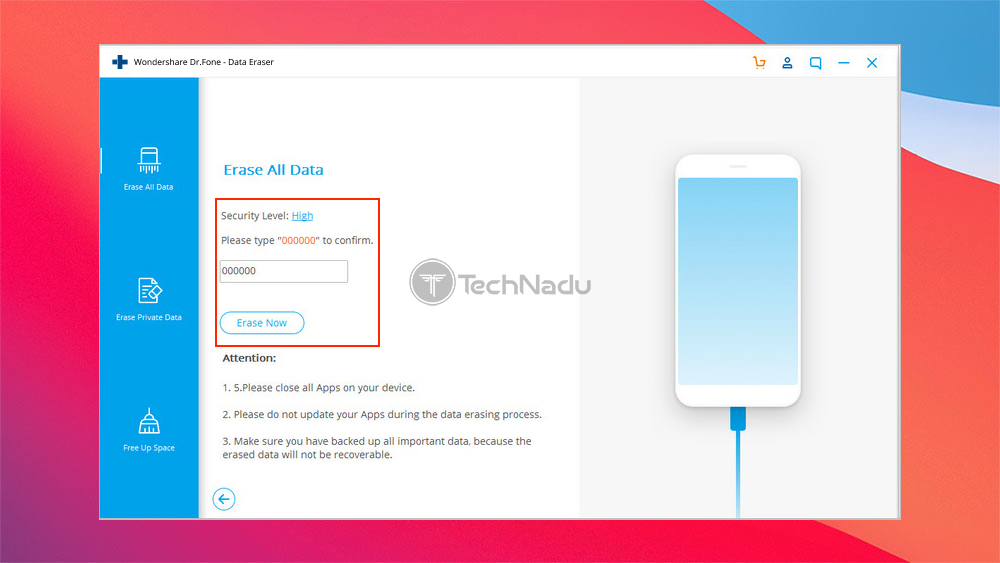
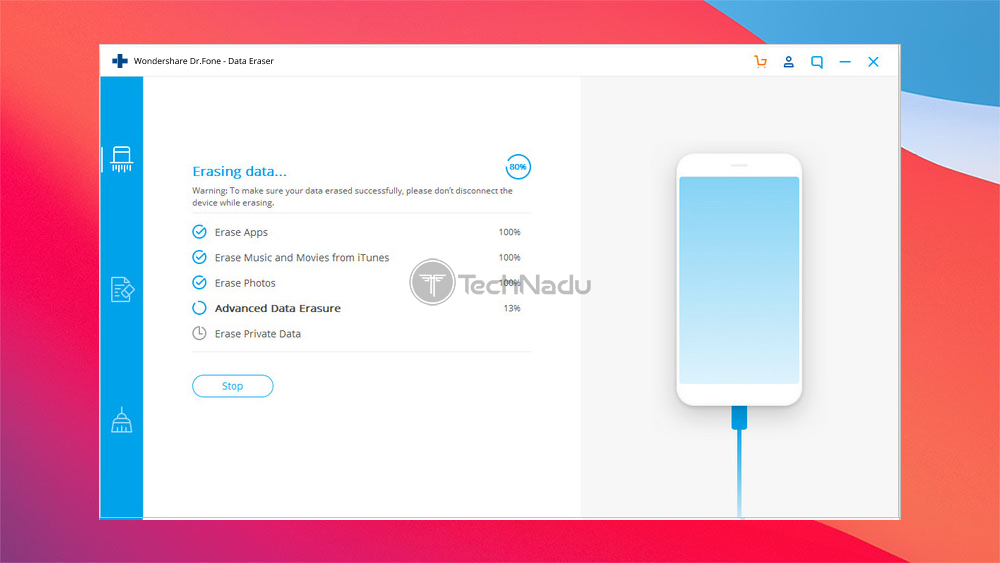
- Dr. Fone will now ask you to enter '000000' to confirm your decision while giving you an overview of what this process will do. Once ready to begin, click on 'Erase Now.' Keep in mind that this process might take some time. Dr. Fone will show you an overview of how things are going, so you’ll know when to expect to proceed next.
- Once your iPhone is erased, a notification will appear saying that you can reboot your device. Once you do so, your iPhone will look like a brand-new device – so you can now use a different Apple ID to sign in and continue using it.
That would be all on how to erase an iPhone without an Apple ID password. If you have any questions for us, don’t forget to post your comment below. And lastly, thanks for reading!
For a better user experience we recommend using a more modern browser. We support the latest version of the following browsers: For a better user experience we recommend using the latest version of the following browsers: