If you’re teaching students how to write personal narratives by taking them through the writing process, then you are doing what’s best for your writers! You know that great writing takes work–prewriting, drafting, revising, and editing.
For this reason, today’s blog post will focus on using graphic organizers to plan and draft student narratives. If your students have decided on a topic, then keep reading. If they haven’t, then visit post #2, “Find Authentic Topics for a Personal Narrative with These 5 Powerful Strategies,” for engaging activities to help students find unique topics. Also stay tuned for my upcoming posts where I’ll share strategies for revising, editing, and publishing personal narratives.
Now let’s get started!
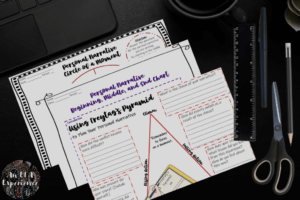
I’m sharing three graphic organizers with you: Freytag’s Pyramid, Circle of a Moment, and a BME (Beginning, Middle, End) Chart. Read through the post, and decide which is best for your students at this time. (Later you can use another one for short story writing. These organizers will work for both.)
Whether you choose the pyramid, circle, or chart, remember to model each step for students. Show them what to do one step at a time; then have them do it. You are welcome to use my examples, but if you feel comfortable doing this with your own story, then do that. It would work better because you can model your thinking as you write. Also, stop every so often to allow a few minutes for quick elbow-partner or whole-class readings. This will add inspiration and engagement.
As with every blog post I write, I am providing you with step-by-step instructions, but if you prefer the handouts, you can purchase them at my TPT store.
How to Write Personal Narratives Using Freytag’s Pyramid
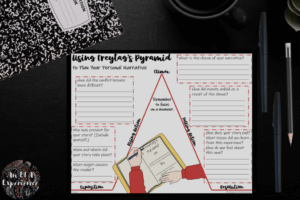
If you have advanced learners or you are studying Freytag’s Pyramid, aka plot mountain, then use this organizer to help students plan their narratives. This will allow them to make connections between their reading and writing objectives. Plus, you can hit at least two goals with one lesson!
Plan Your Narratives
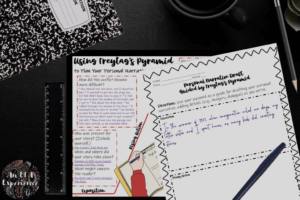
Draw a triangle-shaped mountain and label the elements of Freytag’s Pyramid, as seen in the above image, as you project it onto your screen for students to view and copy. Next, walk them through each element.

Exposition
Remind students that writers introduce characters, describe the setting, and hint at the conflict in the exposition. List the characters who were present in your story, remembering to include yourself since this is a true story about a moment you lived. Next, describe when and where the story took place. Then hint at the conflict by writing what might concern the reader.
In my example, I wrote, “My sister and I were playing in the dryer.” This already hints at the conflict since no child should be playing in a dryer, but I build on that by also noting that my story takes place in a garage in Texas during the summer. (Texas summers are hot; one hundred-degree days almost seem normal.)
Rising Action and Climax
I usually prefer doing things in order, but I’m going to change things up here. To help students understand rising action, move to the climax then return to the rising action.
For the climax, think of the most exciting part of the story that serves as a turning point where the outcome of the conflict becomes clear, and write it at the top of the mountain. Then, for the rising action, note the actions that develop the conflict and occur before the climax in that section of the pyramid. The goal is to build suspense for readers as you develop the conflict.
In my example, the climax occurs when I knock on the dryer’s window to let my parents know where I am. This is the turning point of my story, where the outcome becomes clear. I don’t die. Actions in the rising action include the events that lead up to that moment, such as me getting locked in the dryer and not wanting to tell my father about it for fear of getting spanked. When you decide on the climax of the story, the actions that lead up to it will be easier to identify.
Falling Action
In the falling action, tension is eased as authors reveal how events unfold as a result of the climax, so note what happens after the climax.
In my example, I include Mom pulling me out of the dryer and bathing me.
Resolution
In the resolution, authors tie up loose ends and reveal how everything turns out. Personal narratives often end with a lesson learned, a reflection on the moment, or a prediction of what might happen in the future. For my prewriting here, I wrote, “My dad was in trouble for not watching us” and “Life is a great teacher.” Think of what you learned from this experience, and write it down.
One more note here. When you think of life lessons, think deeply. If you are attacked by bees in your story, you want a more thoughtful lesson than don’t play with bees. If you do use that, make sure to develop it.
When you begin class with a warm-up, model each of these steps, and allow some time for writers to read what they wrote to the class, this planning session will take a forty-five-minute period. Just so you know. 😉
Draft Your Narratives
When drafting their narratives, students need time to write, so make sure to give them that time. While they’re writing, you can draft your narrative and conference with students about their writings.
Use your pyramid to guide you as you draft your narrative, filling in the details as you write.
Also, remember to allow students to read their writings to an elbow partner or the class. They want to share what they wrote, and it does help build classroom community.
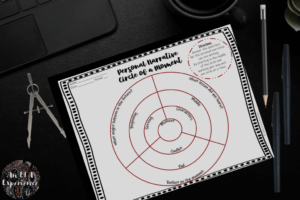
How to Write Personal Narratives Using Circle of a Moment
What I like about this graphic organizer is its uniqueness. Students respond well to activities that are different, even when it’s just writing in circles instead of lines. I’ve mainly used it with regular-level students, but it works well for all levels.
Again, model each step for students while projecting your writing onto the screen.
Plan Your Narratives
Begin by drawing four circles onto a sheet of paper, one circle inside the other. (A compass will come in handy here.) Make your circles as large as possible so that you have plenty of room to write. Then draw three lines from the inner to the outer circle as seen in the above example.
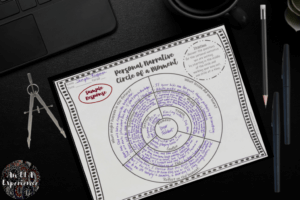
For your prewriting, start in the middle of the circle and work your way out.
In the center circle, write the topic of your personal narrative. I used the dryer story for all of these prewritings, so mine says “dryer incident.”
In the next circle, note the people, the setting, and the conflict of your story.
In the third circle, write what happened at the beginning, the middle, and the end. (The exposition and rising action will be the beginning, the climax will be the middle, and the falling action and resolution will be the end.)
Finally, in the outer circle, note a lesson learned, a prediction for the future, and a reflection on the moment.
Draft Your Narratives
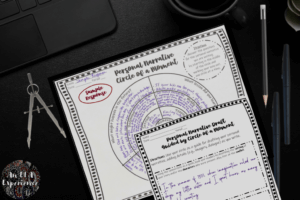
As with the pyramid organizer, you’ll use this one to guide you as you write your draft. Begin with the second circle where you noted the characters, setting, and conflict. (Setting and character descriptions can be great hooks for narratives, which I’ll discuss more in my next blog post.)
Next, move to the third circle (with the beginning, middle, and end), and write your story in that order, adding as many details as you can remember.
Finally, move to the last circle. You’ll notice this circle includes three ways to end your narrative, but you don’t need to use all of them. Choose the one you think is best or a combination of two or three, and conclude your story.
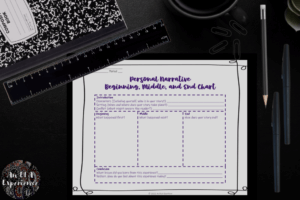
How to Write Personal Narratives Using a BME Chart
If you or your reading teacher are using a beginning, middle, and end strategy for reading instruction, then this is the perfect time to use this chart. Because of its simplicity, this organizer is also good for lower-level students.
Plan Your Narratives
Draw and label a chart, as seen in the above example, with five sections labeled introduction, beginning, middle, end, and conclusion.
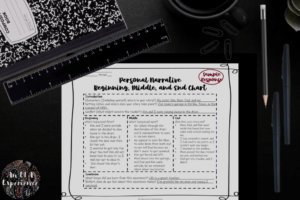
In the introduction, write who was present for the story, where the story takes place, and what might concern the reader.
In the beginning, middle, and end sections, write about the events that happen first, second, third, etc., and note how your story ends.
Finally, in the conclusion, write a lesson you learned from this experience and reflect on the moment. How do you feel about that moment today? Think about it and write it down.
Draft Your Narratives
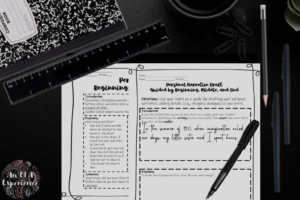
Using your chart as a guide, start drafting your narrative, bringing in all of the details you can remember. Start with the introduction. Move to the beginning, middle, and end sections. When you’ve finished with those steps, conclude with a lesson and/or a reflection on the moment.
Remember to provide students with plenty of time for writing and a few minutes for sharing.
Close Your Lesson
Close any of these lessons with an exit slip where students note a question they have or explain how to write a personal narrative. You can begin your next period together by reading a few of these to students while answering questions, offering praise, and clarifying misconceptions.
You should now have some unique drafts! Prepare to move on to the next steps to make them even better!
If you’d like any of these handouts, visit Graphic Organizers for Personal Narratives at my TPT store.
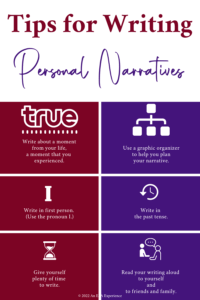
Tips for Students Writing Personal Narratives
Tips for Teaching Personal Narrative Writing
- Make sure students have decided on a topic before beginning these activities. (See blog #2, “Find Authentic Topics for a Personal Narrative with These 5 Strategies,” for engaging activities.)
- Read examples of good personal narratives so students will know what they’re expected to write.
- Have students keep their prewriting and drafts in a writer’s notebook so that they can find them.
- Use the organizers that work best for your students. If you’re studying plot development, use Freytag’s Pyramid. If you’re using a beginning-middle-end strategy for summarizing, then use the BME Chart. (I’ve also used these for differentiating with the pyramid for higher-level students, the circle for regular-level, and the chart for lower-level.)
- When using the organizers, model each step for students.
- Allow students plenty of time for drafting their narratives.
- Remind students to write in first person (using the pronoun I).
- Since personal narratives are stories about past events, they should be written in the past tense.
- Allow students to read portions of their organizers and their drafts to an elbow partner or the entire class.
- Close the lesson with exit slips where students ask questions or summarize what they’ve learned.
Related Links
Blog Post #5: Writing a Hook to Reel in Your Readers Immediately
This post explains how you can teach students to revise their introductions for personal narratives or any essay.
Find Authentic Topics for a Personal Narrative with These 5 Powerful Strategies
This blog post discusses activities to help students decide on topics for their personal narratives.
How to Write a Personal Narrative
This post gives tips for writing a personal narrative with everything from topics to writing.
How to Write a Personal Narrative: Steps and Examples
For personal narrative writing guidelines, visit this link.
Teachers & Writers Magazine / This IBelieve: Personal Narratives by High School Students
This site includes personal narratives written by high school students. (You want students to read what they’re expected to write.)
Leave a Comment
I want to hear from you! If you found my blog, “Teach Students How to Write Personal Narratives with Graphic Organizers,” useful, leave a comment!