
Is it your first time changing your guitar’s strings? Or has it been a while and you’d like a quick recap? If the answer is ‘yes’ to either question, then this simple guide will get your instrument restrung in no time.
Remember, you should always change all six strings at once, never just one at a time. This keeps your guitar tone sounding even.
Restringing a Guitar – Step by Step Guide
1. Loosen the Machine Heads
The first thing to do is to remove those old, dirty strings. Turn the tuning pegs to slacken and remove them from the machine heads.

2. Remove the Bridge Pins
Now they’re loose, go to the bridge end of the guitar and remove the bridge pins. Be careful not to apply too much force.

If they really won’t budge, try a bridge pin remover tool. After removing, keep the pins in a safe place and don’t throw them away, you’re going to need them later on.

You should be left with a rather naked looking guitar by now.

Cleaning Time
5. Clean and polish the body
With the strings off, it’s the perfect time to give your guitar a clean with a good guitar polish as you can reach areas that were otherwise unreachable. You don’t have to do this – and certainly not if you’ve just bought a new guitar – but typically you should give your guitar a quick rub down every time you do this. It will make it sound so much better and hardly takes any time.

6. Clean the fretboard
Now’s also a perfect time to give your fingerboard a clean. There are several solutions you can use to clean a fretboard, some better than others depending on the type of wood you have. In this case, as this acoustic has a rosewood fingerboard I’ve used lemon oil to clean and soften the fingerboard. However, if yours is made of maple, or you have an exotic type of wood (e.g., Koa) then make sure you choose an appropriate product for that wood.

7. Clean the frets (optional)
Depending on the state of your guitar (this one hadn’t been cleaned in years), it’s also a good idea to clean the actual frets (the thin bits of metal on your guitar fretboard) as well as the wood fingerboard. With this kit you see here, you get a handy metal guard that makes sure you only clean the metal fret.

Adding New Strings
8. Bend the string
Start with the bottom E string, and bend it at the ball end slightly. Doing this helps to keep it in place for the next step.

9. Push ball through hole
Feed it in like so, making sure you put it in the right hole.

10. Secure it with a bridge pin
Take any bridge pins (they’re all the same size), and push one into the hole to secure the new string in place. You need to make sure the cut-out slot of the pin is facing the neck. Make sure you don’t apply too much force when pressing it in, either. Once it’s in place, pull it gently to make sure the ball end is correctly positioned at the bottom of the pin.

Repeat steps 8 through 10 with the remaining strings in ascending order from E-A-D-G-B-E, moving from thickest to thinnest. Here’s a guide to the order of the guitar strings (with some memorable phrases to stop you from forgetting them!).
11. Attach Other End to Machine Head
Once done, it’s time to connect them to the machine heads. Feed the strings over the saddles on the bridge, pull them towards the headstock, and slot them into the corresponding grooves of the nut while you do it.

12. Push into machine head
Feed the end of the string through the inside of the tuning peg to the outside, and pull it so that it feels tight.

13. Pull It Back Around and Under
Now, take it and wrap it around the back of the machine head, going back on itself, making sure it goes under itself.
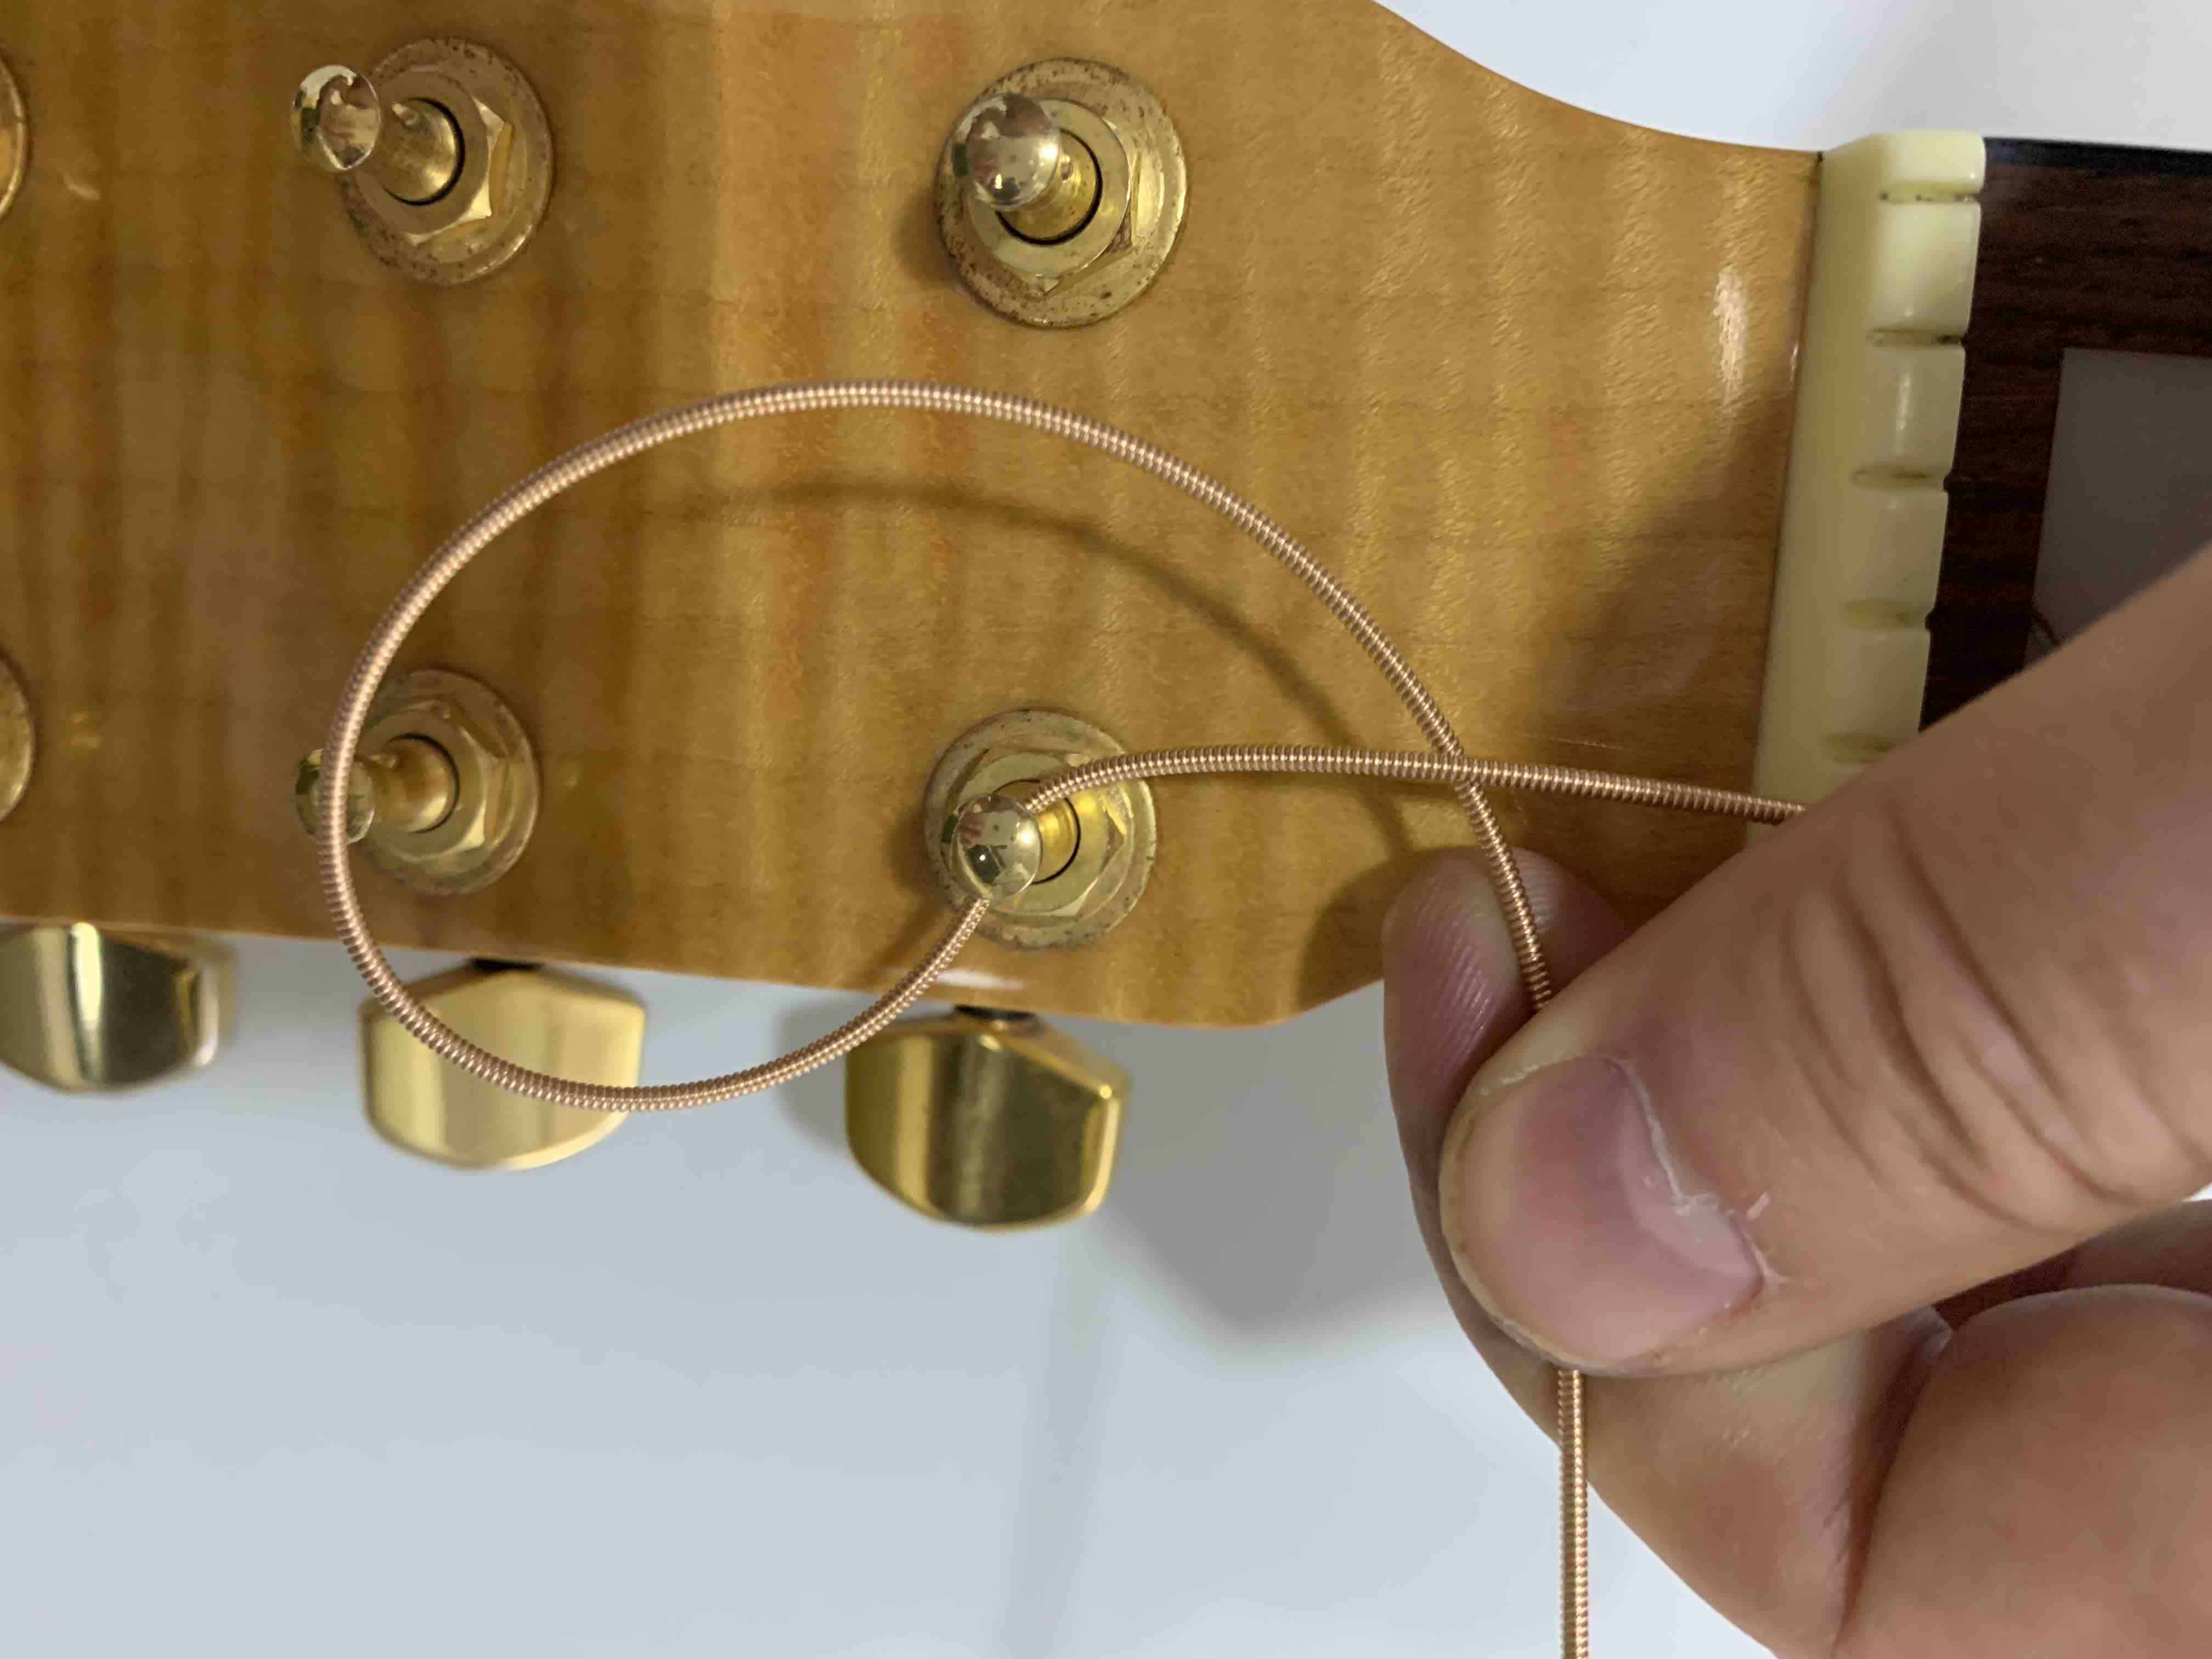
14. Turn the Machine Head
Next, fold it over the top of itself and turn the tuning peg to tighten it a little.

15. Snip it!
Push the end down and cut off the excess wire with a pair of wirecutters. I generally leave an inch or so of spare wire, but it’s up to you.

Follow the same process for the rest.
16. Tighten up
Now, start slowly tightening them all until they are nice and ‘taught.’ Do this by hand, or use a string winder. Expect them to slip a lot as you increase the tension, that’s natural.

17. Gently Pull
One thing I like to do is gently pull like this. It helps to stretch them.

18. Tune Up
Finally, take a tuner and start to tune them. You’ll need a few attempts at getting them in tune; eventually, they’ll start to stay in tune. We wrote a thorough guide to tuning your guitar here.

You see, wasn’t so bad, was it. Restringing shouldn’t take you more than thirty minutes, and by the end of it, you’ll have a decent sounding guitar again.
The process for an electric guitar is similar but varies depending on the type of bridge and machine heads you have.
Now go make awesome music!