
Creating "Tonowari" from "Avatar: The Way of Water"
Side Academy student, Omar Frare, created a 3D Character inspired by "Avatar: The Way of Water." Here, he shares details of this challenging and rewarding project.
Side Academy student, Omar Frare, created a 3D Character inspired by "Avatar: The Way of Water." Here, he shares details of this challenging and rewarding project.

Omar Frare is a 22 years old student attending Side Academy, in Verona, Italy. For his second year project, he gave himself the challenge of creating a detailed 3D Character inspired by "Avatar: The Way of Water". In this article, he sheds light on his process along with challenges and learnings, that led him to his final presentation.

The project in question, "Tonowari", I had been assigned at the beginning of 2023 and the film "Avatar: The Way of Water" which sees among its protagonists my character had just come out in cinemas.
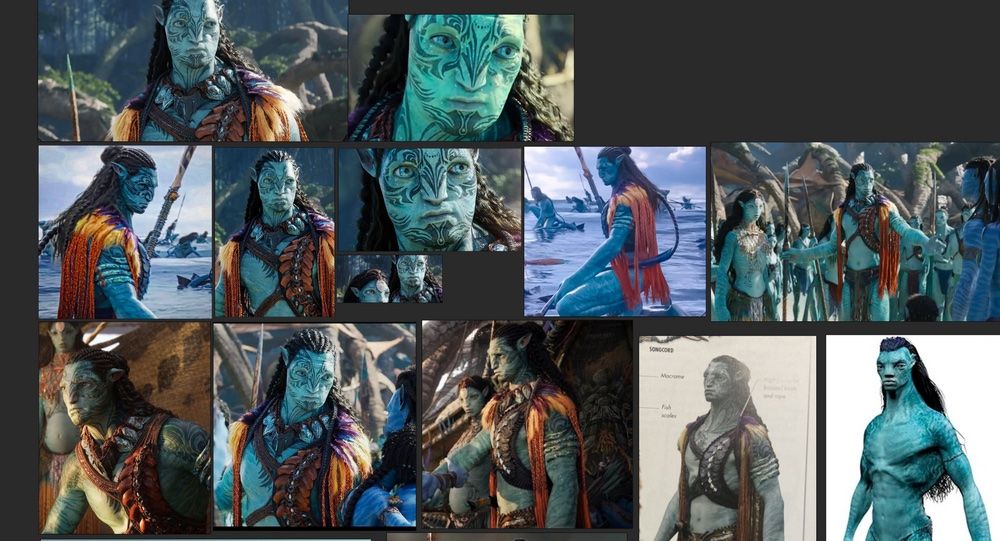
This presented a significant challenge in gathering initial references, as there were no clear images available online. However, my fondness for the film drove me to revisit it multiple times, aiming to capture as much detail as possible. Additionally, the artbook provided by my academy proved invaluable. Eventually, with the film's release on streaming platforms, I was able to rectify certain aspects, such as the design of the Tonowari spear, which I had improvised due to the lack of reference material.

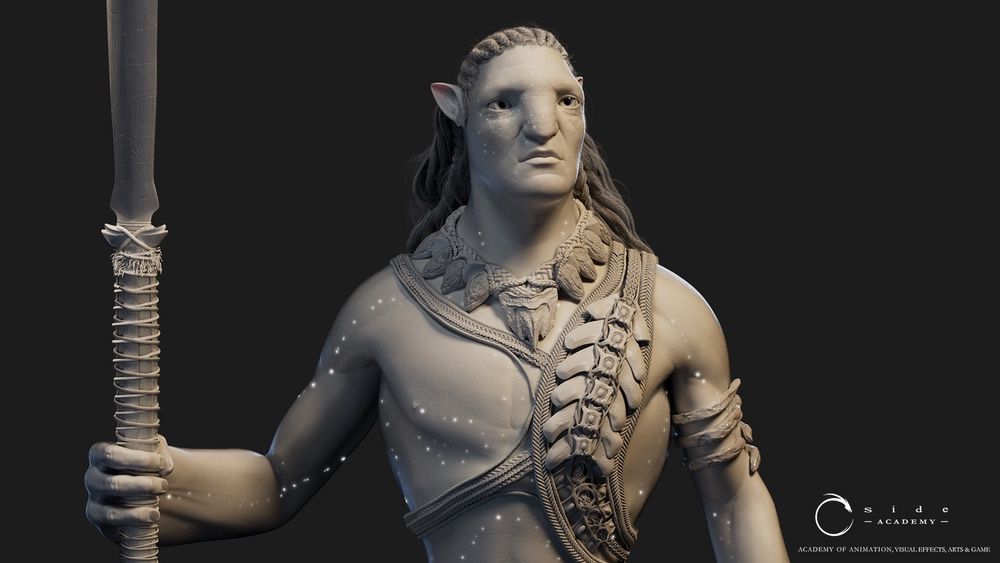
I was very quick to do the initial blocking in ZBrush to get a general idea of proportions and characteristics, and I slightly underestimated the fact that anatomically they are very similar to humans but also very different.

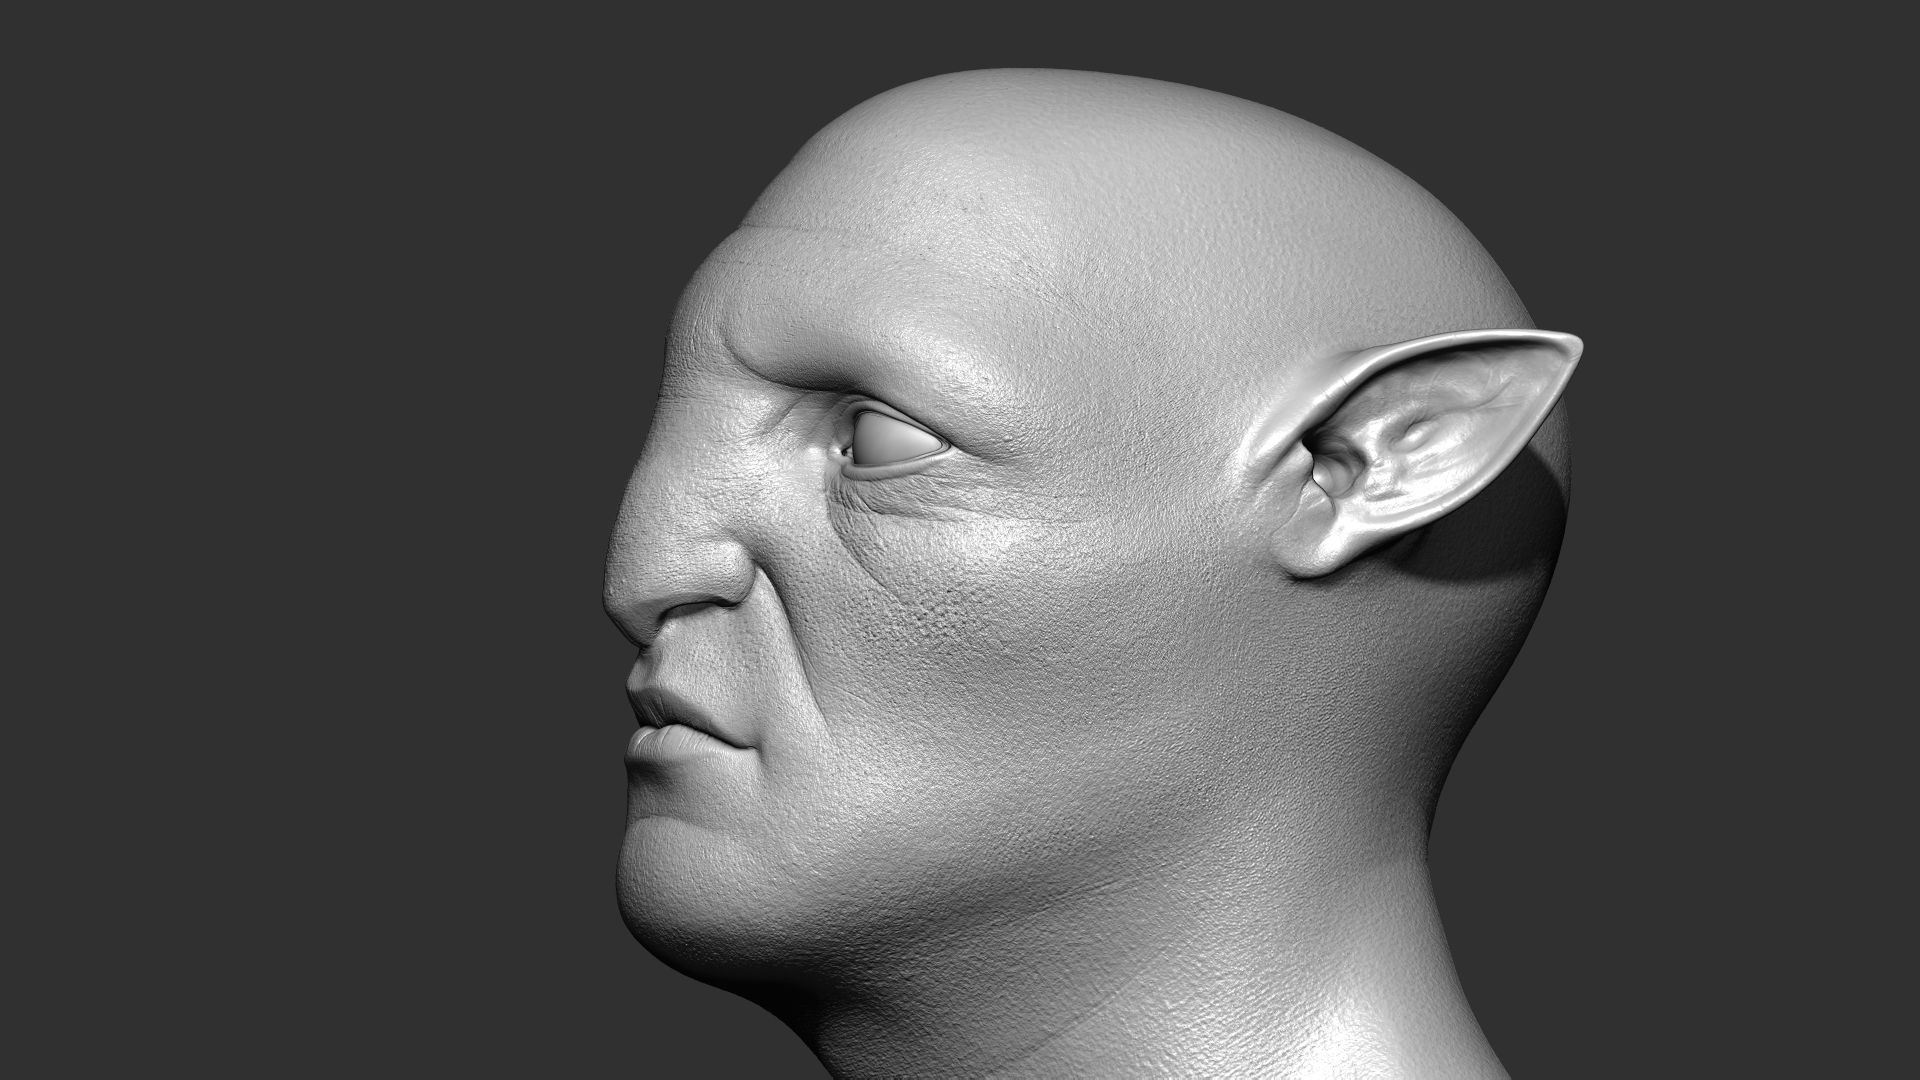
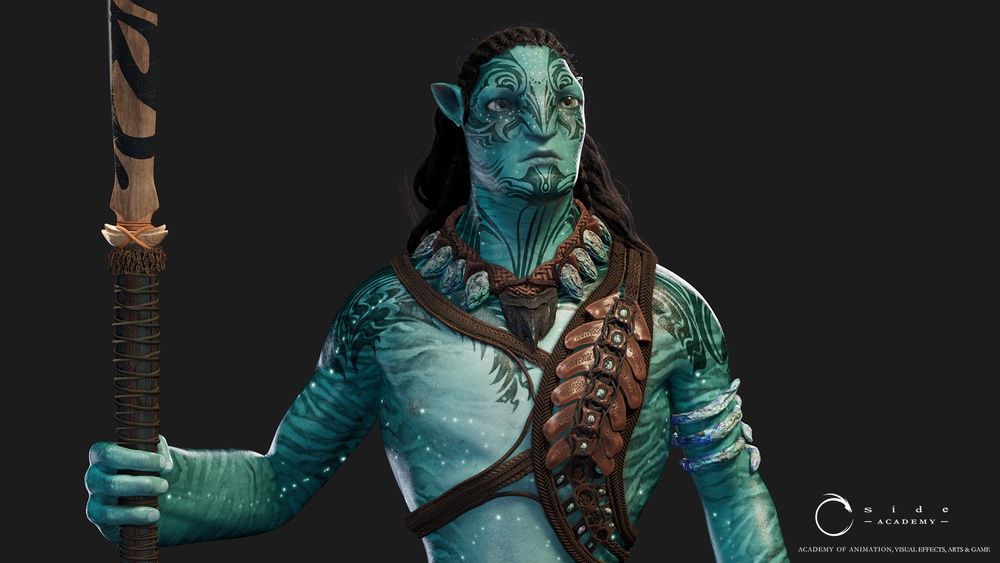
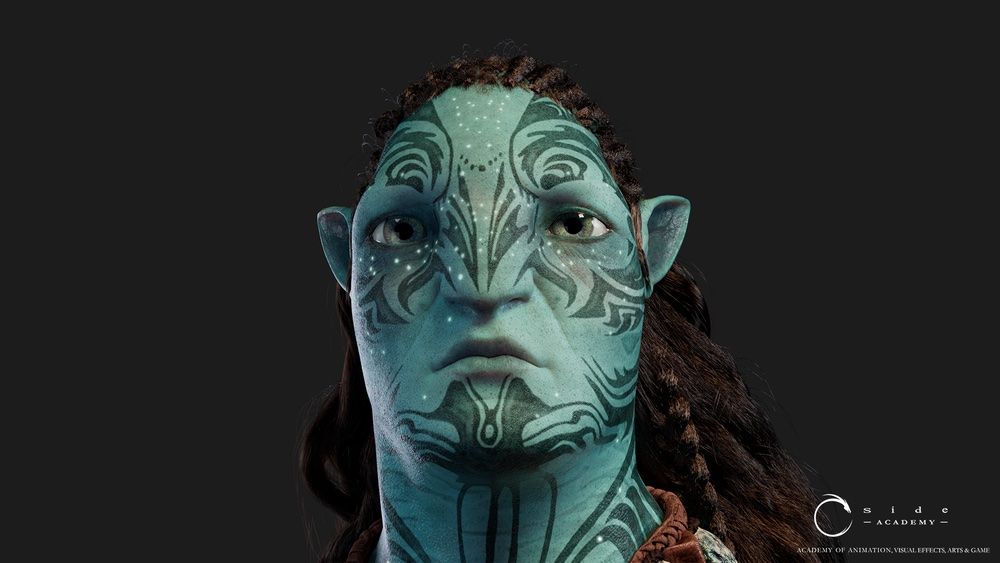
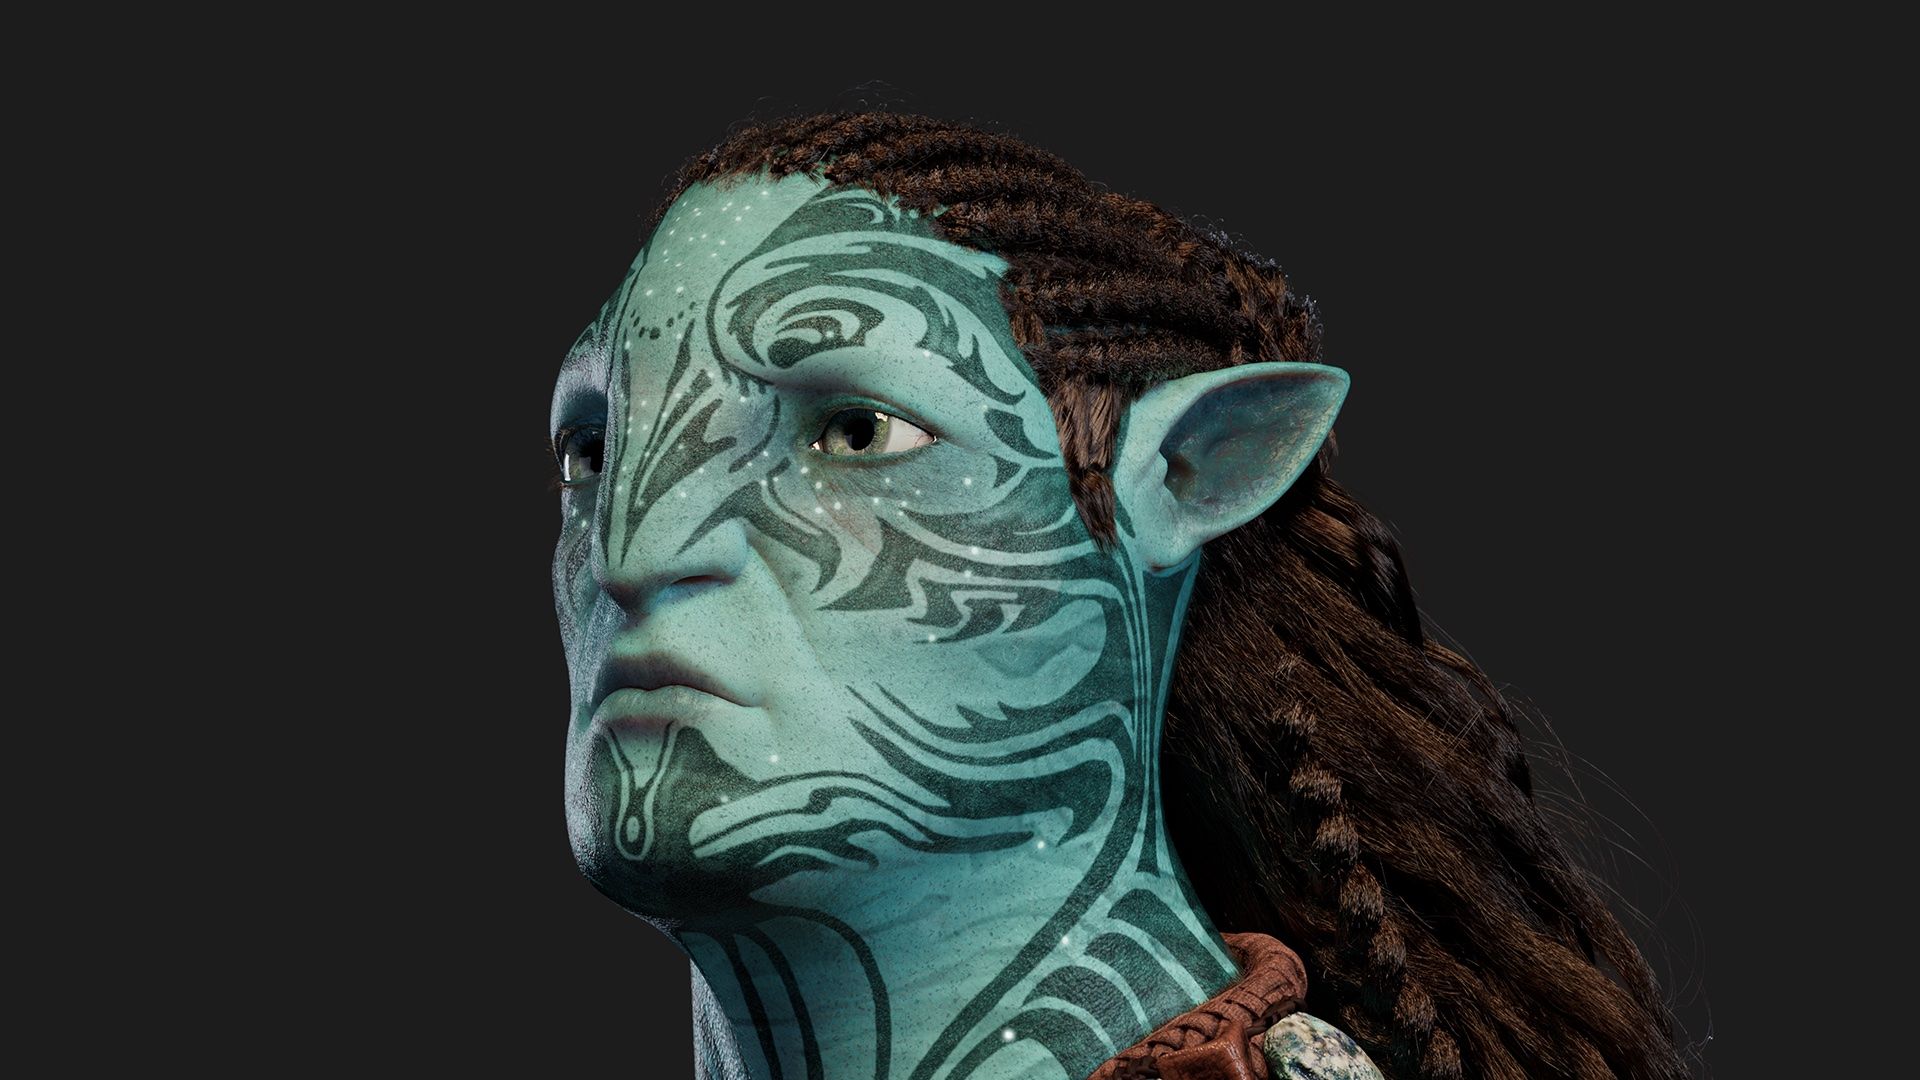
Unlike the tribes of the forest in the fantasy world of "Avatar," those of the sea have very special characteristics. For example, they have a very wide thoracic cage with a very evident sternum, long arms with wide forearms for swimming, and hands with four fingers. The most challenging part was the face, with its huge eyes, squat and crushed nose, and all the other features that distinguish this character.

With the teachers of Side Academy, we decided to pose it early enough to break the symmetry and anatomically seek the shapes of various muscle groups. This allowed me to create volumes according to the body's position immediately, thus avoiding the need to correct them after finishing the modeling.
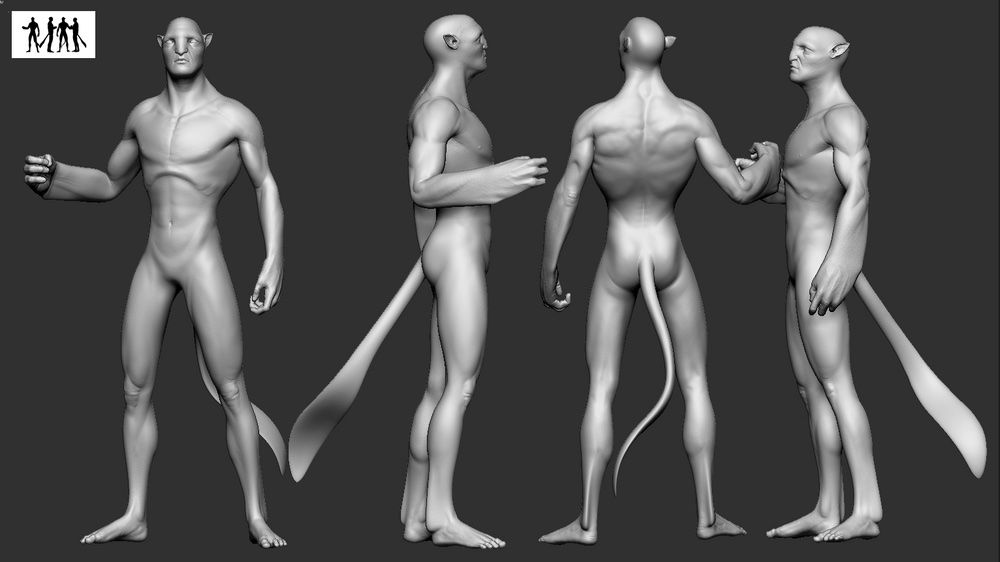
Of course, it's a consciously different approach from what we would adopt for a character that will later be animated. In this case, we lose the ability not only to work in symmetry but also to turn it over once the modeling is complete. We chose this workflow because it was primarily an exercise in asset creation, with no expectation for the character to be rigged and animated.
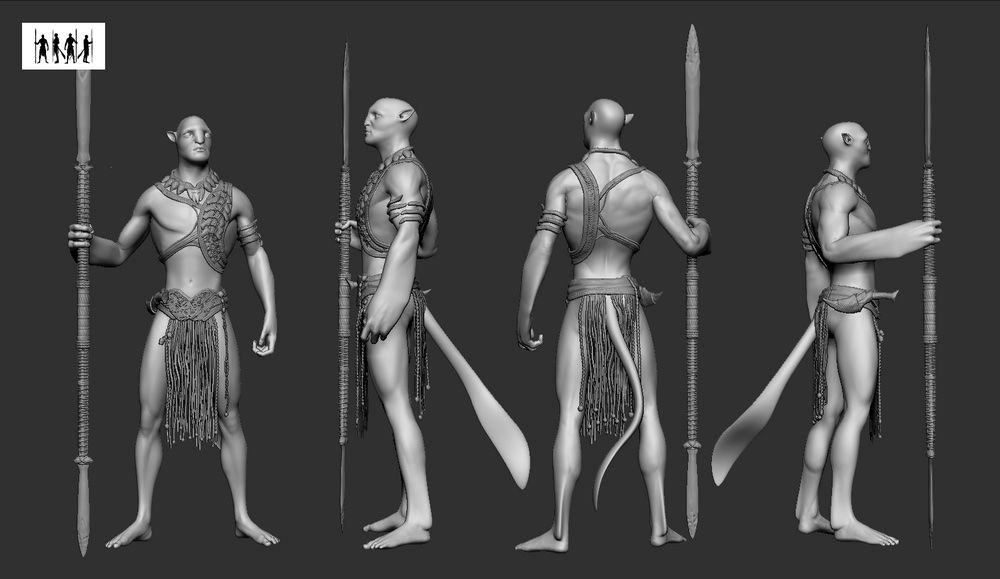
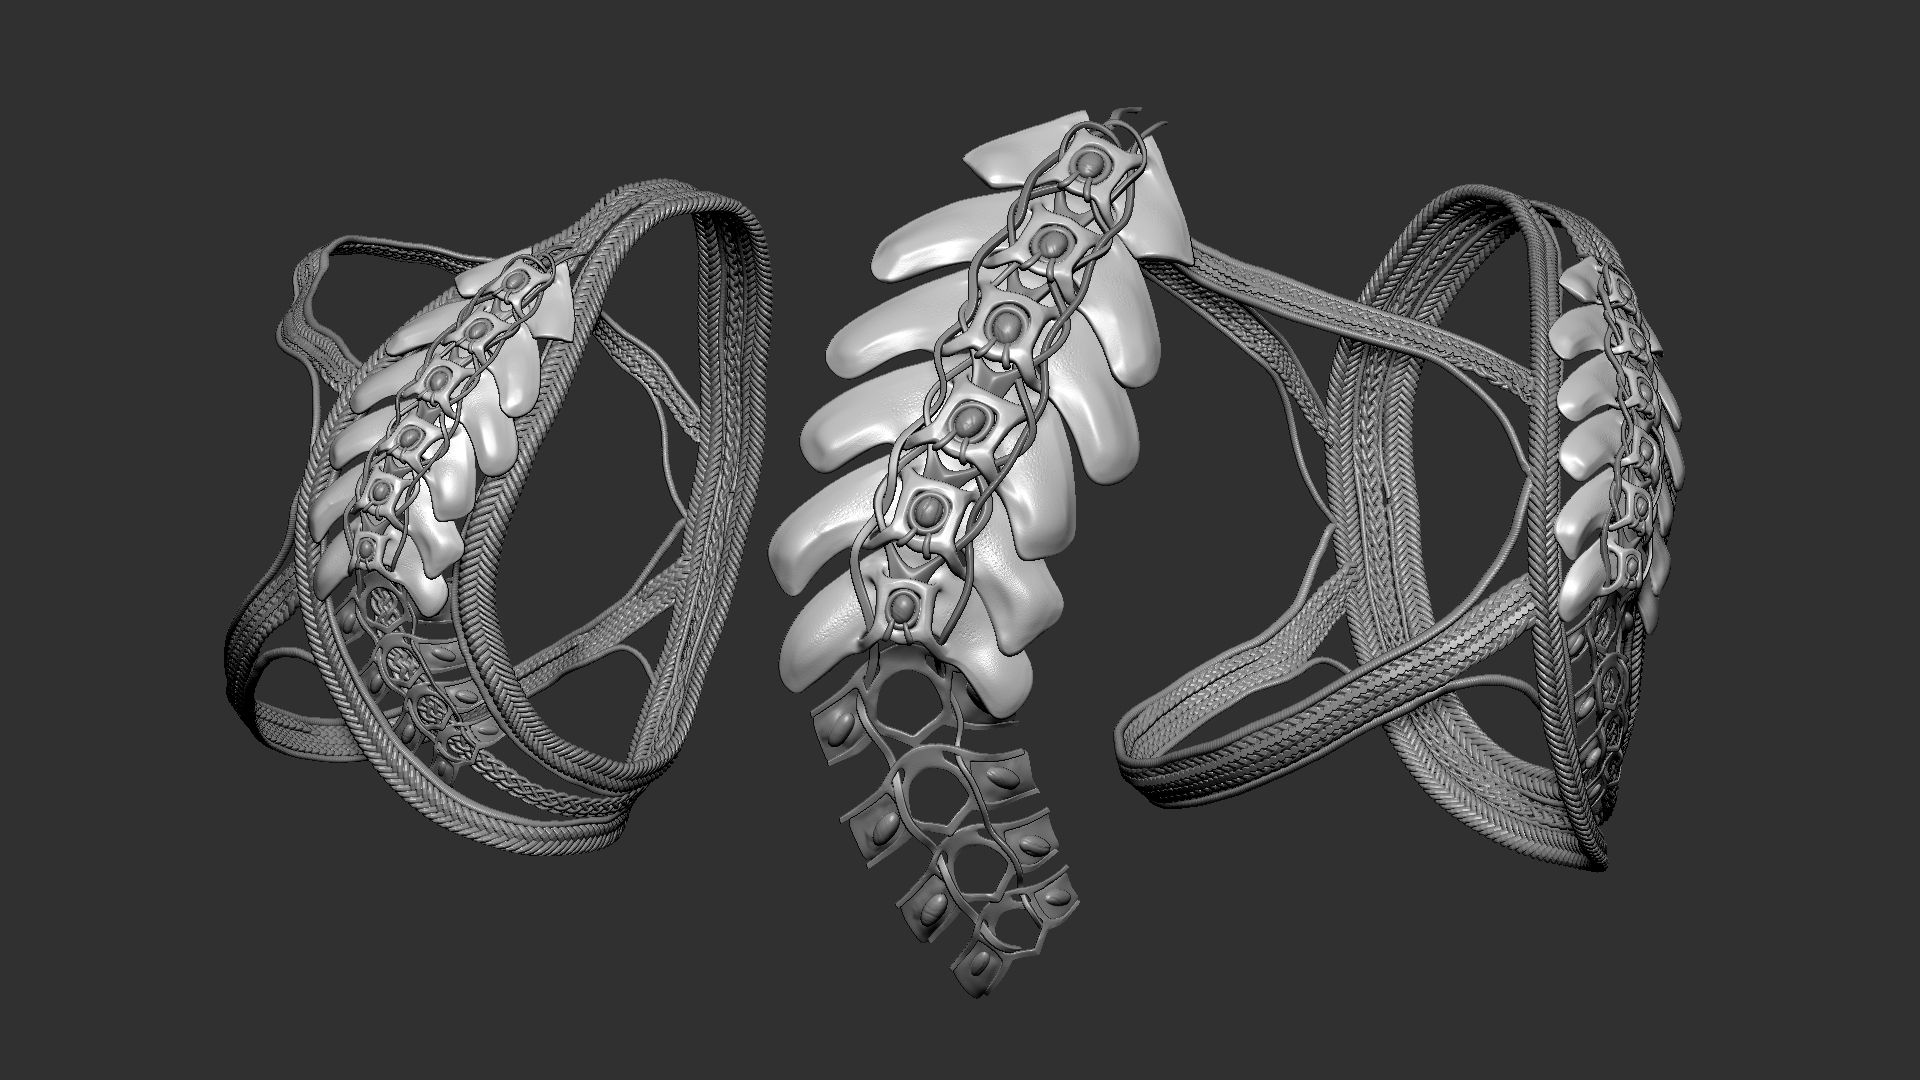
As for the various props, I frequently switched between ZBrush and Maya. For instance, to create the belt buckle, I first modeled curves in Maya that followed the leather turns of the reference. Then, I generated geometry based on those curves and added details in ZBrush.

I did a similar procedure for the various laces and braids of the breastplate.
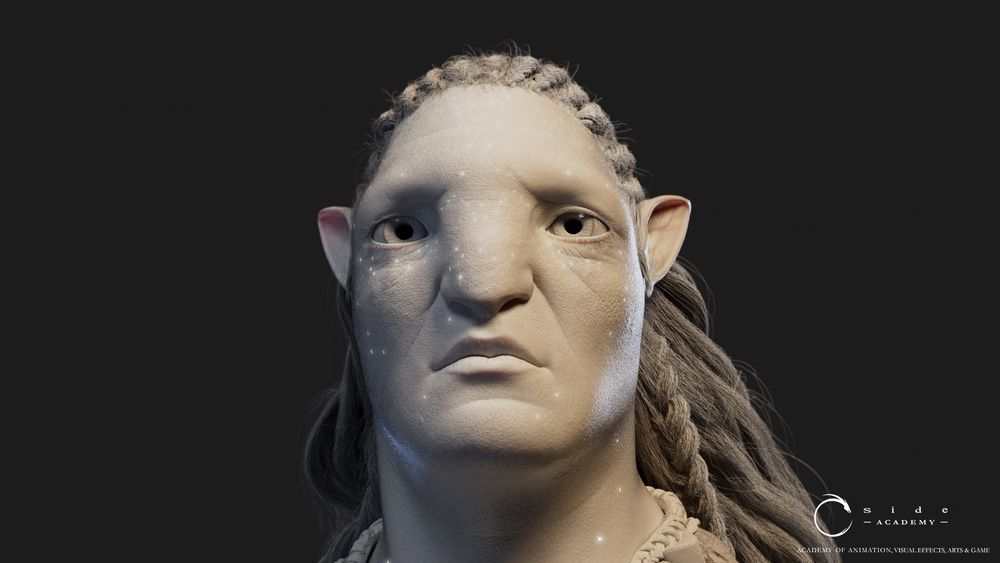
For the details of the skin, especially the details of the face, I used the so-called "Killer Workflow" by Texturing XYZ. This method consists of applying a photoscan of a human face with all its details to another model, using the maps provided by TexturingXYZ, Zwrap and XNormal.

As for the various props, I frequently switched between ZBrush and Maya. For instance, to create the belt buckle, I first modeled curves in Maya that followed the leather turns of the reference. Then, I generated geometry based on those curves and added details in ZBrush.


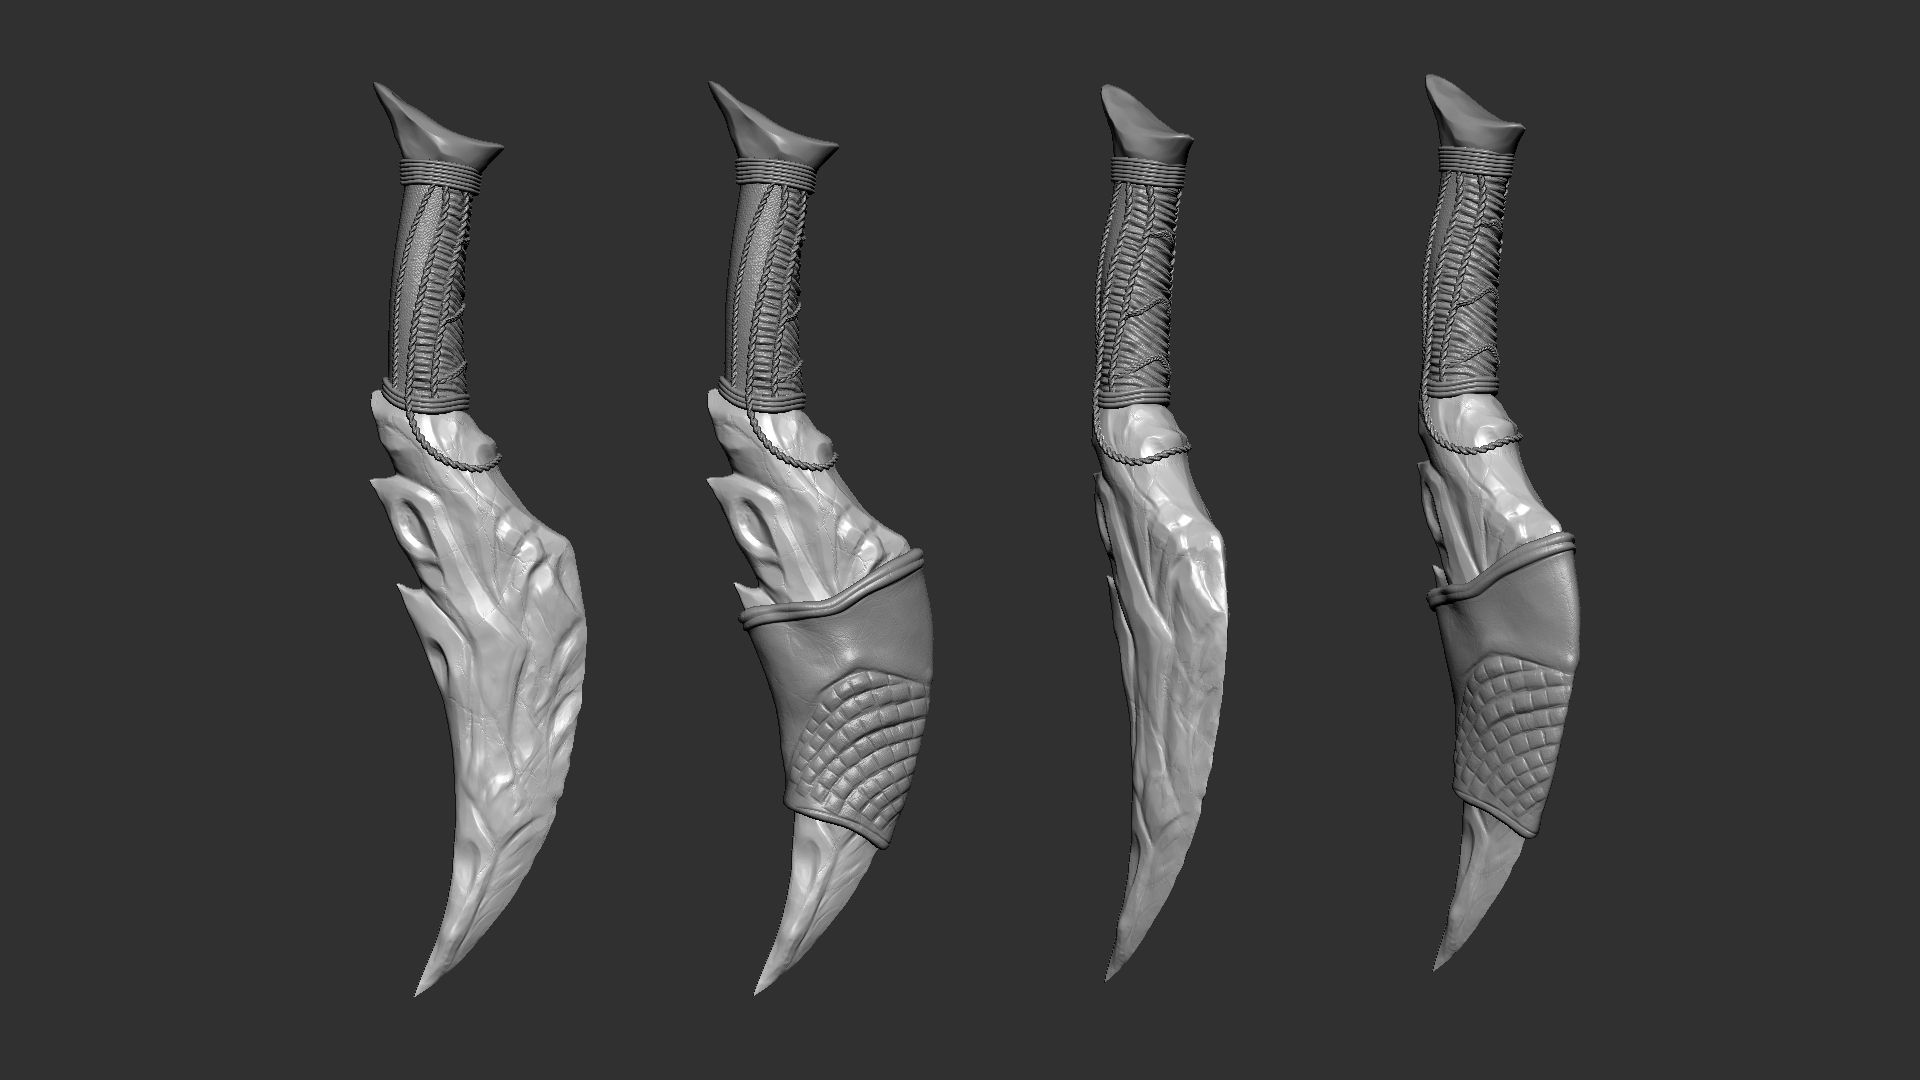
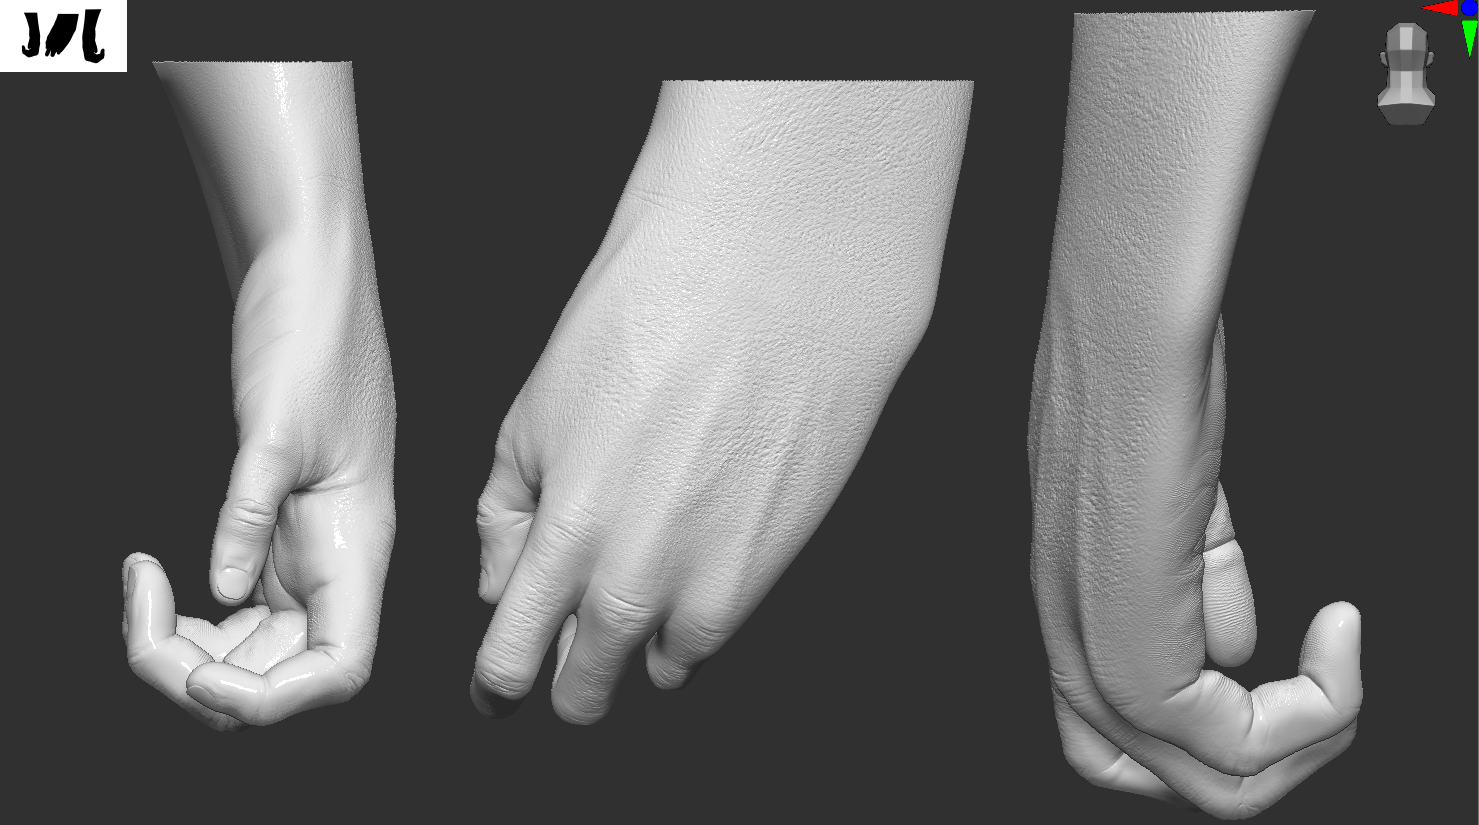
For the rest of the body, especially for hands and feet, unfortunately, I did not have any scans available. Therefore, I went to add the details the old-fashioned way, using various Alphas and adding them by hand or using the Noise tool by ZBrush.


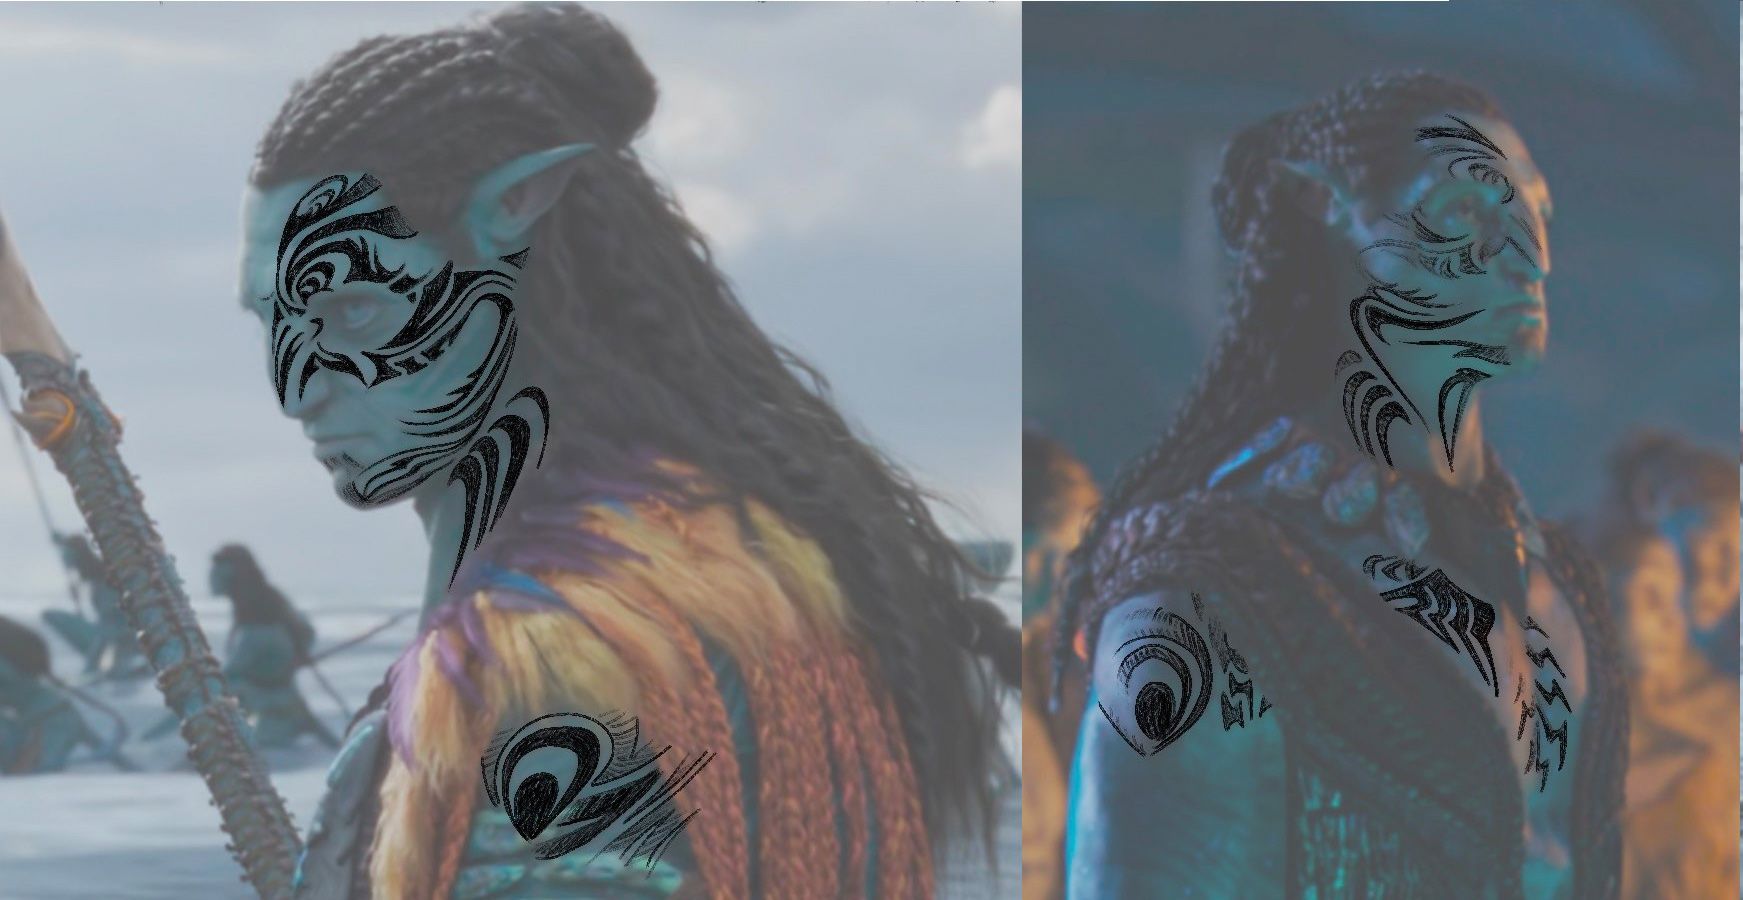
For the texturing part, I utilised Substance 3D Painter, and I must admit I had a lot of fun, especially with creating the skin. The most time-consuming aspect was reproducing the tattoos that Tonowari has on the upper body. To create them, I used Photoshop to generate alphas by tracing the reference tattoos. Then, I applied them as stencils in Substance to establish a starting base.


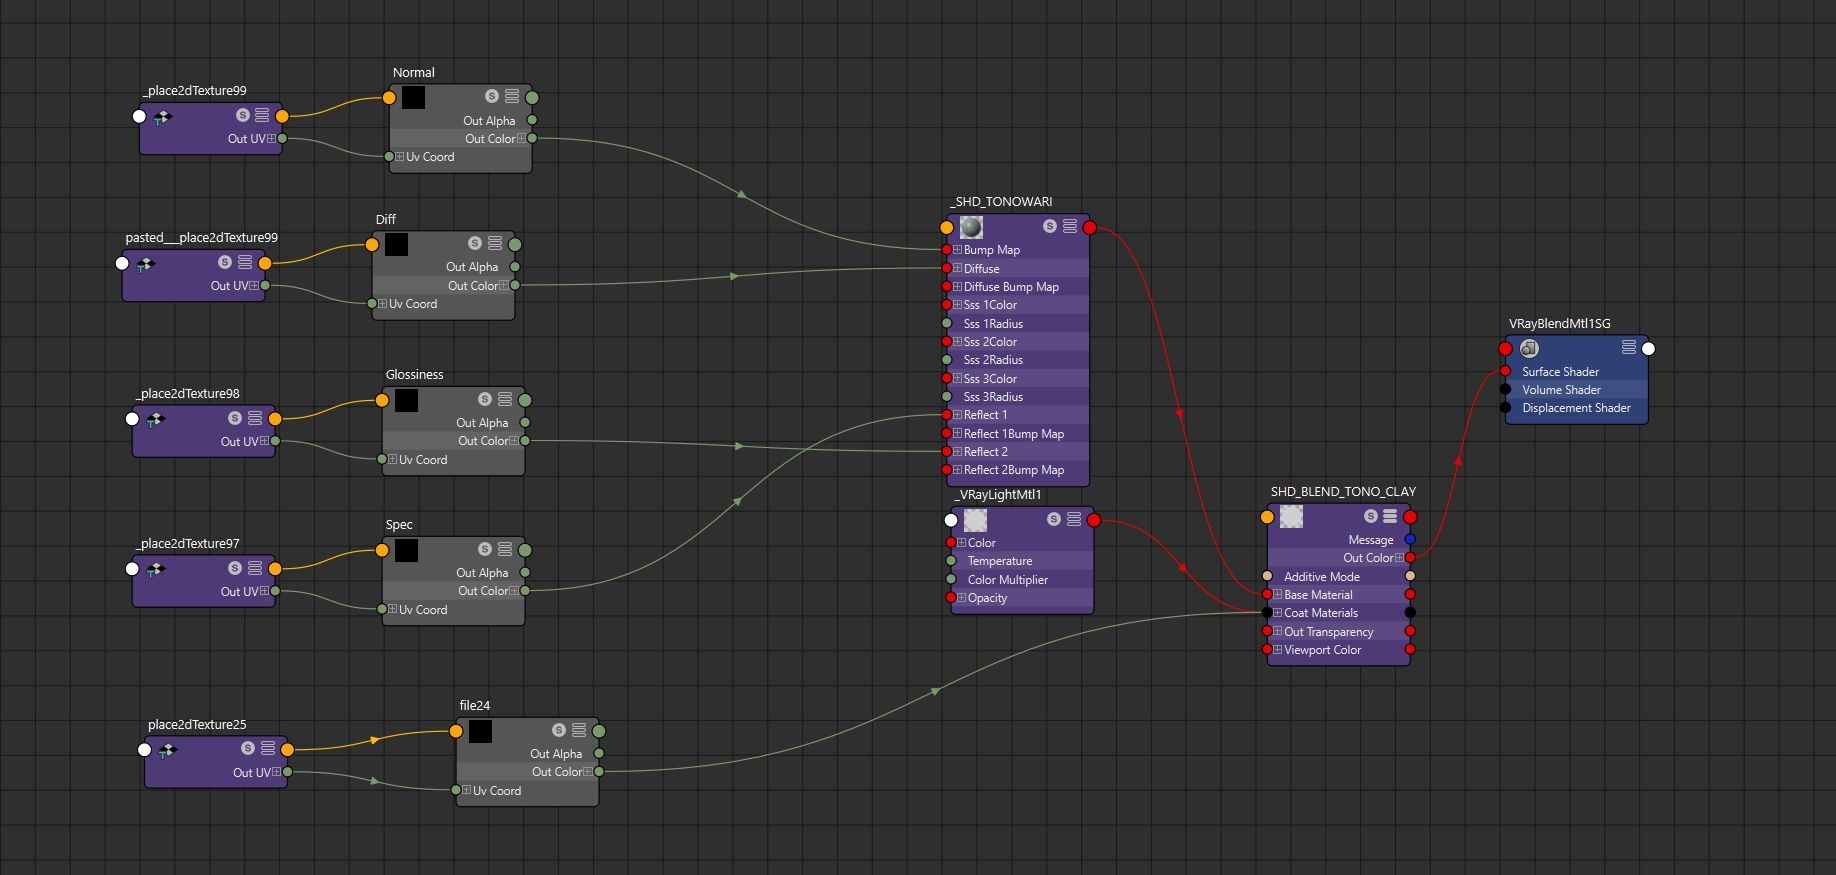
One particular task was creating an emissive map for the skin shader because all creatures in the world of Pandora (the planet featured in the "Avatar" franchise films) have these fluorescent parts, and Tonowari is no exception. I created it using Substance. In V-Ray, I then utilised a Blend Material to combine the Skin Shader with an Emissive Shader, using the previously created mask.
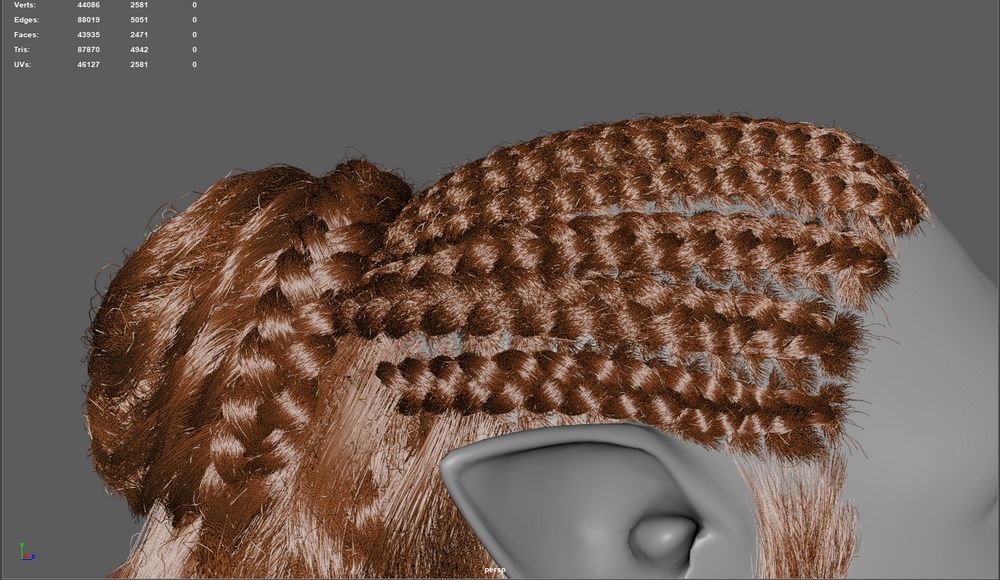
Before making the braids in XGen, I created a mesh of Tonowari's hair, which included numerous braids, a bun on the nape, and loose hair on the shoulders.
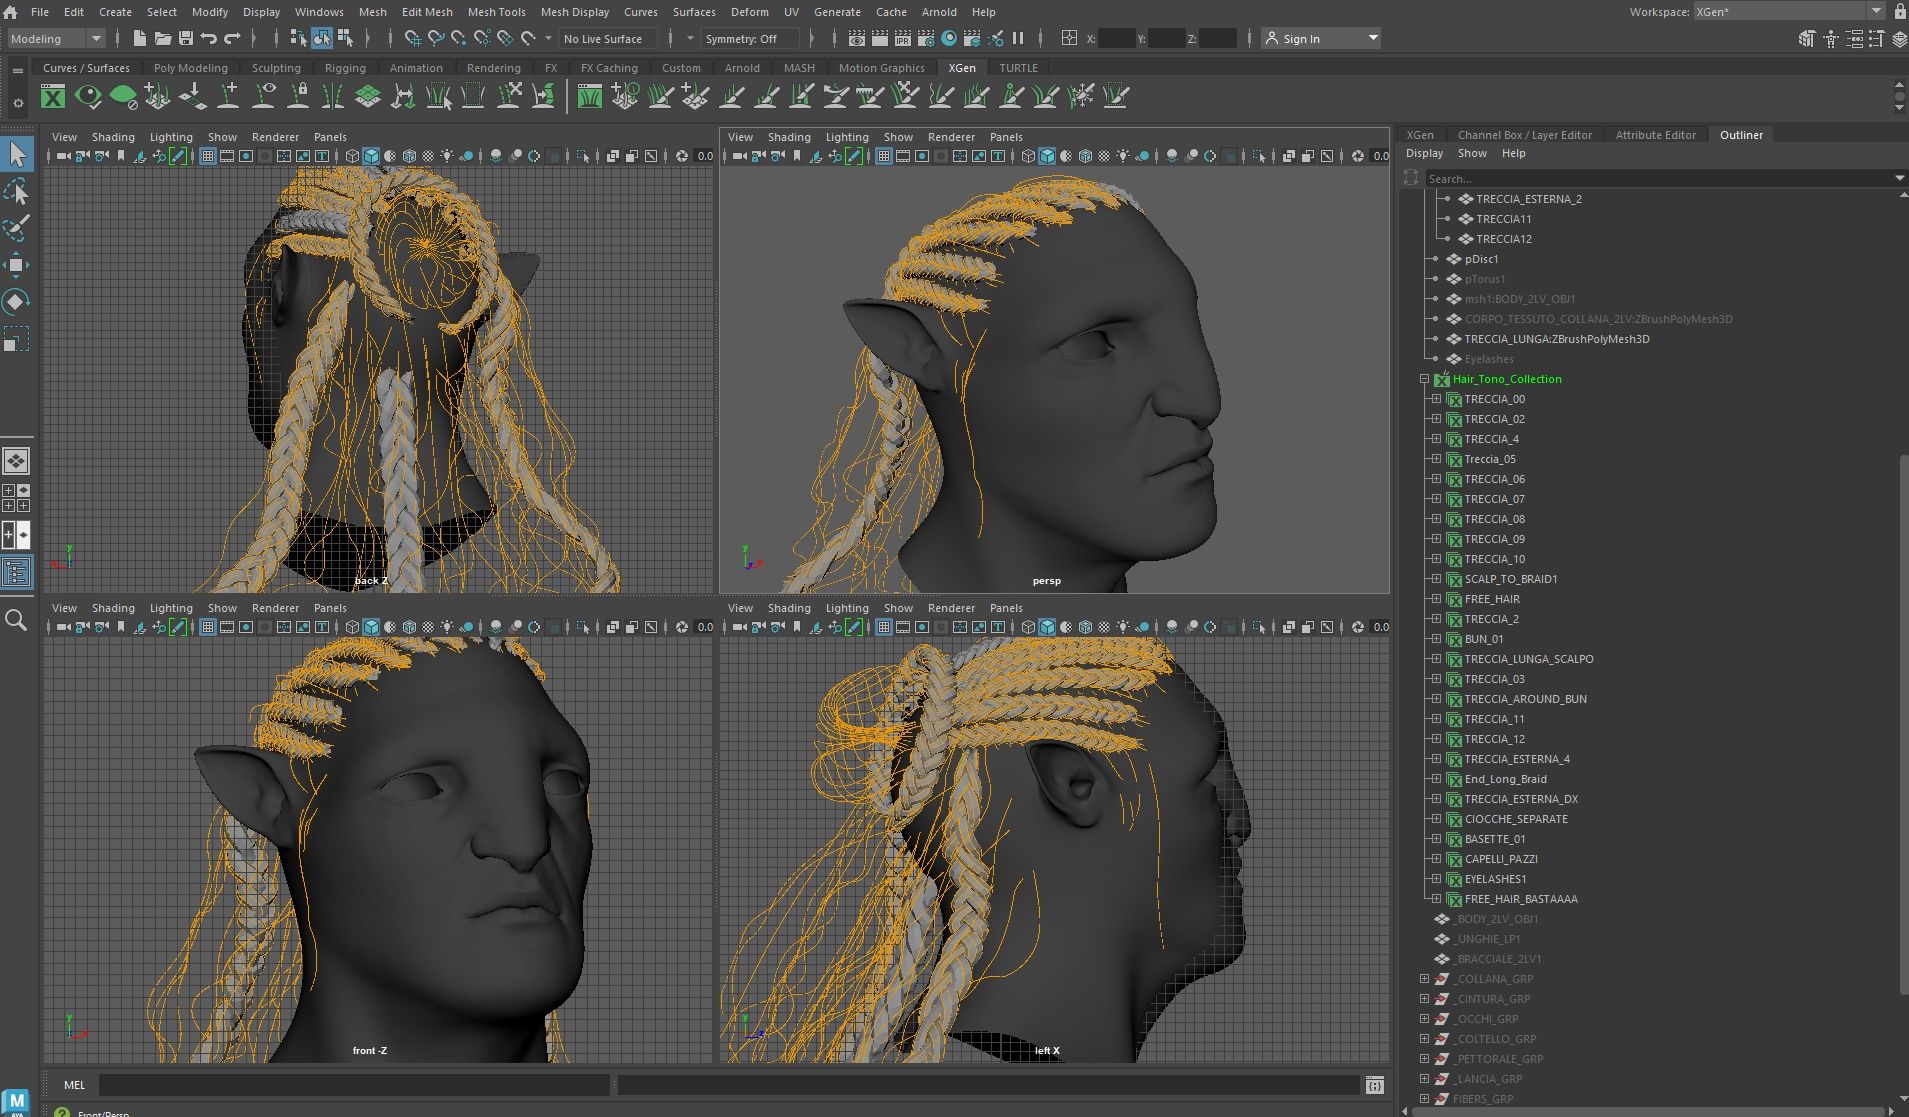
To create braids on Xgen:

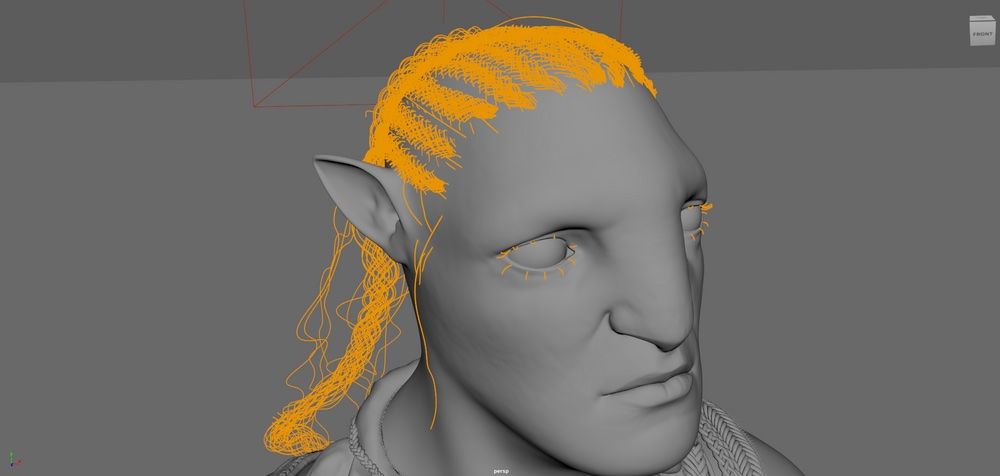
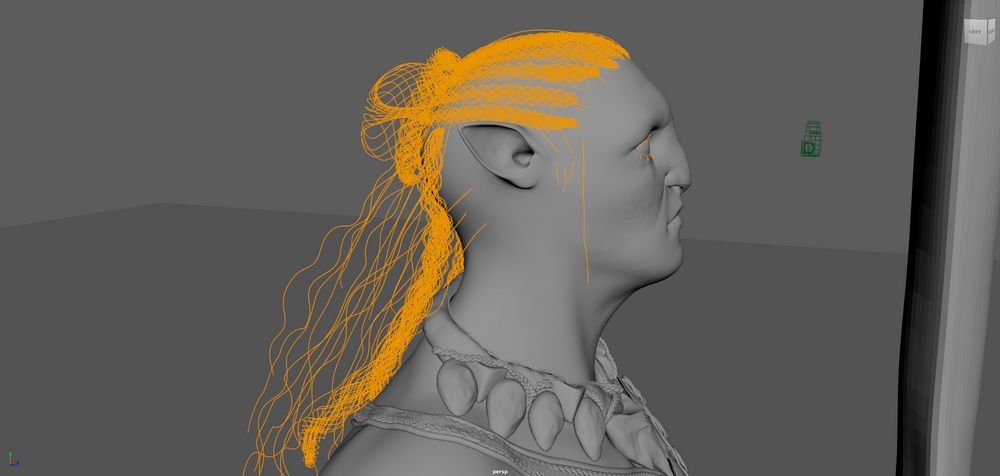

For each braid, I crafted a dedicated Xgen Description. The process was nearly identical for the bun behind the head. However, for loose hair, I directly modeled the guides originating from the head's scalp. Subsequently, I developed an Xgen Description exclusively for the hair inside the braids and another for the loose stray hair.

For rendering, I employed V-Ray from Chaos Group. I set up multiple cameras for still shots and various turntables, configuring render passes and layers in Maya. This enabled rendering of turntables for the beauty, clay, wireframe, and UV versions.

I composited in Nuke, separating passes with a Shuffle node to modify them individually before merging them into the beauty. Below, you can find an example of the process I used for the Emissive pass.

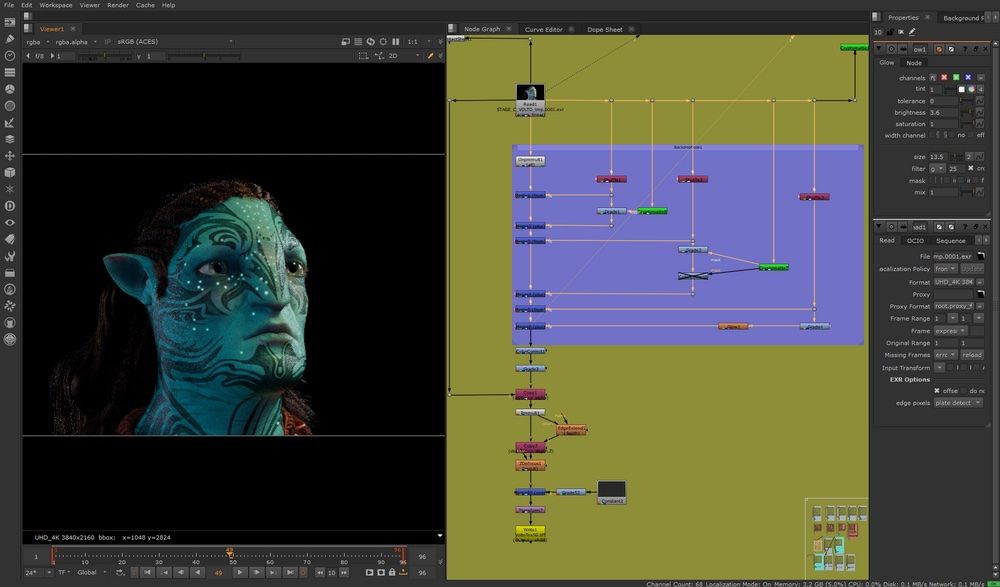
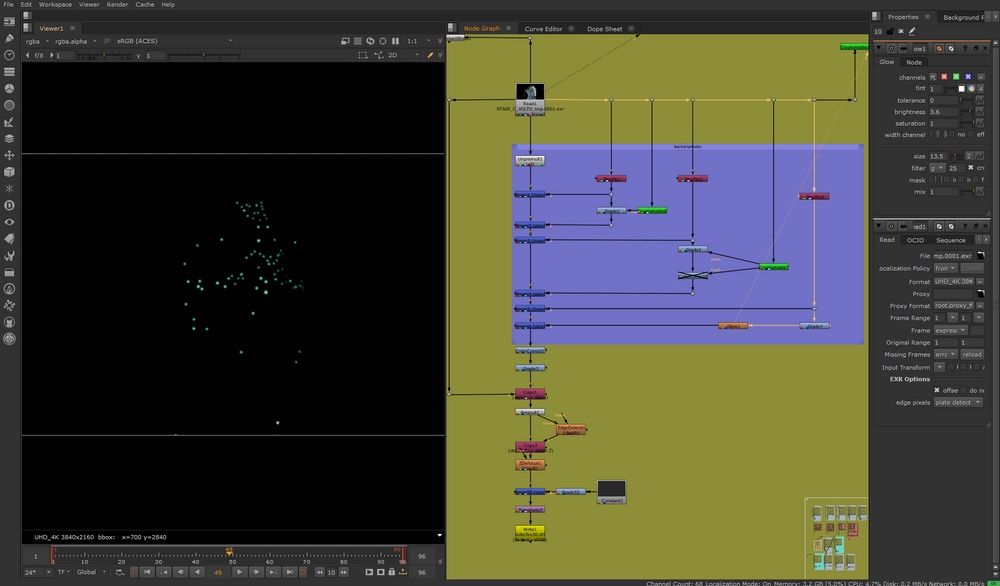
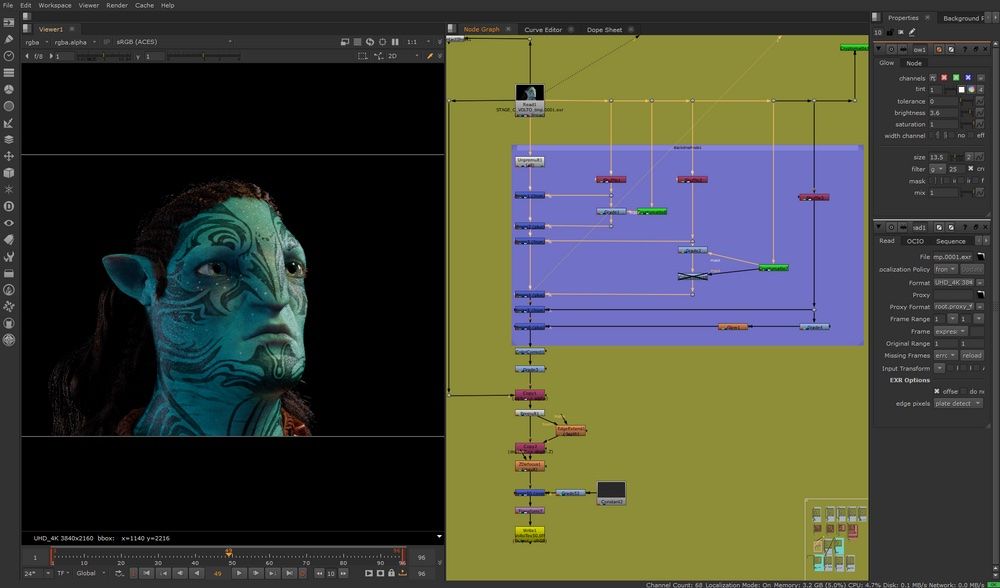
After fixing the various passes, I simply went to put a neutral background and export with a Write node. Here are some of the composite renders:

For this project, I want to extend my gratitude to Side Academy, Valeria Niculita (my tutor), Riccardo Meneghello (my supervisor), and The Rookies for the opportunity to share and discuss it. Check out my Rookies profile here.