Introduction
Screen recording has become an increasingly popular feature among tablet users. Whether you want to capture a tutorial, demonstrate an app, or even record your gaming skills, being able to screen record on your tablet can be incredibly useful. In this article, we will explore various methods that you can use to screen record on your tablet and provide tips for a better recording experience.
Tablets have revolutionized the way we consume content, and their portability makes them an ideal device for recording on-the-go. The ability to record your screen allows you to share your knowledge and skills with others or simply capture moments that you want to relive or share with friends and family.
While specific methods may vary depending on the tablet brand and model, we will cover some general techniques that should work for most tablets. So whether you own an iPad, Android tablet, or any other tablet device, continue reading to explore the different options available to you.
Before we delve into the methods, it’s important to note that while some tablets come with built-in screen recording features, others may require the use of third-party apps or external tools. Additionally, the steps may differ slightly depending on the operating system version of your tablet. Rest assured, though, that we will provide you with options suitable for a range of tablets and operating systems.
Why Screen Recording on a Tablet?
Screen recording on a tablet offers a wide range of benefits and can serve multiple purposes. Let’s explore some of the key reasons why you may want to consider screen recording on your tablet:
- Tutorials and Demonstrations: Screen recording is an excellent tool for creating tutorials or demonstrations. Whether you’re sharing a step-by-step guide, teaching a skill, or showcasing an app’s features, a tablet screen recording allows you to capture every detail with ease.
- Showcasing Creativity: Tablets are often used for creating artwork, animations, or design projects. Screen recording allows you to capture your creative process, making it easier to showcase your work to others or even create time-lapse videos.
- Gaming and App Reviews: If you’re an avid gamer or someone who enjoys exploring different apps, screen recording is a valuable tool for recording your gameplay or reviewing apps. You can share your gaming achievements, provide tips and tricks, or even create engaging app reviews.
- Remote Learning and Collaboration: With the increasing popularity of remote learning and virtual collaborations, screen recording on a tablet can be incredibly useful. You can record online classes, webinars, or collaborative sessions and review them later or share them with others who may have missed the live session.
- Bug Reporting and Troubleshooting: If you encounter a bug or issue with a particular app or website, screen recording allows you to capture the problem and provide a more detailed explanation when reporting the issue to developers or support teams. This can help in resolving the problem more efficiently.
These are just a few examples of how screen recording on a tablet can enhance your productivity, creativity, and communication. The ability to capture your tablet’s screen opens up a world of possibilities, whether you’re a content creator, educator, gamer, or simply someone who loves exploring new apps and features.
Now that we have discussed the reasons behind screen recording on a tablet, let’s move on to the methods you can use to achieve this.
What You Will Need
Before you start screen recording on your tablet, there are a few things you will need:
- A Tablet: Of course, you will need a tablet device that is capable of capturing screen recordings. Whether you have an iPad, an Android tablet, or any other tablet, make sure it is in good working condition.
- Updated Operating System: Ensure that your tablet’s operating system is up to date. This is important because some screen recording features or apps may require the latest version of the operating system to work properly. Check for any available software updates and install them before proceeding.
- Storage Space: Screen recordings can take up a significant amount of storage space, especially if they are in high definition. Make sure you have enough free space on your tablet to accommodate the screen recordings.
- Screen Recording App (if necessary): While some tablets have built-in screen recording features, others may require the use of third-party screen recording apps. Depending on your tablet model, you may need to find and download a reliable screen recording app from your respective app store.
- External Microphone (optional): If you plan to record audio along with your screen recording, consider using an external microphone for better audio quality. While most tablets have built-in microphones, an external microphone can provide clearer and more professional audio.
- Mount or Stand (optional): To keep your tablet stable and minimize camera shake during screen recording, you may want to invest in a tablet mount or stand. This is particularly useful if you need to record tutorials or demonstrations that require steady positioning of your tablet.
Having these essentials in place will ensure a smooth and hassle-free screen recording experience on your tablet. Now that you have everything you need, let’s explore the different methods you can use to screen record on your tablet.
Method 1: Built-in Screen Recording Feature
Many modern tablets come equipped with a built-in screen recording feature, making it convenient and easy to capture your device’s screen without the need for third-party apps. Here is how you can use the built-in screen recording feature on your tablet:
- Start by navigating to the screen or app that you want to record. Make sure everything is set up the way you want it to appear in the screen recording.
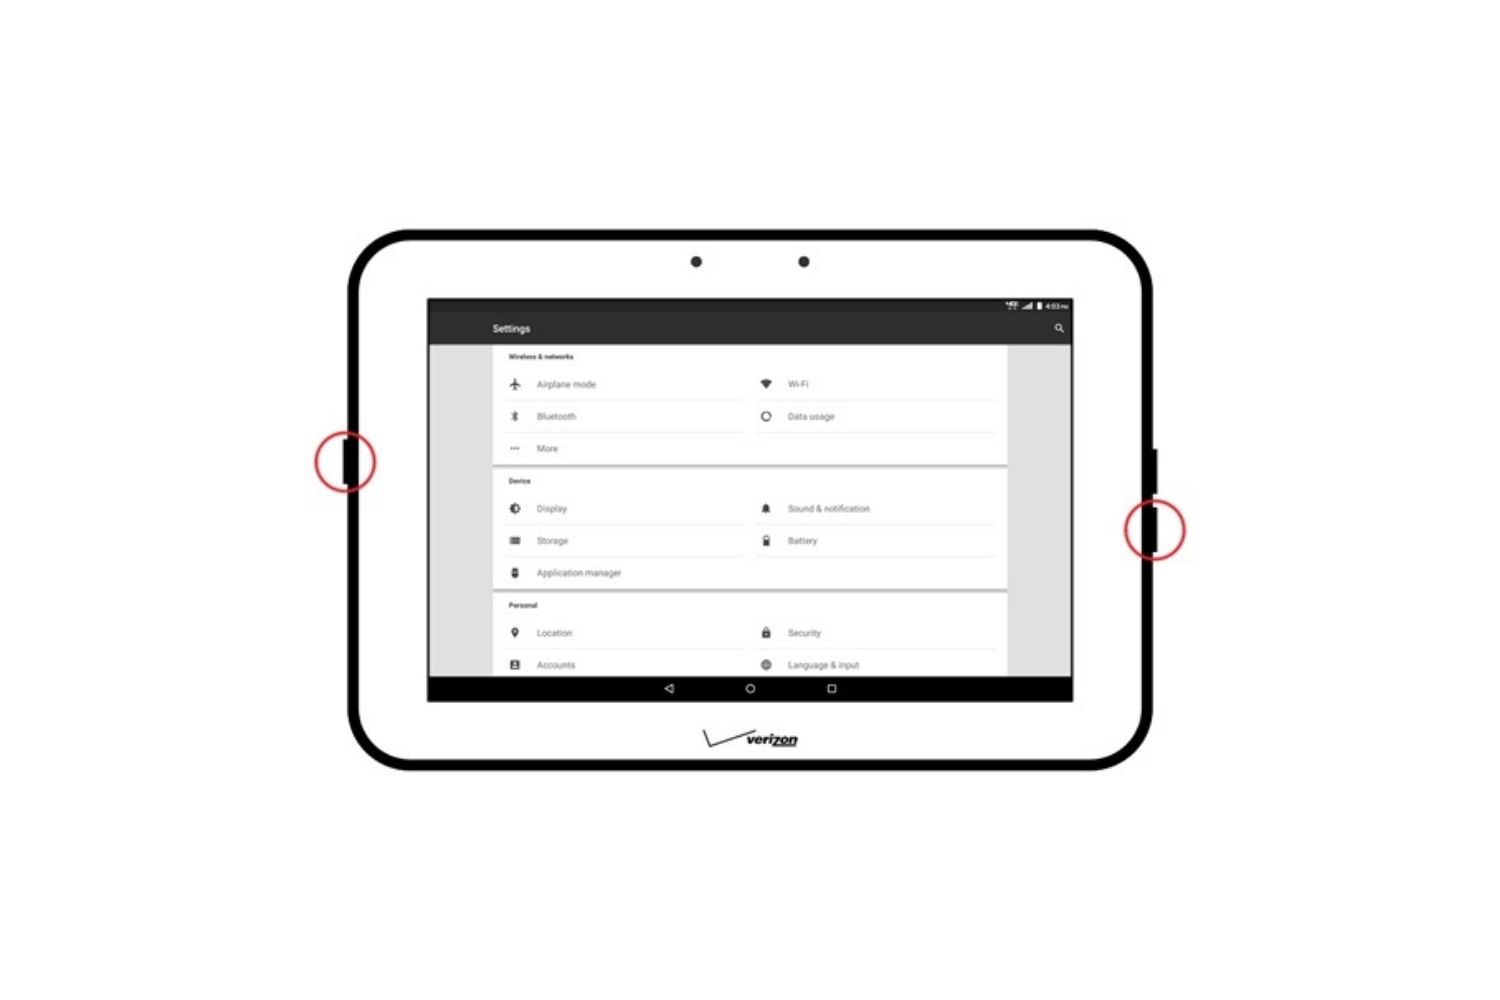
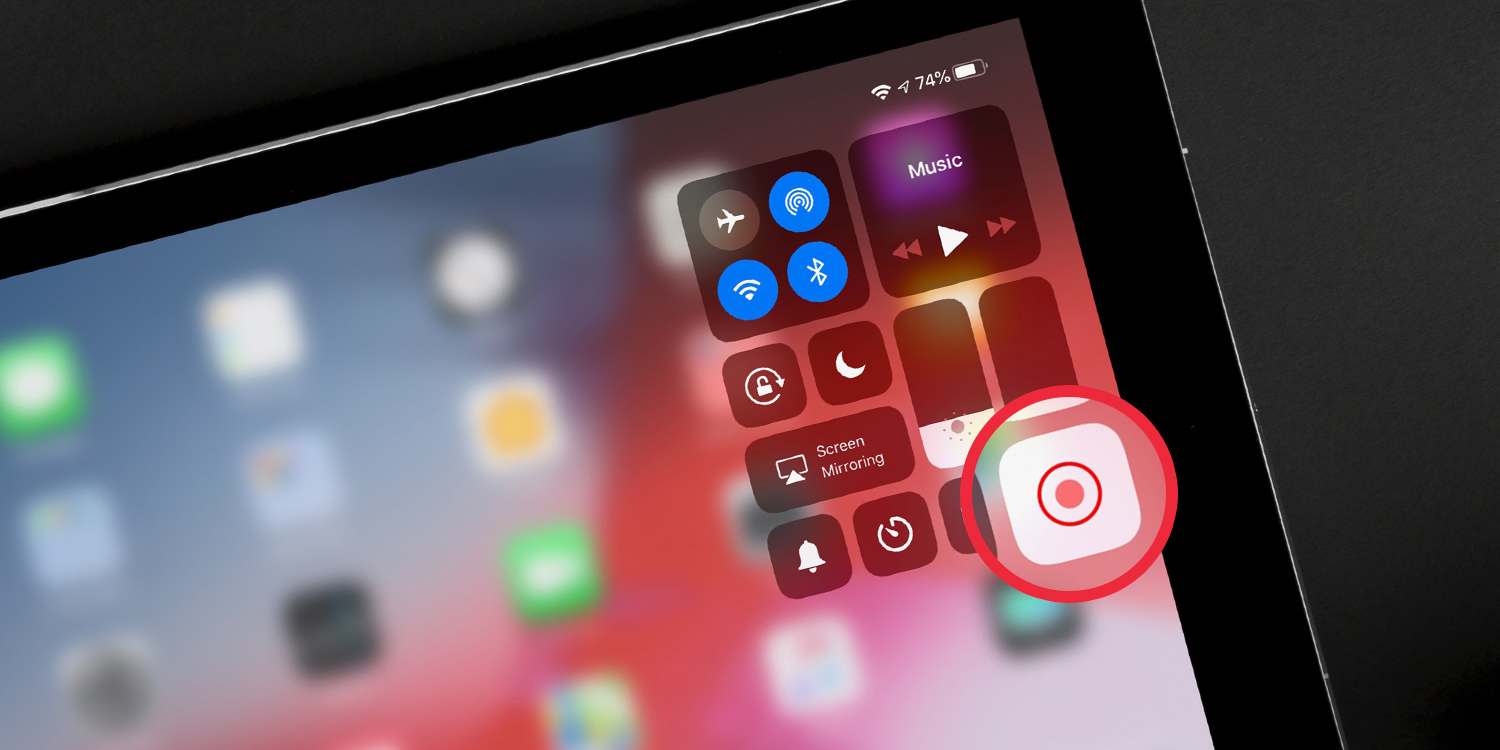
- Next, access your tablet’s control center or notification panel. The method to do this may vary depending on the operating system and tablet model you have.
- Look for the screen recording button or icon. It is usually represented by a circle inside a square, resembling a record button. Tap on it to start the screen recording.
- A pop-up menu may appear, asking you to confirm if you want to record the entire screen or only a portion of it. Select the desired option based on your preference.
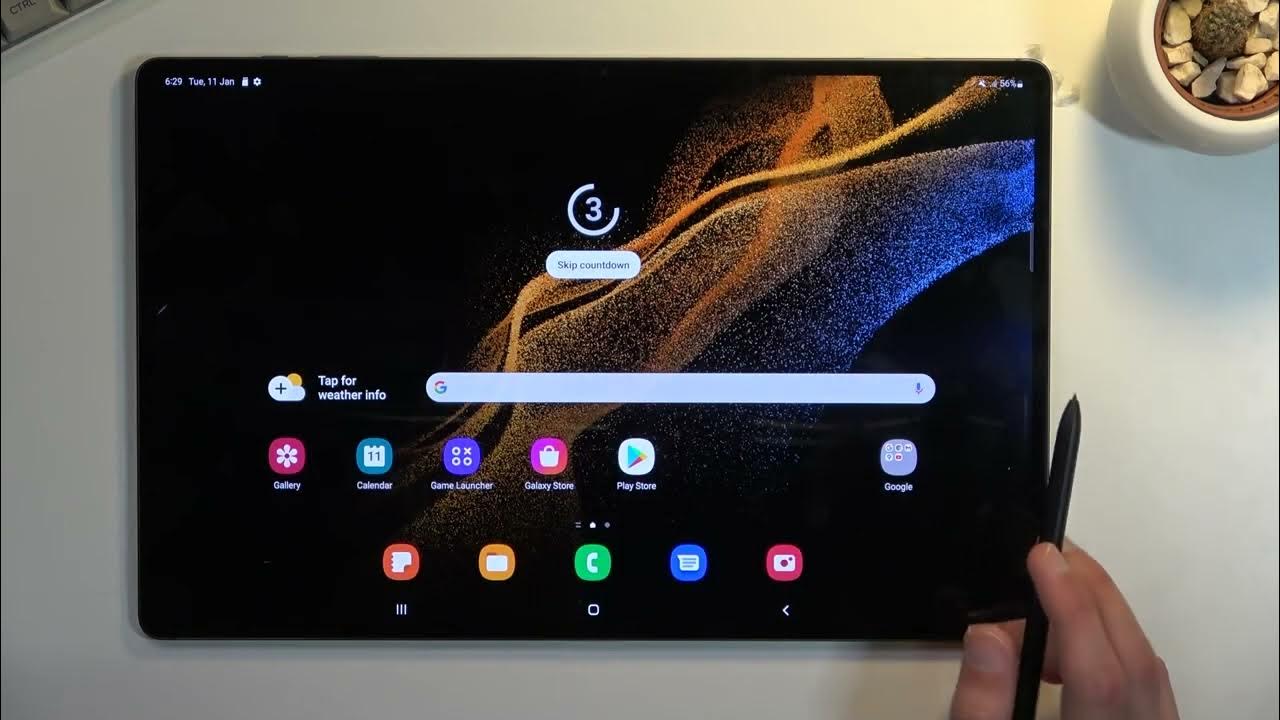
- The screen recording will begin after a short countdown, allowing you to navigate through the screen or app you are recording.
- When you are finished recording, access the control center/notification panel again and tap on the screen recording icon to stop the recording.
- The screen recording will be saved to your tablet’s gallery or designated folder. You can now access, edit, or share the recorded video as needed.
It’s important to note that the exact procedure for using the built-in screen recording feature may vary depending on your tablet’s brand, model, and operating system version. If you are unsure of how to access the screen recording feature, refer to your tablet’s user manual or conduct an online search for specific instructions.
The built-in screen recording feature provides a straightforward and convenient method for capturing screen recordings on your tablet. However, if your tablet does not have this feature or you require more advanced screen recording options, you can explore other methods such as using a screen recording app, as we will discuss in the next section.
Method 2: Using a Screen Recording App
If your tablet does not have a built-in screen recording feature or if you need additional recording options, you can use a screen recording app. These apps offer more flexibility and customization for your screen recording needs. Here are the general steps to use a screen recording app on your tablet:
- Go to your tablet’s app store (such as Google Play Store for Android devices or the App Store for iPads) and search for a screen recording app. There are several popular options available, such as AZ Screen Recorder, DU Recorder, or ScreenFlow.
- Read the app descriptions, reviews, and ratings to choose a reliable and highly-rated screen recording app that suits your needs. Download and install the app on your tablet.
- Launch the screen recording app and familiarize yourself with its user interface and settings.
- Adjust the recording settings as desired. You may have options to select video resolution, frame rate, audio source, and other settings. Customize the settings based on your requirements and preferences.
- Once you have configured the settings, navigate to the screen or app you want to record.
- Open the screen recording app and locate the recording button on its interface. It is typically represented by a circle or a camera icon.
- Tap on the recording button to start the screen recording. The app may display a countdown timer before the recording begins.
- Proceed with your screen recording, interacting with the screen or app as you normally would.
- When you have finished recording, return to the screen recording app and tap on the stop or pause button to end the recording.
- The recorded video will be saved to your tablet’s gallery or a designated folder within the screen recording app. You can access, edit, and share the recording as needed.
Remember that the specific features and steps may vary depending on the screen recording app you choose and the tablet you are using. Take some time to explore the app’s settings and options to fully utilize its features and capabilities.
Using a screen recording app gives you more control and flexibility over your screen recordings. You can customize various settings and access additional features that may not be available with the built-in screen recording feature. Experiment with different apps to find the one that best suits your requirements.
Method 3: Mirroring to a PC and Recording
Another method to screen record on your tablet is by mirroring your tablet’s screen to a PC and recording it using screen recording software. This method provides more advanced recording options and the ability to capture your tablet’s screen on a larger display. Here’s how you can use this method:
- Make sure you have a PC or laptop with screen recording software installed. There are various screen recording software options available, such as OBS Studio, Camtasia, or Bandicam.
- On your tablet, ensure that both your tablet and PC are connected to the same Wi-Fi network.
- On your tablet, go to the settings and look for the “Screen Mirroring” or “Cast” option. This may vary depending on your tablet’s brand and model.
- Select your PC from the list of available devices for screen mirroring.
- On your PC, open the screen recording software. Set it up to record the “screen” or “window” that is displaying the tablet’s screen.
- Once the screen mirroring is established and the recording software is set up, you can start recording the tablet’s screen on your PC.
- Interact with your tablet as you normally would while the screen recording is ongoing.
- When you are done with the screen recording, stop the recording using the screen recording software on your PC.
- The recorded video will be saved on your PC’s designated folder, as specified by the screen recording software.
- You can now access, edit, and share the recorded video as needed.
It’s important to note that this method requires a stable Wi-Fi connection between your tablet and PC. Additionally, the screen mirroring and recording software settings may vary depending on the specific software you choose. Be sure to follow the instructions provided by the software to ensure successful screen recording.
Mirroring your tablet’s screen to a PC and recording offers more advanced recording options and the ability to utilize screen recording software features. This method is particularly useful if you want to record longer sessions or if you prefer the convenience of editing and managing your recordings on a PC.
Tips and Tricks for Better Screen Recording on a Tablet
To enhance your screen recording experience on a tablet and produce high-quality recordings, consider implementing the following tips and tricks:
- Plan and Prepare: Before starting a screen recording, plan and organize what you want to capture. Clear clutter from your tablet’s screen, close any unnecessary apps, and ensure that your tablet is fully charged or connected to a power source.
- Use a Stable Surface: When recording, place your tablet on a stable surface or use a tablet mount or stand to minimize camera shake. This will help maintain a steady recording and prevent distractions for your viewers.
- Use Good Lighting: Make sure you have adequate lighting to ensure clear visibility on your tablet’s screen. Avoid overly bright or dim lighting situations, as it may affect the quality of the recorded video.
- Record in Landscape Mode: Unless specifically required, record your screen in landscape mode to provide a wider viewing experience. This is especially important if you are recording app tutorials or gameplay that may be best viewed in landscape orientation.
- Focus and Zoom: When recording, ensure that the critical elements on your tablet’s screen are in focus and clearly visible. Use the zoom feature if necessary to highlight specific areas or details while recording.
- Speak Clearly and Concisely: If your screen recording includes audio narration or commentary, speak clearly and at a moderate pace. Avoid background noise and distractions to ensure that your voice is easily heard and understood.
- Utilize Annotations and Highlighters: Many screen recording apps or software offer annotation and highlighter tools. Use these features to draw attention to specific areas or provide additional explanations during the recording. This can enhance the viewer’s understanding and engagement.
- Review and Edit: Once you have finished recording, take the time to review the recorded video. Trim unnecessary sections, remove any mistakes, and make any edits or enhancements to improve the overall quality of the recording.
- Consider External Microphone: If
Conclusion
Screen recording on a tablet is a valuable tool that allows you to capture and share your tablet’s screen in various ways. Whether you want to create tutorials, showcase your creativity, review apps, or collaborate remotely, the ability to record your tablet’s screen provides endless possibilities.
In this article, we explored three methods for screen recording on a tablet. We discussed using the built-in screen recording feature, using screen recording apps, and mirroring the tablet’s screen to a PC. Each method offers its own advantages and may be suitable depending on your tablet model and personal preferences.
Additionally, we provided some tips and tricks to enhance your screen recording experience. Planning and preparing, using stable surfaces, optimizing lighting conditions, recording in landscape mode, and utilizing annotation tools are just a few examples of how you can improve the quality of your screen recordings.
Remember to familiarize yourself with your tablet’s specific features and settings, as well as the capabilities of any screen recording apps or software you choose to use. This will allow you to make the most of your tablet’s screen recording capabilities and produce high-quality recordings.
Whether you are a content creator, educator, gamer, or simply someone who enjoys exploring and sharing content, screen recording on a tablet is a valuable skill to have. So grab your tablet, implement the methods and tips discussed in this article, and start capturing and sharing your tablet’s screen in a whole new way.