Update 2023: Good news! Despite the Nepalese government introducing a new rule that requires all foreign hikers to be accompanied by a local guide while hiking nationwide in Nepal, the regional government of the Everest region has opted not to follow this new regulation. Consequently, you are not required to have a local licensed guide to hike the Everest Base Camp trail. Therefore, you should be able to use this hiking guide as it stands. Happy hiking!
After I went and trekked the Annapurna Base Camp in 2013, I couldn't get Nepal out of my head. I knew I was bound to be back at some point, and after 5 years, I was finally back trekking in Nepal again.
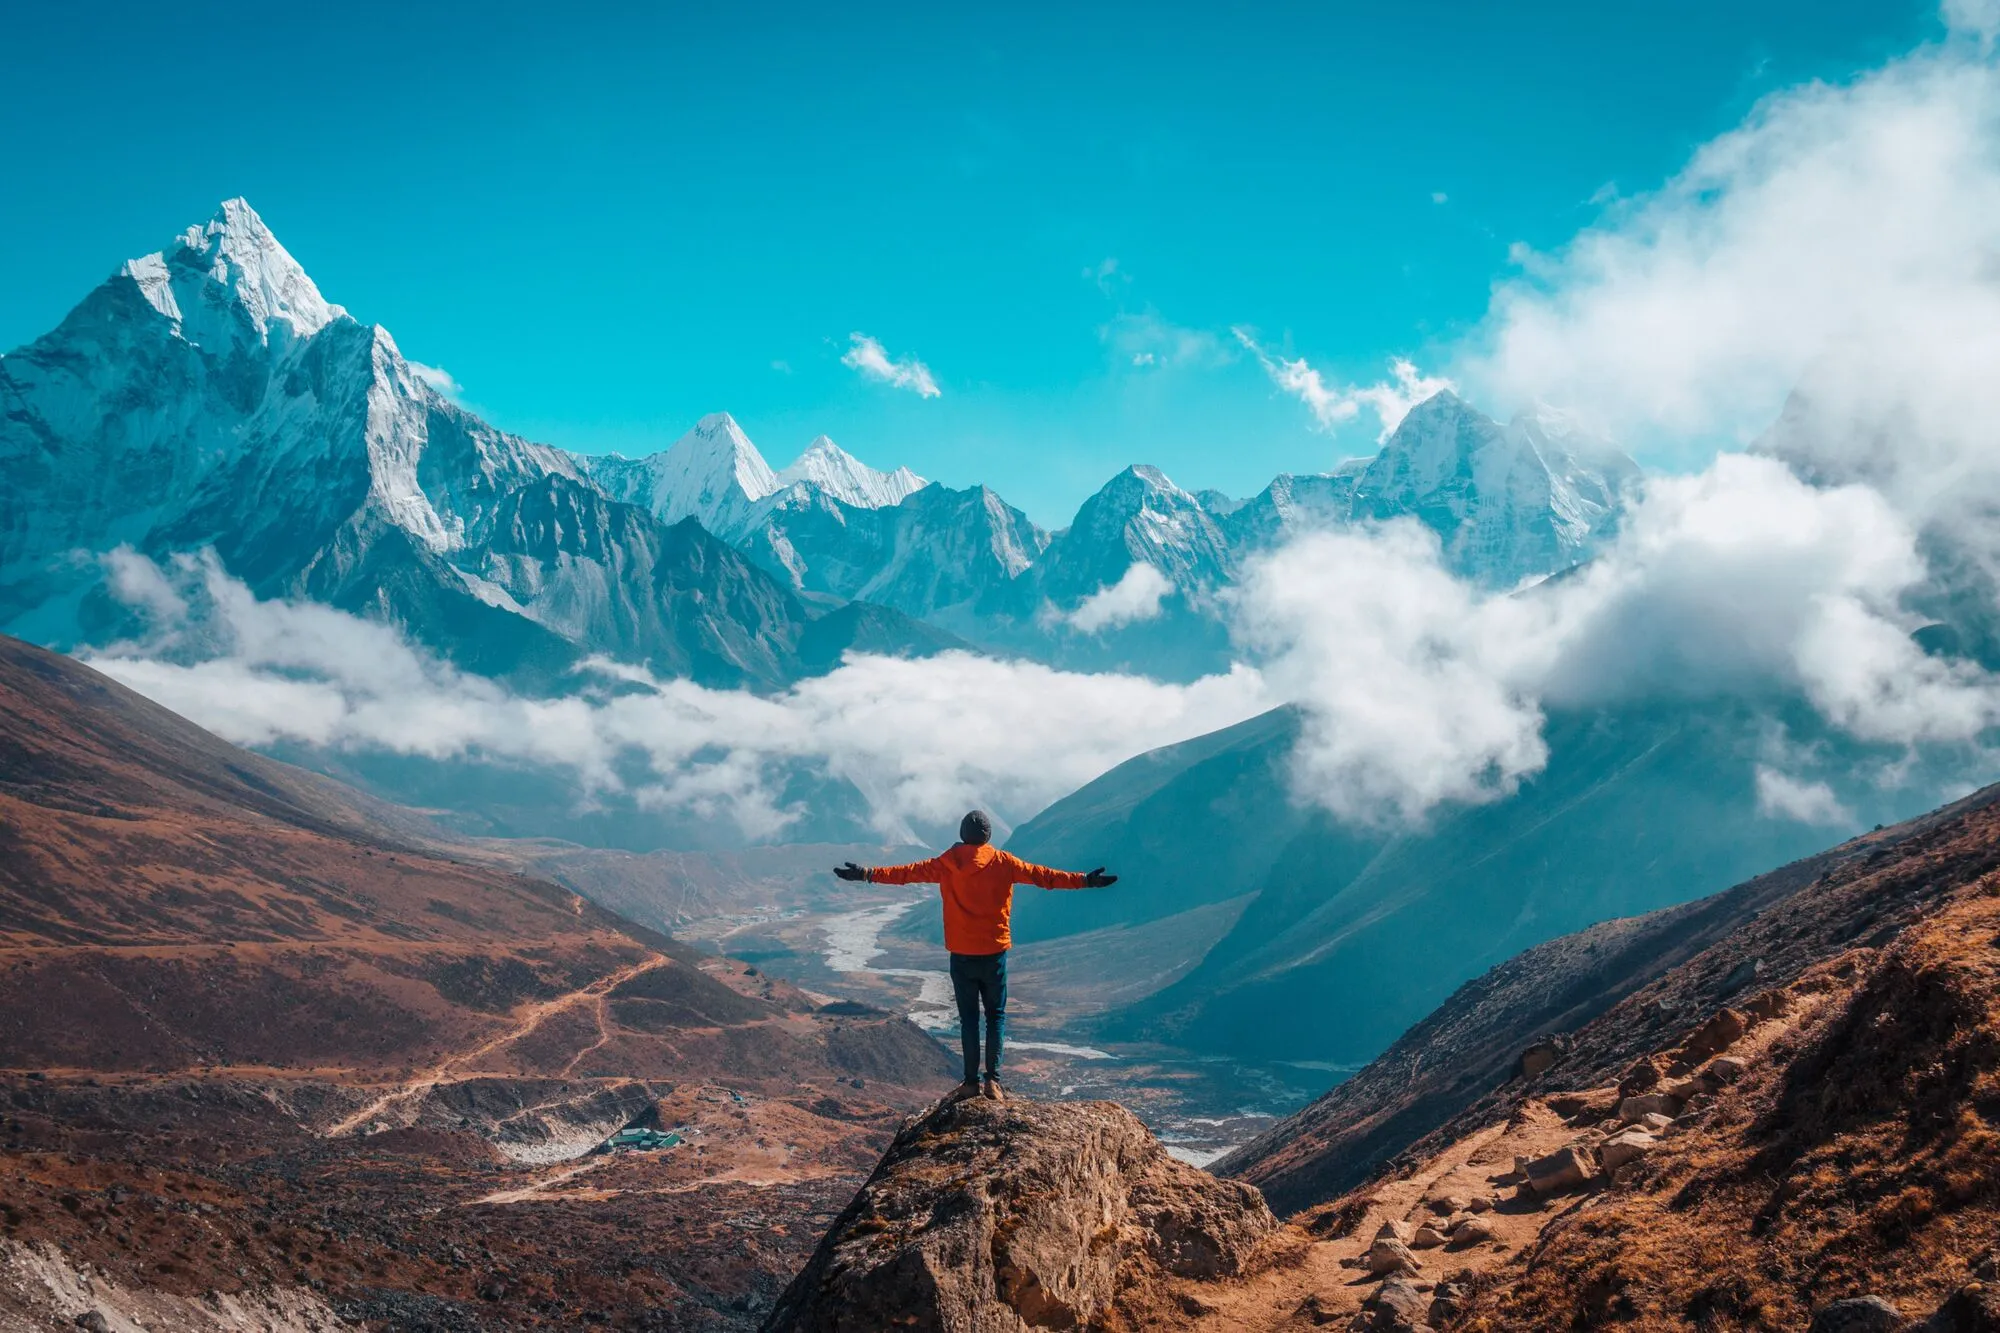
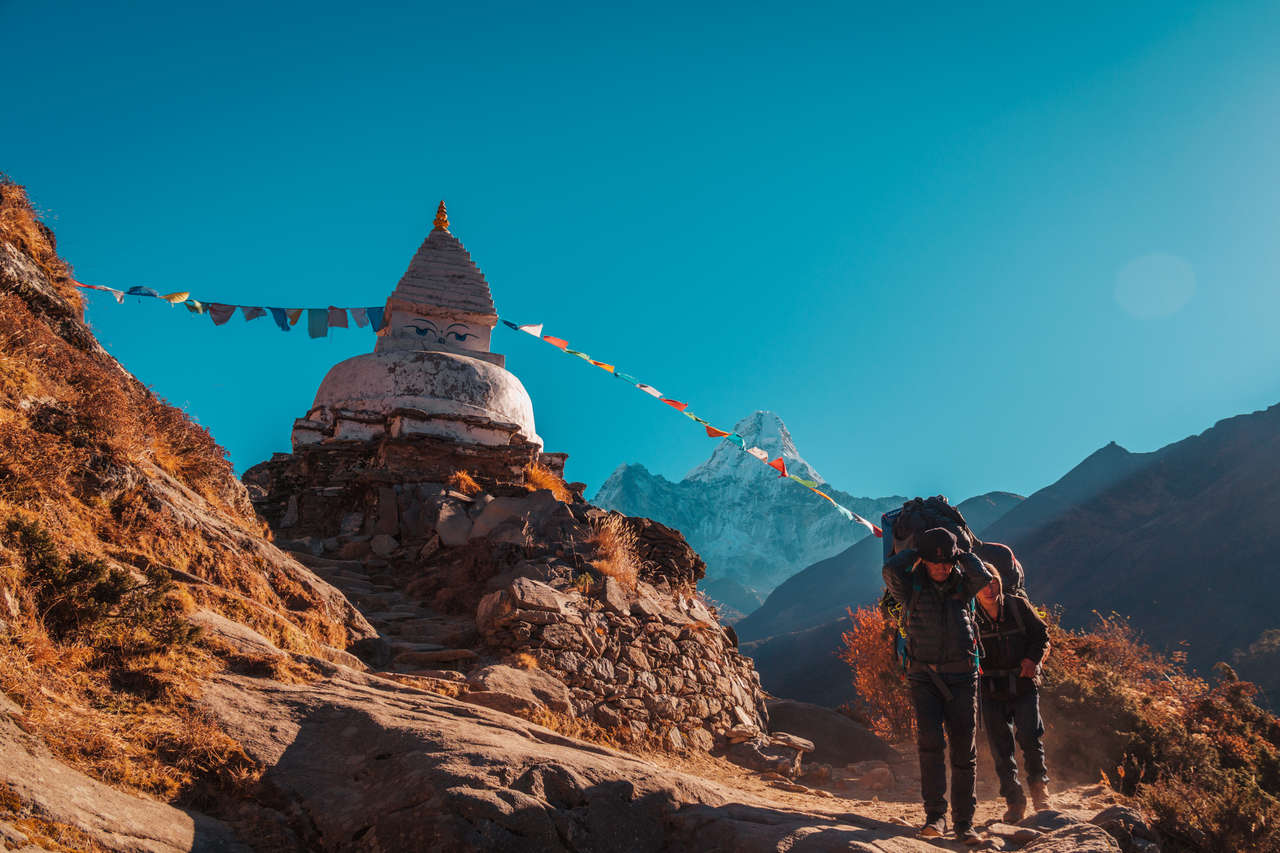
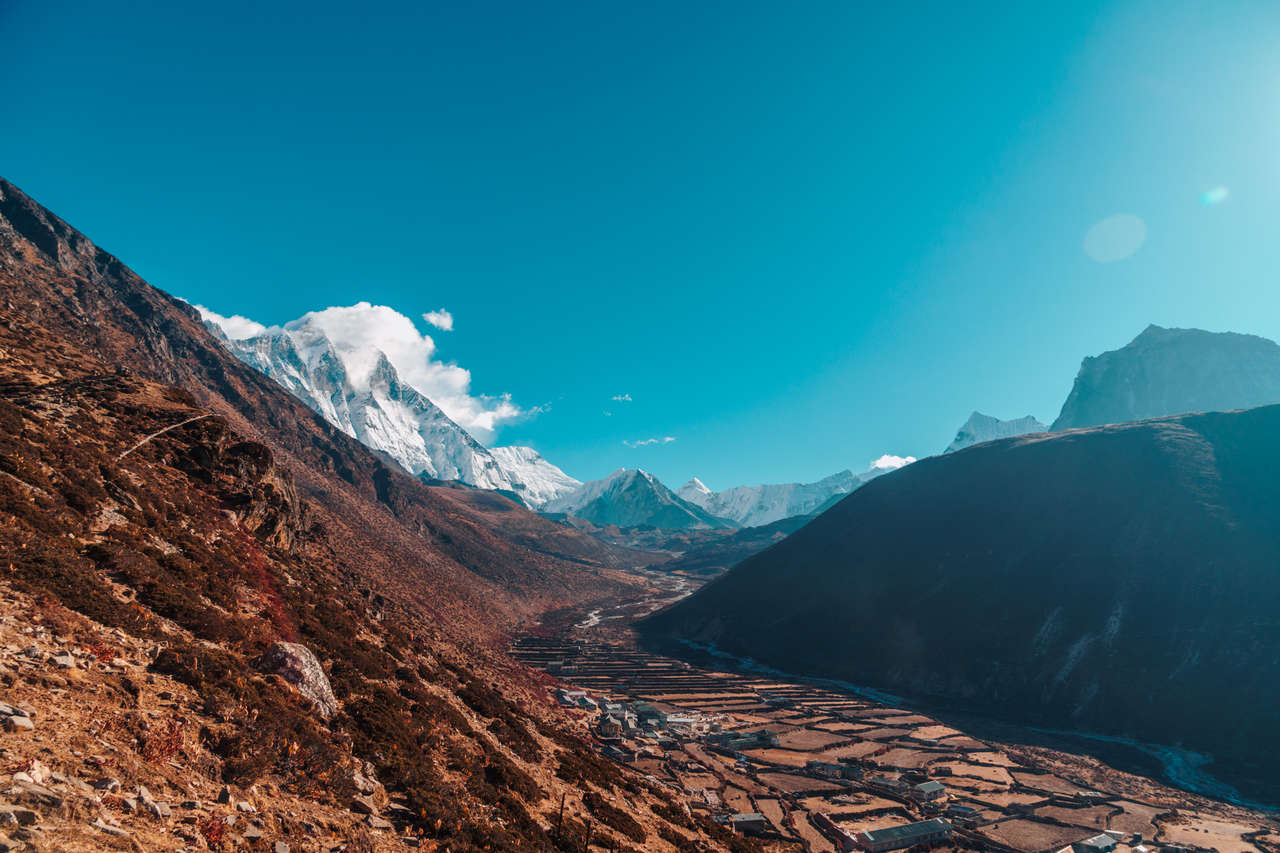
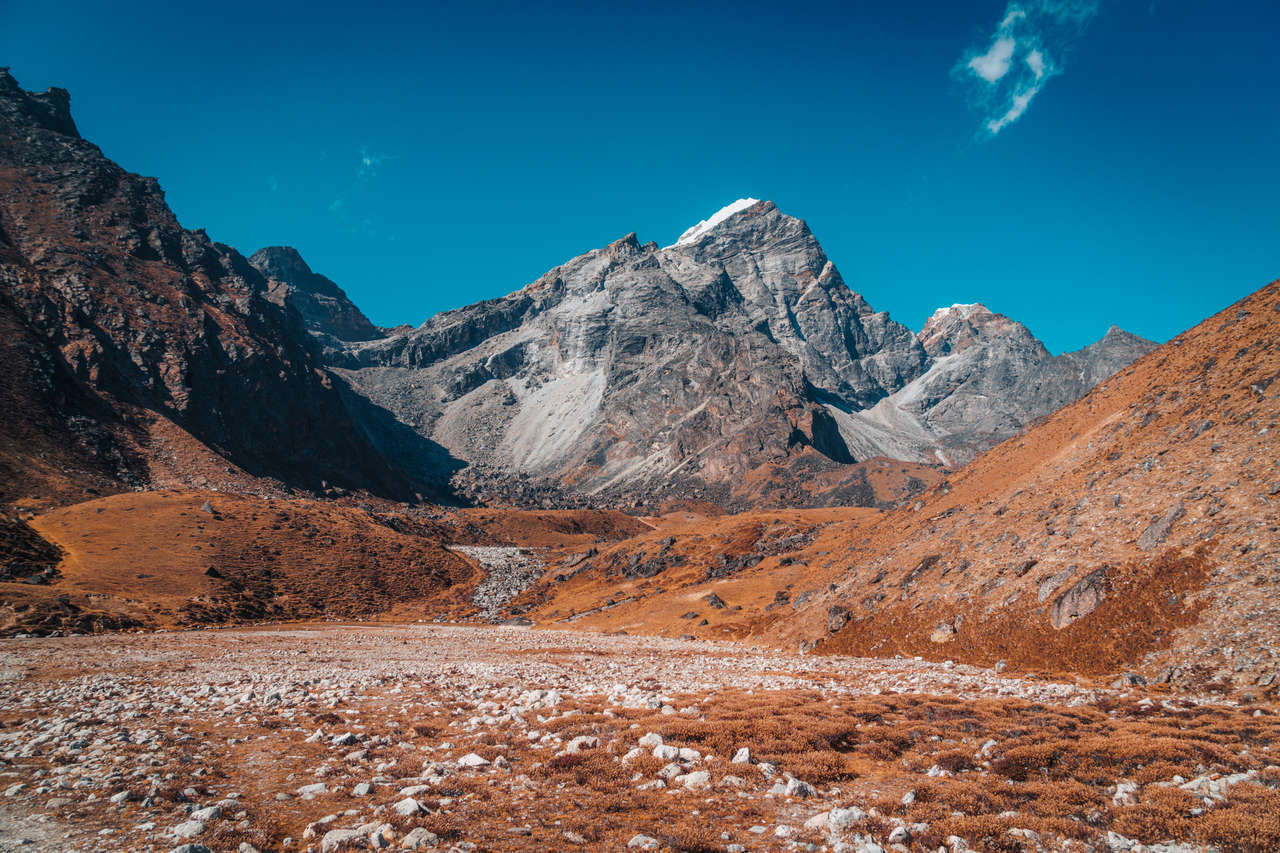
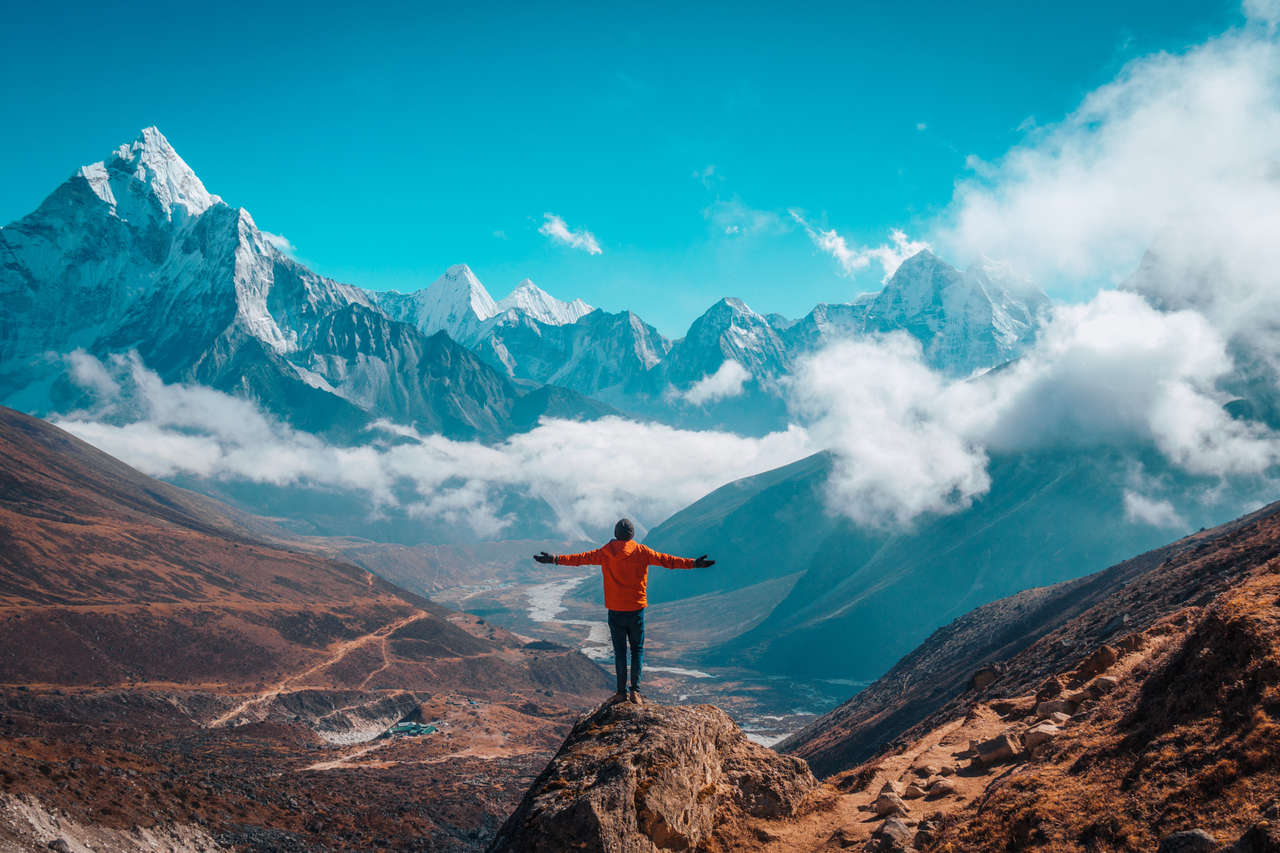
This time, I trekked the Everest Base Camp and Gokyo Lake trail, which covers around 120 km spanning over 15 days. It is the longest and highest trek I have ever done and one of the most memorable trekking experiences I have ever had throughout my 6 years on the road. The Himalayas do not disappoint!
Seeing Mount Everest with your own eyes is definitely a once-in-a-lifetime experience, and I'm here today to make it happen for you. This is the ultimate guide on how to trek to the Everest Base Camp independently.
A complete itinerary, things to prepare, where to stay, a day-by-day breakdown of my budget, and tons of stunning photos - here is everything you need to know to have the best trekking experience of your life.
- Everest Base Camp Trek Itinerary Map
- Quick Summary: 15 Days Everest Base Camp Trek Itinerary
-
15-Days Everest Base Camp Trek Itinerary
- Day 1: Kathmandu to Lukla to Monjo
- Day 2: Monjo to Namche Bazaar
- Day 3: Namche Bazaar
- Day 4: Namche Bazaar to Tengboche
- Day 5: Tengboche to Dingboche
- Day 6: Dingboche
- Day 7: Dingboche to Lobuche
- Day 8: Lobuche to Gorakshep to Everest Base Camp and back
- Day 9: Gorakshep to Kala Patthar to Dzongla
- Day 10: Dzongla to Chola Pass to Gokyo Lake
- Day 11: Gokyo Lake to Gokyo Ri and Back
- Day 12: Gokyo Lake to Dole
- Day 13: Dole to Namche Bazaar
- Day 14: Namche Bazaar to Lukla
- Day 15: Lukla to Kathmandu
- More Nepal Activities
- Everest Base Camp Travel Video
- When to Trek Everest Base Camp?
- How Much Does it cost to trek the Everest Base Camp trail?
- What are ways to save cost when trekking the Everest Base Camp Trail?
- How hard is trekking the Everest Base Camp Trail?
- What are things to know before trekking Everest Base Camp?
- What To Pack for Everest Base Camp Trek?
- How to Get to Lukla?
- Where to Stay in Kathmandu?
- Where to Stay on the Everest Base Camp Trail?
- Which tourist SIM card is best for Nepal?
- Further Reading for South Asia
Everest Base Camp Trek Itinerary Map
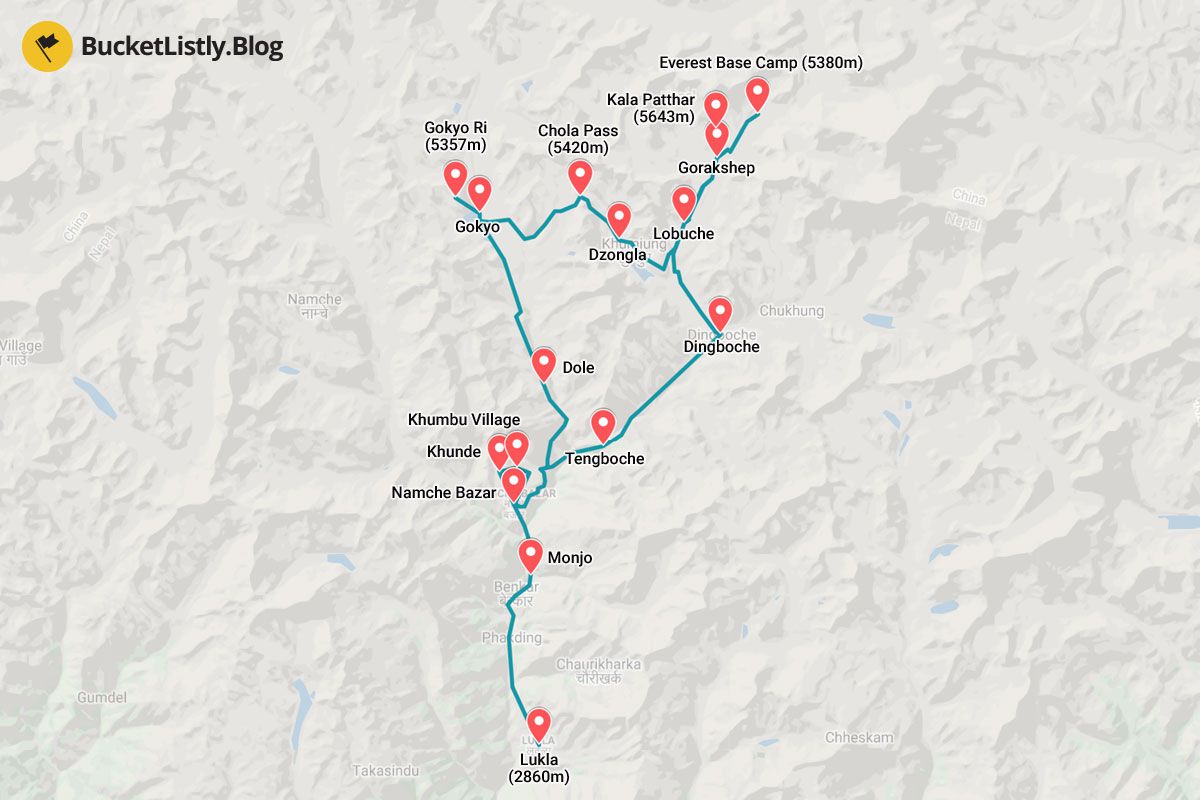
Quick Summary: 15 Days Everest Base Camp Trek Itinerary


- Shangrila Boutique Hotel (Budget)
- Kathmandu Mantra Home (Mid-Range)
- Arushi Boutique Hotel (High-End)
- Epic Everest Base Camp Trek 12 Days (12 days)
- The Amazing Everest Base Camp Trek (14 days)
- Hiking Adventure: Everest Base Camp Trek (16 days)
15-Days Everest Base Camp Trek Itinerary
Day 1: Kathmandu to Lukla to Monjo
Trek Time: 5 hours
Difficulty: Easy with a few ups and downs.
Where to Stay: Monjo Guesthouse - 200 NPR/Night (Twin Room).
Since most of the flights flying to Lukla are in the morning, there is plenty of daylight left when you arrive in Lukla. To avoid wasting a day doing nothing, we will hit the ground running and start hiking towards Phakding.
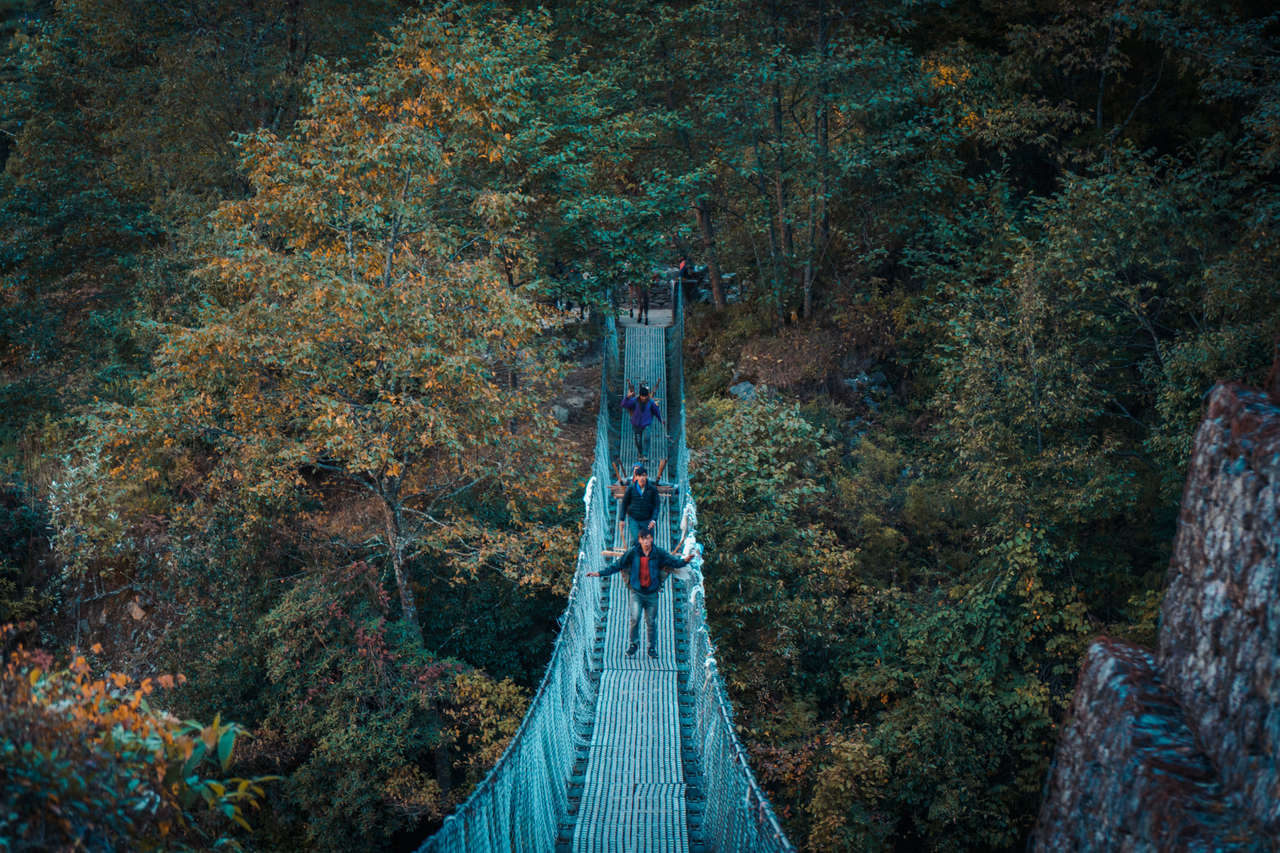
The trail starts with a descent into the valley, until it runs alongside the river where you will have to cross a few suspension bridges. It will take around 3 hours before you arrive in Phakding.
Continue on for another 2 hours, and the trail will start to climb. That's when you know you have arrived in Monjo, where you will spend the first night.

No time to read?
Don't worry. You can save this page to Pinterest and come back later.
Day 2: Monjo to Namche Bazaar
Trek Time: 3 - 4 hours
Difficulty: Easy start and then it's all uphill for 2 hours. Luckily, Namche Bazaar isn't too far from Monjo.
Where to Stay: Khumbu Lodge - 300 NPR/Night (Twin Room).
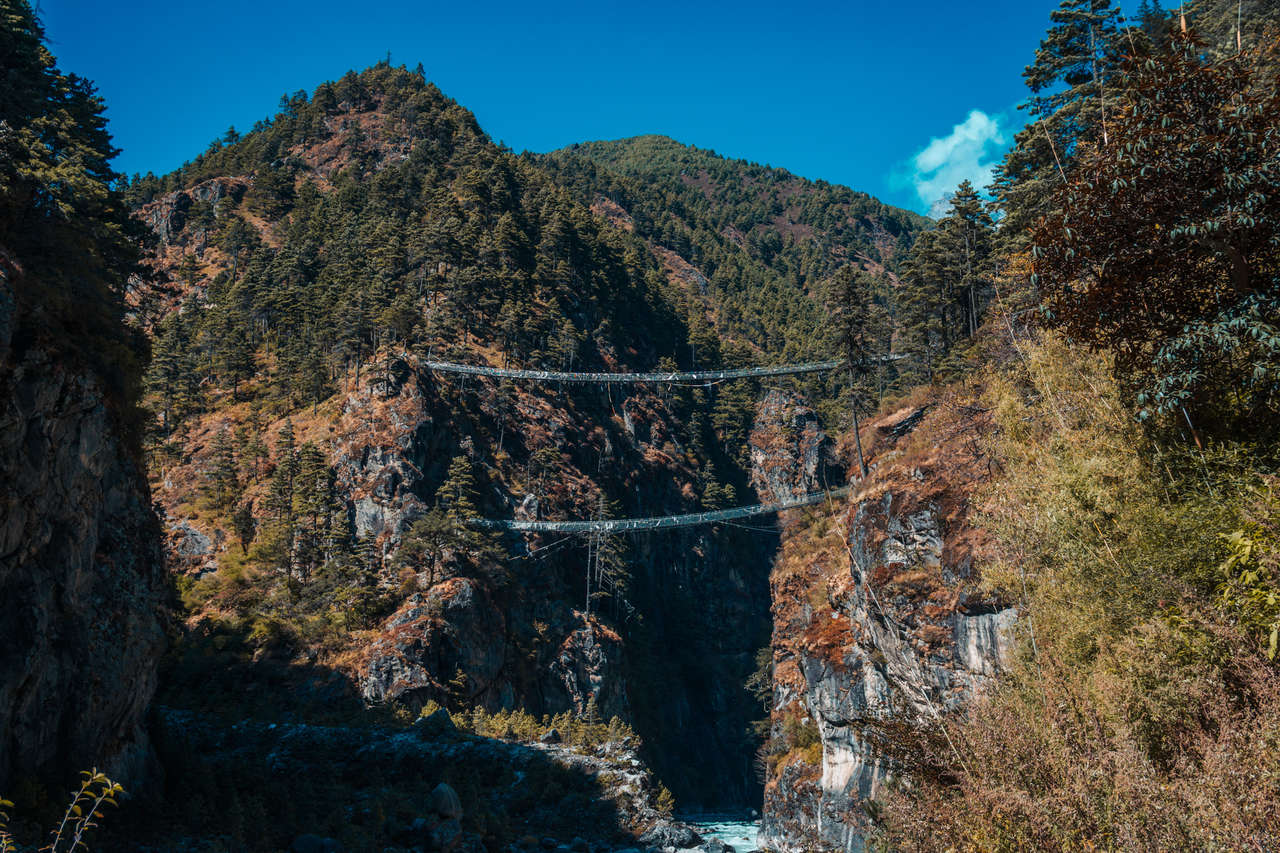
From Monjo, it is an easy stroll until you see the famous double suspension bridge; that is where the trail starts to climb towards Namche Bazaar. Once you cross the second suspension bridge, it is all uphill from here on out.
You will be climbing up for about 2 hours until you arrive at a checkpoint, where you will have to line up and register. Avoid arriving at the checkpoint in the afternoon, as it will get crowded and you will have to line up for about 30 minutes just to get yourself registered.
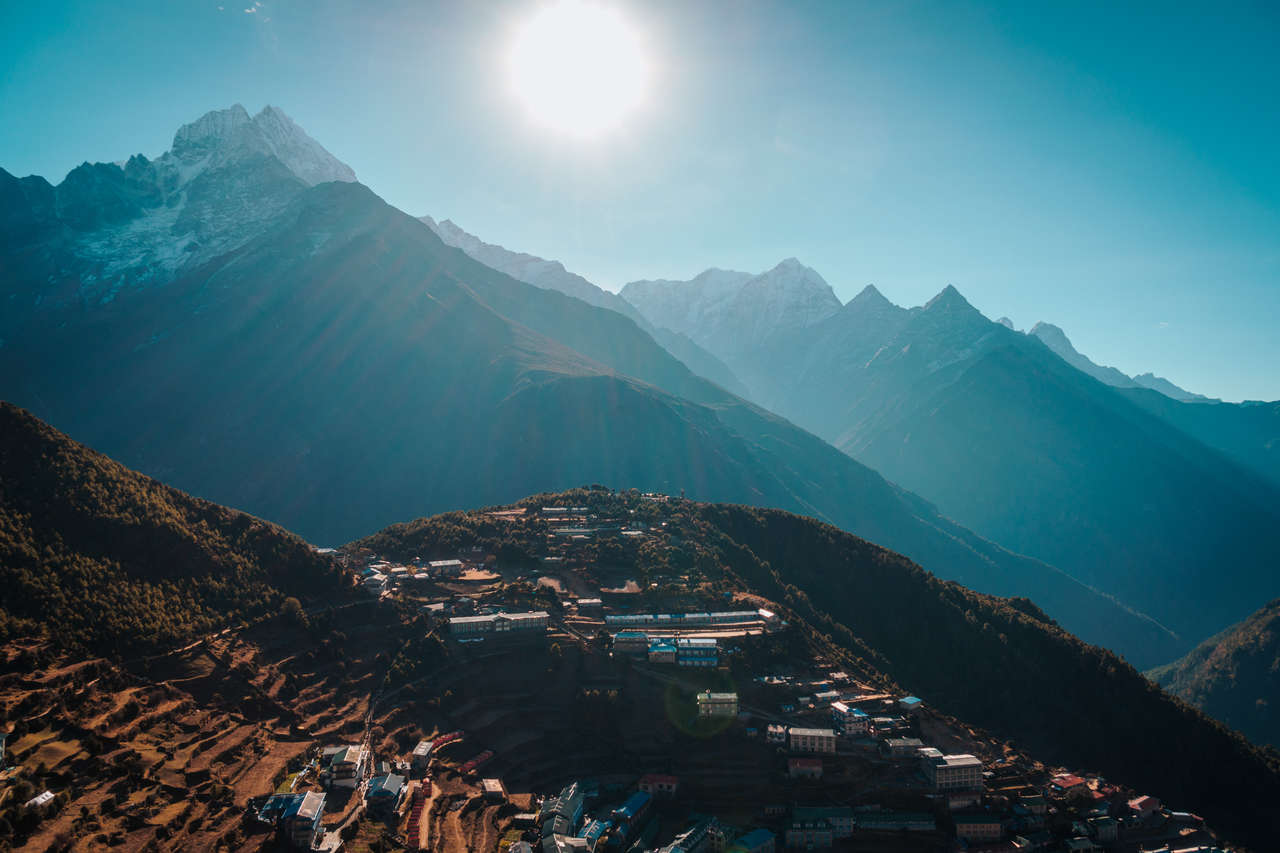
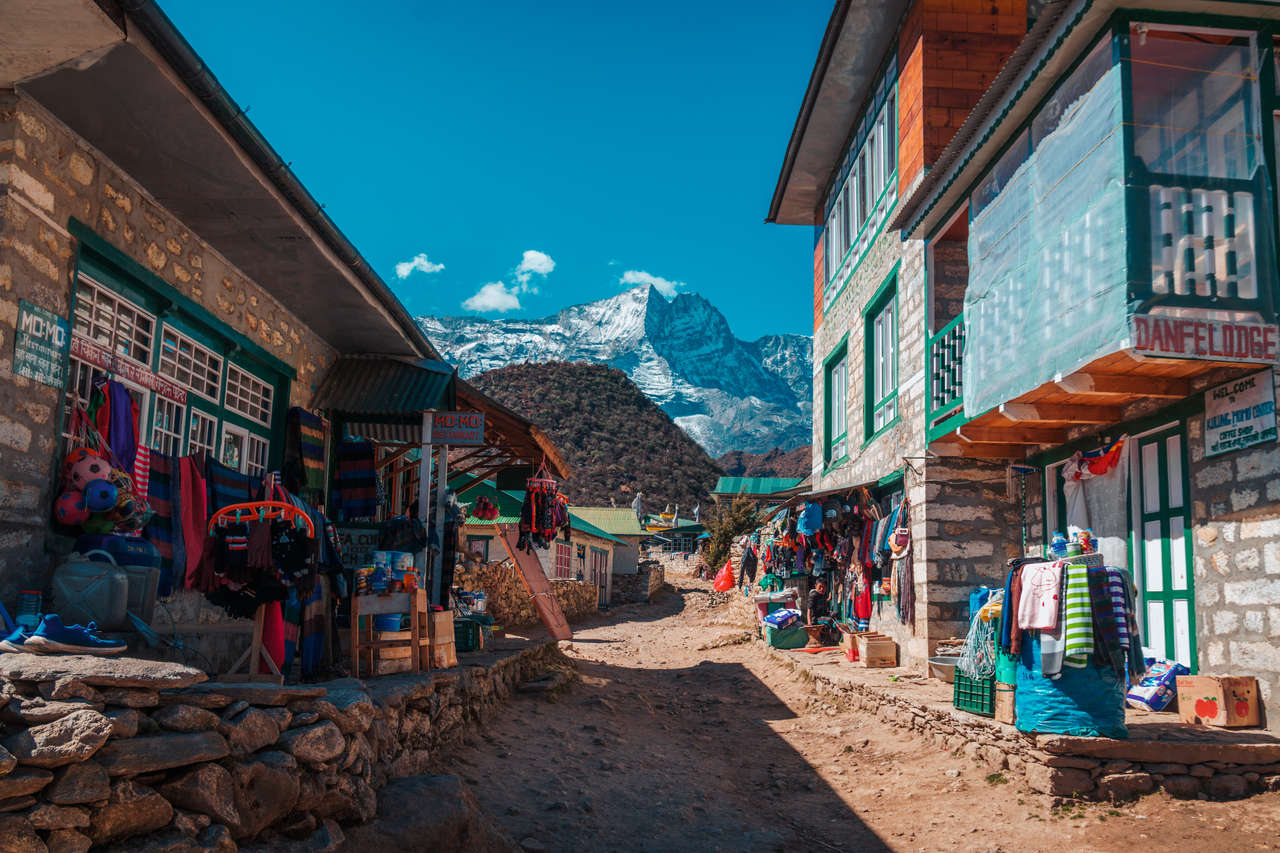
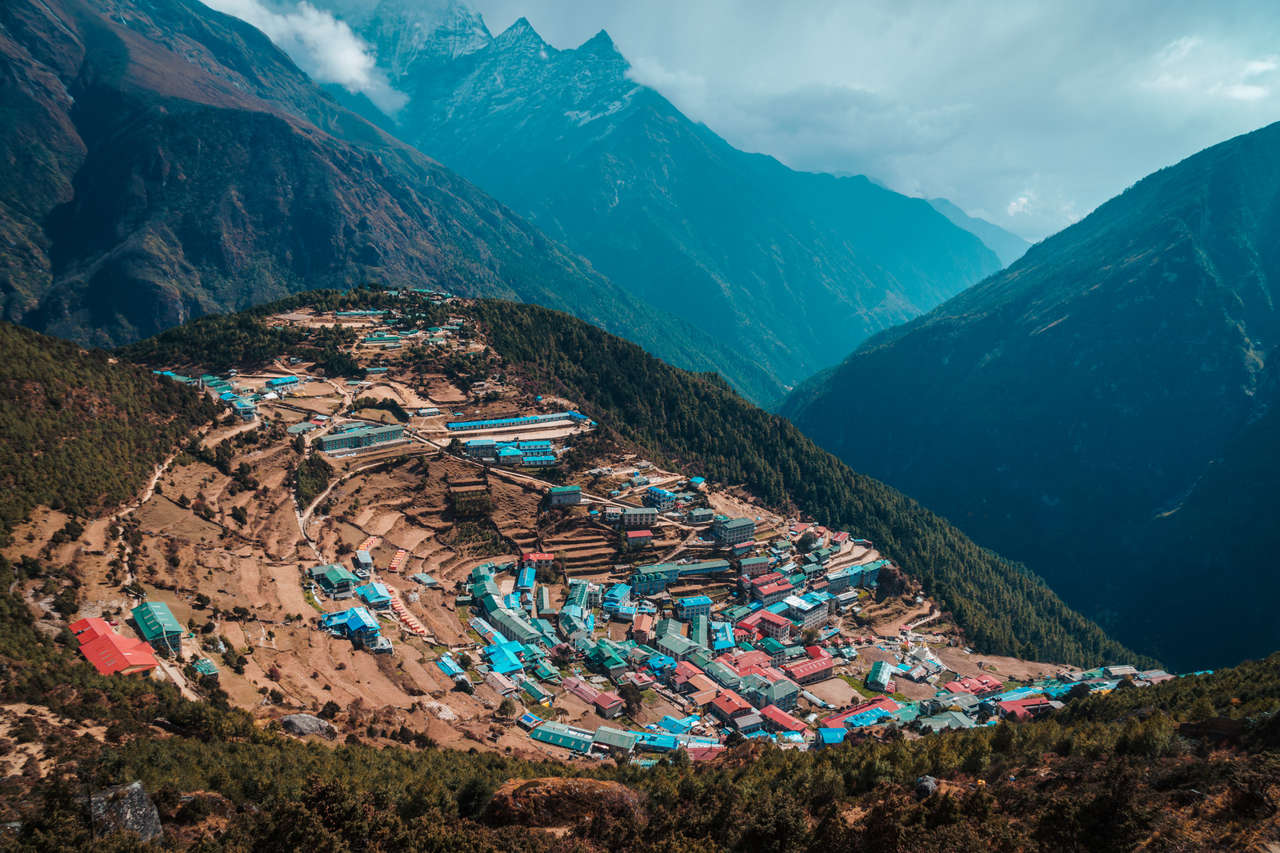
From the checkpoint, it's just another 10-minute hike before you arrive at Namche Bazaar, the last place where you can get last-minute gear, cash, and comfort.
It's amazing how touristy Namche Bazaar is. I didn't really like it at first, but came to appreciate it after the trek as it is a perfect place to rest my body, and my last chance to be around the Himalayas before I left.
Day 3: Namche Bazaar (Acclimatization Day)
Trek Time: 6 hours
Difficulty: Easy stroll on a mostly flat trail
Where to Stay: Khumbu Lodge - 300 NPR/Night (Twin Room).
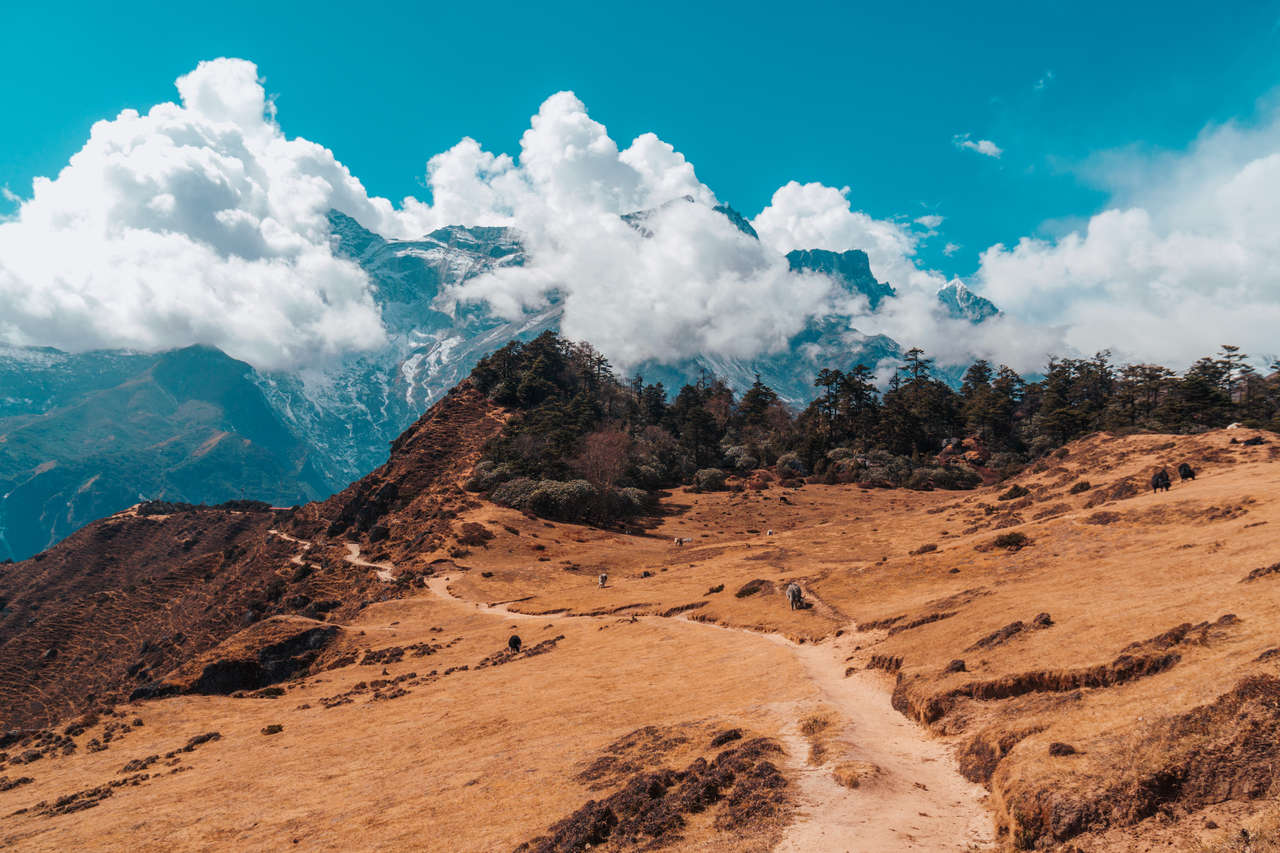
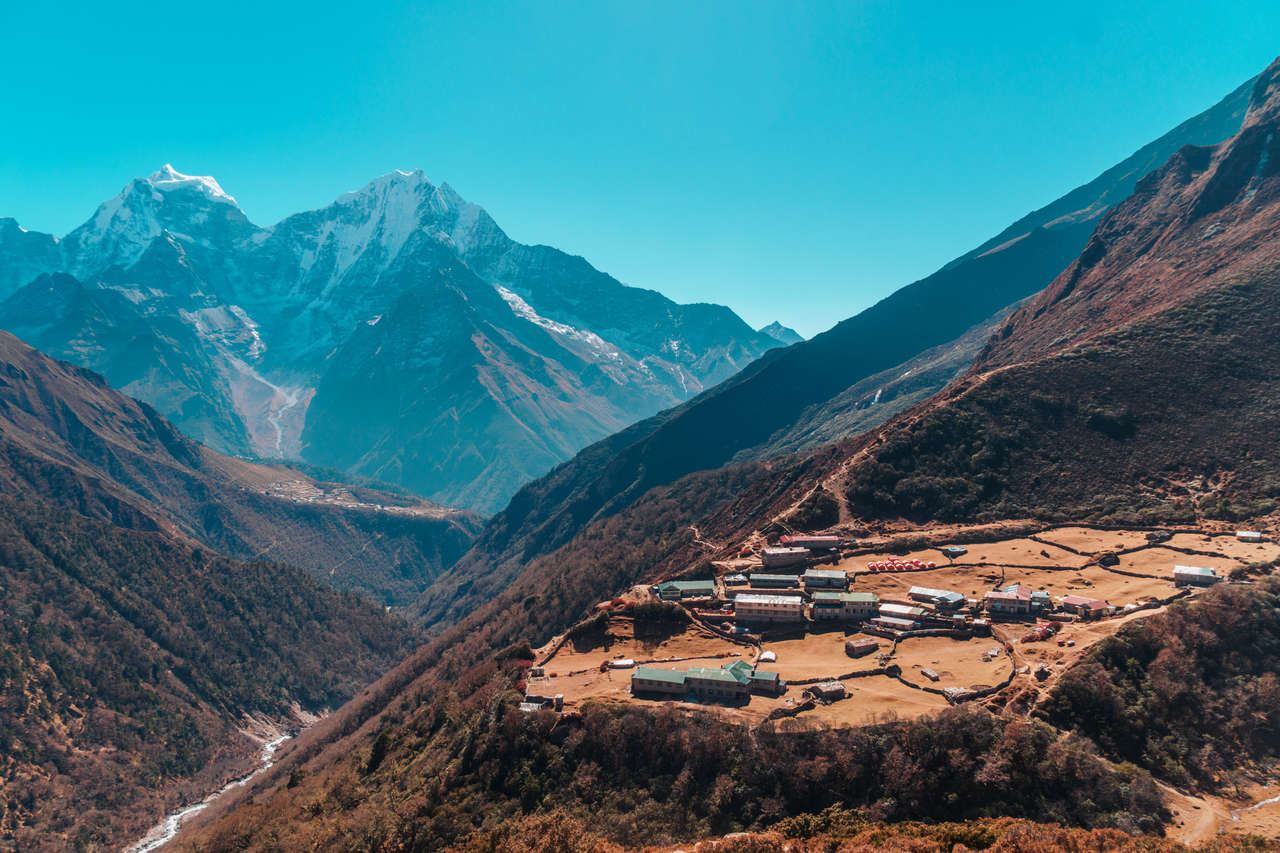
Now that we are at 3,440m, it is a good time to start acclimatizing our bodies for what's to come. So on the third day, we will be exploring the traditional villages around Namche Bazaar.
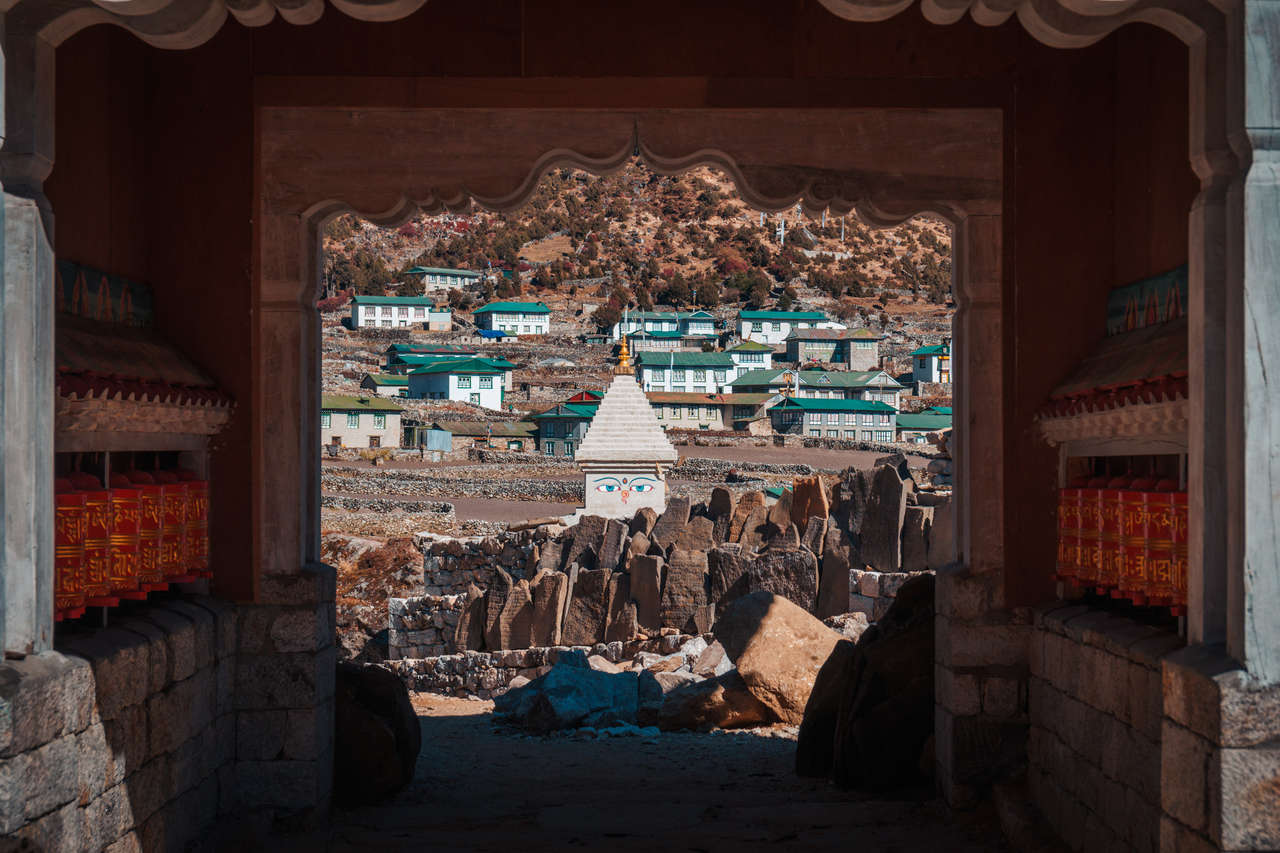
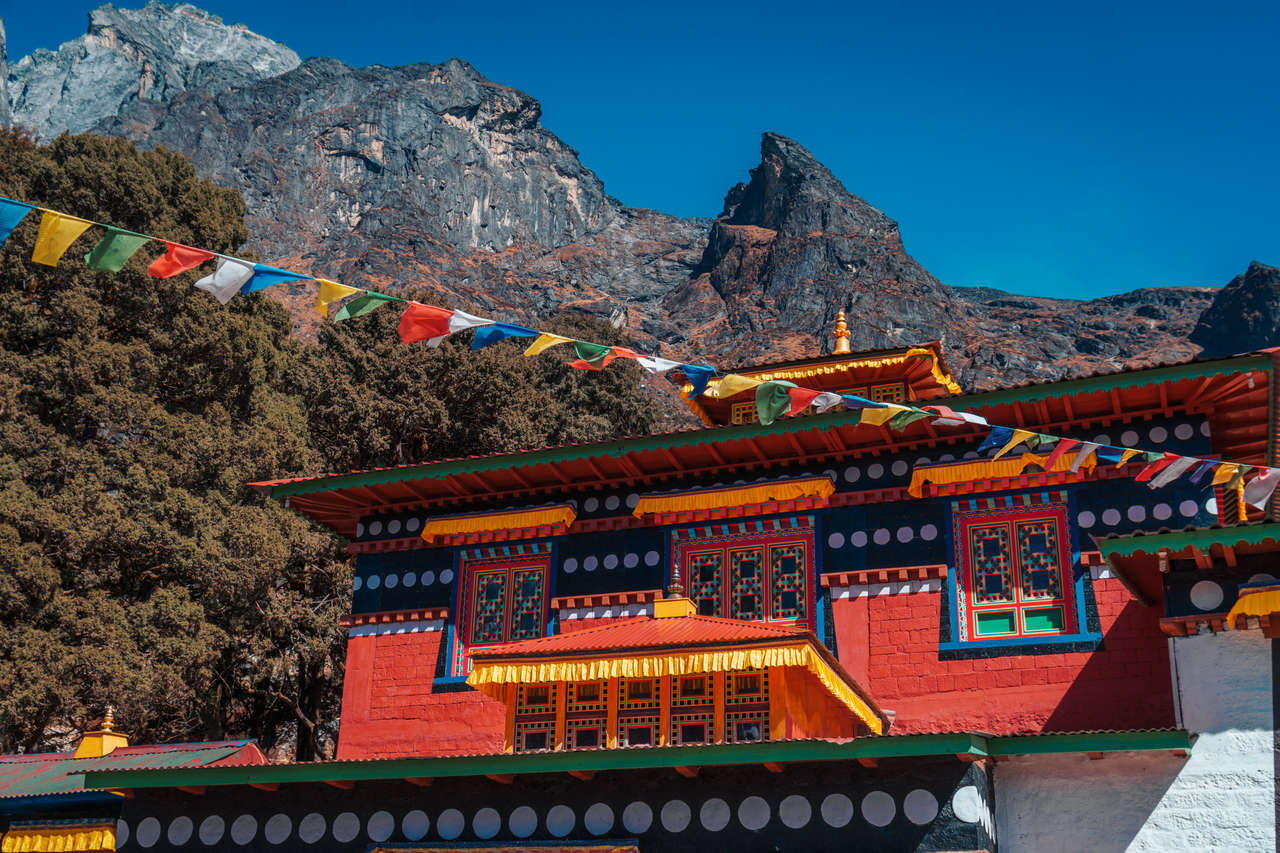
Start your day around 8 AM and hike north towards Khunde Village. In this village, there is a local monastery with a great view of the valley.

If you are lucky, you might be able to experience the chanting ceremony in the monastery, as I did.
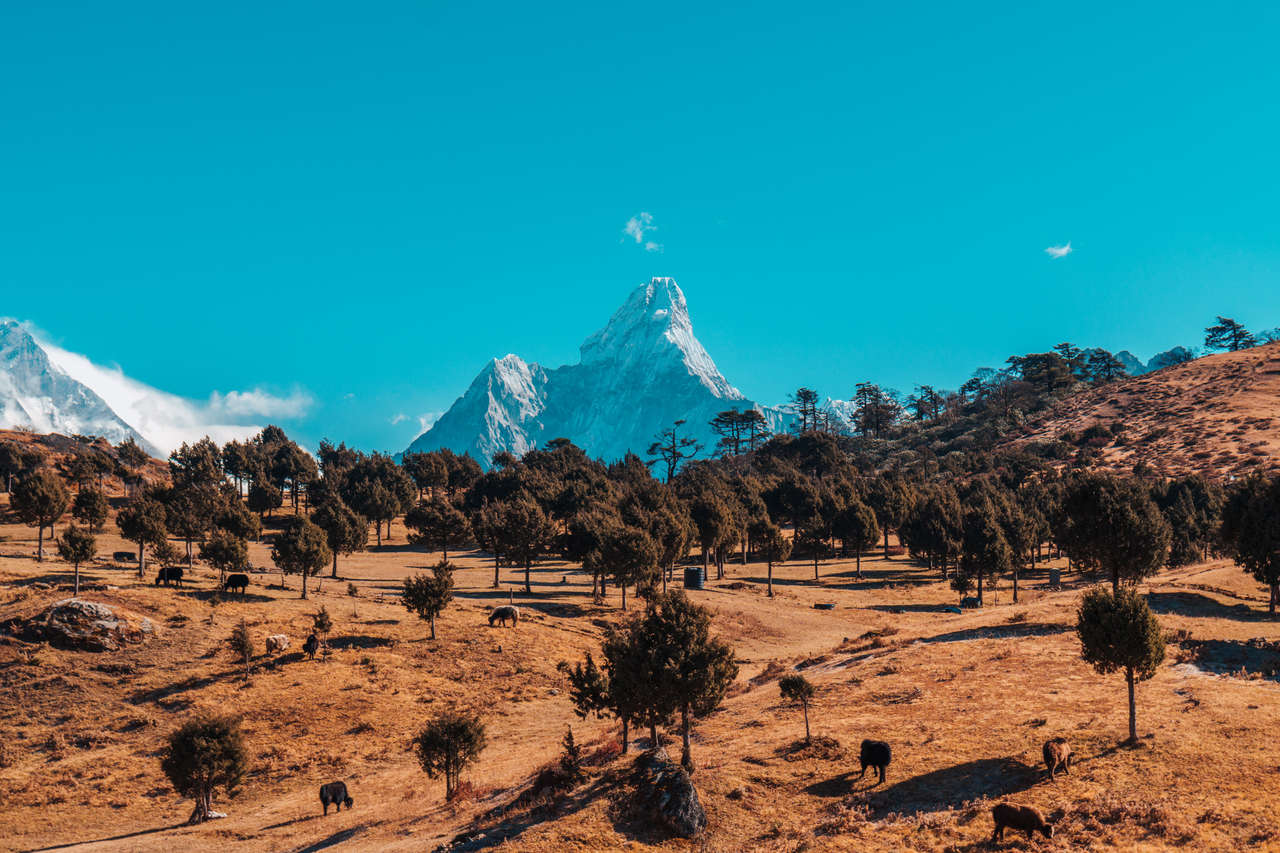
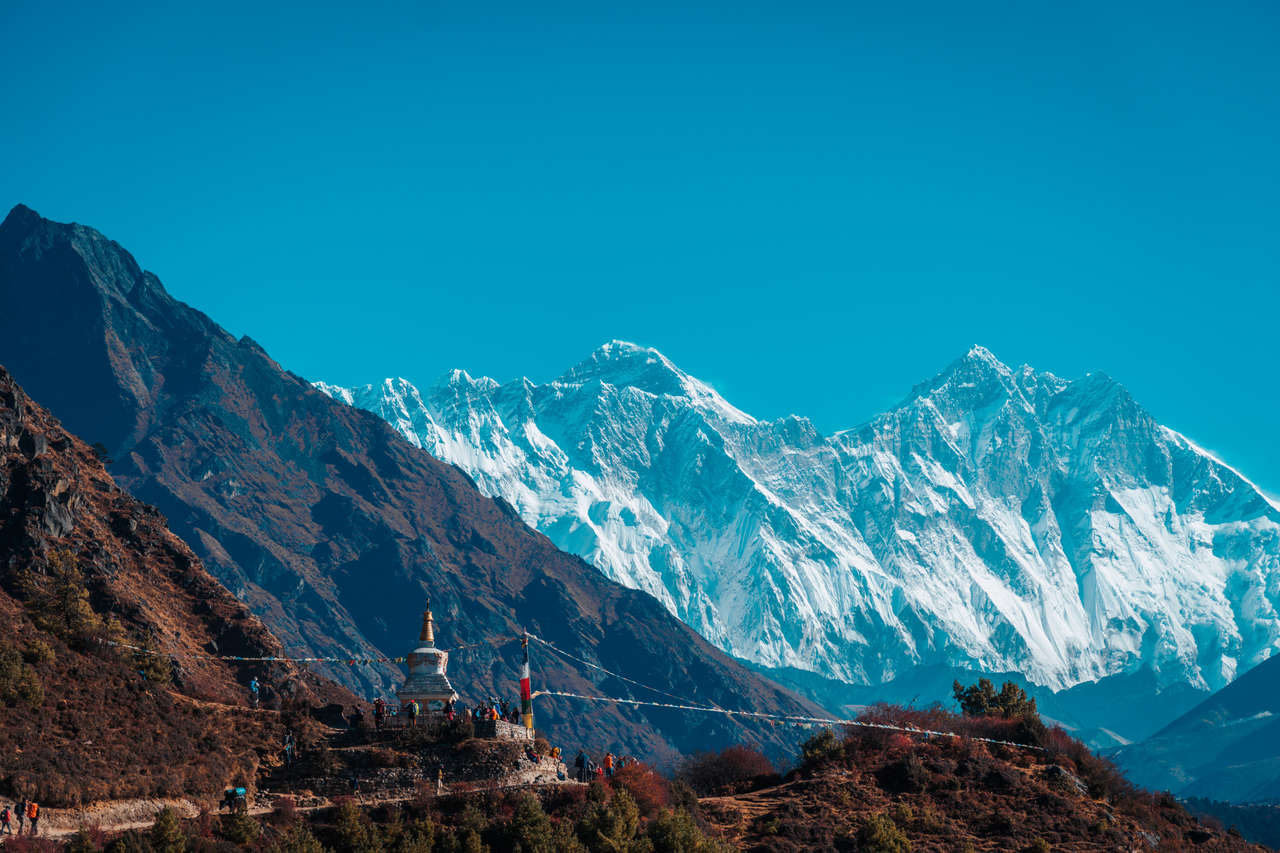
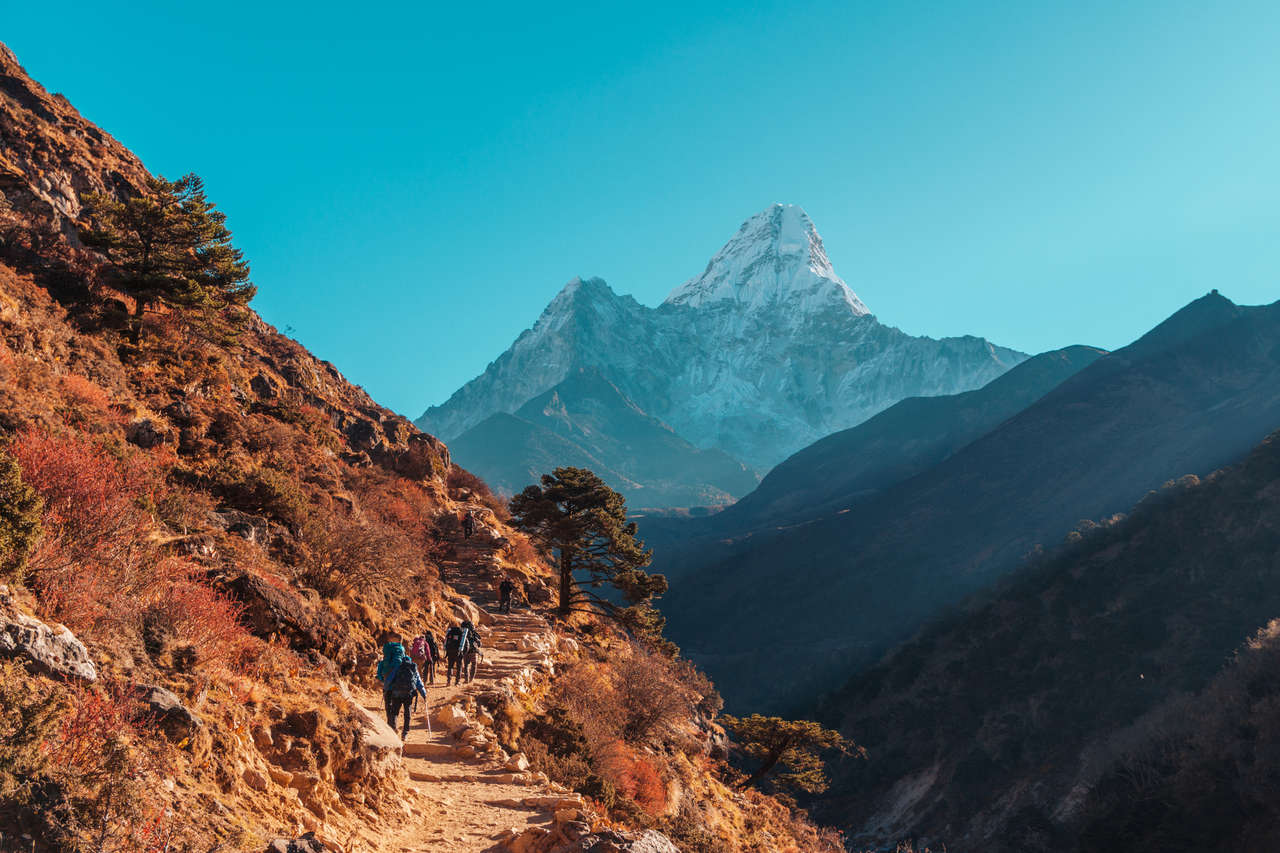
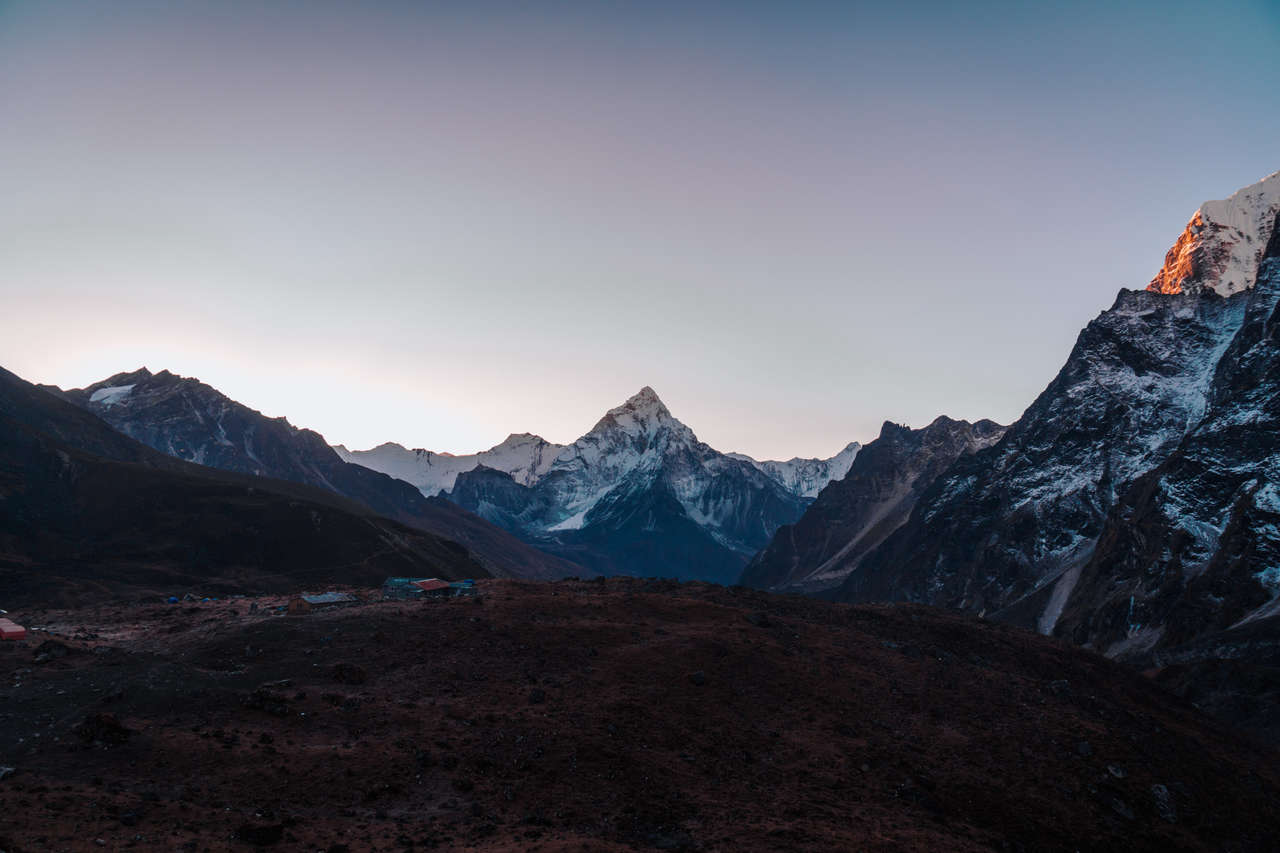
From Khunde, you can continue east for about 10 minutes until you arrive in Khumjung Village, a good place to rest, have lunch, and enjoy your first sight of the iconic Ama Dablam mountain. There's also another local monastery where you can pay to get in and see its interior.
After you are done in Khumjung, head south towards the Everest View Hotel, and if you are lucky, you might have your first sight of Mount Everest all the way from here. I wasn't so lucky though, as the clouds swept in at noon.
After the hike, return to Namche Bazaar and relax. Make sure you have everything you need for the trek, as this is your last chance to buy gear or get cash out.
Day 4: Namche Bazaar to Tengboche
Trek Time: 5 hours
Difficulty: Easy to Moderate. You go down at first, but then it's all up from there.
Where to Stay: Tash Delek - 500 NPR/Night (Twin Room).
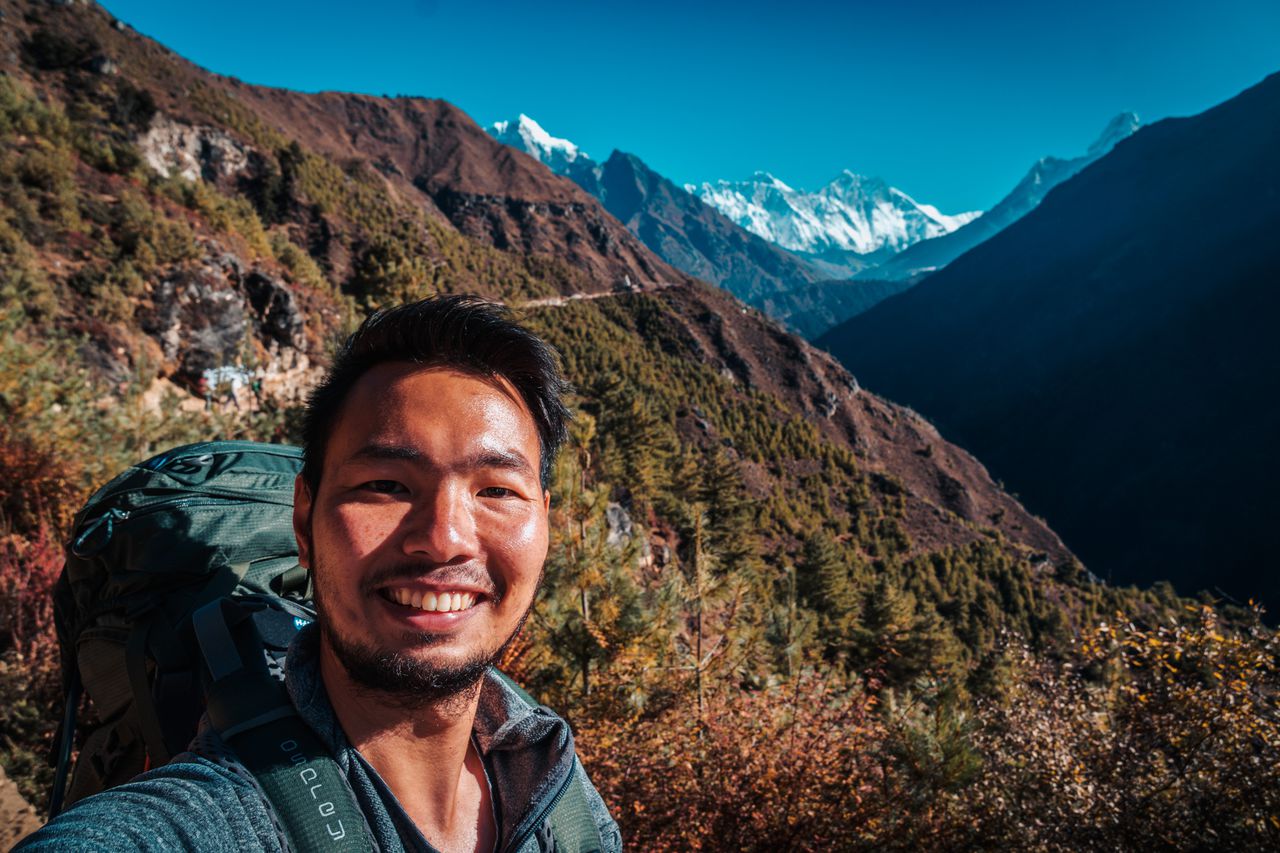
Start from Namche Bazaar as early as you can to beat the crowds. If you didn't see Mount Everest that day, today is the day you will see it.
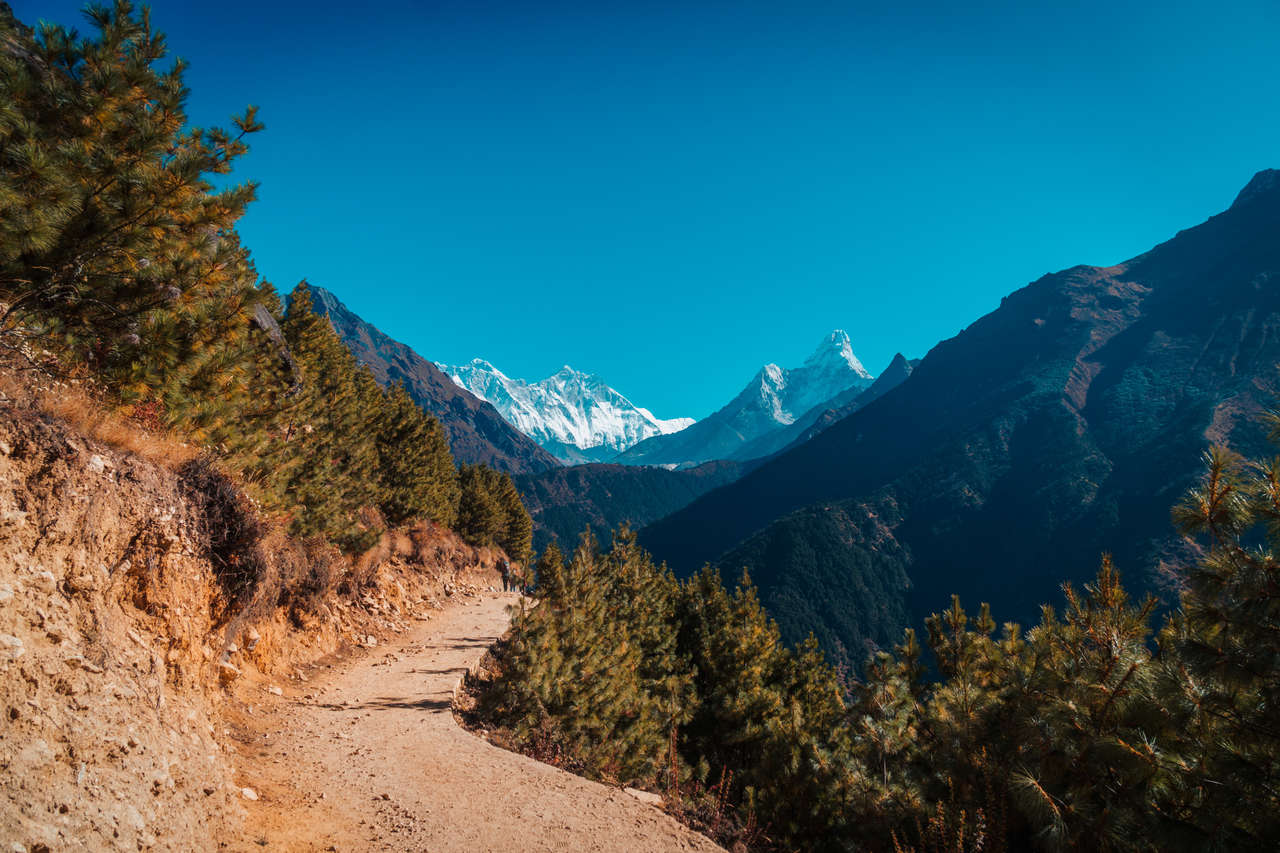
It's a steep climb out of Namche Bazaar, but the trail should peak gradually. Then, you will be going down along a mountainside where you will have a sweeping view of the valley, Ama Dablam, and Mount Everest towering above them all.
After about an hour of walking along an exposed mountainside, you will arrive in Sanasa, where the trail continues northeast, mostly under thick forest.
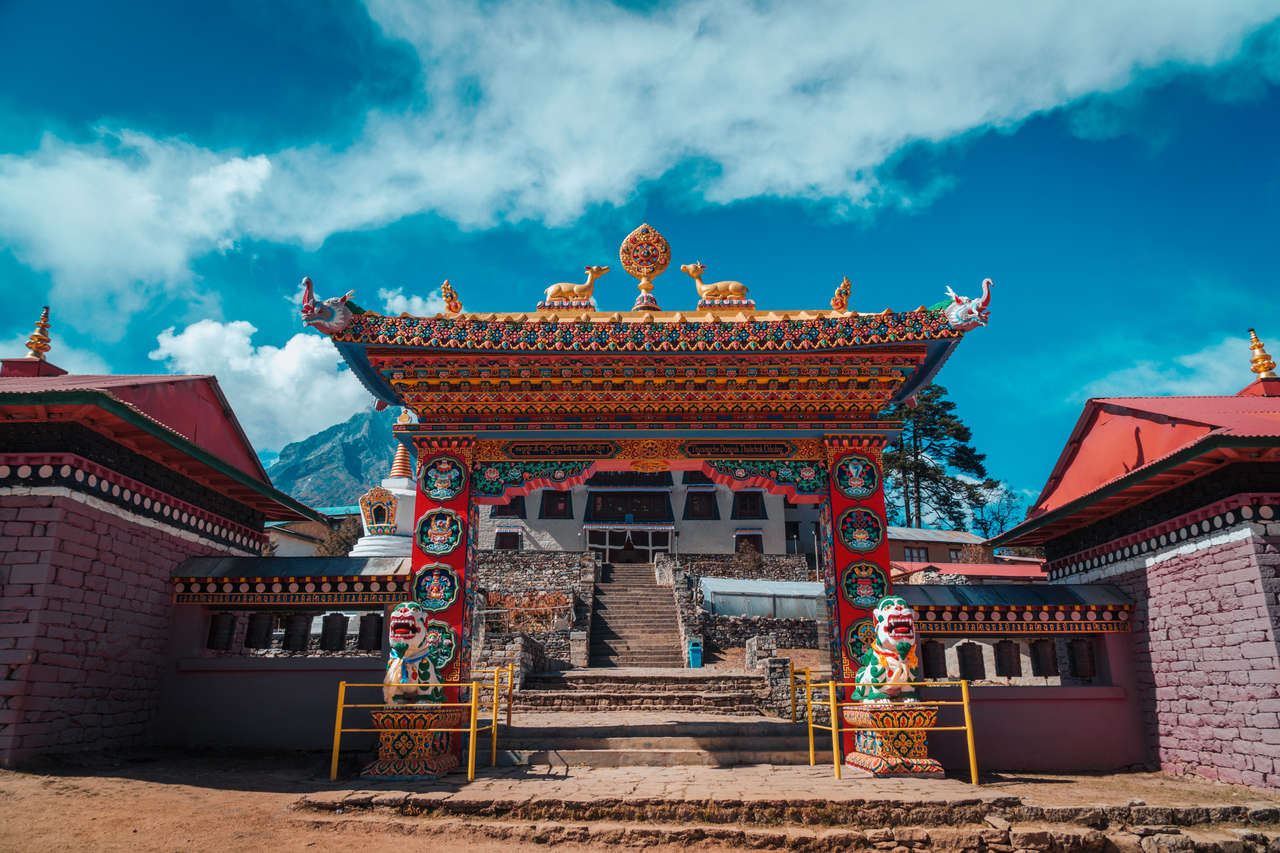
Another hour hike, and you will arrive in Phunki Thanga where you can stop for lunch. From here on, you will be climbing up a steep trail through a pine forest for 2.5 hours straight, and then you should arrive in Tengboche.
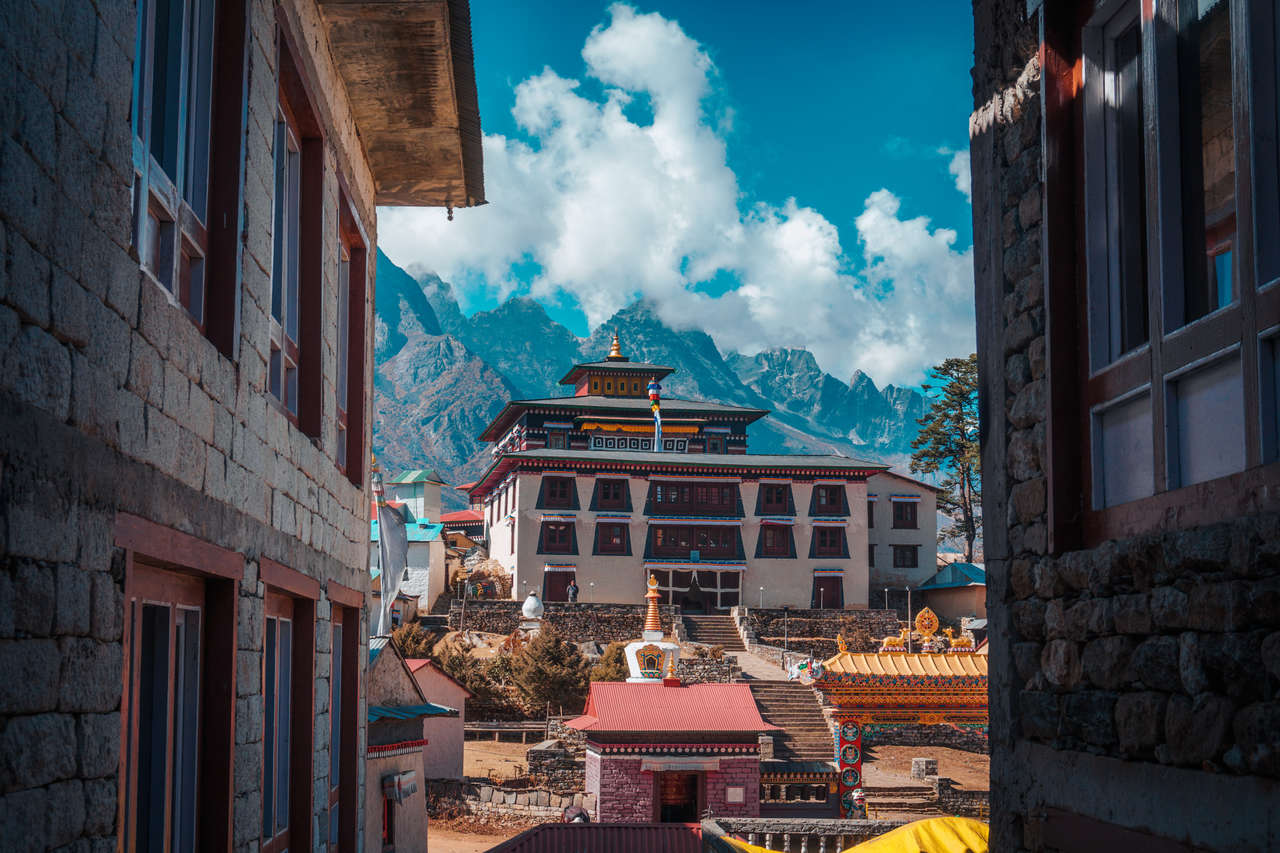
Tengboche has a monastery, the biggest in the region that is worth visiting. Tenzing Norgay, one of the first people to summit Mount Everest, was born in a village nearby, and he used to be a monk in Tengboche Monastery.
Day 5: Tengboche to Dingboche
Trek Time: 4 hours
Difficulty: Easy. One of the easiest and shortest days, but you will start to feel the altitude from here on out.
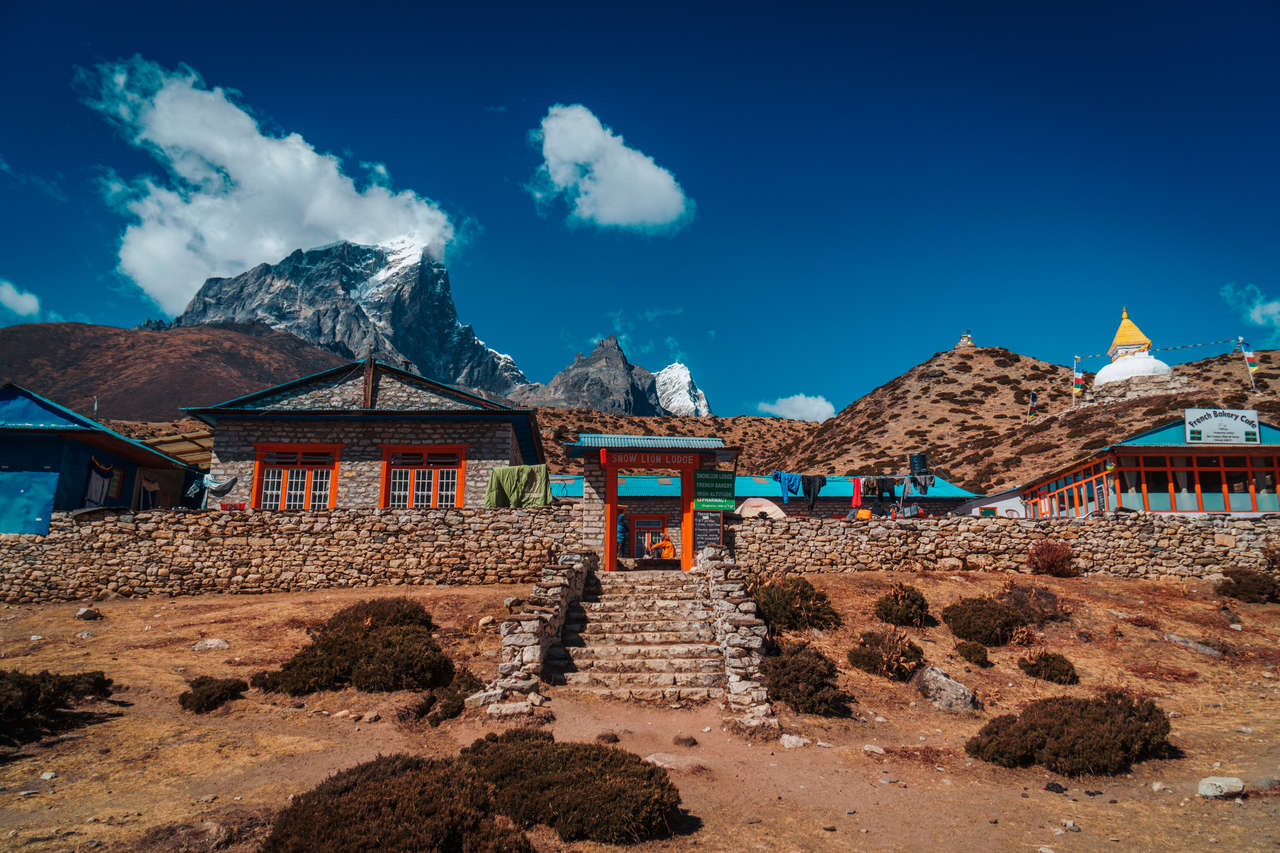
Where to Stay: Snowlion Lodge - 500 NPR/Night (Twin Room).
Today is an easy stroll, starting with a descent from Tengboche to Pangboche, where the trail will gradually climb for another 3 hours towards Dingboche. If you start at 7:30 AM, you should be there before 12 PM.
Since you have almost half a day left, make sure to spend your time walking around the village or hiking up to one of the many stupas around the valley.
Day 6: Dingboche (Acclimatization Day)
Trek Time: 0 - 8 hours
Difficulty: Depends on what you want to do. Pheriche is a pretty easy hike, whereas Ama Dablam base camp is a full-day hike with lots of ups and downs.
Where to Stay: Snowlion Lodge - 500 NPR/Night (Twin Room).
In Dingboche, you are almost 4,400m above sea level, which is why it is time for another acclimatization day. Spend another day in Dingboche, either hiking to the sister village, Pheriche, or you can spend the entire day (8 hours) hiking to the Ama Dablam Base Camp.
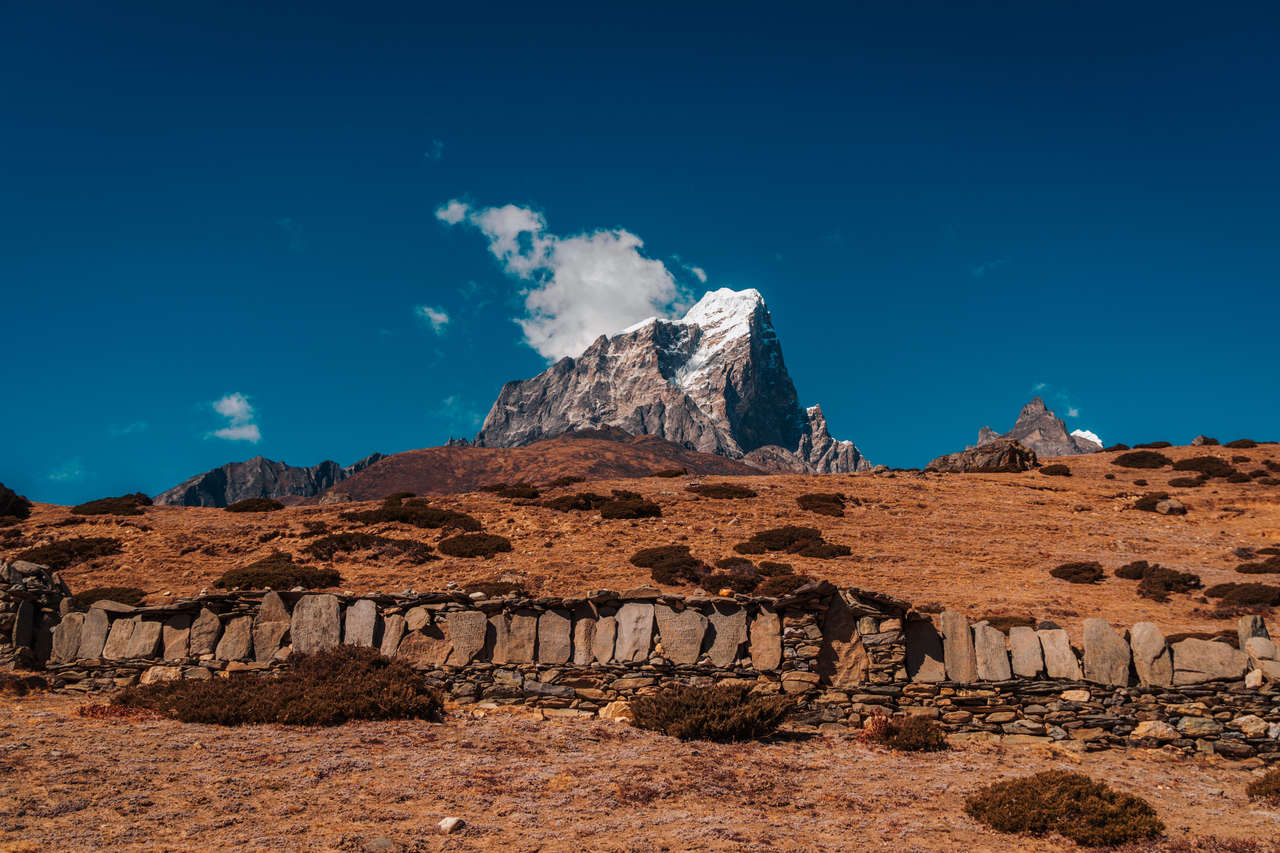
I decided to just relax, enjoy the stunning view of Ama Dablam, and have a nice cheesecake with a good cup of coffee at a local bakery. 😅
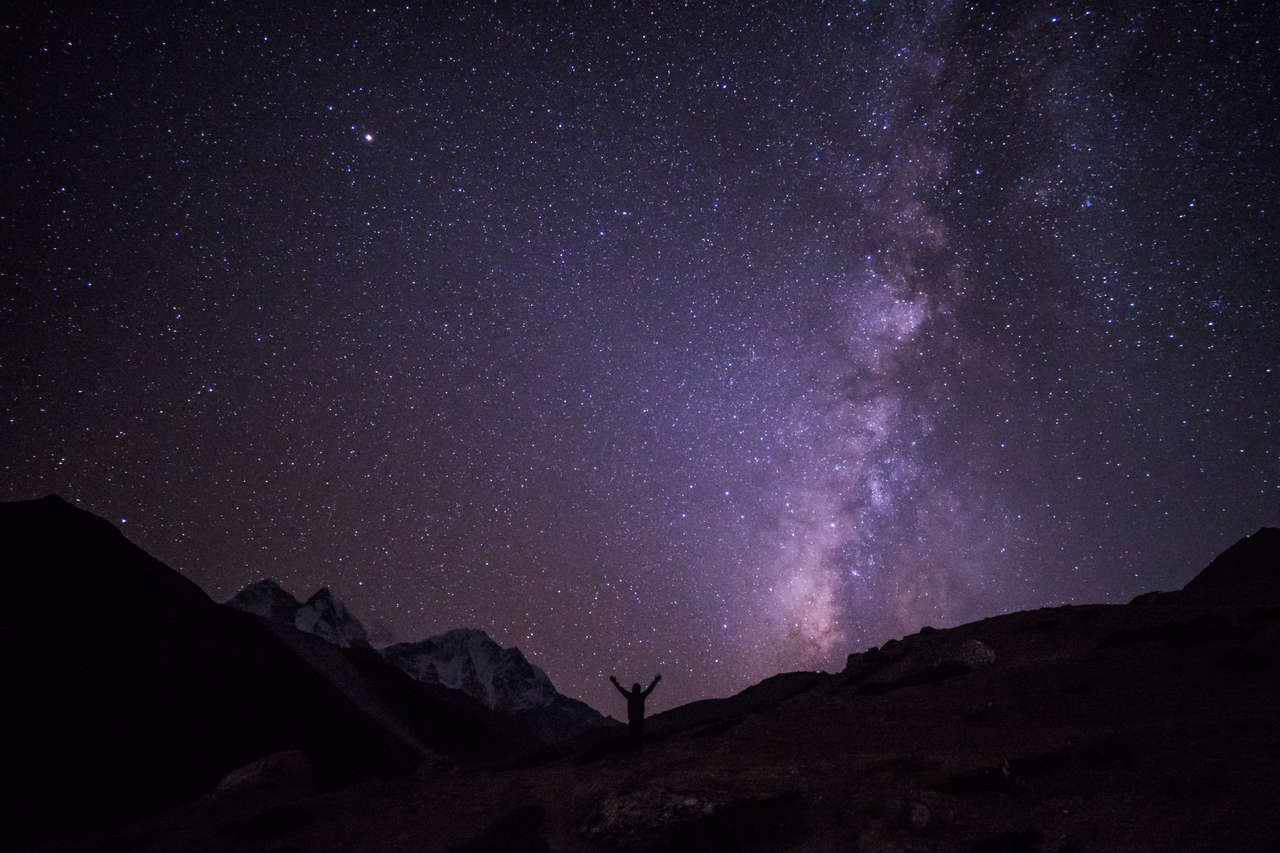
I got really bored at night so I went out, wrapped with full winter gear and saw this!
Make sure to go out at night and look up at the sky; you might be able to see the Milky Way in its full glory!
Day 7: Dingboche to Lobuche
Trek Time: 4 hours
Difficulty: Moderate to Hard, due to the altitude and the steep climb before Lobuche.
Where to Stay: Oxygen Altitude - 700 NPR/Night (Twin Room).
On day 7, we will be gaining almost 600m in elevation, which is the maximum height one should gain at this altitude. But since we have already acclimatized in Dingboche, we should be safe from altitude sickness.
The trail gradually climbs out of Dingboche for about 2 hours until you arrive in Dukla, where the trail shoots up steeply. It's a difficult uphill climb, and the altitude of 4500m isn't helping either.
After about an hour, you will arrive at a plateau where you will see several shrines dedicated to those who died in the Himalayas. It is a chilling moment to find Scott Fischer's and Rob Hall's shrines up here.
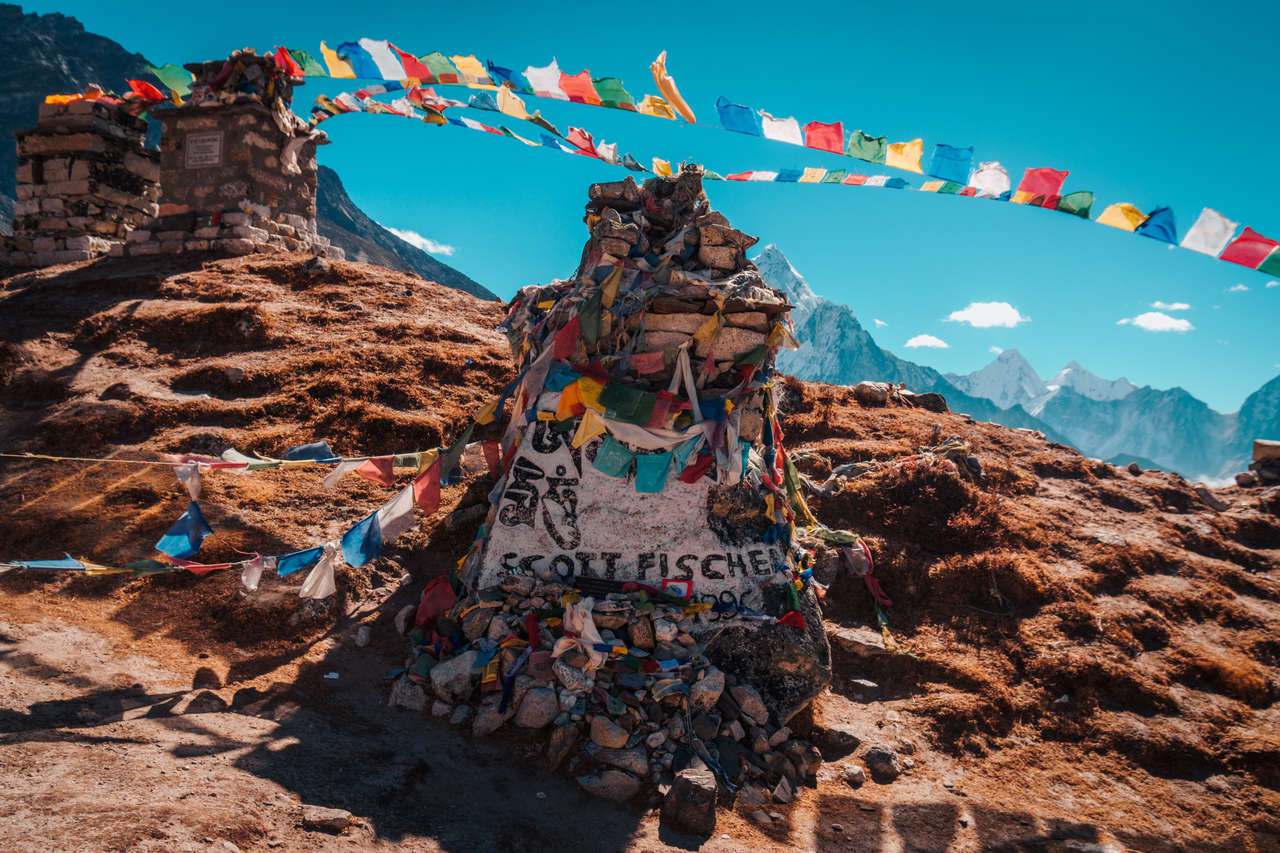
They lost their lives during one of the deadliest disasters on Mount Everest in 1996. The stories of their demise are well-covered in the "Into Thin Air" book by Jon Krakauer. I highly recommend you read the book while you are on the trail.
After visiting the shrines, it will take approximately 30 minutes for the trail to fork west to Dzongla and east to Lobuche. This is where you will need to backtrack your way to Dzongla on day 9, so be sure to mark that on a map.
From the intersection, it should take you no more than 30 minutes to arrive at Lobuche.
Day 8: Lobuche to Gorakshep to Everest Base Camp and back

Trek Time: 6 hours
Difficulty: Moderate with a steep climb towards Gorakshep and an easy trail to Everest Base Camp and return.
Where to Stay: Buddha Lodge - 500 NPR/Night (Twin Room).
Today is the day you have been waiting for: the day you will reach the Everest Base Camp (5,380m). But first, you will have to make your way from Lobuche to Gorakshep. The trail starts out flat for about an hour, and then it becomes a constant climb for another 2 hours until Gorakshep.
Once you have arrived in Gorakshep, get some lunch and start hiking northeast from the village towards Everest Base Camp.
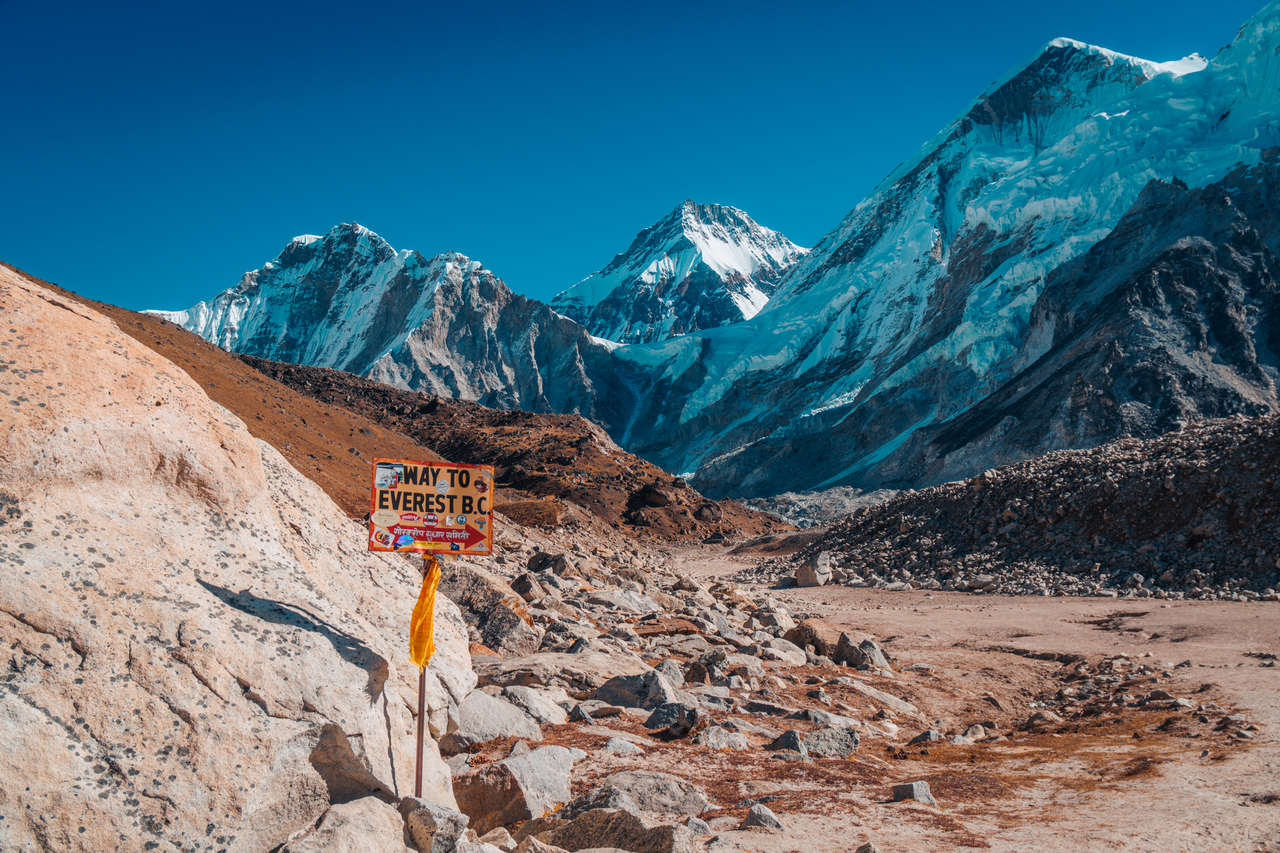
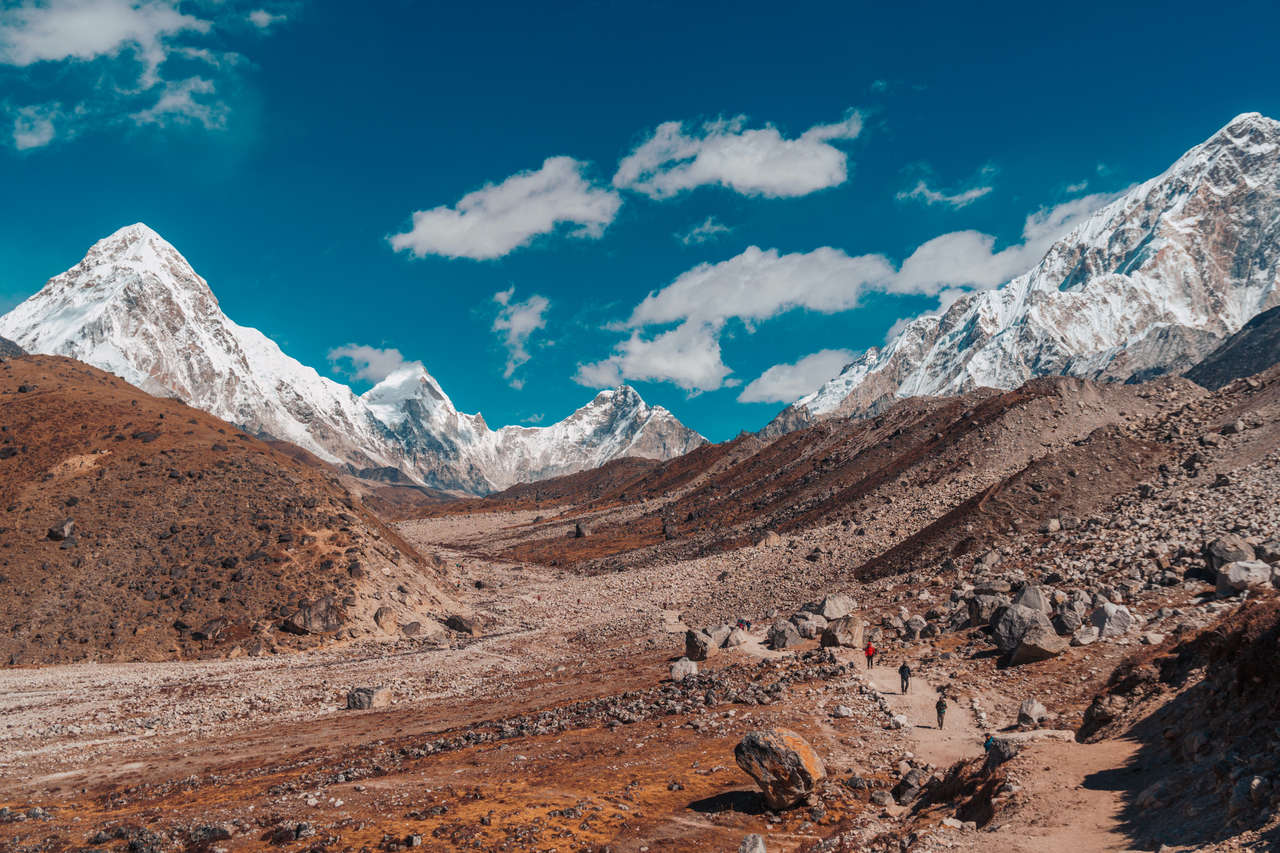
The trail to Everest Base Camp consisted of a lot of ups and downs on a very dry gravel trail. It will take you around 1 hour and 15 minutes to reach the base camp, where you will see a big pile of rocks, prayer flags, and the Everest Base Camp plaque, signifying that you have finally made it.

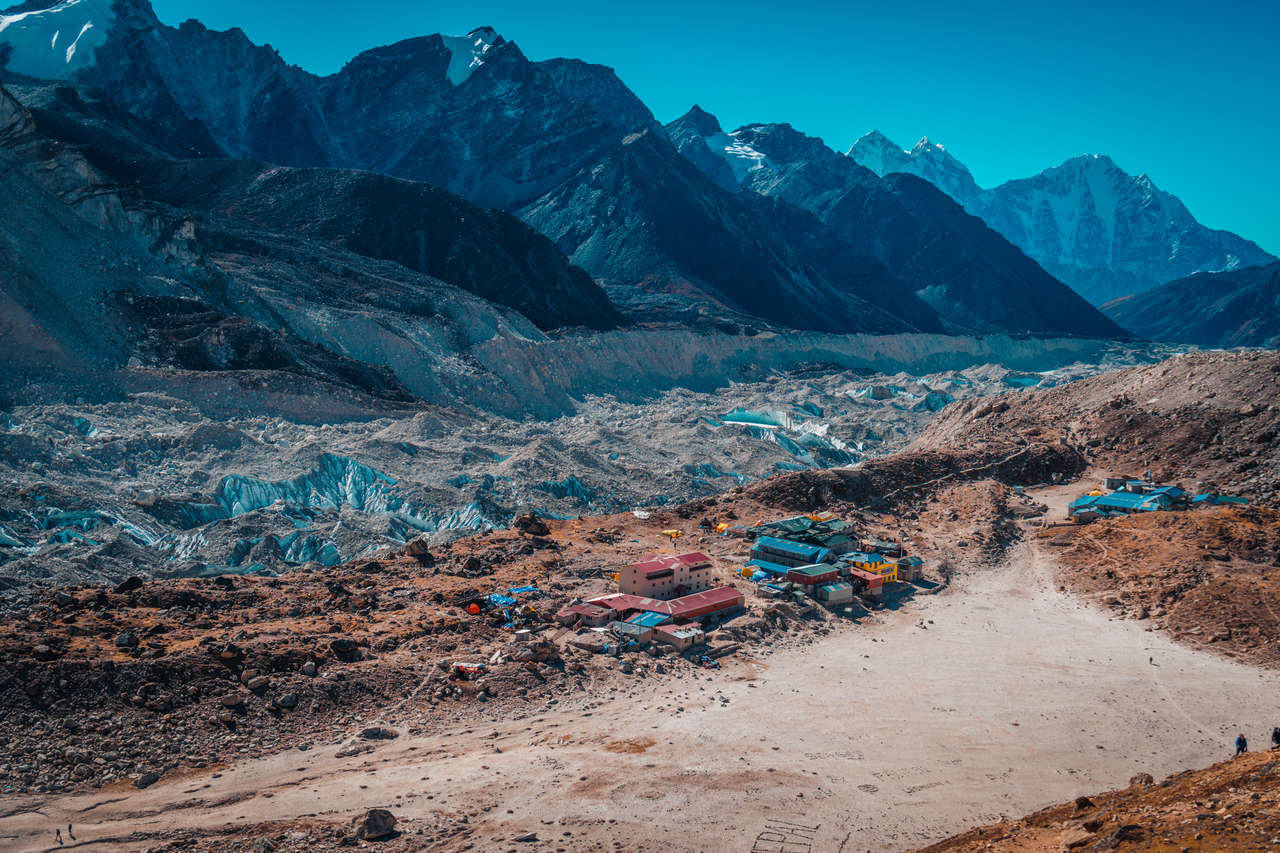
It's time to celebrate! It will take the same amount of time to get down to Gorakshep. Gorakshep is not much of a village but more of a crude settlement with little to no running water or any pool of natural water that is not frozen, for that matter. Don't expect much here.
Day 9: Gorakshep to Kala Patthar to Dzongla
Trek Time: 7 hours
Difficulty: Hard and Long (That's what she said 🤣)
Where to Stay: Mountain Home Zonglha - 500 NPR/Night (Twin Room).
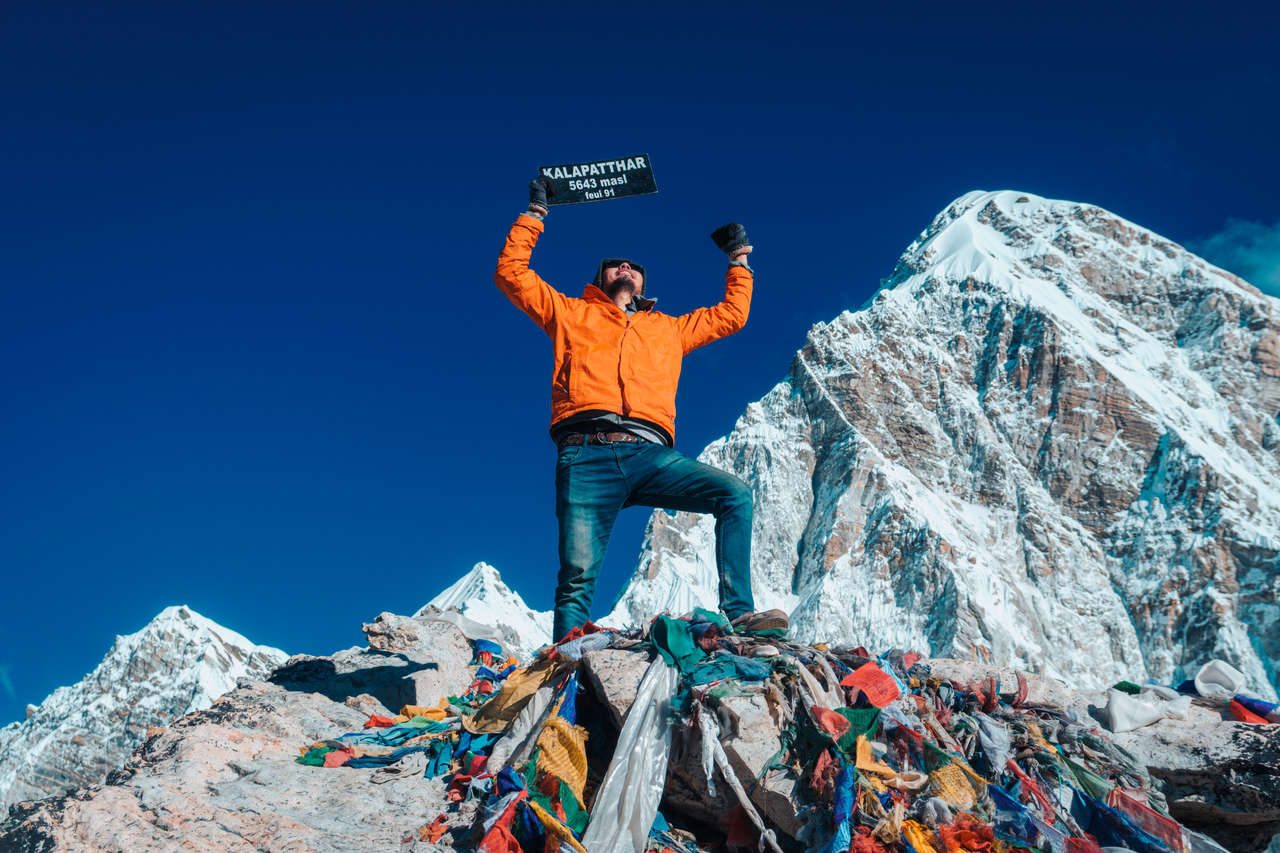
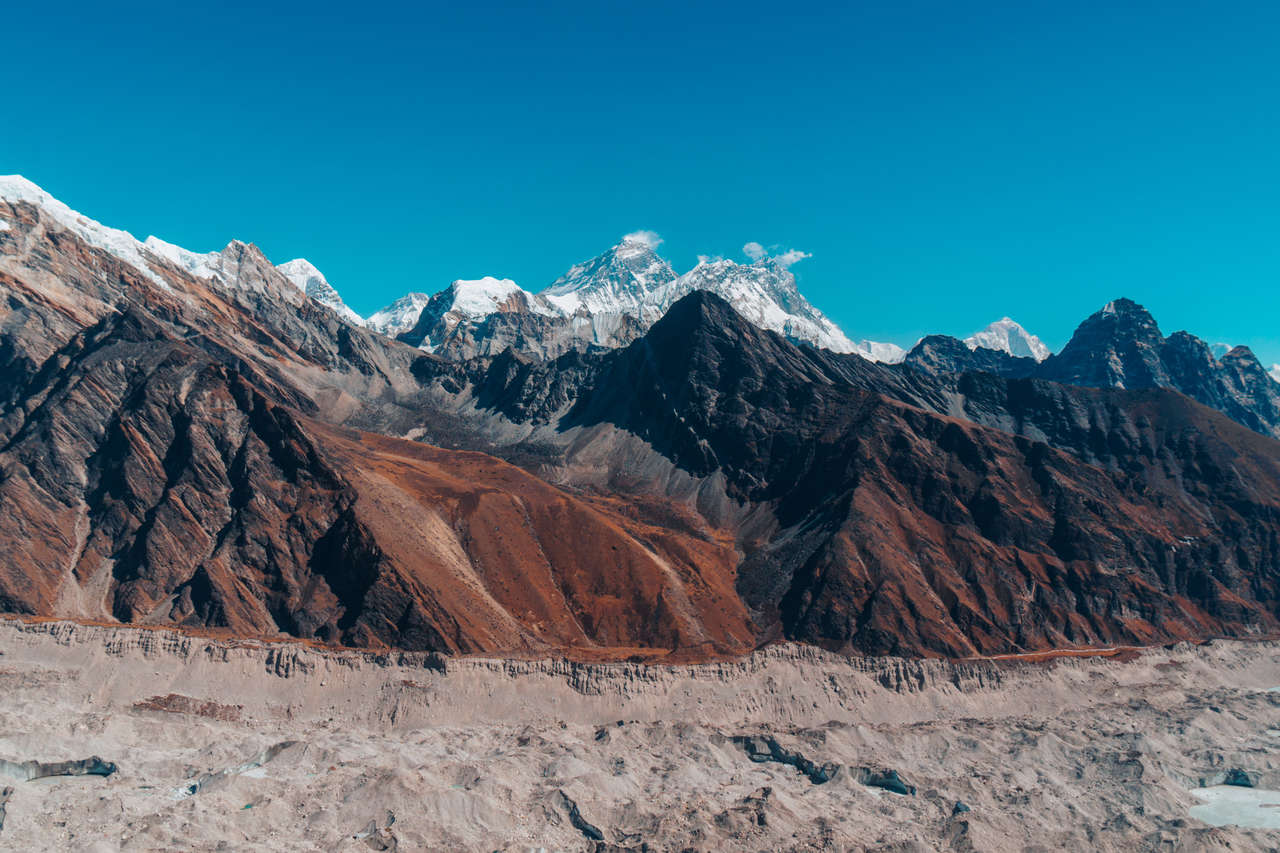
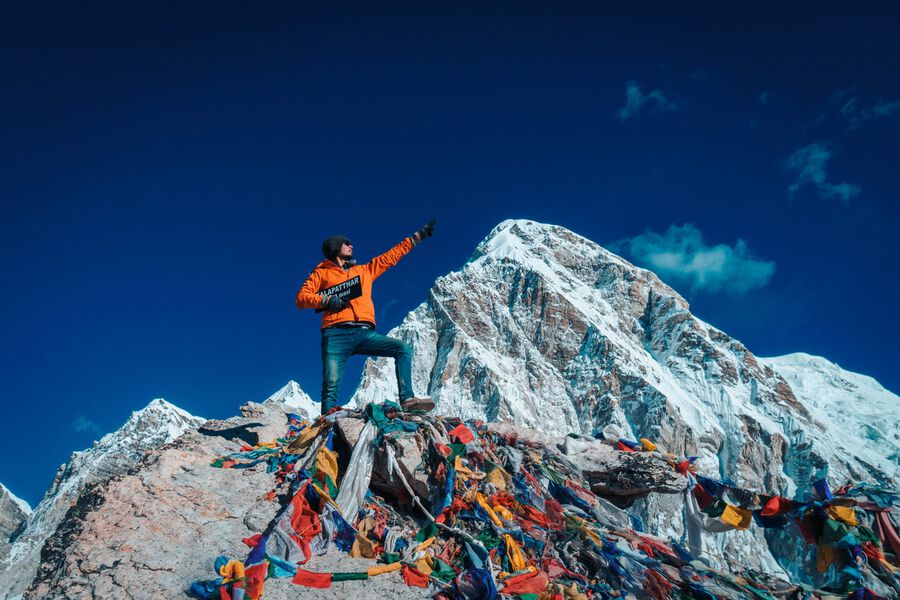
The next morning, start hiking as early as 6 AM to Kala Patthar, the highest point of the trail (5,643m), and probably the highest one can reach without mountaineering gear.
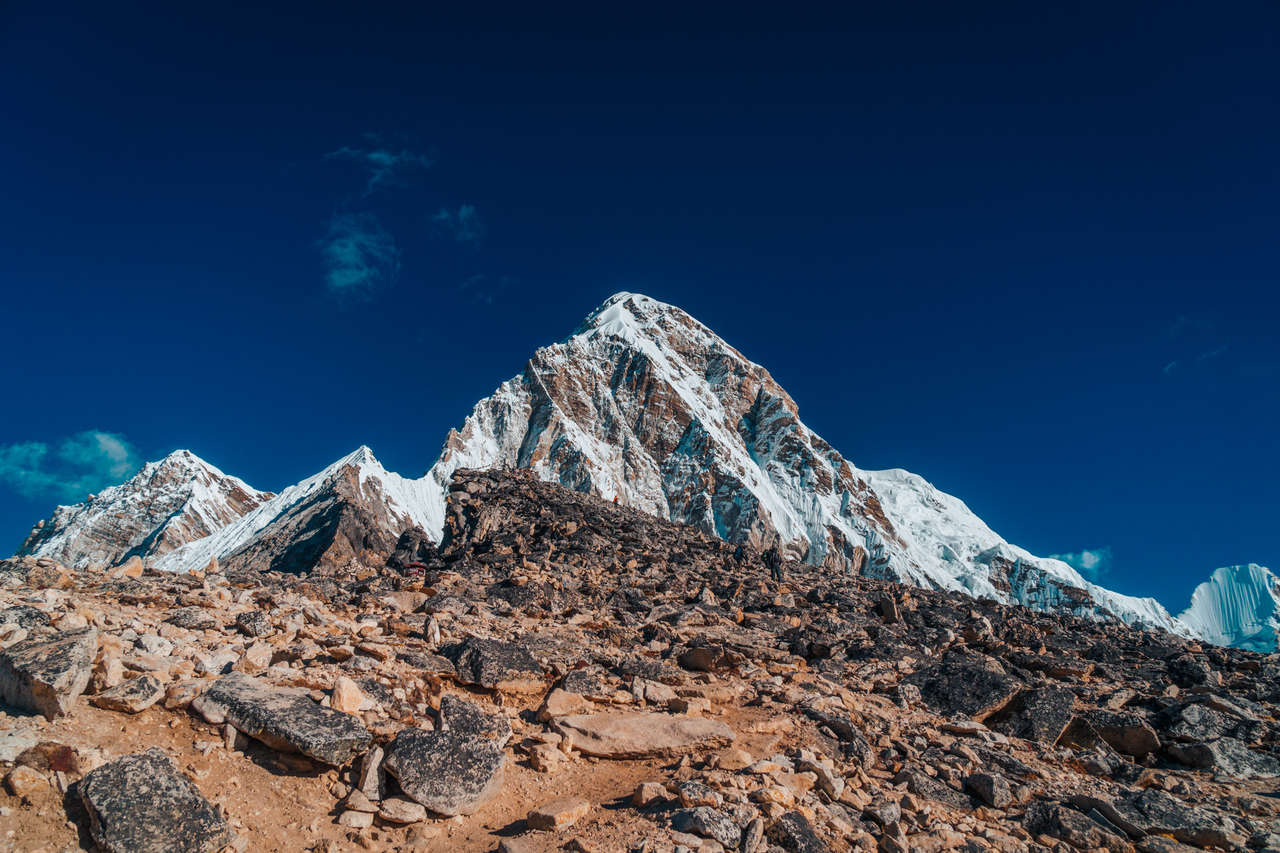
Kala Patthar is just a big rock, but it offers a rewarding view of the landscape around Mount Everest. Mount Everest is also more visible from up here than from the base camp.
The hike is straight up for 1.45 hours along a rocky trail full of boulders. It's not a particularly inspiring trail, but the view up there is well worth the effort. It takes another 45 minutes to get down to Gorakshep.
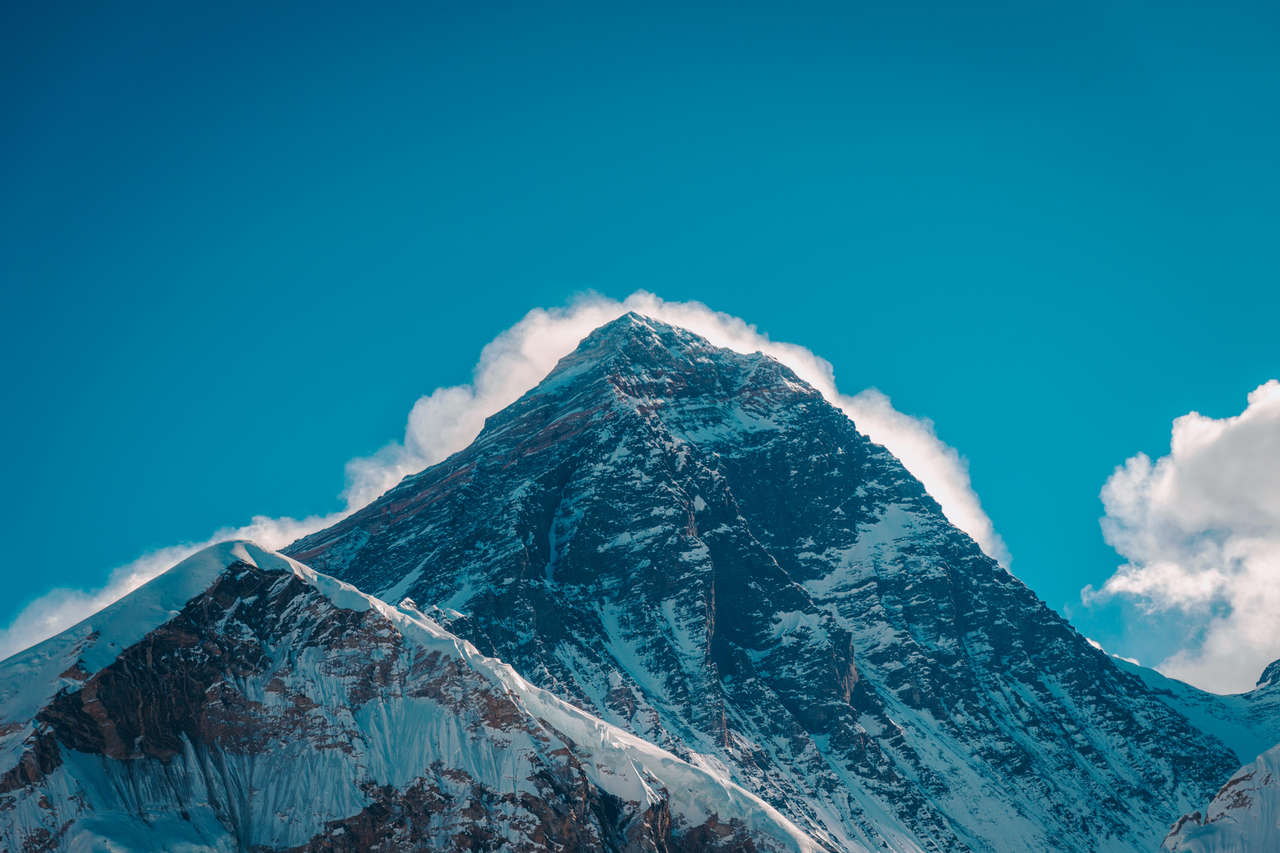
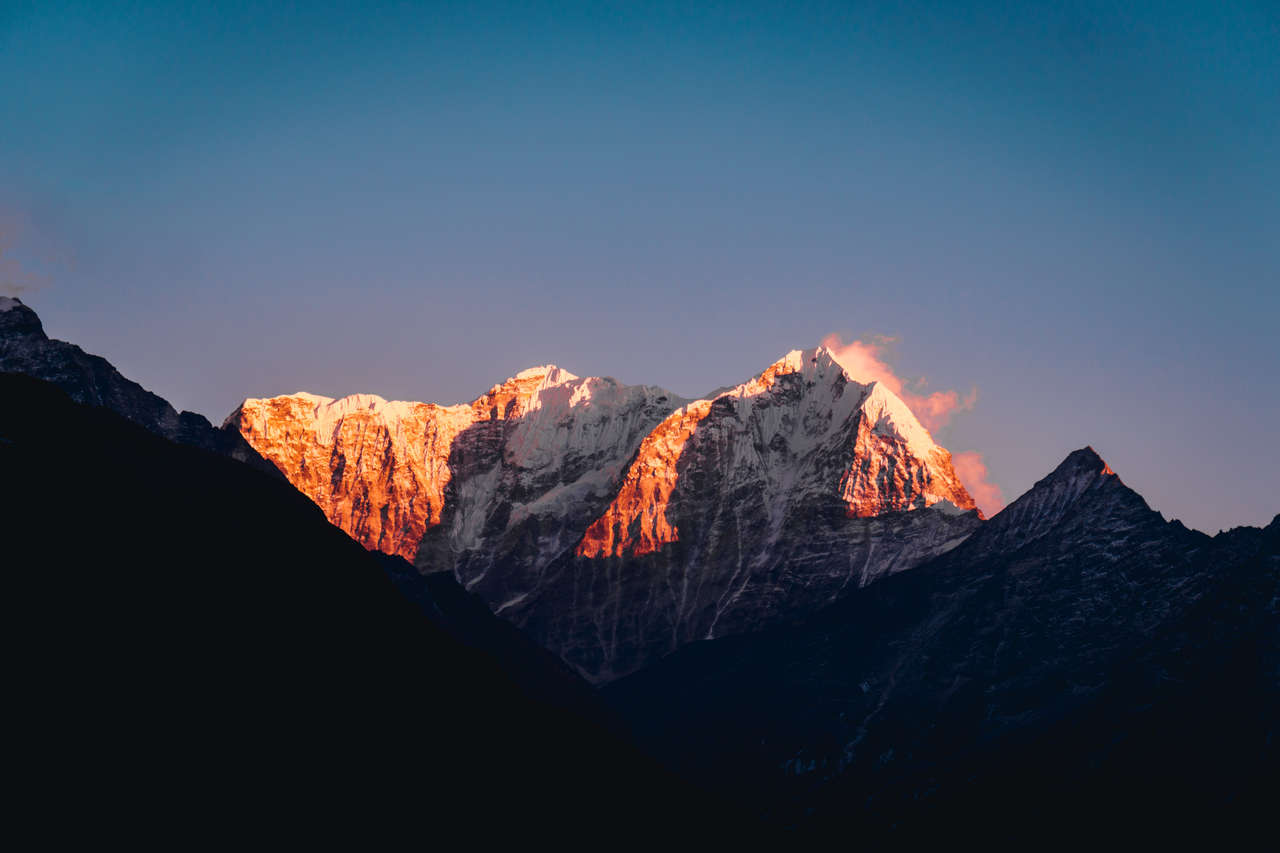
This, ladies and gentlemen, is Mount Everest!
After you get down to Gorakshep, start heading down to Lobuche before 10 AM, so that you will have enough daylight to get to Dzongla on the same day. It will take around 2 hours to get to Lobuche, where you can stop for a while and have lunch.
Remember the intersection mentioned in Day 8? That is where you will have to backtrack to, but instead of returning the same way, turn right, and you will arrive at an opening where you will have to cross to the other side.

Once you are on the other side of the valley, the trail will start going along the left side of the mountain, heading west. Now, you are officially on a side-trail, away from the crowds.
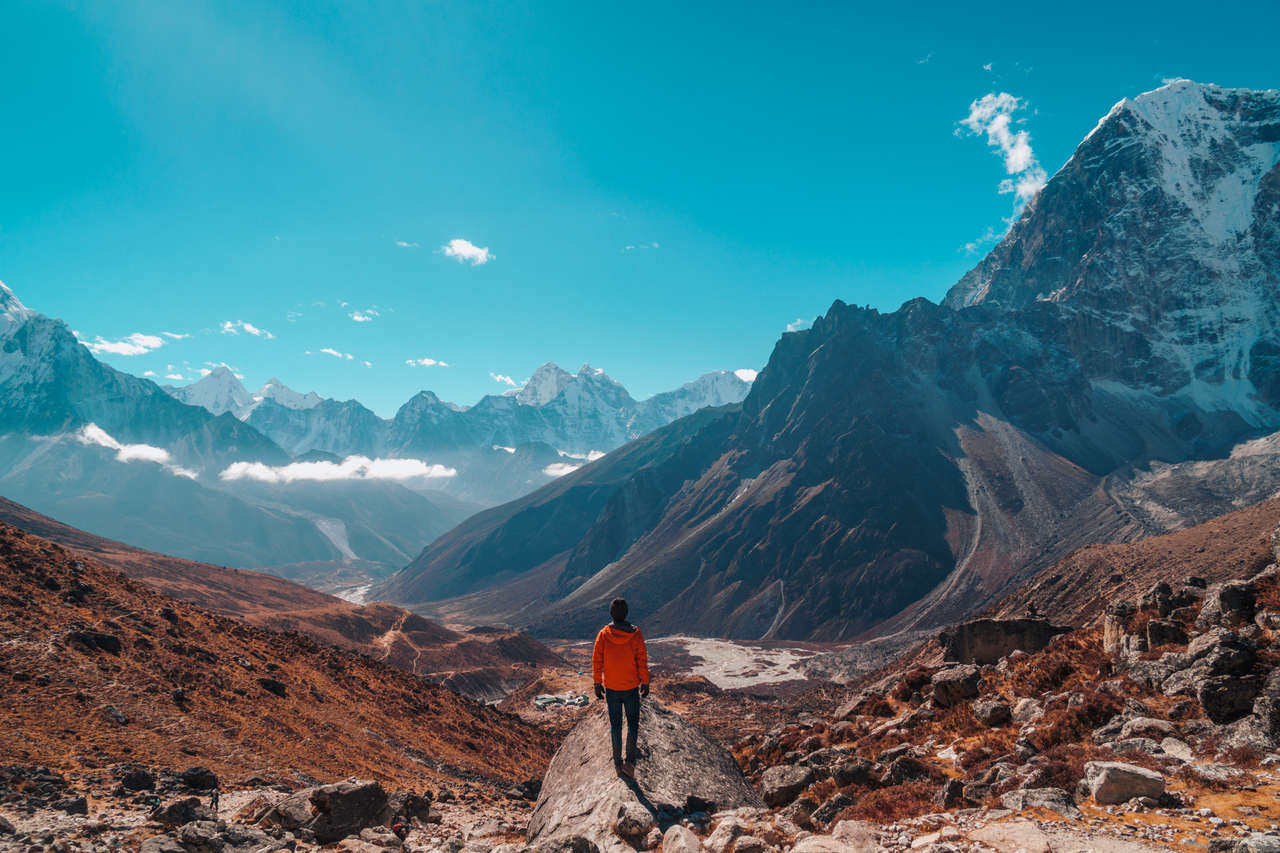
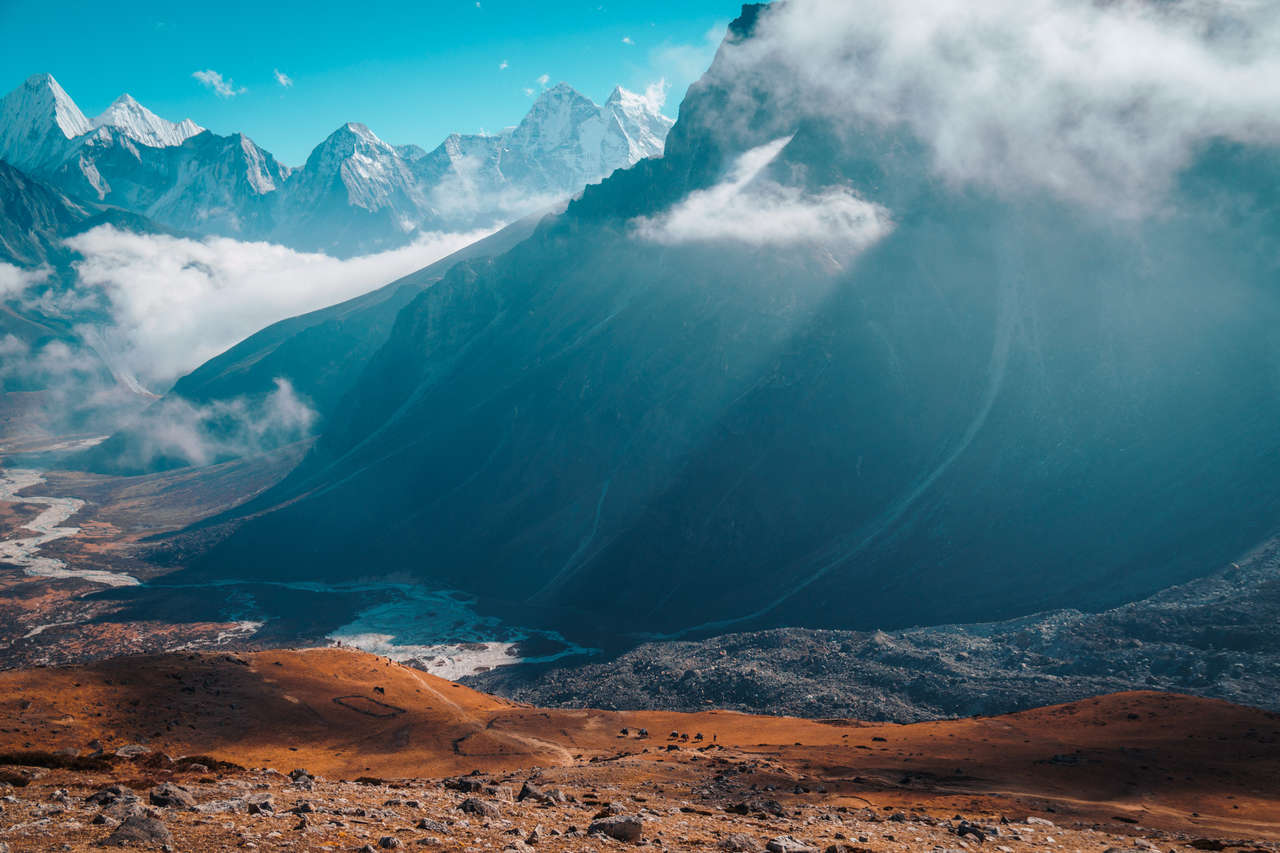
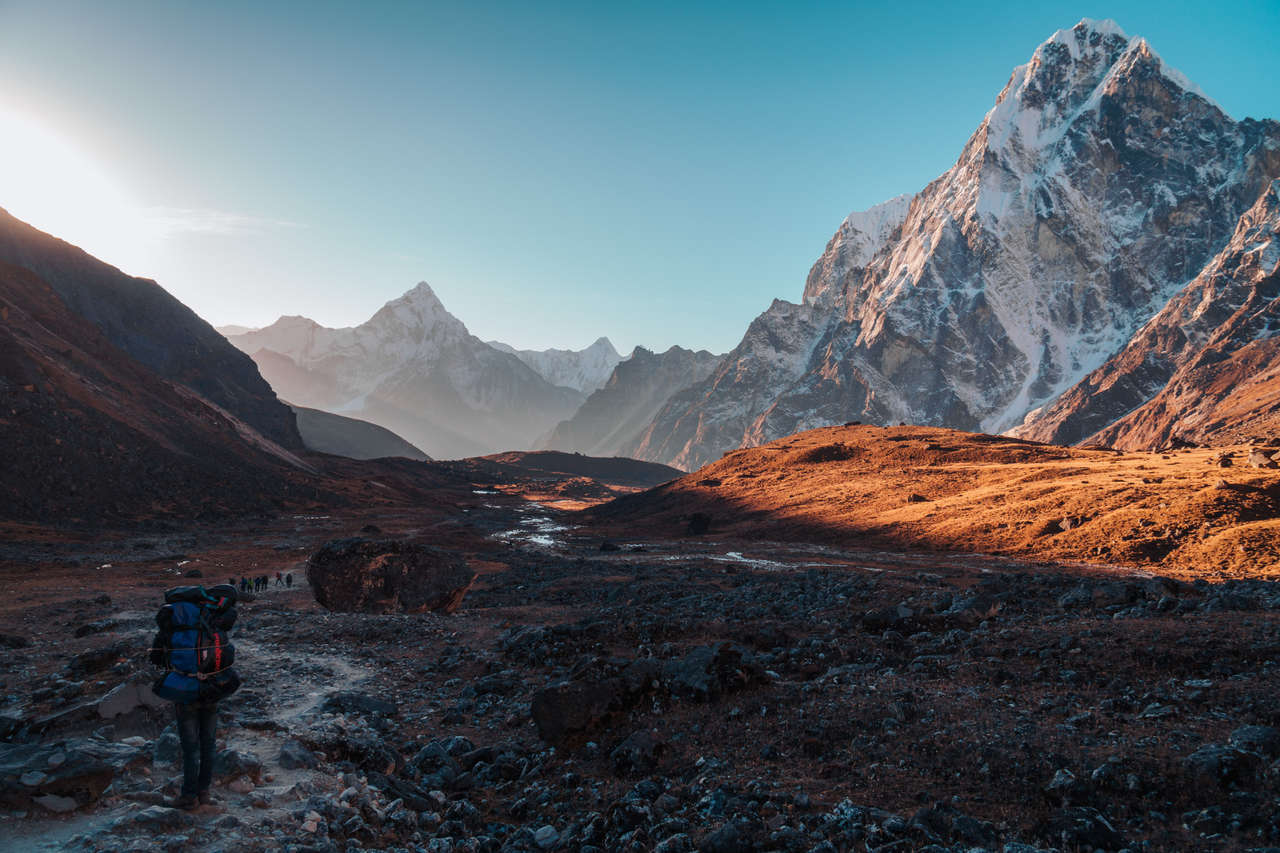
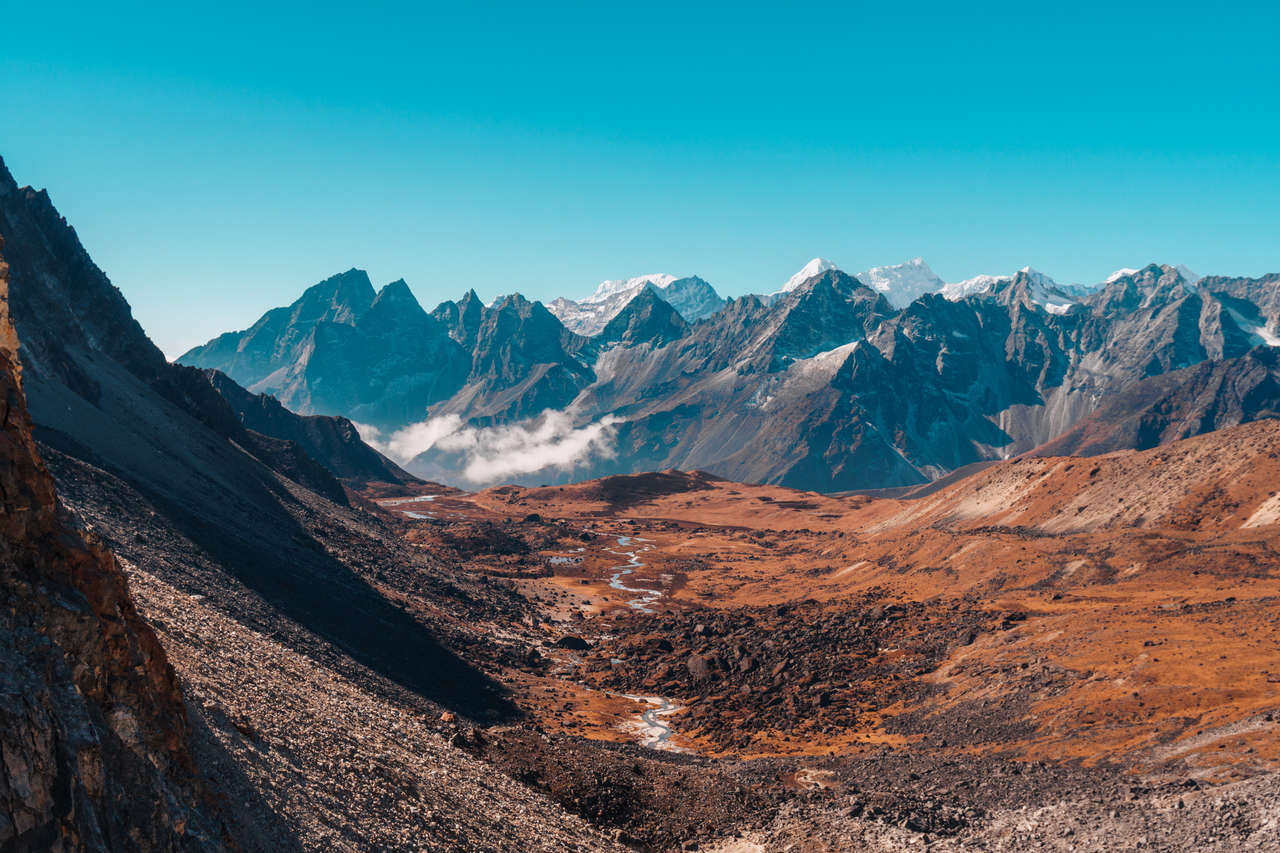
The trail from Lobuche to Dzongla is by far one of my favorite trails on this trek, as the trail hugs along the side of a mountain, exposed to a panoramic view of the valley, the river, and Dukla. This kind of view is why I love hiking so much!
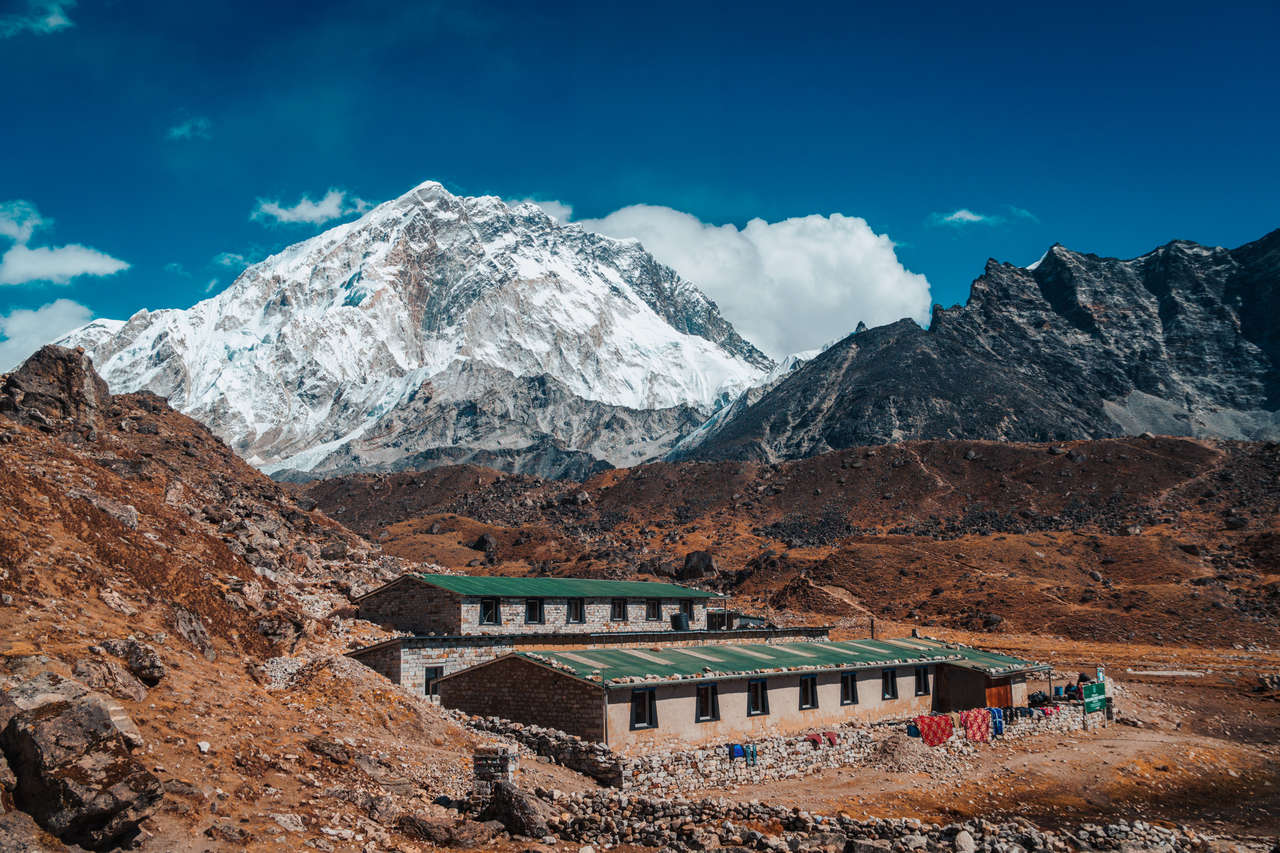
From Lobuche, it should take around 2 hours to arrive in Dzongla, a pretty basic village perfect for a stopover before one of the most challenging parts of the trek - the Chola Pass.
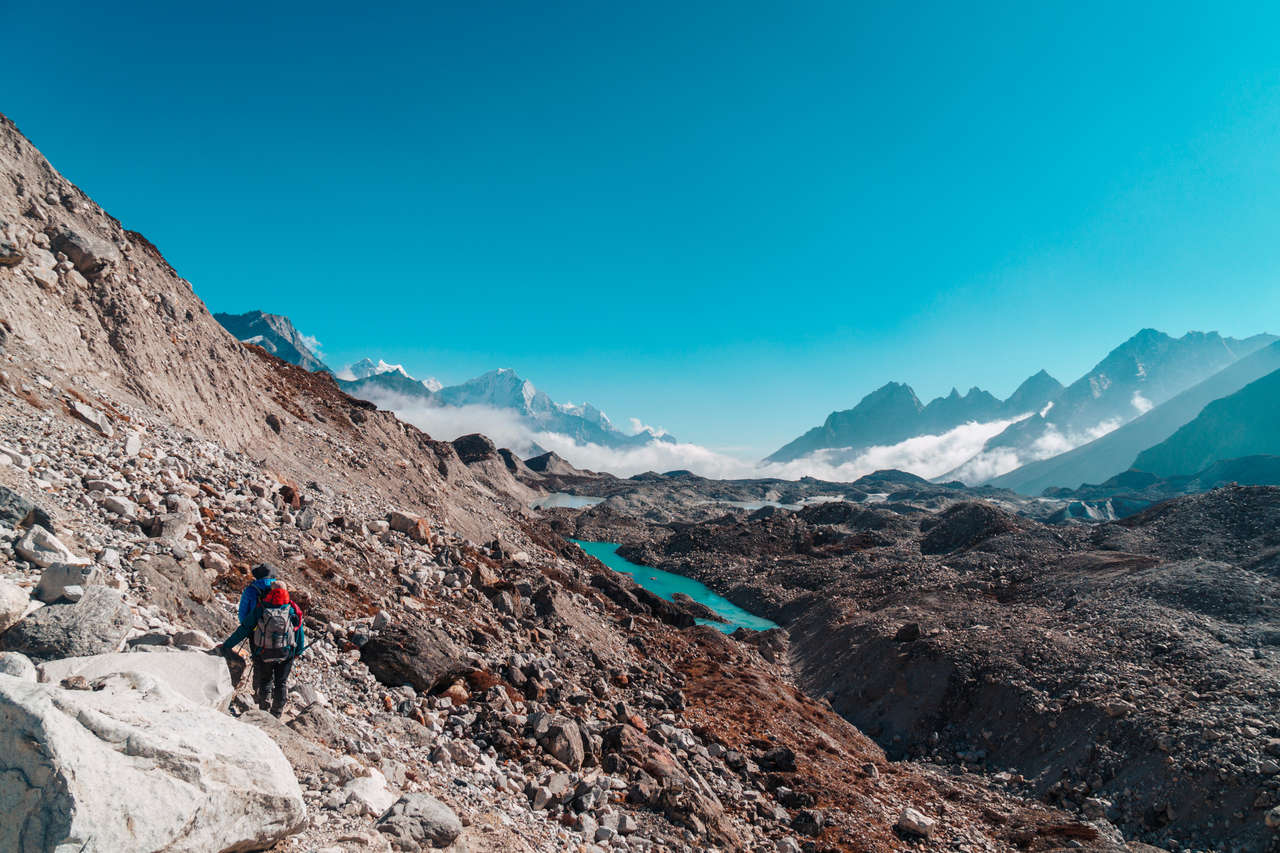
Day 10: Dzongla to Chola Pass to Gokyo Lake
Trek Time: 8 hours
Difficulty: Hard. There is a steep climb to Chola Pass, walking on the glacier, and lots of annoying ups and downs to Gokyo.
Where to Stay: Fitzroy Inn - 150 NPR/Night (Twin Room).
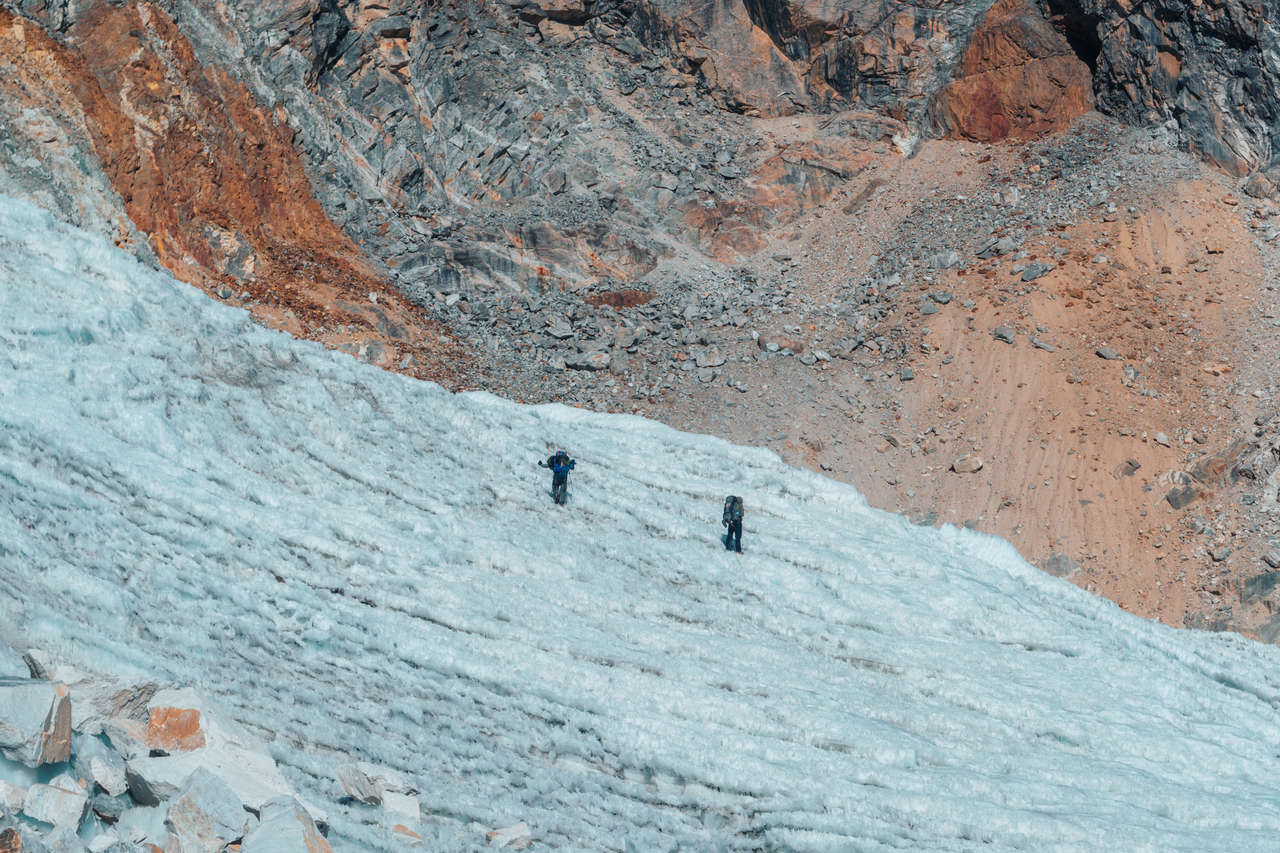
Day 10 will be one of the longest days of all, with the hike starting in Dzongla at 5 AM. This is important because today is the day we cross the Cho La Pass, and in order to do that, we will have to walk up an icy glacier.
The reason we started early is that we want to be at the glacier at 9 AM to cross it because the later into the day, the harder it is to hike the glacier as the ice will start melting, causing it to become even more technical.
The trail begins easily enough along a river through a flat plain in the valley. It will take you about an hour to walk through until the trail starts to climb. This is where things get challenging. The trail will shoot up steeply for another hour until you reach the side of a mountain.
From there, you will have to climb straight up over several large boulders to the top of that mountainside. It is one of the steepest and most tiring parts of the entire trek. Thankfully, it is not too high, and you will reach the plateau in about an hour.
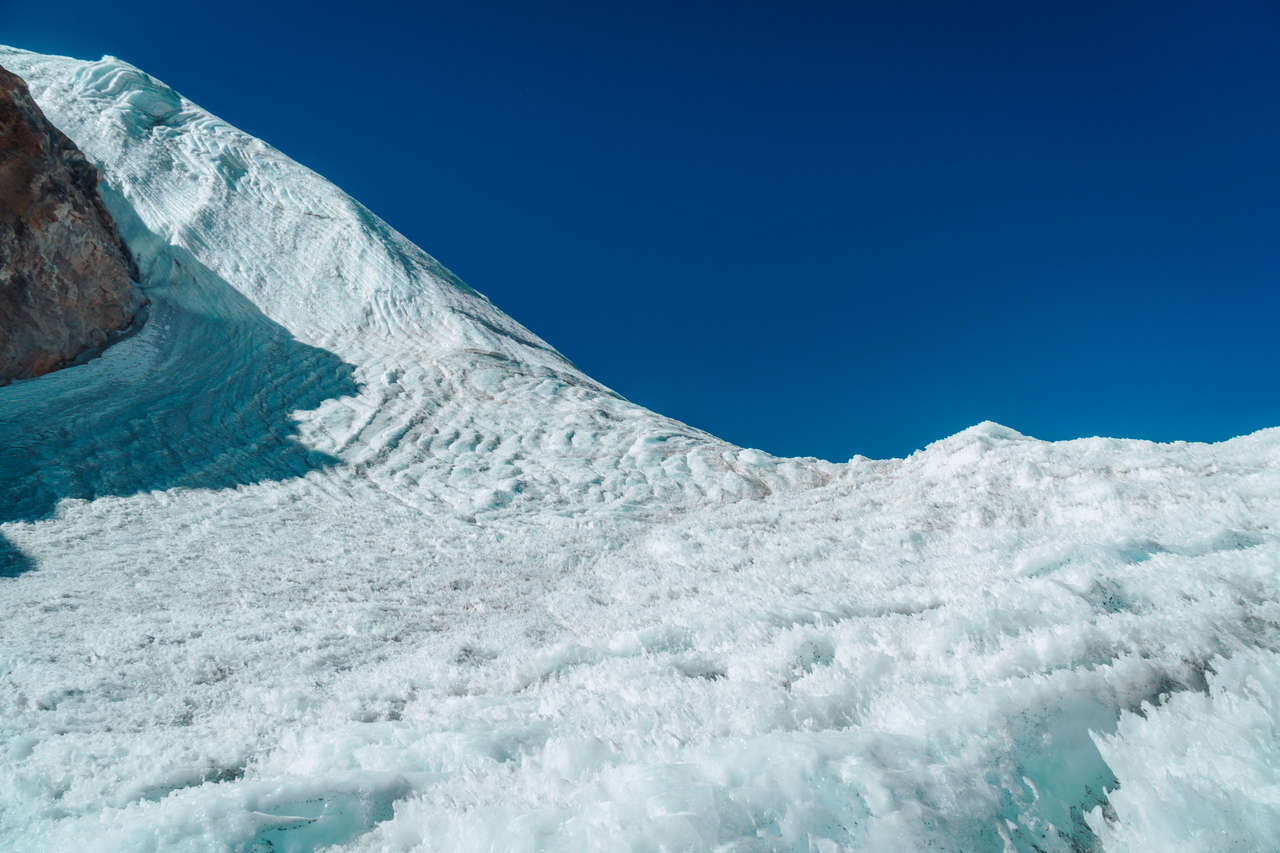
From the plateau, turn left and walk along the left side of the glacier. Do not walk on the glacier just yet, as you can still jump over boulders for around 15 minutes before you will actually have to walk on a glacier.
The trail is not very clear here, so simply follow someone or stick to the rocky part of the mountain until the glacier is unavoidable.
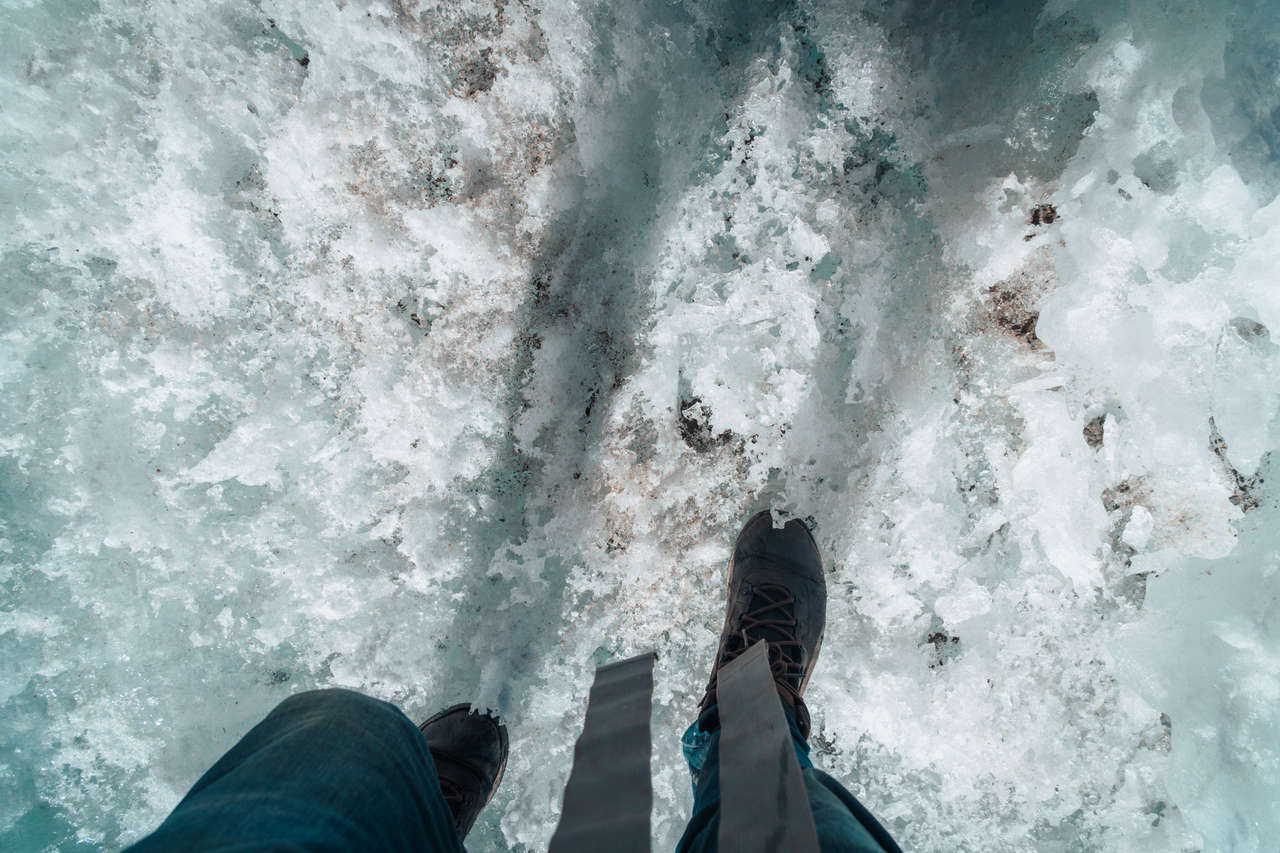
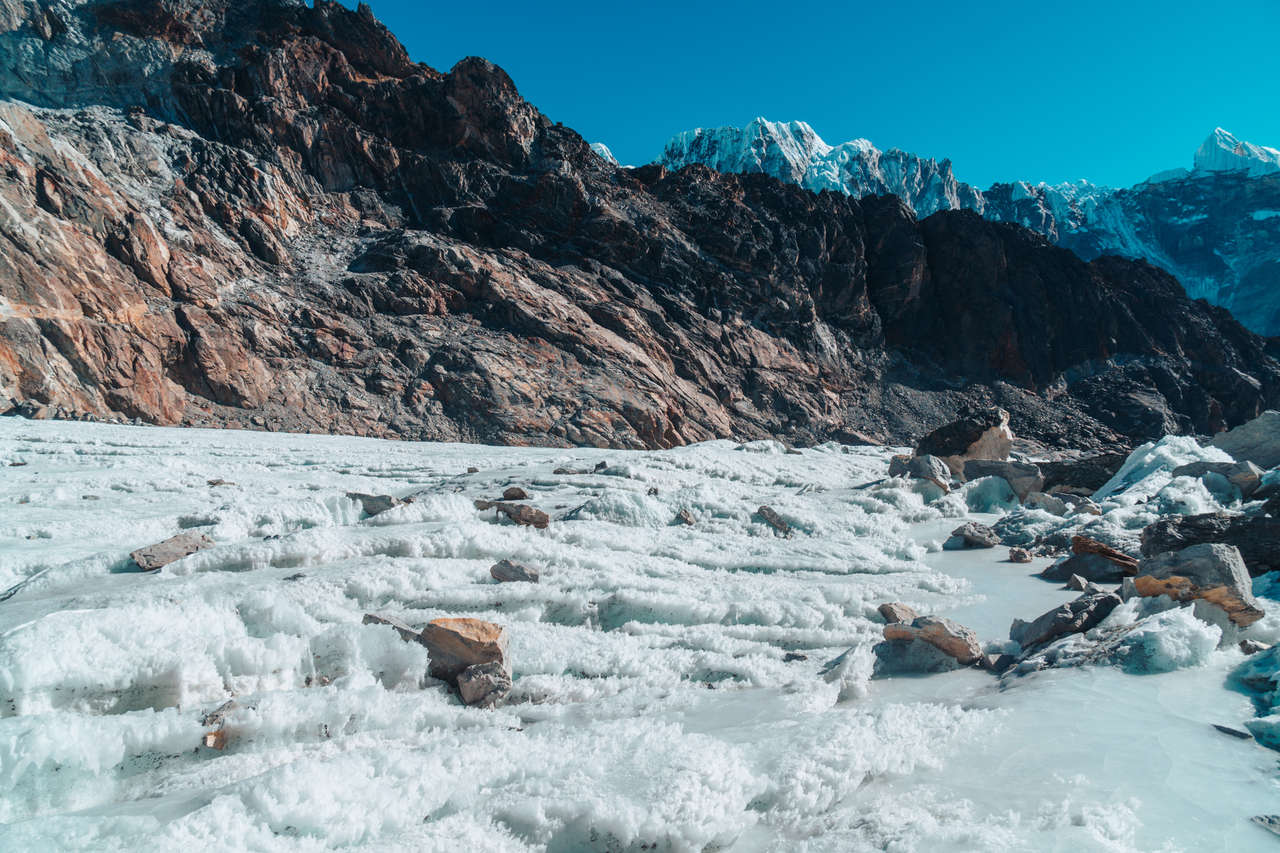
Here is the tricky bit. The glacier is on an upward slope, and you will have to climb up to get to Chola Pass. Without a crampon, this becomes a little challenging, but it becomes easier once you get used to it.
The key is to walk sideways, slowly, and only step on a jagged surface. Avoid flat icy surfaces at all times! You can do as I did and simply follow one of the porters, slowly stepping on a surface to make sure that it is not slippery, and continue on for about 30 minutes until you arrive at Chola Pass.
Now that the most technical part is done, from the past, it's all downhill from there for about 1.5 hours until you reach the Dragnag village. Stop here and have lunch. Treat yourself, you deserve it!
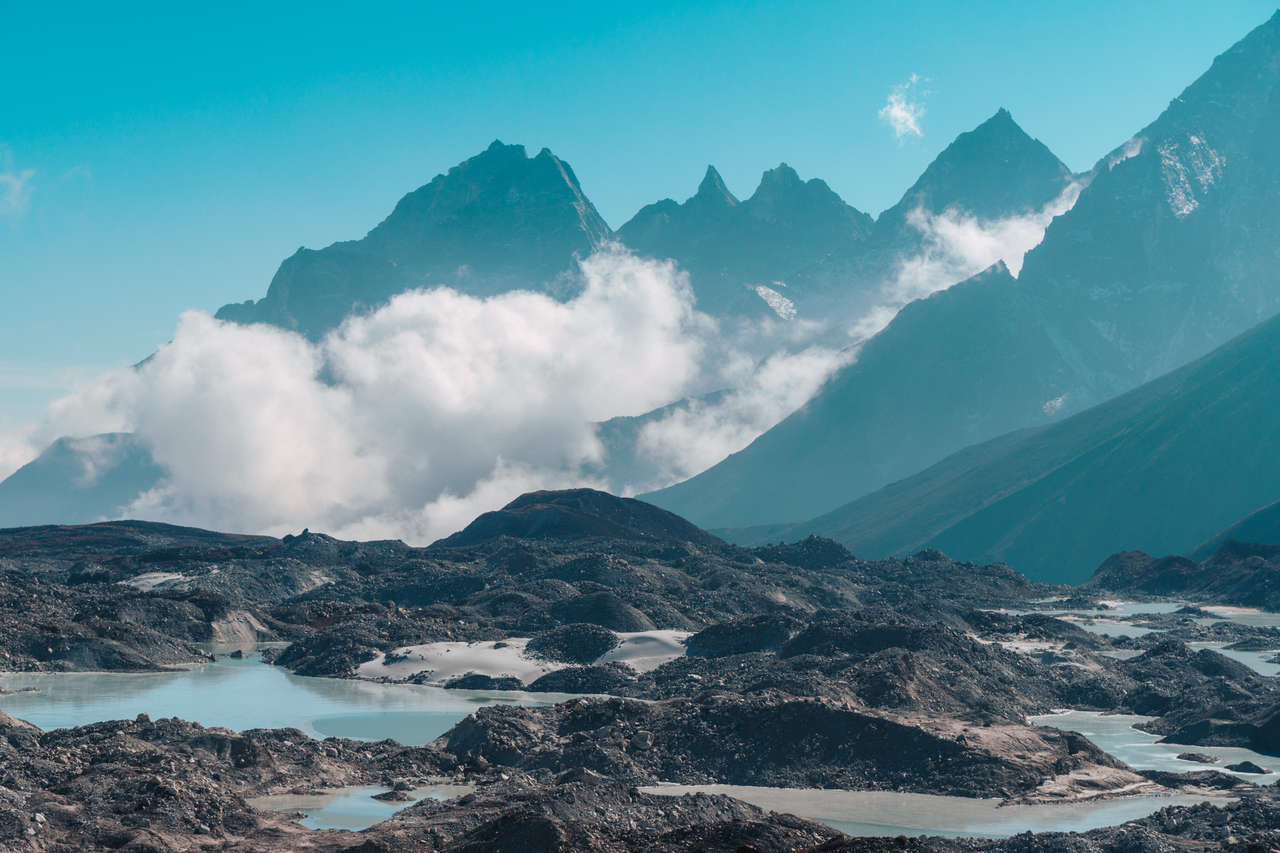
After spending an hour for lunch, you will have to push onward until you reach a hill that goes down into the rocky glacier. It is like stepping into a different world. This rocky glacier is almost moon-like!
You will have to walk on the glacier again, but thankfully, this is a rocky glacier, so there is no need to walk on a sketchy ice surface. It's an easy stroll with lots of ups and downs for about one hour, and then the trail will start to climb out of the glacier.
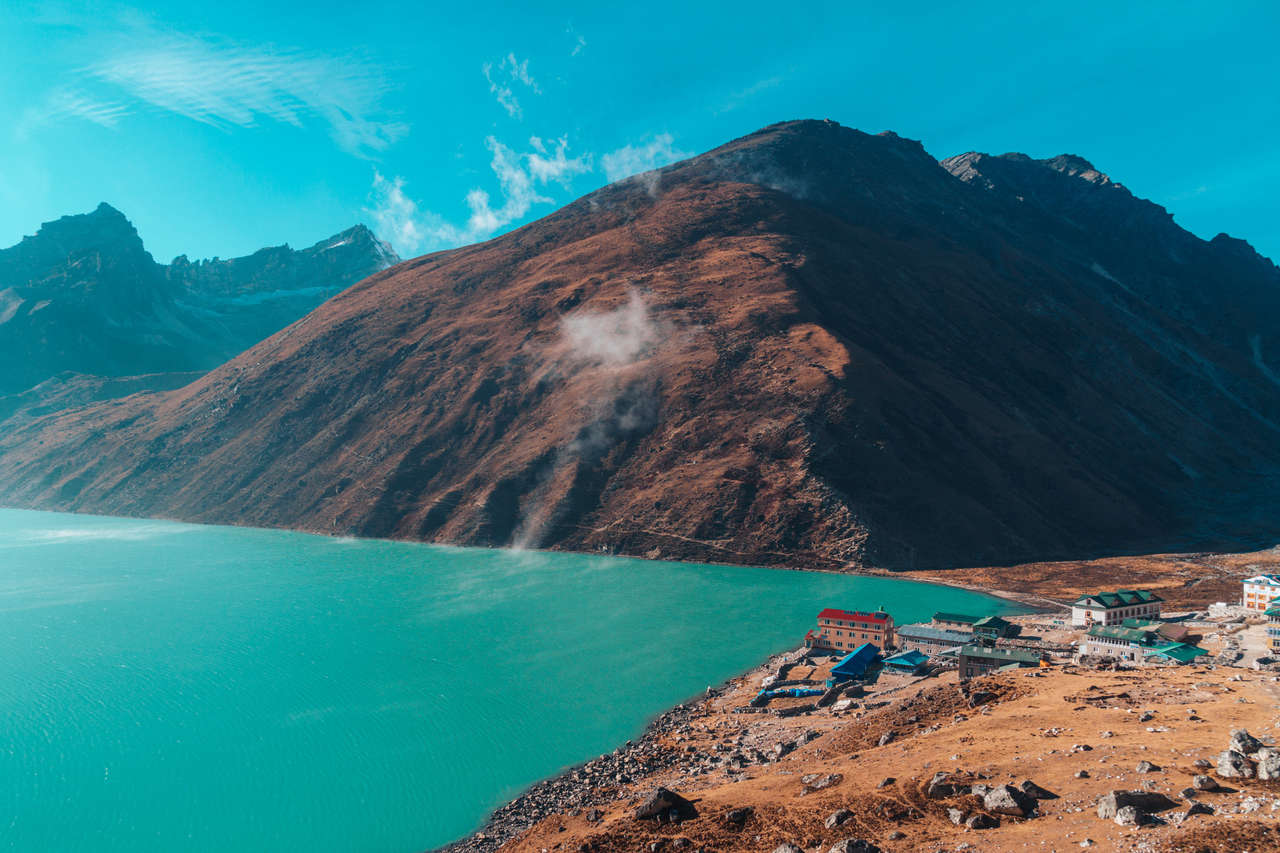
Once you have reached the plateau, it will be about a 15-minute walk until you start seeing a village and a vivid blue lake. Welcome to Gokyo!
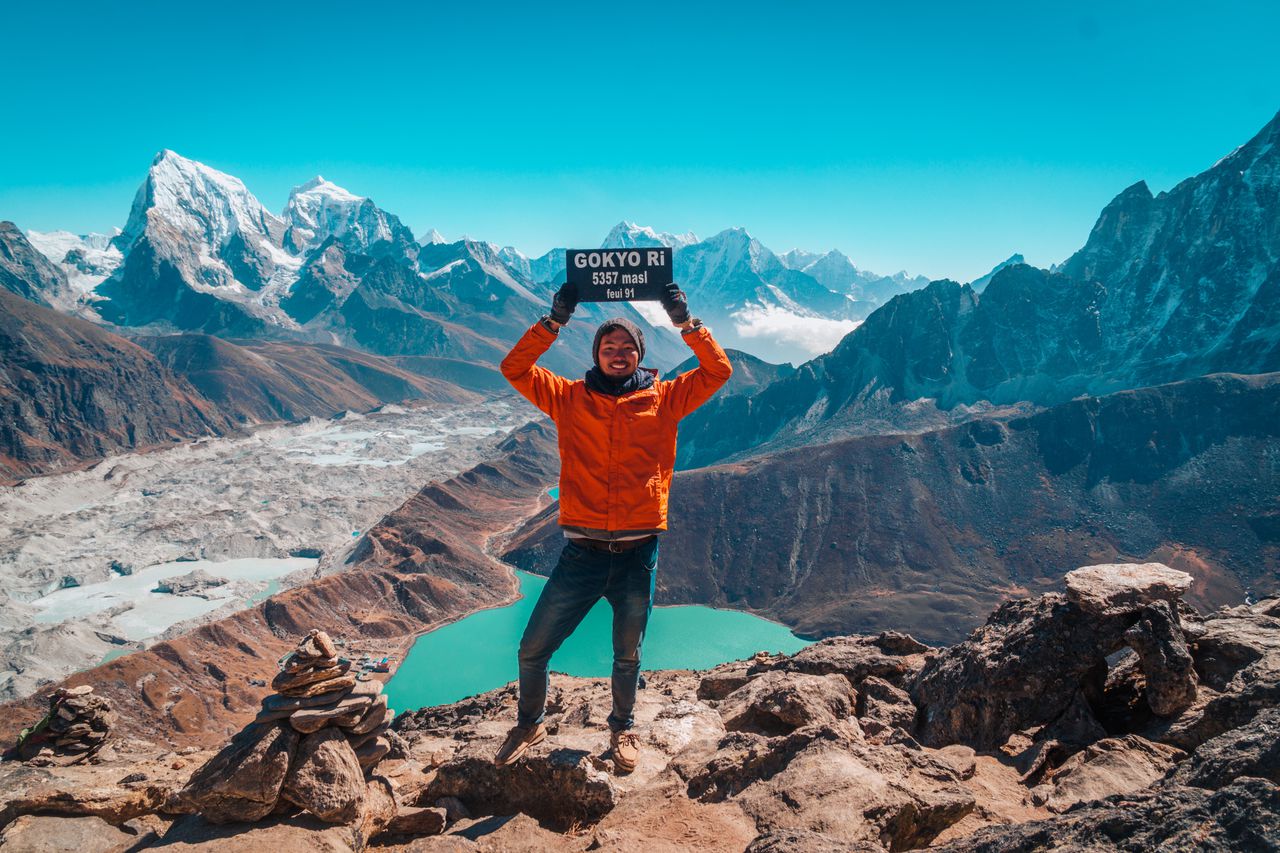
Day 11: Gokyo Lake to Gokyo Ri and Back
Trek Time: 3 hours
Difficulty: Moderate to Hard. Hard climb to Gokyo Ri and then rest for the rest of the day.
Where to Stay: Fitzroy Inn - 150 NPR/Night (Twin Room).
We have made it to Gokyo Lake! It's time to rest, but before that, we will have to climb Gokyo Ri first. Gokyo Ri is pretty much like Kala Patthar, an ugly rock to climb, but with a rewarding view at the top.
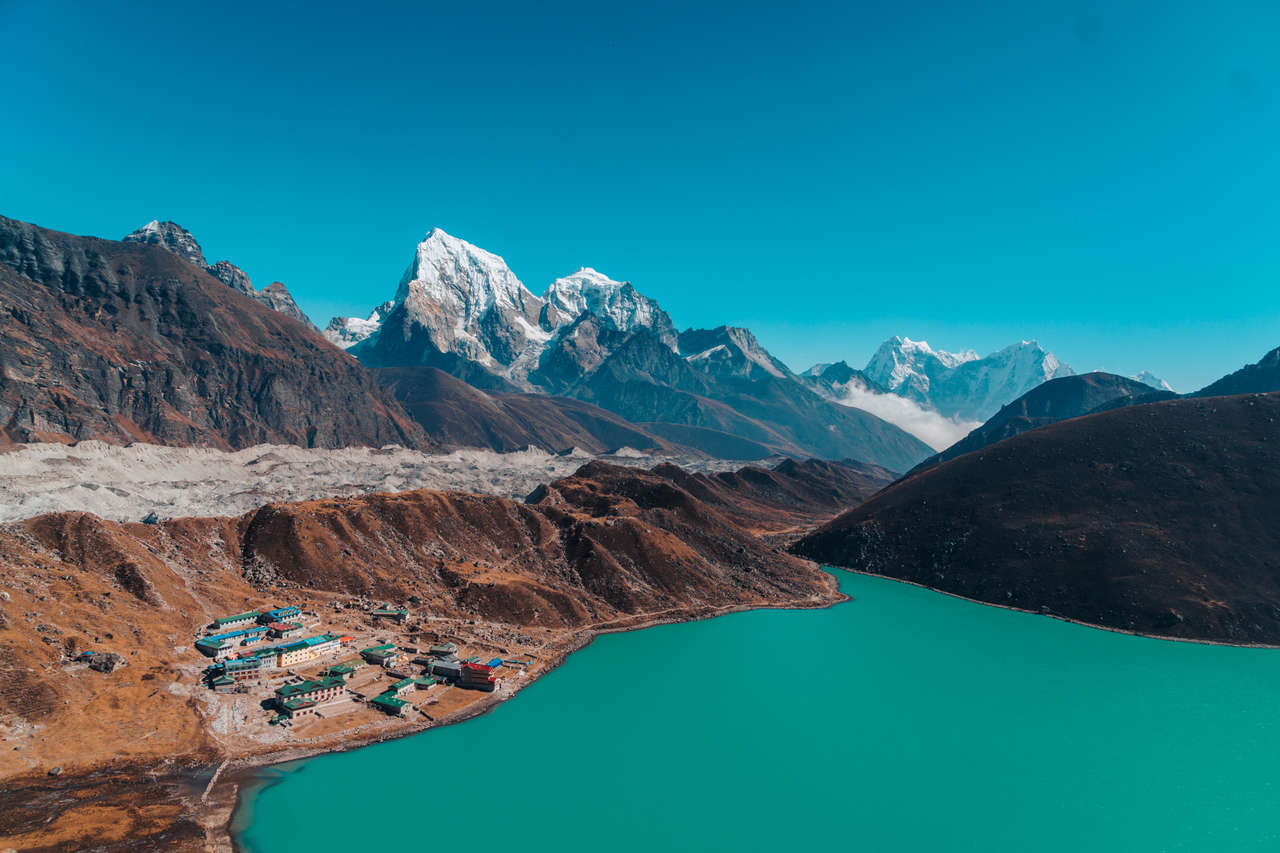
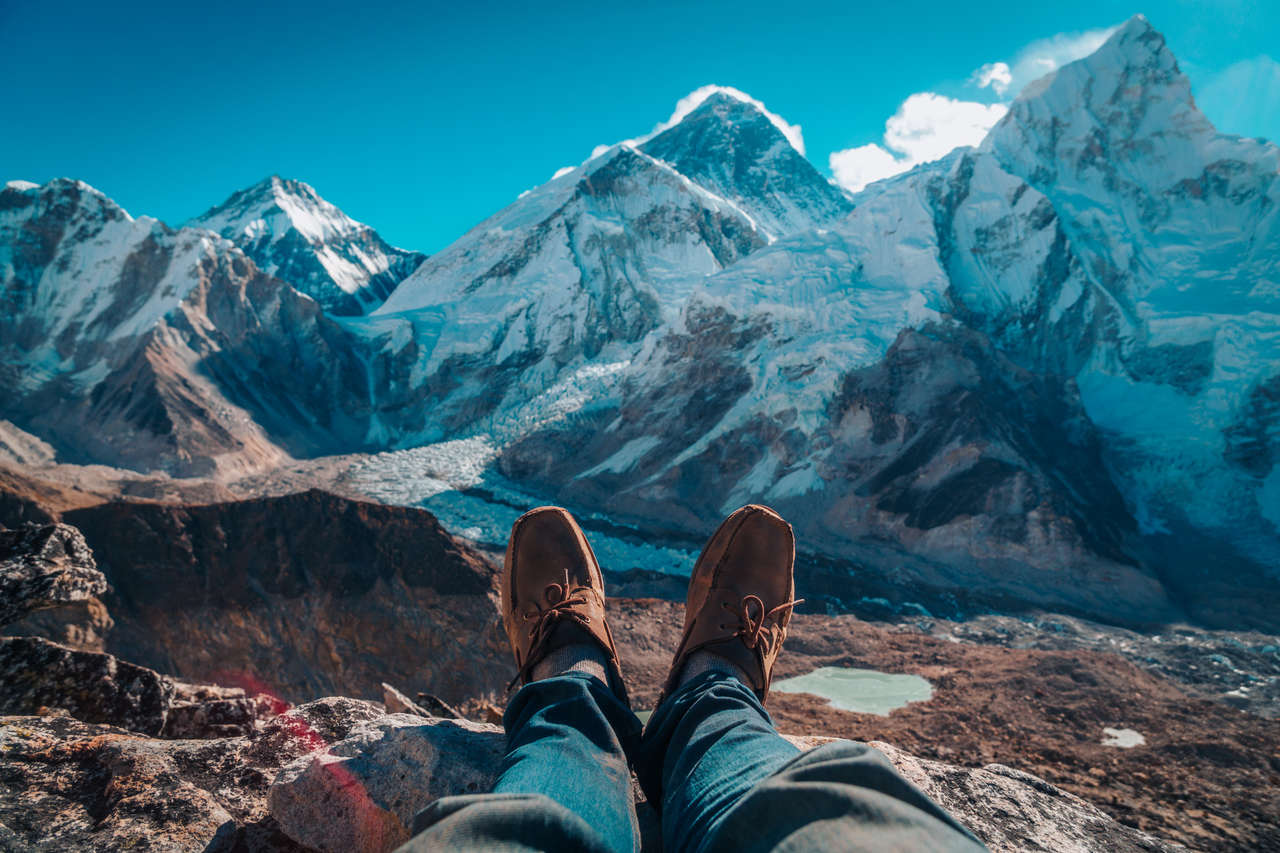
It will take around 2 hours to climb all the way to the summit, and you will be rewarded with a view of Gokyo Lake 3, the glacier you crossed yesterday, and Mount Everest from afar.
From here, you can clearly see that Mount Everest is the highest among all, something you can't really tell when you are up close, looking up.
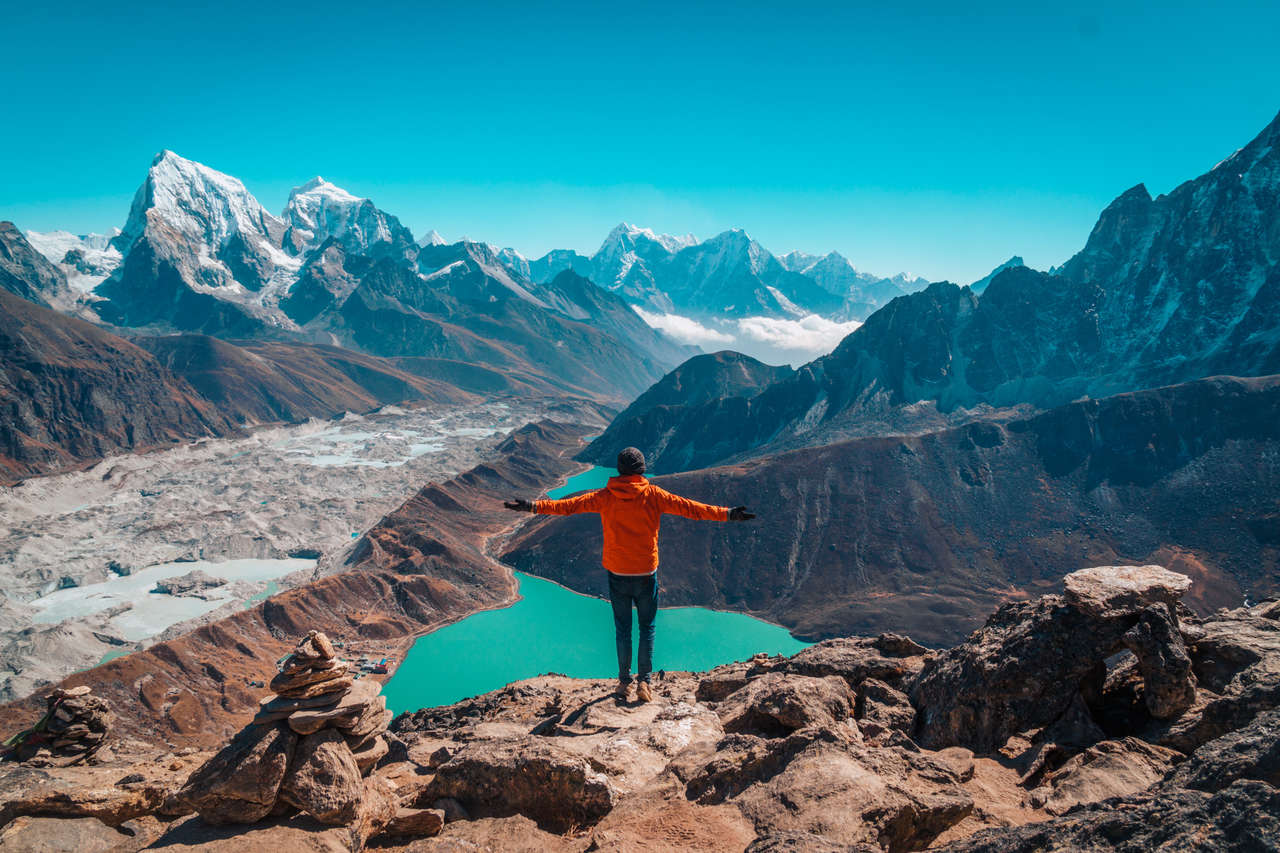
One hour easy down to Gokyo and spend the rest of the day chilling by the lake or treat yourself to a delicious bakery at Fitzroy Inn.
Day 12: Gokyo Lake to Dole
Trek Time: 4 hours
Difficulty: Easy. All downhill from Gokyo to Dole.
Where to Stay: Himalayan Lodge - 300 NPR/Night (Twin Room).
The 12th day is all downhill, which is a welcome pace compared to all the ups and downs we've been through. You will start to get more and more oxygen in your bloodstream, which makes hiking much easier unless you have a case of nasty Khumbu Cough, as I did. The walk down was as hard due to my constant coughing, disrupting my airflow. Wear a buff when you hike!
Day 13: Dole to Namche Bazaar
Trek Time: 5 hours
Difficulty: Moderate. I really want to make it easy for you, I really do, but the truth is, there is one steep climb before you reach Namche Bazaar.
Where to Stay: Khumbu Lodge - 300 NPR/Night (Twin Room).
Oh, how I wish the last day would be an easy stroll for us, but unfortunately, that is not the case. From Dole, it's a one-hour easy hike down to Phortse Tenga. However, from the bottom of the mountain, you will have to hike straight up for 2 hours to Mong village.
Hiking in the Himalayas is like real life. When you think you have made it, there's always another goddamn obstacle to overcome. 😆
The good thing is, after Mong, it's all downhill from there. The trail will merge back at the intersection in Sanasa, a village you passed on your 4th day, and then you will be walking along an exposed trail leading back to Namche Bazaar.
Day 14: Namche Bazaar to Lukla
Trek Time: 6 hours
Difficulty: Easy. A simple walk with a lot more downs than ups.
Where to Stay: Everest Lodge Restaurant and Bar - 400 NPR/Night (Twin Room).
For day 14, it's pretty much the same as day 1 and 2 combined, but from the opposite direction. There are a lot of ups and downs, and you are still quite far from Lukla, but nothing will motivate you more than a nice shower, delicious food, and warm beds waiting for you in Kathmandu the next day.
Once you arrive in Lukla, stay at the Everest Lodge Restaurant and Bar to be close to the airport, allowing you to catch the earliest available flight you can purchase.
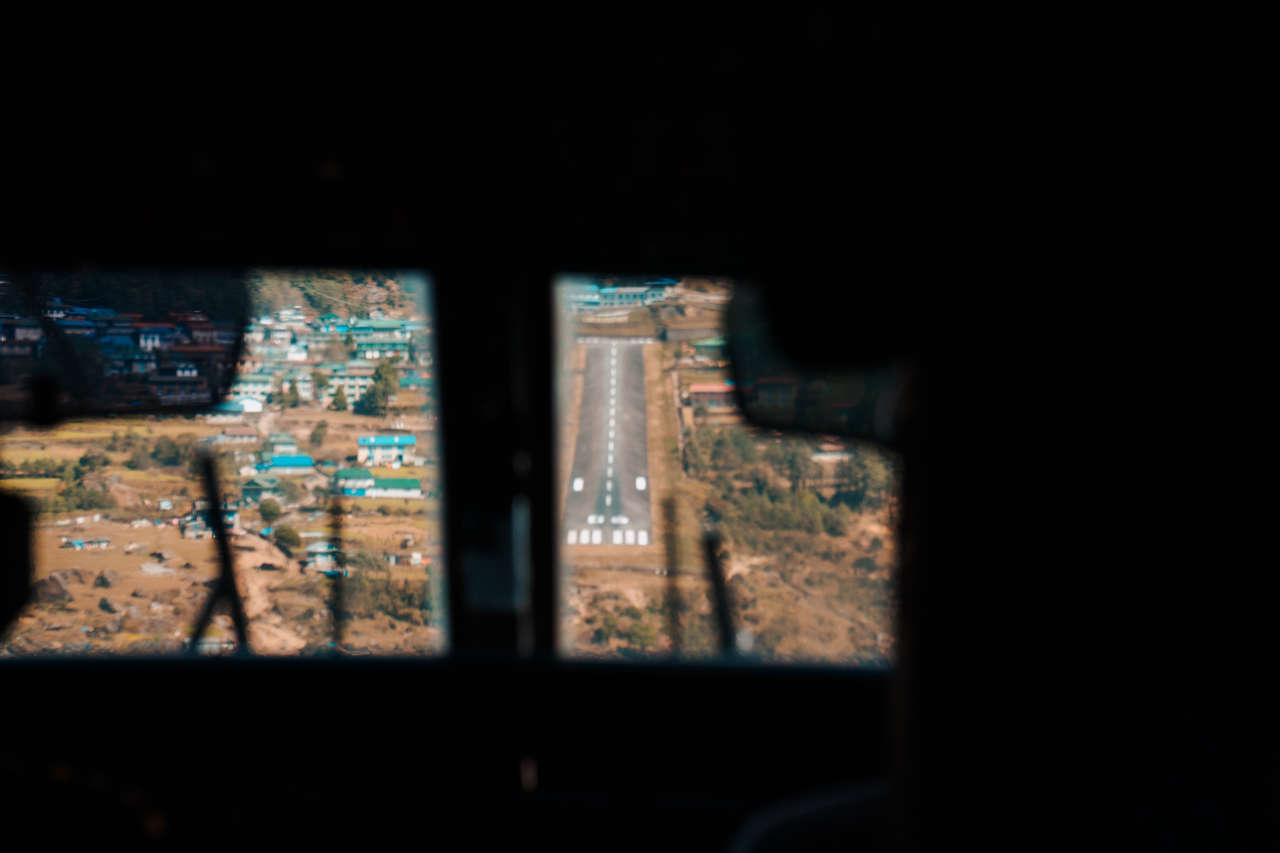
Day 15: Lukla to Kathmandu
Wake up, it's time to head back to civilization! Get the earliest flight you can as clouds often roll in in the afternoon, and there is a higher chance that the flight will be canceled when that happens. After you get on the flight, you should be back in Kathmandu in about 30 minutes. Congratulations, you did it! You have trekked to the Everest Base Camp, including Gokyo!
More Nepal Activities
When to Trek Everest Base Camp?
The best time to trek the Everest Base Camp trail or anywhere else in the Nepalese Himalayas, for that matter, is either in April - May (Spring) or October - November (Autumn), which are considered to be the pre-monsoon and post-monsoon seasons, respectively. There is less chance of rain, and the colors of the season are in full swing during these periods.
Unfortunately, the Everest Base Camp trail is very popular to the point that it is almost impossible to avoid crowds unless you trek in winter or go off on a side trail. So, be prepared for an influx of tour groups when you trek during this time.
I did the trek in late October-November, and it rained on me only once during my entire 15-day period, which is more than I could hope for. The temperature during the day is warm when the sun is out, but it rapidly drops to almost -12°C at night when the sun disappears, so make sure you prepare accordingly.
How Much Does it cost to trek the Everest Base Camp trail?
A Day-by-Day Breakdown
Here is the updated 2019 pricing of Everest Base Camp and Gokyo trek, broken down day-by-day for the entire 15-day duration, with the estimated total amount at the end.
Day 1: Kathmandu to Monjo (Total: 22,500 NPR)
Flight to Lukla: 167 USD (19,000 NPR)
Accommodation: 300 NPR
Food per meal: 300 - 500 NPR x 3 = ~1,200 NPR
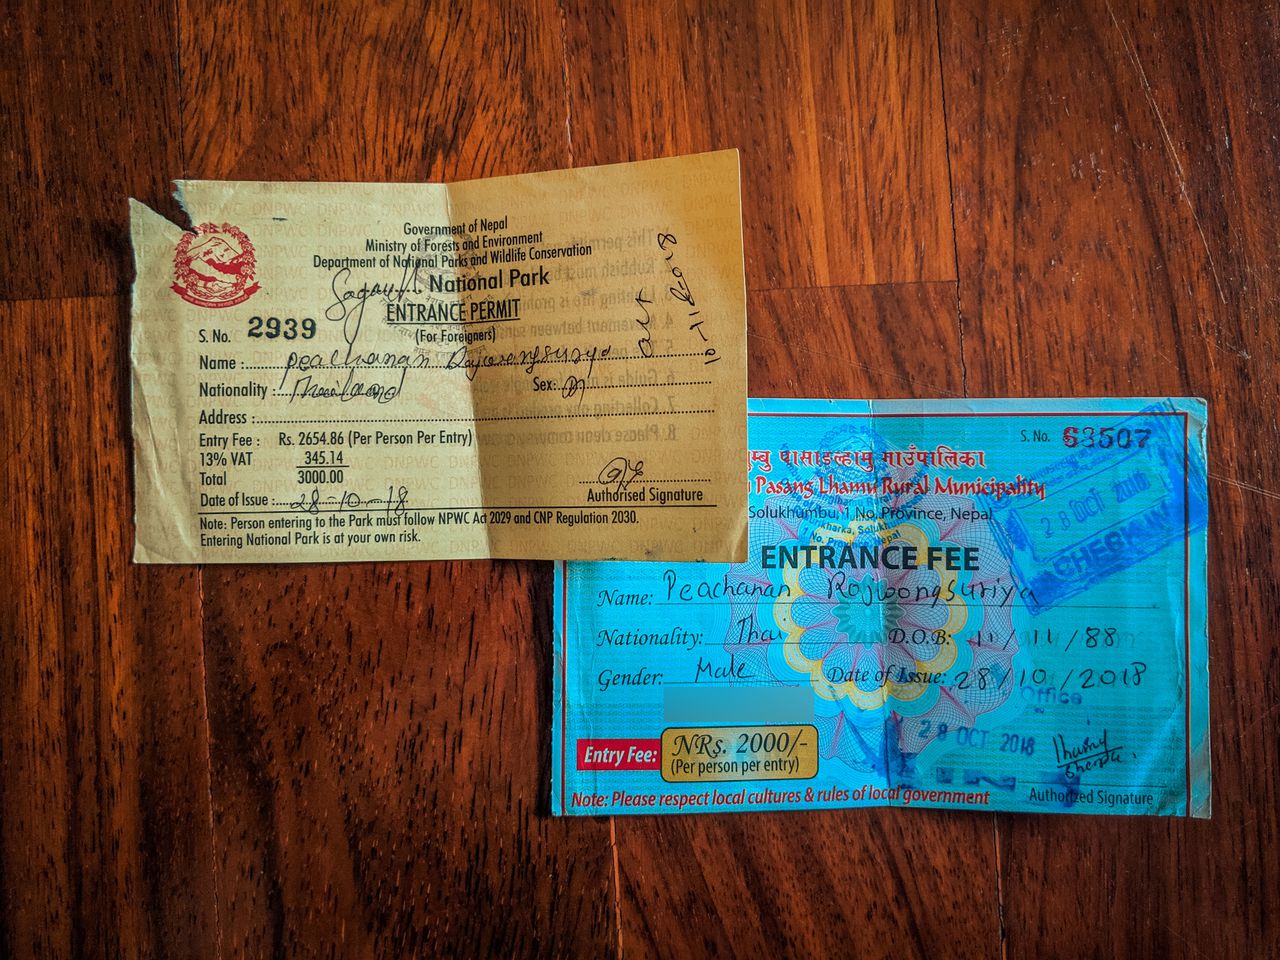
Local Permit: 2,000 NPR
Day 2: Monjo to Namche Bazaar (Total: 4,800 NPR)
Accommodation: 300 NPR
Food per meal: 400 - 600 NPR x 3 = ~1,500 NPR
National Park Permit: 3000 NRS
Day 3: Acclimatization in Namche Bazaar (Total: 1,800 NPR)
Accommodation: 300 NPR
Food per meal: 400 - 600 NPR x 3 = ~1,500 NPR
Day 4: Namche Bazaar to Tengboche (Total: 2,900 NPR)
Accommodation: 500 NPR (fixed)
Food per meal: 600 - 1000 NPR x 3 = ~2,400 NPR
Day 5: Tengboche to Dingboche (Total: 2,900 NPR)
Accommodation: 500 NPR (fixed)
Food per meal: 600 - 1000 NPR x 3 = ~2,400 NPR
Bakery Treats (optional): 500 + 150 NPR (coffee)
Day 6: Acclimatization in Dingboche (Total: 2,900 NPR)
Accommodation: 500 NPR (fixed)
Food per meal: 600 - 1000 NPR x 3 = ~2,400 NPR
Day 7: Dingboche to Lobuche (Total: 3,100 NPR)
Accommodation: 700 NPR (fixed)
Food per meal: 650 - 1300 NPR x 3 = ~2,400 NPR
Day 8: Lobuche to Gorakshep (Total: 2,900 NPR)
Accommodation: 500 NPR (fixed)
Food per meal: 650 - 1300 NPR x 3 = ~2,400 NPR
Day 9: Gorakshep to Dzongla (Total: 2,300 NPR)
Accommodation: 500 NPR
Food per meal: 400 - 800 NPR x 3 = ~1,800 NPR
Day 10: Dzongla to Gokyo (Total: 1,950 NPR)
Accommodation: 150 NPR
Food per meal: 400 - 800 NPR x 3 = ~1,800 NPR
Day 11: Gokyo (Total: 1,950 NPR)
Accommodation: 150 NPR. Food per meal: 400 - 800 NPR x 3 = ~1,800 NPR.
Day 12: Gokyo to Dole (Total: 2,100 NPR)
Accommodation: 300 NPR
Food per meal: 400 - 800 NPR x 3 = ~1,800 NPR
Day 13: Dole to Namche Bazaar (Total: 1,800 NPR)
Accommodation: 300 NPR. Food per meal: 400 - 600 NPR x 3 = ~1,500 NPR.
Day 14: Namche Bazaar to Lukla (Total: 1,500 NPR)
Accommodation: 300 NPR
Food per meal: 300 - 500 NPR x 3 = ~1,200 NPR
Day 15: Lukla to Kathmandu (Total: 19,000 NPR)
Flight to Kathmandu: 167 USD (19,000 NPR).
Cost Breakdown
- Accommodation: 5,300 NPR (twin room)
- Food: Approximately 26,100 NPR per person.
- Transportation: 38,000 NRP per person.
- Permits: 5000 NPR per person.
Total Cost for 15 Days Everest Base Camp Trek
Now that we have it all summarized, we can sum it all up to get the total cost of trekking the Everest Base Camp and Gokyo trail for 15 days.
Minimum Cost per person: 74,400 NPR | 654 USD.
Optional Costs (Snacks, Drinks, Bakeries, Hot Shower, etc.): ~10,000 NPR | ~90 USD per Person.
Total Cost per person: 84,400 NPR | 742 USD
Total Cost for 2 people: 138,200 NPR | 1,216 USD
What are ways to save cost when trekking the Everest Base Camp Trail?
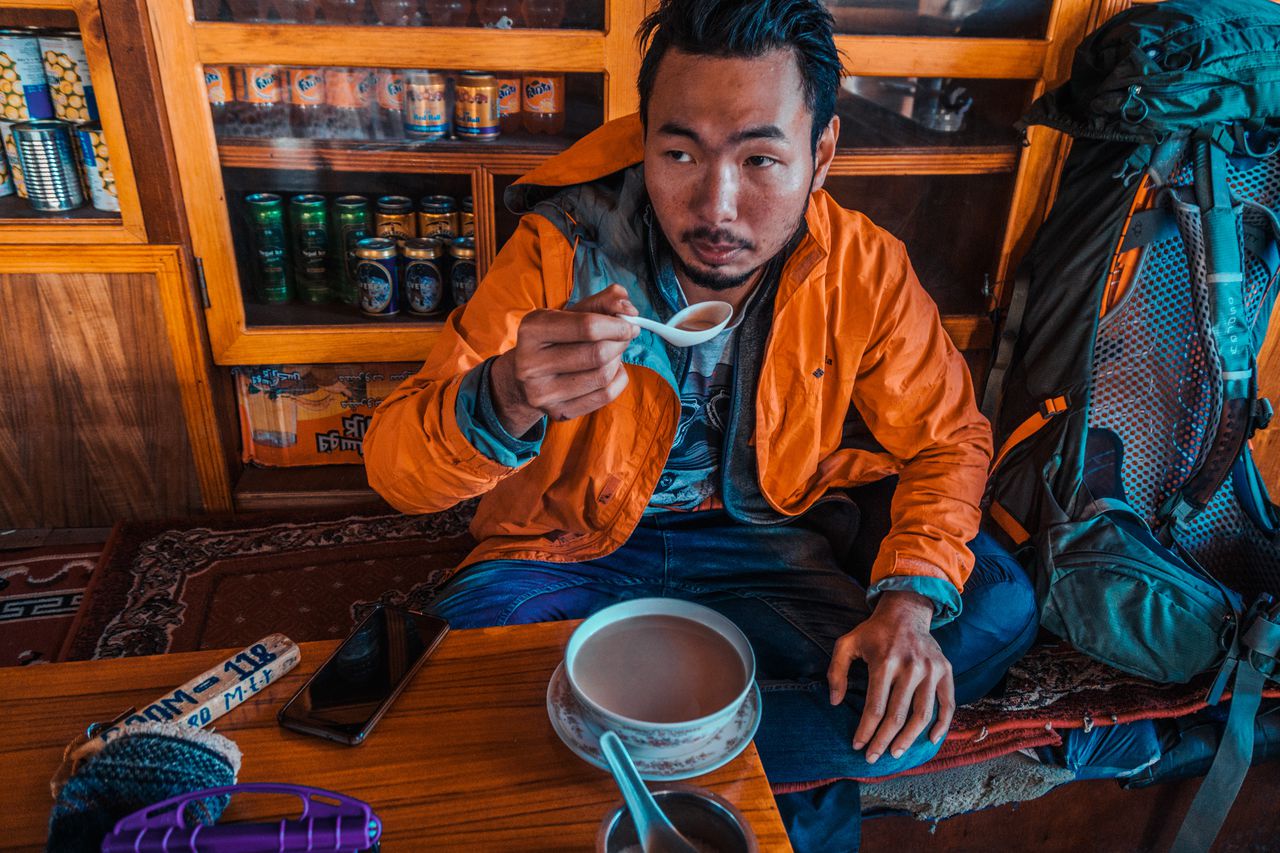
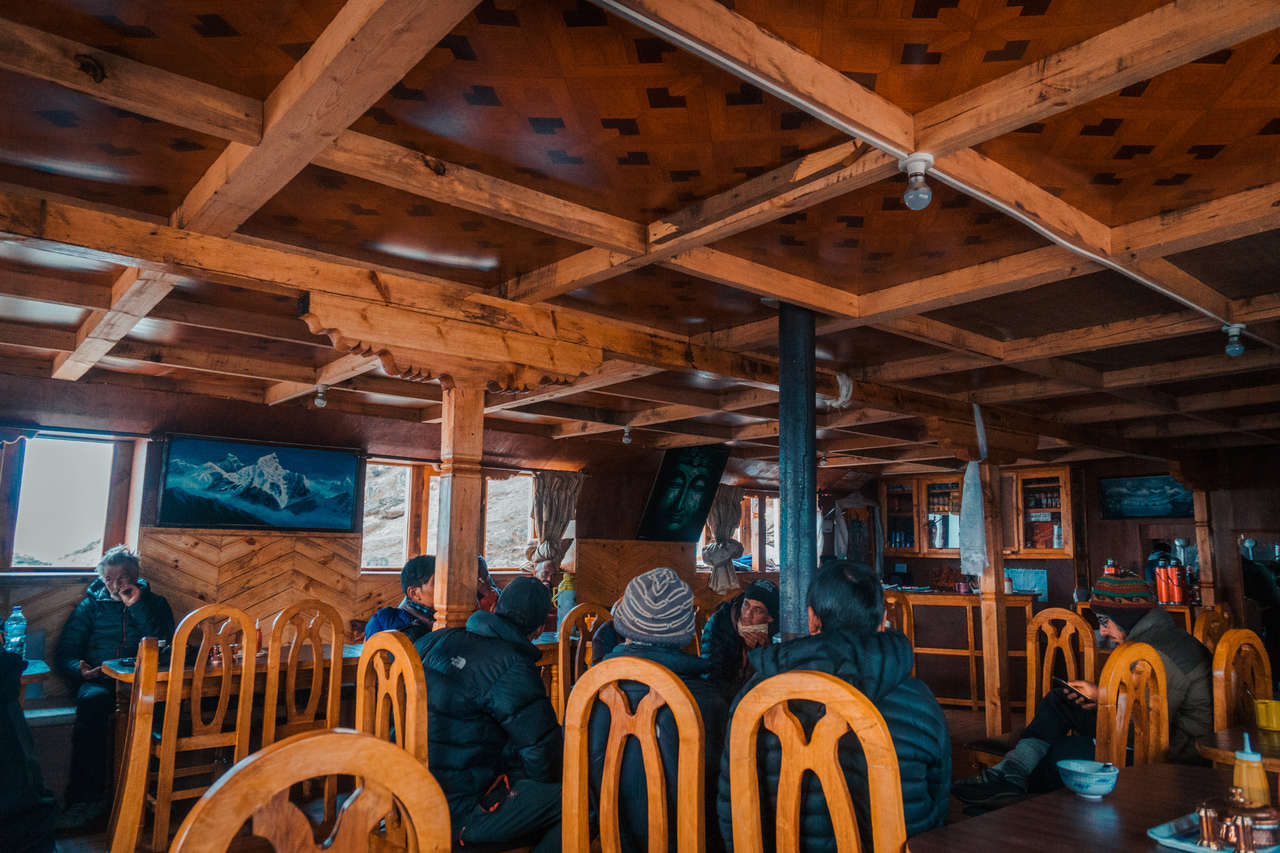
This is how I look after a long day hike, enjoying my delicious garlic soup. 🤣
Given the budget breakdown I wrote above, there are a few ways to optimize your budget to save even more costs for your Everest Base Camp trek. Here are a few cost-saving tips I wish I knew before doing the trek:
- Water Purification Tablets: A bottle of water up there can get very expensive real fast, and there is no better way to save costs than to fill up your bottle with tap water and purify it yourself. Personally, I just drank from the tap like the locals do without purifying it, and I was fine. But then again, I was born in Bangkok. 😉
- Bring Your Own Treats: I understand the feeling of wanting to "Treat yo self" after a long trek like this, but a Snickers bar up there can cost an arm and a leg. So, it's better to bring your own snacks to treat yourself.
- Carry a 20,000mAh power bank: Charging your devices costs money up there, so it's better to bring your own power bank with a large capacity and only charge a few times when you need it.
- Share a room with someone: If you are traveling solo, the best way to save on accommodation costs is to find someone to share a room with, which should reduce the cost by half.
- Stick to vegetarian food: Stick to vegetarian food, as it is among the cheapest food options provided by the teahouses.
How hard is trekking the Everest Base Camp Trail?
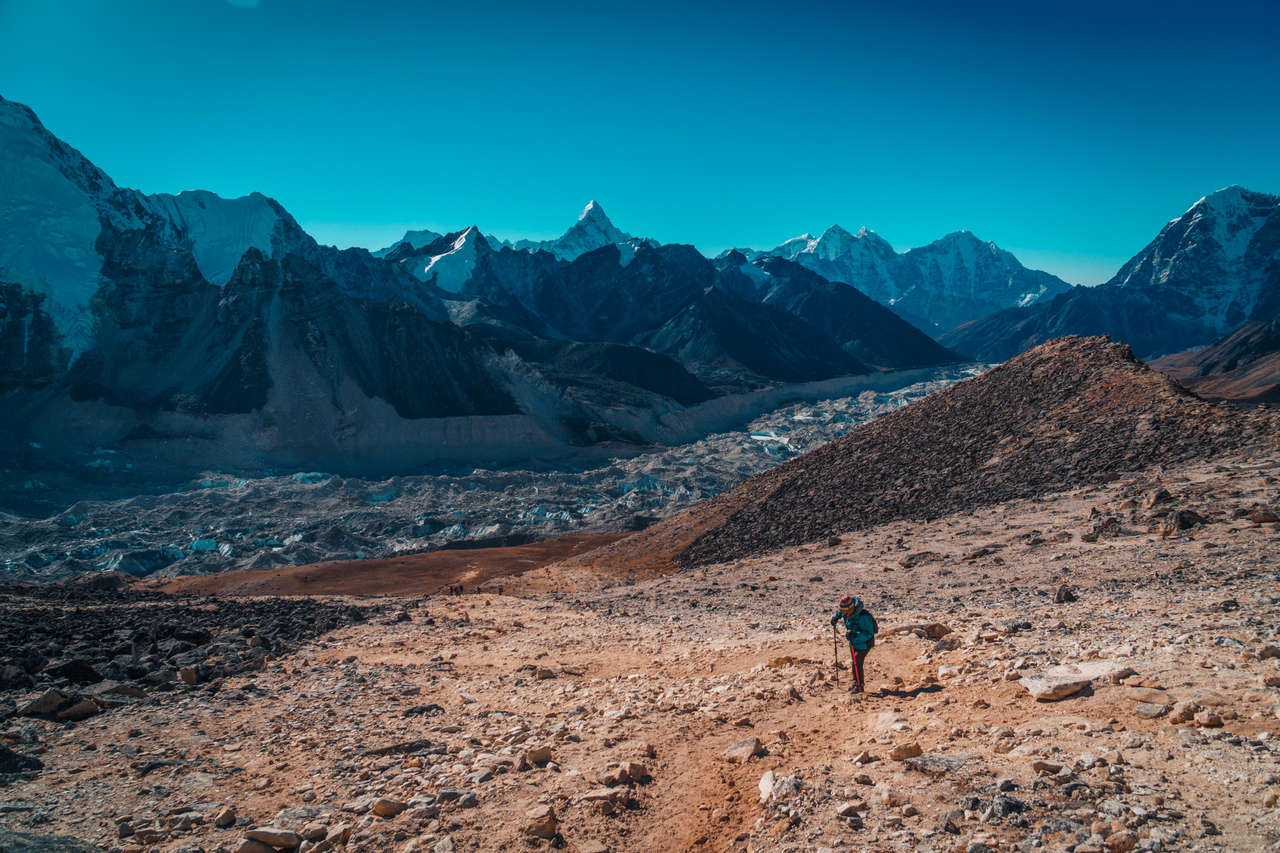
The entire trail is spread out over 14 days of walking, covering a total distance of 123 km from Lukla to Everest Base Camp to Gokyo and back. The average walking time is around 4-8 hours per day, with shorter days when you are above 4,000m.
The trail is well-traveled, easily navigable, and requires no technical mountaineering skills except for one part on the Chola Pass, where you will be walking on a melting glacier.
For this particular itinerary, I would consider the difficulty to be moderate as you will be carrying around a 10-15 kg backpack while walking for 4-8 hours each day.
The altitude is another factor to consider as this trail will probably take you higher than you have ever been (the highest point is at 5,643m), and it's hard to predict how your body will react until you are actually there.
The golden rule is once you have reached the elevation of 4000m, do not climb up and sleep at an elevation higher than 600m each day.
What are things to know before trekking Everest Base Camp?
- ATMs: The last working ATM machines (with hefty fees) are in Namche Bazaar. That will be your last chance at getting money out before spending another 10 days in the mountains so be sure to prepare enough money for the trip.
- Food Availability: There are a variety of food available up there thanks to high demands from mass tourism but a thing to consider is that meat is hard to come by when you are up there and it might not be in the best condition for consumption so it is best to stick to vegetarian food. It is also cheaper too!
- High Altitude Sickness: If there is even a little sign of altitude sickness symptoms, you have to tell someone about it. It's lethal to continue on. You must be accompanied by someone and start heading down immediately.
- Wear Buff: Something I learned the hard way is that when you are hiking in high altitude for many days like this, it is best to protect your lungs against dry air by wearing a buff over your nose and mouth. Khumbu Cough is a nasty symptom from breathing in dry air for a long period of time and can last for weeks after you are back down.
- Buy or Rent Hiking Gear in Kathmandu: If you are in the middle of a long trip and do not have your hiking gear with you, you can rent or buy them in Thamel district, Kathmandu. They are cheaper and works perfectly fine in the Himalayas.
- Start Early: Clouds often roll in in the afternoon and evening so it is best to start hiking as early as you can to maximize your time under the sun.
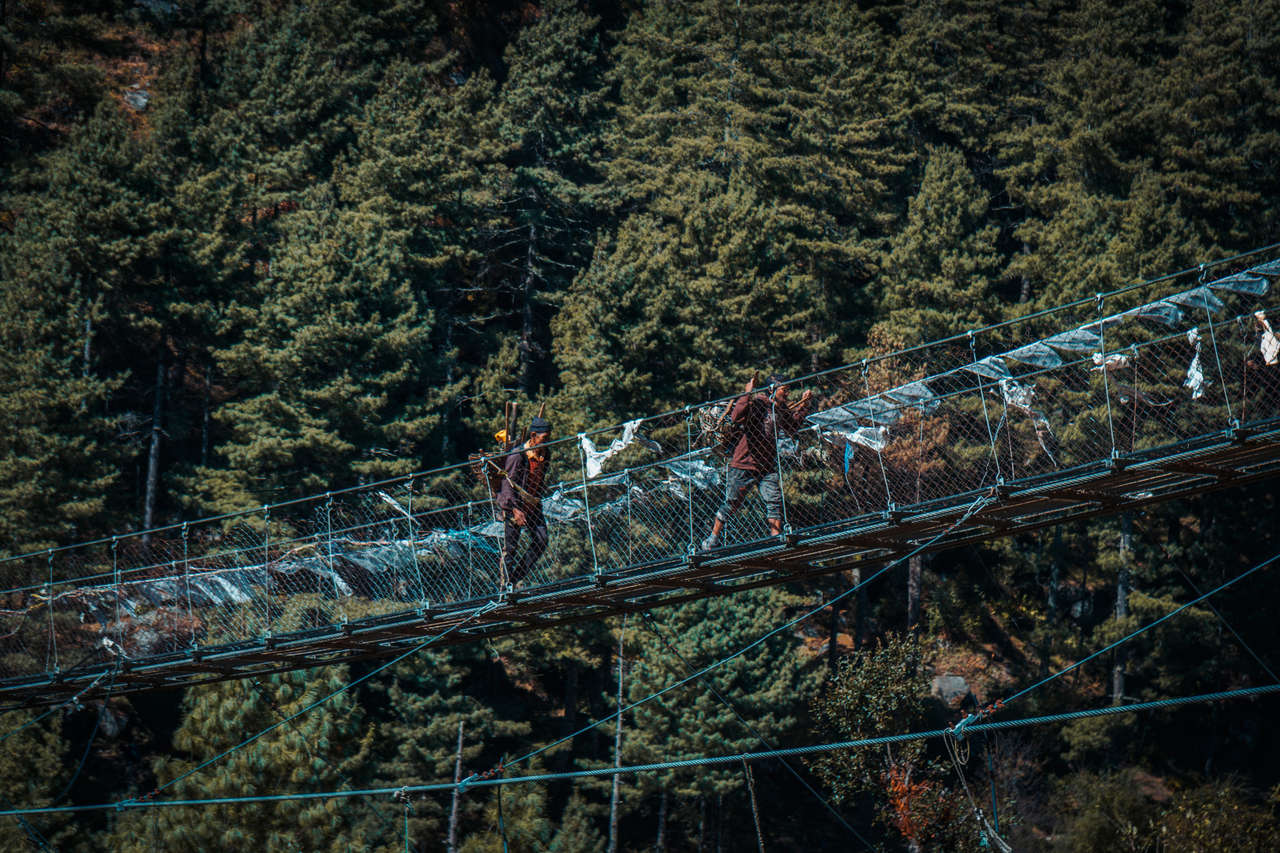
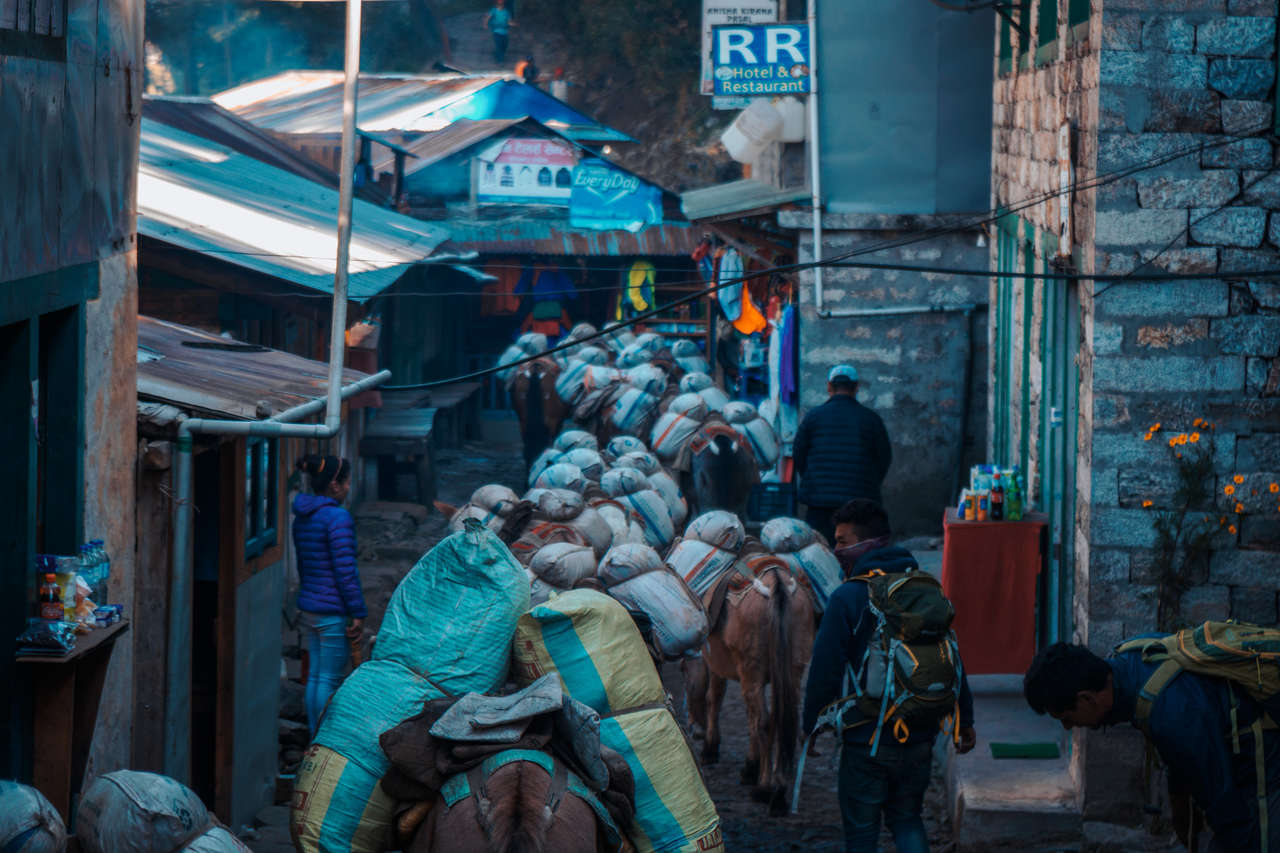
- Give way to Animals: Yaks and Donkeys roam the trail as many as hikers themselves and it is important to give way to them. Keep in mind that they do not know what is on their backs so they might unknowingly hit you with it. Stay clear and try to stick to the mountain side if you are walking along a cliff.
What To Pack for Everest Base Camp Trek?
- Hiking Cloths: The sun is strong and you will be sweating a lot while hiking so I would recommend something light and breathable like a weather-proof outer-shell jacket together with a fleece jacket and a regular shirt inside. Here are jackets I recommend you get for the trip: fleece jacket and the beautiful orange Columbia outer-shell jacket.
- Teahouse Clothing: When you are idle, you will need something that can keep you warm. A big down jacket is recommended for when you are in the teahouse. Most teahouse's bedrooms are NOT equipped with a heater so you will definitely need a good down jacket.
- Head Lamps: Important in the early mornings and in case you have to hike at night (I do not recommend this). Here is a headlamp I use during this hike: Ultra Bright Cree Headlamp.
- First Aids: Bandages in case of blisters, Tylenol for headaches, Diamox for Altitude Sickness etc.
- Sunglasses: The sun is extremely strong up there.
- Buff: To warm up air before you breath in to prevent the nasty case of Khumbu Cough afterward.
- Wet Wipes: The next best thing from actually having a shower in the mountains. You will thank yourself for it after 10 days of not showering.
- Good Sturdy Shoes: I've seen plenty (including myself) hiking with sneakers but do it only if you know what you are doing. If not, go with waterproof sturdy shoes in case of rain. At Chola Pass, you will also be hiking on a melting glacier which is quite technical and requires you to have high ankle shoes or even better, crampons. I have a high ankle trekking shoes to spare but no crampons and all I had to do is walk sideways and placing my feet on a more jagged area while avoiding the smooth ice area. This Timberland Shoes is my go-to hiking boots in most situations and I recommend you carry high ankle shoes like the Columbia Newton Ridge shoes just in case.
- Money: Get enough cash out in Kathmandu for all the days you are trekking as they are no way you will be able to get money out along the trail except Namche Bazaar (hefty fee).
- Sleeping Bag: Bedrooms in teahouses can get really cold at night and there's nothing worse than not being able to sleep after an 8 hours hike day. I would recommend getting the -10°C one in Thamel, Kathmandu. You can also get the Coleman North Rim Sleeping Bag online prior to your trip.
- Toiletries: Wet wipes, tissue papers, toothbrush, toothpaste, sunscreens, lip balms etc.
- Snacks: Prepare some snacks to Treat yo self so you don't have to buy an overpriced Snickers bar up there. You deserve it!
- Get Maps.me: Download Maps.me app on your phone and download the Nepal map for offline navigation. They do have the trail map available and it's quite accurate. The app is available on both Android and iOS.
- Large Backpack (60+L): And of course, a backpack big enough to fit all these stuff so you can carry up the mountain. I highly recommend the 65L Osprey Atmos AG Backpack with their mesh grid back support that makes your backpack lighter, a good capacity to carry everything you need for you trip, and you can't beat the Osprey lifetime guarantee.
How to Get to Lukla?
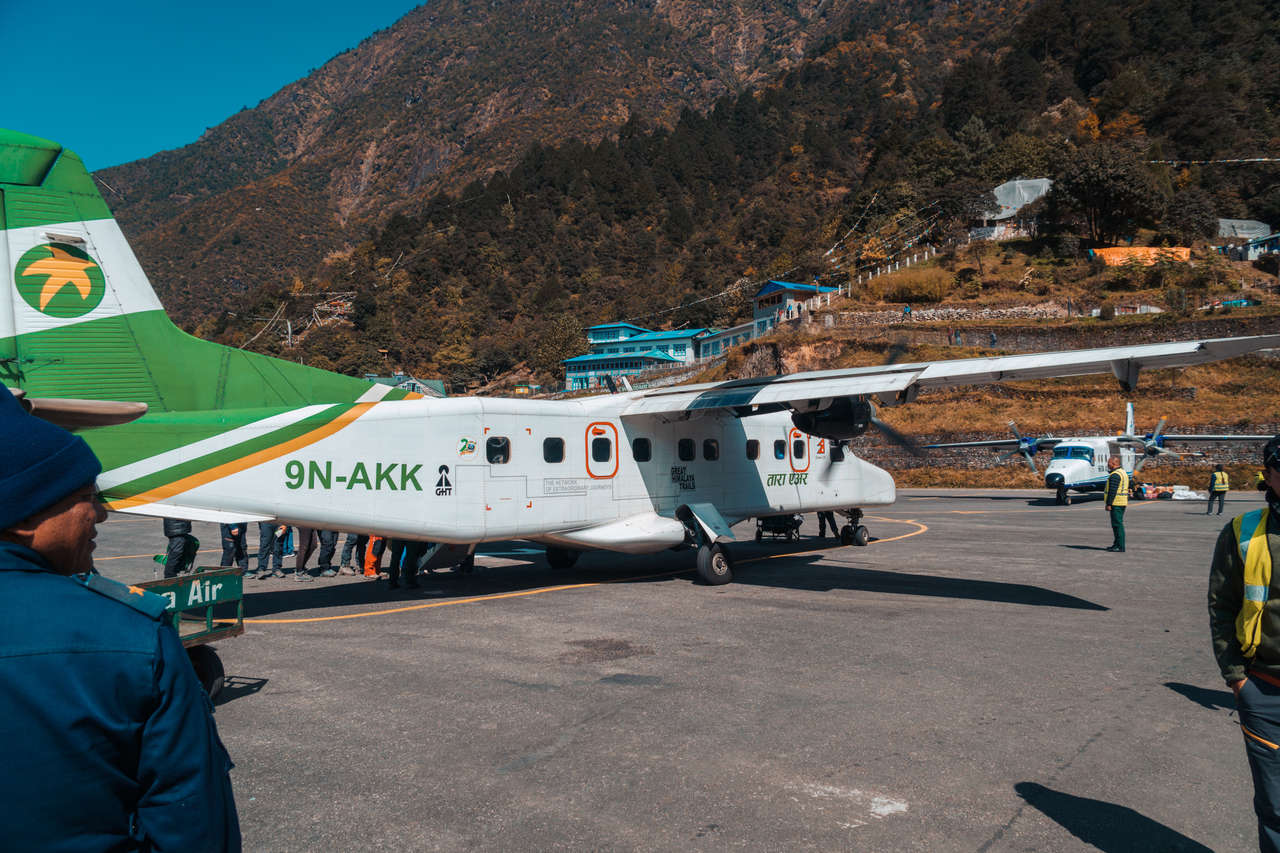
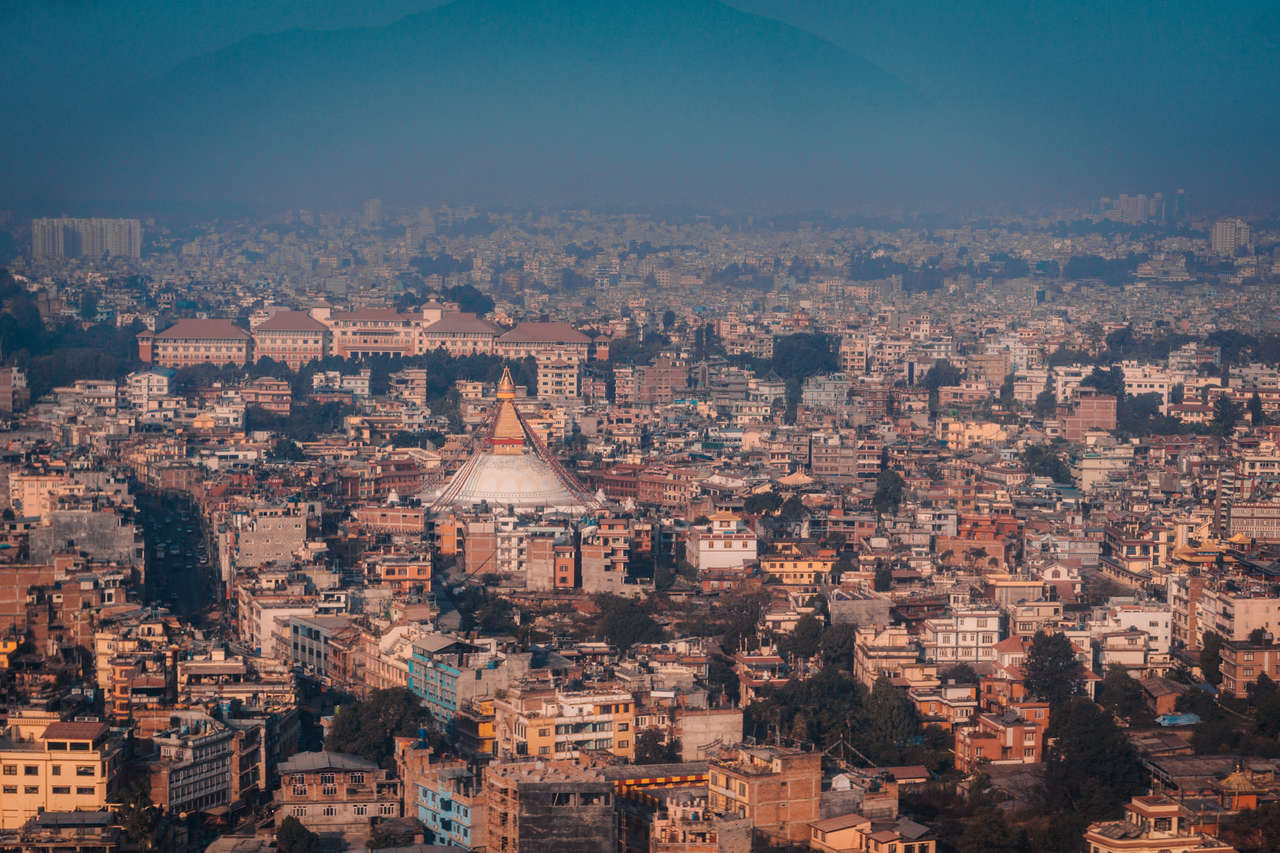
First, you have to get yourself to Kathmandu, the capital city of Nepal. From the US and Europe, you can fly via Turkish, Emirates, Etihad, or Qatar Airways. If you are from Asia, Thai Airways and Cathay Pacific are recommended. Be sure to check out the prices on Skyscanner and Expedia for the best possible deal for your trip.
From Kathmandu, you can fly to Lukla via Yeti Airlines, which often flies in the morning. They are often known to be delayed a lot, though. The cost for a one-way ticket is 167 USD.
You can also travel by land and hike to Lukla via Jiri for about an extra week. This is the cheapest way to do it, and you get to see a more traditional side of Nepalese culture. However, it will take you a week longer than simply flying.
For more info on how to trek from Jiri to Lukla: Jiri to Lukla (Expert Guide).
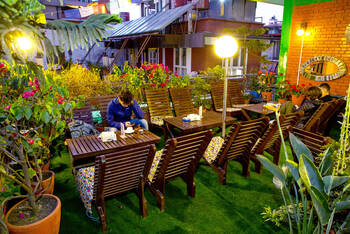
Where to Stay in Kathmandu?

Where to Stay on the Everest Base Camp Trail?
Monjo - Monjo Guesthouse - 200 NPR/Night (Twin Room)
Namche Bazaar - Khumbu Lodge - 300 NPR per night (Twin Room)
Tengboche - Tash Delek - 500 NPR per night (Twin Room)
Dingboche - Snowlion Lodge - 500 NPR/Night (Twin Room)
Lobuche - Oxygen Altitude - 700 NPR per night (Twin Room)
Gorakshep - Buddha Lodge - 500 NPR per night (Twin Room)
Dzongla - Mountain Home Zonglha - 500 NPR per night (Twin Room)
Gokyo - Fitzroy Inn - 150 NPR per night (Twin Room)
Dole - Himalayan Lodge - 300 NPR per night (Twin Room)
Lukla - Everest Lodge Restaurant and Bar - 400 NPR per night (Twin Room)
Which tourist SIM card is best for Nepal?
Update: If your phone supports eSIM, I highly recommend checking out Airalo, a global eSIM marketplace. It allows you to stay connected affordably while traveling in Everest Base Camp, Nepal without having to switch out your physical SIM card.
Gone are the days when you needed to scramble to find a local SIM card at an airport upon arrival. You can purchase an eSIM before your arrival, and you'll be good to go. If your phone doesn't support eSIM, here is how you can get a local SIM card in Everest Base Camp, Nepal:
If you want access to the internet, the best and cheapest way is to get the NCell sim card at the Kathmandu airport before you start heading to Lukla. They offer a reliable data connection from Lukla all the way to Tengboche, and it worked a little bit at Gorakshep, which is more than I could have asked for in such a remote place like this. You can also buy wifi access, but it's extremely overpriced and might not work sometimes.
For more information on Nepal SIM cards, visit the Nepal Prepaid Data SIM Card webpage.
Tips: To stay connected with people at home, be sure that you have a VPN, such as ProtonVPN, installed before traveling. It's FREE, and you can gain access to services that may be blocked in certain countries.
That is it for the 15 Days Everest Base Camp Trek Itinerary. Have we missed anything? Have you found the guide useful? Let us know in the comments below!
Now that we have all the information we need, it's time to plan your trip to Everest Base Camp, Nepal! Here are some resources to help you get your trip going:
Are you planning to travel to Everest Base Camp, Nepal independently? Be sure to check out my guide on How To Plan A Backpacking Trip here.
Further Reading for South Asia
Looking for more information for your trip to South Asia? Here are a collection of articles about South Asia that might help you with your trip planning:
- Ever wonder what it is actually like to trek Everest Base Camp solo? Here is an inspirational story of my trip trekking the Himalayas in great detail. Get immersed in the Himalayas! On My Way To Everest Base Camp - A Personal Story From The Himalayas.
- There are also some short treks in Nepal for you to do, such as the Annapurna Base Camp. Here's a complete guide on how to hike the Annapurna Base Camp in 7 days solo.
- Annapurna Base Camp is a 7-day hike, and there is quite a lot you will have to pack for the hike. Here is What To Pack For Everest Base Camp Hike - A Complete Packing List.
- Looking for a complete packing guide for the Everest Base Camp trek? Check out: What To Pack For Everest Base Camp Hike - A Complete Packing List.
- Here are a few important things you should know before visiting Bhutan: 11 Important Things to Know Before Visiting Bhutan.
- If you are looking for an off-the-beaten-path country to visit, why not check out Bhutan, the land of happiness during one of its famous festivals? Here is an itinerary for you: 7 Days Bhutan Festival Itinerary.
- Pakistan is rich with culture, history, and stunning landscapes. It is, after all, the place where the Himalayas, the Hindu Kush, and the Karakoram mountain range meet. Here's the ultimate guide and one-month itinerary for backpacking in Pakistan.
- One of the best road trips you can do in the world is to traverse the Karakoram Highway in Pakistan, which connects the country with China. Here's the ultimate guide to traveling the Karakoram Highway.
- I have also written a bit about my trip to India. Here are the 2-part photo essays of my journey: Incredible India Part 1 and Incredible India Part 2.
- If you are feeling a little too intimidated by India, you can start off your journey in South Asia by visiting Sri Lanka first. Here's a complete 2-week itinerary for Sri Lanka.
- You can also watch my travel videos about South Asia here: Sri Lanka travel video, Nepal travel video, and Pakistan travel video.
- Want to know where to go after Nepal? How about exploring the Golden Triangle in India, exploring Sri Lanka by train, or going off-the-beaten-path and backpacking through Pakistan?
- For all articles about Nepal, visit the Nepal Travel Guide page.
- You can see all of my South Asia-related articles on my South Asia Travel Guide page.
- For more of my travel guides like this, visit my Destinations page.
55 Comments
Hey Pete. Thanks for your very detailed post! I'm planning on doing this trek myself solo in a few weeks and find this so helpful. I've hiked in Nepal before (Manaslu in 2018), but with guide, so this is a first for me. One question - and the part i'm most nervous about: Cho-la Pass. Is this a dangerous route? does this require any technical equipment? Do you know if there are townsfolk that can be hired to take one across the pass if necessary?
Thanks!
Thank you so much for the comments. Chola Pass itself is a simple climb but the ice field right before it can be quite tricky to navigate. Thankfully, there will be a lot of people doing it so you can follow them.
A crampon would be nice to have but you don't really need it as long as you go slow and step only on the jagged part and avoid the smooth ice part. Also, the earlier you are there the better as the sun may melt the ice faster at noon making it a little less friendly.
Fortunately, the ice field is not super long and will take around 30 minutes before you reach the Chola Pass. There are no tea houses around the pass for hours so you won't be able to hire anyone. Just follow the people and you should be fine. :)
Remember, go slow and make sure you have a firm ground before stepping on the next one. :)
I hope this helps and good luck!
My girlfriend and I will be following this itinerary in a few weeks. Your post definitely made the hike more approachable. Thanks for all the detail!
One question. We are doing the hike as part of a longer trip, so we are going to have extra luggage that we won't want to bring with us on the flight to Lukla. Are there facilities for hikers to store excess luggage safely in Kathmandu?
Cheers!
Hey Pete, thank you so so much for this detailed and very entertaining diary of EBC! I read it thoroughly through twice (once out of fascination, second time i literally feel my feet on the rocks)! First time I read it my question was "wow does he mention what camera to pack for this trip!" haha because I have to say your pictures are astonishing! Second time I finish your post, I was awestruck, "who's that amazing SHE who went along"! I'm a girl myself so I was wondering if this trek would cause much hardship but I guess I'm more motivated now! Now for the more proper questions:) Is it true that one does not get to shower for 14 days out in the wild? And, if I were to engage a guide for my trek, would it be possible to mirror your trail? (I'm in love with the Lobuche to Dzongla trail thank you for highlighting it!)
We are intending to do our trek either in Mar or Oct 2020, may I also ask when did you do your trek?
Thank you so very much!!
Cheers!
Amanda (from Singapore!)
Hey RG,
Thank you for leaving the comments! Glad you find the guide useful! If you know which hotels you are coming back in Kathmandu, you can leave your luggages with them and they will keep it until your return no problem. I left one bag at one of the guesthouse in Lukla when I started the hike and came back and get it 15 days later. :) It's very common for a hotel to keep the luggages safe for you when you are out and about, trekking.
I hope this helps and good luck with your trip!
Hey Amanda,
Thank you so much for the kind words! I'm glad you like the travel guide and photos. :)
For the shower, you can pay if you don't mind spending a bit. It costs 400~ NPR in Namche Bazar and gets more expensive the further you go up. The cheapest way is to bring your own wet wipes and use it instead and that's how I did it.
For the guide, of course. It's a popular trail and a lot of people were doing it with a guide when I was there. I'ts EBC + Gokyo trails.
For the timing, I did it in October and it was only cloudy for me for a day out of 15! I got real lucky with the weather for sure. :)
I hope these help! :) And safe journey!
Fantastic comment Pete...Any idea how much a guide/ porter will charge..? Is a guide available from Lukla or Namche bazaar...?
Hey Gopa,
I personally have no experience hiring porters but I heard the going rate is around 15 - 20 USD per day (not including tips, and they do expect them) and they can carry around 30 KG. Also if you go with a porter, make sure you agree upon the price before hand and make sure that you don't have to pay extra for their food and accommodation. Usually, they have fix price, and they will arrange these stuff themselves.
I hope this helps!
I forgot to answer one other question. Yes, it's available in Lukla and Namche but I would recommend you find them way ahead of time, ideally in Kathmandu so that you will be able to gauge how you feel with the porter. You will be hiking with your porter for 15 days so the chemistry should be good.
Hey , this is one article I came across with very detailed step to step narrative of EBC. Just give me some tips and best route for only EBC &Kalapathar as I want to do solo. Being solo what all I should plan in advance apart from international flight.
Question like .. should I book stay at teahouse in advance ?