JoJo's Bizarre Adventure, Part 4 - Diamond Is Unbreakable
"This is just great!"
~Josuke Higashikata
Overview
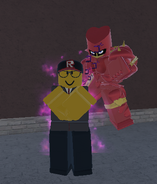
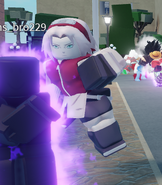
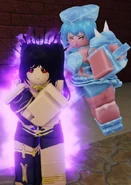
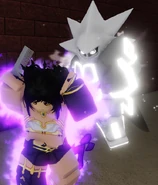
Crazy Diamond is a Stand from JoJo's Bizarre Adventure Part 4: Diamond is Unbreakable. It is wielded by the main protagonist, Josuke Higashikata. During this part, the Stand is seen repairing objects such as a motorcycle, a pipe, and broken debris like sidewalks and broken glass. In-game, Crazy Diamond has a 2.5% chance of obtainment.
Crazy Diamond's main niche is its healing, which only ten other Stands have - Gold Experience, Gold Experience Requiem, Tusk (all acts), Killer Queen: Bites the Dust, Made in Heaven, Mr. President, Stone Free and The World Over Heaven. However, Crazy Diamond's healing is effectively limitless, only bound by the stand speed (which is still very fast). This makes Crazy Diamond vital for teams within the Steel Ball Run gamemode. Crazy Diamond also has an excellent combo potential.
Crazy Diamond is extremely unique in that its main abilities are extremely versatile. Yo Angelo can immobilize an enemy, allowing you to land brutal attacks. The Crazy Wall ability is extremely defensive, allowing you to block projectiles and other dangers, such as The Hand's erasures, Hierophant Green's Emerald Splash, The World's knives, and basically any other projectile. Crazy Wall is good for zoning, and dealing free damage at times. Heal Mode allows for the healing of allies. Because of Crazy Diamond's ranged moves, it can easily distance itself from opponents while dealing damage.
Total Skill Points: 66 Points
Skills[]
LMB - Punch: This short move with a short cooldown deals 8.9 damage (11.1 in Rage Mode) at max destructive power and can be used 5 times, ultimately dealing 44.5 damage if all hit.
E - Stand Barrage: Crazy Diamond sends out a flurry of fast and strong punches that deals 1.5 points of damage (1.8 in Rage Mode) when Destructive Power is maxed. (Around 30 punches in total.) If your entire barrage hits, it does a total 45 damage (With maxed Destructive Power). In Rage Mode, it does 54 damage.
R - Stand Barrage Finisher: Crazy Diamond throws a strong punch that deals 16.1 points of damage (20.1 in Rage Mode) when Destructive Power is maxed.
T - You're In My Range: Crazy Diamond punches the enemy dealing 3.2, and follows up with a barrage of punches and ends with two ending punches with one dealing 4.8 damage and one dealing 16.1. This move is blockable but it cannot be perfect blocked. This move is also cancellable.
Z - Bearing Shot: Crazy Diamond will flick a metal bearing at the user's cursor, dealing 22.5 points of damage (28.2 in Rage Mode) when Destructive Power is maxed. This move can be blocked.
V - Rage Counter: The user sets themselves in a position of them combing their hair, and if attacked in this state, the opponent's attack will be parried (Note: Even if the attack that activated the counter is unparriable, it will still stun the opponent and make a parry effect), and they will be stunned. Upon the counter activating it causes the user to enter Rage Mode, and deal more damage and healing than usual. Like other active rage modes, you'll also gain damage reduction. These defensive and offensive buffs stack with spec passives, such as Hamon punch and tough skin, making it very useful.
X - Blood Slash: Crazy Diamond throws blood at the cursor blinding and dealing 12.9 damage (14.6 in Rage Mode). The move will leave a blood spot on where the user shot it, which its details follow below. This move can be blocked but will still mark the enemy either way.
C - Shard Shot: Crazy Diamond shoots a shard of glass in the shape of a heart pointed to your cursor dealing 12.9 damage (14.6 in Rage Mode). If the user has recently shot Blood Slash and the spot it left still remains, the shard will auto-track to where it is, and deal an increased 19.3. The move is blockable unless it is homing onto something, in which case it will break block, and cannot be parried.
Y - Crazy Wall: Crazy Diamond punches the ground in front of it and the flying debris creates a wall. It deals 19.3 damage (20 in Rage Mode) to anyone who is caught in it. This move breaks block and cannot be parried.
G - Yo Angelo: Crazy Diamond does a barrage of seven hits to the ground, with each of the first six punches doing 2.3 damage to anyone who is caught in them, and with the final hit doing 16.1 damage, while trapping the opponent in the rocks from the destroyed ground, the rocks will crumble after some time or when the opponent is hit (another players can't destroy rock or deal damage to player in it). This can be blocked.
No Upgrade : 2.5 sec
Precision I : 3.3 sec
Precision II : 4.1 sec
Precision III : 4.9 sec
Precision IV : 5.7 sec
Precision V : 6.5 sec
H - Crazy Beatdown: Crazy diamond throws a punch in a way similar to most beatdowns, and heals the opponent to full health after they land on the ground. Both the user and opponent enter an animation where the opponent attempts to attack the user, not until Crazy Diamond throws an uppercut dealing 8.1 damage immediately followed by a barrage of punches dealing 0.5 damage each, Crazy Diamond ends it with two punches dealing 6.4 damage each and a final blow. Because this move is an execute, the damage dealt by the final blow will depend on the victim's health before the move landed, the minimum being 6.4.
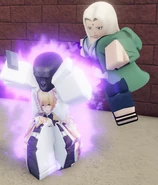
J - Healing Mode: Upon activating this move, the user will enter a small start-up animation of them and Crazy Diamond equipping a yellow aura while saying "Naosu!". In Healing Mode, your Barrage, Stand Barrage Finisher, and both the M1 and M2 buttons heal.
Crazy Diamond Healing Mode
LMB: +1.4
RMB: +1.9
R: +2.7
E: +0.2
LMB: +2.9
RMB: +3.9
R: +5.8
E: +0.5
LMB: +4.4
RMB: +6
R: +8.8
E: +0.7
LMB: +5.9
RMB: +8.1
R: +11.8
E: +1
LMB: +7.4
RMB: +10.1
R: +14.8
E: +1.2
LMB: +8.9
RMB: +12.2
R: +17.9
E: +1.5
LMB: +1.7
RMB: +2.3
R: +3.4
E: +0.3
LMB: +3.6
RMB: +4.9
R: +7.2
E: +0.6
LMB: +5.5
RMB: +7.5
R: +11
E: +0.9
LMB: +7.4
RMB: +10.1
R: +14.8
E: +1.2
LMB: +9.3
RMB: +12.7
R: +18.6
E: +1.5
LMB: +11.2
RMB: +15.2
R: +22.3
E: +1.9Combos and Tips[]
Trivia[]
- This stand, along with Red Hot Chili Pepper, Anubis and Stone Free are the only 2.5% and rarer stands that do not have evolutions.
- Crazy Diamond has the most moves for a stand in the entire game, having a total of 9 moves. (Not including Barrage, Heavy & Homing shard)
- Some moves come from All Star Battle, and some come from the anime and manga itself.
- Rage Counter is likely based on the fact that Josuke, Crazy Diamond's user. gets extremely angry when anyone insults his hair.
- The Bearing Shot is a reference to the 16th episode of Part 4, "Let's Go Hunting!" Although, it is never used after this.
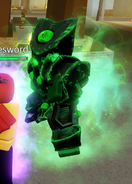
- On August 16th, 2021, Uzu released a video on his YouTube channel detailing why he has been away and some leaks for an upcoming YBA update. It showed the current skin known as Jade Peace. There were many debates on if this is either a requiem, skin, or over heaven, with the outcome being a skin.
- Crazy Diamond's stand-summon voice-line is Josuke saying, "This is just great!"
- Crazy Diamond's Heal Mode voice-line is Josuke saying, "Naosu!" (written 治す or 直す) which means heal/repair.
- Shard shot will always, no matter how far away you are, auto aim to wherever you put blood slash. You can use this in tandem with fast travel to hit people from across the map.
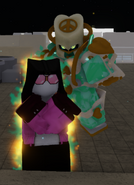
- Similar to many other stands, the Crazy Ruby and Jade Peace skins still use Crazy Diamond's old model.
- Uzu once suggested that crazy diamond would have a 'rock' ability like Gon from Hunter X Hunter, but he never gave another update to this statement, this turned out to be crazy diamond's old Rage Heavy attack.
- The programming for the beatdown appears quite odd; when hitting someone with low enough health that the normal beatdown hits would finish off, they instead take damage as normal and do not die until the beatdown finishes. This means that rather than being completely cosmetic, it actually does heal them to full, and only adds on any damage once the move finishes.
Gallery[]
| Stands and Specialities | ||
|---|---|---|
| Stands | ||
| Arrow Stands | Whitesnake • Star Platinum • The World • Anubis • Red Hot Chili Pepper • Crazy Diamond • Killer Queen • Gold Experience • King Crimson • Silver Chariot • Hermit Purple • The Hand • Purple Haze • Cream • Hierophant Green • Magician's Red • White Album • Aerosmith • Six Pistols • Beach Boy • Mr. President • Sticky Fingers | |
| Rib Cage Stands | Scary Monsters • The World (Alternate Universe) • Dirty Deeds Done Dirt Cheap • Tusk (Act 1) | |
| Evolved Stands | Gold Experience Requiem • King Crimson Requiem • Chariot Requiem • Killer Queen: Bites the Dust • Star Platinum: The World • Tusk (Act 2) • Tusk (Act 3) • Tusk (Act 4) • D4C: Love Train • C-Moon • Made in Heaven • The World Over Heaven | |
| Specialities | ||
| Specs | Boxing • Sword-Style • Spin • Hamon • Vampirism | |
