Recently I have been thinking about creating a home dance studio for my kids that could also double as a workout space for me. With so many lessons and fitness classes now being available online having a dedicated space, rather than moving the couches out of the way to make room sounds like a good idea. But starting out I have so many questions – how much would it cost? do I need to have special flooring? I’d like to have some mirrors in the room – how do I hang those and where do I get them from?
To build a home dance studio you need to decide on the space you will convert, the flooring you will install, wall coverings such as mirrors, room ventilation, equipment as well as a screen or sound system, and internet for streaming classes & music.
Lucky for you, I have done most of the hard work already with plenty of tips, information, and ideas to ensure your home dance studio or home gym ends up being perfect for you and your family – from ensuring the barre you install on your wall is the right height to ensuring the flooring you choose is safe to dance on!
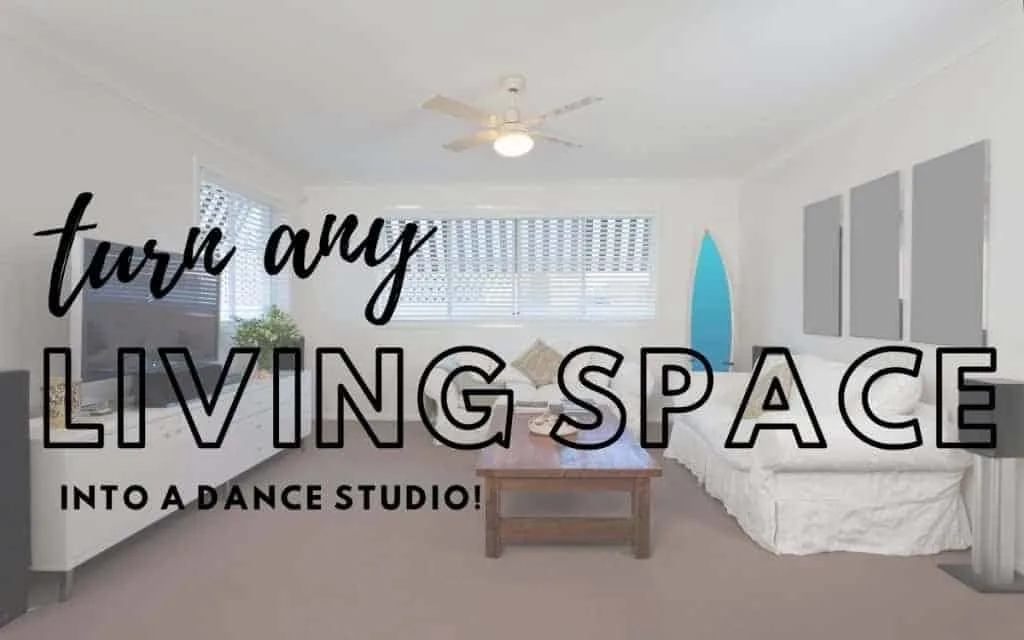
In this article, I have specifically looked at ideas for permanent dance studio spaces that you might want to set up in a spare room, basement, or attic. I have plenty of inspirational pages with more portable solutions for bedrooms or living rooms if you click here – it will open in a new tab so you can read it later too!
Wall-to-wall dance flooring, a full wall with ceiling to floor mirrors and a permanent barre are immediately the first things that I would personally invest in to create a dance studio or workout space in a room that was permanently designated to the job – but first you need to choose where it is all going to go!
CHOOSING A SPACE


Now to be honest I actually added in this section after I had researched and written the rest of the article. My thinking was most people will be reading this with a room or space already chosen or others only have one spare room or space available and have to make do with what they have. But even if you have already chosen the space you are going to convert the following has some important information you will still want to think about and consider as there may be factors about the room you have chosen that will impact your final design that you hadn’t thought about and for those of you still deciding on where to put your home dance studio hopefully this handy guide will help you make that important decision.
What size space or room is best for a home dance studio?
A room that is at least four metres long and three metres wide or about 13/14 feet by 10 feet will give a dancer adequate space to move in a home dance studio – this is about the size of a kids bedroom in a regular house. But remember bigger is always better than smaller!
What shape room is best for a home dance studio?
A rectangle-shaped room is also more commonly used and chosen by dance studios as this has a similar dimension to a stage that might be danced on. It also makes it much easier to install mirrors and ballet barres onto long flat walls as well as easily fit and lay dance flooring.
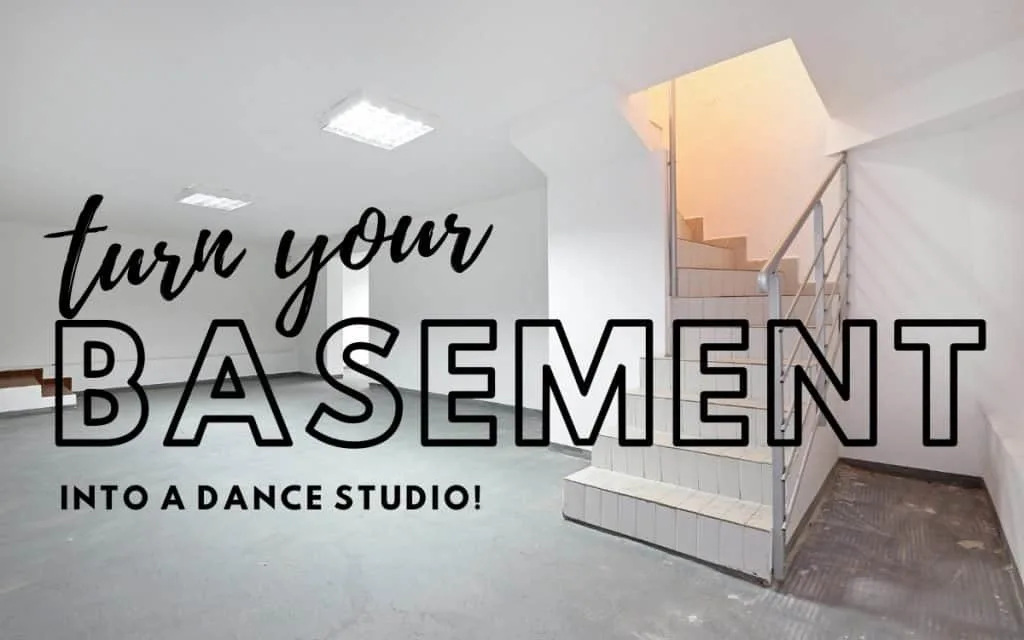
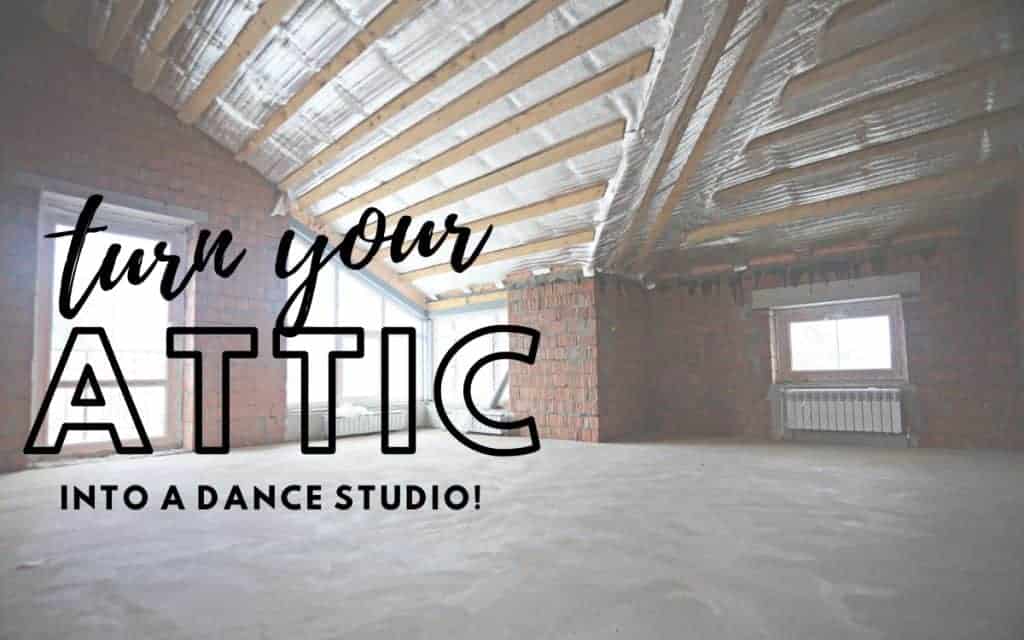
Should I convert my basement or attic into a dance studio?
Converting an unused or underused basement or attic into a home dance studio are great ideas! Both have their pros and cons which I will describe below
| ATTIC | BASEMENT |
|---|---|
| Access to natural light | May have no access to natural light |
| Access to natural air | May need ventilation |
| Noise and sound from dancing and music can travel down through the house, disturbing everyone. | Sound does not travel up into the house easily. |
| The noise made by the dancer may restrict times they can be practice and use the studio. | As there is less noise, dance can be practiced at most times of day or night. |
| Can get overly hot in summer | Stays cooler being at the bottom of the house. |
| Roof may come down on sides lowering ceiling height and available space to dance. | You may have supporting poles in the way creating obstacles to dance around. |
| Access to the attic may make conversion and renovation easier or more difficult. | Access to the basement may make conversion and renovation easier or more difficult. |
For inspirational ideas on building a dance studio in a basement check out our article here. Or if you have decided to go use your attic check out this page full of inspiration!
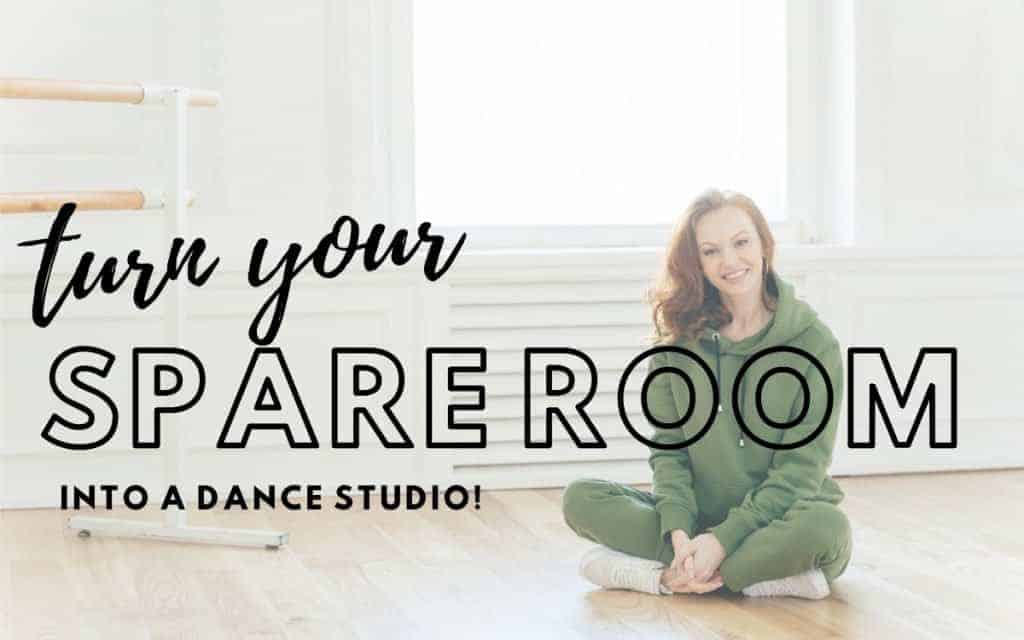
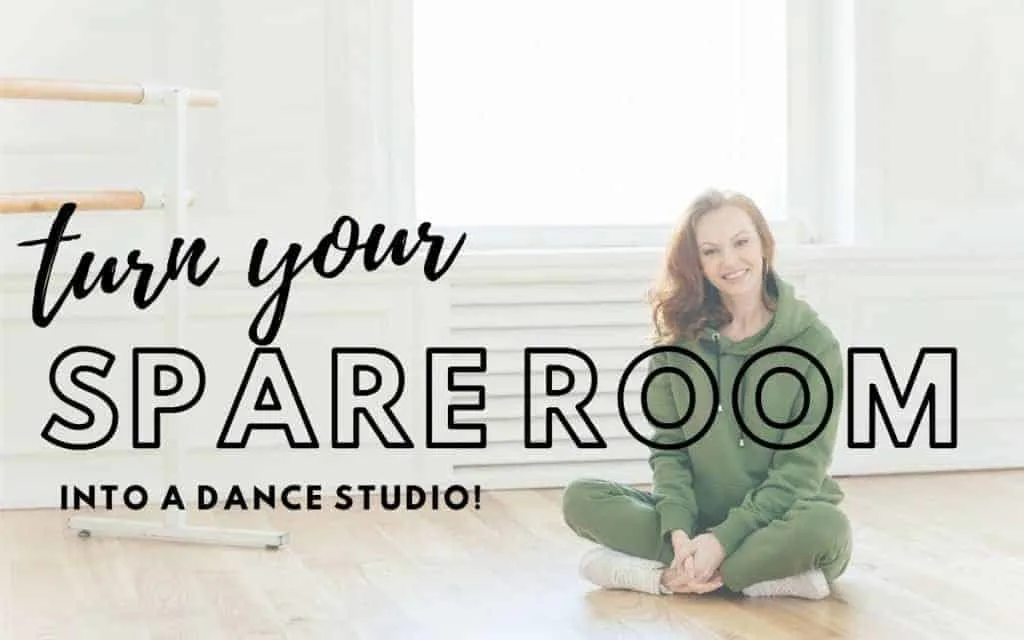
Can I use a spare bedroom to build a home dance studio?
You can definitely convert a spare bedroom to build a home dance studio, but there are a few things to be mindful of when doing this.
- Even if this spare room already has wooden flooring, you will need to think about what is underneath that wood and if it is safe for dancing on – read the section on permanent dance flooring in this article for more information.
- If this room is upstairs, you will need to think about the noise that will be created by the dancer as if you are in the room underneath you will most definitely hear the thumping of their movements over the floor.
- Where is the room located? Is it next to other bedrooms meaning your dancer can’t get up early in the morning to practice without waking other people?
Can I convert the garage into a home dance studio?
A garage is another space underused by many people and can be a great location for a home dance space as long as you install shock-absorbent or sprung dance flooring. NEVER allow your dancer to practice daily on concrete or other similar hard surfaces! It is not okay to lay down vinyl dance flooring such as Marley or tarket straight over a surface like this. The vinyl flooring by itself is not going to absorb the shock of a landing after a jump or leap whilst dancing. Instead, a dancer’s feet, ankles, shins, knees, hips, and spine will and it is one of the surest ways to ensure an injury happens! (you can read more about dance flooring in the next section!)
I would never choose the garage for a dance space if it was still being used to house a car on top of the same space, due to the flooring issue as well as the dust and grime that it would create. However, if you no longer use the garage to house your car, or have a double or triple garage and have spare spaces not being used then go ahead and convert these spaces into a permanent dance studio for your home!
Need some inspiration on choosing the perfect space in your home? Check out these articles which are full of inspirational photos and ideas:


PERMANENT DANCE FLOORING
The first thing I would be thinking about installing in a room that I was going to permanently fit out as a dance studio would be wall to wall dance flooring!
But you actually have several choices to choose from and different installation practices as well!


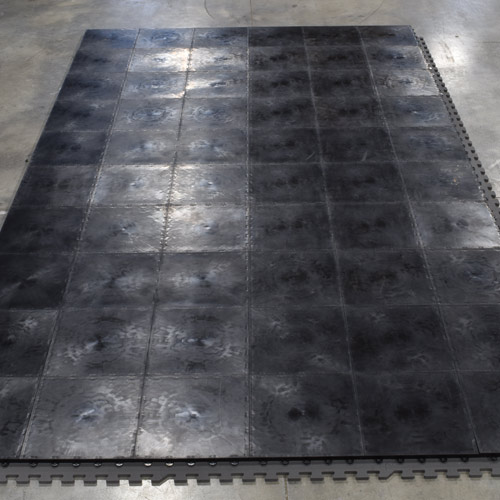
A special type of vinyl flooring called Marley or Tarket is used by dance studios all around the world. From my dancing experience, I can tell you that Marley is the standard flooring for dancing on as it gives a dancer the perfect balance between sliding and gripping the floor. A dancer can turn, slide into the splits easily as well as land leaps without fear of slipping!
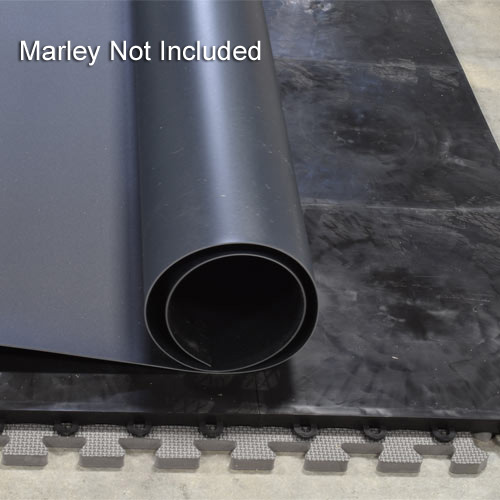
It is sold in rolls of various widths and placed on top of the subflooring. It is normal to see long lines of gaffa or grey duct tape over the joins to ensure the flooring stays flat and your dancer does not trip over the joins. Great Mats are a great supplier of dance flooring and you can check out their prices and what they have to offer here.

Once you have decided on the color of your Marley and how much you will need, you will also need to think about what is going under it. This is really important for dancing because you need to ensure that the subflooring absorbs shock from the dancer’s movement so that it is not absorbed by the body alone as this can lead to injury – the most common injuries being shin splints or foot or ankle injuries. This means not covering concrete with Marley or Tarket and calling it a day!!!
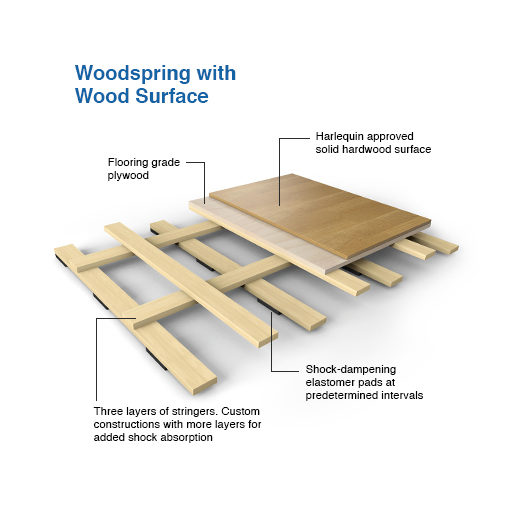
The best option is creating a sprung dance floor. All reputable dance studios provide their dancers with sprung dance floors because they help to absorb shock from leaping, running and even walking just like a good pair of trainers or running shoes do! Having sprung sub-flooring is a great option for any home dance studio not only giving you that professional finish but also ensuring your dancer has a safe surface to practice on.
You can also go the do it yourself route and although these two following videos show how it is done for a larger studio, the techniques can be used a applied to a room at home quite easily!
Another more economical option for some is choosing dance subflooring that can be easily laid over concrete or even over carpet. This subflooring includes various types of foam or rubber tiles. The type, width and amount of levels of foam and rubber you use will depend on the type of flooring you have in the first place and your budget. It is not as good as a floating or sprung floor, but it is much better than not having anything under the vinyl covering!
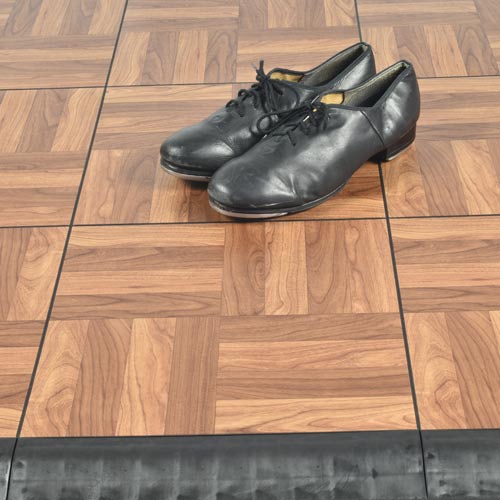
If you have a tap dancer or multidiscipline dancer for whom you are creating the dance studio for you can still go for the vinyl flooring, it just won’t make as much of a defined tapping sound when tapped on compared to a real wooden floor. As long as the tap shoes screws are screwed in tight, the tap shoes should not damage the Marley or Tarket flooring.
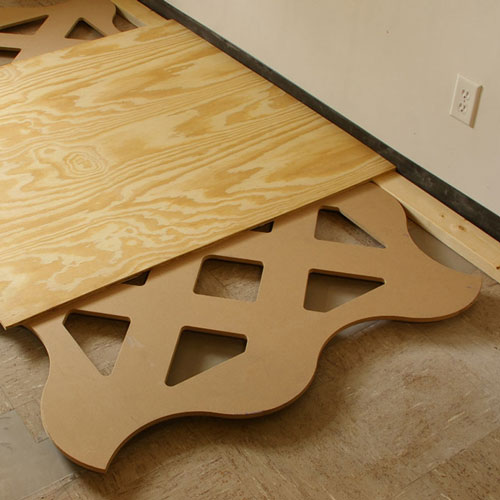
Another option is to install special wooden tiles made for dancing on as pictured below, or to install real wooden planks (not laminated) that will actually be danced on. Wooden planks can be incorporated into your design when creating your subflooring, just like a wood floor in a house that has been sanded and varnished.
Another option is to install Marley or Tarket and to use a portable wooden tap square for practice over the top of the Marley which many tappers use to practice tap dance on practically anywhere.
Vinyl or Wooden Floors which is best for my home studio?
When I was younger I danced on wooden flooring – long real wood plank flooring that was sanded and varnished maybe once every few years in an old community hall. I can remember coming home and picking out splinters from my stockings – big chunky ones. This experience will always make me move towards choosing Marley over wood as my flooring choice, but with advances in technology in creating wooden flooring for dance and sport there are many reasons you might prefer wood over Marley and I will outline them below.
| VINYL FLOORING | WOODEN FLOORING |
|---|---|
| Great for ballet, jazz, contemporary, hip hop dance styles | Better for tap dancers and ballroom dancers as this is the type of flooring you will generally perform on as well. |
| Easy to maintain and replace if need be | Will need to be sanded and varnished over time through use |
| Laid on top of sprung or prepared dance subflooring | Generally laid on top of sprung or prepared dance subflooring, but can be part of the subflooring itself. |
| Can begin to look worn and marked through use and if the tape has been replaced over and over, the residue and dirt can create dark marks. | If looked after can look like new for many years. |
| Wooden flooring options have changed over the years! You can now buy easy install planks made for sports or dance floors. |
A question you may be wondering is which is cheaper? Honestly, there wouldn’t be a huge difference in the overall costs of either when you realize both require subflooring. It will depend on what you are able to source in your location as well and the quality you are after of your wood or vinyl.
Can I use Laminated Floating Wood Flooring?
Many modern homes today come with laminated floating wood flooring, you know those planks that you either glue or click together to make a beautiful wood floor. Please note I am talking about those ones made for the living areas of your home, not the specially made floating flooring boards made specifically for sports and dance. Add some mirrors on the walls and add a ballet barre and presto you have a dance studio. This of course will be an option for some people who already have them installed, but if you are going to build your own dance studio from scratch I would not go down this option for the following reasons.
House Grade Laminated wood flooring does not provide the grip or resistance on it’s surface needed by a dancer especially one dancing in ballet or pointe shoes. The surface is too smooth and will cause your dancer to easily slip or roll an ankle and injure themselves. (Most ballet dancers with this kind of flooring already in their houses still install Marley over the top because of this!)
House Grade Laminated wood flooring scratches easily, one loose screw on a tap shoe and it will gouge and scrap through the surface, and replacing those laminated floor planks is arduous work compared to spot sanding or filling in the whole made in real wooden planks. Scratches, scuffs, and marks can also be made by ballroom heels, character shoes, or props and equipment being used by your dancer.
House Grade Laminated floating wood flooring still needs to be fitted onto appropriate subflooring for dancing. If your house is built on a slab of concrete the subflooring that comes with installing laminated floating wood planks may not be adequate enough for absorbing all the shock of a dancer. Manufacturers of laminated wood floors meant for day to day use aren’t expecting people to be practicing jetes, leaps and other jumps over and over, so you still need to invest in the most shock-absorbent underlays as possible!
However there are companies such as Stagestep who create hardwood floating floorboards specially made for dance studios – and this is the kind of flooring you should be looking for.

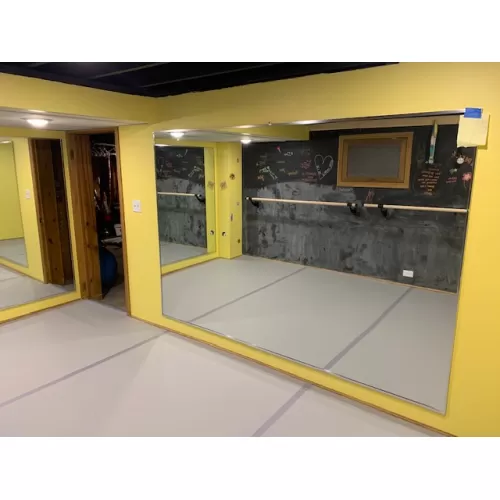
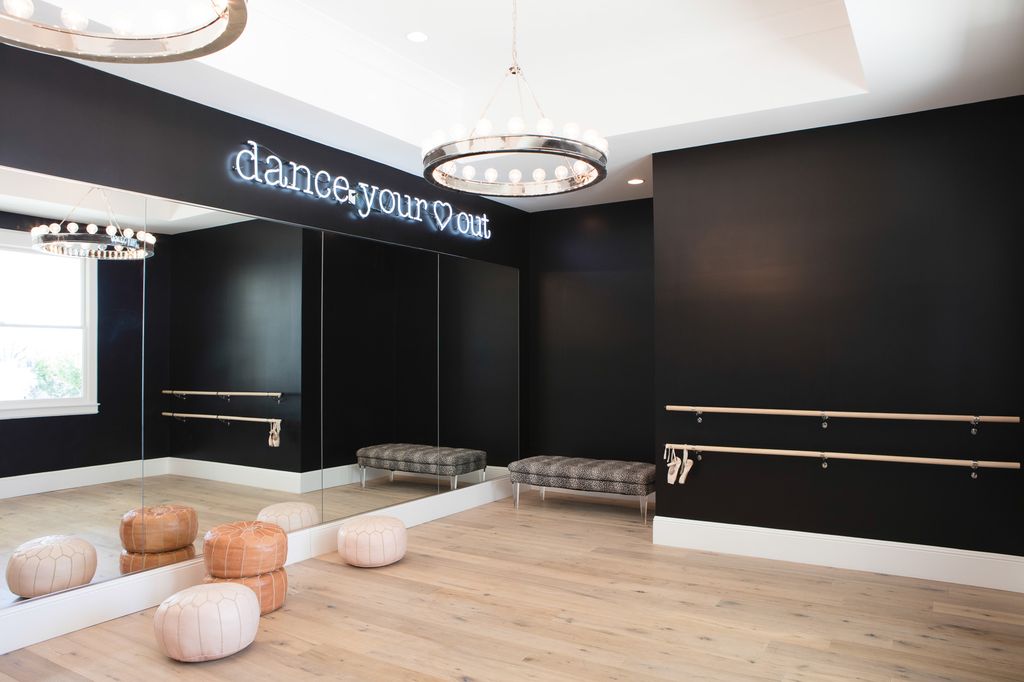
DANCE STUDIO MIRRORS
After flooring the next element of a home dance studio or workout space that I would be looking at installing are full-length mirrors into the room.

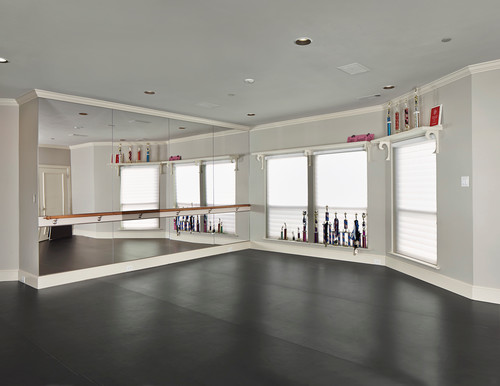
The best but most costly option for mirrors would be installing floor to ceiling mirrors along the length of one entire wall. This is costly because of the large size of the mirrors, the possibility that you will need to get them custom cut to fit your wall, and the fact that you will probably need to pay for a contractor or tradesperson to deliver and install them for you because of their size as well. An added cost may also be if you need the mirrors cut with extra specific measurements, for example, you may need a hole cut for an electrical outlet.
The next best option is to buy mirrors that start as close to the floor or skirting board in your room as possible, but do not completely reach the ceiling and are at least taller than the tallest adult in your home so that when you stand in front of the mirror you can see your whole body. Having them as tall as you can buy them means that when your dancer leaps and jumps they are still able to see their whole body and their head is not cut from view for example. They do not need to go the entire length of the wall, but the more wall covered with mirror means more space for your dancer to move around the room whilst still being able to see themselves.

Which wall should I place my mirrors on in the dance studio?
Before choosing which wall to place your mirrors on I would personally want to spend some time using the studio first to determine their most useful placement. It is generally going to be along the longest and least obstructed wall – for example, one without a door, window, or closet. If each wall in the room has something along it, try to choose the wall that will allow you to put up the longest and tallest mirrors possible.
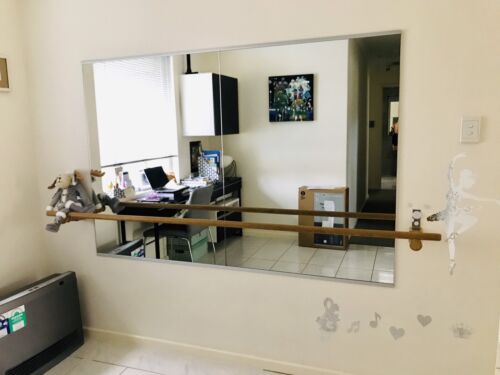
Your next option would be to find pre-manufactured mirrors and just work with those lengths such as a framed mirror bought straigh off the shop floor. Although I probably wouldn’t recommend small square tiled mirrors because they can distort your dancer’s view of themselves and the joins are distracting, (I felt the image below illustrates my point well).


You can buy fairly large mirrors online but for a permanent space in your house, I would recommend using your local mirror supplier and tradesperson to do the job right. I have heard of so many stories where mirrors have arrived broken or fallen because of incorrect installation
Alternatively, if you are a DIY kind of person, I would be looking for people selling used mirrored wardrobe doors and disassembling these to permanently fix to my walls.
One last idea could be to install mirrored sliding doors onto an existing closet or wardrobe in the room which would serve both the function of being full length mirrors as well as hiding equipment behind them.
Should I buy Glass mirrors or Acrylic Mirrors?
Your decision on this will probably come down to your budget. Acrylic mirrors being made of plastic are cheaper than glass and less likely to crack or break at any stage of the installation process. But they can bend and distort what the viewer sees in their reflection and therefore aren’t the best option for a dance studio. Go for glass unless you have seen the acrylic product installed in a similar setup to what you are after up-close and in-person to ensure it is what you want otherwise you may end up spending more money disposing of the acrylic mirror and replacing them with glass!
Can I buy my mirrors online for my home dance studio?
Yes you can buy mirrors online for you home dance studio, you will most likely find appropriate mirrors if you do a search for mirrors for home gyms or full length mirrors. But keep in mind that delivery of the mirror can still be expensive, that the delivery service may not specialize in fragile products meaning that you recieve a cracked or broken mirror and that although many mirrors say they come with all the mounting screws and fixings that many times what is in the box may not be appropriate for your walls or that you may still need to pay for someone to professionally mount your mirror once you receive it, because although the online instructions or video made it look easy, it is not actually that simple in reality.
Personally I would talk to your local glass and mirror supplier. You may find for a little extra money all the worry of measuring and installing your mirrors is done for you!
How low to the floor should my mirror be installed in my home dance studio?
Your mirror needs to be installed as low to the ground as possible so your dancer can easily see their feet! Have you ever been in a change room where the mirror has been mounted a little too high and you have to look down or open the change room door to step back to be able to see your whole body?
Seeing your footwork easily without having to adjust your position is really important for a dancer so they can adjust their body, make sure they are fully pointing their toes, are in a proper turned out or parallel position. If you install your mirror too high off the ground there is no easy way for them to get this all-important view!
How tall should my mirror be in my home dance studio?
Your mirror should be as tall as possible to allow the dancer to see themselves clearly even when they are leaping or jumping in the air. This means the mirrors need to be taller than your dancer or tall than your usually dressing mirror to accommodate this!
If your dancer is young, I would still want the mirrors to be taller than the tallest adult in the home to ensure I didn’t have to replace them as the dancer grew.
What length should my mirrors be in my home dance studio?
The longer and wider your mirrors in your dance studio the better! This is so when your dancer moves around the room they are always able to see themselves. A mirror the length of the entire wall would be an awesome tool for any dancer to be able to use to help them self-correct their movement anywhere in the room!
How wide you are able to get through will depend on your budget and room size. Personally, if I could only buy one mirror and it came down to whether I would install it horizontally/landscape for length or vertically/portrait for height, I would definitely go for the height rather than width! Your dancer needs to have at least one full-length mirror where they can easily see their feet and their hands all the way up into fifth position or over their head when on their tip toes or releve to be able to practice alignment and placement of their whole body.
Frameless or a set of framed mirrors, which are best for a home dance studio?
Depending on where you buy your mirrors you may need to install more than one to get the width you need. I would go for frameless mirrors that are usually glued straight onto your wall to get a seamless look without any distractions or obstructions for your dancer. Framed mirrors look nice and maybe a cheaper option or easier to install yourself but they are not as practical as frameless mirrors for your dancer’s practice!
Is there such thing as too many mirrors in a home dance studio?
Yes absolutely there is such a thing as too many mirrors in a home dance studio. When dancing in a home dance studio, you will generally not have a teacher or coach in there with you to see all your mistakes and so it is up to the dancer to observe themselves in the mirror and to self-correct, but one big large mirror across one wall is sufficient for this purpose.
Having too many mirrors on multiple walls can actually create an effect where your dancer becomes dizzy, unbalanced and lose their position in the room. Have you ever been to a fair or museum where they had a room of mirrors and you could not work out where the entry or exit was because there were too many reflections?
Another reason to only place mirrors on one wall is so your dancer can turn around and dance with the opposite wall as the front to work on remembering a routine and using muscle memory. Dancing without seeing yourself is also an important skill. When you are on stage or in a dancing exam there are no mirrors and not practicing in this way can be detrimental and unnerving to a dancer who is so used to performing their routine or exam exercises with a mirror in front of them! Another option for this issue is to have a curtain which you can pull over your mirrors.
Should I install my ballet barre on top of or across the mirrors?
If you have several other options of where to place your ballet barre I would choose NOT to install a ballet barre on top of or right across a mirror. Only place your ballet barre across the mirror if you have no other options for it’s placement! The following are four reasons why placing your ballet barre on top of your mirror is not the best place for it:
- Your dancer will no longer have a full view of their body in the mirror, their top and bottom halves will always have a split view and will be obstructed.
- When at the barre it is better to view your body from a bit further away to get the whole view rather than be so close making you focus on each section of the body at a time as you are so close to the barre.
- When working at the barre as you are so close you need to move your head up and down to look at the various parts of your body which can affect your alignment, rather than just moving your eyes if you were further away .
- Having the barre cut through the middle of the mirror creates a distraction and obstruction in view in general and is just ANNOYING!!! Trust me I know from experience!
The only time I would place the barre over the mirror is if I could not place it on the opposite wall to the mirror, could not fit a portable barre in the room or if I had to place the barre on either sidewall to the mirror and I could not actually see myself in the mirror while standing at the barre.
The following image is an example of what not to do! Any dancer using this space would never be able to see their lower body and that is really important! This could have been easily fixed if the mirrors had been flipped on their side and installed one on top of the other instead. I would also opt for a portable barre in this space to be away from the mirror to get a full view of the body.
BALLET BARRE
To make this room a dedicated dance space you will definitely need to install a ballet barre and there are a few things you need to consider such as do you want a single or double barre? Are you wanting to buy a traditional wood or metal barre which can be cleaned more easily? Do you need to mount your barre in front of a mirror or on a wall next to or opposite your mirror? What height should I install my ballet barre at? Do I want to install a barre or buy a portable ballet barre instead? I answer all these questions and more in my article How to choose a kids ballet barre which you can read in a new tab by clicking the link, but I will go over some of the things I would specifically think about for a permanent ballet space here.
Should I Install a permanent ballet barre into my home dance studio or get a portable barre?
Even though this space is going to be a permanent fixture in your home there are still some valid reasons why you may not want to drill into your walls and fix a ballet barre to them and I will go over the reasons why or why you may not want to do this here so you can work out the best option for your space.
Firstly if your dancer is young, permanently fixing a barre to a wall means that it is stuck at that height. You might use the guide in my article How to choose a kids ballet barre to decide on the height placement, but then a year or two later, you will need to detach the barre and install it a little higher. Many people choose to do this to give their dancer a personalized room catered to their needs. But others deal with this issue by choosing a double barre which means installing two barres at differing heights. The heights of these barres may never be exactly personalized to the dancer’s own height, but they are installed at the same height as most professional dance studios which the dancer would be or become accustomed to anyway.
Secondly, you may only be able to place your barre on a side wall rather than directly across from your mirror depending on the obstructions in the room such as doors and windows, or even fixings and wall studs etc. This may mean your dancer cannot actually see themselves in the mirror you have installed in the room. The solution for this is to buy a portable ballet barre or even make one and you can view the instructions and videos on how to do that here in my DIY home ballet barre section of this website.
Lastly, many store-bought portable ballet barres are not only portable but also adjustable so you can always move the barres up or down to cater for whoever is dancing.
The downside to a portable barre is that for the home you need to buy one that is light enough for your dancer to move around the room themselves. In a professional dance studio, portable barres are heavy and require several dancers to move them into and out of the space. They are heavy so they do not move even when you have 6 adult dancers holding the barre doing grand battements (throwing their legs high into the air). But at home, your dancer will need to move the barre around themselves which is why I recommend an aluminum portable ballet barre for this purpose. Their downside though is because they are light, they are never going to be as sturdy as a permanent wall-installed barre, but do teach your dancer to always use a gentle and light touch rather than grip the barre.
A permanent barre will definitely finish off the look of your room leaving no doubt in anyones mind what the rooms intended use is. A permanent barre also means it it always there, inviting the dancer and ready to be used. It doesn’t need to be packed away or moved to the side to make space for centre practice and when fixed securely to the wall is alot sturdier than most portable ballet barres.
Wood or Aluminium barre – which is better?
Ballet barres have traditionally been made from wood. I am not sure of the actual history behind this and have tried to find a history of the ballet barre only to be inundated with information about Barre Workouts which are a new type of fitness workout. I am going to assume then that this is because it was the cheapest and easiest material to work with many years ago when side or barre work for ballet practice was developed and that metal or steel barres came into dance studios as the technology and availability of the materials became cheaper and more readily accessible. Today you are able to buy lighter aluminium barres which are easy to clean and they can even come with an antibacterial coating. But which one should you choose?
At the end of the day it comes down to personal preference, budget and what is available to you. Wooden and steel barres are heavier in general and heavier to install. An aluminum barre is going to be lighter and cheaper for longer lengths. Aluminium and steel barres will feel cooler under the hand – cold on a winters day, whereas wooden barres will not conduct the weather as noticeably. Wooden barres feel smooth and sturdy under the hand and can create a more asthetically, inviting or warm and pleasing look in a studio, where as aluminium can have a clean, minimalistic, industrial or clinical look – so your choice may come down to the overall theme and look of your studio!
For all permanent barres regardless of weight, you will need to ensure you have sturdy studs in your wall to accommodate them – especially as your barre will need to carry the weight of your dancer as they put their leg on the barre to stretch or the occasional child who hangs off of it!

MUSIC SYSTEMS
After you have installed your flooring, mirrors, and barre it is really important to also think about how your dancer will listen to their music to dance to and even if they are doing online dance lessons or following pre-recorded classes how they are going to best do this.
Electrical Outlets
Working out where you have electrical outlets available for plugging in electrical equipment should probably be part of your initial planning stages for your room. The best place for them are generally near the corners of your room. This is so you can have a music system set up on the side or in a corner ensuring that it is out of the way and does not become an obstruction in front of the mirrors or your ballet barre.
You may also want some high towards the ceiling on one of the walls so you can install a television or computer display screen on a bracket for your dancer to be able to access online dance lessons using screen mirroring from a smaller device or you may even wire it straight to a computer that sits next to your stereo equipment or use the computer to play your music as well.
Do I need a stereo or can I just use a computer or laptop?
As music today is becoming more accessible from a computer or USB stick it makes sense to think about having a designated computer or laptop that is connected to the internet to stream music and lessons or music stored on the hard drive. You could even have an iPad or tablet for the same purpose! Many laptops and computers still come with CD/DVD players and therefore can also be used to play these if your music was stored on those as well. Just remember these devices will not play your music very loudly and so you will need to ensure you have a separate speaker system available for volume.
Installing a speaker system
Whether you choose to opt for a computer or lap stop or even an ipad for streaming lessons and music or playing music you will still need some sort of speaker or stereo system to actually hear the music because your device will not be loud enough. You might choose to use permanent wireless or bluetooth speakers installed on your walls around the room, one tall tower boom box or speaker, or even just portable blue tooth speakers that can be picked up and moved as required. You may also opt to get a speaker system that is wired and plugs into your laptop or computer to ensure your dancer doesn’t have to deal with syncing issues or have to ensure the speakers batteries are always charged before they dance.
Personally, if this was my home dance studio, although I love the convenience of blue tooth and screen mirroring I find that they can be temperamental and so I would purchase a stereo system and speakers purely to play the music that also came with a USB port and a port to connect my computer/laptop or device. Many stereo systems today also come with Bluetooth so you can play music off a device such as your phone or tablet, but having the ability to plug in your device as well means that if you do have syncing problems you don’t waste your time trying to work out technical issues.
TV screens and Computer Displays
Another addition you might like to add to your home dance studio is a smart tv or a computer display screen and the following are a few reasons why they are helpful for your dancer and worthy of inclusion in your studio plans:
- Can stream and easily watch and participate in online dance lessons
- Able to play or stream pre-recorded lessons, training sessions, daily workouts.
- Can record and playback own practice to assist in self correction
- Can play music through the screen
- can use for one on one coaching through zoom or another online communication app.
Do I need a dedicated screen in our home dance studio – Can’t we just use the lap top or tablet?
No, you do not need a dedicated screen in your home dance studio, but if your dancer regularly uses one it might be an idea to think about including a permanent screen in the room. There are pros and cons to doing this and the main con or difficulty is finding the perfect place for it in your room!
You will want the screen to be at a good height for your dancer to be able to view it easily as well as to be able to place a webcam on top and at eye level for you dancer so they can interact well through an application such as zoom. For these reasons I would not place a screen on the same wall as your mirror, rather I would place it on a wall on either side of the mirror. This way your dancer can face the sidewall to speak to their coach or teacher and either face the screen or camera whilst practicing or choose to face the mirror.
Webcams
Most laptops and some smart tv’s come with inbuilt webcams, but if your dancer is going to be doing online real-time dance classes where the teacher will be interacting with your dancer and giving them feedback you will need a webcam so the teacher can see them.
If you choose to have a dedicated web camera for your home dance studio you will want to ensure that it is placed close to your screen so when your child is looking into or at the screen they can interact with their teacher, whilst at the same time, the camera needs to be able to capture your dancer’s full body in the studio not just their upper half for example so their teacher can give them the feedback they need. Their coach will not be able to fix alignment if they cannot see below your dancer’s waist.
Internet
Lastly in this section I just want to remind you that to be able to do most of what I have written about above such as stream music or online lessons, you will need a fast and most importantly reliable connection to an internet service. If you have a wireless system in your home do you need a router placed in the room to boost connectivity and signal? Do you want to have an ethernet port in the room to ensure you can plug a computer or modem directly into the wall in this room? They may seem like obvious questions but knowing in advance how you intend to use and access the internet in the room will mean your room is planned out to the best it possibly could be. Do it once and do it right!
DANCE STUDIO EQUIPMENT
Generally, all a dancer really needs is good flooring, a mirror, a barre, and a way to play and hear music, but sometimes having some extra equipment to help stretch and to strengthen their muscles can support their overall improvement and make practice engaging and interesting.
You might want to think about buying equipment such as a split stretcher, foam rollers, turn discs or turn boards, a stretch strap, resistance bands, or a balance or wobble board. For some recommendations on products take a look at our stretching and strengthening resource page here!


You might also want to look at different storage solutions for your dancer’s equipment, but I quite like some of these ideas above from pinterest where people have used pegboards to create a place and space for all their workout equipment, and clicking on each photo will take you to the owner of the images webpage where you can get more detailed information on how to make them. Alternatively you may have a wardrobe or cupboard in your room or use baskets or boxes to easily access equipment.
SOUNDPROOFING
Depending on where you are setting up your dance studio you may want to think about some soundproofing options for your walls and floors especially if the studio is in a spare room next to other bedrooms or regularly used rooms, upstairs or in an attic.
Soundproofing within the actual walls or flooring of your room is obviously one of the best options as not only can you really pack the inside cavities of the walls with sound-absorbing materials but it is also not something you have to add on top of your walls that might interfere with mirrors and ballet barres. But this will not be an option for everyone as it requires removing and replacing drywalling and flooring and it is not the same as just installing insulation as that is made to reduce thermal changes within a room.
You may want to look into options such as soundproofing panels, wall or ceiling hanging sound absorbers, or wall coverings that absorb sound vibrations so that the rest of the house can stay in peace as your dancer practices their hearts away. Eugene at Bettersoundproofing.com provides a rich depository of ideas and information on how to soundproof rooms in your home so you should definitely check him and the site out!
VENTILATION, HEATING & COOLING
Dancing can be a hot and sweaty activity to participate in and at the other extreme on cold days, it can take dancers ages to warm their bodies up enough to safely practice because the environment is frosty cold.
Therefore ensuring you have included ventilation or air-conditioning and heating options for your home dance studio are quite important.
In your home dance studio, this might look like installing a split system air-conditioning unit into the room to provide a cool breeze on warm days and warm air on frigid ones. It may mean placing fans on the ceiling, ensuring windows are double glazed, or simply able to be opened and closed easily for maximum airflow. It might mean buying a portable fan or air-conditioning system for the room.
Whatever your budget thinking about how you can keep the air flowing around your home dance studio is important to think about, but overlooked by many until they are actually in their finished studio realizing that it is too hot and stuffy or freezing cold in the room and not a great climate to dance in.
LIGHTING
Lighting may not seem like a big deal for a dance studio, but the brighter the room the better for your dancer both so they can see themselves well, but also because nice bright lighting creates an inviting space in which your dancer will feel energetic and want to work in.
Lots of natural lighting is always going to be a great option for almost any room in your house, but you may have to boost this with more than a few downlights that may already be installed in the room to give your dancer adequate lighting that covers the whole room.
FURNITURE CONSIDERATIONS
It is also a good to think about adding a few items of furniture to the room such as a chair or bench for the dancer to sit on and change into their dance shoes, also so they can sit and take a rest or look over notes or even to be able to write their own notes. A small table for this purpose may also be a handy addition or might be an extension from where the music player has been set up.
A bench can always transform into added storage in the form of a hinged lid over a box or even a single long cube bookcase laid on its side with a foam cushion covering the top for sitting on. A chair might be foldable and hung on a hook when not in use in a small space or if your room allows you may add in a luxurious armchair so that someone else can sit and watch during practice. You may put in a few bean bags and pillows so your dancer can sit and visualize whilst listening to their music or just to rest on.
BUDGETING & COSTS
Before you start building your home dance studio you should sit down and think realistically about how much money you have to work with or are willing to invest in creating a dance space in your home. This will help you determine whether you need to go down a DIY path, need to find items second hand, are able to out source some of the work or get a professional builder in to create your space or have extra money to spare on things such as a dedicated sound system for the room.
How much does it cost to build a home dance studio in your house?
A home dance studio can cost you anything from $500 to set up to over $20,000 depending on what flooring is in your space or room already, the quality of the products you wish to purchase to fit into the room, how many of the tips in this article you follow, what you already own that you can reuse in the space and what items are a priority for you to have such as a sprung dance floor or using the flooring as is.
At the end of the day, rest assured that just building a dedicated space for your dancer to practice in is a step in the right direction no matter how much you spend as the more they are able to practice, the better they will become!
Share this article on Pinterest Now!


Check Out our Google Web Story