How to Draw a Glass of Water (6 Steps)
This tutorial shows how to draw a glass of water in six steps using examples done simple and slightly stylized way.
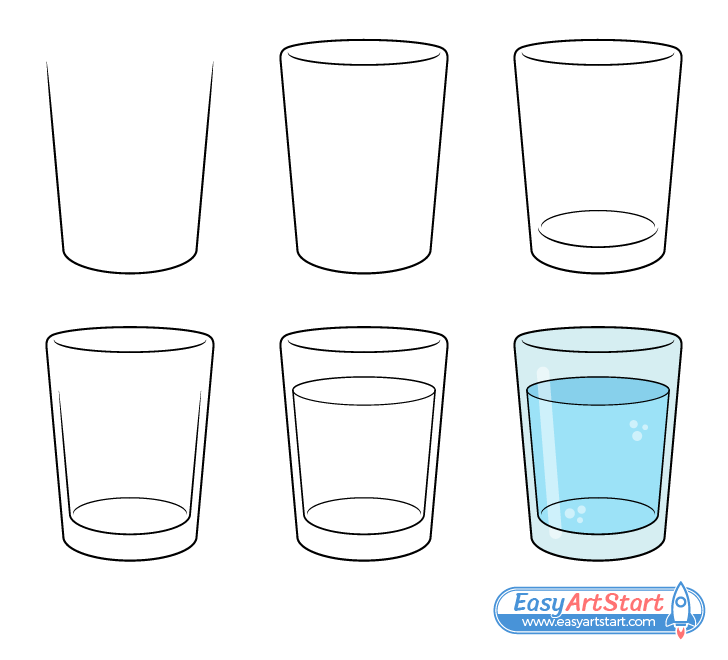
The focus is on creating a drawing of a glass filled with water that is easily recognizable yet also slightly stylized/simplified to make the tutorial beginner friendly.
Please note that although the visual examples are fairly straightforward there are also some instructions that may seem a little complicated. If at any point you become unsure as to what to do just refer to the illustrations and try your best to draw what is shown in them.
It’s recommended that you start the tutorial in pencil and use light lines to make it easy to correct any potential mistakes. You can darken them once you have all parts of the glass outlined.
For drawing a drop of water see:
How to Draw a Water Drop in 4 Easy Step
Step 1 – Outline the Shape of the Water Glass
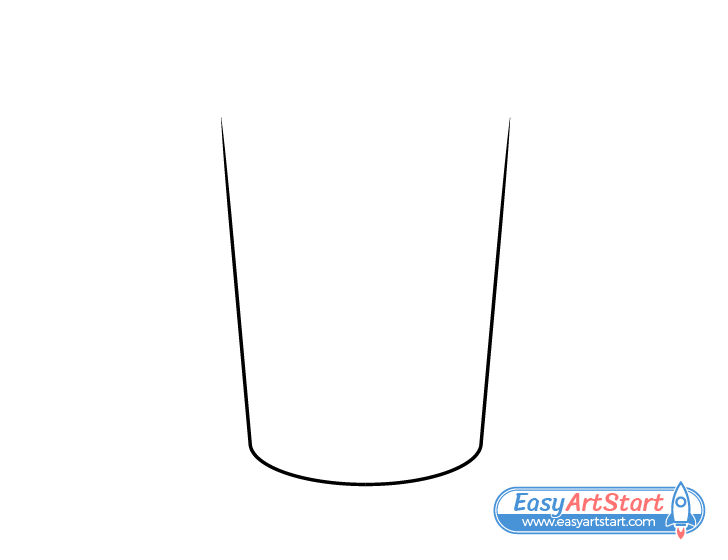
In this case the glass has a fairly simple design. Begin by drawing the curve of it’s bottom followed by the straight lines of the sides. Make it wider as it goes up and leave the top open for the next step.
Step 2 – Draw the Opening
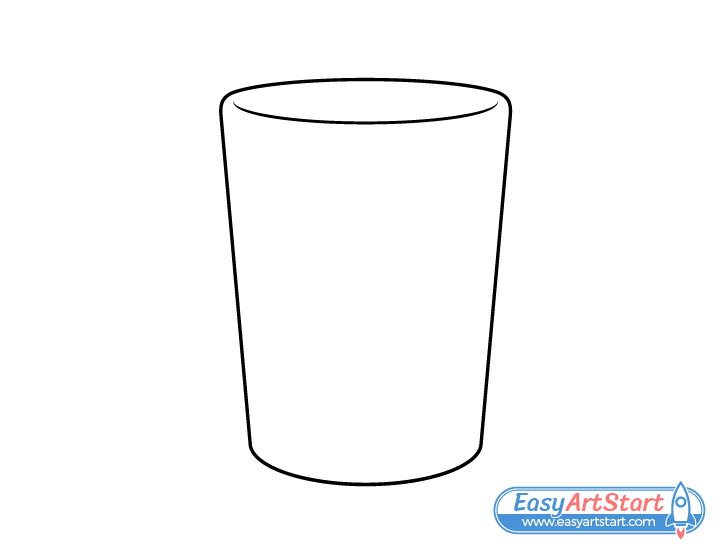
Add the opening at the top of the glass where it’s overall shape is something like a long narrow oval. Draw the upper curve of the opening connecting to each of the sides. Draw the bottom curve slightly smaller (but a little rounder) and leave some tiny gaps between it and the sides. These gaps will help show the thickness of the glass. If you were to draw the bottom curve similar to the top one (touching the sides) the glass would appear paper thin.
Another important thing to note is that you should make both of the curves at the top flatter (less rounded) than the one at the very bottom. The reason for this is that the top and bottom of the glass will appear flatter the close they are to the level of your eyes and rounder as they go below or above them.
In this case the top of the glass is higher up (closer to the eyes) and therefore is flatter than the bottom which is lower down.
If you would like to better understand what is being talked about here simply take a real glass or cup and put it on a flat surface well below your head. Afterwards slowly lift it towards your eyes (try not to tilt it) and watch what happens to the opening. It will keep on looking more and more flat until it pretty much becomes a straight line.
Step 3 – Draw the Bottom
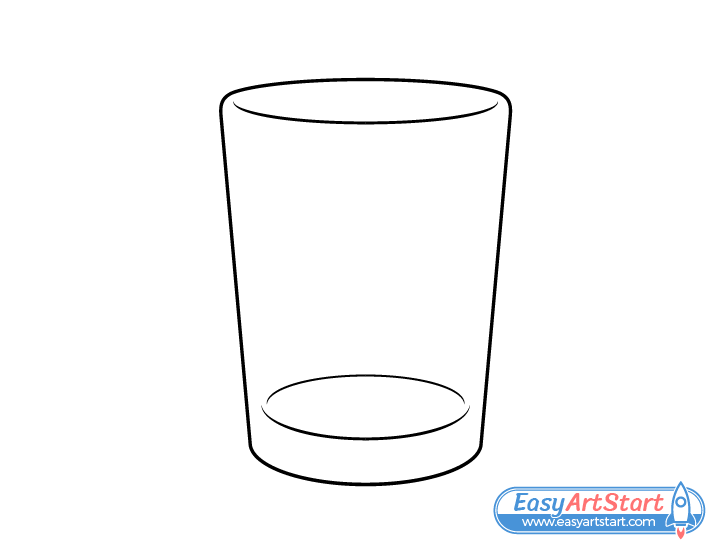
To show the thickness of the base of the glass add another pair of curves (that look like a broken oval) a little bit up from it’s bottom. Make the the lower one slightly larger and rounder than the upper one. It should pretty much follow the curve of the bottom of the glass. Draw both in a way where there is some space between them and the outer sides.
Step 4 – Draw the Inner Sides
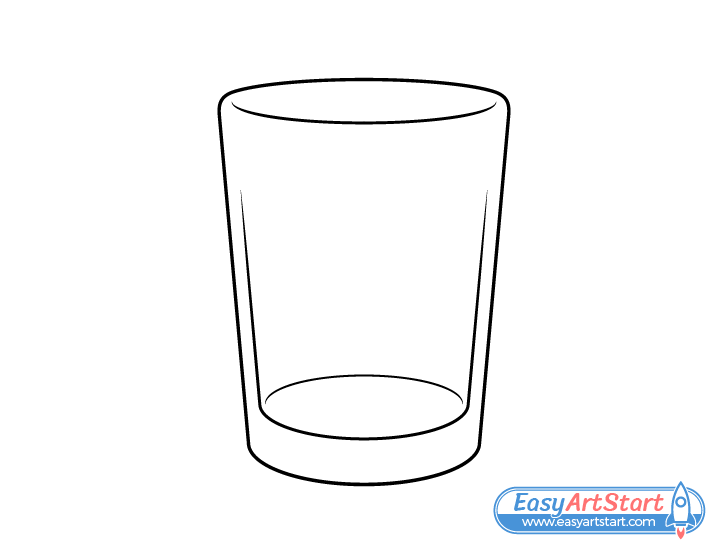
Project a pair of upwards lines from the ends of the bottom curve parallel to the sides of the glass. Draw these as far up as you would like the glass the be filled with water.
Step 5 – Draw the Water
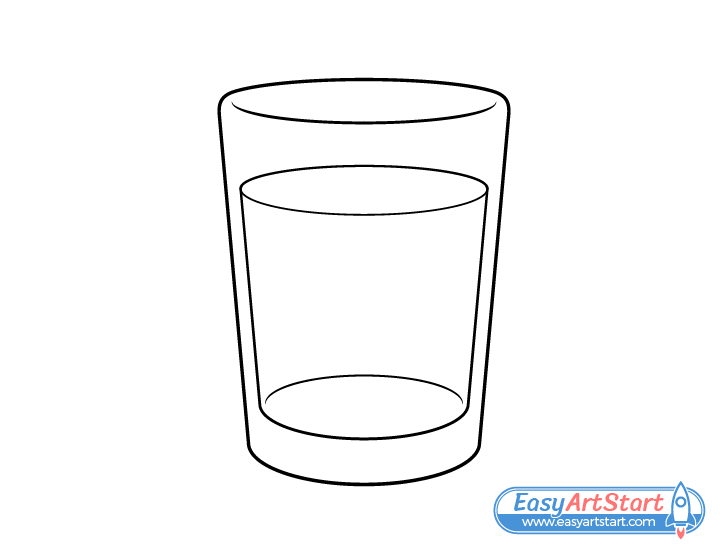
Draw an oval between the top ends of the two lines added in the previous step. Make the top curve of this oval slightly flatter than the bottom but make it’s overall shape a little rounder (closer to a circle) than the opening of the glass. Once added the oval will show the surface of the water (as in the example).
When done with the above you can darken your lines by tracing over them with the pencil or a thin black marker. Just make sure you are happy with the drawing thus far before doing so as it may be hard to make corrections afterwards.
Step 6 – Color the Glass & Water
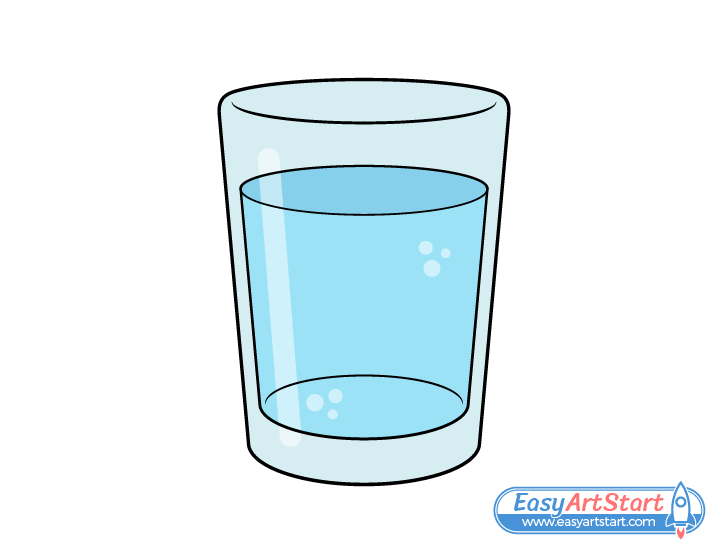
To color the drawing make the glass a light blue/grey and the water a light blue with a darker blue surface. An easy way to do it is with water based paints, colored pencils or pastels. Lighter color markers may work as well.
Before you start coloring you can optionally also add the following:
- A lighter strip along one side of the glass to show light reflecting from it’s surface.
- A few clusters of little circles (of slightly varying size) to show bubbles that tend to form when water is pored.
If you do wish to add the above you can lightly outline them in blue or regular pencil. Leave them white as you color and them and then lightly go over them with the grey/blue so that they don’t look overly bright.
Conclusion
This tutorial shows how to draw a simple and slightly stylized glass of water. As mentioned at the start, the goal is to create a believable but uncomplicated drawing. As also mentioned, some of the instructions may be a little complicated, however, if you’ve found that to be the case hopefully the visual examples helped you out.
If you like these kinds tutorials that show an easy to follow step by step breakdown of the drawing process be sure to try some of the other tutorials on the site such as:

