This Itechguide teaches you how to split screen on Windows 10. The guide covers steps to enable Snap windows setting and steps to split screen on Windows 10 into 2, 3 or 4 screens.
Step 1: Enable “Snap windows”
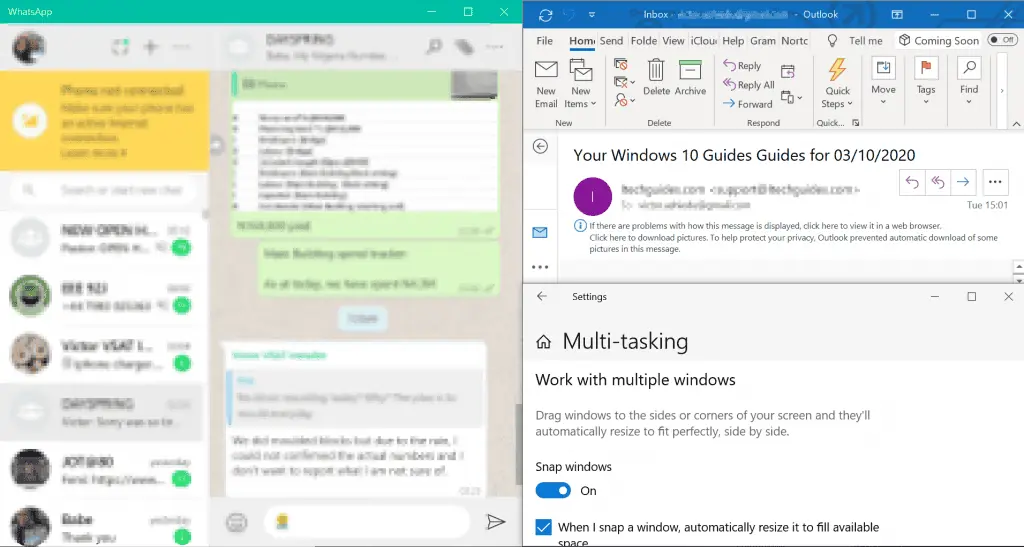
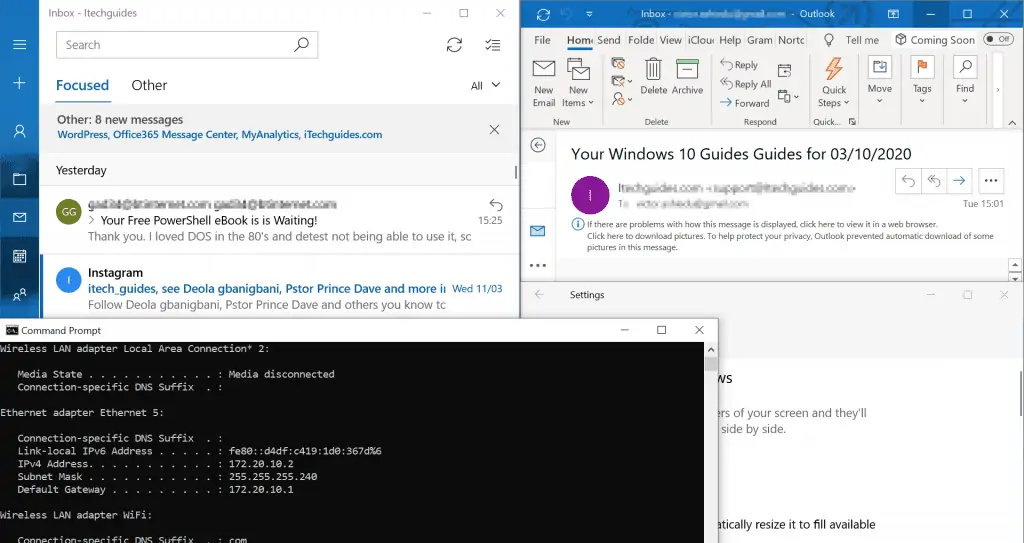
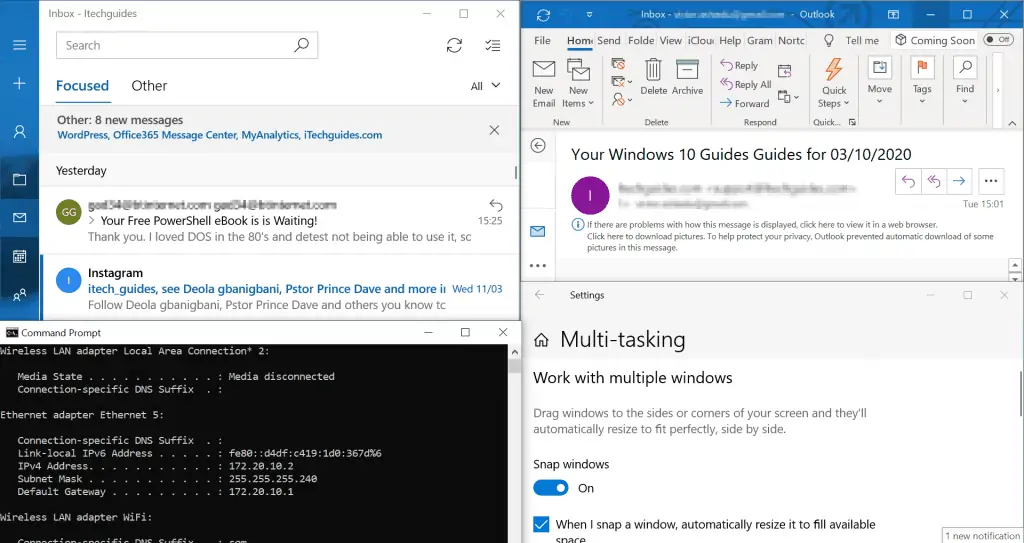
Before you can split screen, Snap windows must be enabled. Though it is enabled by default, it pays to confirm that it has’t been previously disabled. Here are the steps.
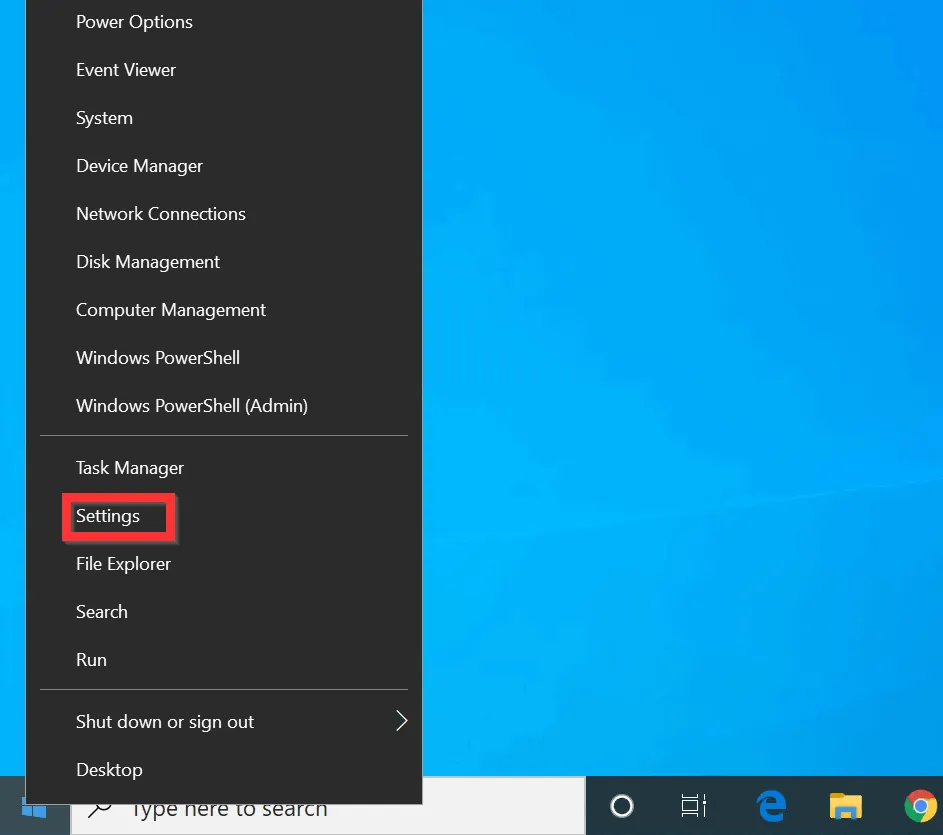
- Right-click the Windows 10 Start menu and click Settings.
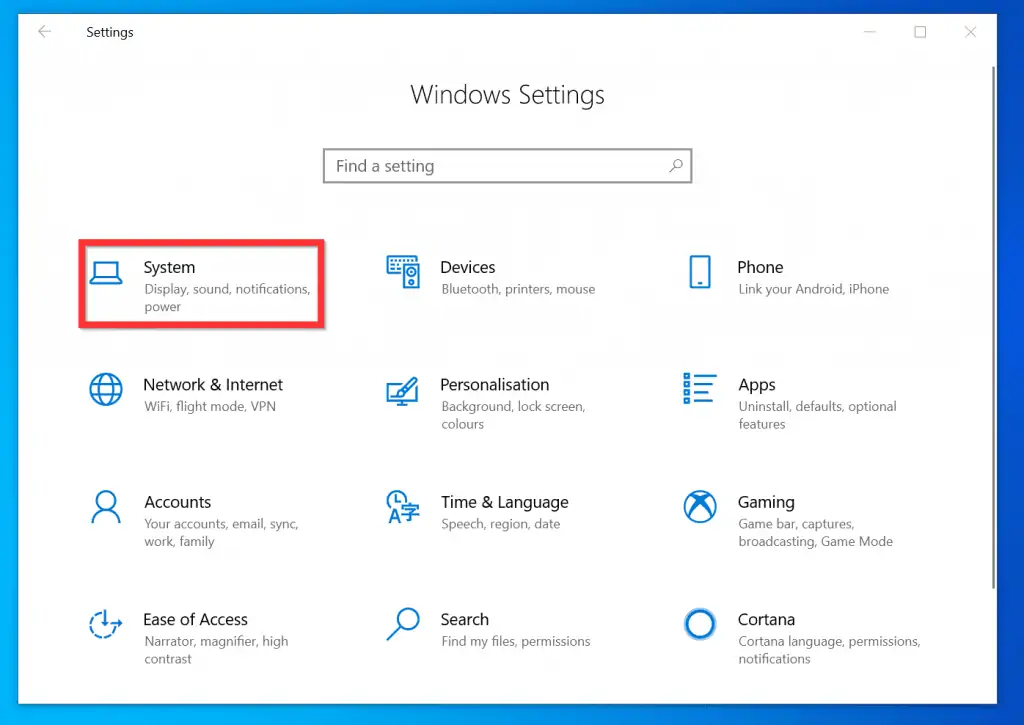
- On Windows Settings, click the System category.
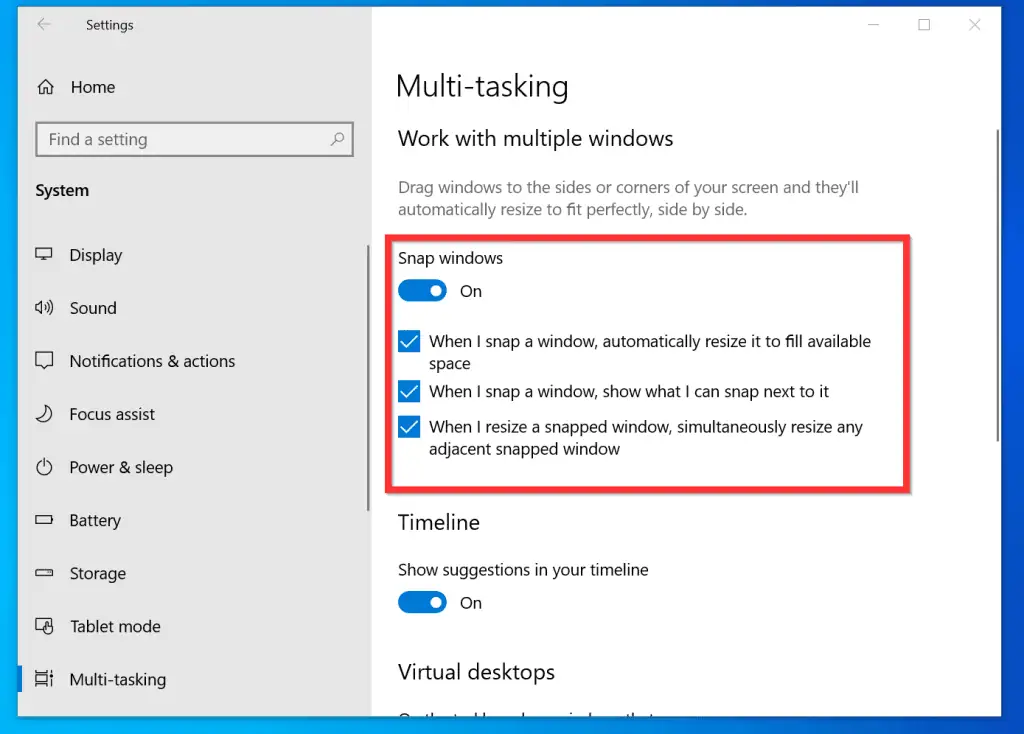
- Then, on the left pane of System Settings, click Multi-tasking.

- When the Multi-tasking setting opens, confirm that Snap windows is turned on. Also, make sure that all the checkboxes underneath Snap windows are checked.
Step 2: Split Screen into 2, 3 or 4 Screens
Once you confirm that Snap windows is enabled, proceed with the steps below to split your screen.
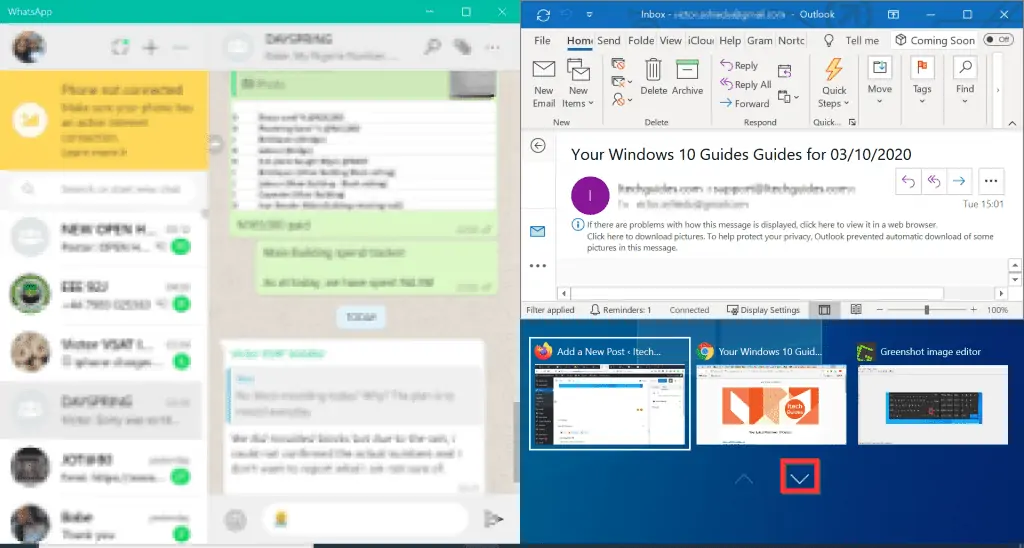
Option 1: Split Screen into 2 Screens
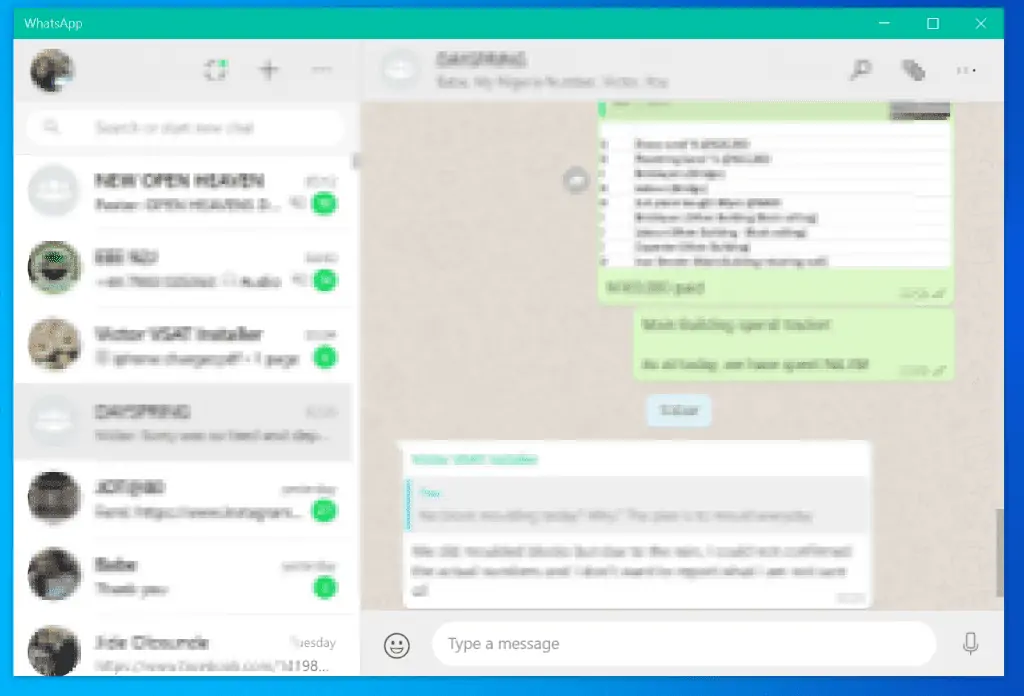
- Open the first Window you want to split. In this example, I am using WhatsApp as my first window to display on the split screen.
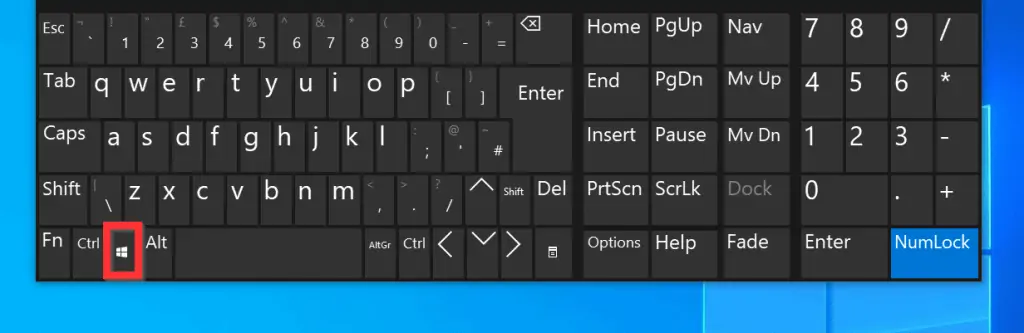
- Next, press the Windows key on your keyboard. Then, if you want the first screen to be displayed on the left, press the left arrow key (Home key for most keyboards).

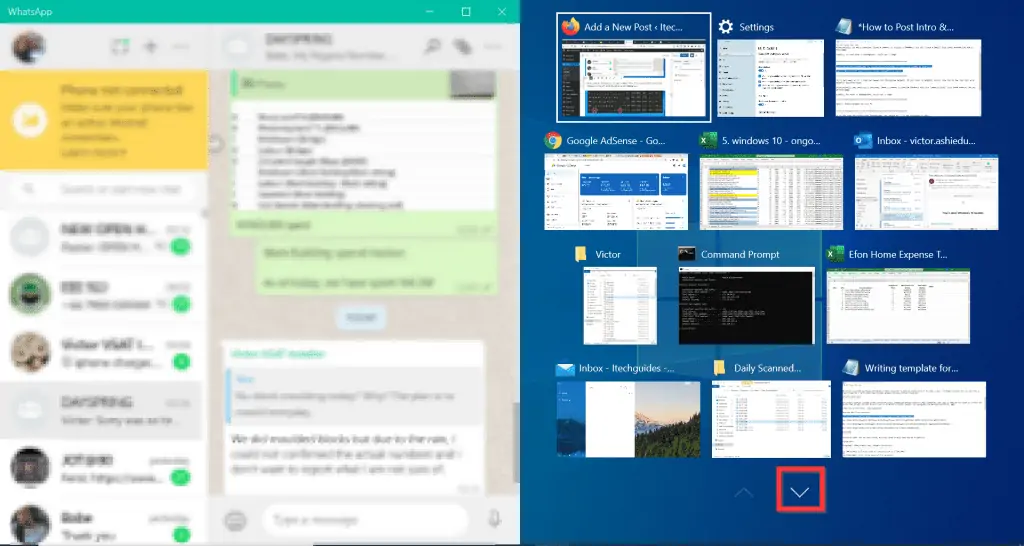
- The open Window will move to the left of your screen. Then, all other available Windows that you can snap to the right will be displayed on the right of the screen.
- To display one of the Windows on the right of the screen, click it.
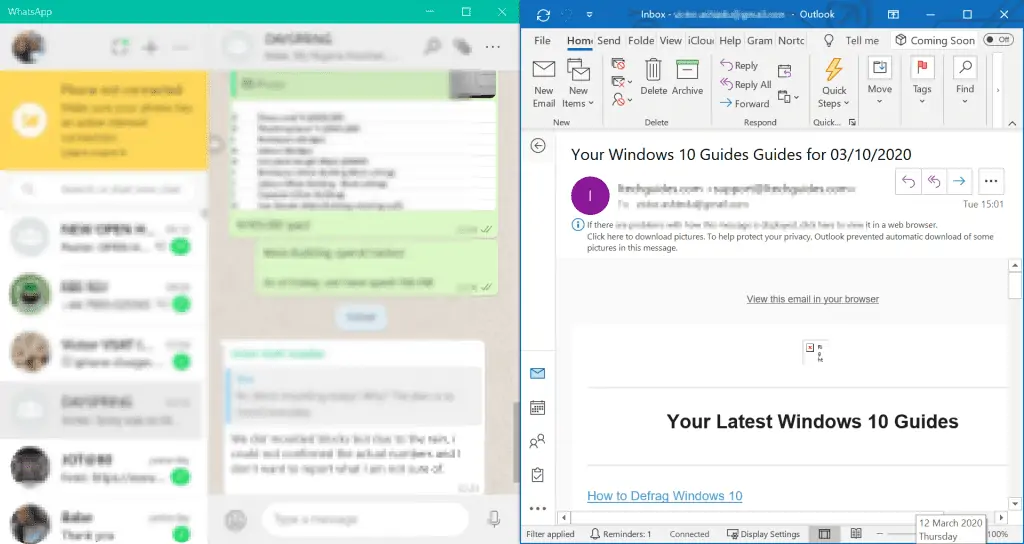
- The second Window will now be displayed on the right of your screen. You have split your Windows 10 screen into 2!
Option 2: Split Screen into 3 Screens
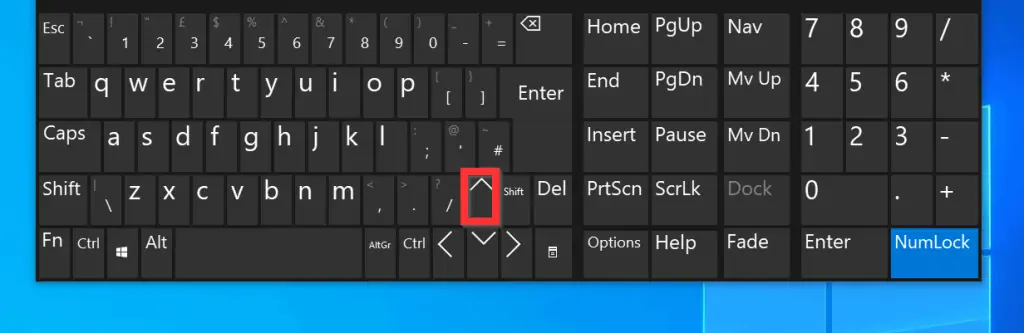
- With the first 2 screens open, click on the Window on the right to select it. Then, press the Windows key on your keyboard. Finally, press the up arrow key.
- The Window on the right side of your screen will split into 2. Also, additional Windows you can display on the 3rd screen will become available on the bottom right of the screen – the screen will also have an arrow key to view more available Windows.
- Click on one of the Windows displayed on the third screen (bottom right of the screen).
- Your screen will be split into 3!
Option 3: Split Screen into 4 Screens
- With the 3 screens open, click on the Window on the left of the screen. Then, press the Windows key on your keyboard. Finally, press the up arrow key.
- The 4th screen (bottom left of the screen) will become free. Click on an open Window on your taskbar. The 4th Window will be displayed in the middle of the screen.
- Drag the Window to the bottom left of the screen (the 4th screen).
- Finally, resize the screen to fit into the 4th screen. The 4 Windows will fit into the available 4 screens!
It is very easy to split screen on Windows 10! I hope you found this Itechguide helpful.
If you found this article helpful, click on “Yes” beside the “Was this page helpful” question below. You may also express your thoughts and opinions by using the “Leave a Comment” form at the bottom of this page.
Finally, for more Windows 10 Itechguides, visit our Windows How-To page.


![How To Run Sysprep (Generalize) In Windows 10 [2 Methods]](https://www.itechguides.com/wp-content/uploads/2022/05/8-2.webp)
I found the same kind of software and share to you.
http://www.colorfulmatrix.com/overview/shutter
Shutter Split Screen software helps you split the screen and improve your operation quickly. It’s an windows application softwre that lets you fast and view multiple windows side-by-side.
I hope this is helpful, enjoy it.
Quick tidbit, you can also drag and drop the window you would like to the left/right edge or to the corner edge of your monitor, for 3-4 blocks, for it to snap into place.