
A booklet simply means a little book. Unlike books which come with quite a lot of pages and a hard cover, booklets are different as they only come with no more than a few pages and usually have a simply designed paperback.
On Google Docs, you can create any type of document but have you ever tried to create a document and didn’t know where to even start? Or maybe you have tried to create a booklet in the past but it seemed too complicated and time-consuming. Don’t worry you’re not alone.
If you’re looking to create an aesthetically pleasing booklet in Google Docs then we’ve got you covered.
In this article, you will learn how to make a booklet in Google Docs easily. Here, you will also find some tips and tricks to make your booklet look as good as possible including some design ideas and templates.
Creating A Booklet In Google Docs: Quick Answer
- Create a new document on Google Docs.
- Set the paper size to A5.
- Add a page background color.
- Add page numbers to all pages except the first.
- Design the cover page of your booklet.
- Add a table of contents.
- Create other additional pages.
- Print your booklet.
How To Make A Booklet In Google Docs (Step-By-Step Guide)
The process of making a booklet in Google Docs is quite similar to the process of creating any other document at all on the platform with the only difference being that you will have to change the page size from the default options to something suitable for booklet designs.
For this article, we will be showing you how to design a simple employee handbook booklet in Google Docs. If you’re designing a booklet for something else, the process should still be the same or mostly similar, so you can just replicate what we have done but this time with your design ideas.
Here is a step-by-step guide showing how you can design a simple booklet in Google Docs.
Step 1: Create a new document on Google Docs.
The first step when trying to make a booklet in Google Docs is to create a new/fresh document that will be used for the design.
To create a new document, go to the Google Docs dashboard then move your cursor over the floating “+” button in the bottom right corner of the page then click the button when the pen icon appears.
Step 2: Setup paper size, margins, and page colors.
After creating a new document, the next step will be to set the appropriate paper size, margin values, and page color for the booklet we intend to create.
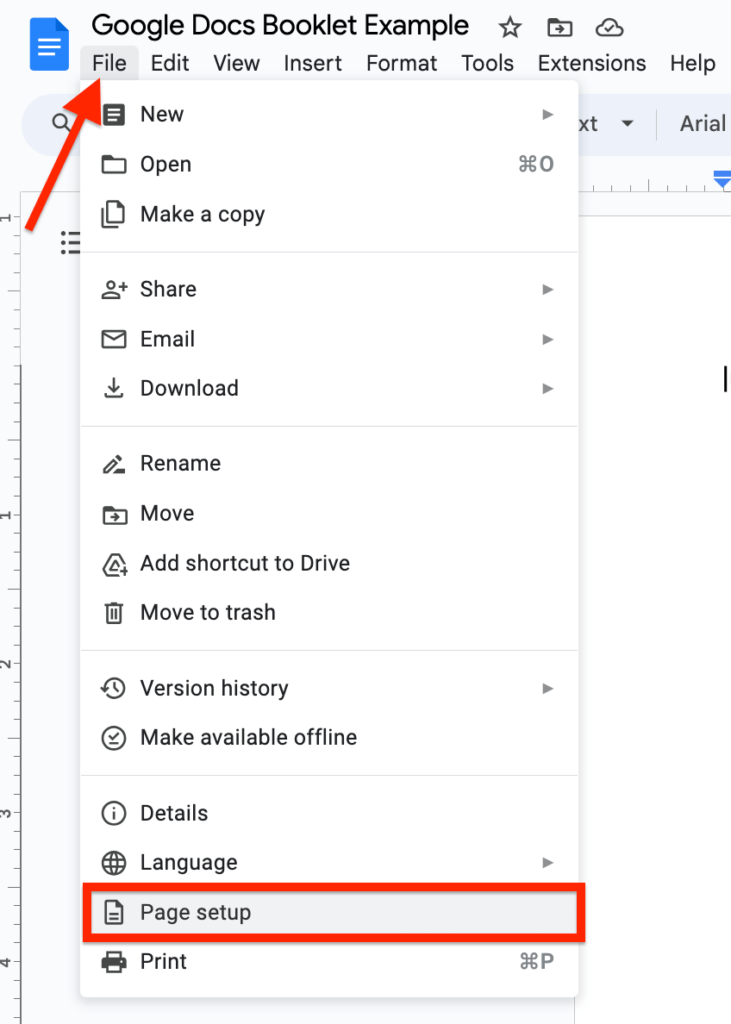
On Google Docs you can easily do this on the Page Setup section on the File menu. To access the Page Setup section, go to the Google Docs menu bar then click “File” and select “Page Setup” from the available menu options.
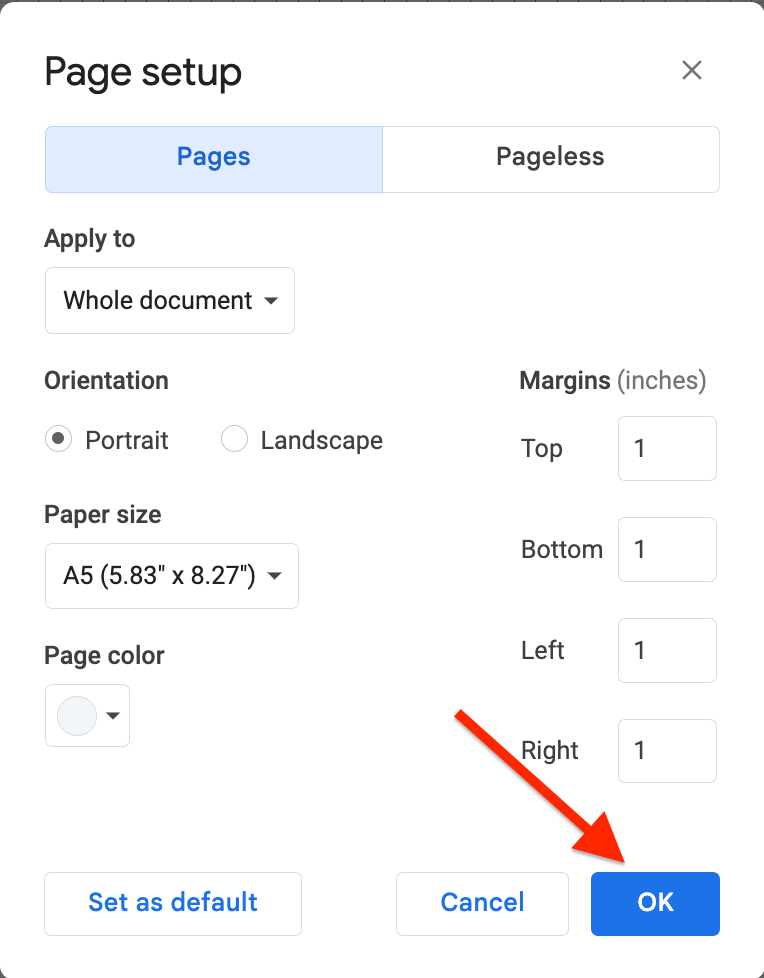
Now you should see the page setup dialog with various setup options including orientation, page color, paper size, and margins amongst others.
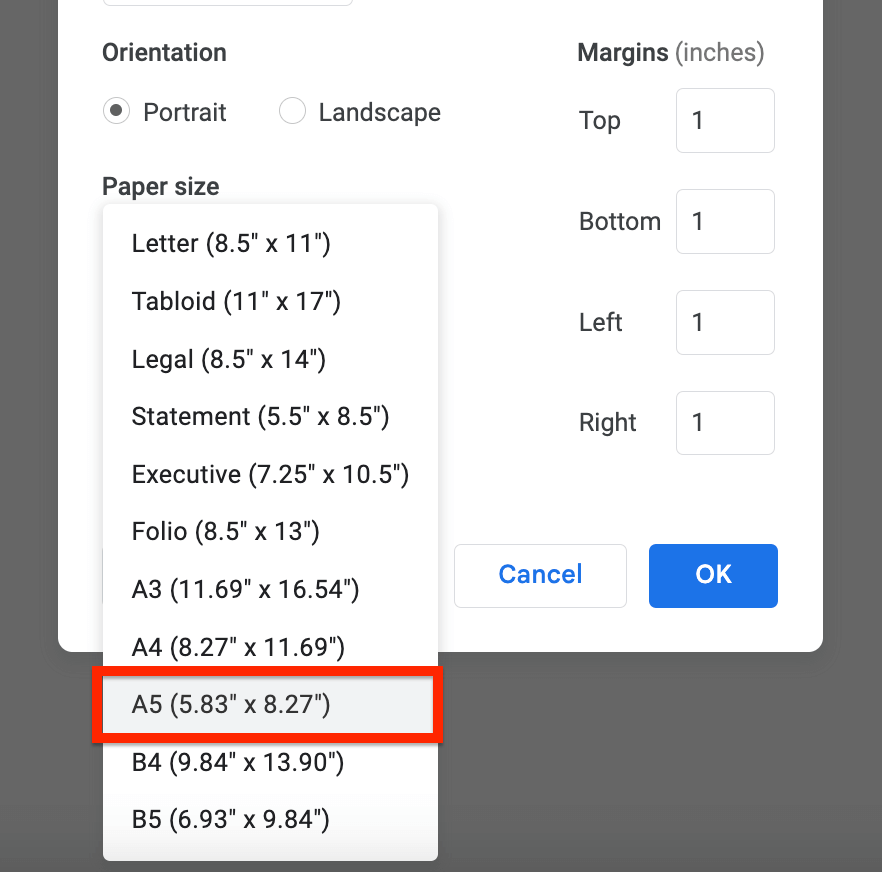
First, we will need to change the paper size to a size that is commonly used for booklets. So go to the “Paper size” section then click on the size selector and choose the “A5 (5.83″ x 8.27″)” options from the available paper sizes.
For the margins, we will be leaving it at the default value for all margins but you can also slightly tweak the values depending on your preferences.
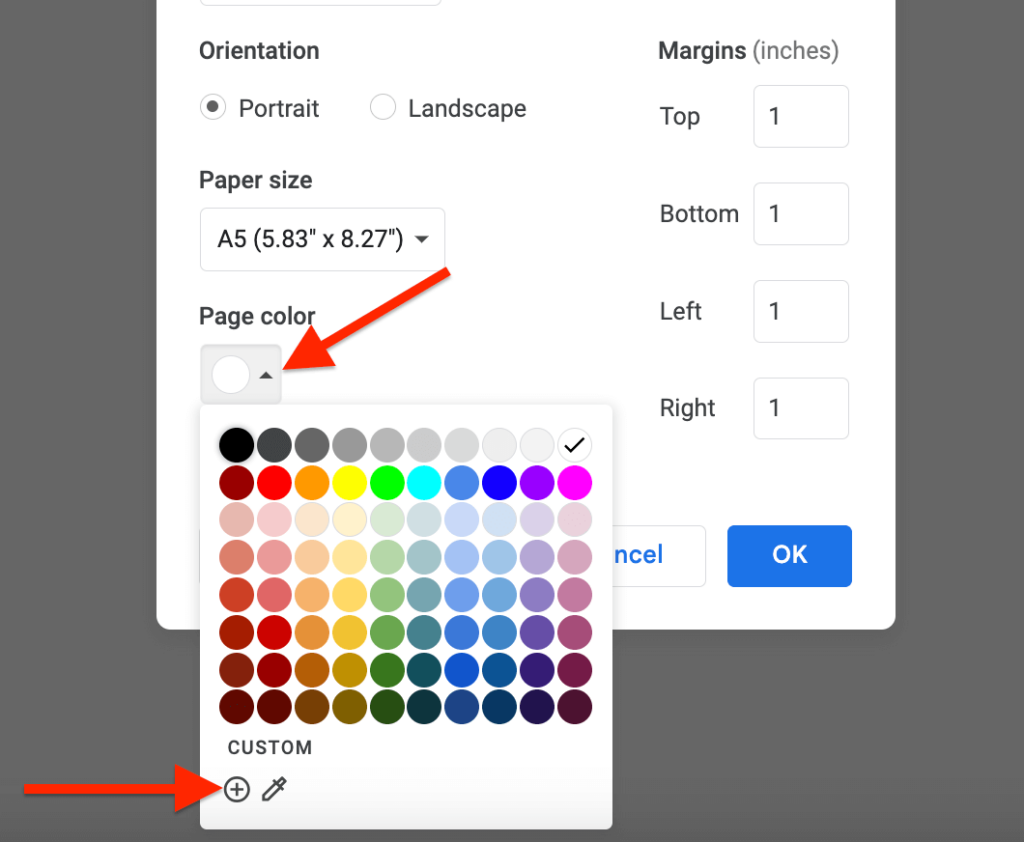
Also, for the page color, we will be changing the page color since the booklet we’re trying to create will not be using a white (default) background color. That said, you can leave the background color as it is if you don’t need to change it.
To change the page background color, go to the “Page color” section on the Page Setup dialog then click on the color selector and choose any color of your choice or click the “+” icon then paste in the hex color code if you intend to use a custom color.
After that, simply click on the “OK” button to save your settings and close the dialog.
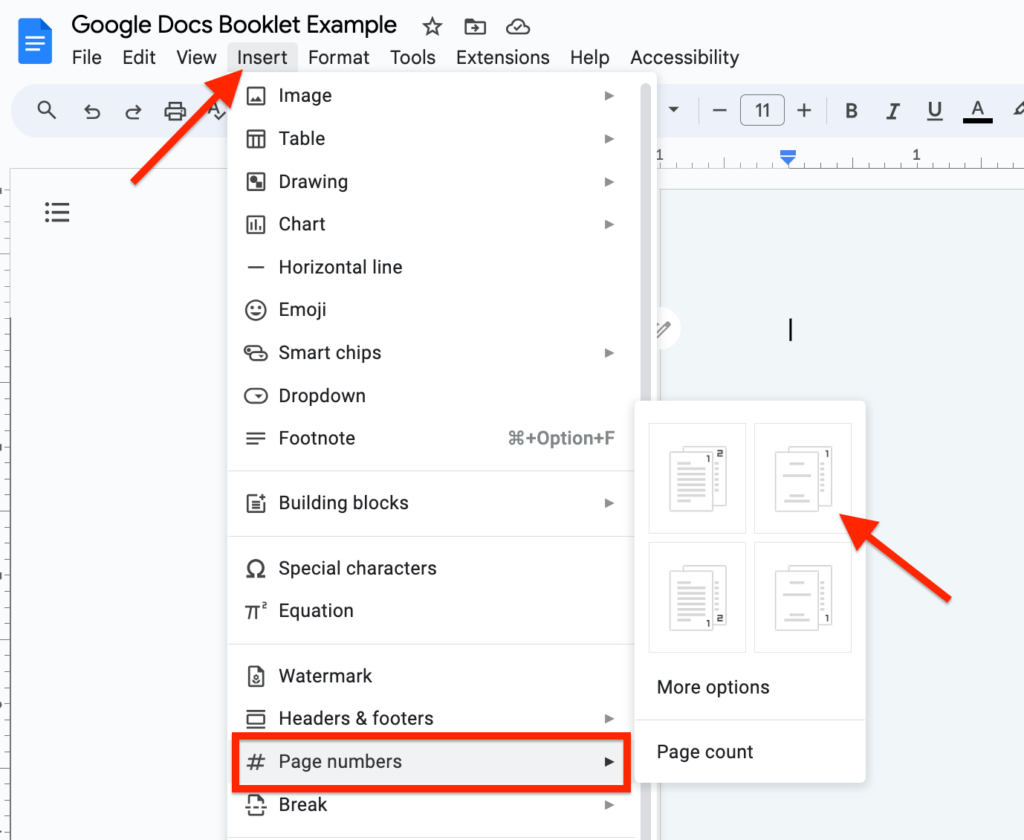
Step 3: Add page numbers.
To make the booklet orderly, we will need to add page numbers to all pages except the first page which is the cover page.
On Google Docs, adding page numbers to your documents is quite easy. To add page numbers, go to the menu bar then select “Insert” > “Page numbers” and select the the second option to the right.
Step 4: Design the cover page.
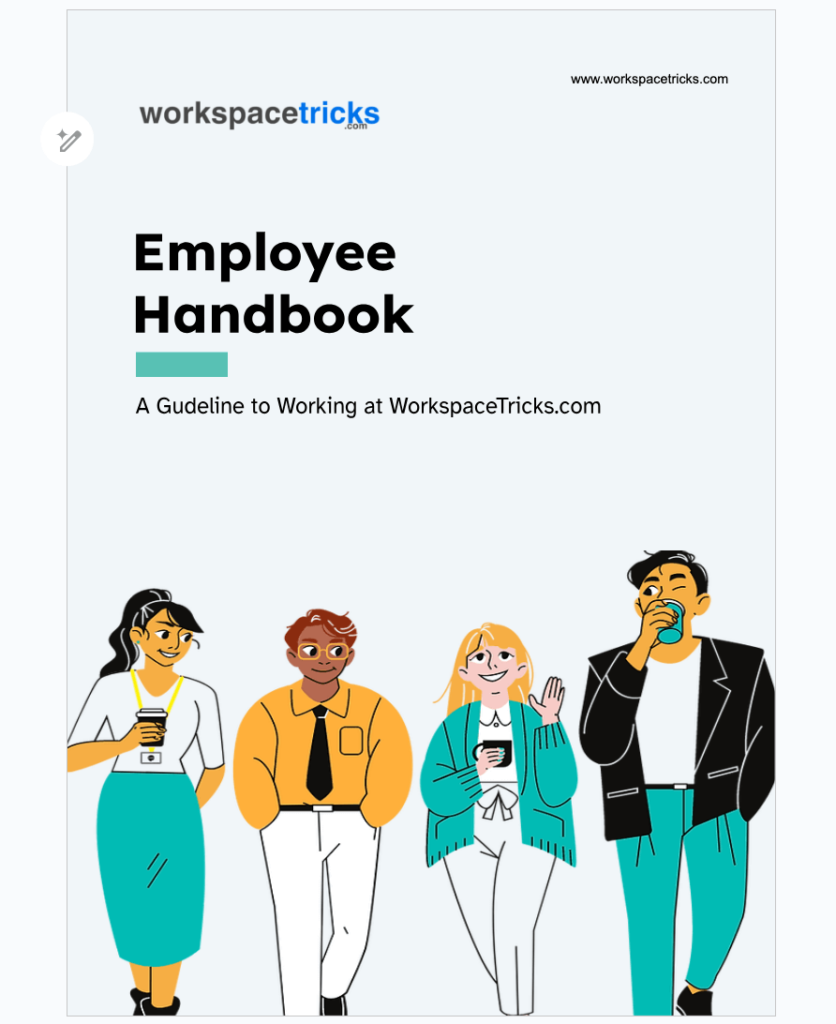
Next, we need to design the cover page for the booklet. For this tutorial, we will be trying to recreate a booklet design I found on Canva for an employee handbook.
Here is what the cover page of the booklet template looks like:

First, we will add the logo and other images needed for the cover page.
To upload an image, go to the menu bar then select “Insert” > “Image” > “Upload from computer” and choose the image from your device file explorer.
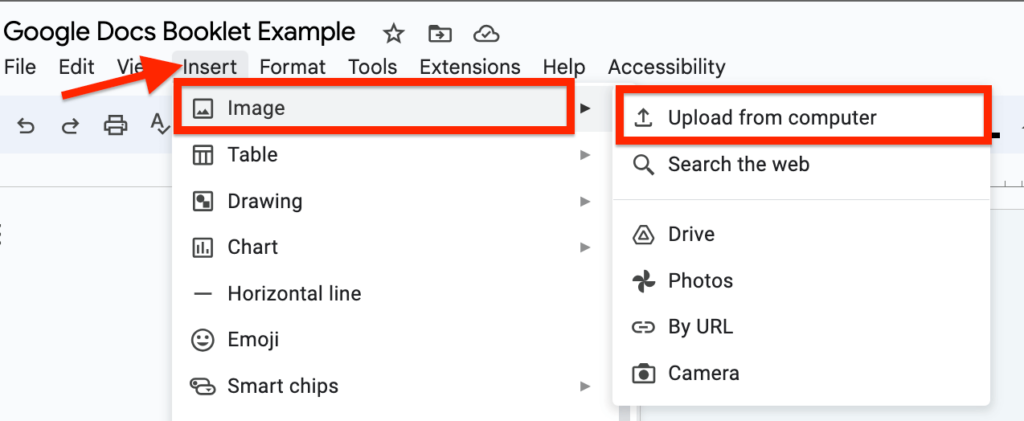
After uploading all the images you need, change the text wrapping setting from “In line” to “In front of text” then move the images to the appropriate positions and resize them till you get the required sizes you need.

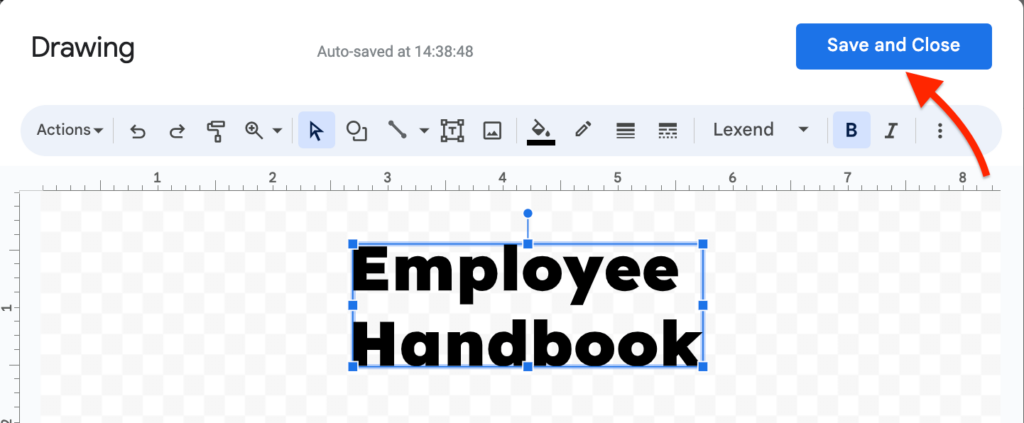
Next, we need to add all the text on the cover page. For this, we will be using the word art feature on Google Docs.
To add a new word art to your document, go to the Google Docs menu then select “Insert” > “Drawing” > “New“.
On the Docs drawing tool, click actions, select “Word Art” from the available actions, input the text you want to turn into Word Art, and then hit “return” on your keyboard.
When the word art is created, change the font, font color, outline/border color, and text appearance of the text. Click “Save and Close” to save the word art, close the drawing tool, and insert the word art into your document.
Just like we did with the images earlier, we will also be changing the text wrapping setting of the word art from “In line” to “In front of text” then move the text to your desired position and resize.
From the design we’re following, we will also need to add a small rectangle and a subheading. For both of these, we will also be using the drawing tool so open up the tool on the Google Docs window.
To add the rectangle, click on the shapes icon on the drawing tool then select “Shapes” and choose the rectangle shape from the available shapes.
Now, draw the shape on the canvas set the outline (transparent), and fill colors of the rectangle then click “Save and close” to insert your design into the document.
Again, just like we did with the other elements, we will also change the text wrapping setting of the rectangle from “In line” to “In front of text“. Once that’s done, resize the rectangle then move it to your desired location.
For the sub-heading, go back to the drawing tool, select “Actions” and click “Word Art” then input the text to be used as the subheading and hit return on your keyboard.
Select a font, outline, and fill color for the subheading (word art) then click “Save and close” to add the subheading to the cover page.
Just like before, select the sub-heading where it was inserted in the document then change the text wrap option from “In line” to “In front of text” then resize and move the text to your desired location.
After that’s done, here is what our cover page is looking like:
Step 5: Add a table of contents (optional)
After designing your cover page, the next step will be to add a table of contents on the next page.
Although it is not required or needed for very short booklets, the table of contents is very helpful to readers who may be looking for something specific in the booklet.
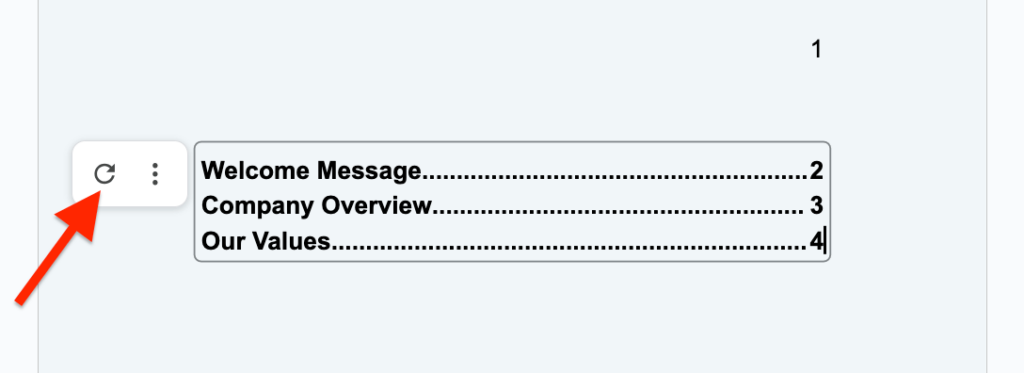
On Google Docs, adding the table of contents block to your document is quite easy. To do this, go to the page where you want to insert the table and place your cursor then select “Insert” > “Table of contents” on the menu bar then select any of the available design options.

Note that the table of contents feature works using any of the top-level headings across all pages on your document so you have to insert a heading on each page containing the name of the page for it to show up on the table of contents you inserted.
If the contents are not showing properly even after adding the appropriate headings on each page of your booklet, simply select the table of contents and click on the refresh icon to refresh it. When that’s done, it should show up correctly.
Step 6: Add other required pages.
After designing the cover page of your booklet and inserting a working table of contents, you can now start adding other required pages to the booklet.
If you need specific designs, you can utilize the Google Docs drawing tool to insert shapes, lines, and custom texts via the word art feature on the tool.
Additionally, if you need to add images to other pages on the booklet, you can simply upload images directly from your computer to Google Docs or use existing images on your Google Drive or Google Photos accounts.
Also, be sure to always add a heading on each page to ensure that the page alongside its page number is shown correctly on the table of contents you inserted earlier.
If you don’t see a page on the table of contents, you can simply refresh it by selecting the block and clicking on the refresh icon.
Step 7: Print your booklet.
When you’re done with adding all the pages needed for your booklet, the final step will be to print the document.
On Google Docs, printing is quite easy. To print out your booklet from Google Docs, go to the menu bar then click “File” and select “Print” from the available options.
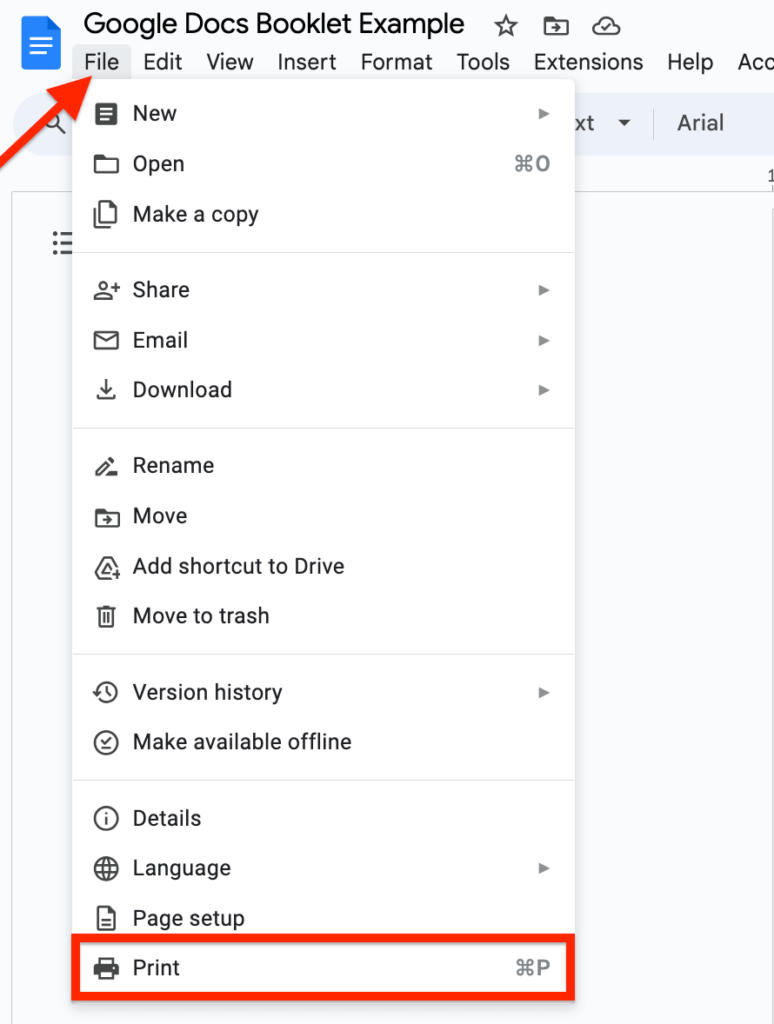
Alternatively, you can access the Google Docs print menu by hitting CTRL + P or Command + P (for users on MacOS).
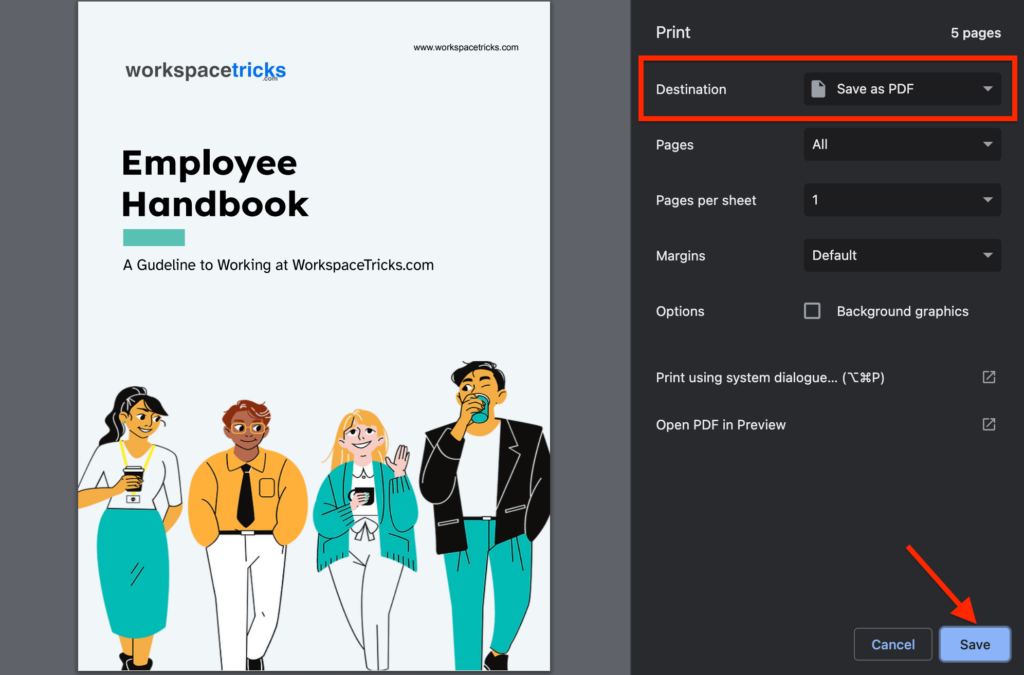
Next, select the destination (a printer or save as PDF), review all the additional options then click “Print” (if you selected a printer) or “Save” (if you selected the save a PDF option) and follow the additional steps to complete printing your booklet.
And that’s it. You have now successfully created a booklet using Google Docs.
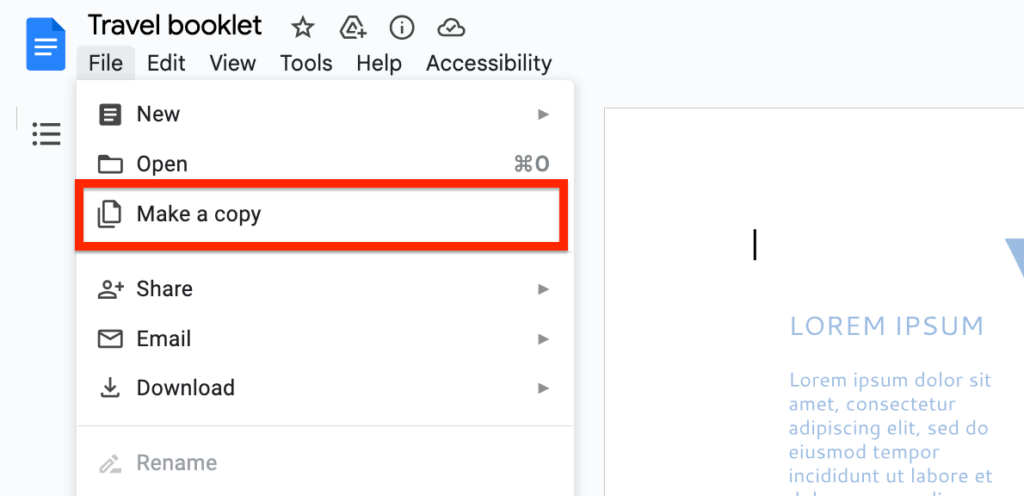
If you need to use our design for your booklet, here is a link to the document. Make a copy of the document and edit as you wish.
Can You Create A Foldable Booklet In Google Docs?
Yes, you can create a foldable booklet in Google Docs using the quick step-by-step guide we provided above.
The only difference when trying to create a foldable booklet is that you will have to change the orientation from “Portrait” to “Landscape” in the Page Setup dialog.
After changing the orientation of the document, create an additional page then add the design you would like to use on the front and back of the booklet on the front page then add the content and design you would like to use for the inner pages in the second page.
When you are done, print the first page as the front page then select the second page you created as the back page and that should do the trick.
After printing, you should now have a simple foldable booklet which you fold into two equal parts with inner pages containing additional information related to the booklet.
Where To Get Google Docs Booklet Templates?
While it is quite easy to create a booklet in Google Docs, the process can be quite time-consuming especially if you’re making a booklet with quite several complex or semi-complex designs.
To make booklets more quickly on Google Docs, we recommend using Google Docs booklet templates related to the design you intend to accomplish. These templates will save you a ton of time especially if you have very little time at your disposal.
But where can one find these templates you may ask? Well, there are quite several online websites you can use to get booklet templates for Google Docs.
Some of these websites include TheGooDocs, DocsAndSlides, SlideDocs, Pinterest, Dribbble, and more.
To use any of the templates provided on these sites, first open the document using the link given then click “File” and select “Make a copy” to duplicate the template on Google Docs.
After that, Google Docs will create an editable copy of the booklet and you should be able to edit as much as you want and also print without any issues.
Wrapping Up
If you were wondering if it was possible to create a good-looking booklet using Google Docs, the answer is yes, it definitely is.
In this article, we shared a step-by-step guide showing how you can create a stunning booklet using only Google Docs.
These steps involve creating a new document on the platform, adjusting the paper size of the document designing the cover page, adding other required pages, and eventually printing using any of the available printing methods on your computer.
