Introduction
Welcome to this step-by-step guide on how to take a battery out of a tablet. Whether you need to replace a faulty battery or just want to perform some troubleshooting, knowing how to safely remove the battery is essential. Tablets are becoming increasingly popular due to their portability and versatility, but their compact design can make accessing internal components a bit tricky. Rest assured, by following the instructions outlined in this guide, you will be able to successfully remove the battery from your tablet without any damage.
Before we dive into the steps, it’s important to note that different tablets have different battery designs. Some tablets have removable batteries, while others have non-removable batteries. If your tablet falls into the latter category, it might be more challenging to remove the battery, as it is typically sealed inside the device. However, we will cover the general steps that apply to most tablets, so you can adapt them to your specific device if necessary.
To safely take out the battery from your tablet, you will need a few tools, such as a small screwdriver or a prying tool. Additionally, it’s recommended to work in a clean and well-lit area to avoid misplacing any small screws or damaging other components.
In the following sections, we will guide you through the step-by-step process of removing a tablet’s battery. By carefully following these instructions, you can successfully complete the task and gain access to the battery to either replace it or troubleshoot any issues.
Step 1: Determine the type of tablet
Before you start the process of removing the battery from your tablet, it’s crucial to determine the type of tablet you have. This step is essential because different tablets have different designs and battery removal methods.
Firstly, check the manufacturer’s information or the user manual that came with your tablet. It should provide you with details about whether your tablet has a removable or non-removable battery. If you don’t have access to the manual, you can usually find this information on the manufacturer’s website by searching for your specific tablet model.
If your tablet has a non-removable battery, it means the battery is sealed inside the device and is not easily accessible or replaceable. In this case, attempting to remove the battery on your own may cause damage to the tablet and void any warranty you may have. It’s best to contact the manufacturer’s customer support or take your tablet to a professional technician for battery replacement or troubleshooting.
On the other hand, if your tablet has a removable battery, you’re in luck! Removable batteries are generally easier to replace or remove for troubleshooting purposes. These batteries are usually housed in a compartment that can be accessed by removing the back cover of the tablet.
It’s worth noting that some tablets may have a hybrid design, where the battery is technically removable but requires specialized tools or a professional’s assistance. In this case, it’s advisable to seek professional help rather than attempting the removal yourself.
By determining the type of tablet you have, whether it has a removable or non-removable battery, you can proceed with the appropriate steps to safely remove the battery without any unnecessary risks or complications.
Step 2: Gather the necessary tools
Before you can begin the process of removing the battery from your tablet, it’s crucial to gather the necessary tools. Having the right tools on hand will help make the process smoother and minimize the chances of damaging your tablet or its components.
The specific tools you will need may vary depending on the make and model of your tablet. However, here are some commonly used tools that will generally cover the needs of most tablet battery removal procedures:
- Screwdriver: Most tablets have screws that hold the back cover in place. Depending on the type of screws used, you may need a small Phillips or Torx screwdriver to remove them. It’s essential to have the right-sized screwdriver to avoid damaging the screws or the tablet itself.
- Prying tool: A prying tool, such as a plastic spudger or a guitar pick, can be useful for gently prying open the back cover of your tablet without causing any scratches or damage.
- Tweezers: Tweezers can come in handy for gripping small screws or connectors, especially if they are hard to reach or manipulate with your fingers.
- Anti-static wrist strap: Although not necessary, an anti-static wrist strap is a good precautionary measure when working on electronic devices. It helps discharge any static electricity from your body, preventing it from damaging sensitive components.
- Clean cloth or soft surface: Having a clean cloth or a soft surface nearby can provide a safe place to rest your tablet during the battery removal process, minimizing the risk of scratches or accidental falls.
Make sure you have all the required tools before you start the battery removal process. It’s recommended to keep them organized and within reach to avoid any delays or interruptions once you begin the procedure.
By gathering the necessary tools upfront, you will be well-prepared to proceed with the next steps and ensure a smooth and successful battery removal process.
Step 3: Power off the tablet
Before you proceed with removing the battery from your tablet, it’s important to power off the device completely. This step ensures your safety and prevents any potential damage to the tablet or its internal components.
To power off your tablet, follow these simple steps:
- Press and hold the power button: Locate the power button on your tablet. It is typically located on the side or top of the device. Press and hold the power button until a menu appears on the screen.
- Select “Power Off”: On the menu, you should see various options such as “Power Off,” “Restart,” or “Shut Down.” Select the “Power Off” option.
- Confirm power off: A confirmation prompt may appear, asking you to confirm the power-off action. Follow the on-screen instructions or press the appropriate button to confirm and shut down the tablet.
Once the tablet is powered off, it’s a good practice to wait a few seconds before proceeding to the next step. This ensures that any residual power is completely depleted, reducing the risk of electrical shock or damage during the battery removal process.
By powering off your tablet before attempting to remove the battery, you ensure that the device is in a safe state and minimize the chances of accidental damage. Remember, safety should always be a priority when working with electronic devices.
Step 4: Locate the battery compartment
After powering off your tablet, the next step is to locate the battery compartment. The location of the battery compartment can vary depending on the make and model of your tablet, but it is typically found on the back of the device.
Here are some general guidelines to help you locate the battery compartment:
- Look for screws or clips: Examine the back of your tablet for any visible screws or clips that secure the back cover in place. These screws or clips may indicate the presence of the battery compartment.
- Consult the user manual: If you still haven’t found the battery compartment, refer to the user manual or the manufacturer’s website for specific information on the location of the battery compartment for your particular tablet model. The user manual should provide clear instructions or diagrams on how to access the battery.
- Search online resources: If the user manual is not available or doesn’t provide the necessary information, you can search online forums or communities dedicated to your tablet’s brand or model. Often, users share their experiences and provide insights into locating the battery compartment.
Once you have successfully located the battery compartment, take a moment to examine its design. Note any screws, latches, or connectors that need to be addressed in the following steps. Familiarizing yourself with the compartment will help you understand how to proceed with removing the battery without causing any unnecessary damage.
It’s important to approach this step with caution and patience to avoid accidentally damaging any components or the tablet itself. If you feel uncertain or overwhelmed, it’s recommended to seek professional assistance or refer to more specific resources for your tablet model.
By successfully locating the battery compartment, you are now ready to proceed with the next steps in safely removing the battery from your tablet.
Step 5: Remove the back cover
With the battery compartment located, the next step is to remove the back cover of your tablet. The back cover typically serves as the access point to the battery compartment, allowing you to remove and replace the battery.
Follow these steps to safely remove the back cover:
- Identify the fasteners: Take a close look at the back of your tablet to identify the type of fasteners used to secure the back cover. Common fasteners include screws, clips, or a combination of both.
- Use the appropriate tool: Depending on the type of fasteners, use the suitable tool (such as a screwdriver or a prying tool) to remove them. If your tablet has screws, carefully unscrew them using the appropriate size and type of screwdriver. If your tablet has clips, gently pry open the back cover using a prying tool, being careful not to apply excessive force that may damage the cover.
- Work your way around: Once you have started to loosen the fasteners, continue working your way around the edges of the tablet, progressively releasing any remaining clips or screws. Take your time and apply gentle pressure to prevent any damage to the back cover.
- Set aside the back cover: Once all the fasteners are removed, carefully lift off the back cover and set it aside on a clean and safe surface. Be mindful of any cables or connectors that may be attached to the back cover and gently detach them, if necessary, using tweezers or your fingers.
It’s important to note that some tablets may have back covers that are held in place with adhesive. In such cases, warming the back cover slightly with a hairdryer can help loosen the adhesive, making it easier to remove. However, exercise caution not to overheat the tablet during this process.
By successfully removing the back cover, you have gained access to the battery compartment and are now ready to proceed with the next steps of removing the battery from your tablet.
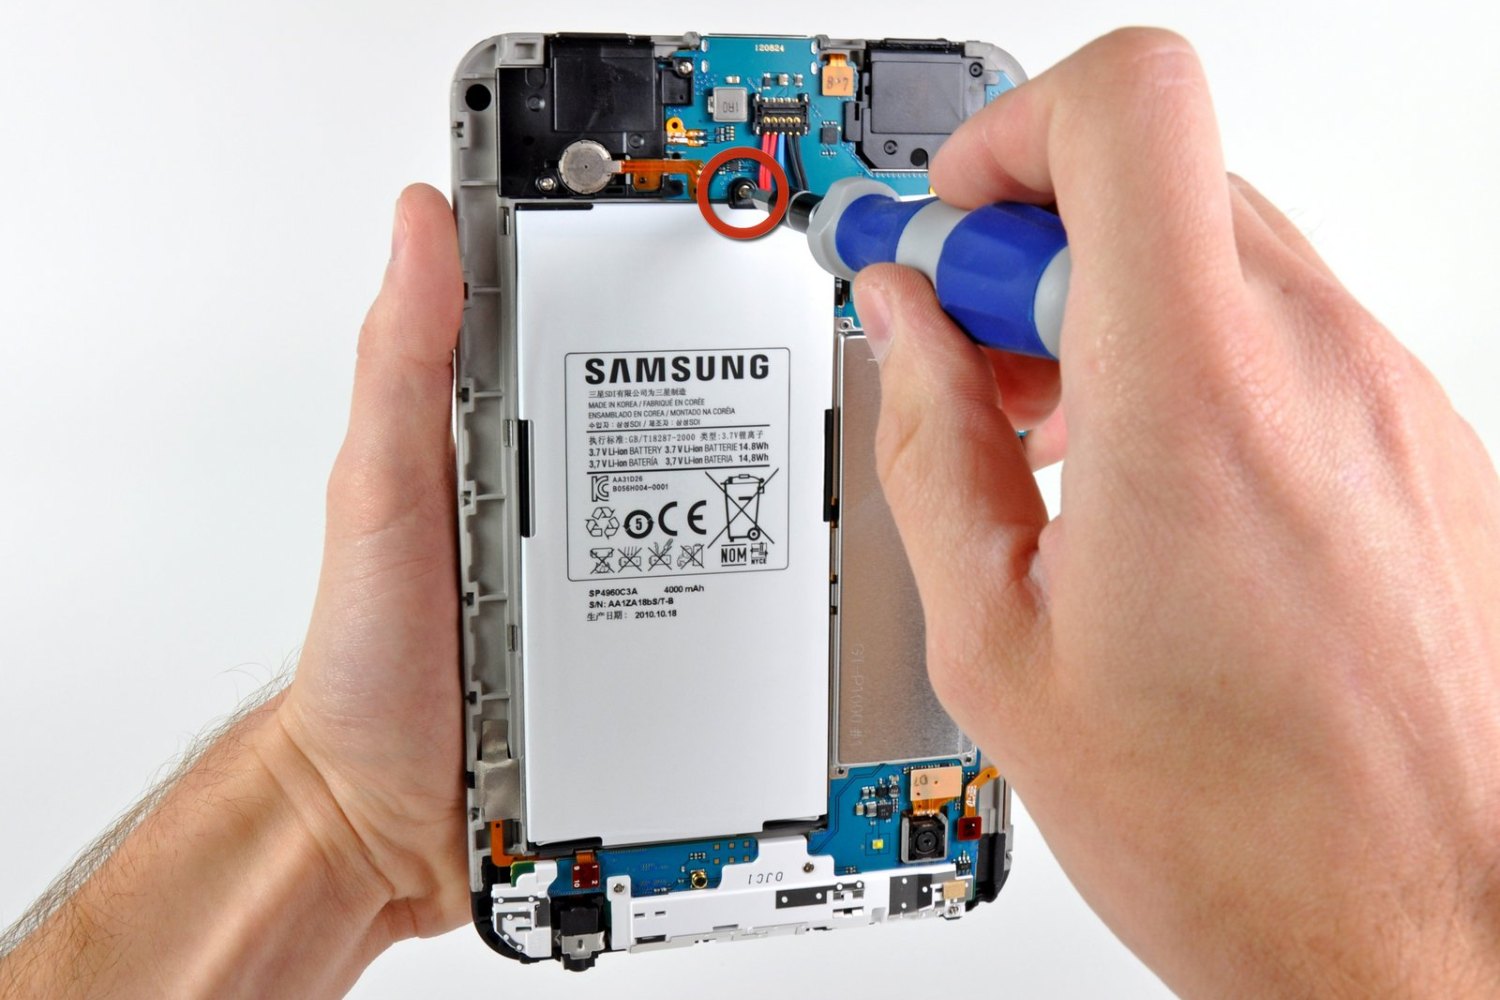
Step 6: Disconnect the battery cable
With the back cover removed, it’s time to disconnect the battery cable. The battery cable is the connector that links the battery to the tablet’s internal circuitry. Disconnecting this cable is an essential step before removing the battery itself.
Follow these steps to safely disconnect the battery cable:
- Locate the battery cable: Look for the cable that is connected to the battery. It is usually a thin and flexible wire that leads from the battery to the motherboard or power supply board.
- Identify the connector type: Examine the end of the battery cable to determine the type of connector used. Common connector types include snap-on connectors, ZIF (Zero Insertion Force) connectors, or ribbon connectors. It’s important to understand the type of connector to disconnect it properly.
- Disengage the connector: Depending on the connector type, you may need to gently lift a latch, slide a locking mechanism, or carefully pull on the cable to disengage it from the connector. Take your time and apply light and even pressure to avoid damaging the connector or cable.
- Confirm the cable is disconnected: After disengaging the connector, verify that the battery cable is no longer connected to the tablet. Ensure that there are no other cables or connectors that need to be detached before proceeding to the next step.
If you encounter difficulty or resistance when trying to disconnect the battery cable, double-check that you have correctly identified the connector type and are using the appropriate method to disengage it. If you are unsure, consult the manufacturer’s resources or seek professional assistance.
Remember to handle the battery cable with care and avoid excessive bending or twisting, as it can be delicate and sensitive. Properly disconnecting the battery cable is necessary to ensure a safe and successful battery removal process.
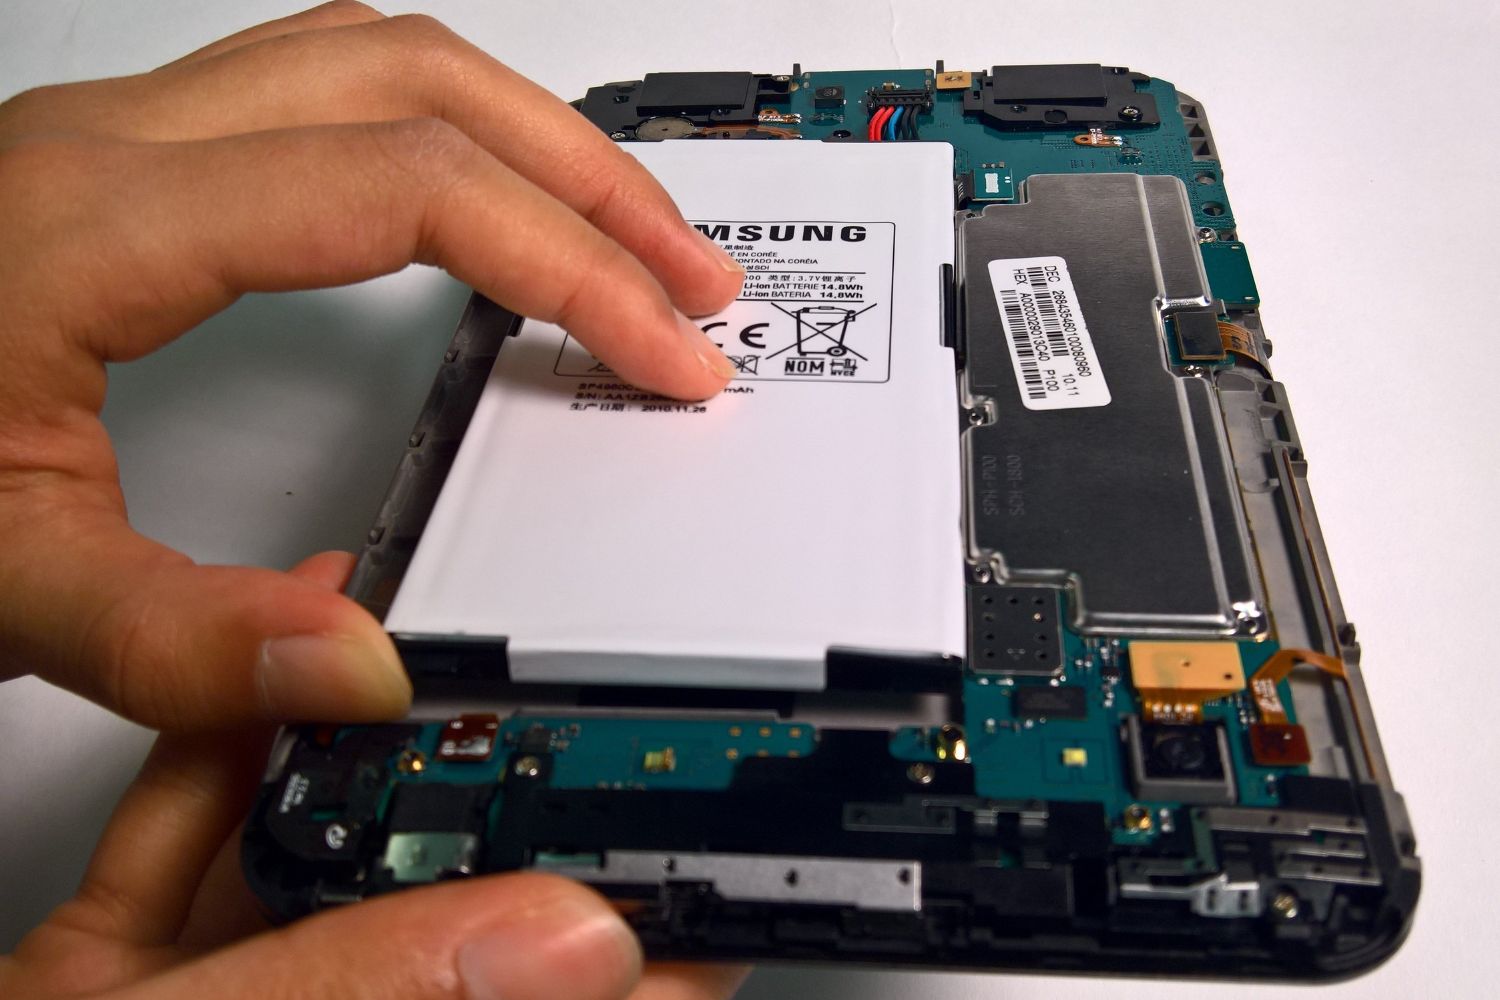
Step 7: Take out the battery
Now that the battery cable is disconnected, you can proceed to remove the battery from your tablet. Carefully following the steps in this section will help you safely extract the battery without causing any damage to the tablet or other components.
Here’s how to take out the battery from your tablet:
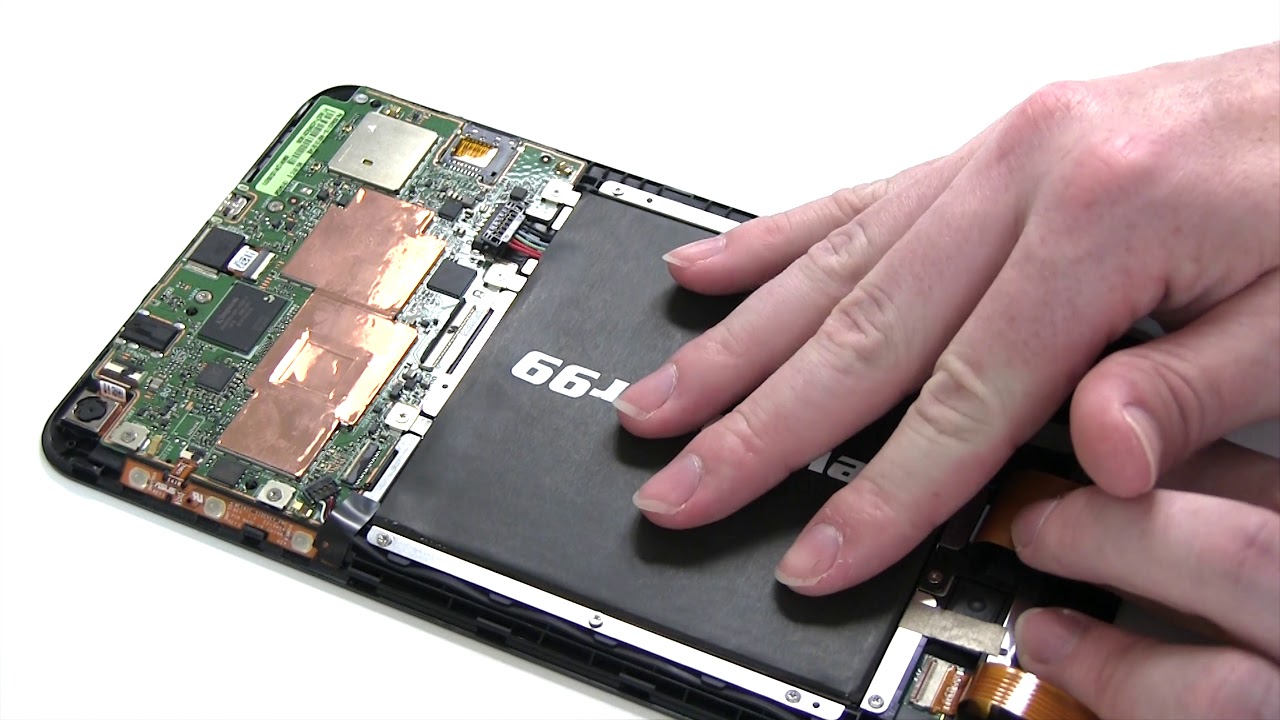
- Ensure a secure grip: Before attempting to remove the battery, ensure that you have a firm and secure grip on the battery itself. Avoid holding it by the cables or applying excessive force that may cause damage.
- Gently lift the battery: Using your thumb and forefinger, lift the battery out of the compartment. Apply gentle and even pressure to ensure a smooth removal.
- Inspect for any additional connectors: While lifting the battery, inspect the compartment for any additional connectors that may still be attached. Some tablets may have a secondary cable or connector that needs to be disconnected before fully removing the battery. If you find any additional connectors, refer to the tablet’s documentation or consult online resources for the appropriate method to disconnect them.
- Place the battery aside: Once the battery is fully detached from the compartment, place it on a non-conductive surface or in an anti-static bag to prevent any accidental short-circuits or damage.
It’s important to handle the battery with care, as it contains fragile components and should be treated as an electronic device. Avoid touching the battery terminals or exposing it to extreme temperatures or moisture.
Remember that some tablets may have internal batteries that are not meant to be user-replaceable. If you encounter any resistance or difficulty when attempting to remove the battery, it’s advisable to seek professional assistance or refer to the tablet’s documentation for further guidance.
By safely removing the battery, you have completed a crucial step in the battery removal process. Now you’re ready to move on to the final steps of reassembling your tablet.
Step 8: Reassemble the tablet
After successfully removing the battery from your tablet, it’s time to reassemble the device. Reassembling the tablet involves carefully putting the back cover back in place and securing it, ensuring all connectors are properly reconnected, and any screws or clips are securely tightened.
Follow these steps to reassemble your tablet:
- Position the back cover: Align the back cover with the edges of the tablet and ensure it sits flush with the device’s frame. Take care to line up any screw holes or clips.
- Reconnect any connectors: If you disconnected any additional connectors during the battery removal process, carefully reconnect them to their respective ports. Ensure they are securely attached and in the correct orientation.
- Secure the back cover: Depending on the type of fasteners used, either use a screwdriver to reinsert and tighten the screws or apply gentle pressure to snap the back cover into place. Make sure all fasteners are properly seated and tightened but avoid over-tightening, as it may damage the cover or strip the screws.
- Power on the tablet: With the back cover securely reattached, press and hold the power button to power on the tablet. It should boot up normally, and you should be able to use it as usual.
While reassembling the tablet, pay attention to details such as proper alignment, cable placement, and avoiding trapping any cables or components under the back cover. Take your time and be meticulous to ensure everything is correctly assembled.
If you encounter any difficulties or uncertainty during the reassembly process, consult the tablet’s documentation or seek professional assistance. It’s better to reach out for help rather than risking damaging your tablet or its components.
By successfully reassembling your tablet, you have completed the journey of removing and replacing the battery. Your tablet should now be ready for use, and you can enjoy its functionality once again.
Conclusion
Congratulations! You have successfully learned how to take a battery out of a tablet. This step-by-step guide has equipped you with the knowledge and instructions needed to safely remove the battery from your tablet for replacement or troubleshooting purposes.
Remember, it’s crucial to determine the type of tablet you have before attempting to remove the battery, as different tablets have different designs and battery removal methods. Additionally, gathering the necessary tools and powering off the tablet are important initial steps to ensure a smooth and safe battery removal process.
Throughout the process, taking care to locate the battery compartment, remove the back cover, disconnect the battery cable, and finally remove the battery itself is vital. Pay close attention to the specific details and follow each step carefully to prevent any damage to your tablet or its components.
Once you have successfully removed the battery, reassembling the tablet correctly is equally important. Aligning the back cover, reconnecting any connectors, and securing the cover with the appropriate fasteners are essential steps to ensure your tablet functions properly again.
Always remember to prioritize safety when working with electronic devices. If at any point you feel unsure or encounter difficulties during the battery removal process, it’s best to seek professional assistance or refer to the tablet’s documentation for further guidance.
Now that you have learned how to take a battery out of a tablet, you have gained valuable knowledge to maintain and troubleshoot your device more effectively. Whether you need to replace a faulty battery or perform other repairs, you are now equipped with the skills to do so.
Take pride in your newly acquired knowledge and feel empowered to tackle any battery-related issues that may arise in the future. Enjoy using your tablet with its newly replaced or troubleshooted battery!