VPN
Guides
By Use
How to Back-Up and Restore an iPhone Without iCloud or iTunes
Your iPhone comes with built-in tools that let you easily create back-ups and restore them as needed. However, Apple forces you to use either iCloud or iTunes for that purpose. Both of those tools can indeed be very helpful, but they're not everyone's cup of tea. With that said, let's talk about how to back-up and restore an iPhone without iCloud or iTunes.
Before we jump in, a piece of friendly advice: you’ll find many tools online promising to handle your iPhone’s back-ups, even better than iCloud or iTunes can do. However, be very picky when choosing an application handling your personal information. Always go for a reputable one.
First, Here’s How to Back-Up Your iPhone (Without Resorting to Use iCloud or iTunes)
We'll first show you how to create back-up copies of your iPhone's data – on-demand. You can keep these on your computer and use them as restore points in the future. Here's what you need to do.
- We recommend using Dr. Fone by Wondershare (based on our personal experience). This application goes beyond creating backups and restoring your iPhone, and it can be used for free. So, use the provided link and then download and install Dr. Fone (on a Windows PC or Mac).

- Then, launch the application, and you'll see a grid of icons. Take a look at the right-hand side of its interface and click on 'Phone Backup.' You will need to wait until this module is downloaded and installed. Once that happens, click on it again to launch it.
- At this moment, you should connect your iPhone to your computer (using a USB cable). If you haven’t done that in the past, your iPhone will ask you to authenticate this connection. So, look at your phone’s screen and tap on 'Trust.' After that, Dr. Fone will initialize the connection and read your phone’s contents.
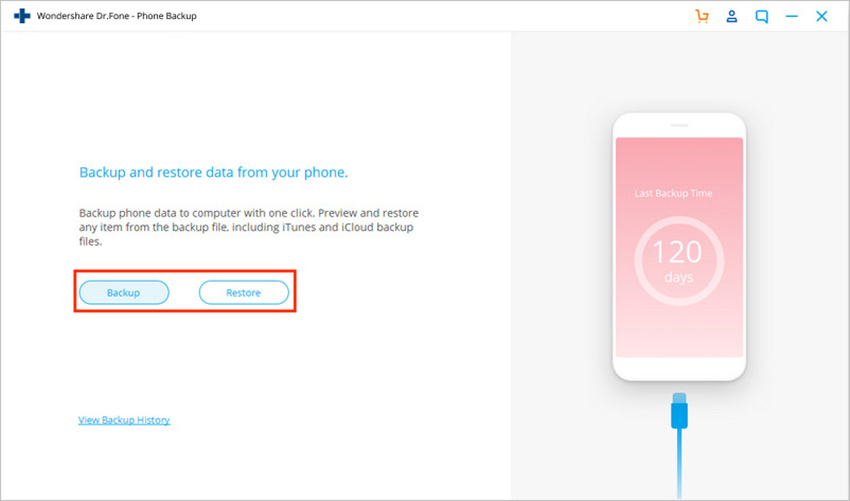
- You should have two options to choose from right now. Since we first need to back-up our phones, we'll need to click on 'Backup.' This will open another window, asking you to choose the types of data you'd like to save. Also, take a look at the bottom of that window, where you can select a back-up patch (it’s good to know where your back-ups will be located).
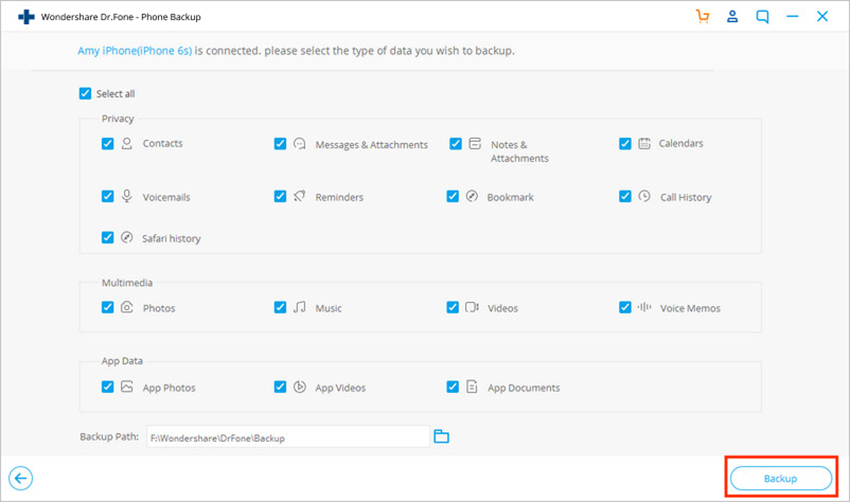
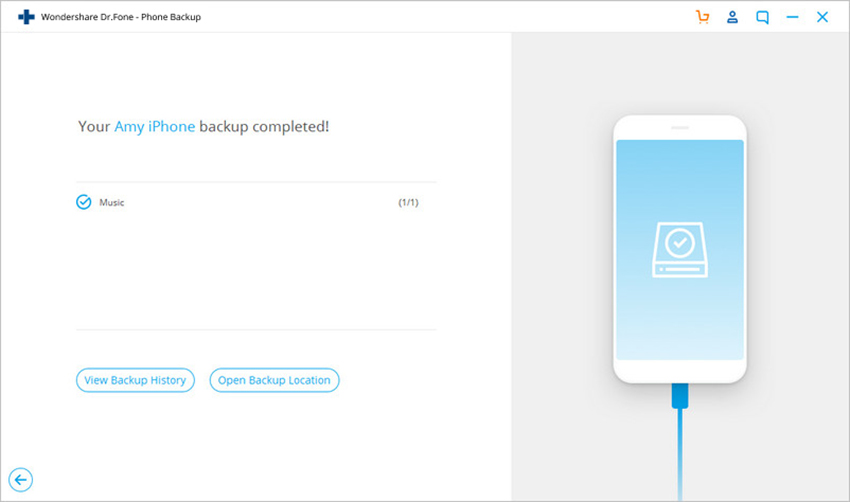
- Once ready, click on 'Backup.' Dr. Fone will now create a backup of your iPhone's contents based on the file types you've selected. At any moment, you can check the progress by taking a look at Dr. Fone’s interface. Once done, you can either check your back-up history or open the location of your back-ups. That's it!
Then, Here’s How to Restore Your iPhone (Without Using iCloud or iTunes)
So far, we have taught you how to back-up your iPhone. However, once the time comes to restore your data, you will once again have to turn to Dr. Fone. With that said, go through the following steps.
- Launch Dr. Fone and click on 'Phone Backup.' You will see two options at this moment, so you need to click on 'Restore.'
- The application will now show you a history of your backup files. Each entry contains your device’s name, model, date, and similar. So, pick any of those back-up files and then click on 'Next' in the bottom-right corner.

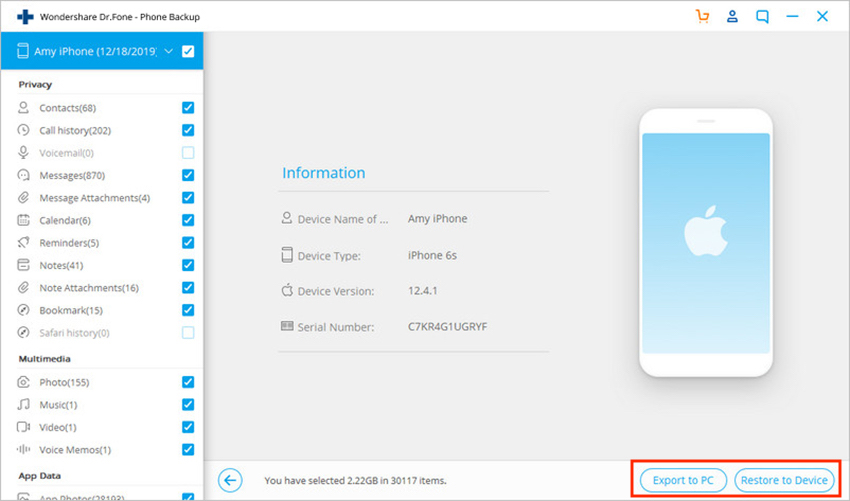
- Wait a couple of moments until Dr. Fone extracts the selected back-up. Using the left-placed sidebar, you'll get to pick individual file types. This comes in handy if you want to restore only your messages, notes, or calendar entries. So, decide what you plan to restore or keep all those file types checked. Then, to begin transferring those files back to your iPhone, go with 'Restore to Device' (in the bottom-right corner). That's it!
That would be all on how to back-up and restore an iPhone without iCloud or iTunes. If you have any questions on your mind, feel free to post a comment below. And also, thanks for reading!
For a better user experience we recommend using a more modern browser. We support the latest version of the following browsers: For a better user experience we recommend using the latest version of the following browsers: