If writing a paper wasn't complicated enough, you often have to contend with specific formatting requirements. Have you been told that your paper must use the MLA format? Do you have any idea what that means or how to apply it? Don't worry, we're here to help.
We're going to explain what the MLA format is and how to apply it to your documents in Google Docs, both through a template and manual set-up.
What Is the MLA Format?
MLA stands for Modern Language Association. According to the MLA website, it's a group that established itself in 1883 with the aim to "strengthen the study and teaching of language and literature". As part of the group's work, it publishes a style guide that many educational establishments and businesses adhere to.
If you're asked to use the MLA format, you should clarify the specific expectations. Though MLA sell a handbook, your school or organization may have slightly different requirements.
When it comes to setting up a Google Docs document to use the MLA format, these are the key formatting points to account for, as taken from the MLA Handbook:
- A one-inch margin on all sides of the text.
- A readable typeface, between 11 and 13 points in size, where the regular style contrasts clearly with the italic. Times New Roman is a good choice, though not a requirement.
- Double-space the entire document.
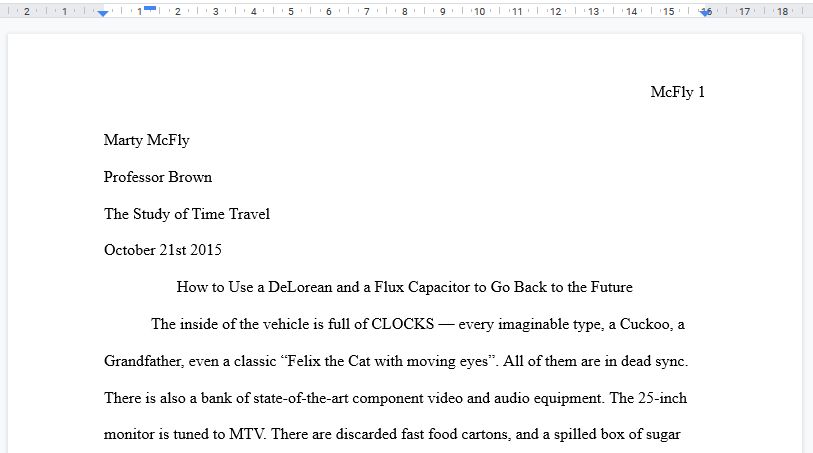
- Indent the first line of every paragraph half an inch from the left margin.
- On the right side of the header, enter your surname, followed by a space, and then consecutive page numbers. This should be half an inch from the top and flush with the right margin.
-
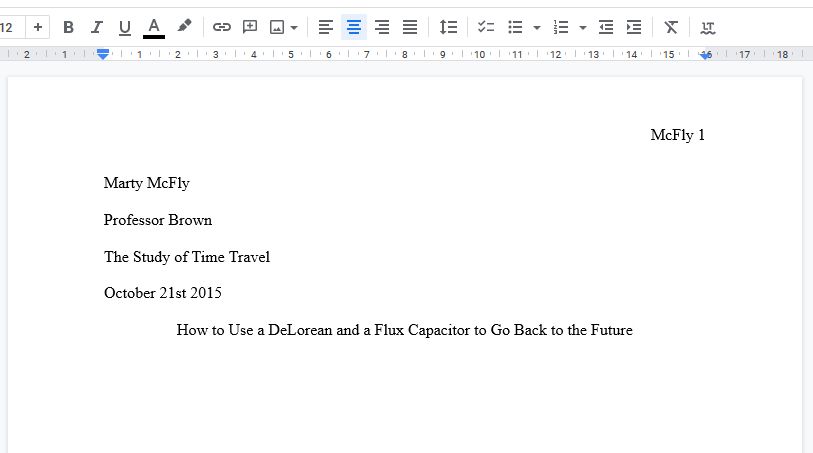
On the first page, place your name, your instructor's name, the course details, and the date one inch from the top and flush with the left margin. This should also be double-spaced.
- Also on the first page, beneath the details above, place and center your title. It doesn't need any formatting, like bold or underline.
- Cite your works at the end of the paper on a new page. Title it "Works Cited", centered and an inch from the top of the page. Each entry should be flush with the left margin, with additional lines indented half an inch from the left margin.
How to Apply the MLA Format in Google Docs With a Template
Google Docs offers a range of templates so that you don't have to manually set up common formatting rules. Handily, one such template is for the MLA format. Here's how to use it:
- With a Google Doc document open, go to File > New > From template.
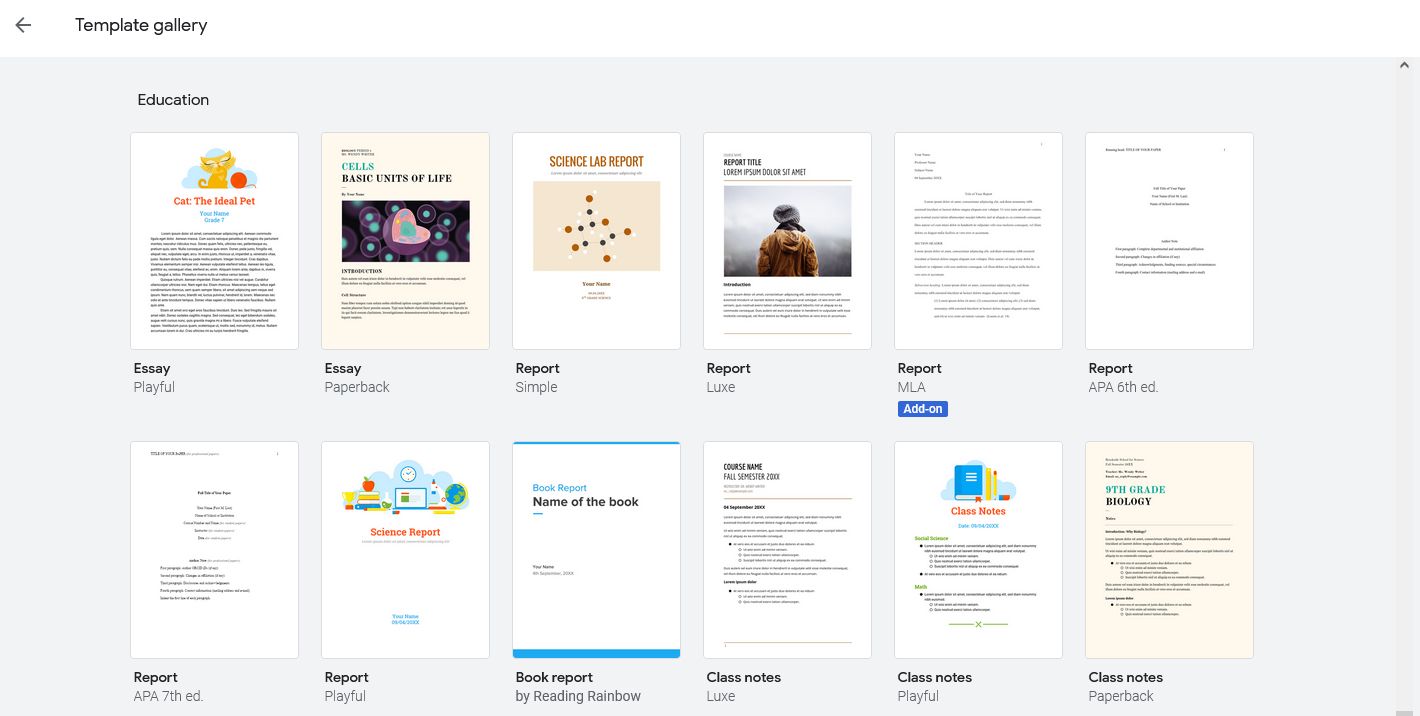
- This opens the template gallery. Scroll down and look for the Education header.
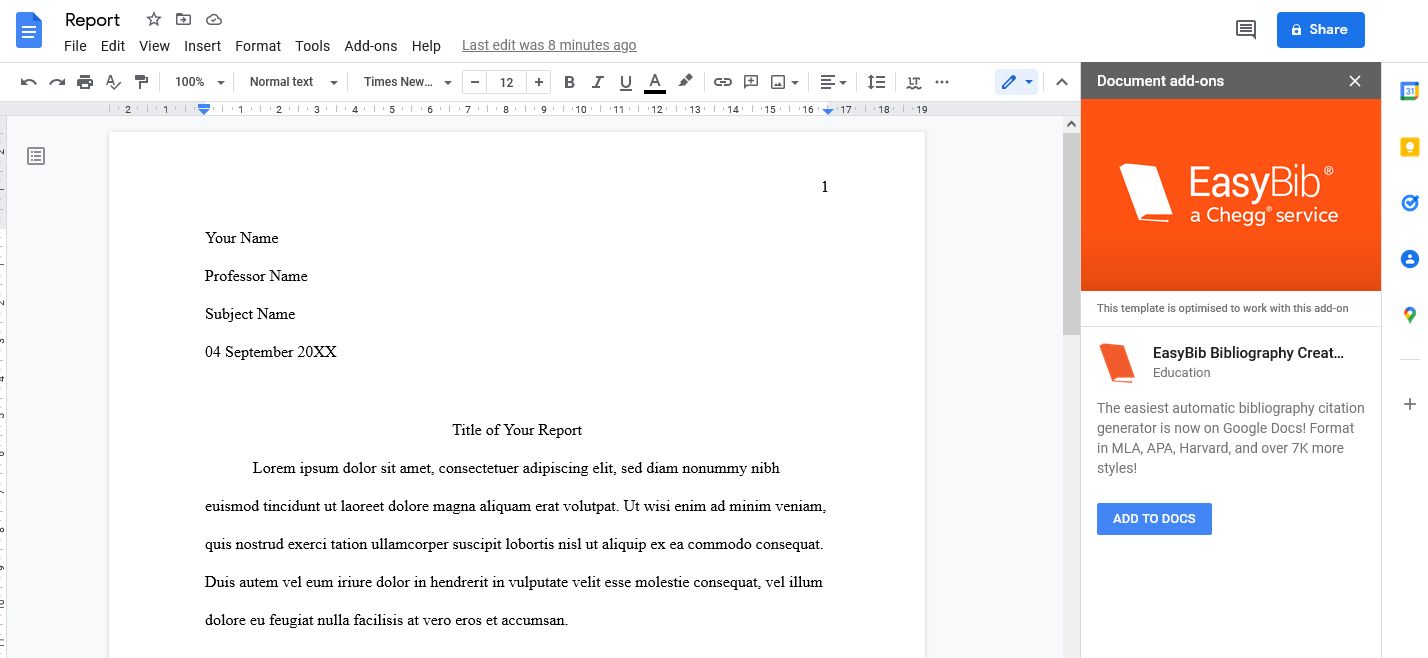
- Click Report MLA. This opens a document in the MLA format, with dummy text for you to replace.
- On the right-hand sidebar, you'll see information about the EasyBib add-on, which is an automatic bibliography citation generator compatible with the template. Click Add to Docs if you want to use it, otherwise dismiss the sidebar with the X in the top-right.
Remember, you may need to follow slightly different MLA rules than what the template provides, so double-check everything is in order before submitting your document.
How to Apply the MLA Format in Google Docs Manually
Alternatively, you can apply the MLA formatting yourself. This is a good option if you have slightly different requirements from what the template offers, or if you want to be completely certain that you've applied all necessary formatting rules.
1. One-Inch Page Margin
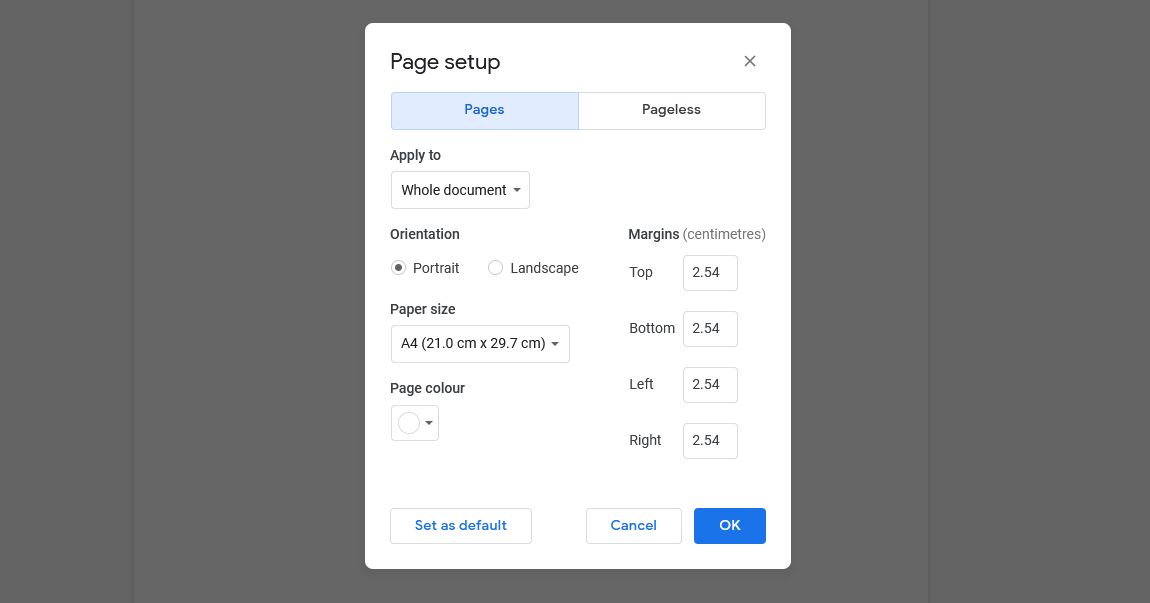
Google Docs uses a one-inch margin on all sides of the document by default. However, you can double-check this:
- From the top menu, click File.
- Select Page setup.
- Within Margins, ensure everything is set to 1. If Google Docs is using centimeters, it should be 2.54.
- Click OK.
2. Readable Typeface
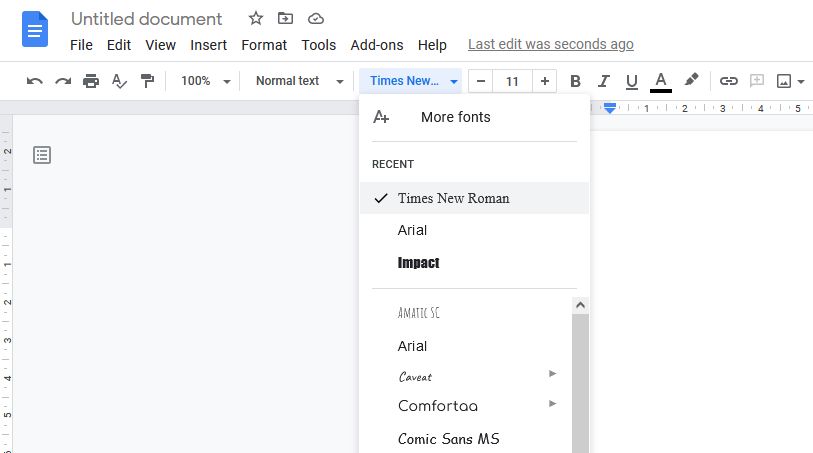
By default, Google Docs uses Arial at size 11. Remember, MLA requires a readable type face, not necessarily Times New Roman at size 12, but many people prefer this. As such, to change the font in Google Docs:
- Click the Font dropdown in the top toolbar and select Times New Roman.
- Click the Font size dropdown in the top toolbar and select 12.
3. Double-Spacing
To apply double-spacing to all your text:
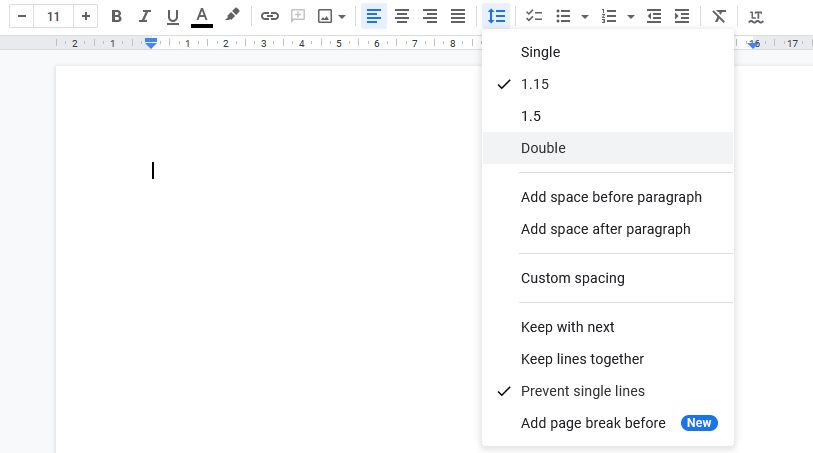
- Click the Line & paragraph spacing button in the top toolbar. It's to the right of the alignment buttons and to the left of the list buttons.
- Select Double.
4. Page Numbers
You need your surname and page numbers in the right of the header:
- Double-click at the top of the document to edit the header.
- Your header is separate from the rest of your document, so you will need to apply your font face and size again.
- In the top toolbar, click Right align or press Ctrl + Shift + R.
- Type your surname followed by a space.
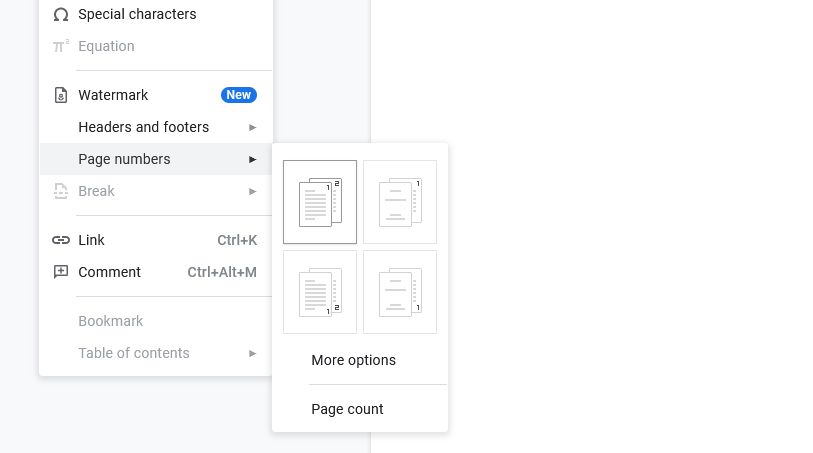
- From the top menu, go to Insert > Page numbers and select the diagram that shows the page numbers in the top-right.
5. Course Information and Title
The information about yourself, your course, and the title of your document should appear on page one:
- In the body of the document, select Left align from the top toolbar or press Ctrl + Shift + L.
- Type the necessary course details, pressing Enter after each to insert a new line.
- Press Enter after the final detail (usually the date) to insert a line break, then enable Center align from the top toolbar (or press Ctrl + Shift + E).
- Type your title using title case, remembering to apply no extra formatting.
6. Indent Paragraphs
The first line of every paragraph needs to be indented by half an inch:
- Press Enter to place a line break after your title, if you haven't already, and return to Left align (Ctrl + Shift + L).
- From the top toolbar, select Format > Align and indent > Indentation options.
- Use the Special indent dropdown and select First line.
- Input 0.5 inches or 1.27cm.
7. Works Cited
Finally, your list of cited works must be on a new page, with a half-inch indent for overflow lines:
- From the top toolbar, go to Insert > Break > Page break or press Ctrl + Enter.
- Enable Center align from the top toolbar (or press Ctrl + Shift + E) and type the header Works Cited.
- Return to Left align (Ctrl + Shift + L) and enter all your citations.
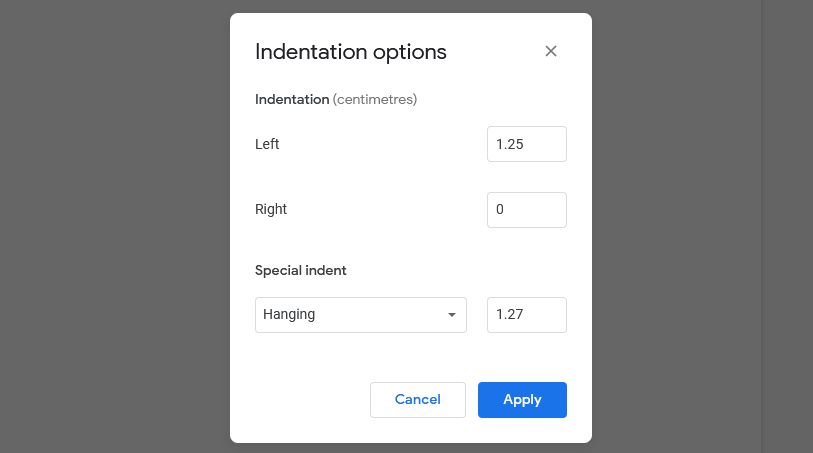
- Highlight all the citations and, from the top toolbar, select Format > Align and indent > Indentation options.
- Use the Special indent dropdown and select Hanging.
- Input 0.5 inches or 1.27cm.
Turn In Your MLA Formatted Paper With Confidence
Now that you've applied all the necessary formatting, the only thing left to do is write. Google Docs saves automatically, so you don't need to worry about losing your work. Just remember to keep track of everything that you want to cite at the end. Good luck on your paper!


