
In the current age of smartphones and digital cameras, it’s a fact that we are capturing more photos than ever before. Modern cameras and smartphones often work very hard to automatically optimize and clean up your images, and when it comes to finally editing those photos the styling options are limitless – but sometimes, this clean and polished look just doesn’t cut it, leading many photographers to look to their past for inspiration, choosing to emulate the look and feel of analog film photography in their digital photos.
Why Emulate Film?
Why would we purposely want to achieve the look of an older technology when modern cameras work so hard to avoid a lot of the pitfalls presented by shooting film? Simply put, emulating the film look is a lot about nostalgia, injecting a more idyllic and wistful vibe into photos so that better mimic our actual memory of that moment – with all of the glorious imperfections that come with that.
´Film Look’ in Lightroom with Presets
Film grain, tone-curves, light leaks, fades and the recognizable vintage color palettes (oranges & blues) are some of the basic elements that when applied correctly that can transport your digital photo back to another era. Mastering this look is a matter of drawing from inspiration and experimenting with various settings, but thankfully there are lots of fantastic film-style presets out there to speed up the process for you.
1. Find Quality Presets
Before you start, you’ll want to find yourself a pack of quality presets that reflect the final result you want. There are many perfect film presets for Lightroom on the marketplace for you to choose from, or check out this handy curated collection I put together to help you decide.
For reference, the photos that I create in this tutorial were made using this delightful pack of presets called InstantFilm Pro by The Preset Factory.
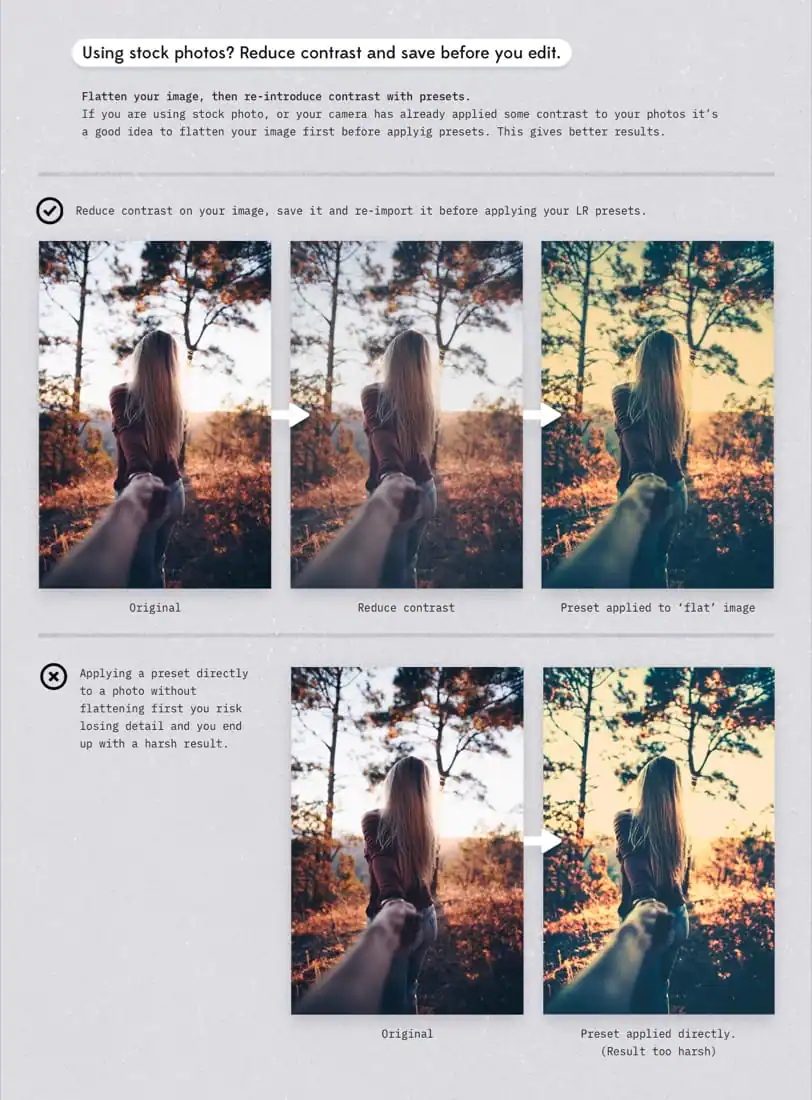
2. Start With ´Flatter’ Images
Before you dive into using the presets, it’s important to note that when working with presets it’s always a good idea to start off with a ´flatter’ image. This means aiming for photos with less contrast and saturation.
This may seem like a strange idea, but we are going to inject colors and contrast in Lightroom itself, so if your image is already packed full of color saturation and contrast then those effects will become overwhelming. Shooting RAW and activating, flat or neutral settings in your camera is a good first step.
 Of course you can still get some great results with photos that already have contrast, highlights and saturation in them, but just as a general rule, if you intend to use your photos with presets it’s a good idea to aim for a flat photo as your starting point.
If you are using stock photos that may already have been processed it might be a good idea to first make your image look a little flatter by adjusting it’s exposure, brightness and contrast first. Export that image, then you can apply your presets to this new flatter image.
Of course you can still get some great results with photos that already have contrast, highlights and saturation in them, but just as a general rule, if you intend to use your photos with presets it’s a good idea to aim for a flat photo as your starting point.
If you are using stock photos that may already have been processed it might be a good idea to first make your image look a little flatter by adjusting it’s exposure, brightness and contrast first. Export that image, then you can apply your presets to this new flatter image.
3. Import Your Presets
Importing presets can be done in a number of ways, but one method that should work with any version of Lightroom is going to your App window menu bar, and looking for Lightroom > Preferences > Presets > Show Lightroom Develop Presets.
 This will take you to your local folder where Lightroom is storing your presets, you can just drag and drop your new presets into here. Now, depending on which version of Lightroom you are using, your presets should now be accessible in the Presets panel found inside the left sidebar – just below your Navigator panel.

4. Apply Presets & Stack Effects
As you took the time earlier flatten the look of your image, applying presets now becomes even easier, the chances are that most presets will now look great in just one click.
Tip: Some presets include different types of effects that can be used in combination. For example, in the pack we are using (InstantFilm Pro) we have different categories; Fades (light overlays), Grain (film grain effect), Instant (color grading and processing) and Light Leaks (overlays).

Stacking different film effects from the presets.
It’s just a case of experimenting with various combinations, and different looks – simply by clicking through your presets and seeing what works. If you don’t find something that fits 100% however, don’t worry, just get as close as you can to the result you want, then we can go in and make some extra adjustments.
5. Quick, Basic Adjustments
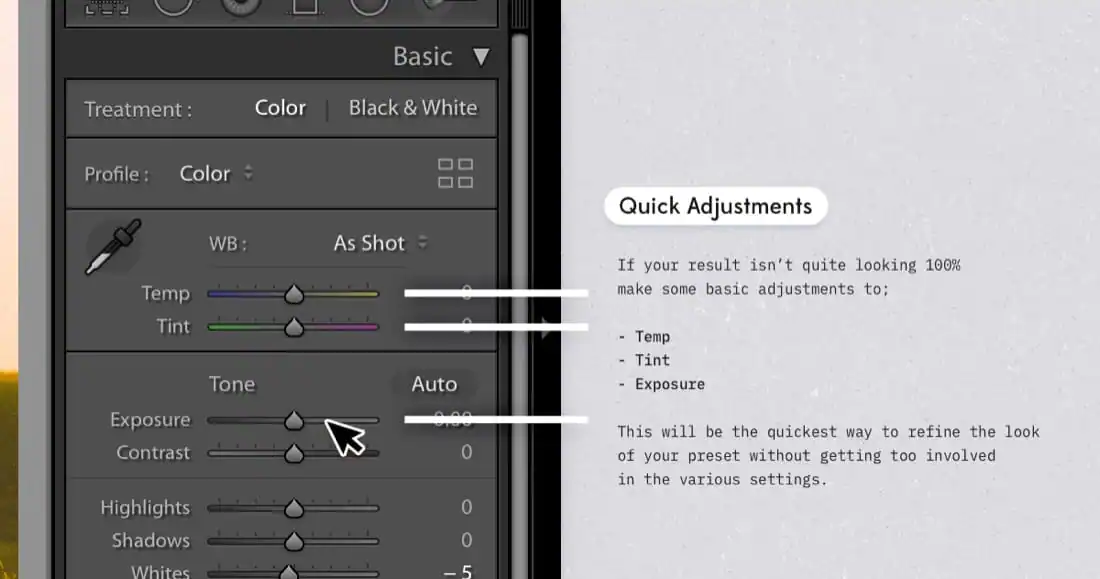
Of course Lightroom allows you to tweak all manor of settings for as long as you want to further refine the look of your applied presets, but for the purpose of simplicity and speed, you can refine the preset settings quite well most of the time by just focusing in on three simple settings:
- Temp
- Tint
- Exposure
Depending on your images, and the preset used, these sliders may need to be moved in any which way, so there are no right or wrong values here – you’ll need to play with the sliders and see how things look. If you captured a nice flat and neutral image to start, you will only need to make very minimal adjustments if any.
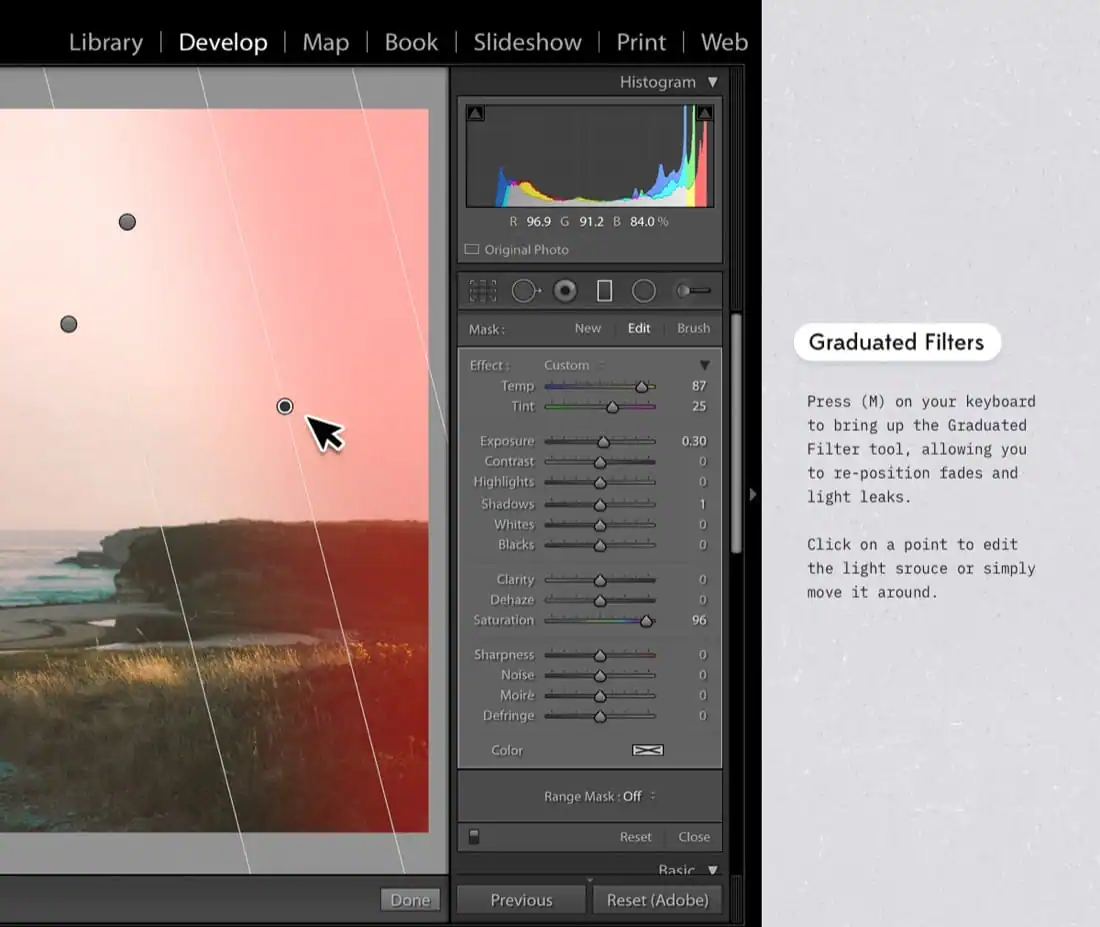 For those of you that choose to apply fades or light leaks you might want to jump into the Graduated Filter panel (“M†on keyboard) where you can control the position and colour settings of those effects.
Recap & Walkthrough
I captured a handy video walkthrough of me going through each of these steps, starting out with a stock photo that had a little too much contrast, working to flatten that out, then applying presets and making some basic adjustments outlined in this article. Here’s the basic steps, and the video:
- Flattening a photo with too much contrast & saturation.
- Export a copy of the ´flat’ image.
- Import the flatter photo.
- Apply ´Instant’ presets to set colors and tones.
- Optionally stack ´Grain’ / ‘Light Leaks’ / ‘Fades’ as desired.
- Adjust Exposure if needed.
- Adjust Temp & Tint if needed.
- Press M to adjust any graduated filters.
That’s all there is to it. Pretty easy once you get used to the workflow and start capturing your images in neutral mode, if you want to find out more about how best to set up your camera to capture flat images, this article from the Digital Photography School can give you an in-depth explanation and guide.
Examples of The ´Film Look’
To get yourself in the mood for creating photos in this style, let’s take a look as some beautiful examples in the real world – some of these photos may even be shot on film, but I’d be willing to guess a lot of them are simply emulating the style in much the same way that we have done in this walkthrough. As you will see, they all share a certain nostalgic aesthetic that adds a lot to the mood and character of the shot.
Products Seen In This Post:

We get it. Sometimes technical terms can make DSLR cameras seem too complicated. Download this cheatsheet and card to start your journey to better photos.
Download them here


Try some of my FREE goods: https://liammckay.lemonsqueezy.com - Designer with a love for beautiful Icons, Textures, Brushes and WordPress Themes.
View More Posts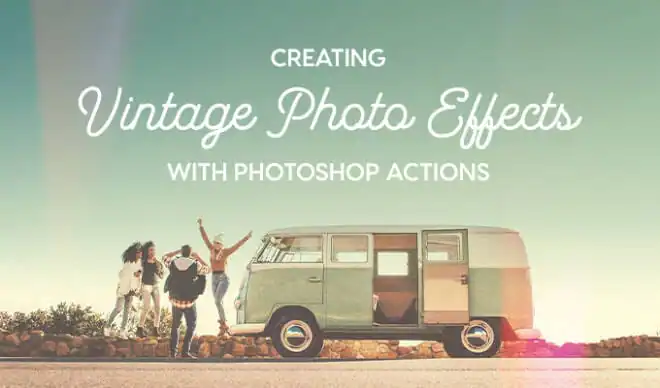

