
Even though Google Docs is completely free to use and ships with a ton of features, the platform still lacks some basic features that could make editing quite easier for users. One such feature is the ability to move or rearrange pages easily like you would have on other document editing platforms like Microsoft Word and others.
If you have ever created a document on Google Docs and realized along the line that you wanted to rearrange or move pages around on the document or maybe you simply wanted to delete a page and insert it somewhere else in your document, you will notice that it can be quiet challenging as there is no direct way to do this as you would have on other word processing software out there.
Well, like with other features that may be lacking on the platform, there is a very easy workaround you can use to move pages in Google Docs.
In this article, we will be sharing two simple methods you can use to rearrange pages in Google Docs easily. So whether you are a beginner or an experienced user, using these methods, you should be able to move pages around on your documents in Google Docs quite easily.
How To Move (or Rearrange) Pages In Google Docs (2 Methods)
As we mentioned earlier, there is no way to automatically rearrange pages on Google Docs right now as you would have on other document editing platforms like Microsoft Word for example where you can simply click and drag a page on the page sorter to move/reorder the page.
If you want to reorder, move, or rearrange pages on your document, you will have to do it manually.
One method to do this is by creating a new document on the platform then copy all the content from each page individually and paste in their correct positions on the new document.
For example, if you want to move page 3 to page 1, copy all the content from page 3 on the old document then paste in page 1 on the new document, and repeat for all the pages you want to reorder.
Another method you can use if you don’t want to create a new document is to cut all the content from a page you want to move then insert a page break at the beginning of the page/position where you want to move it to and paste in the content you copied in the new page. You can use this method if you don’t want to create a new document.
Below we discuss both methods of rearranging pages in Google Docs in detail.
Method 1: Copying and pasting on a new document.
Here is how to move pages in Google Docs by simply copying and pasting (in a new order) on a new document on the platform.
Step 1: Open a new Google Document.
First, you will have to open a new document in Google Docs. This is necessary since we will be copying and pasting content on a new document.
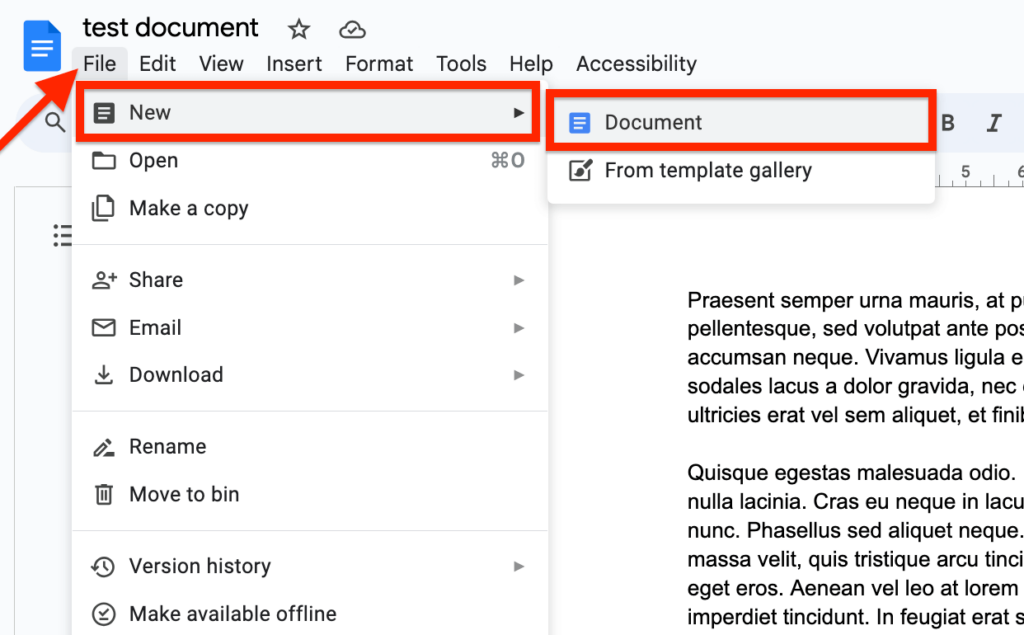
To open a new document in Google Docs when you already have an existing document opened up, go to the menu bar then click “File” > “New” > “Document” and a new Google Docs tab containing your document should open up.
If you’re on the Google Docs dashboard, you can simply click the floating “+” button to create a fresh document on the platform.
Step 2: Copy all the content from the page to be used as the first page and paste in the correct position on the new document.
Now, go back to the old document then scroll to the page you want to move to the first page.
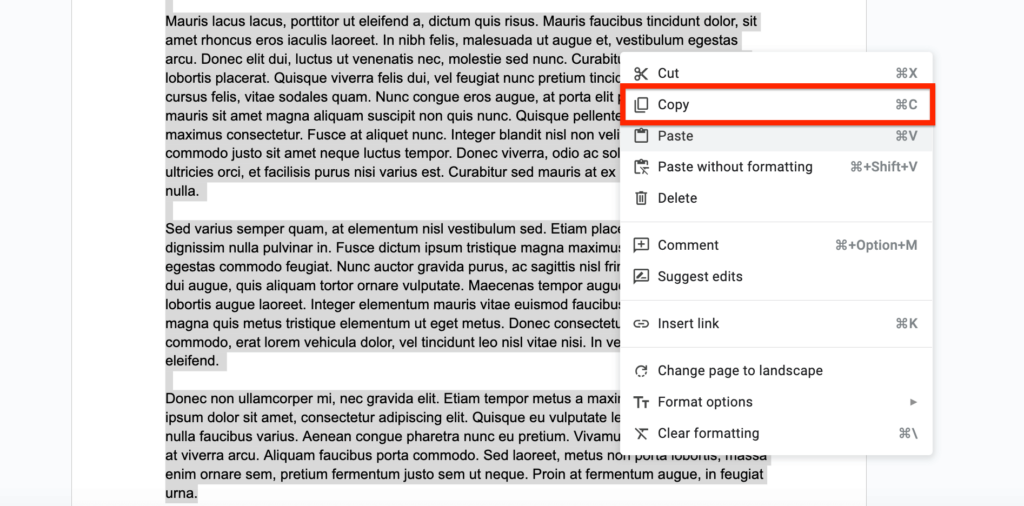
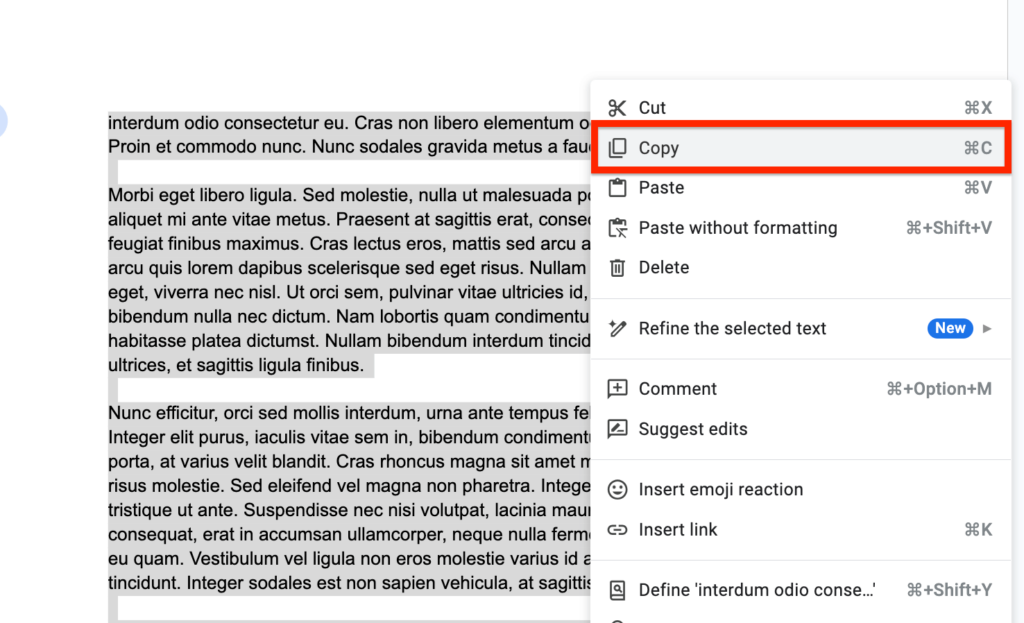
Highlight (or select) all the text on the page using your mouse cursor and then copy the text you highlighted/selected by right-clicking and selecting “Copy” from the available options or using the Ctrl/Command + C shortcut on your keyboard.
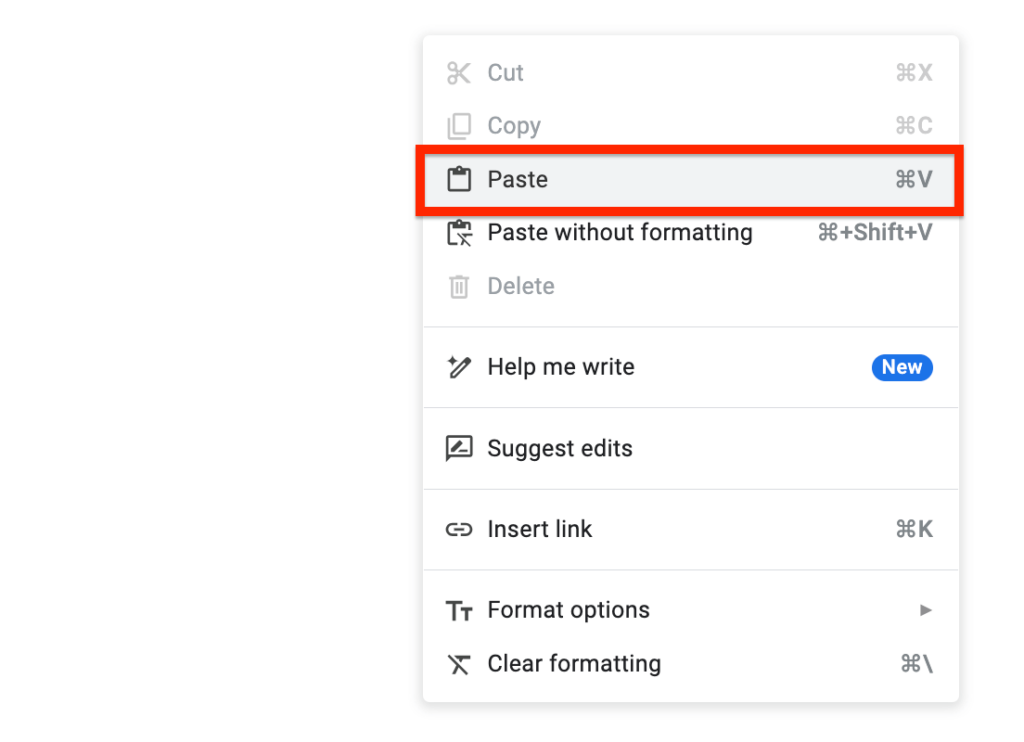
After copying, switch back to the Google Docs tab containing the new document you created and paste the content you copied by right-clicking anywhere on the page and selecting “Paste” from the options or by using the Ctrl/Command + V key combination on your keyboard.
Step 3: Repeat Step 2 for other pages on your original document.
After copying and pasting all content from the page to be used as the first page on the new document from your original document, you will need to repeat the same step for other pages on the original document until you have finished moving all the page content from the original document to their new positions on the new document.
Normally, after pasting the content you copied from the original document to the first page on the new document, a new (second) page should be created automatically just under the first page, but in some cases, you may need to create a new page yourself.
Creating a new page is quite easy and if Google Docs doesn’t automatically create a new page at the end of each page, you can do that easily by inserting a page break at the end of any page.
To insert a page break, first place the text cursor at the end of a page then go to the Google Docs menu bar and click “Insert” > “Break” > “Page break“.
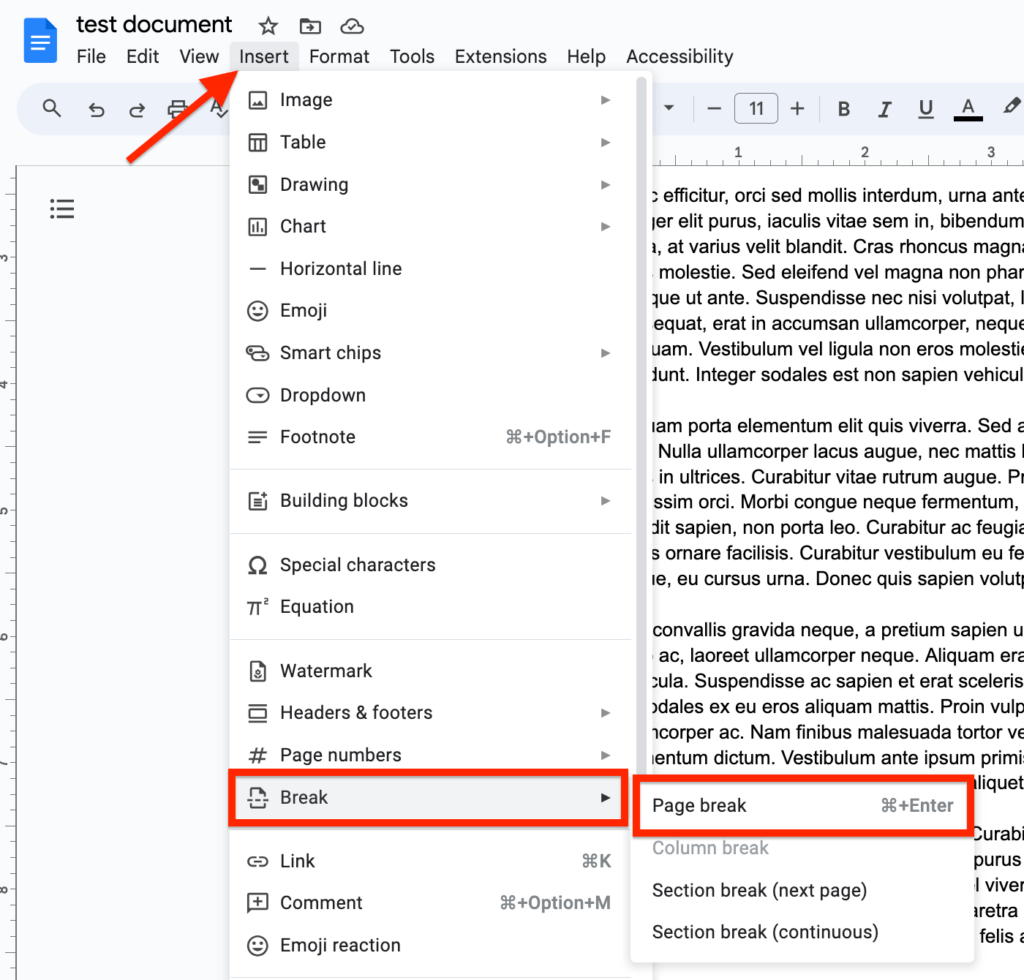
Now you should see that a new page has been created in inserted just below the page where the page break was inserted. You can also add a page break in Google Docs by using the Ctrl/Command + Enter/return (Windows/Mac) key combination on your keyboard.
After adding a new page (if it wasn’t initially added/inserted), go back to the original document then copy all content from the page to be used as the second page the paste it on the second page in the new document.
Repeat the same step for all pages needed on the new document from the original/old document until you have successfully moved all pages to their respective positions on the new document.
Step 4: Rename the new document.
When you’re done with moving over the content of all pages on the original document to their correct positions on the new document, the next step would be to rename the new document after the original document.
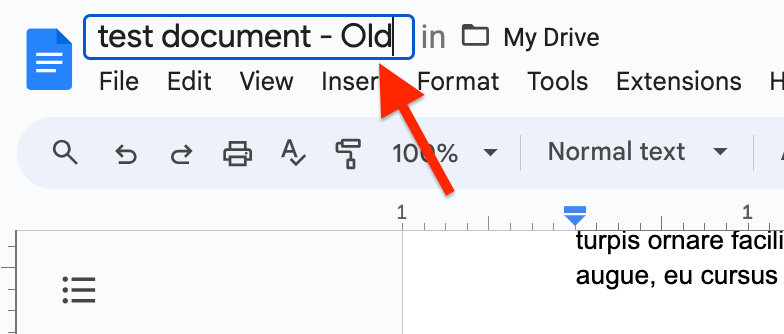
To do this, first, go to the original document then click on the document name at the top left corner of the window, select the name of the document then right-click and choose “Copy” to copy the name.
When you’ve copied the name, attach “– Old” to the name of the original document. This will be used to differentiate both documents.
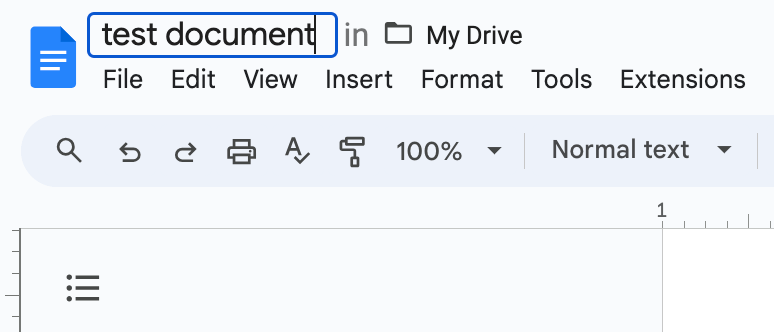
Now, go to the new document then click and select the current document name, delete it, then paste the name you copied from the old document.
Once you’re done renaming the document after the original document, you can either delete the original one or leave it as it is since we have already added the “– Old” identifier to help with distinguishing the new document from the original one.
And that’s it. You have successfully rearranged the pages of your document in Google Docs.
Method 2: Reordering pages on the same document.
If you find the concept of rearranging pages on a new document entirely quite challenging, then you can also simply reorder or move pages around on the same document in Google Docs using this method.
Here is how to reorder pages on this same document.
Step 1: Open the document where you want to reorder pages.
First, open the document where you want to reorder or move pages in Google Docs – you can do this by selecting the document from the list of available documents on the Google Docs dashboard.
Step 2: Cut all content from the page you want to move.
Next, go to the page where you want to change its position on your document then highlight all its content and cut by hitting Ctrl/Command + X on your keyboard.
You can also copy on Google Docs by right-clicking anywhere on the highlighted content and selecting “Cut” from the pop-up menu options.
Step 3: Insert a page break at the top of the destination page.
Now, go to the page where you want to move the contents you copied then place the text cursor at the very beginning of the page.
After that, go to the Google Docs menu bar and click “Insert” > “Break” > “Page break“ to insert a page break.
When that’s done, you should notice that the page is now empty and the content that was on the page you placed your cursor on has now been moved to a new page below the current page.
Step 4: Paste the content on the new page.
Next, paste the content you copied earlier from the page to be moved by hitting Ctrl/Command + V on your keyboard.
Alternatively, you can also paste by right-clicking anywhere and then selecting “Paste” from the pop-up menu options.
Step 5: Repeat Steps 2,3 & 4 for all pages you want to move/re-order.
Finally, repeat all the above steps (2,3 & 4) for all pages you want to move or re-order on your document in Google Docs.
First, go to the page you want to move then cut all the contents on the page. Afterward, go to the position (page) where you want to move the page you initially cut to and insert a page break at the top.
When you have inserted a page break at the top of the page, all content will be moved to a new page just beneath the current page. Paste the content you cut and the page should be moved.
And that’s how to move or re-order pages on the same document in Google Docs. It’s quite easy!
Wrapping Up
If you have ever needed to rearrange or move pages on your document in Google Docs, you will find out that the process can be quite confusing when compared to other word processing platforms like Microsoft Word where re-arranging pages is a breeze.
In this article, we shared 2 methods you can use to re-arrange pages on your documents in Google Docs and discussed both methods in detail.
The first method you can use to rearrange or move pages in Google Docs is by creating a new document and manually moving over pages from the original document to their new positions in the new document by copying and pasting.
If you prefer staying on the same document as opposed to creating a new document on Google Docs entirely, you can easily re-order pages on the same document by cutting all content on the page you want to move, inserting a page break at the top of the destination position and pasting the content on the new page inserted.

I think i might to spend some time learning and understanding how this works. Great tutorial overall, many thanks!