Quilted Christmas Tree Wall Hanging – free sewing pattern!

Sew a Christmas Tree wall hanging and put some holiday love in any room in the house!
To make this beautiful holiday decor piece, I used an easy Quilt-as-You-Go technique that is shown in step by step photos below. Anyone can do it! It’s the same technique that I used on my Quilted Tree Skirt.
UPDATE: This blog post has been converted to an optional PDF that’s optimized for printing. Find it here. The pattern in the blog post below is totally free to read, print, and sew! Just hit CTRL +P on your computer to print. The Optimized for Printing PDF download for $2 is totally optional.
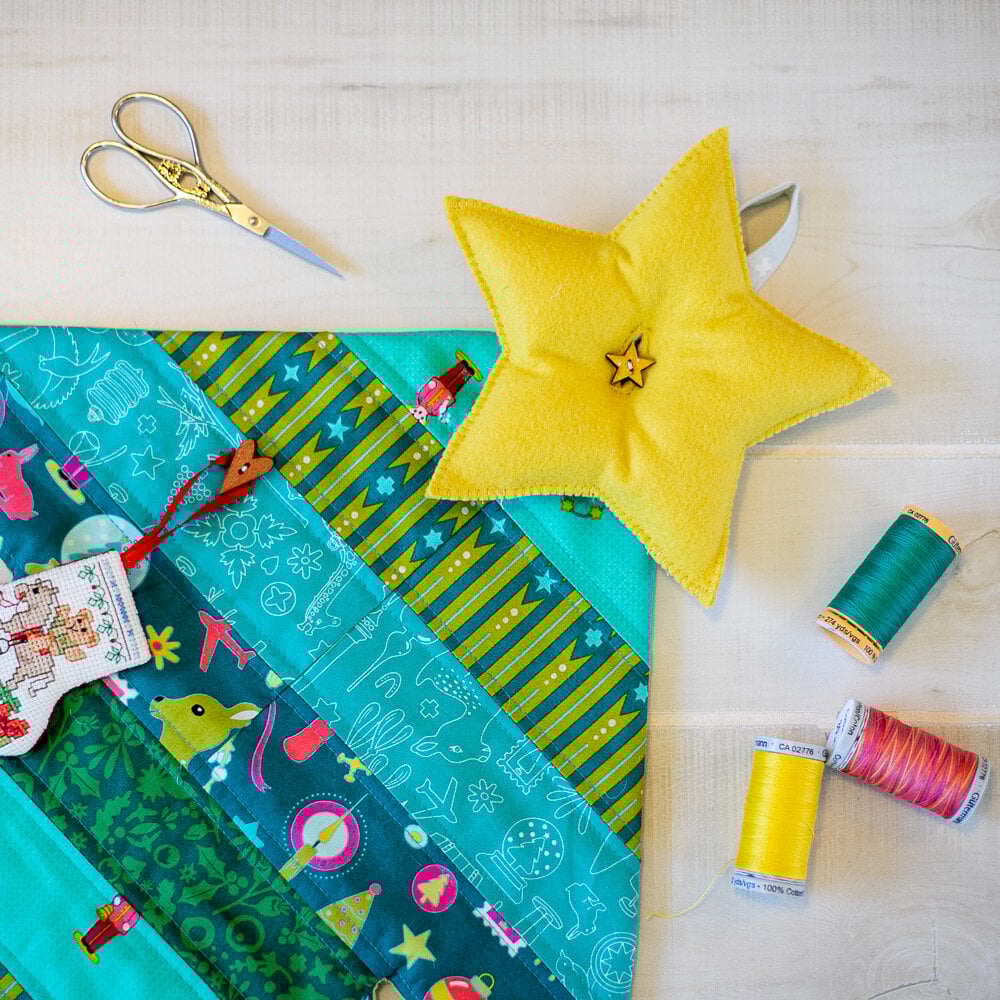
The Quilted Christmas Tree has buttons sewn to it so it can hold ornaments plus a cute puffy star (pattern included). There are wooden dowels inside to give it support – no droopy branches here!
For more fun projects like this, check out all my free sewing patterns.
I used the green fabrics from a Fat Quarter Bundle of Alison Glass Holiday 2019 fabrics. You may also be able to use a jelly roll, if it includes 2 of each green fabric, or at least 10 strips that you would like to use.

This fun free sewing pattern uses jelly roll strips (2 1/2’’ strips of fabric) with an easy piecing technique. It is also fat quarter friendly!
Finished size: Approximately 48’’ tall x 36’’ wide (not including the star or hanging loop).
Are you ready to sew one? Let’s get started!
Quilted Christmas Tree Wall Hanging
You will need:
-
1/4 yard each of 5 different tree fabrics (fat quarters are fine)
or:
-
10 strips 2 1/2’’ x WOF (width of fabric)
plus:
-
1 fabric square 8 1/2’’ x 8 1/2’’ (for the trunk)
-
1 strip of fabric 2’’ x 10’’ (for the hanging loop. Tip: make it the same color as your walls.)
-
a piece of batting at least 52’’ x 40’’
-
1 1/2 yards of fabric for the backing
-
4 dowels, 3/16 diameter, length:
-
17’’
-
25’’
-
29’’
-
33’’
-
-
fabric marking tools, such as a pen and a fabric pen or hera marker
-
10-12 buttons
-
Safety pins (optional)

Cutting
From the tree fabrics, cut:
-
4 strips 2 1/2’’ x 21’’ from each of 5 fat quarters (20 short strips total)
or:
-
2 strips 2 1/2’’ x 42’’ from each of 5 regular cut fabrics (10 long strips total)
plus the 8 1/2’’ x 8 1/2’’ trunk piece mentioned above.
Tip: arrange the fabric strips in an order that gives lots of contrast, such as the dark, light, dark, light, dark pattern that I show in the photo above.


Sew the Strips Together
1. Sew the strips together to make 4 strip sets, each with 5 different fabrics (or as desired). If you are using long strips instead of strips cut from fat quarters, you will only need to make 2 strip sets.
2. Press the seams in each set in a single direction.

Cut the Strip Sets
The strip sets should be approximately 10 1/2’’ tall. Don’t worry if this varies a little.
1. From the strip sets, cut the following pieces (height may vary):
-
1 piece 10 1/2’’ x 16 1/2’’
-
1 piece 10 1/2’’ x 12 1/2’’
-
1 piece 10 1/2’’ x 8 1/2’’
-
4 pieces 10 1/2’’ x 11’’ (not shown above)

2. The four 10 1/2’’ x 11’’ pieces need to be cut diagonally – but not from corner to corner.
The next step shows how to do this, but first note in the photo above how two are cut diagonally in one direction and two are cut diagonally in the opposite direction.


3. Mark 2 of the pieces as seen above, with a mark on the top of the piece 1/4’’ from the left edge and a mark on the bottom of the piece 1/4’’ from the right edge.

4. Slice the piece in half cutting from the mark on the top of the piece to the mark on the bottom of the piece. Each triangle with have a 1/4’’ ‘nub’ at the top.
Repeat steps 3 and 4 with the last two 10 1/2’’ x 11’’ pieces, except place the mark at the top 1/4’’ from the right edge and the mark at the bottom 1/4’’ from the left edge.
You will now have 8 triangle pieces.

Sew the Christmas Tree ‘Tiers’
1/4’’ seam allowance allowed.
1. Arrange the cut pieces as seen above with triangles at the sides of each rectangular piece. You may follow the same pattern that I did, or arrange them how looks best to you.
Set two of the triangle pieces aside for now.

2. Sew triangle pieces to the rectangular pieces, nesting the seams as you go.
Some of the seams on the triangles will need to change direction in order for the seams to nest. You may either re-press the seams in the needed direction before you sew, or after you sew.
Then press the new vertical seams to one side.

3. Sew the two remaining triangle pieces together along the vertical edge.
You should now have 4 different sized ‘tiers’ for your Christmas tree quilt top.
Number your tiers from 1-4, 1 being the smallest and 4 being the largest.

Use Quilt-as-You-Go to Sew the Tiers to Batting
Tip: Using a walking foot is very helpful when doing quilt-as-you-go, or any straight line quilting.
1. Fold your batting in half and then in half again to find the center. Draw a long horizontal line and a long vertical line through the center in each direction using a pen.
Before using a dark marker as I did, check to make sure the lines will not show through your fabrics. The fabrics will cover them up, you just don’t want the lines to show through.

2. Fold each of the 3 larger tiers in half and use a fabric marker to draw a vertical line down the center. I used a hera marker which is hard to see in the photos because it doesn’t use ink, but I could see the line just fine.

3. Sew the tier #3 on the batting first. (The one that is approximately 22’’ wide.)
Place the tier on the batting so that it the vertical line on the fabric tier is aligned with the vertical line on the batting.
The horizontal line on the batting should be aligned with the second horizontal seam on the fabric tier (counting down from the top). Refer to the photo above.

4. Quilting is not required since the tree ‘quilt’ will be secured all over with buttons, but I love quilting so I added plenty. Feel free to quilt the tier to the batting any way that you wish.
I sewed straight lines of walking foot quilting 1/4’’ from either side of the horizontal seams.


5. Place tier 2 on top of tier 3 (right sides together), with the bottom edge of tier 2 lined up with the top edge of tier 3.
The vertical center line on tier 2 should be aligned with the vertical center line on the batting.
Pull back tier 2 a little to see where the vertical seams are on tier 3. Place pins on those spots. You may also place more pins between those if needed.
Note: You will start and end sewing at those pins, so that your line of stitching runs only between the vertical seams on the tier underneath.

6. Stitch tier 2 to the batting, sewing only in between the pins that mark the vertical seams on the tier underneath, as mentioned above.

7. Make a 1/4’’ clip into the top layer of fabric at both ends of the stitching.

8. Open tier 2 out and smooth it across the batting above tier 3. Press the seam flat, if desired.
The bottom edge of the ‘branches’ will be able to lay flat on the batting since you clipped the seam in the previous step.
Quilt tier 2 to the batting, if desired.

9. Attach the bottom edge of tier 1 (the top of the tree) to the top edge of tier 2 in the same way.
The vertical seam on tier 1 should be aligned with the vertical center line on the batting.
Pull back tier 1 a little to see where the vertical seams are on tier 2. Place pins on those spots.
Start and end sewing at those pins, so that your line of stitching runs only between the vertical seams on the tier underneath.
Make a 1/4’’ clip into the top layer of fabric at both ends of the stitching.

10. Open tier 1 out and smooth it across the batting above tier 2. Press the seam flat, if desired.
The bottom edge of the ‘branches’ will be able to lay flat on the batting since you clipped the seam in the previous step.
Quilt tier 1 to the batting, if desired.

11. Attach the top edge of tier 4 to the bottom edge of tier 3 with the fabrics right sides together.
For this tier, you do not have to worry about sewing between the horizontal seams on the tier beneath.
Just sew on the wrong side of tier 4, 1/4’’ from the edge. You also do not have to clip the fabric.


12. Place one edge of the 8 1/2’’ fabric square for the trunk along the bottom edge of tier 4, centered with the vertical line on the batting.
Attach the trunk by sewing on the fabric square 1/4’’ from the edge.

Use matching thread to quilt the trunk, if desired. I decided to use wavy lines on my trunk!

Finish Sewing the Quilted Tree Hanging
1. Cut the extra batting off all the way around the tree. Do not leave a seam allowance of batting – just cut right next to the edge of the fabric.

2. Pin the tree to the backing fabric, right sides together. Use lots of pins so the tree won’t shift.
3. Cut away the extra backing fabric all the way around the tree.


click to enlarge
4. Along one side of the tree, mark openings for inserting the dowels after the tree is turned right side out.
To do this place two marks about 1’’ apart just above the point on each tier (branch). You only need openings on one side of the tree. See the red arrows on the photo above.
You will also need to leave a 6’’ opening at the bottom of the tree trunk for turning the tree right side out. Mark this opening too, if desired.

5. Sew all the way around the tree with a 1/4’’ seam allowance. At each of the markings, backstitch and leave the space between the openings unsewn.
Also remember to leave a 6’’ opening at the bottom of the trunk!


6. Trim away the extra fabric at all of the outside corners, and clip to the stitching at the inside corners. Be careful not to clip the stitches.

7. Turn the quilted tree right side out through the opening at the bottom of the trunk. Press flat. Press the edges at all of the openings to the inside.
8. Insert each dowel into one of the small openings, making it go all the way across the center of the tree and rest above the branch on the opposite side.
If any of the dowels are too long, they may be trimmed as needed to fit.
Hand sew all of the openings closed.


Make the Hanging Loop
1. Press the 2’’ x 10’’ strip on half lengthwise and press. Fold the long edges to the center and press.
Then open the sides and press the short ends over to the inside by 1/4’’. Refold again to make a 1/2’’ x 9 1/2’’ strip with no raw edges.


2. Topstitch all the way around the strip 1/8’’ from the edge. A sewing stiletto helps so you don’t sew your finger!

3. If desired, sew button holes near the ends of the hanging loop so you can attach it to the back of the tree using a button.
Another option is to sew the loop directly onto the back, but it will not be removable.


4. Sew one button at the top of the tree for attaching the star (Use my Puffy Felt Star Tutorial) and sew another button in the same place on the back of the tree for attaching the hanging loop.
Or fold the loop in half with the ends together and sew the loop to the back of the tree at the top using tacking stitches. Then sew a button on the front to cover up the tacking stitches and hold the star.

5. Attach safety pins to the tree in different locations and hang ornaments on them first, moving the pins around until you like the placement. When satisfied, sew on the buttons.

6. Use my Puffy Felt Star Tutorial (it’s really easy) to make a star for the top of your tree.

This Christmas Tree Wall Hanging looks great near my Quilted Tree Skirt!
Happy Holidays,

p.s. Come get 35+ Favorite Christmas Sewing Projects – All Free!
Disclosure: some of my posts contain affiliate links. If you purchase something through one of those links I may receive a small commission, so thank you for supporting SewCanShe when you shop! All of the opinions are my own and I only suggest products that I actually use. 🙂