
Civil War Timeline Worksheet (Student-Created Timeline)
A Civil War timeline will help your students connect historical events together. As teachers, we often teach events one at a time. We may assume that students are connecting the events together in their minds, but they often aren’t.
Many students don’t “get” timelines
The truth is, students don’t use timelines as effectively as adults do. Many students can’t place an event on a timeline or explain an event’s historical context. (Info. from teachinghistory.org)
The solution?
Students need regular practice creating and interpreting timelines.
Here is an easy and effective way for students to practice creating timelines during your Civil War Unit (or any unit, really).

1. Students select the most significant events
Print these vertical timelines for the years of the Civil War (pssst I’ve also included a blank worksheet so you can use these for other units of study too!).
Students glue the blank timelines into their social studies notebooks or keep them in a folder.
As your Civil War unit unfolds, students evaluate which events to add to their Civil War timeline worksheet.
How does this look?
Well, each day or two give students 10 minutes to add events to their timelines.
First, they brainstorm a list of all of the events they have recently learned about. Hint: Let students do this with a partner!
Then, students evaluate the events and select the ones which are most important. Only these events are added to the timelines. This is hard stuff!
Your students may have trouble deciding what is important. They may beg you to just tell them what to add to their timeline.
Don’t do it.
Interpreting events and determining their significance is the work of a historian! Give students a chance to practice critical thinking!
Will students sometimes choose too many or too few events? Yep. But it’s all about practice, feedback and more practice.
You could model this evaluating step or do it together as a class the first few times.
2. Students add events to their timelines
For each event, students add the following information to their timeline:
-
The date
-
One or two sentences summarizing the event
-
An illustration

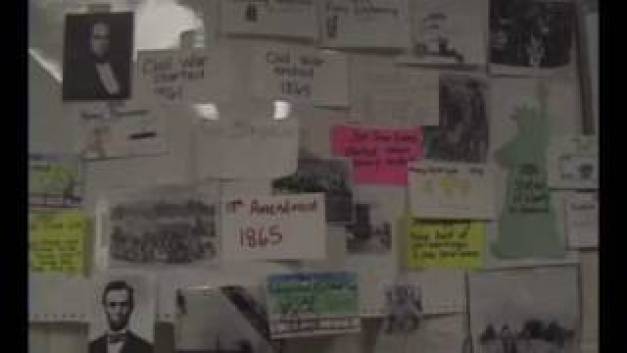
Notice in the example above that most of the events happened at the beginning of the year while the end of the year is mostly blank.
That’s perfectly ok.
Civil War battles usually didn’t occur in the winter because it was too cold to fight. Don’t feel like you have to have the events evenly spaced out (Where are my Type A personalities at?). After all, that’s not how history works.
3. Students Do “Timeline Talks”
The next key is to get students to tell the story of their timelines. This idea comes from Elise Fillpot from the Bringing History Home Project.
Basically, the kids go through their timelines and use the events as “prompts” to tell the story of the Civil War. They could tell the story to themselves, a partner, or the whole class.
A timeline talk from the example above would sound something like this…
The Civil War started when the Southern states left the Union at the beginning of 1861. By February, they had created their own government called The Confederate States of America. Jefferson Davis was their president. One month later, the Union got a new president: Abraham Lincoln.
The Confederacy fired on Fort Sumter on April 12, 1861 to show that they meant business. Just two days later Lincoln responded by asking for 75,000 volunteers to fight “the rebels”. He also ordered a blockade which means that the North refused to trade with the South and did not allow them to trade with anyone else.
On July 21, 1861 things got serious. The Confederates surprised everyone and beat the Union at the Battle of Fort Sumter. Northerners realized that this war might be harder to win than they had thought.
Did you notice how a timeline talk is not simply reading the sentences on a timeline? (Some of your kids will try this.)
Rather, it is explaining the events and how they connect together (like telling a story). This is a chance for students to show off what they remember about the events!
Timeline talks will help your students remember and make sense of important historical events. They can also be really fun!
Below is a video of a third grader doing a timeline talk. It’s clear that she understands how the historical events fit together, so just imagine what a “timeline talk” from middle schoolers would sound like!
4. Get Started
Here are my favorite online timelines about the Civil War. Students can use these websites as resources to create their own timelines.
1. Library of Congress: Civil War Timeline 1
2. Library of Congress: Civil War Timeline 2
2. Ken Burns: The Civil War Timeline
However, I think the best way is for students to fill out the events as you go through your unit. It doesn’t make sense to add an event to the timeline if you don’t know anything about it, right?
Download your free timeline template below!

Want a FREE Civil War Battles Lesson?
I created a lesson where students learn about 8 important Civil War battles by analyzing clues around the room. The “clues” are actually primary and secondary sources like an 1861 newspaper article, a map, a letter from Ulysses S. Grant, and more!
Enter your email below to grab your free Civil War battles lesson!
Even More Civil War Resources
If you need more help teaching about the Civil War, check out my 3 week unit (it is my #1 bestselling unit.
Save yourself precious planning time and shop now.
Related Posts:

Thank you so much for sharing!!
Thank you for the timeline. It’s very useful to me. Thank you!
Usefull information. Keep rocking